CLASS ANNOUNCEMENT #7 (July 5, 2018): BC3-1806 is officially over! The Class Wrap stream recording is available to watch and the closing post is on page 63. Please take a minute to fill out the Questionnaire 🙇🏻♂️
CLASS ANNOUNCEMENT #6 (June 20, 2018): Week 4's stream recording has been edited together - curse you computer freeze! - and is available to watch. This is the final week of the class! Spend some time sculpting a wild and crazy vehicle design and let's finish strong 💪
Also a reminder that we will be having a 5th stream to wrap up the class on July 3rd, so don't miss that.
CLASS ANNOUNCEMENT #5 (June 20, 2018): Check out Week 3's stream recording if you missed the broadcast! I also updated Week 3's homework for those of you that want to finish your vehicle exterior.
CLASS ANNOUNCEMENT #4 (June 13, 2018): Week 2's stream recording is now available to watch if you missed the broadcast. Also the additional timelapse video mentioned in the stream is available here.
CLASS ANNOUNCEMENT #3 (June 11, 2018): Week 1 is done! Thanks for getting your homework submitted on time. Here's a link to the report card if you'd like to keep track of your grades throughout the class. Onward to Week 2!
CLASS ANNOUNCEMENT #2 (June 6, 2018): Week 1's stream recording is now available if you missed it. Also I've secured a concept car blueprint thanks to the talented 2D/3D artist, Milen Ivanov (see page 9 of this thread to download it). This is the vehicle I'll be modeling and you're welcome to model it as well if you don't want to find your own!
CLASS ANNOUNCEMENT #1 (June 4, 2018): Class is in session! Today officially begins the BC3-1806 class. Please check the syllabus below for Week 1's focus and assignments. Begin watching the pre-recorded courses if you haven't already and begin searching for a cool vehicle you want to model. The first Live Event is tomorrow at 2pm EST - SEE YOU THERE! 😎
Vehicle model by Chris Kuhn on blendwap.com
Welcome to the CGCookie Class: Vehicle Modeling with Blender! Here by popular demand, this class is designed to be a holistic learning experience about the art of modeling vehicles. If you’re diligent in watching all content and hitting homework deadlines, by the end of the class you'll be prepared to build digital vehicles to your heart's content! This is an intermediate-to-advanced class which means you’ll do best by having some experience with Blender and 3D modeling before committing to this class.
This is the third "Class" format where Citizen members are invited to focus together on a particular topic/skill for a month. Participation looks like this:
WHEN? The class will take place from June 4th through July 2nd (ish)
Abstract: Vehicle modeling is pure hard surface modeling. Therefore it's important to be proficient with general polygon modeling techniques. This first week we're ramping into this particular modeling skillset to prepare us for the vehicle modeling extravaganza to come!
Goal of the Week: Level-up and/or dust off your hard-surface modeling skills.
Pre-recorded course to watch:
Week 1 Live Event (Remember to RSVP!)
Homework:
Abstract: When I say "Imagine a vehicle" I'll bet a million dollars you're thinking about the exterior. And that's why the exterior is important. It defines everything about a vehicle's visual perception: Style, utility, purpose. This week we're going to build a vehicle exterior based on concepts like building to scale and building from blueprints.
Goal of the Week: Build the exterior of your chosen vehicle based on blueprints. This will be good practice in strict adherence to orthographic front/side/back/top view modeling.
Pre-recorded courses to watch:
Week 2 Live Event (Don't forget to RSVP)
Homework:
Model by Neubi on blendswap.com
Abstract: The insides of vehicles involve more organic, soft shapes as well as opportunity for lots of fine hard surface details. Often vehicles renders focus on the exterior where the interior can be hidden or approximated. But not in this class!
Goal of the Week: Model the interior of your chosen vehicle to gain experience with fine hard-surface details in a confined space.
Pre-recorded courses to watch: Admittedly we don't have much in this context specifically...
Week 3 Live Event (Don't forget to RSVP)
Homework:

Abstract: There's another facet of vehicle modeling that doesn't involve strict adherence to blueprints. Instead, Concept Sculpting is about designing a vehicle from scratch using the artistic approach of digital sculpting. This can be an extremely fun, experimental method for creating unique vehicles.
Goal of the Week: Sculpt a vehicle exterior from scratch; Practice hard-surface sculpting techniques.
Pre-recorded courses to watch: Again we don't have much in this context specifically, but we have a couple courses that cover hard-surface sculpting in general:
Week 4 Live Event (Don't forget to RSVP)
Homework:
This thread is reserved for CG Cookie Citizens that are participating in the "Vehicle Modeling with Blender" class. Its purpose is to serve as central communication for all participating Citizens (excluding Hobby plan Citizens) to ask Kent and fellow participants questions and to post homework. As the instructor of the class, Kent will be monitoring this thread on a daily basis (especially Mon-Thurs) throughout the month of June to review homework and answer questions.
Free members are welcome to observe the thread but please respect that communication is reserved for Citizens.
aarev If you have your reference images on planes you can just move your image plane towards the camera so it will obscure you wireframe.
If you are using background images i think you can switch drawing method for your image from back to front as shown below
![]() tbrbn Daaaaamn! If it makes you feel any better I'm like 40% done with my exterior and hitting 360k verts so I won't be far behind you.
tbrbn Daaaaamn! If it makes you feel any better I'm like 40% done with my exterior and hitting 360k verts so I won't be far behind you.
![]() thecabbagedetective It actually does make me feel better, thanks for cheering me up :D Let's not forget that the interior will also easily add 200-500k verts I'd estimate !
thecabbagedetective It actually does make me feel better, thanks for cheering me up :D Let's not forget that the interior will also easily add 200-500k verts I'd estimate !
![]() tbrbn And to think I wanted to animate this in its fully detailed state, how naive I was haha.
tbrbn And to think I wanted to animate this in its fully detailed state, how naive I was haha.
![]() dieedi If Batman lived in Victorian London he would be driving this.
dieedi If Batman lived in Victorian London he would be driving this.
After wasting hours of time trying to make a good-looking connection between the hover thrusters and the arms that connect them to the main body of the tank (and fruitlessly searching for reference), I decided to ask you for help. You'll come up with something, right? Here's the blend file.
How many of you are modeling the undersides of your vehicles? Will doing so get me a higher grade?
![]() williamatics Certainly gonna give it a shot, though I must admit it's low on my list of priorities.
williamatics Certainly gonna give it a shot, though I must admit it's low on my list of priorities.
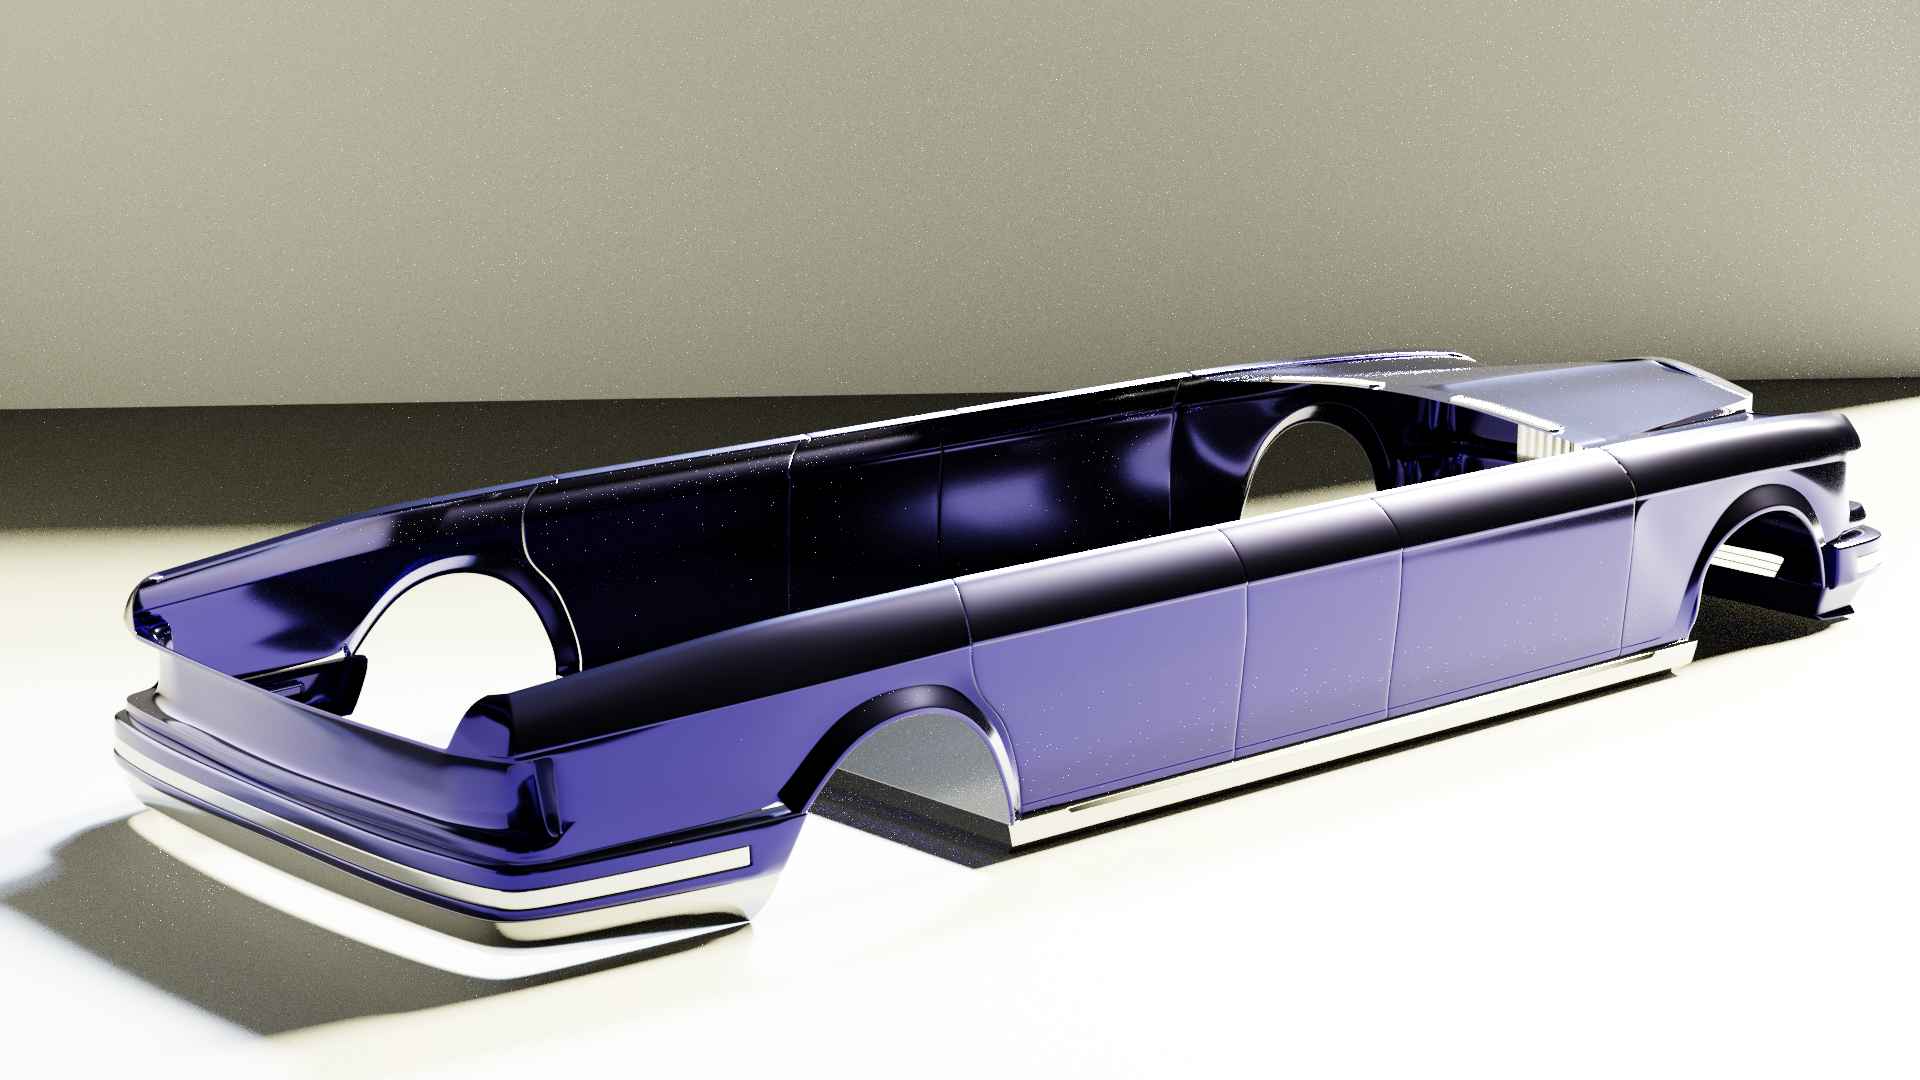
Day 3 (2.5?) finished. Good progress I think, though making all these pieces look connected is gonna be a pain:
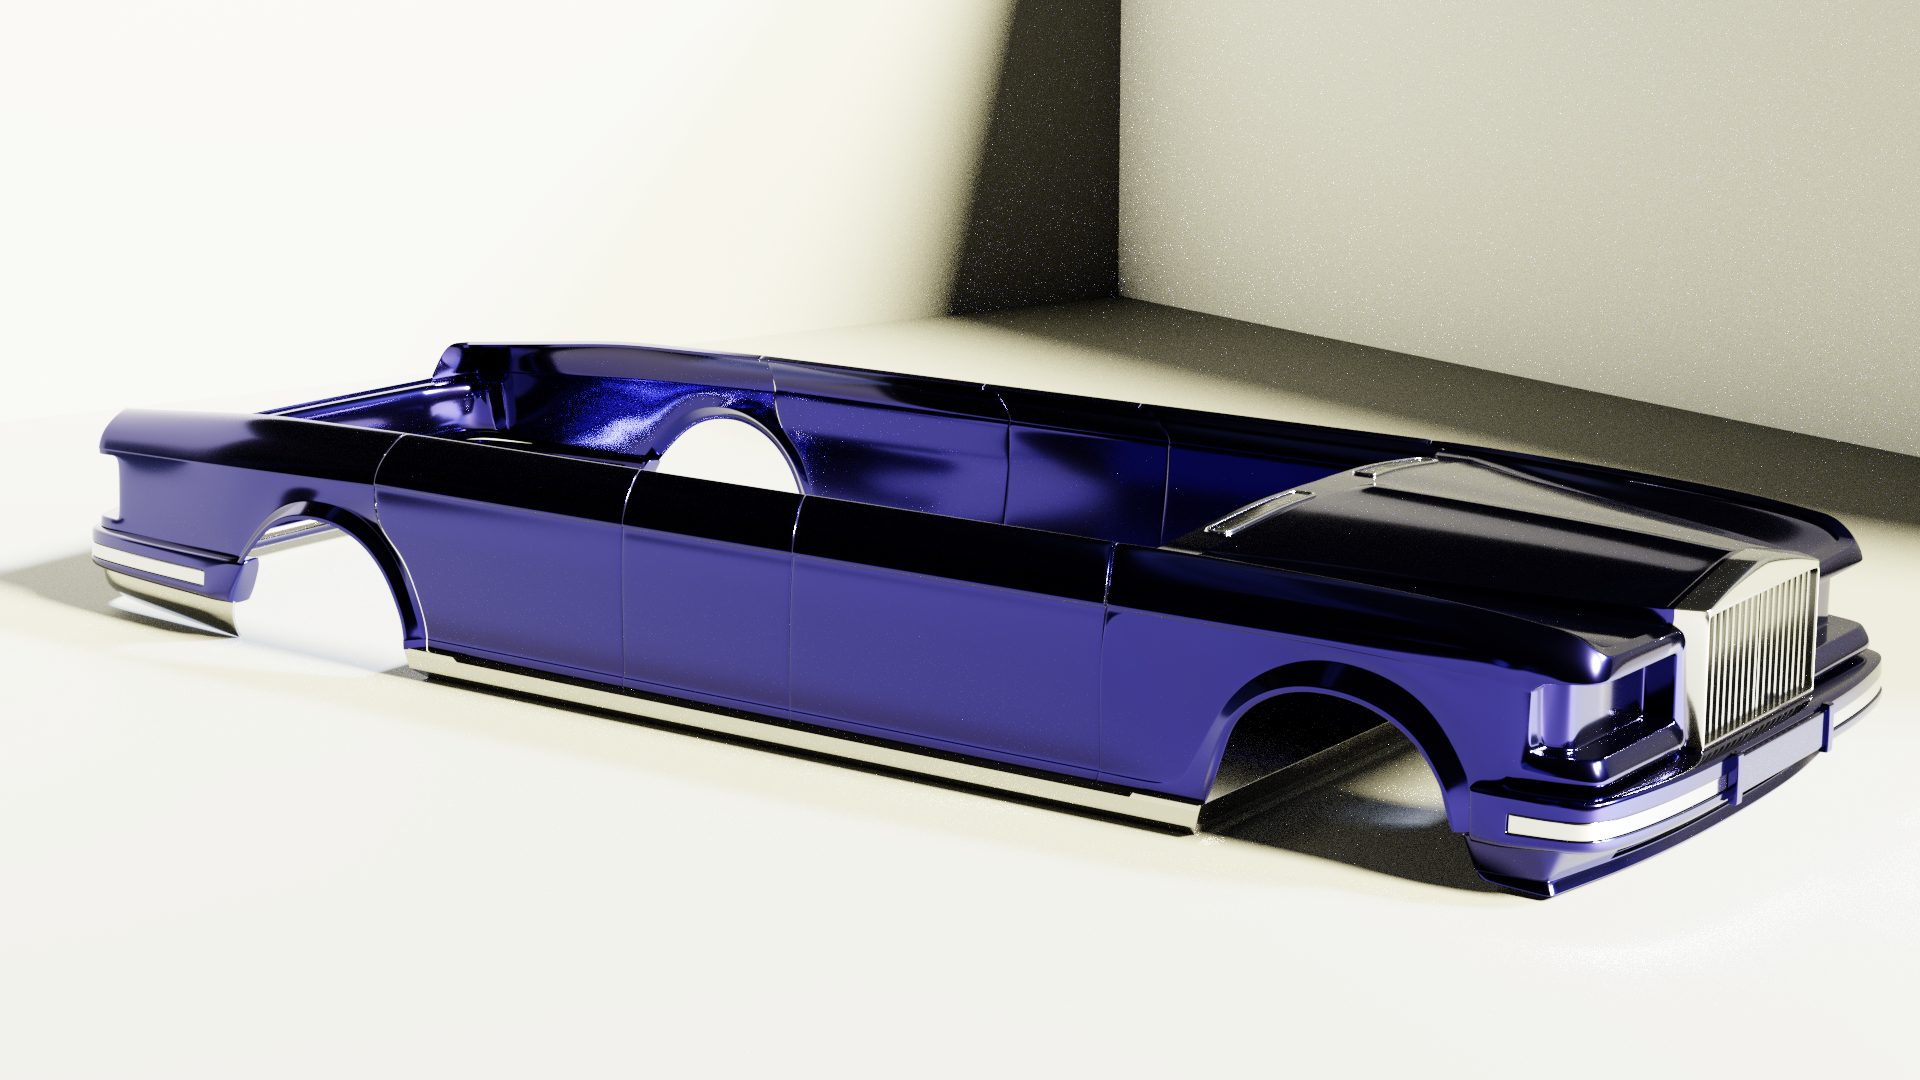
Changed the material on this one to make it look more appealing:
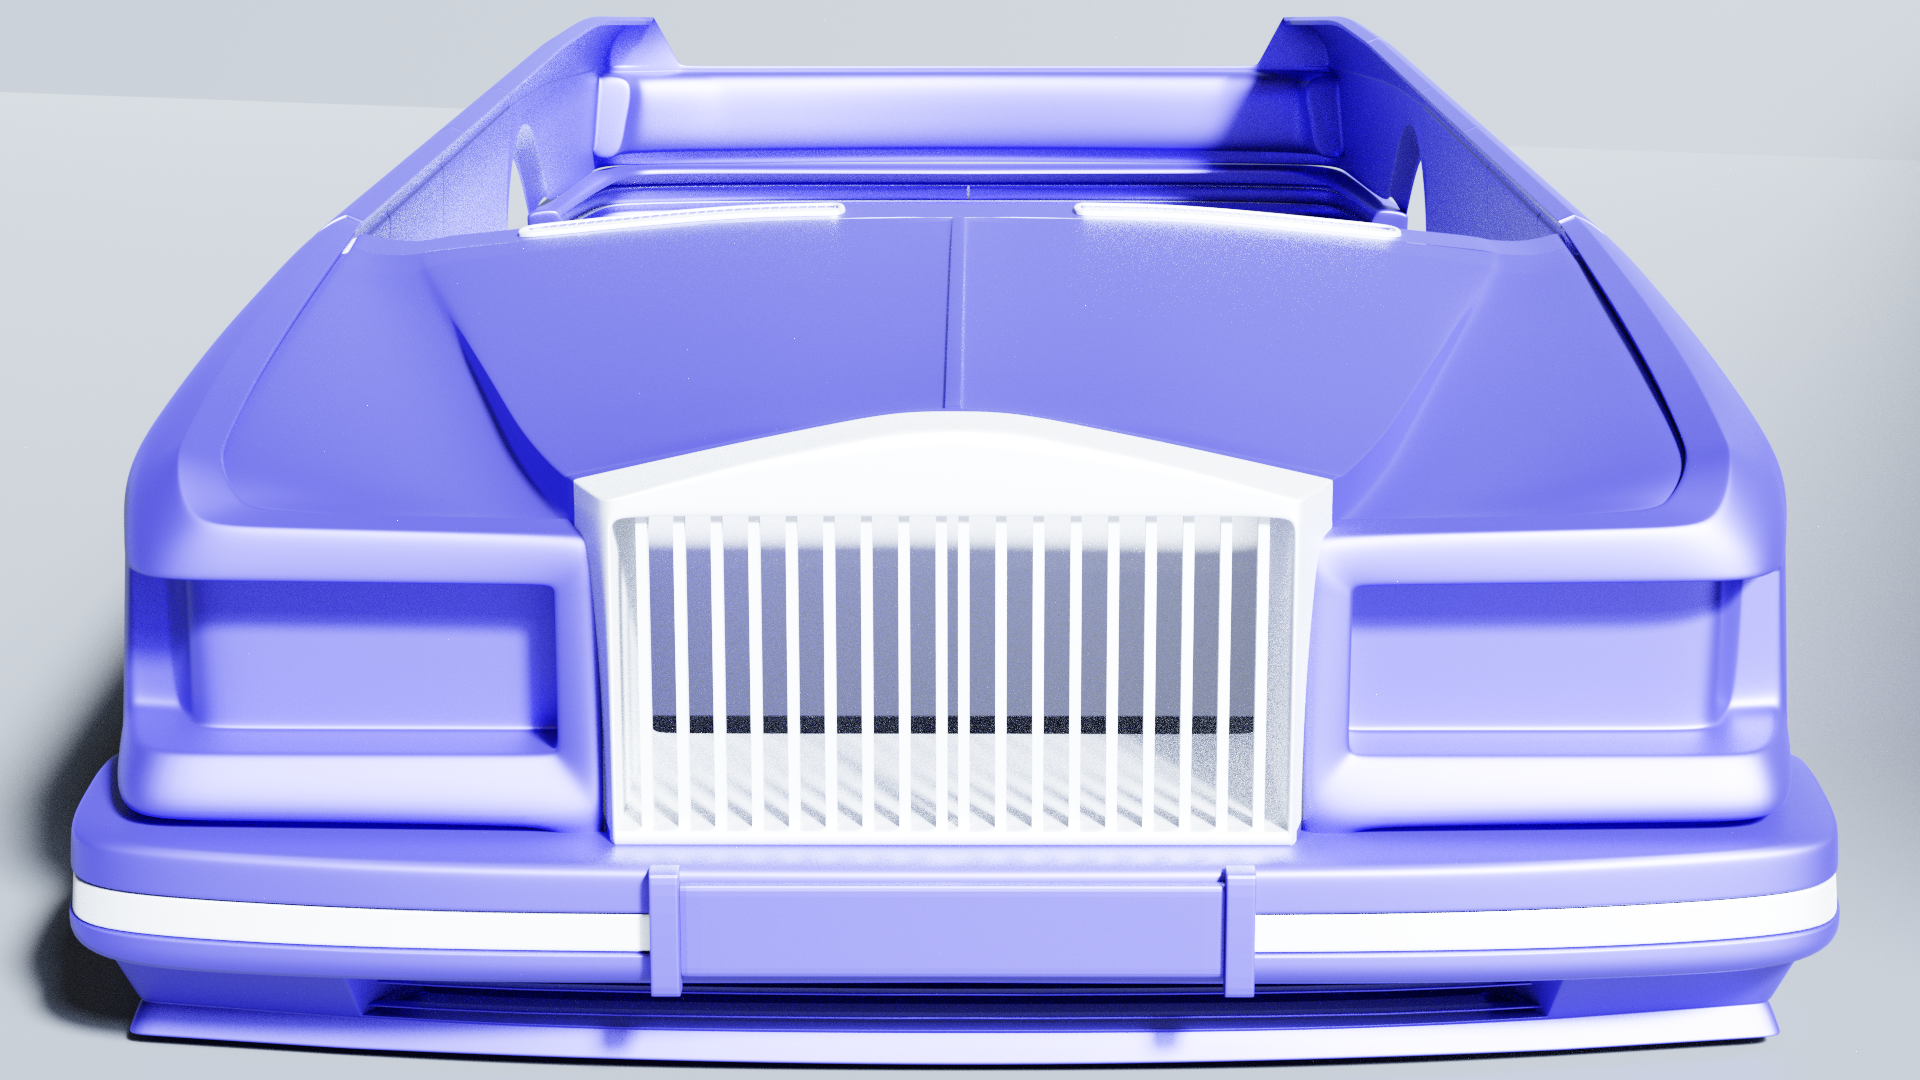
Planning to get the roof done tomorrow, hope I manage to get this finished by the next livestream. As always, feedback and criticism - regardless of how harsh - is welcome. Good day and good luck to you all!
![]() tbrbn very nice, this would take me ages :-) The underneath of the truck is very nice done as well!
tbrbn very nice, this would take me ages :-) The underneath of the truck is very nice done as well!
![]() thecabbagedetective great progress indeed! The surface looks super smooth and you did a great job with the details, I really like the bumpers and the front grid. Do you have a modeling strategy in mind for the head and rear lights ?
thecabbagedetective great progress indeed! The surface looks super smooth and you did a great job with the details, I really like the bumpers and the front grid. Do you have a modeling strategy in mind for the head and rear lights ?
Having a hard time to model some holes in my panel. I tried:
- adding supporting edge loops
- vertex rip
and always my panel is not so smooth anymore.
I think I need a trick, but after googling, I'm still a little bit stuck:
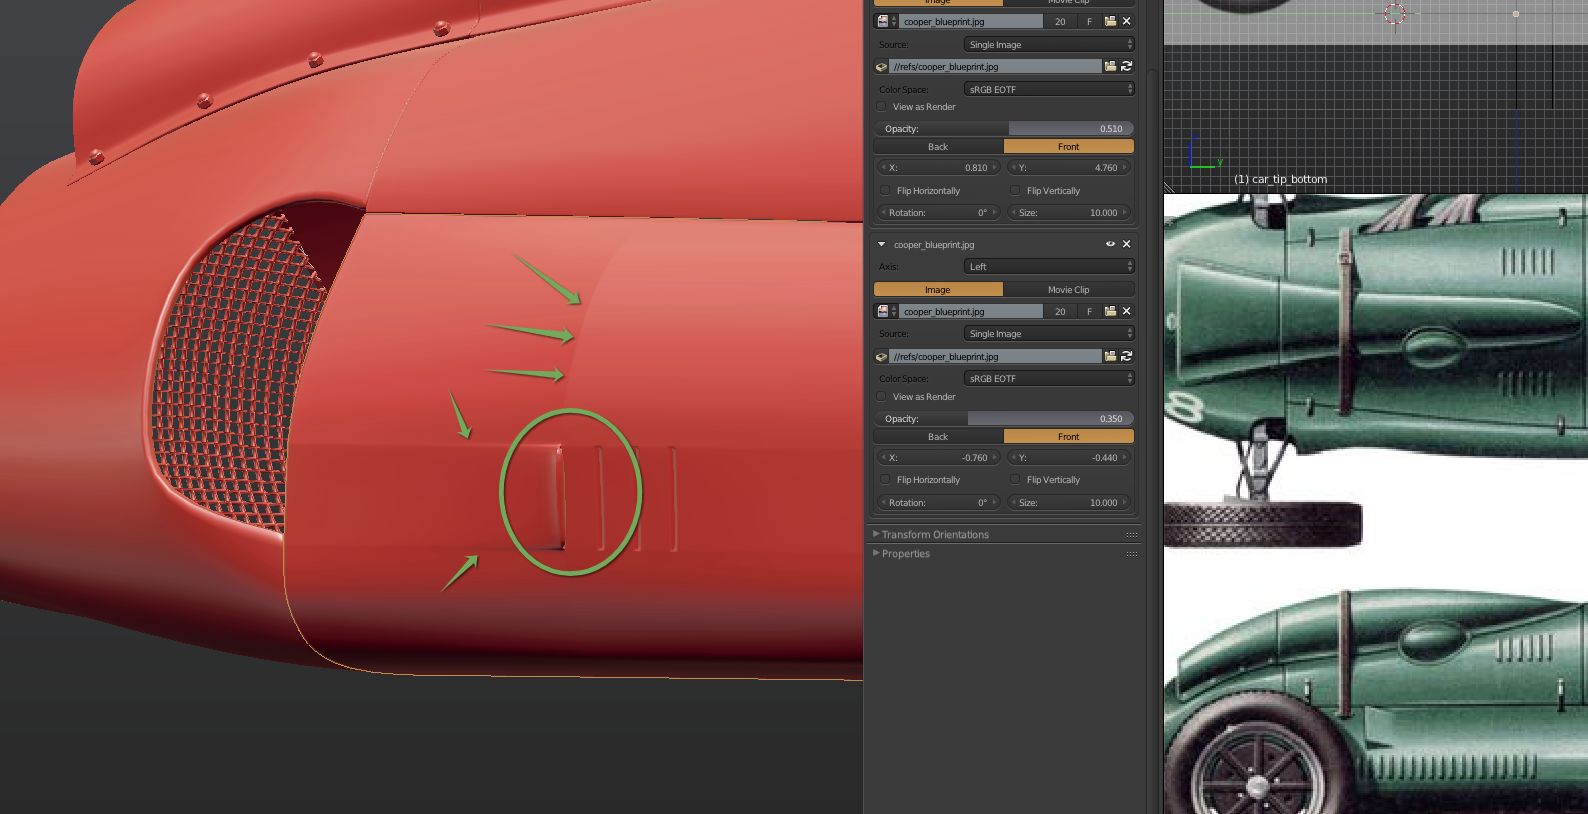
my mesh at the moment looks like this:
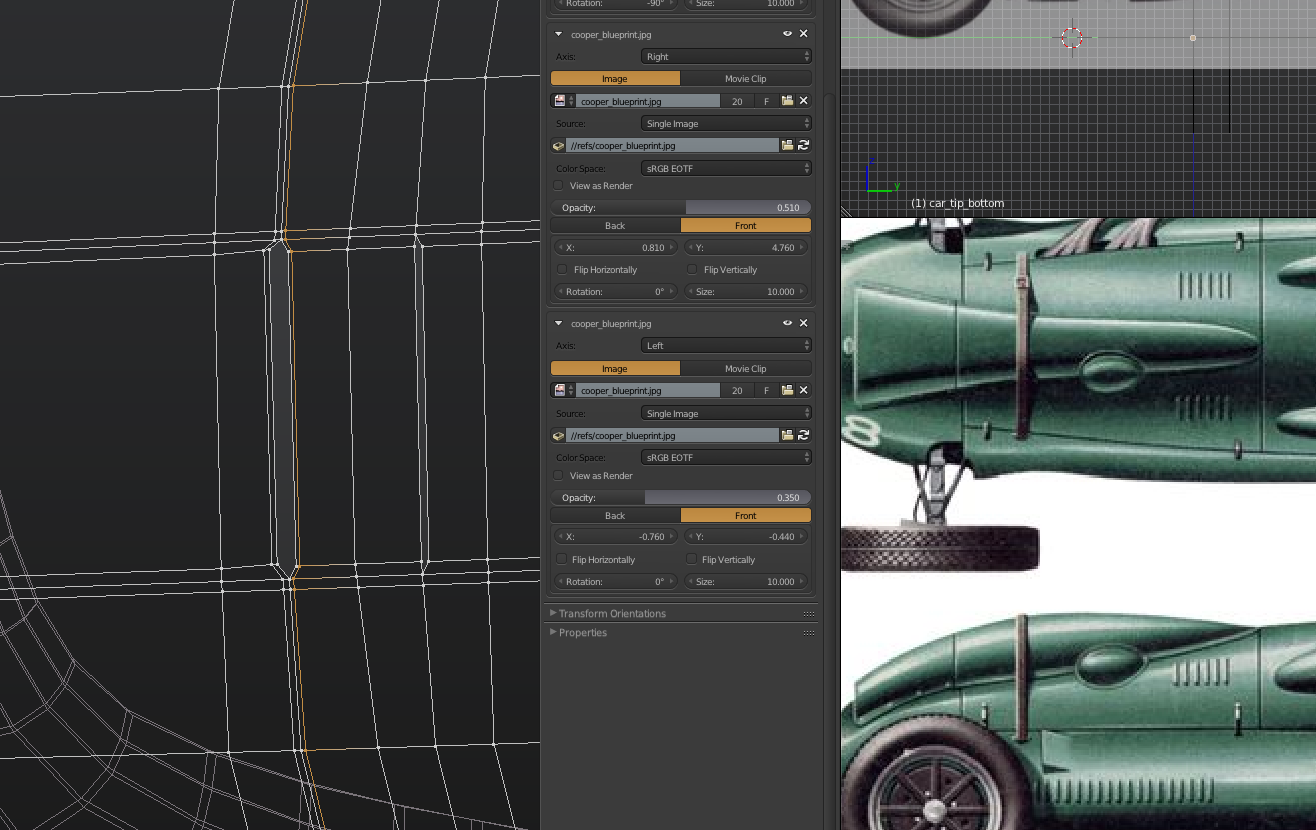
personally I think already that there are way too many edge loops to support that.
Any ideas on how to do this?
![]() michallis shrink wrap can be helpful here if you still have the mesh without the hole. Make sure the smooth mesh is higher density than the shrinkwrapped mesh and the just exclude the vertices that make up the hole with a vertex group. You can also try spreading the edge loops evenly where they don’t directly affect the shape you want.
michallis shrink wrap can be helpful here if you still have the mesh without the hole. Make sure the smooth mesh is higher density than the shrinkwrapped mesh and the just exclude the vertices that make up the hole with a vertex group. You can also try spreading the edge loops evenly where they don’t directly affect the shape you want.
![]() tbrbn Thanks! Whilst I haven't thought about extensively I'll probably end up starting by duplicating the verts surrounding the insets, separate them and modify them to better suit the lights:
tbrbn Thanks! Whilst I haven't thought about extensively I'll probably end up starting by duplicating the verts surrounding the insets, separate them and modify them to better suit the lights:
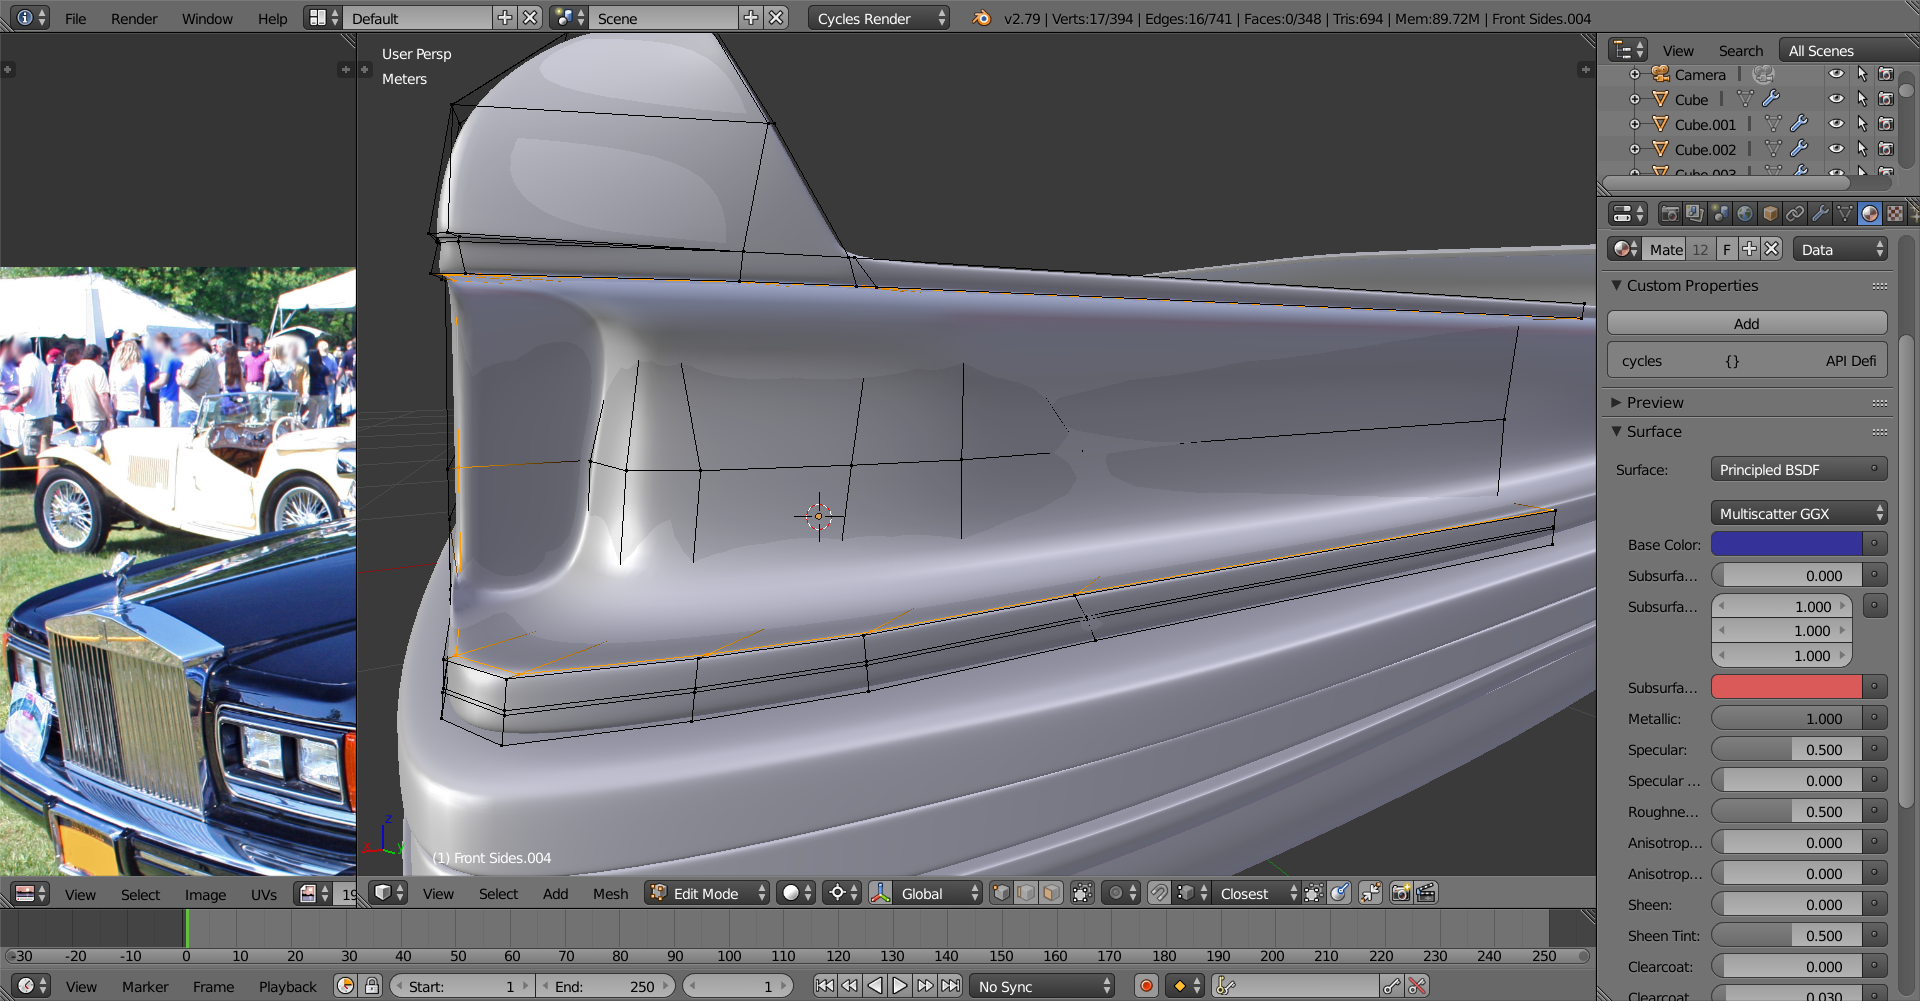
Looking closely it might be a good idea to separate the light like this:
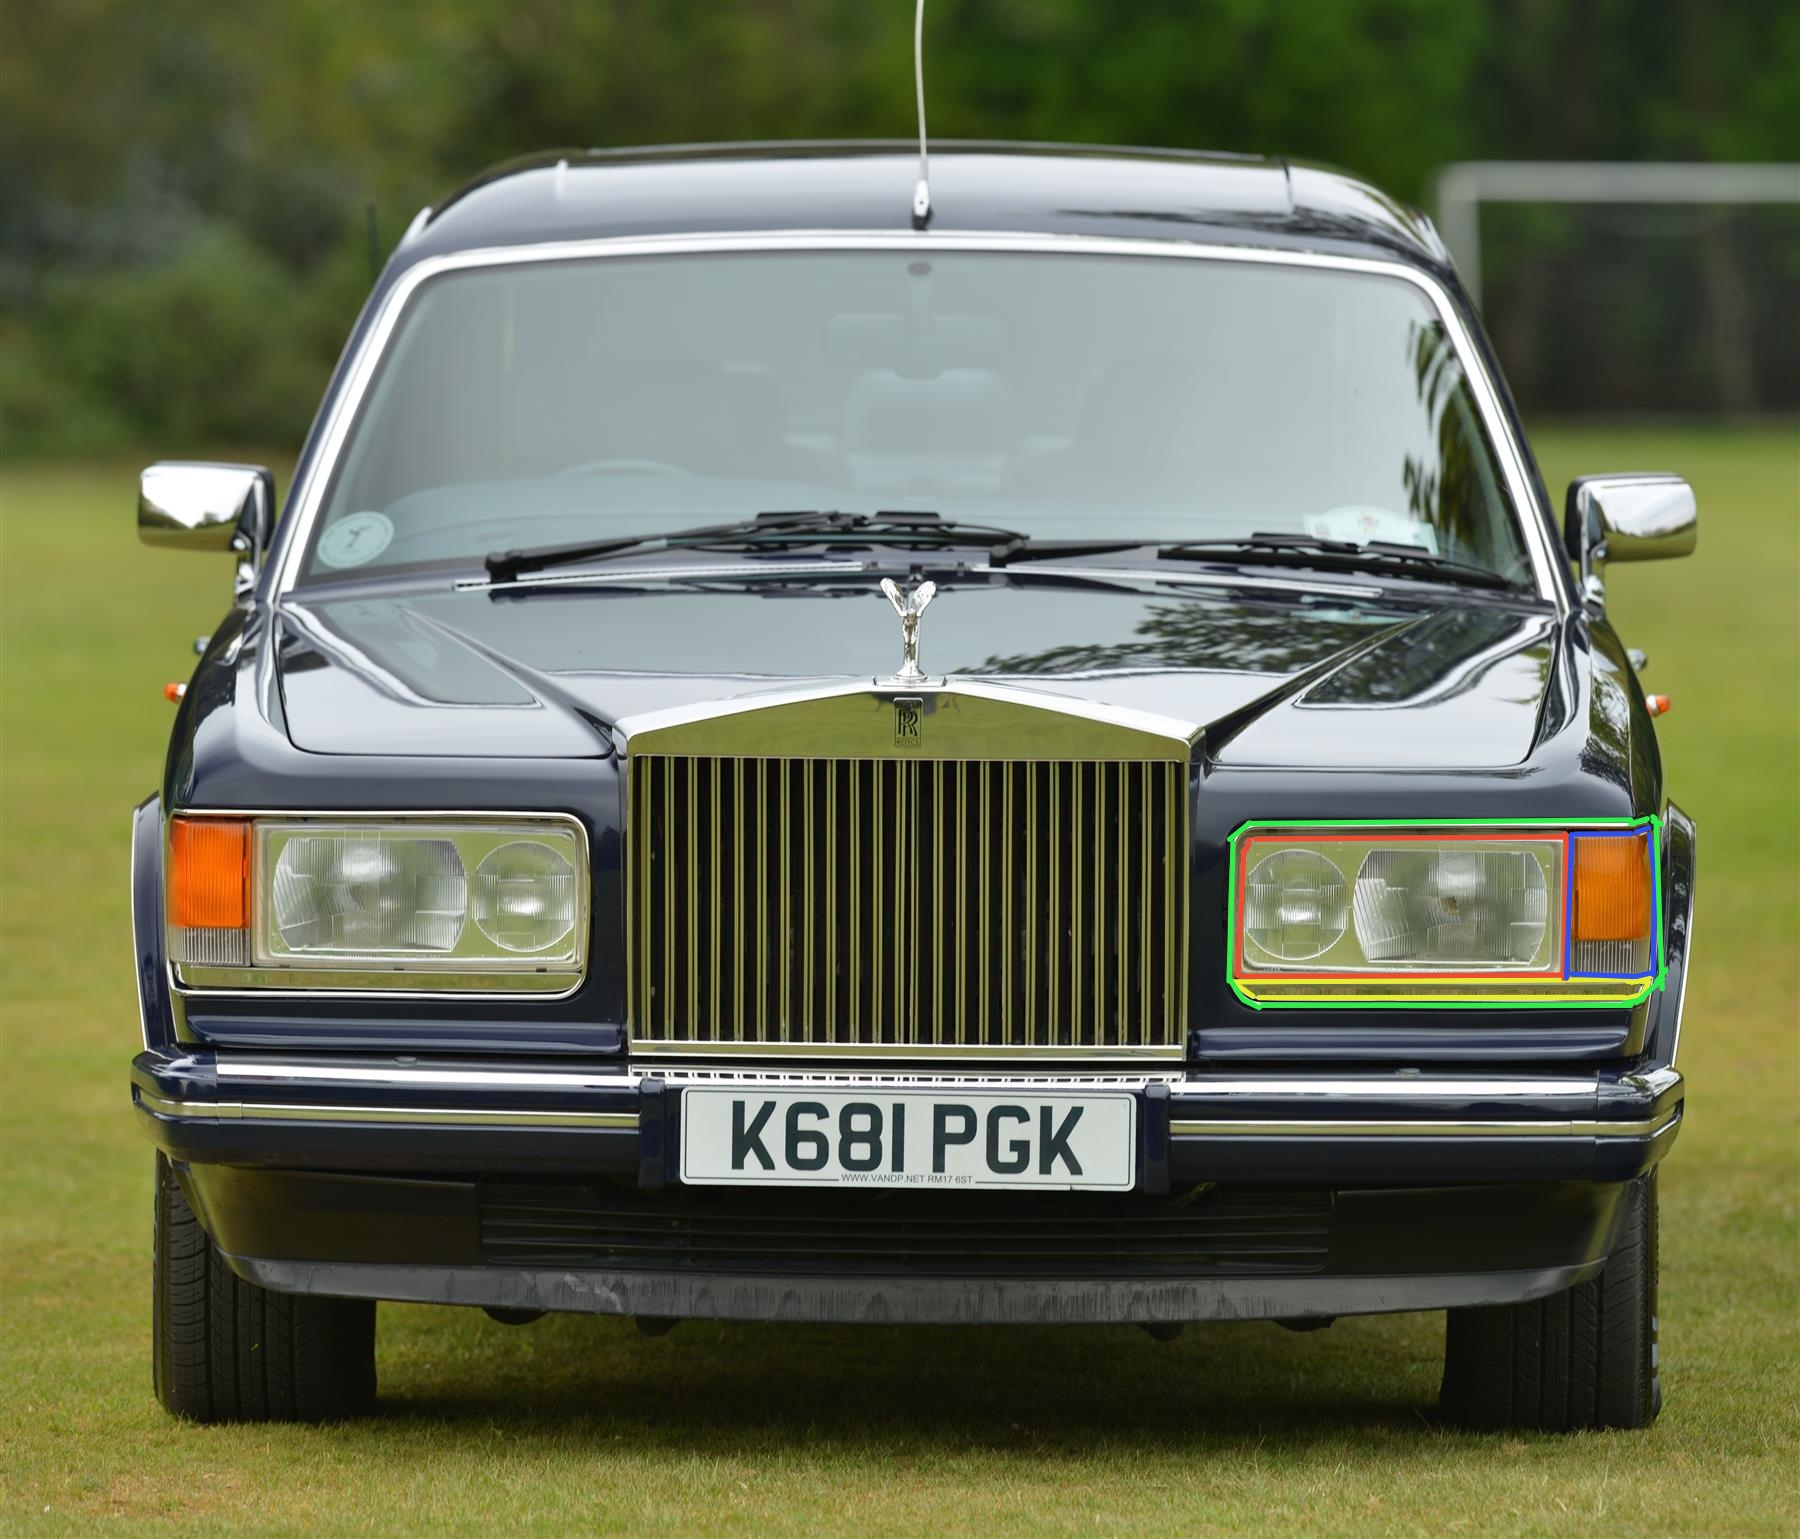
Apologies for the wonky lines, still haven't got the hang of my tablet plus haven't practiced drawing for a bit.
I might end up deleting the inset faces considering you won't really see them, but for now they're a good guide as to where things need to go.
![]() baukepost Thank you very much! Was quite concerned mine wasn't up to snuff in comparison to others here but the encouragement being thrown around in this class has certainly helped.
baukepost Thank you very much! Was quite concerned mine wasn't up to snuff in comparison to others here but the encouragement being thrown around in this class has certainly helped.
For some reason, the curves won't work. If I try to give them thickness in the curve properties, it gets a little bit of thickness, but then it stops. The same thing happens to objects I use a curve modifier on. Also, I'm out of ideas for how to connect the hover thrusters with the arms coming out of the side of the tank. Could you help with that?