This thread is dedicated to the wheels and the rear axle of the backhoe project.
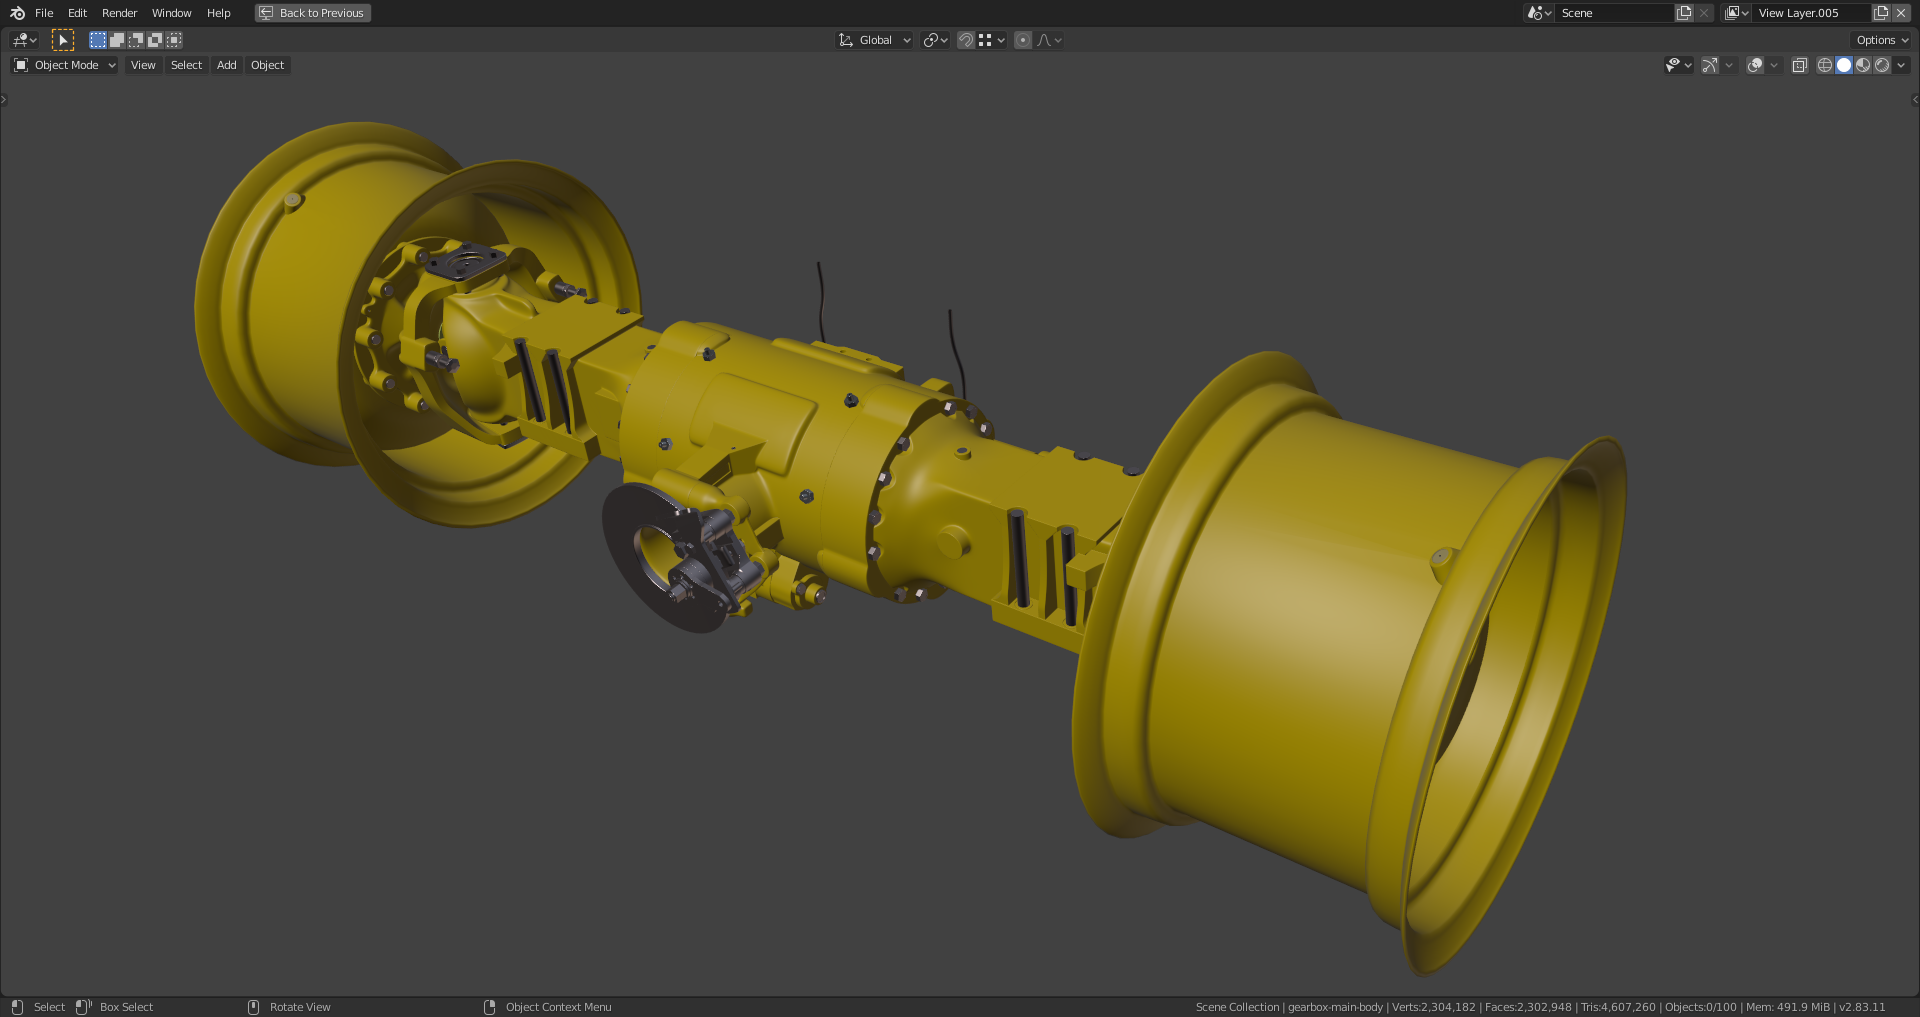
I finally got my motion capture studio set up with my new Kinect (Fathers day gift I got myself haha) So now you can see my pretty face. I still struggle not sounding monotone but a few 1000 more hours of videoing myself should solve that.
Thanks, ![]() blanchsb for all your efforts and the video 😀👍 !!! A calming voice is definitively what I need now the most.👂😀!
blanchsb for all your efforts and the video 😀👍 !!! A calming voice is definitively what I need now the most.👂😀!
I've decided to model the backside of the attachment ring as the negative form of the front. Furthermore, I've found some 6-poles and some overlapping vertices where there should be connections. Finally, I used "Bridge Edge Loop" to close the gap between front and back at the ring's inner rim:
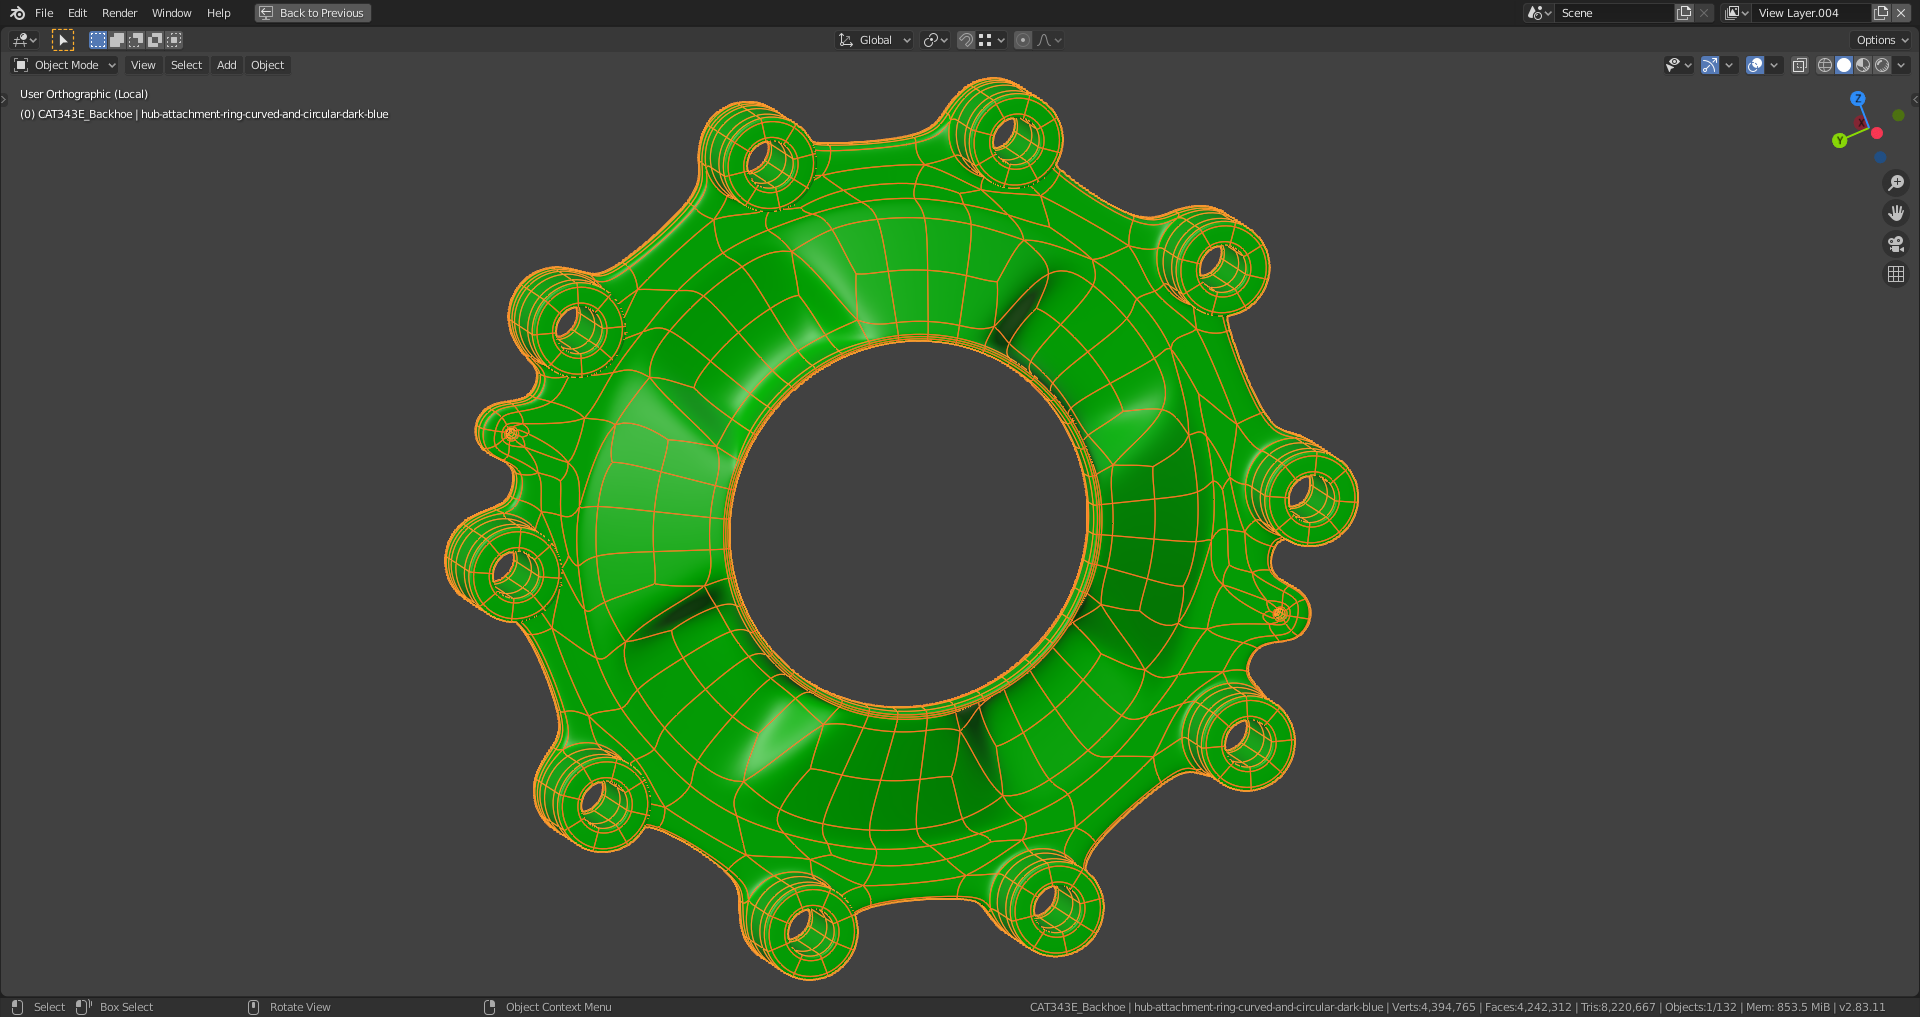
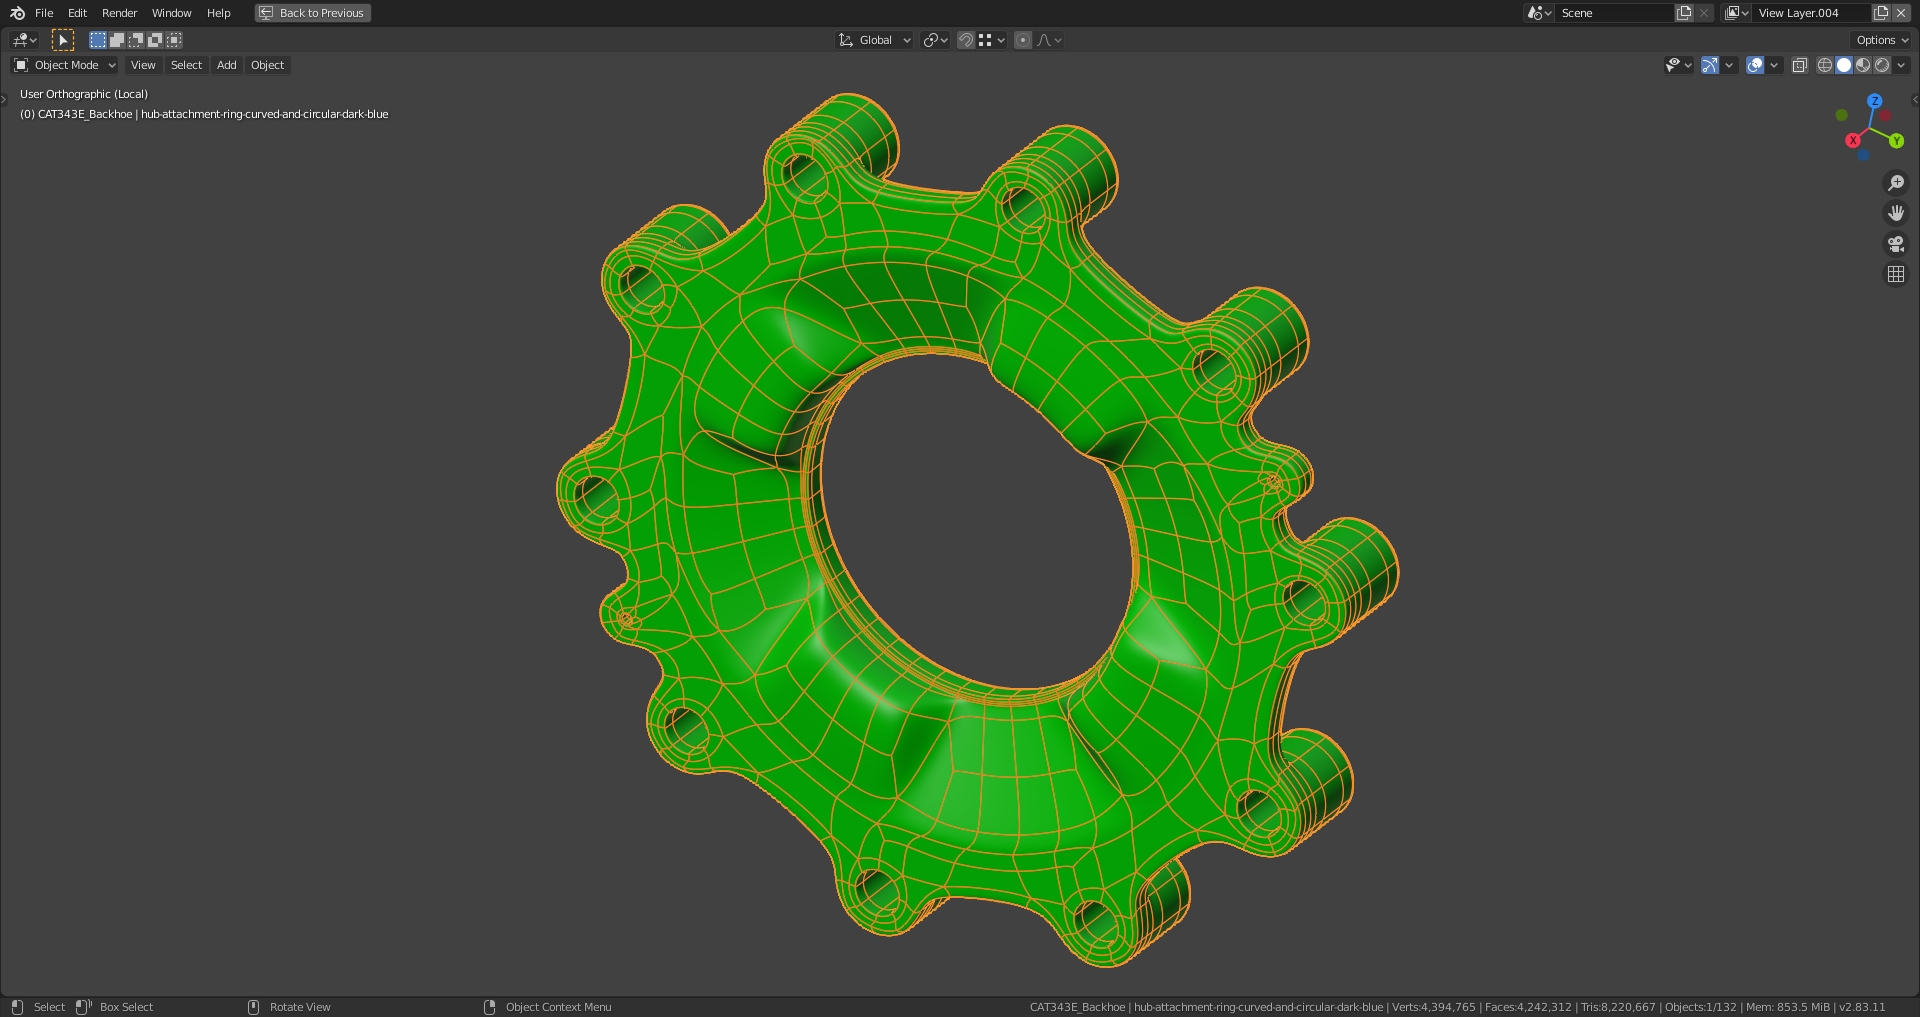
File is here.
![]() spikeyxxx, you're absolutely right about the beauty of these pieces! They're for me not only technical pieces, they're artworks🏆!
spikeyxxx, you're absolutely right about the beauty of these pieces! They're for me not only technical pieces, they're artworks🏆!
From this image, the attachment ring looks completely solid:
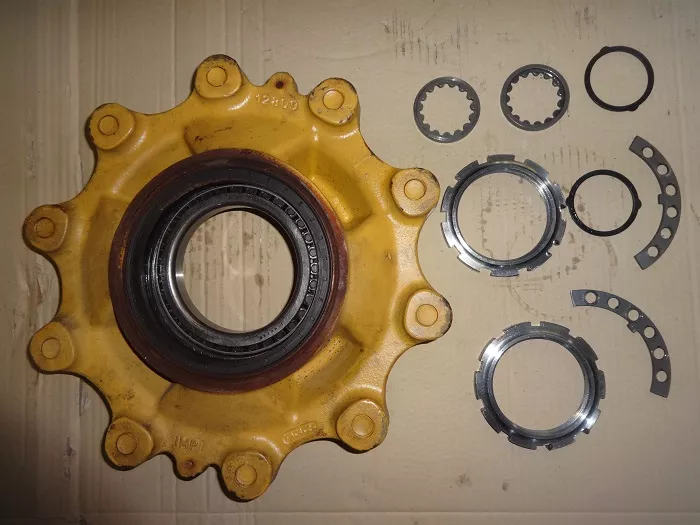
But on this drawing, one could thinks that there're holes where you can see through:
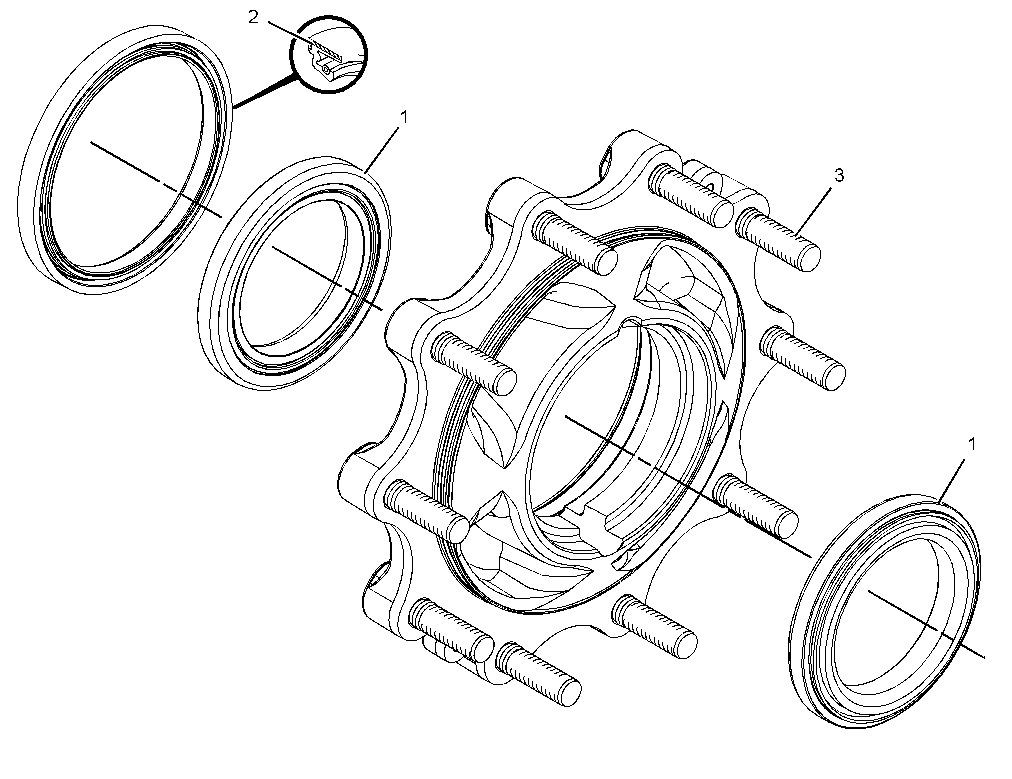
Or are these just cavities that are hidden from the other side?
Spikeys first video snapshot from above suggests (especially the deepening at the image bottom) that there could be holes but I'm not completely sure:
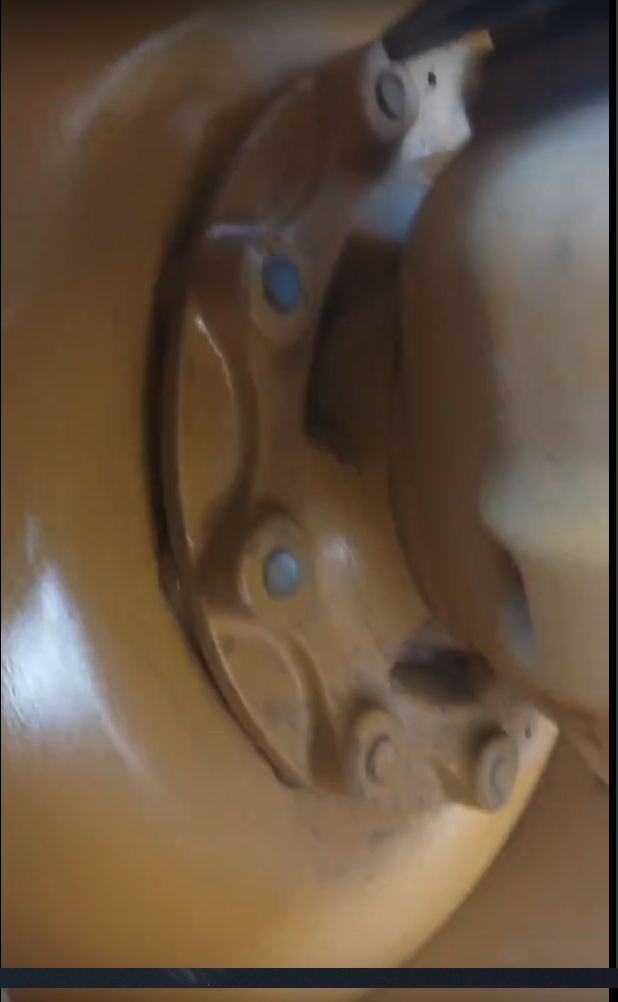
Maybe, the design has changed since in Spikeys screenshot the front ring seems to be one piece with the disc below. Or is this just an illusion caused by the paint layer?
But from this section of the front axle, it seems again a continuous structure (red circle):
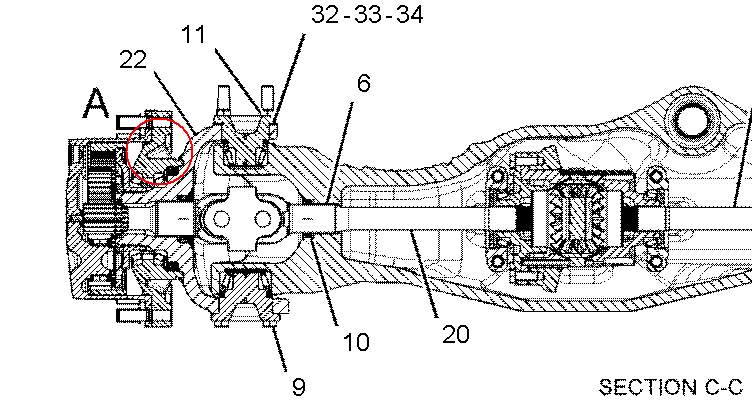
And the same on the rear axle:
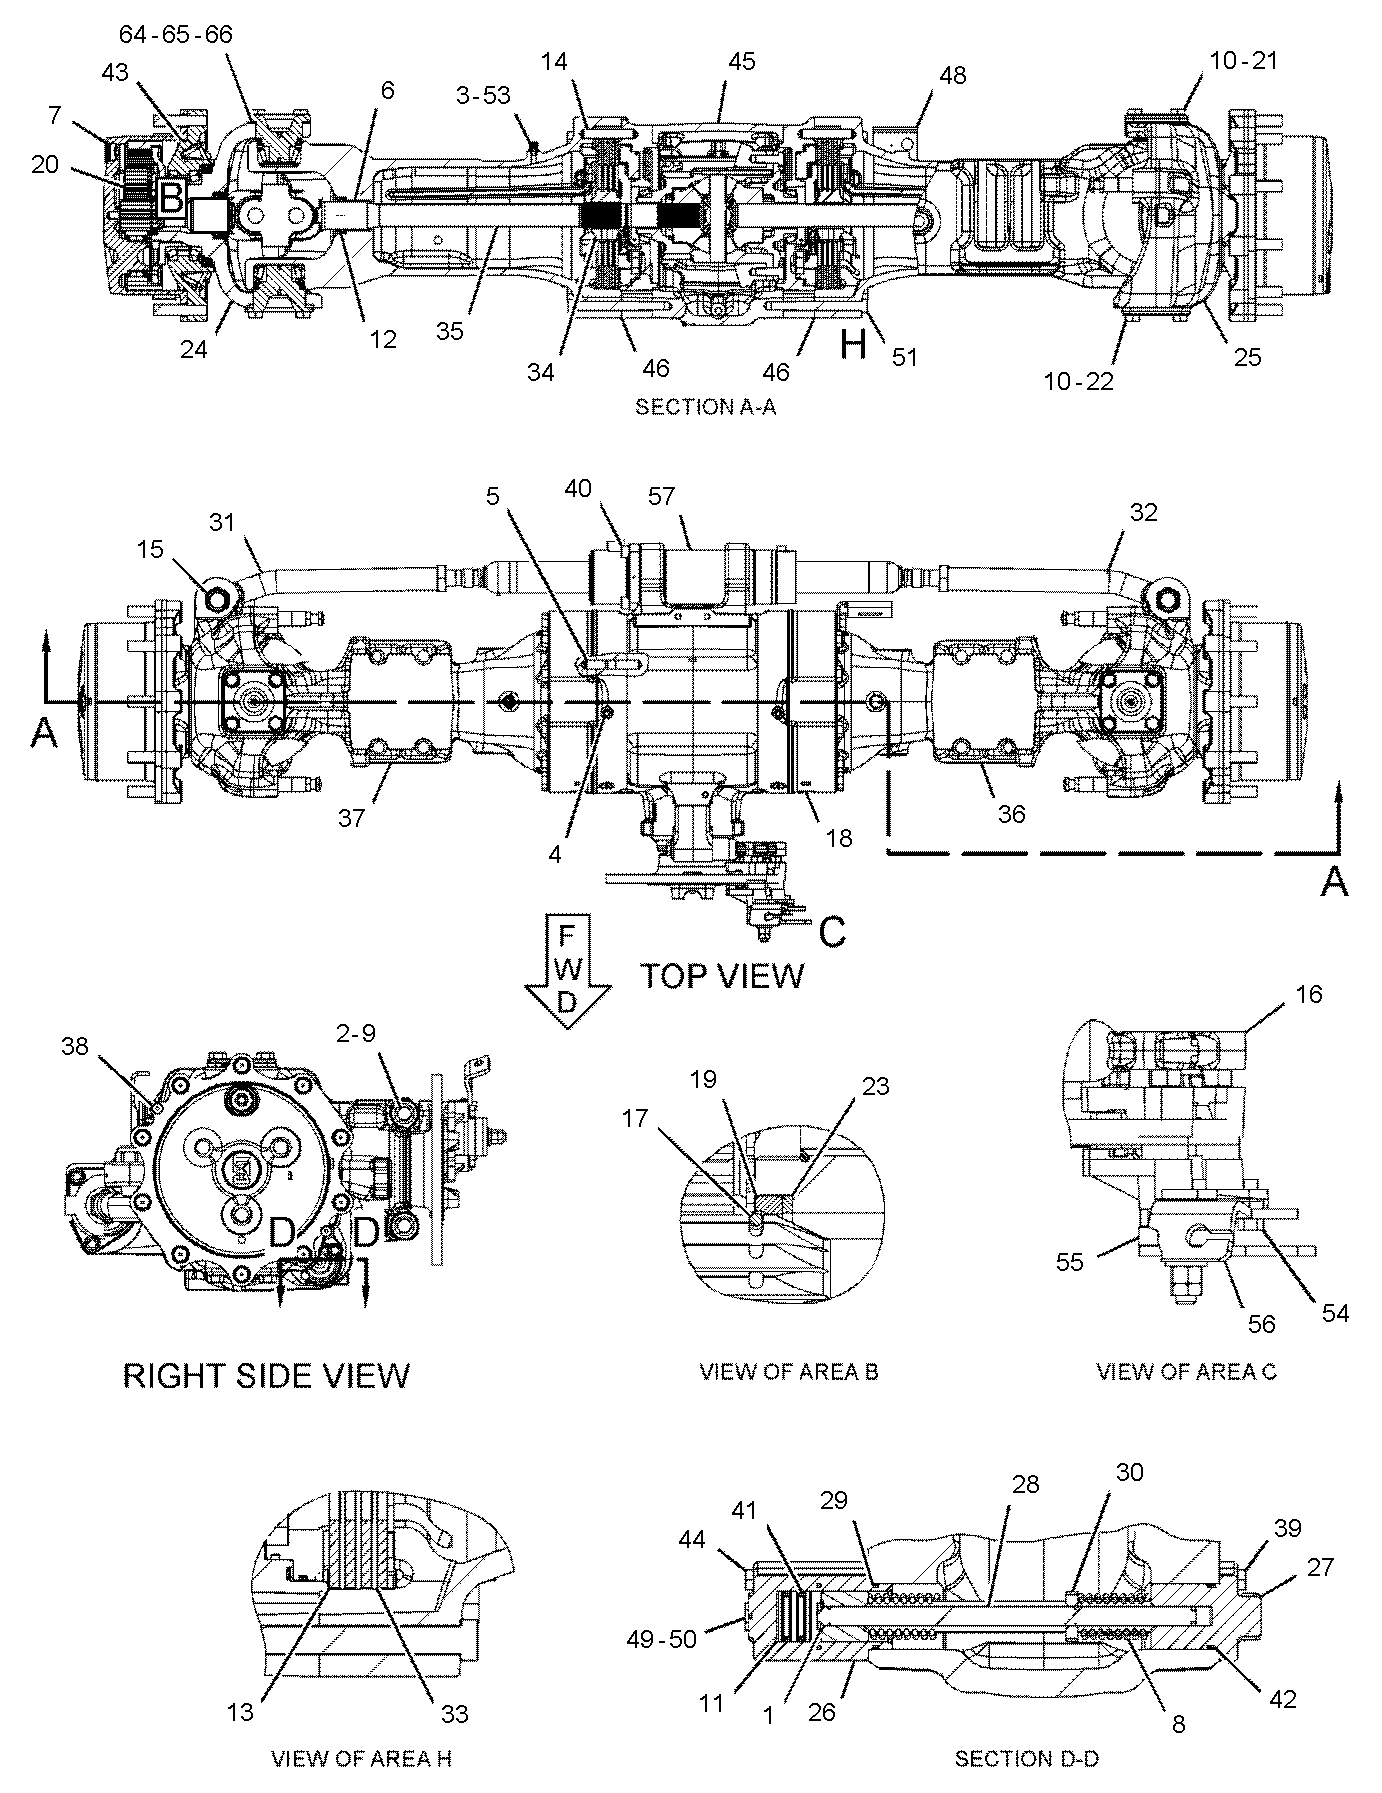
So, I'll keep my model as it is with some artistic freedom.
Not sure about all of the 5 sides poles. When you have that many circles close together you can work the number of circle sides to your advantage. Using a 16 sided circle versus an 8. I would say keep them to divisions of 4 in most cases. But I have seen 6 and 12 sided circles work sometimes too. You may just need 16 or more sides to get better edge flow with fewer poles possible or at least get those poles not next to each other (creating more geometry in between them).
Also here is another easy fix. You can remove this one: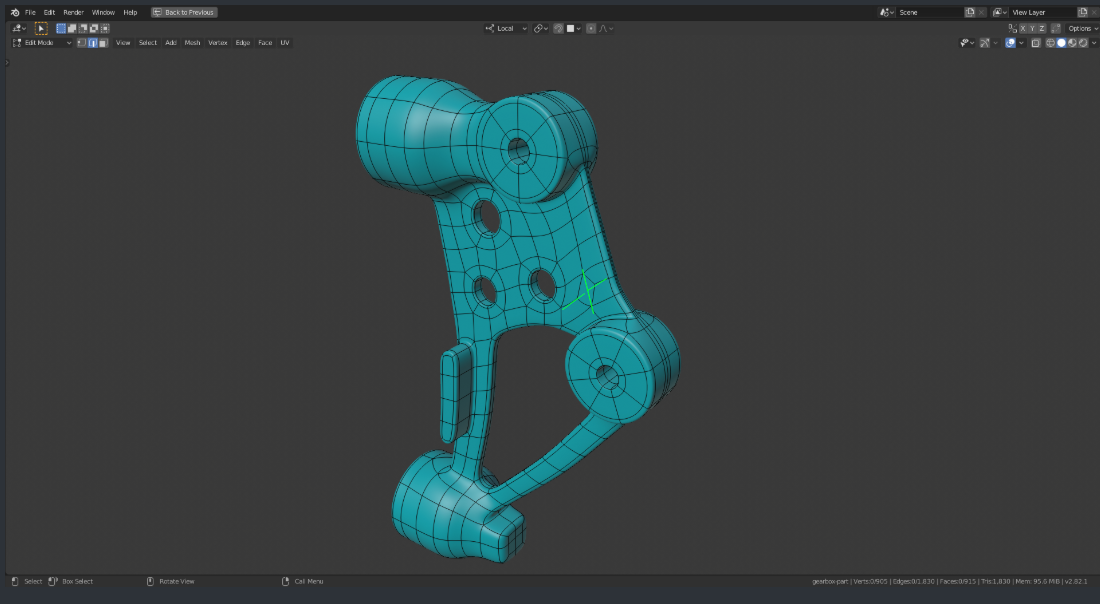
The rear axle end housing is more complicated than I thought. Here a quick update on this work in progress:
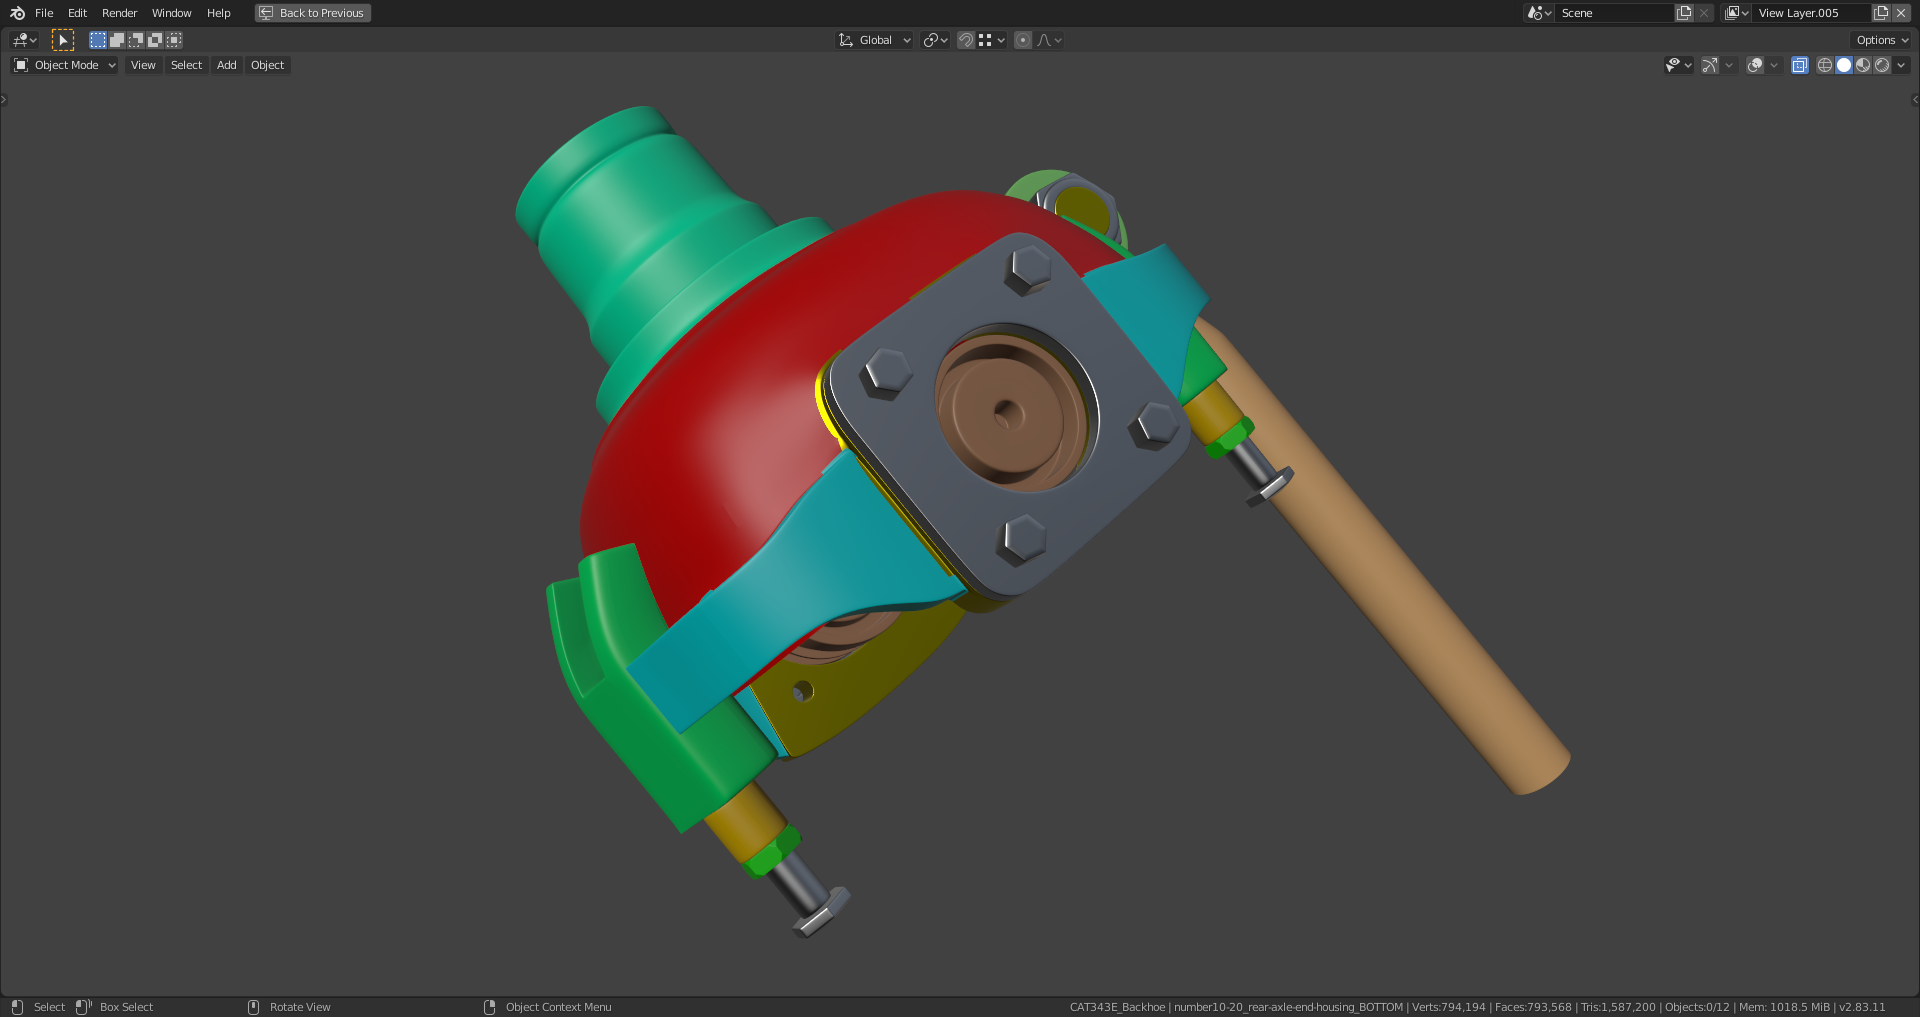
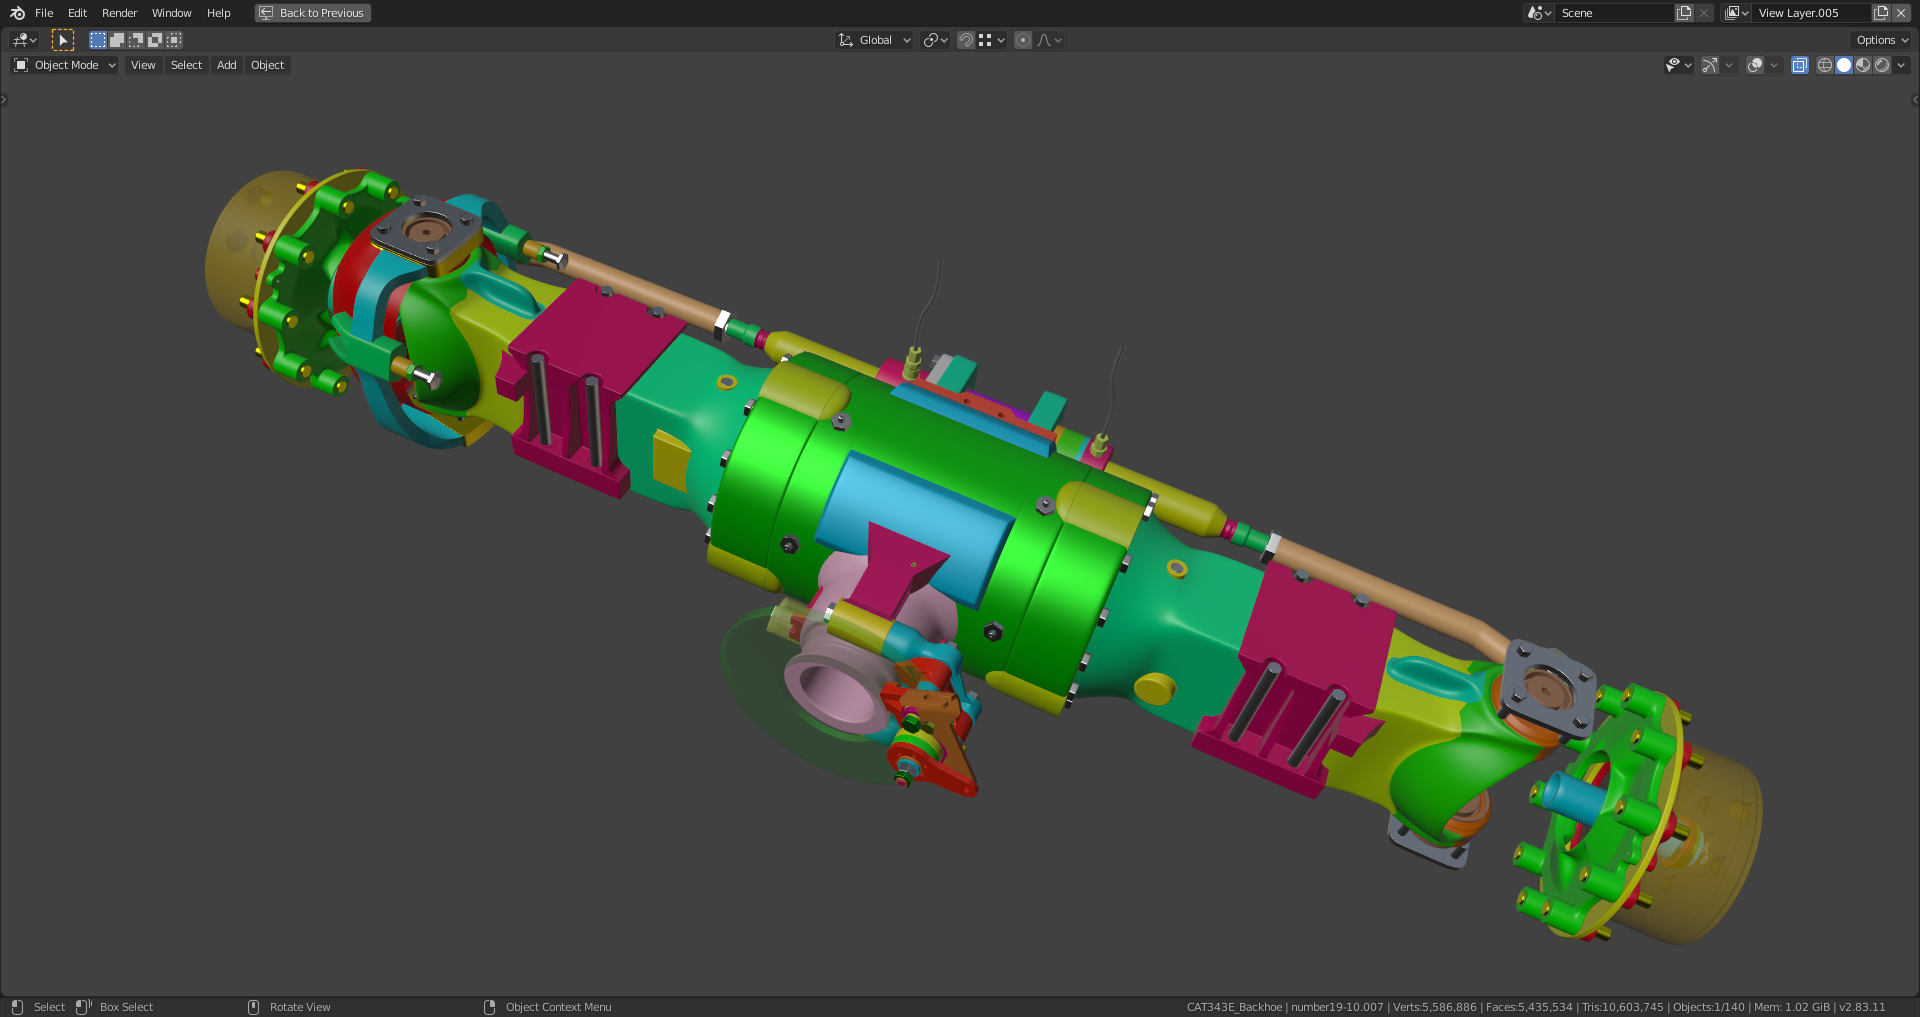
It sometimes looks to me like a new version of "Battleship Galactica" 😉😁.
I finally managed to get an all-quad-retopo of my rear axle end housing but it still causes a really bad shading especially in the area where the green bolt holder is connected to the red main body:
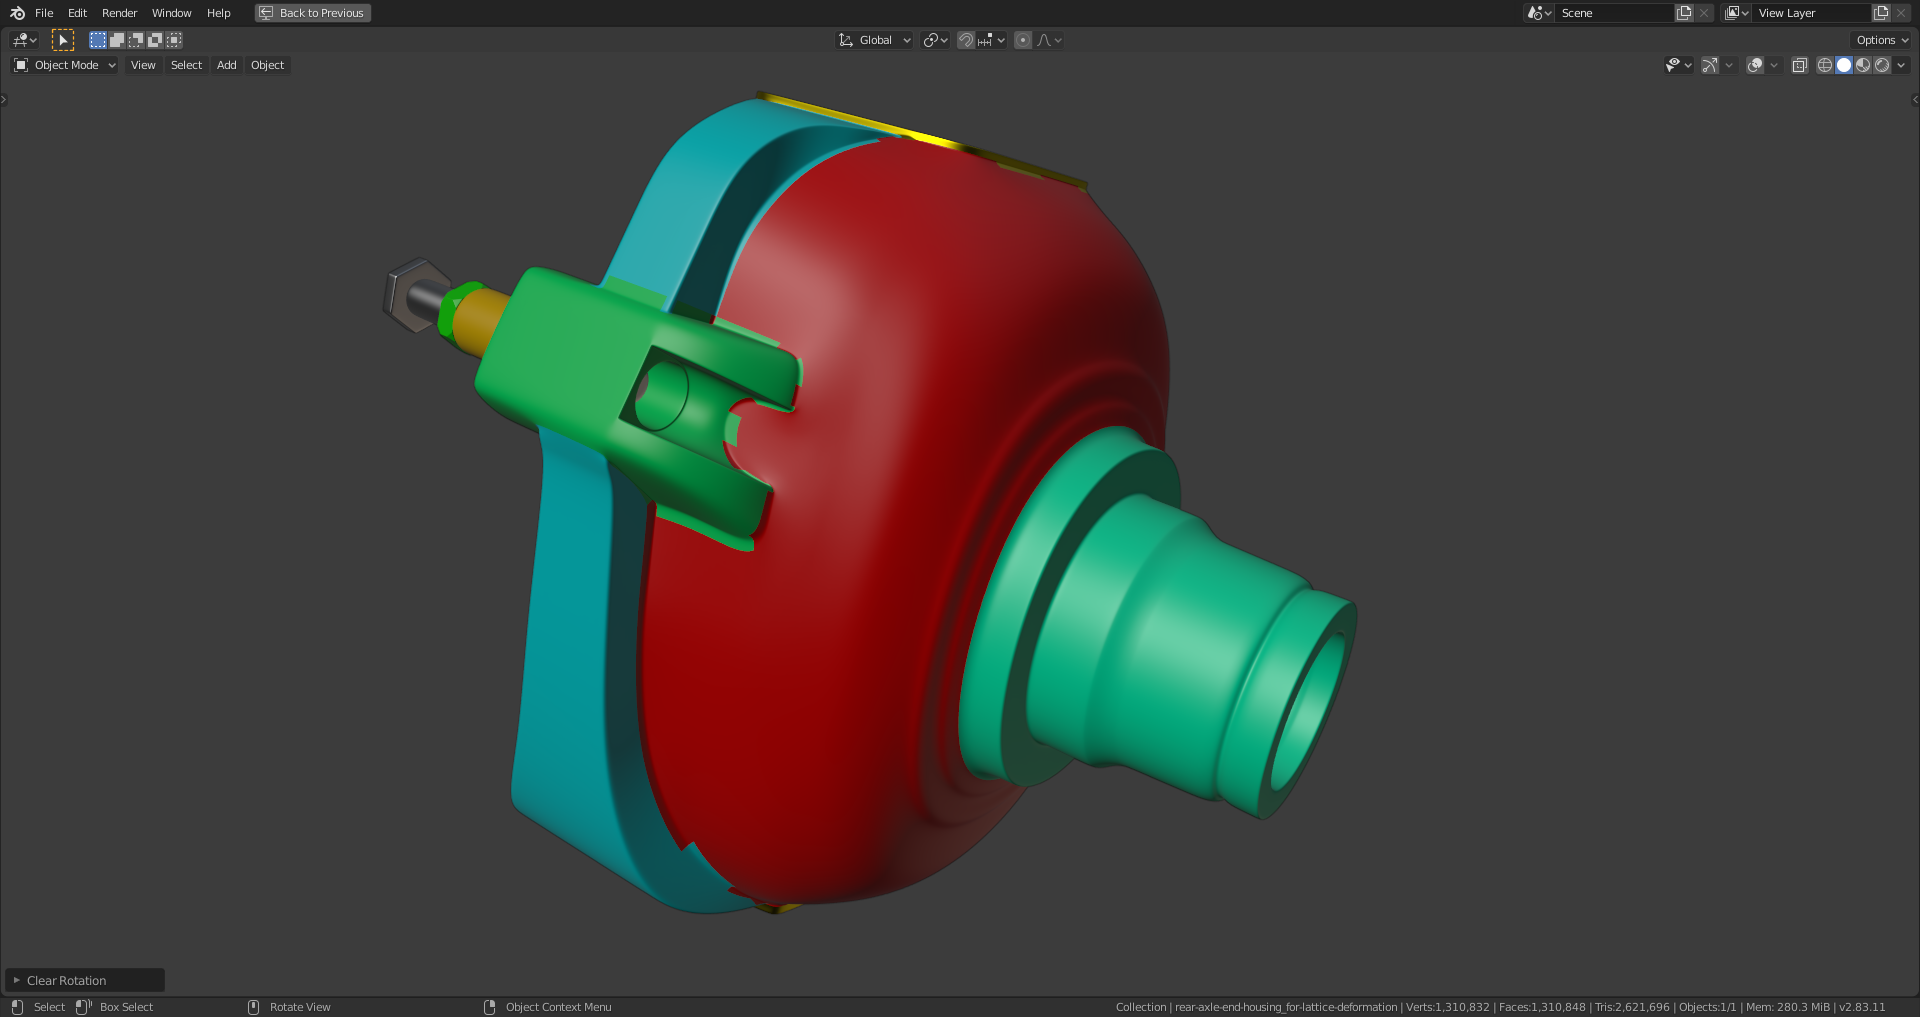
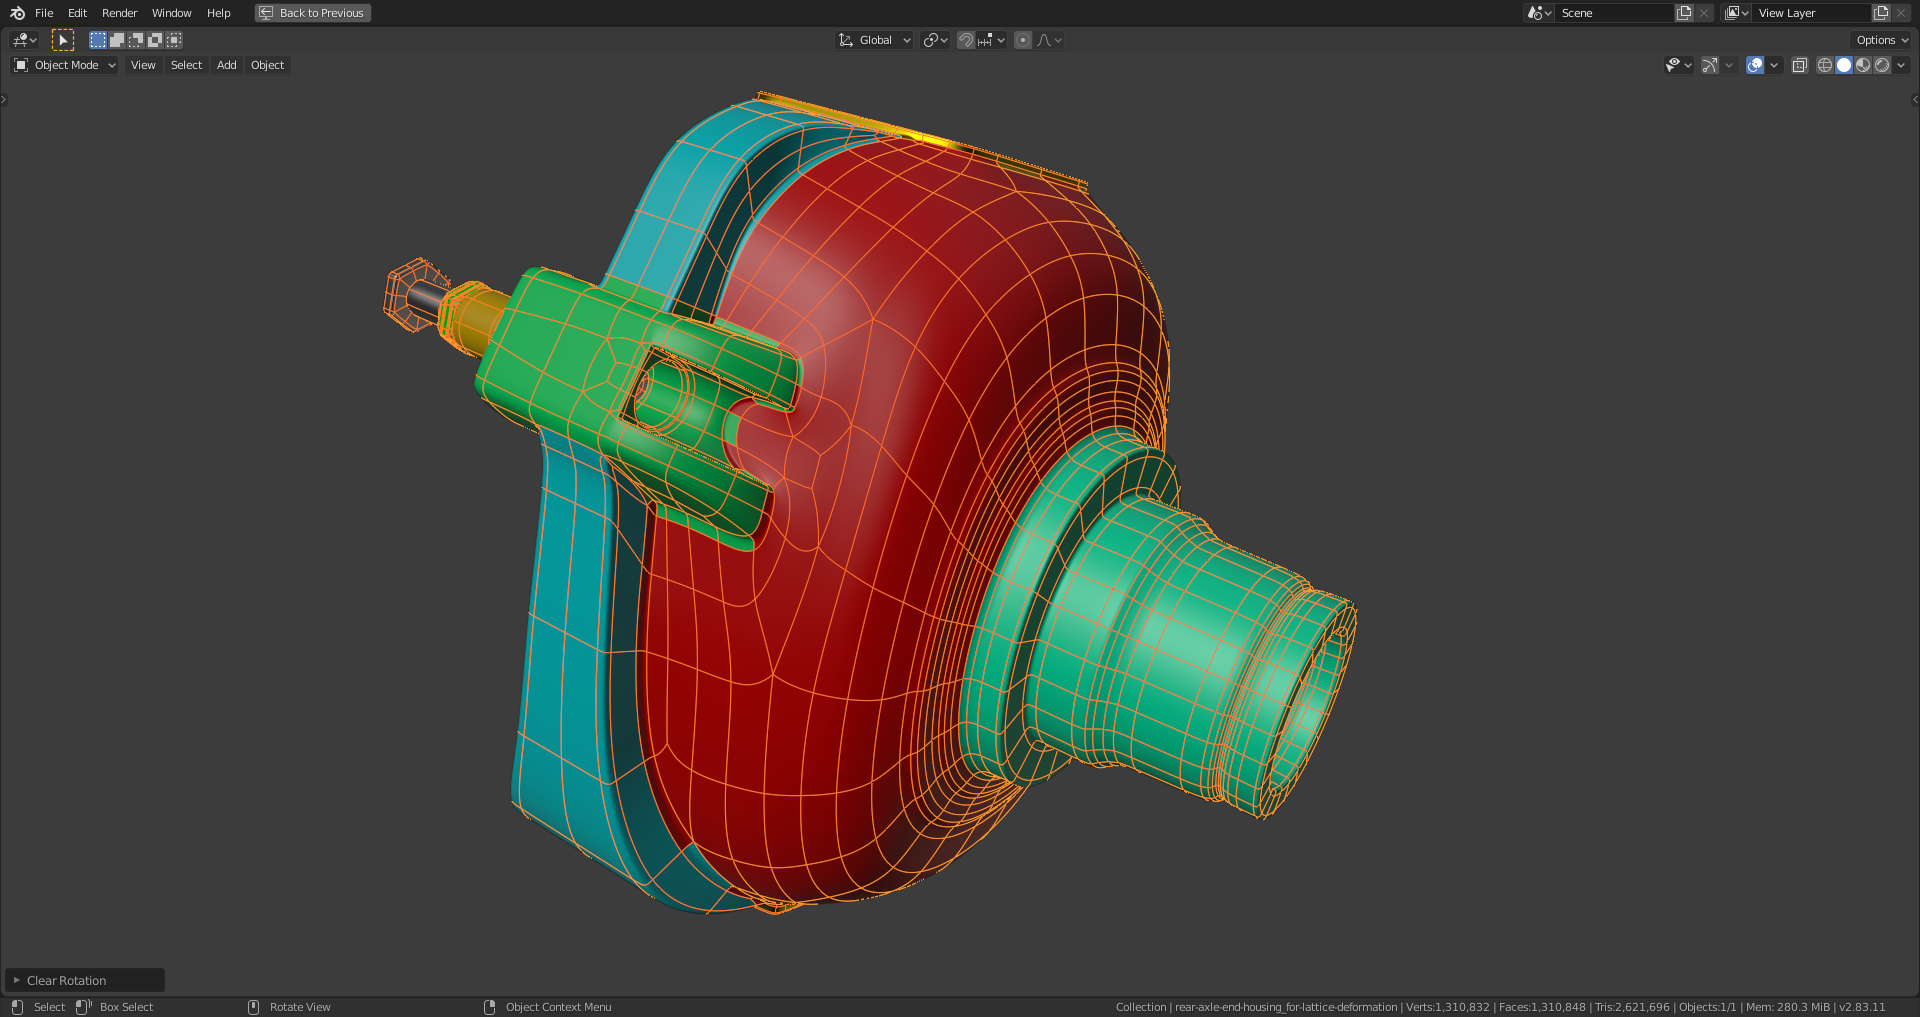
File is here.
I think that a "Topology Basecamp" here at CGCookie with training of how to clean up problematic topology (N-Gons, poles, triangles etc.) would be a good idea. I'm thinking at something what William Vaughan does in the two volumes of his "Topology Workbook". But the examples described there are mostly with flat planes and not with closed surfaces like my rear axle end housing above.
By the way: Can anybody explain this in my eyes arbitrary color bleeding in the areas of the beveled edges?
PS: I just found out that a complementary color bleeding effect with swapped colors can be achieved by calculating the normals inside.
@ duerer I had a quick look at your file (don't want to look at it too much, because I am at the moment also struggling with the housing and I do not want to get 'prejudiced'/torn into doing it in a certain way...) and the problems (both the shading and the random color bleeding) are caused by your use of the Bevel Modifier...
If you apply it and look at the geometry it creates (set the distance a bit higher so you can actually see what's happening), you''ll see the mess: concave n-gons and poles to give you nightmares...No mesh like that could survive a Subsurf!
I'd never use Bevel Weight with a delicate mesh like this and make sure I'd have full control over the topology, but of course you are free to use any method you like, but at least use more than 1 segment on the bevel (best 2, just like when you use edge loops to control the sharpness of an edge, you'll put one on each side...)
It's a difficult part. I will post my file when I've finished the housing in my thread (with just the housing), so you can see how I did it. Maybe that will be helpful in some way.
Thanks, ![]() spikeyxxx for your tips. The "Bevel Modifier" is certainly not easy to use since you can easily mess up things with the wrong settings and on such a complicated part like this, it's obviously better to use holding edge loops. Changing the "Inner Miter" type from "Sharp" to "Arc" makes things even worse. But it was worth a try. The axle end housing is by far the most difficult part that I've modeled on the rear axle.
spikeyxxx for your tips. The "Bevel Modifier" is certainly not easy to use since you can easily mess up things with the wrong settings and on such a complicated part like this, it's obviously better to use holding edge loops. Changing the "Inner Miter" type from "Sharp" to "Arc" makes things even worse. But it was worth a try. The axle end housing is by far the most difficult part that I've modeled on the rear axle.
Another difficulty for me is to contain additional geometry as local as possible. But when it fits in one part, it often does not / no longer fit in another part. Furthermore, keeping geometry as local as possible can generate a relatively dense geometry which will be visible as sharp edges in smooth shading like scars. It's a really sensible balance that you have to keep and just a little step too far to the left or to the right can produce a really ugly result. Nonetheless, this part is an excellent opportunity for training your skills in terms of creating a clean topology and my top candidate for a future "CGCookie Topology Basecamp".
![]() blanchsb your video is really helpfull and looks as if you were already part of the CGCookie crew for years. I'm wondering when they will offer you a permanent job in their team 😀.
blanchsb your video is really helpfull and looks as if you were already part of the CGCookie crew for years. I'm wondering when they will offer you a permanent job in their team 😀.
![]() duerer the Mesh Modeling Bootcamp by @jlampel really helped me wrap my head around topology better. I went from bad topology to not as bad to decent. I still make mistakes a lot but doing that learning flow really helped. The other tidbit from @theluthier that I am terrible at is: get the main outside edges all sorted then sort the detailed extrusions and give them good holding edges that take all of the push and pull from a Sub-D mod and then work your way connecting the two and figuring out the n-gons and poles on fairly flat areas. Hopefully that makes sense. Watching his live stream working out the rear digger arm and details was very helpful. I want to go back and watch that a few more times because I still forget to do that.
duerer the Mesh Modeling Bootcamp by @jlampel really helped me wrap my head around topology better. I went from bad topology to not as bad to decent. I still make mistakes a lot but doing that learning flow really helped. The other tidbit from @theluthier that I am terrible at is: get the main outside edges all sorted then sort the detailed extrusions and give them good holding edges that take all of the push and pull from a Sub-D mod and then work your way connecting the two and figuring out the n-gons and poles on fairly flat areas. Hopefully that makes sense. Watching his live stream working out the rear digger arm and details was very helpful. I want to go back and watch that a few more times because I still forget to do that.
Now granted you're and Spikey's job is an extreme situation where very little geometry isn't going to be a challenge. I almost wonder if modeling things on a flat plane and then wrapping them into circles and joining them would maybe be a clever way of working with cylindrical objects??? Or maybe I am just rambling? ![]() spikeyxxx has really good ideas when it comes to this stuff. I want to see more WIP pictures Spikey!
spikeyxxx has really good ideas when it comes to this stuff. I want to see more WIP pictures Spikey!
Thanks, ![]() blanchsb, for your hints! The challenge with the axles is that there'are a lot of curved and straight surfaces intersecting and flowing into each other. Adding a new part on curved surfaces so that it doesn't distort your curvature especially in that relatively small space is very tricky and frustrating. As soon as it fits in one place it often causes problems in another place.
blanchsb, for your hints! The challenge with the axles is that there'are a lot of curved and straight surfaces intersecting and flowing into each other. Adding a new part on curved surfaces so that it doesn't distort your curvature especially in that relatively small space is very tricky and frustrating. As soon as it fits in one place it often causes problems in another place.
Okay, here's a new version of my rear axle end housing without "Bevel Modifier" and with holding edges instead:
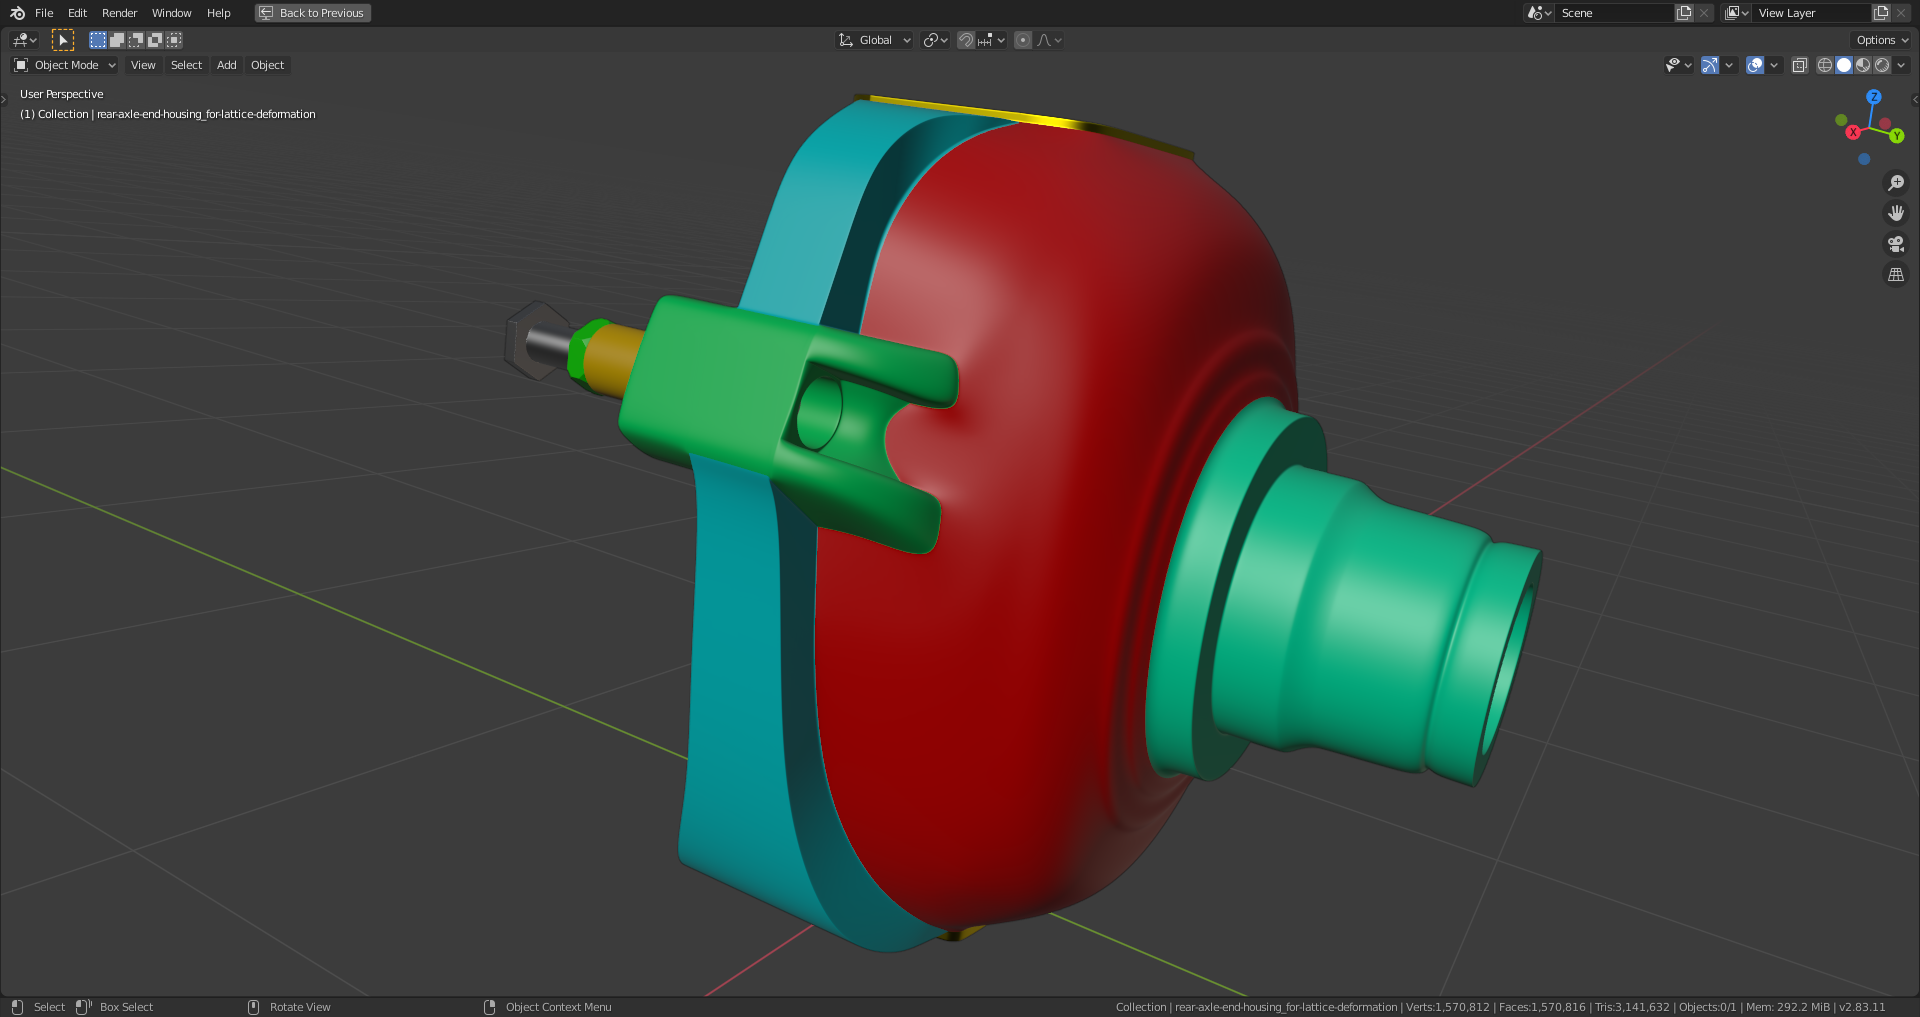
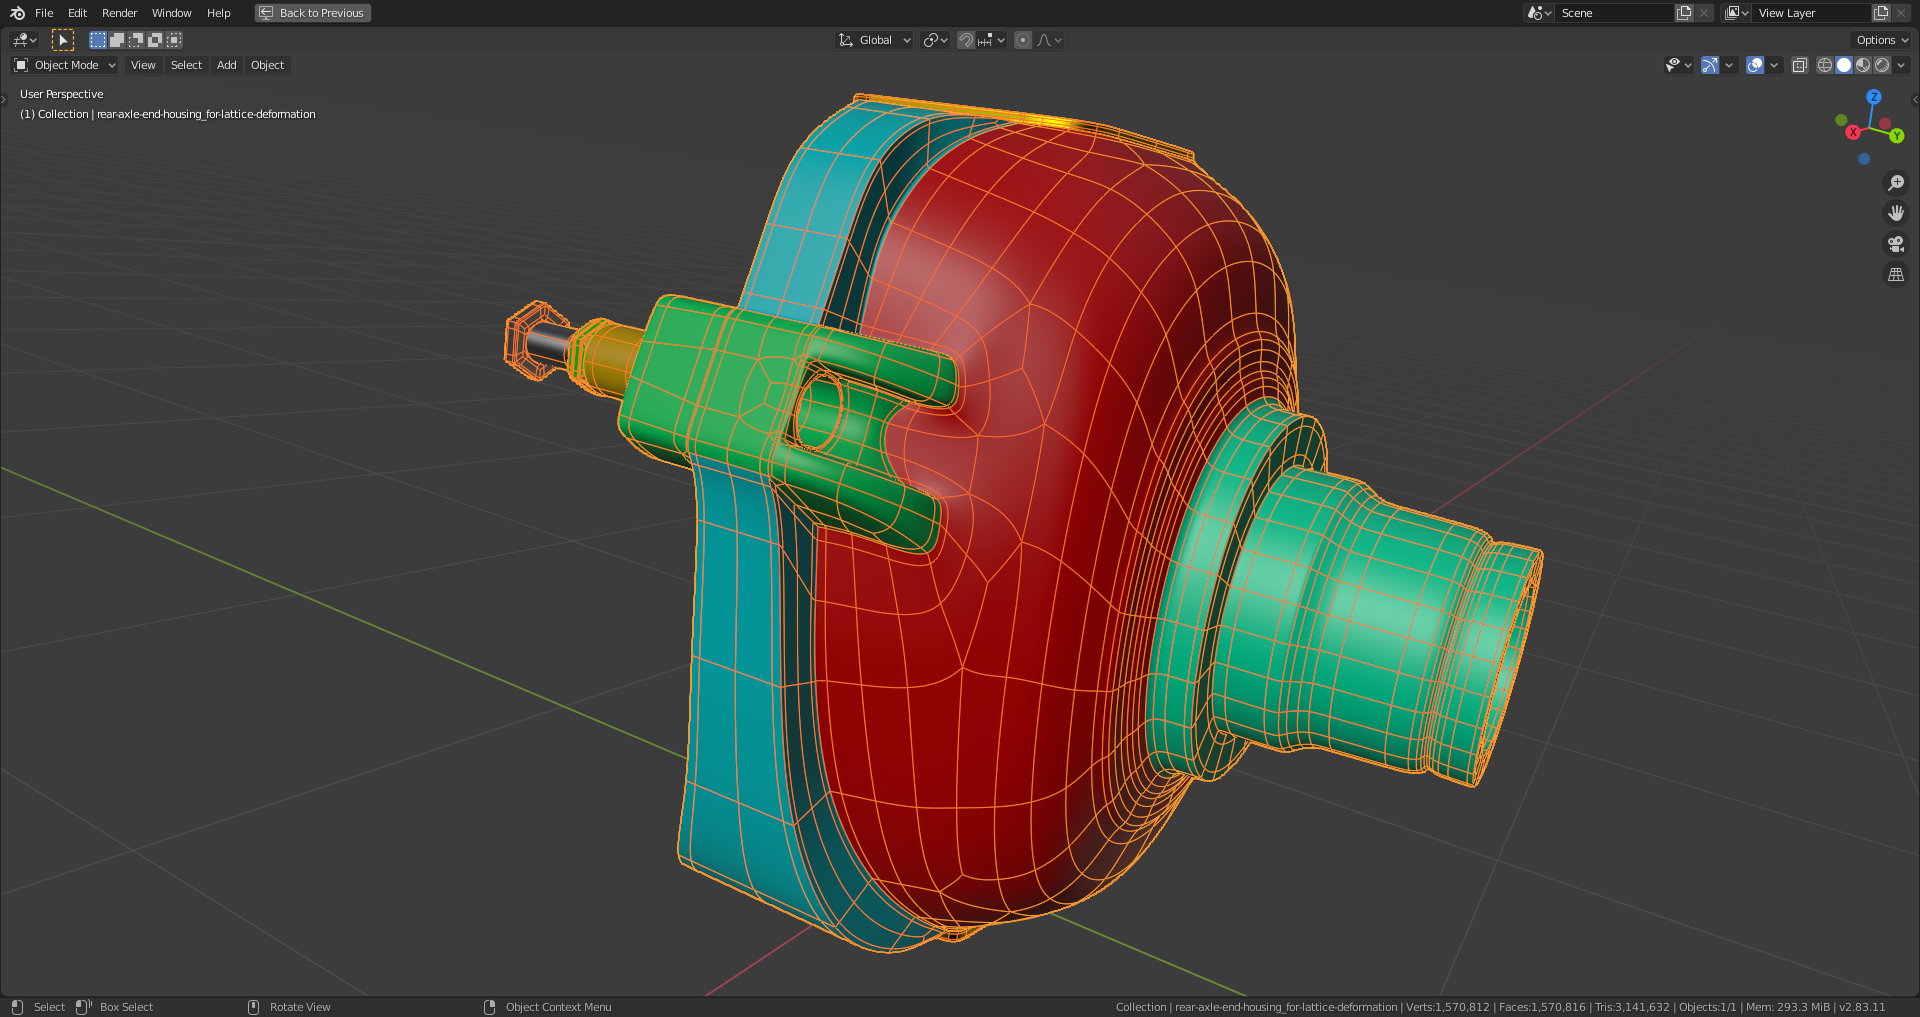
But the shading issues due to bad topology in the red main body and the green bolt holder remain: Either I get pinching because of too dense mesh parts or too big parts on curved surfaces cause problems. I'm somehow turning in a circle where, when I solve an issue another one arises. File is here.