Starting in March 2020, I began a large stream project to model a comprehensive, highly-detailed Caterpillar 434E backhoe. Please watch the first stream (first 3 minutes of abridged version at least) for an overview.
It's a straight-forward project of building a complex model over an extended period of time. The spin on the project is that I want your help to accomplish it! If I build some parts and you build some parts, we will finish this thing much quicker. Plus the contribution format will include reviews, the potential of having your piece(s) assimilated into the final model. Not to mention large quantities of XP are at stake 🤑
NOTE: This is an involved project reserved for Citizen members.

The general idea is that I kickoff stages of the project via live stream, which is typically once per month. For the time in between streams, you choose a piece of the backhoe and apply what you learned from the stream to that piece. For example, the first stream covered initial block out. So between stream 1 and stream 2, your job is to pick a piece and block it out.
This is the repeating protocol for each Assignment Period (between-streams):
I will reply to this thread after each stream with a [big] assignment post denoted by a 📣 emoji in the title. There I will clarify instructions about each Assignment Period.
We will centralize our collaborative communication between the streams and this thread. Ask any and all questions pertaining to the Backhoe project here.
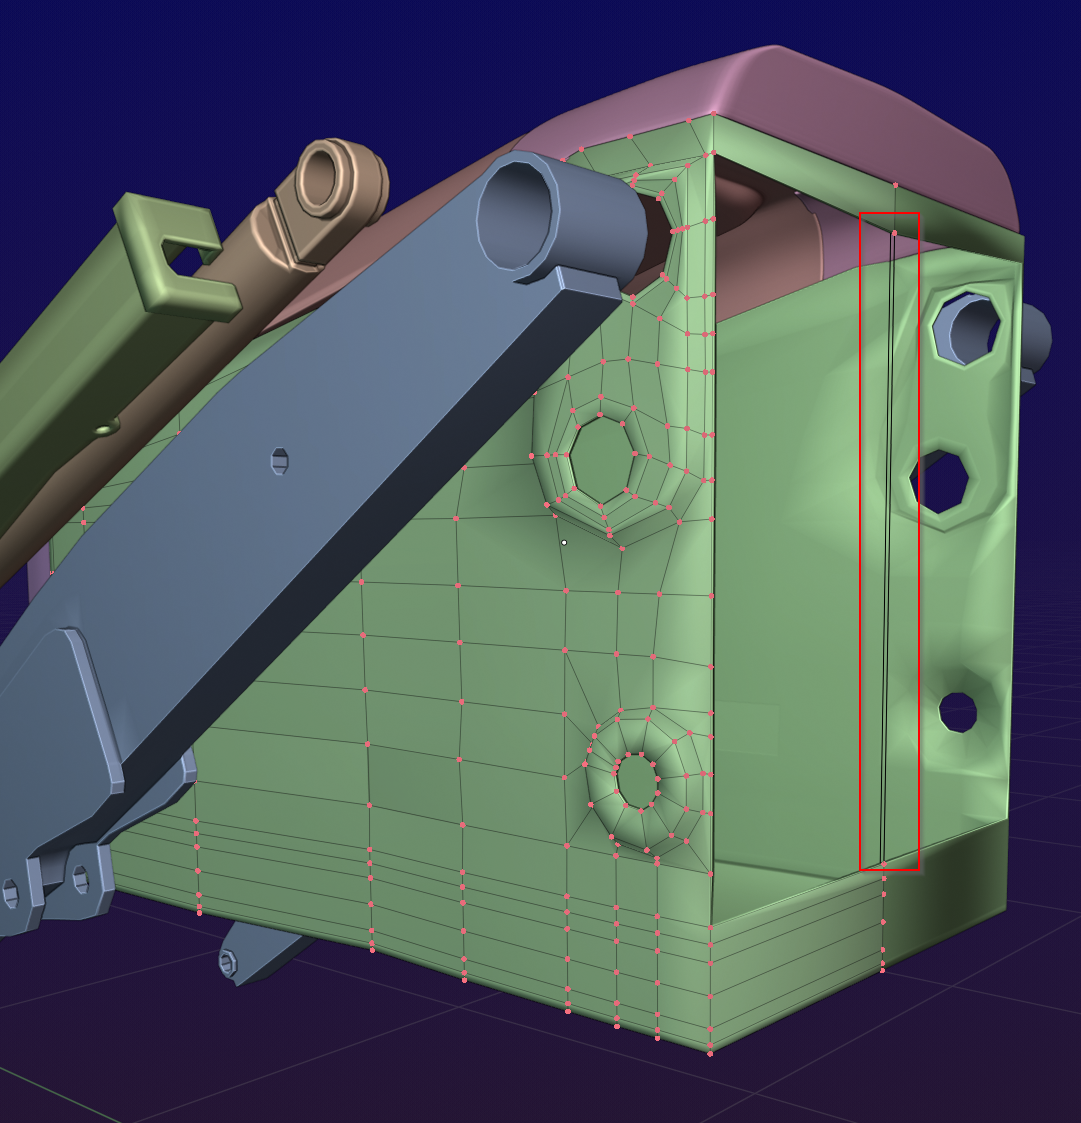
OK dudes and dudettes, here's the link to my battery box and step box, for if anyone wants to see how it fits with their part.
https://drive.google.com/drive/folders/1Nc7P0RQ3lAdfU4bSq2YwdZDZqd9wYUHo?usp=sharing
There are two files, the Normal one and the Optimized one, like Kent asked. They are the same only that one has the "Triple Vertex Optimization Technique" all over the place.
![]() blanchsb Had some time to work on the engine enclosure today. Still work-in-progress but as I suspected, dealing with the extrusion plus thinning out the enclosure towards the cab solved the intersection problem with your loader arms. Here's a link you can check out.
blanchsb Had some time to work on the engine enclosure today. Still work-in-progress but as I suspected, dealing with the extrusion plus thinning out the enclosure towards the cab solved the intersection problem with your loader arms. Here's a link you can check out.
https://drive.google.com/drive/folders/1KeDXLDCDh_m6I5sz-ygC7MaBA_urtJPv?usp=sharing
I found a relevant use case for the knife project tool on this project that I thought I would share since some of us are doing work on not-perfectly-symmetrical parts. This helped me in a pinch when I needed to update some geometry.
Thanks for sharing. Used the knife tool loads, but never the knife project. That can save so much time on a big project.
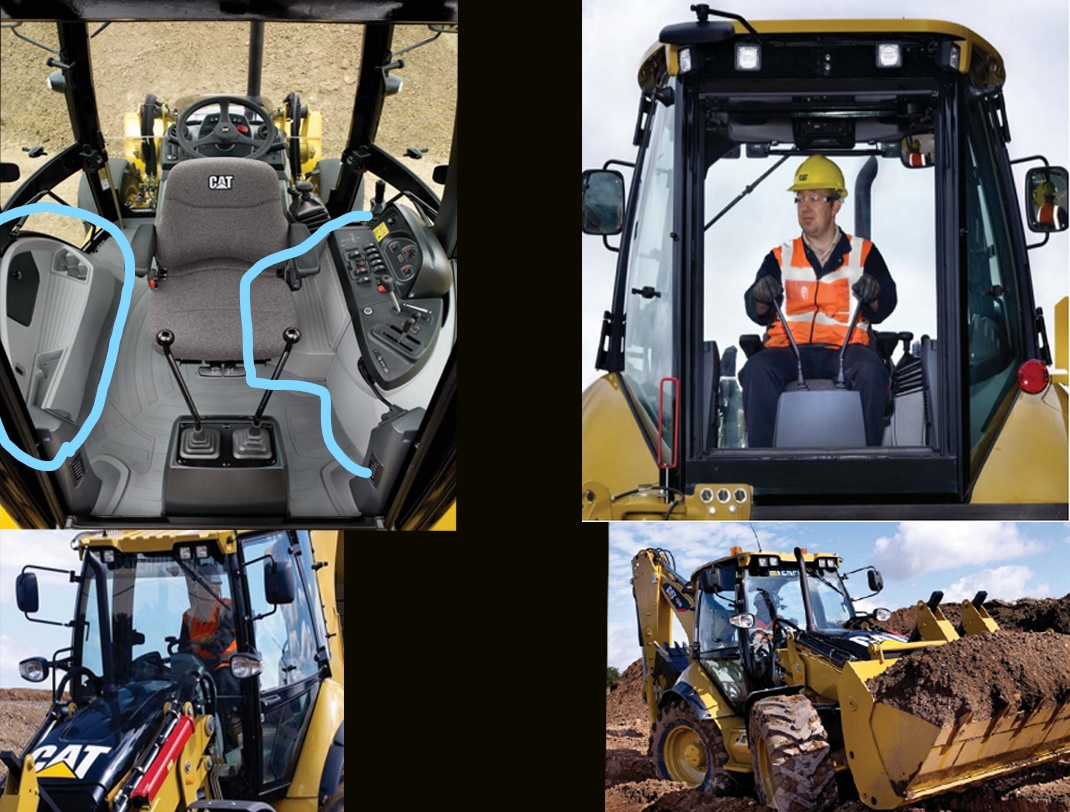
My bad there is on step on the right side of the top left image.
I was talking about those 2 consoles. They are fatter at the bottom than at the top. The console on the right of the image does have a small step though.
If the verts are not exactly at the same distance to the plane you want to cut then you will want to be mindful of the viewport orientation before using the knife project. Since my verts were at the same depth as the plane I was cutting (and both were perfectly flat) then it did not matter.
If my verts were hovering above the plane then I would want my view to be a left orthographic for the Knife Project so that it projected directly to the side (hopefully that makes sense). It is similar to UV unwrapping when projecting from view. IF your view is in perspective then your cut will be skewed off to the side when you probably didn't want that.
Ok the floor is mostly flat, as you can see in the image I had an issue with it hitting the tire....can you imagine the grating...wonders how long the tread would last lol. For some reason its not lining up on one side.
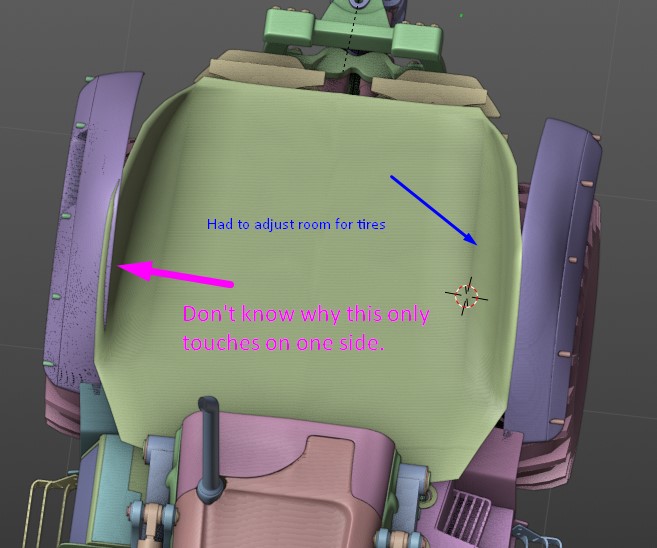
The floor sits above the tires. I know this for sure when I was walking around the backhoe loader on Monday this week. I was curious about that. But maybe the part that sits above the tires is where the side consoles are covering and they might sit slightly higher than the floor.
There is a few inches air gap. I think that was shown in my reference photos and videos posted.
As far as the uneven part: Are you using a mirror modifier and is your object origin centered with the world origin?
've turned mine in, I'm going to be getting ready to leave for Texas so I wanted to make sure I got this turned in. Also for those who need it for their part its available.
https://drive.google.com/file/d/1hpDxfUsC3Lc-jDNMYQvesPNMj87idInd/view?usp=sharing
When you're stuck in a ditch....and then stuck out of a ditch
I found another fun video of our DOG in action. Looks like these guys got it in a compromising position, but they had an HD camera to record it getting out on it's own. There are some good and unique views in this video if you can ignore the camera shake. Pausing creates high quality stills and playing at 1/4 speed seemed to help me narrow down my focus on some stuff. Plus you get to see the cab doors opening and other fun uses for this DOG that the designers probably hadn't thought of when they invented it.
Super funny to watch it get high centered haha.
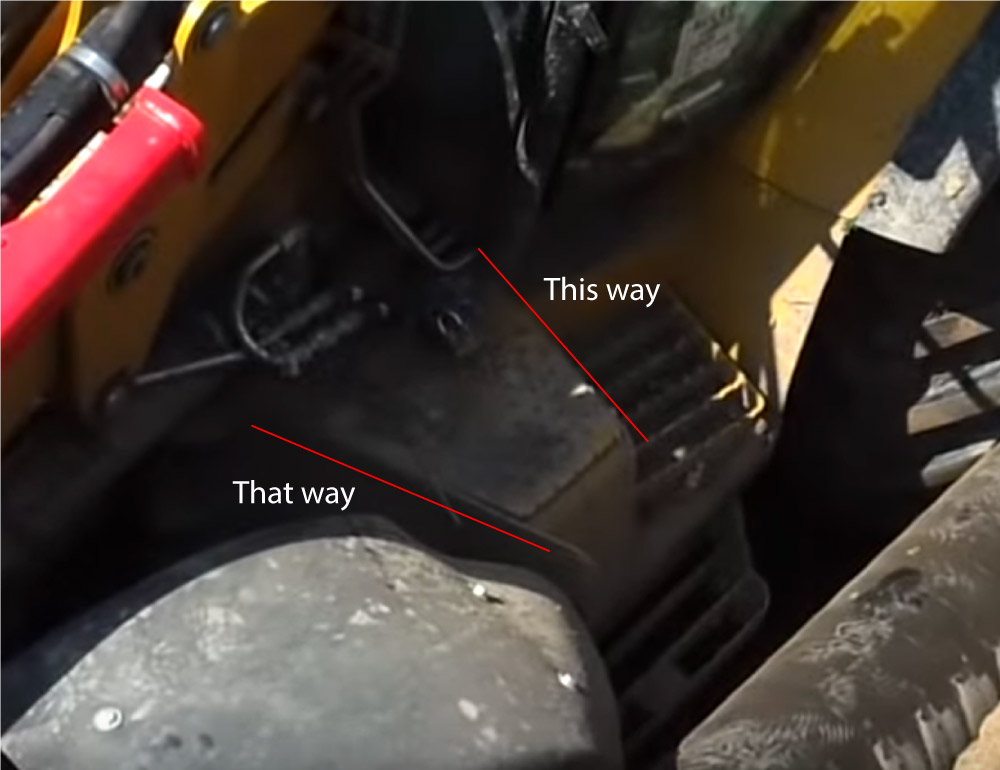
Noooooo, this thing is not only slanted this way, it also slants that way.... I had already committed to the mesh when I abused the heck out of the Triple Vertex Optimization Technique. And the second step is much closer to the edge, and there's a square shape in the middle of the first step... Gods from the Mesh Olympus help me.
wow, seeing that video makes the doors make much more sense now that I saw it open...ugh I can see now that I need to rethink the door and how its made.
I've got some heft changes as well. I just spent most of the day redoing the loader arm haha
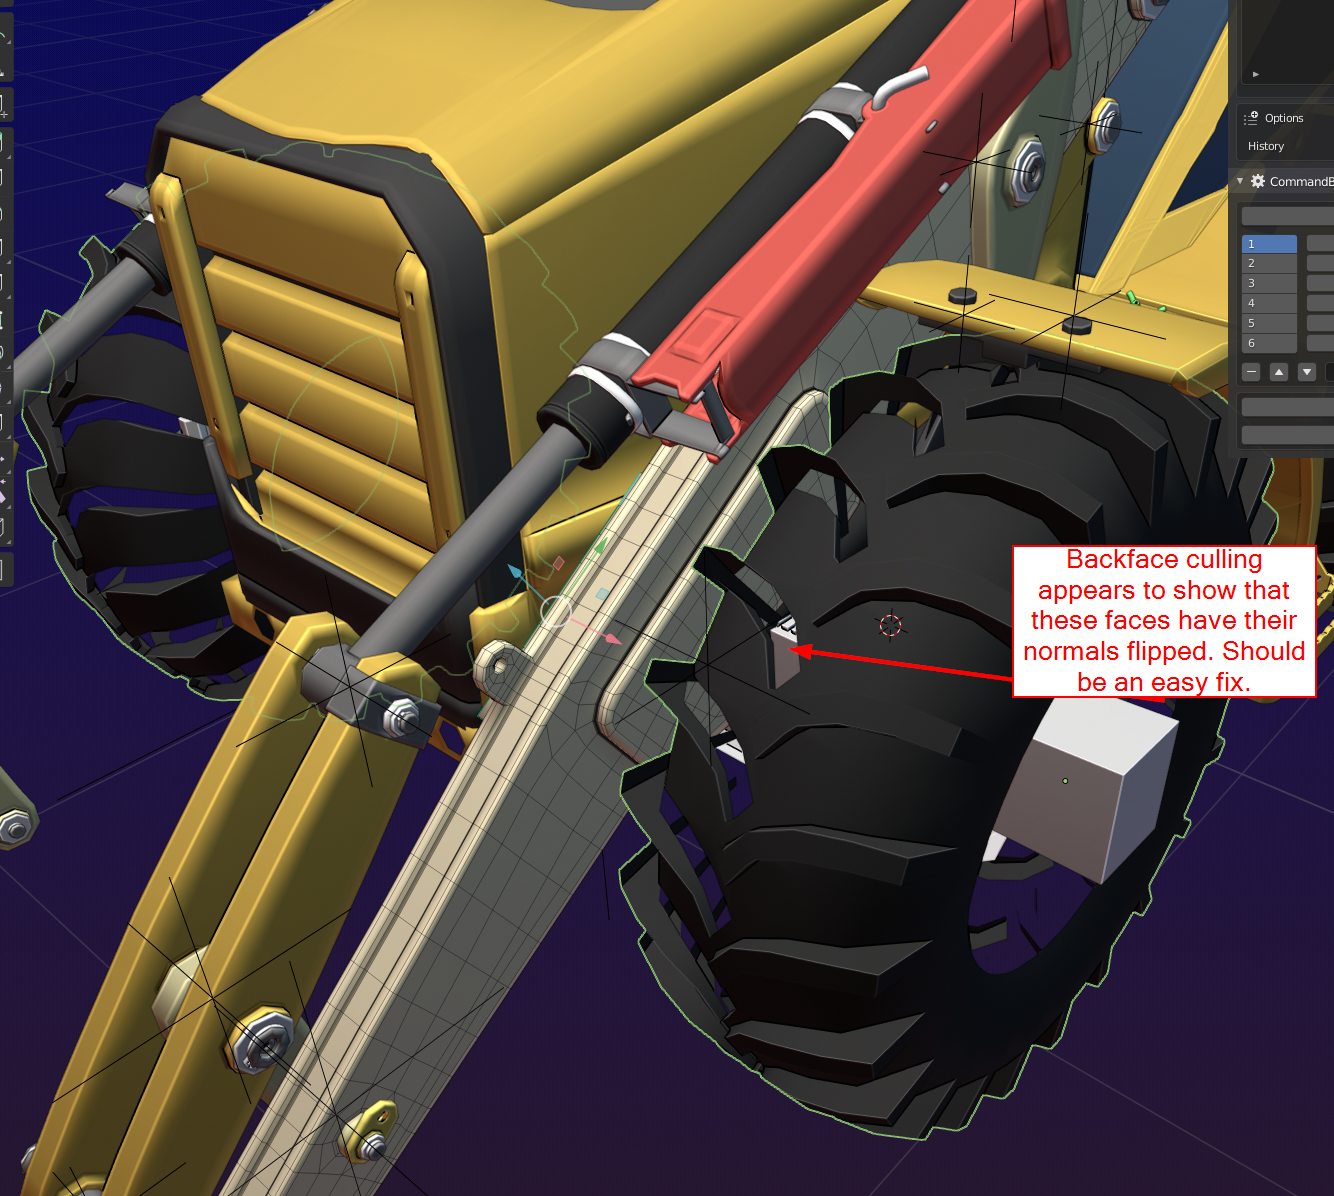
![]() spikeyxxx I just noticed something small on your tires that you will want to fix. Should be super simple. Looks like the inner treadz have thier normals flipped like an egg......sunny side down.
spikeyxxx I just noticed something small on your tires that you will want to fix. Should be super simple. Looks like the inner treadz have thier normals flipped like an egg......sunny side down.
I fixed all the flipped normals in my file they were all over. I should have said something.
![]() blanchsb thanks! I made one side and then used S, X, -1 to get the other side. I knew I should check the Normals after that, but apparently I forgot to do that;)
blanchsb thanks! I made one side and then used S, X, -1 to get the other side. I knew I should check the Normals after that, but apparently I forgot to do that;)
The tires are still in Blockout stage, working on the front axle at the moment, but I'll definitely fix those Normals right away, before I forget...
aartifact Hey man I saw this stray back edge here and I thought I would let you know. I don't see any interference with this and the loader arms though. Nice work man!
