Starting in March 2020, I began a large stream project to model a comprehensive, highly-detailed Caterpillar 434E backhoe. Please watch the first stream (first 3 minutes of abridged version at least) for an overview.
It's a straight-forward project of building a complex model over an extended period of time. The spin on the project is that I want your help to accomplish it! If I build some parts and you build some parts, we will finish this thing much quicker. Plus the contribution format will include reviews, the potential of having your piece(s) assimilated into the final model. Not to mention large quantities of XP are at stake 🤑
NOTE: This is an involved project reserved for Citizen members.

The general idea is that I kickoff stages of the project via live stream, which is typically once per month. For the time in between streams, you choose a piece of the backhoe and apply what you learned from the stream to that piece. For example, the first stream covered initial block out. So between stream 1 and stream 2, your job is to pick a piece and block it out.
This is the repeating protocol for each Assignment Period (between-streams):
I will reply to this thread after each stream with a [big] assignment post denoted by a 📣 emoji in the title. There I will clarify instructions about each Assignment Period.
We will centralize our collaborative communication between the streams and this thread. Ask any and all questions pertaining to the Backhoe project here.
Also, on the 1st stream, it isn't labeled free, yet you can still watch it.
![]() jakeblended It may be a small *scaled* piece compared to others, but it's not small in terms of complexity and detail. I'm OK with you doing that piece only. I'll put you down for "digger arm hinge".
jakeblended It may be a small *scaled* piece compared to others, but it's not small in terms of complexity and detail. I'm OK with you doing that piece only. I'll put you down for "digger arm hinge".
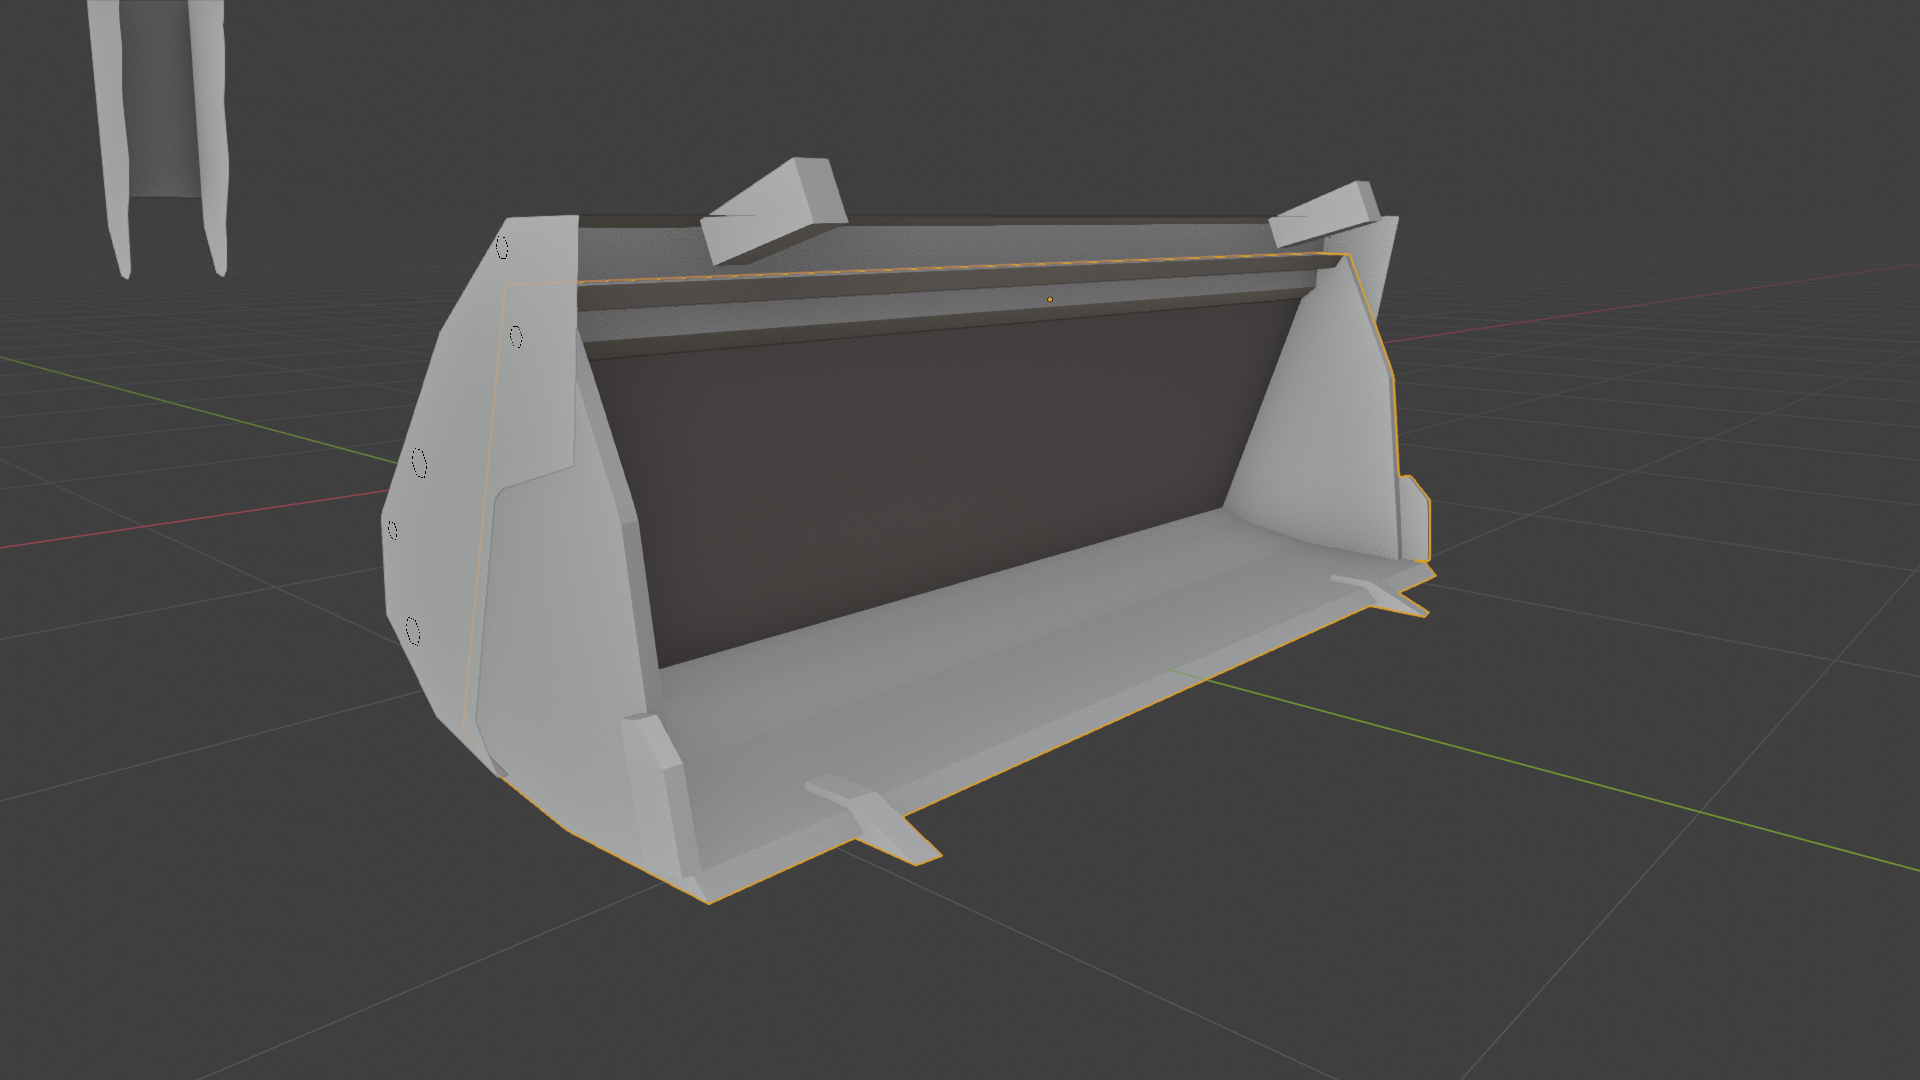
Here's what I have so far. I'm noticing some differences between the reference in the parking lot, and those from the brochure.
Are we following the parking lot, or the brochure for consistency?
Also ![]() blanchsb , we should probably collaborate closely on the part where my piece meets yours.
blanchsb , we should probably collaborate closely on the part where my piece meets yours.
That's looking great ppfbourassa! A fine level 2 blockout to me.
You bring up a good point about (in)consistency between the blueprint and the photo reference sheet (parking lot). The loader bucket in the parking lot has 2 additional pieces not featured in the blueprint:
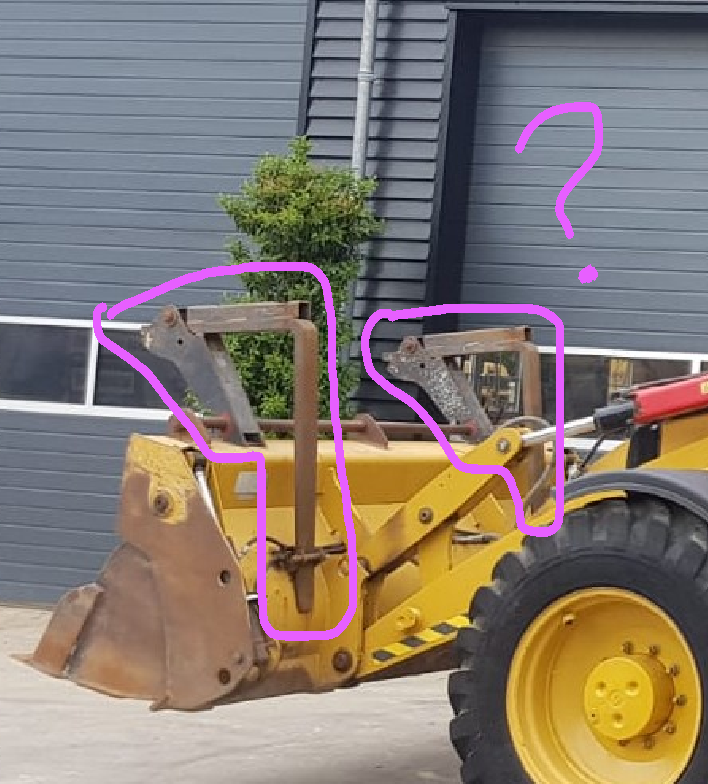
I wonder what those are for..I would say leave them out and follow the blueprint for consistency. They're kinda ugly in my opinion any way.
I'm sure we'll run into many inconsistencies along the way that we'll need to sort out.
ppfbourassa Yeah I was thinking the same thing!I think it would be best for me to post the arms and connectors to you so that you can implement them onto your bucket. I actually started modeling the whole think on my own and noticed that Kent’s first blockout of the bucket comes too far back into those hinges. You’ll need to adapt it obviously.
Also, I don’t think we need this level of detail yet but the forked-shovel piece on the bucket that swings open (with the hinge on the top of the loader bucket) is used to grab objects such as logs on the back end. It has some “teeth” on the back edge that helps it grab those objects.
I am getting closer with my blockout but there are a lot of holes and pins on mine that I need to build in. I’m about 60% done. I’ll post a link when I am done.
Actually. I have enough to give you to work your part now. Gimme a sec and I will upload it.
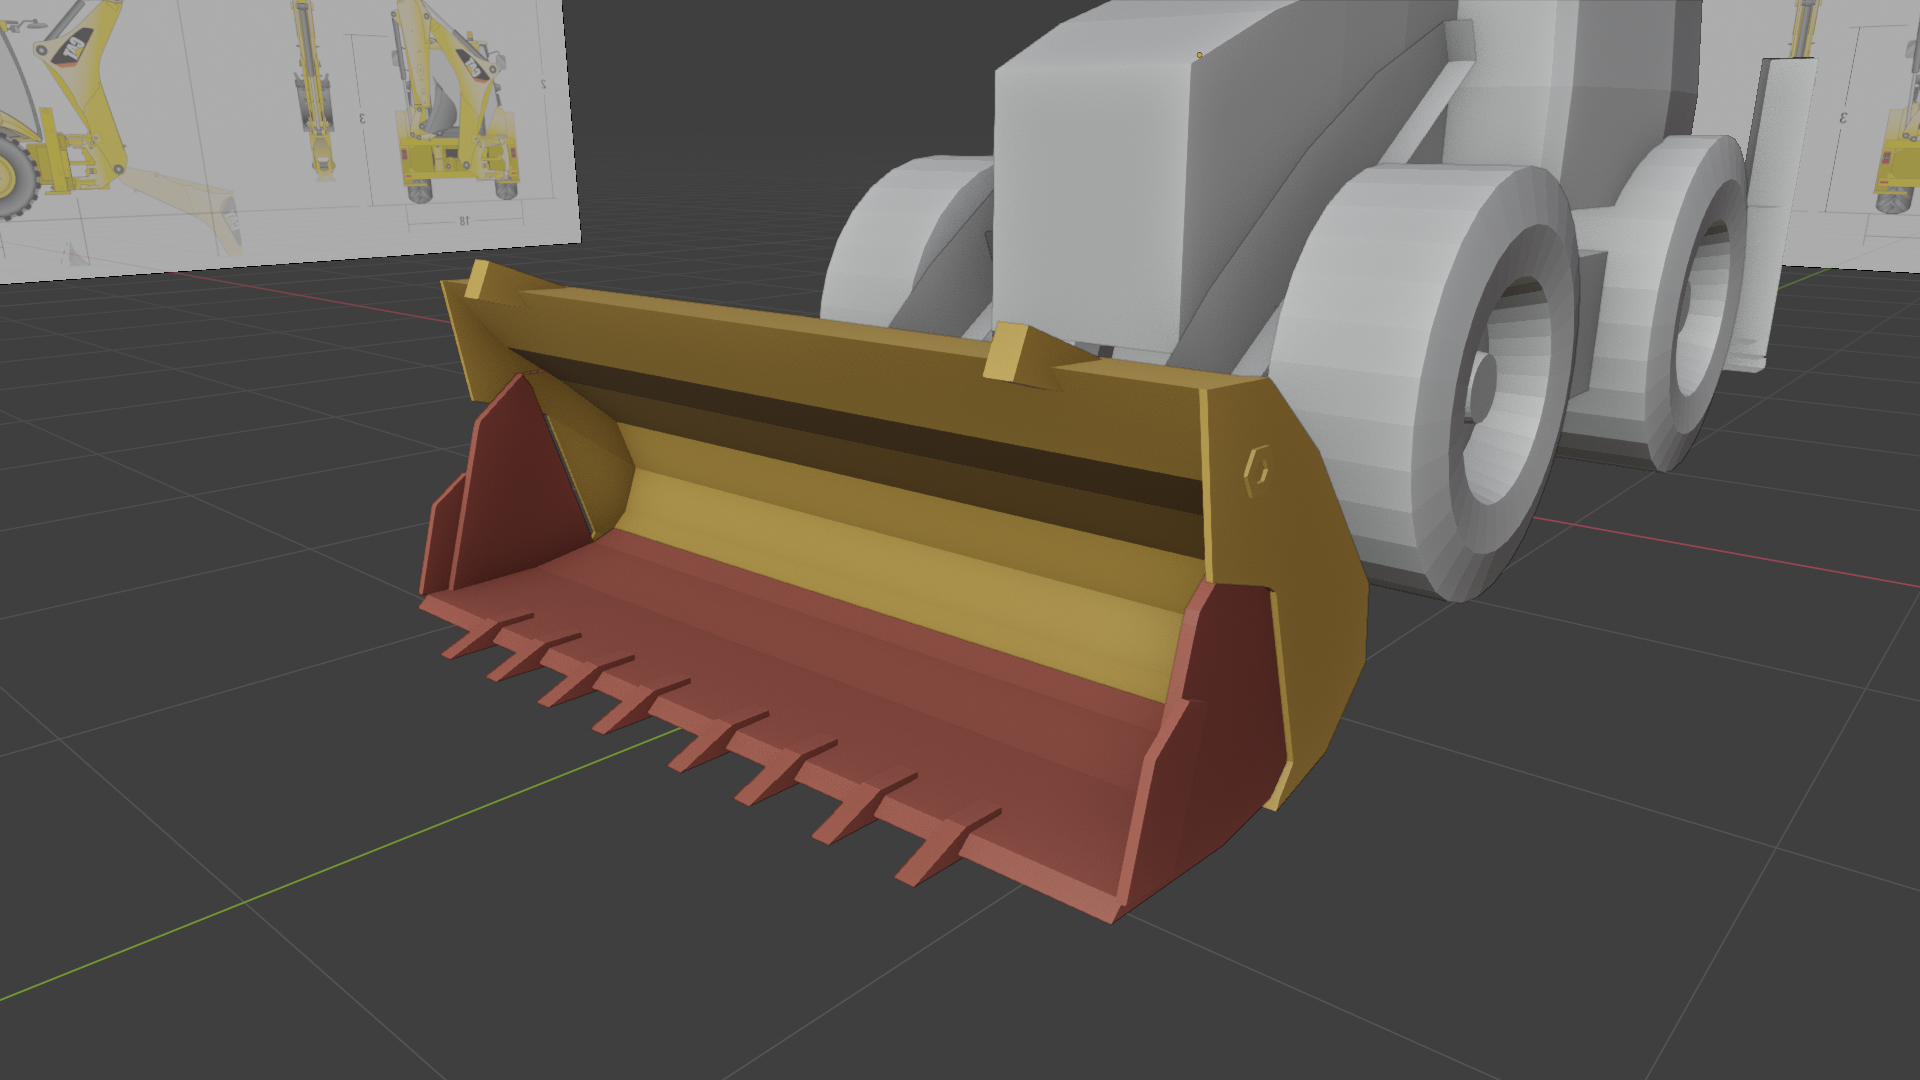
![]() blanchsb I'm not exactly sure what you mean. On the bottom part, which I'm calling Loader Bucket B, colored red here, did I address what you meant?
blanchsb I'm not exactly sure what you mean. On the bottom part, which I'm calling Loader Bucket B, colored red here, did I address what you meant?
ppfbourassa Here’s what I was talking about. I may be getting ahead of the blockout with this comment but it is good to keep it in mind for later.
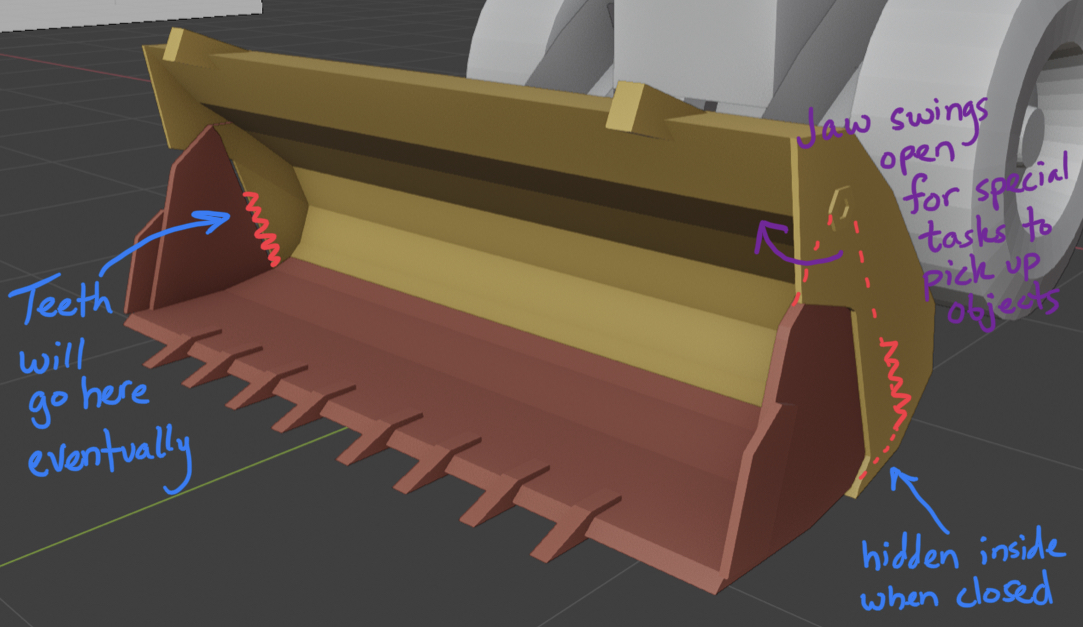
I private messaged you with a link to the blend file I created with the Loader-Arms. That should be enough to get you going.
ppfbourassa A couple more things to note: the back of the bucket ended up going too far back. I made a ”better” blockout to represent the contour a little better for reference in the file. You can delete it as I just wanted to point it out. I don’t think I got the supports exactly right but they are close enough to drive the point home.
Before:
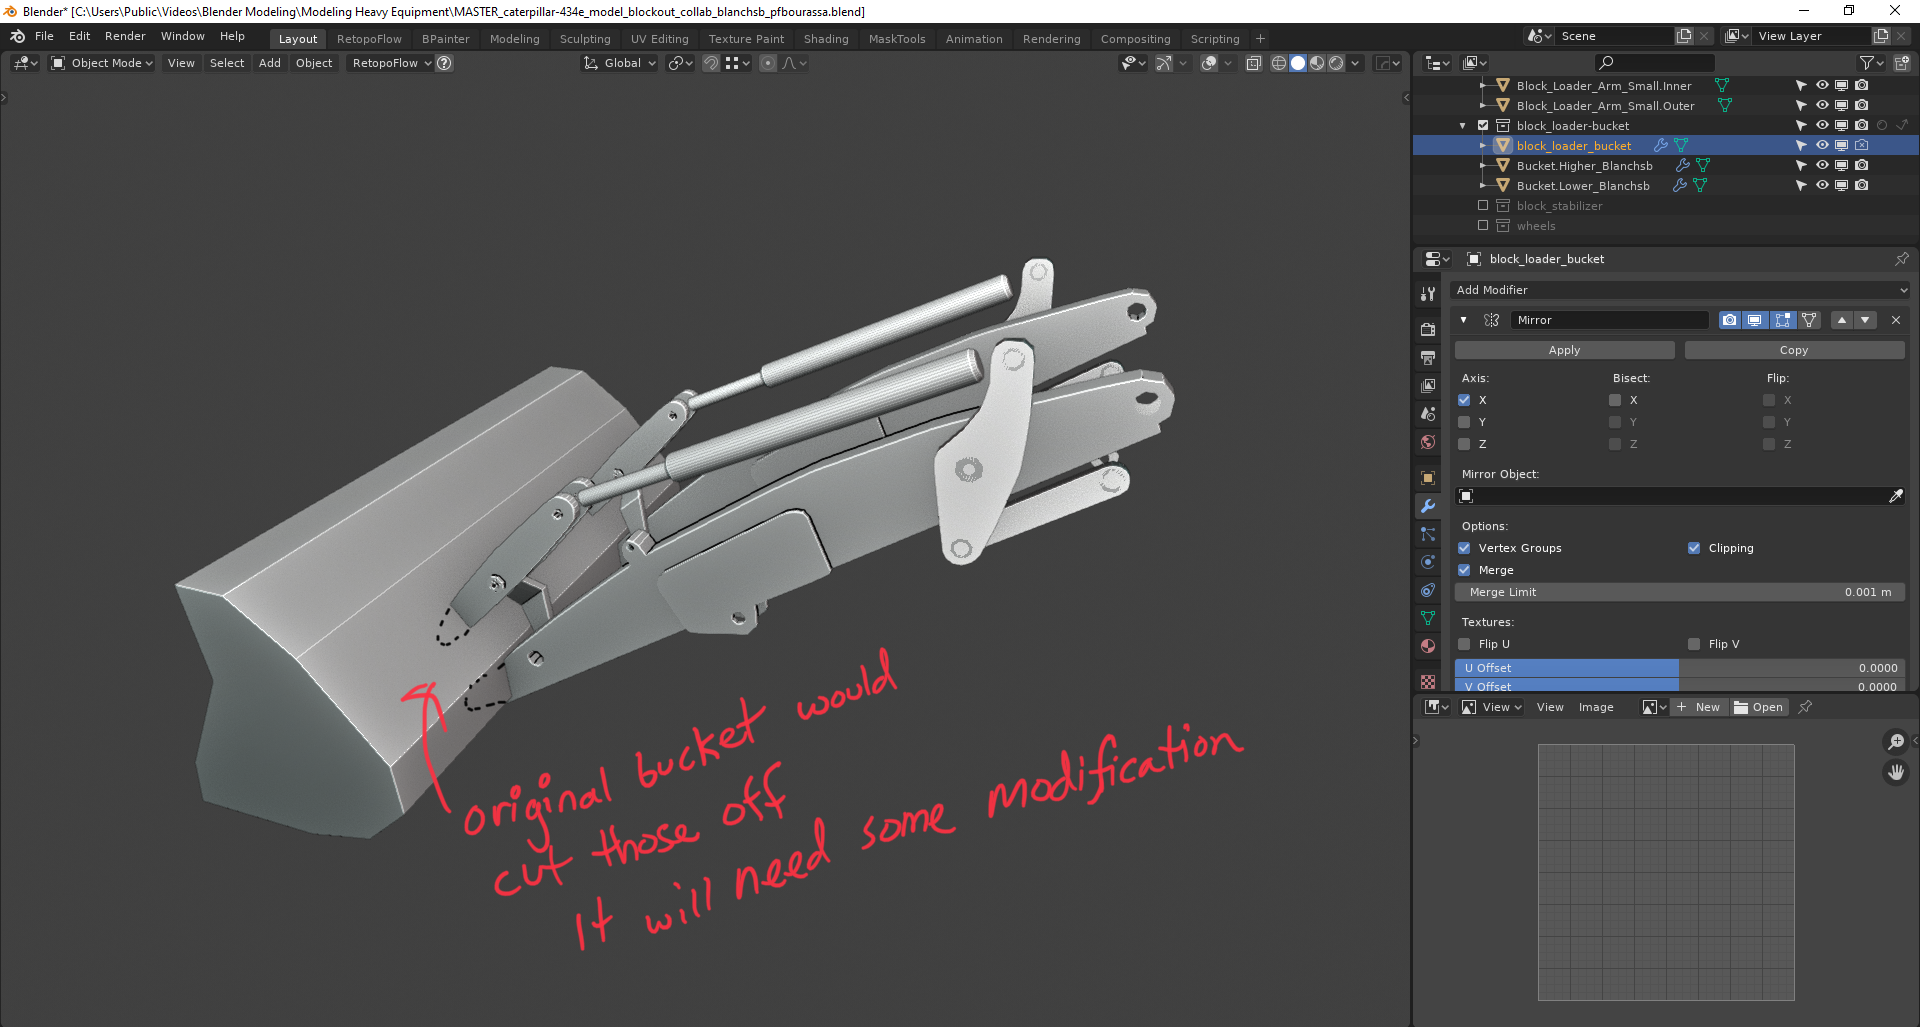 Before
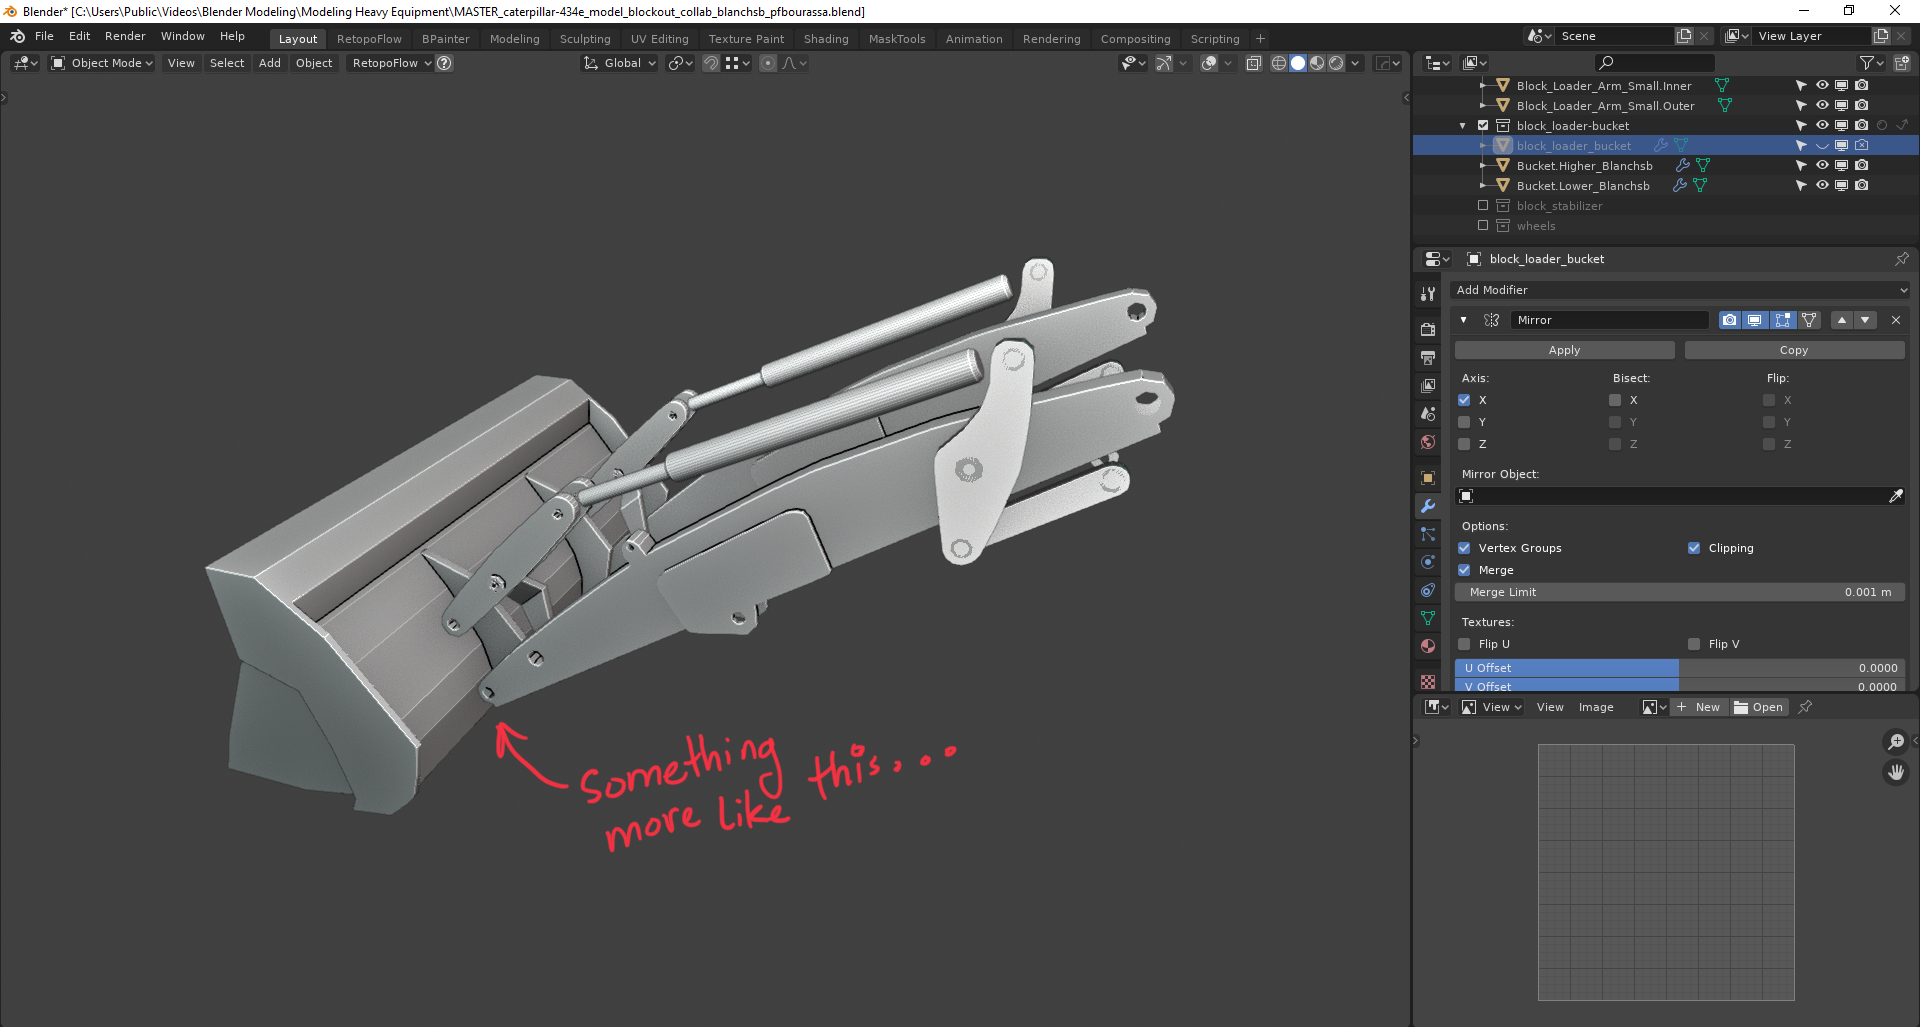 After
After
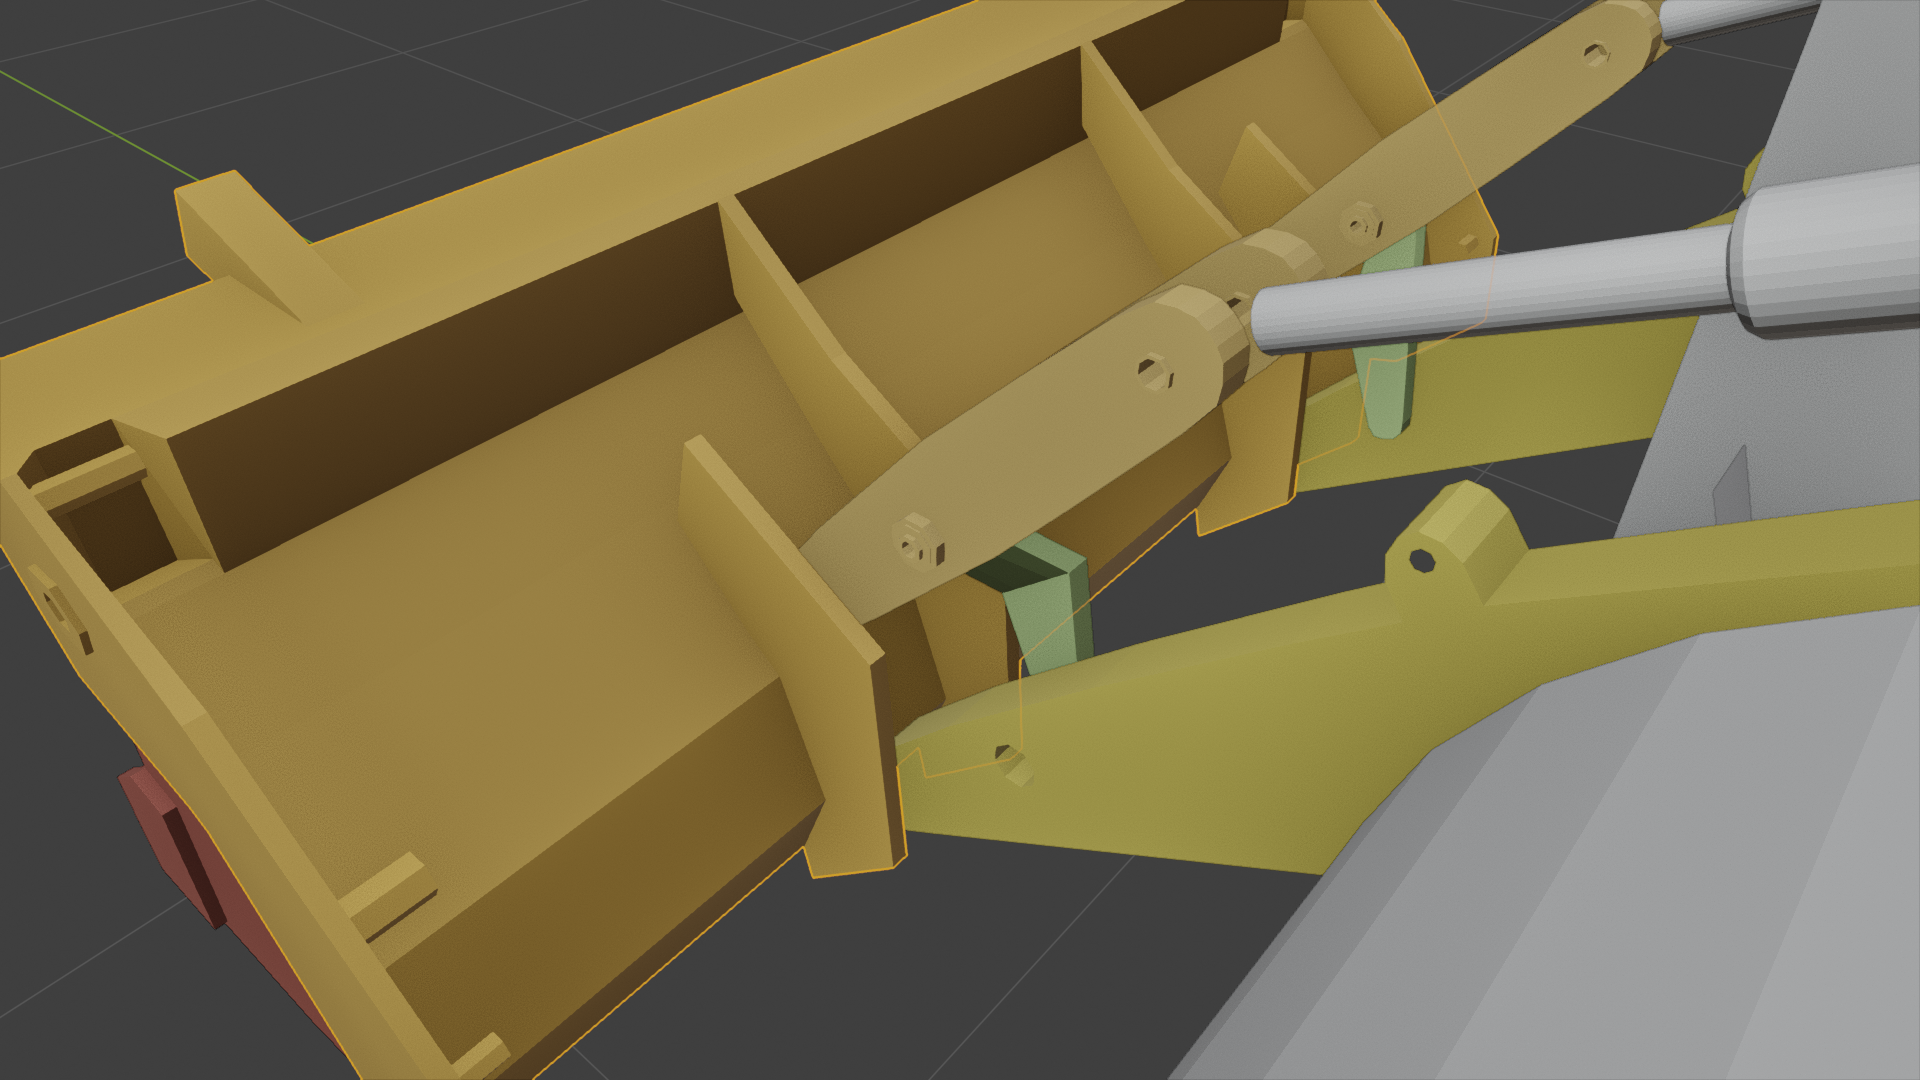
![]() blanchsb Yours is looking so good! Am I on the right track with the connections?
blanchsb Yours is looking so good! Am I on the right track with the connections?
ppfbourassa ![]() blanchsb The collaboration between you too already is awesome! Both of your level 2 blockouts are looking sharp too. Excellent work so far 🤜💥🤛
blanchsb The collaboration between you too already is awesome! Both of your level 2 blockouts are looking sharp too. Excellent work so far 🤜💥🤛
Okay here’s my updated loader arm progress. Made lots of holes and filled them with pins. Tried to maintain somewhat of decent topology for next stages around all of the holes and details.
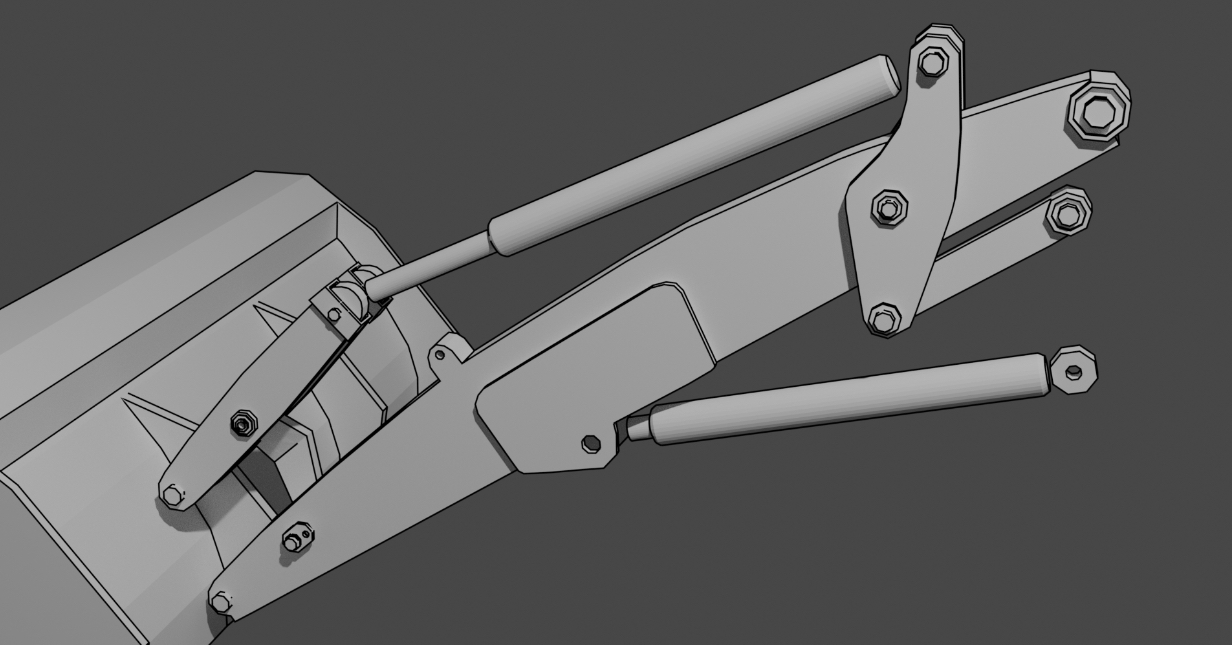
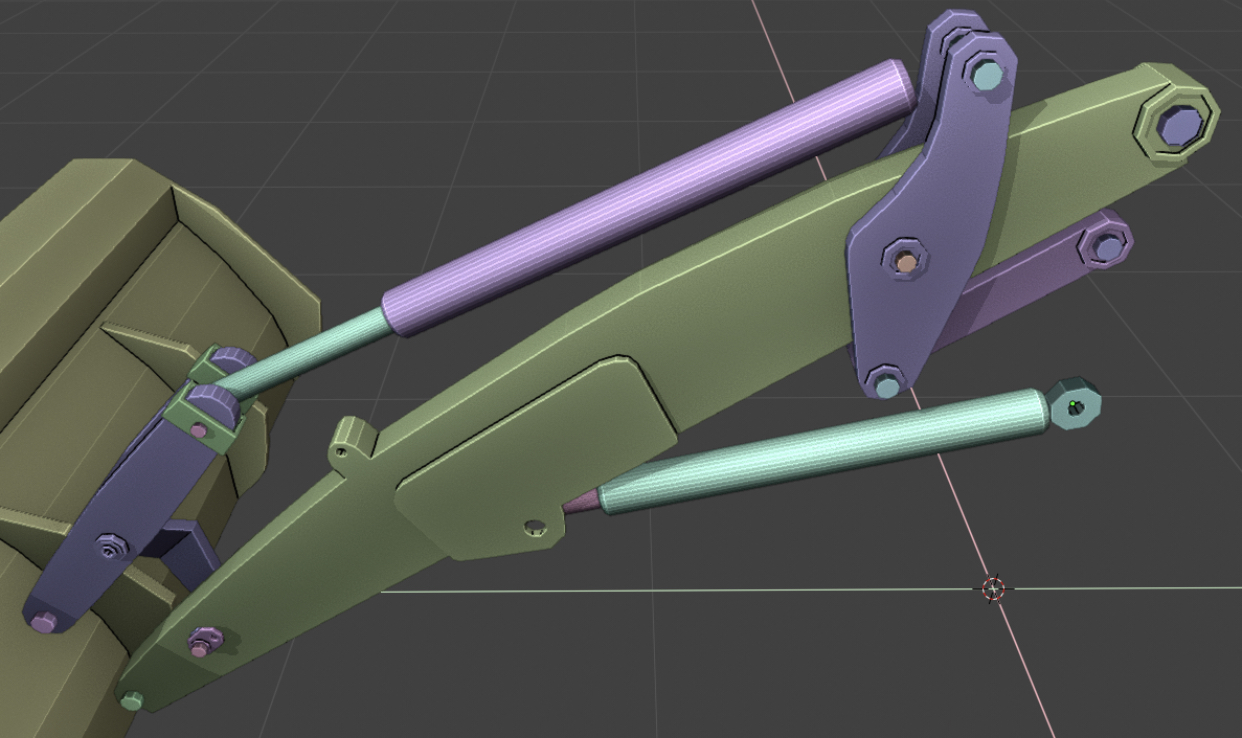
Really nice work ![]() blanchsb! I'm wishing the next stream wasn't a month away...seeing you and ppfbourassa do work is making me impatient to continue the project!
blanchsb! I'm wishing the next stream wasn't a month away...seeing you and ppfbourassa do work is making me impatient to continue the project!
![]() az93 Sorry for the confusion. As owner of the document, I'm the only one that can enter info into the cells. But you can add a comment to cells that are like a mini conversation.
az93 Sorry for the confusion. As owner of the document, I'm the only one that can enter info into the cells. But you can add a comment to cells that are like a mini conversation.
So you know, I received your comment and added your name to the stabilizer 👌
I just noticed my piece is one side a battery box and stairs on the other. No symmetry for me. It seems to me the people that designed this thing knew I was going to get this part and made it so I couldn't use a mirror modifier. Thanks industrial designers.
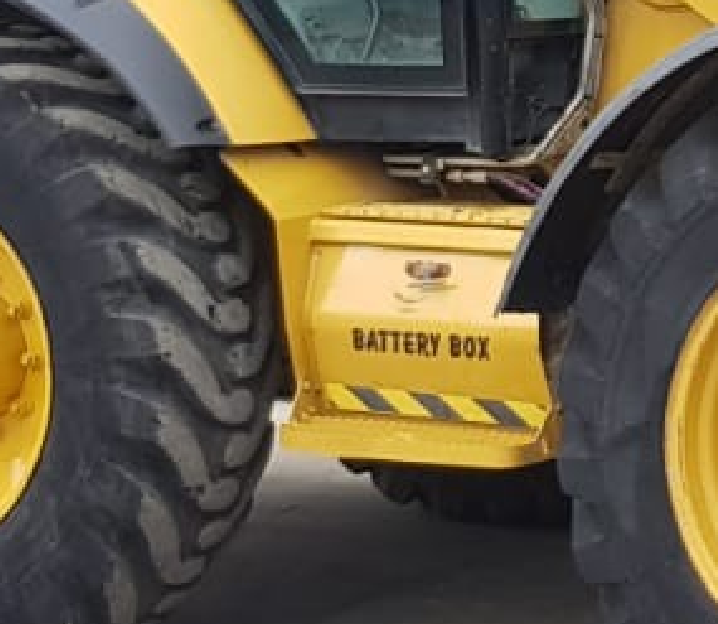
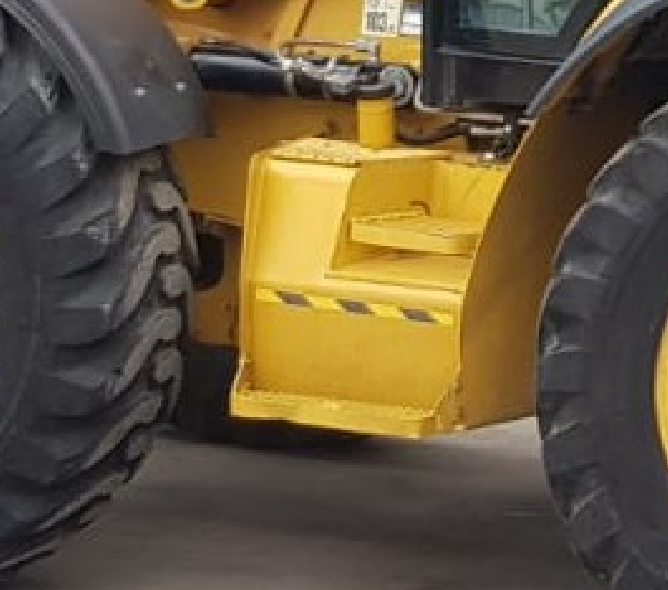
@theluthier Kent how does this work now? In the sense that I don't know if I upload the modeled piece to Drive, is it like a submission and I can't undo it? Or can I upload it and you take a look and see if there is stuff that I need to change and I change it?
Here's the Drive link. I tried to make it that only you can see it but seems I didn't know Gmail.
https://drive.google.com/drive/folders/1Nc7P0RQ3lAdfU4bSq2YwdZDZqd9wYUHo?usp=sharing