Starting in March 2020, I began a large stream project to model a comprehensive, highly-detailed Caterpillar 434E backhoe. Please watch the first stream (first 3 minutes of abridged version at least) for an overview.
It's a straight-forward project of building a complex model over an extended period of time. The spin on the project is that I want your help to accomplish it! If I build some parts and you build some parts, we will finish this thing much quicker. Plus the contribution format will include reviews, the potential of having your piece(s) assimilated into the final model. Not to mention large quantities of XP are at stake 🤑
NOTE: This is an involved project reserved for Citizen members.

The general idea is that I kickoff stages of the project via live stream, which is typically once per month. For the time in between streams, you choose a piece of the backhoe and apply what you learned from the stream to that piece. For example, the first stream covered initial block out. So between stream 1 and stream 2, your job is to pick a piece and block it out.
This is the repeating protocol for each Assignment Period (between-streams):
I will reply to this thread after each stream with a [big] assignment post denoted by a 📣 emoji in the title. There I will clarify instructions about each Assignment Period.
We will centralize our collaborative communication between the streams and this thread. Ask any and all questions pertaining to the Backhoe project here.
"Ahhhhhh, yes" said the blind man, spitting into the wind............"it's all coming back to me now"
Indeed I was wrong. Nice work Jake and Adrian. Those roof cutouts would guide rain water off just as easily. The sides are curved but the top is flat with ribs (or are they ruffles?). Now I'm hungry
ppfbourassa really cool trailer. In a way I cant wait for the final result, it's gonna be box office stuff. Netflix here we come.
Its not about the destination, Its about the journey........
The journey so far has been great,
But that destination is looking pretty good from here.
You all have to see ![]() spikeyxxx tyre (tire) demo how ever you spell it, Excellent is the same wherever you are.
spikeyxxx tyre (tire) demo how ever you spell it, Excellent is the same wherever you are.
@theluthier we don't have to do a video tutorial on our parts forum thread do we? I'm shy, HaHaHa
![]() blanchsb and these guys have started something.
blanchsb and these guys have started something.
Thanks! I really tried to show the journey as well as the final result, and I hope that can continue until this project wraps up.
I'll be checking all the threads for new material.
Keep posting WIP beautiful screenshots, and draw overs!
@adrian2301 do you get messages on here? I sent you one on tues and you didn't reply.

@adrian2301 Good question. I vote yes to keeping it one thread per artist as opposed to one thread per part. I will update the assignment prompt with this info.
we don't have to do a video tutorial on our parts forum thread do we?
Haha no that's not an expectation. But now you've planted the idea for a future homework assignment perhaps 🤔
@adrian2301 sure gives you a hand haha, I clicked on your profile and when you click on that little arrow out it says
idk if you can get messages on the site or if it goes to your email.
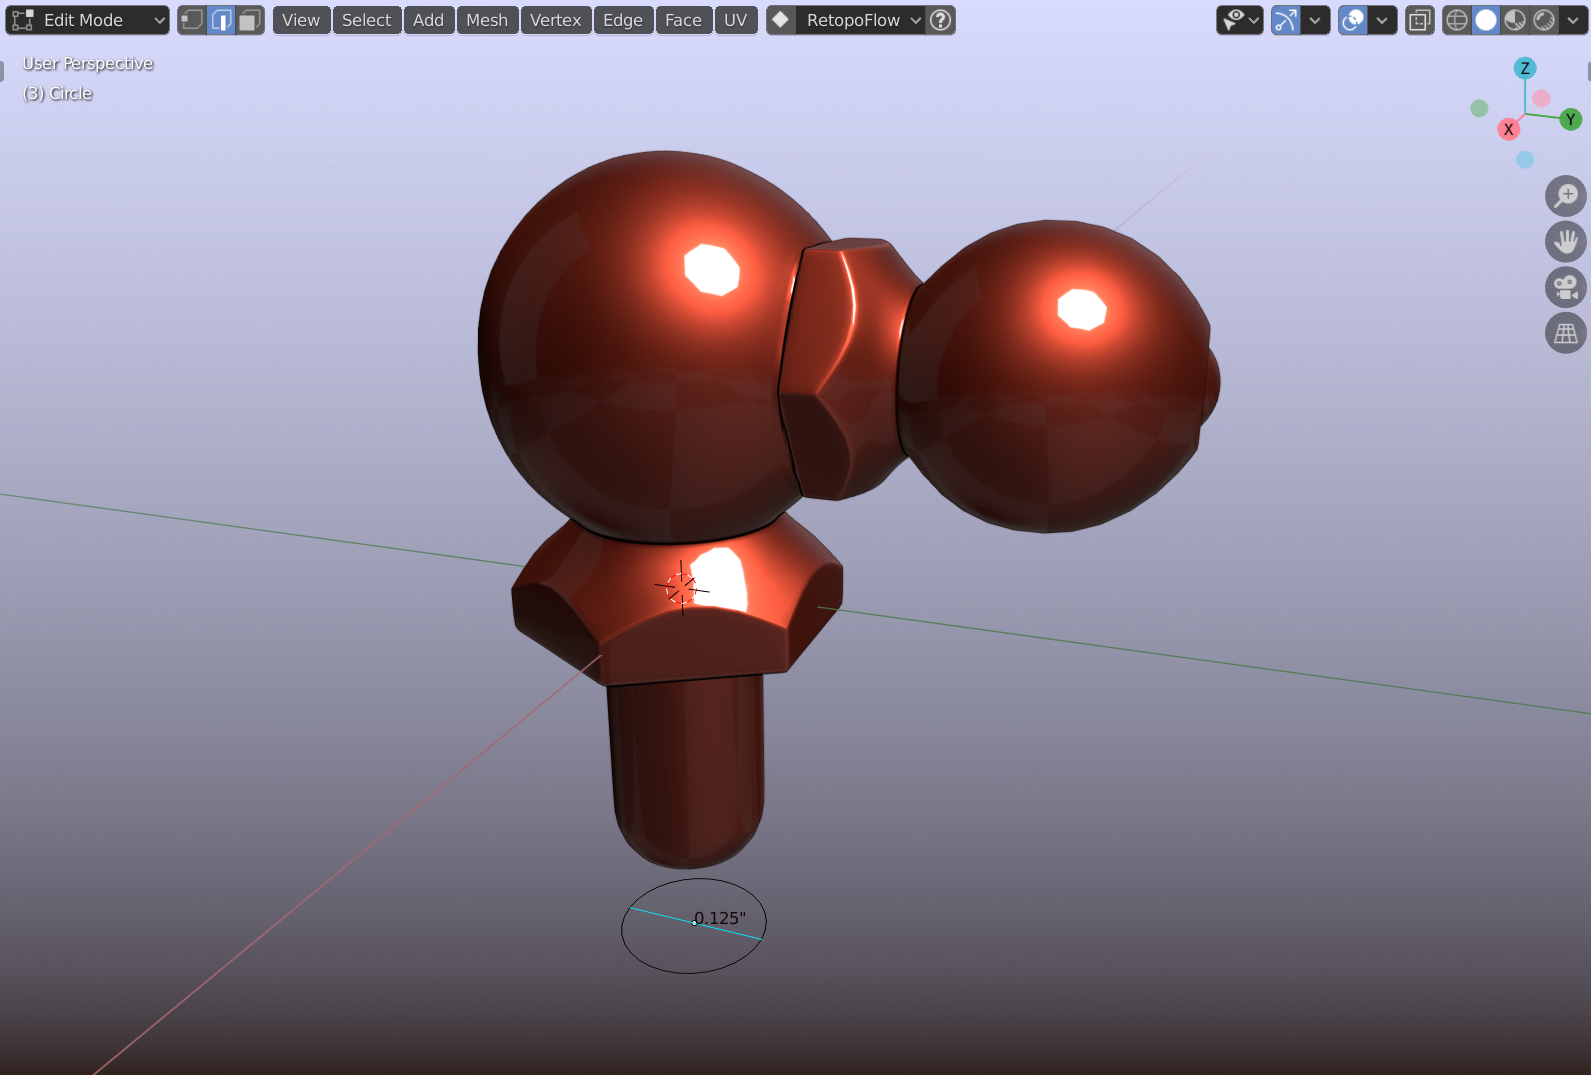
I tried my hand at the Zerk Fitting: and did it with Retopoflow to keep my skills up with that add-on.
It's such a small part I'm not sure it will need such detail but there are a ton of them on this DOG so I will leave it as is for now and maybe ask Kent how he wants to handle small parts haha. I'll post a reference shot just to show them on my own thread but I figured I would post saying I was able to recreate @theluthier 's teaching topic without too much trouble. The intersect boolean took me a while to figure out. I was cutting way too much material off because I wasn't intersecting enough!
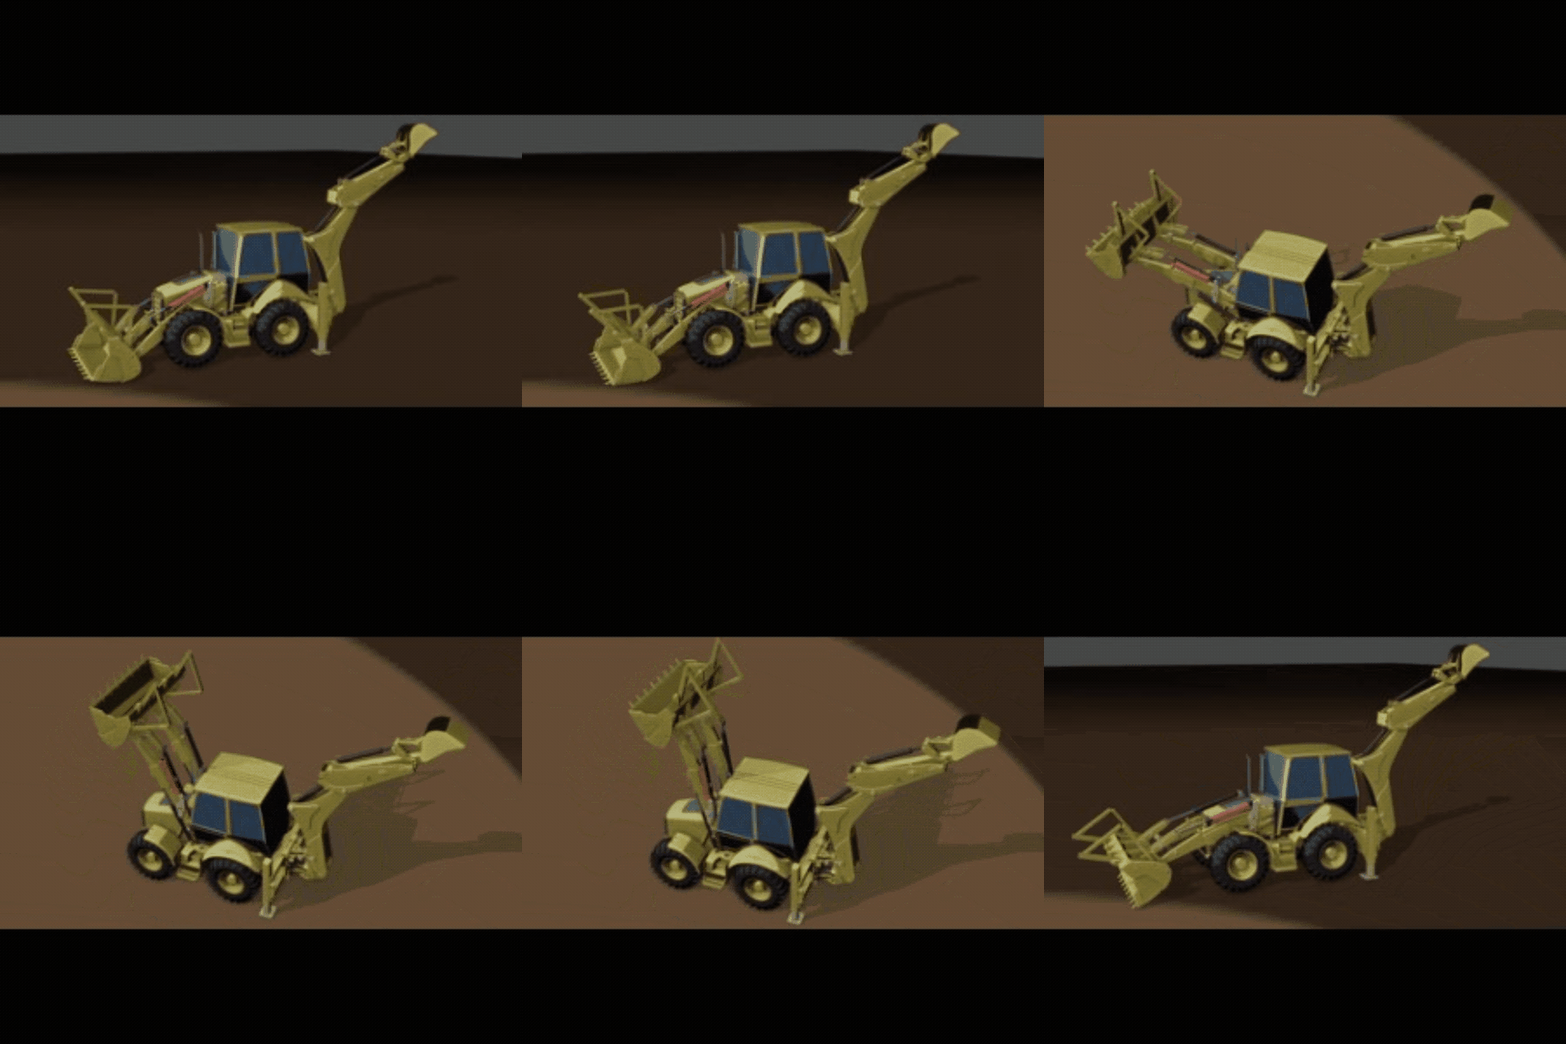
I decided to spend part of today getting my rig together and testing out a small animation and showing off this Puppy.
Short clip but even with what we have done thus far........ our DOG looks amazing!

Everything but 1 piece works great. The one piece is just an interference issue and not an operation issue (see item 3 below).
It took 2 days for my brain to wrap around what needed to be assigned so that all the parts moved in unison and moved believably. I kept getting 75% of the way with the rigging and the last 25% ate up most of my creative juices because the top of the assembly kept wanting to rotate around in a circle (ended up disconnecting everything haha).
I made an empty for each joint and then went to town parenting stuff together and gave just a few objects some constraints to damp track, copy location, and copy rotation where needed. At the end of the day I got it to work beautifully by just rotating 2 different empties (one at the front of the main loader arm and one at the back of the same loader arm) and I had to constrain a 3rd empty to copy the rotation of the front empty in order for the top hydraulic bar to stay pointing in line with the shovel rather than just rotating in a circle or flopping like a rag doll.Not too bad. Now I can adjust the assembly as needed with only 2 empties for the time being. When it comes time for the rigging I will rethink things and add actual bones for Wayne to give him a head start and I think I can make some cool looking "dynamic curved arrows" as the bones to signify they will rotate the assembly.
I'm actually really happy I did this because I noticed a couple of interfering parts in the assembly as I was rotating everything up and down and this rigging is going to help a little with my side of the adjustments.
Here are issues I currently see on the front end:
1. The battery box and loader arms are clashing where the fuel fill on the drivers side is currently installed. ![]() dostovel I will post a photo and lets work together.
dostovel I will post a photo and lets work together.
2. The loader bucket and arms need some adjustments. My main loader arms need to shorten a little because they are passing through the bucket mesh, and the hinge locations are going to need to be sorted out. ppfbourassa and I will sort this out. I might need to fix item 3 first though........
3. My angle bracket @theluthier gave feedback on in the live stream (regarding non-uniform thickness) is interfering when the upper hydraulic extends it. The angle bracket pushes forward and stabs into the top or bottom pieces that it is hinged to (or both haha I can't remember now) and looks ugly. It only does this when the upper hydraulic is fully extended. I referenced the images and videos online again and I believe the angle bracket is not as angled as I made it out but I am having a hard time figuring out what it should be because everything looks symmetrical about the main loader arm. I'll post some images when I get off work. This is a problem only to do with me and no one else so I'll get with me to figure this out. But I would appreciate some guidance as this one has me scratching my head a little. Images to come later.....
![]() blanchsb You're so on top of this project! Nice job troubleshooting and connecting with the relevant parties for solutions. A guiding force for the Dog Pound ✊
blanchsb You're so on top of this project! Nice job troubleshooting and connecting with the relevant parties for solutions. A guiding force for the Dog Pound ✊
Take a screenshot or gif of the angle bracket issue when you can. I'll do my best to help but we're tip-toeing into Wayne's rigging territory. If I can't figure it out we can always mention Wayne to get his thoughts.