CLASS ANNOUNCEMENT #5 (Feb 1, 2018): The class is officially closed! Thanks to all who participated. Be sure to check page 43 for the closing "statement" and commendations.
CLASS ANNOUNCEMENT #4 (Jan 30, 2018): The timing worked out where this week's homework stretch is 10 days instead of the usual 7. So you've got extra time to complete the assignment! I'll look for submission through tomorrow, the 31st, and then I'll do a final post to close out the class.
BTW week 4's live event is archived if you missed it.
CLASS ANNOUNCEMENT #3 (Jan 15, 2018): Week 2 is done - We're halfway through the class! Today WEEK 3 begins where the focus is digital sculpting. This is a far more artistic method of shaping 3D models, so if you struggled in week 2, week 3 should be refreshing.
- Only 1 course to watch this week: Fundamentals of Digital Sculpting
- Live Event tomorrow at 2pm EST
- Please submit homework anytime between Jan 15 - Jan 21 with "BC1-1801 Week 3 Homework Submission" at the top of your post.
Keep up the awesome work, Class! So much creativity and hard work being contributed from everyone 🤘
CLASS ANNOUNCEMENT #2 (Jan 8, 2018): Week one is accomplished! Today WEEK 2 begins. We're moving forward from basic viewport interaction and into mesh modeling; into Edit Mode and the modifier stack.
- Reminder that you have 2 courses to watch this week: Mesh Modeling Fundamentals and Modeling with Modifiers.
- Live Event tomorrow at 2pm EST
- Please submit homework anytime between Jan 8 - Jan 14 with "BC1-1801 Week 2 Homework Submission" at the top of your post.
As always, don't hesitate to ask questions in this thread!
CLASS ANNOUNCEMENT #1 (Jan 2, 2018): The class has officially started! Today we held the first live event to kick things off. The recording will be published by tomorrow at the latest is now available in "Past Events".
That means it's now up to you to watch the Blender Basics Course and submit your homework to this thread. Please add a big, bold title to your homework submission reply so I can easily tell. Like this:
"BC1-1801 Week 1 Homework Submission"Also don't hesitate to ask questions along the way. I'll be checking this thread daily to answer questions, give advice, check homework.
This thread is for CG Cookie Citizens that are participating in the "Getting Started with 3D Modeling and Blender" class! Its purpose is to serve as central communication for all participating Citizens (excluding Hobby plan Citizens) to ask me and each other questions and to post homework. As the instructor of the class, I will be monitoring this thread on a daily basis (especially Mon-Thurs) throughout the month of January to review homework and answer questions.
This thread is intended only for Citizens who are participating in the class. Free members are welcome to observe the thread but please respect that communication is reserved for Citizens.

Welcome to the CGCookie Class: Getting Started with 3D Modeling & Blender! This is the first "Class" format where Citizen members are invited to focus together on a particular topic/skill together for a month. Participation is this:
It will take place from January 2nd through January 31st and the topic is for beginners that want to get into 3D modeling. The class is based on pre-recorded courses that students are expected to watch each week along with weekly Live Events.
Download the latest official version of Blender and watch the Blender Basics course. The goal this week is to simply get familiar with the application. We’ve all been there: Opening Blender (or any 3D package), gazing at all the crazy UI, trying to orbit in the viewport, crying...Ok, maybe you were stronger than me and didn’t cry. But the reality is 3D software is daunting. There’s SO MUCH to digest especially when you’re a beginner.
This first week we’re going to overview Blender and 3D from an absolutely beginner perspective. What is Blender for? What can it do? Wait, this isn’t a juicing seminar?
During the Live Event we're also going to open the floor, ask me anything (AMA) style, so I can answer all your questions about getting started with Blender.
HOMEWORK: Create a scene out of primitive shapes. It can be anything from a landscape to a spaceship to a character. Just get comfortable with creating and positioning mesh objects. Here's an example:
Take a screenshot of your scene and post it in a reply to this thread *during the week of Jan 1-6*.
Enter the world of mesh modeling! The oldest form of building objects in 3D, in the computer. We’ll discuss the technical art of “pushing and pulling verts” as modelers often call it. First, watch the Mesh Modeling Fundamentals and Modeling with Modifiers courses to be introduced to this wild, geometric world.
Practice makes perfect here and during this week's Live Event we’ll be mesh-modeling a few objects to demonstrate tools and workflow available with Blender. It’s ideal if you practice along with me!
HOMEWORK: Model either 1, 2, or 3 unique objects using mesh-modeling techniques. They can be as simple or as complex as you like, but they can't be primitives. I want to see that you've used mesh tools to significantly customize your shapes. For example, you could model a hammer, a cell phone, a keyboard, a game controller, a picture frame, a coffee cup - choose something fun!
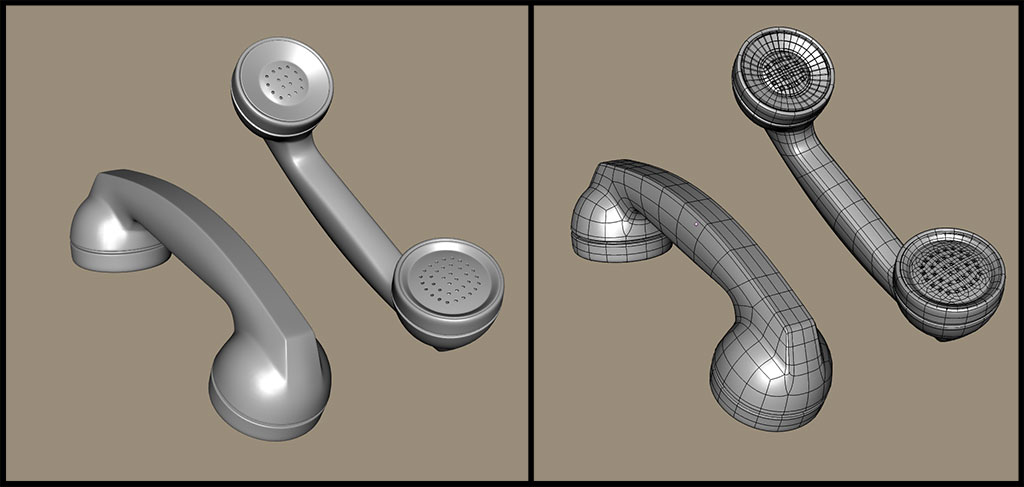
Take a screenshot of your shaded model + wireframe-over shaded (as pictured above) and post it in a reply to this thread *during the week of Jan 7-14*.
Digital sculpting is the more artistically intuitive method of 3D modeling. If pushing and pulling verts felt like the hard way of doing things, sculpting will be a welcomed alternative! Watch the Fundamentals of Digital Sculpting course this week.
During the Live Event, we'll discuss the pros and cons of digital sculpting as well as how it compares to mesh modeling. Again, practice makes perfect with any craft, and we will also practice sculpting. Be sure to have your pen and tablet ready!
HOMEWORK: *Submit during the week of Jan 15-21*
There’s still much more to learn about modeling with Blender. Remember, it’s a craft. Time + practice is the only way to develop your modeling skills.
This week your challenge is to dive into the Modeling in Blender Learning Flow. While the class gives you a boost, the Flow takes you further into intermediate and advanced modeling techniques/workflows. Test the waters and see how far you can go this week.
During the Live Event we'll discuss the journey of becoming a skilled modeler as well as the potential for turning it into a career. Finally, I’m going to sift through homework submissions to commend my favorites and offer critiques!
HOMEWORK: Model and/or sculpt something challenging this week! Try tackling a character or a complex vehicle, etc. Show me what you've learned; what you're capable of!
Take a screenshot of your shaded model and post it in a reply to this thread *during the week of Jan 21-31*.
I was wondering if there is a simple way of extruding a face from an existing model along a curve? I know I can Ctrl+click to 'jump' the extrusion along, but I'm looking for something with more control along the length of the curve, as well as ease in editing the curve (and hence the extrusion) after it has been created.
Well done. And quick too. The glass looks good and I like the bevelled edges of the table, nice and smooth.
That is a nice rendering.
For beginners it might be important to remind, that in this phase such beautiful rendering is not expected in the homeworks, at this point we just move vertices left and right :-)
Not sure that you can snap an extruded face from one object onto another, but perhaps there are other ways to achieve a look you want. What are you trying to do?
BC1-1801 Week 2 Homework Submission (Part 1/3)
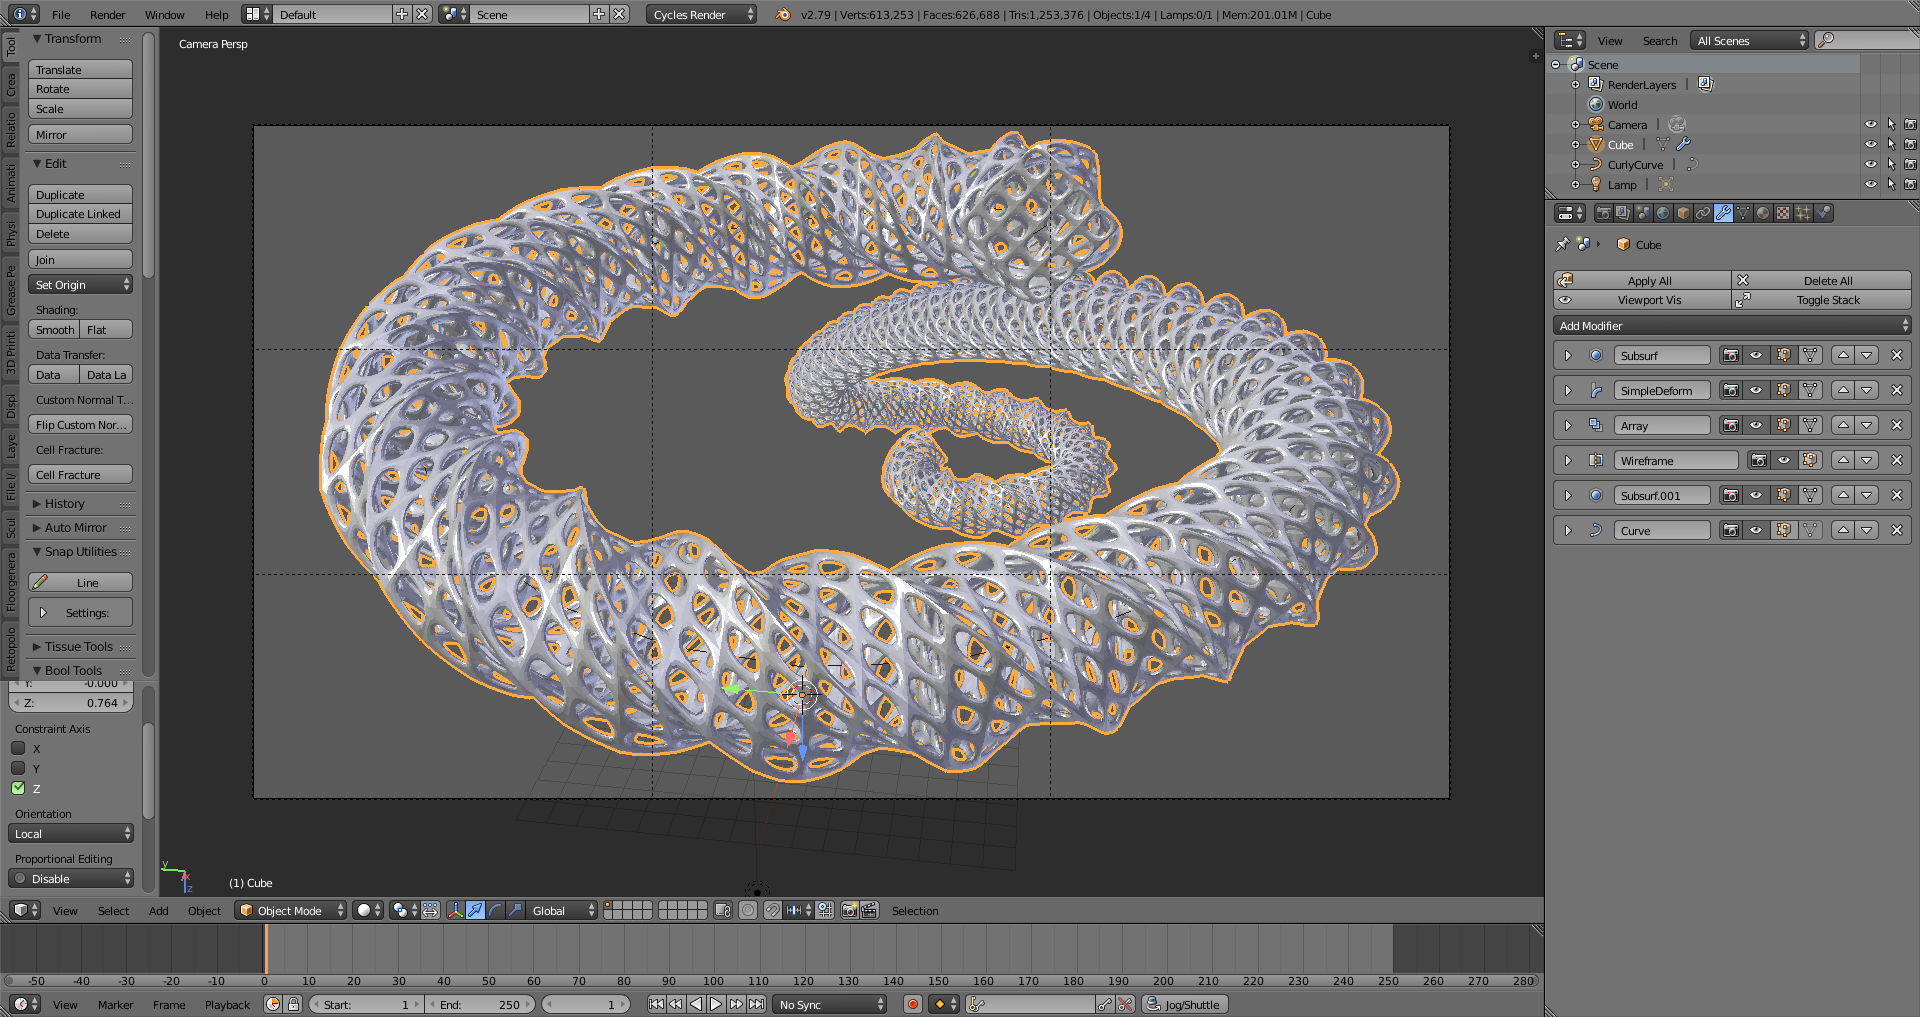
If you've never done an exercise like this, this is a fun one to do... If you look in the upper right in the outliner, you can see this scene only has 1 object added to the default scene -- a Curly Curve. (I'll get to that in a second.) Everything else is all modifiers. I share this one as a demonstration of just playing around and experimenting to get a feel for how these modifiers work. With a little coloring and texturing of the object and background, and you have an interesting abstract that could be used as a desktop background. Pieces like this are great ways to practice color theory, composition --all the technical aspects that are useful to understand when creating a scene -- and in a way that is non-threatening because it started off as just a piece to play around with.
Best of all, these don't have to take long at all. When I do one like this, from start to finish (except maybe rendering time) usually only takes me an hour, maybe two, to create, texture, compose, and prep for rendering.
Now, as for that CurlyCurve... Blender has a number of mesh and curve objects that aren't turned on by default. In the User Preferences under Add Ons, in both the Add Curves and Add Mesh categories, there's one that says "Extra Objects". These have a number of useful meshes and curves with everything to bolts, to shapes, and more. In the most recent update to Blender, 2.79, one of the curves added is the Curly Curves, which is a collection of the curly flourishes used as decorations on a lot of things, such as mirrors, chairs, walls... These flourishes are found as decorative elements in so many places.
So feel free to experiment and explore! You never know what you'll find that is useful or interesting -- or that just might come in handy on a project down the road.
(The idea for doing something interesting came from Michael Pan, who, several years ago, did several of these in a month. He used particles and probably a few other tricks beyond the scope of a beginner class, but the idea here is to experiment with what you know to see what you can do. To see some of his, check out http://mikepan.com/cubes.html )
Great job! I just have one question... where's the third? I only see 2 objects here ;)
Fantastic texturing, by the way.
That's what I'm thinking too, Grady. ![]() mathias67 Can you post an image of the object you're trying to create? Knowing more of the context should help us offer tips for creating the shape.
mathias67 Can you post an image of the object you're trying to create? Knowing more of the context should help us offer tips for creating the shape.
Grady thanks a lot for detailing the applied method. Very inspiring, can not wait to start Blender and check those Curly Curves, did not hear about them before
Check that out! That's the power of modifiers right there. Nice one ![]() gradyp. Especially nice that you shared details of the model's creation 🙇🏻♂️
gradyp. Especially nice that you shared details of the model's creation 🙇🏻♂️
Good submission ![]() choyce7! I like that you modeled your objects as part of a unified scene. And showed how such a simple model can be used for convincing lighting + rendering. Grade A work 👍
choyce7! I like that you modeled your objects as part of a unified scene. And showed how such a simple model can be used for convincing lighting + rendering. Grade A work 👍
After the stream yesterday, I got to thinking about our recordings and the fact that they completely lose the context of the chat. Unfortunately I can forget to read every question I answer or I'll make a passing comment based on another passing comment I see..And I wonder if people watching the recorded stream get lost by that lack of context.
So I'm going to try a stream overlay next week that incorporates the chat into the stream like this:

The PRO's being:
The CONs:
Any thoughts about testing this format next week?
BC1-1801 Week 2 Homework Submission
Anthony Huerta's Week 2 Homework Submission.
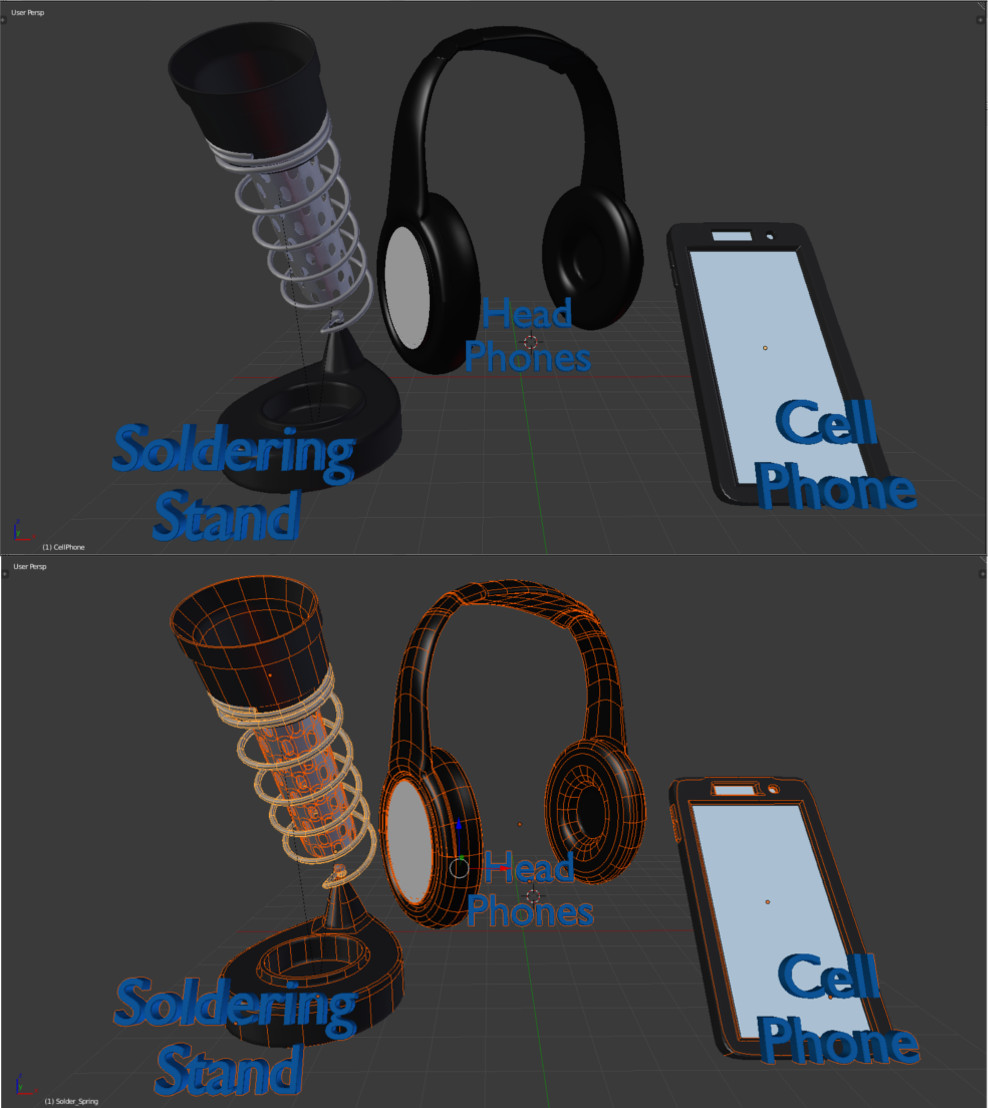
-Items are just some random clutter on my desk that I thought would be fun to model.
-Modifiers used: Mirror, Screw, Solidify, Subdivision Surface
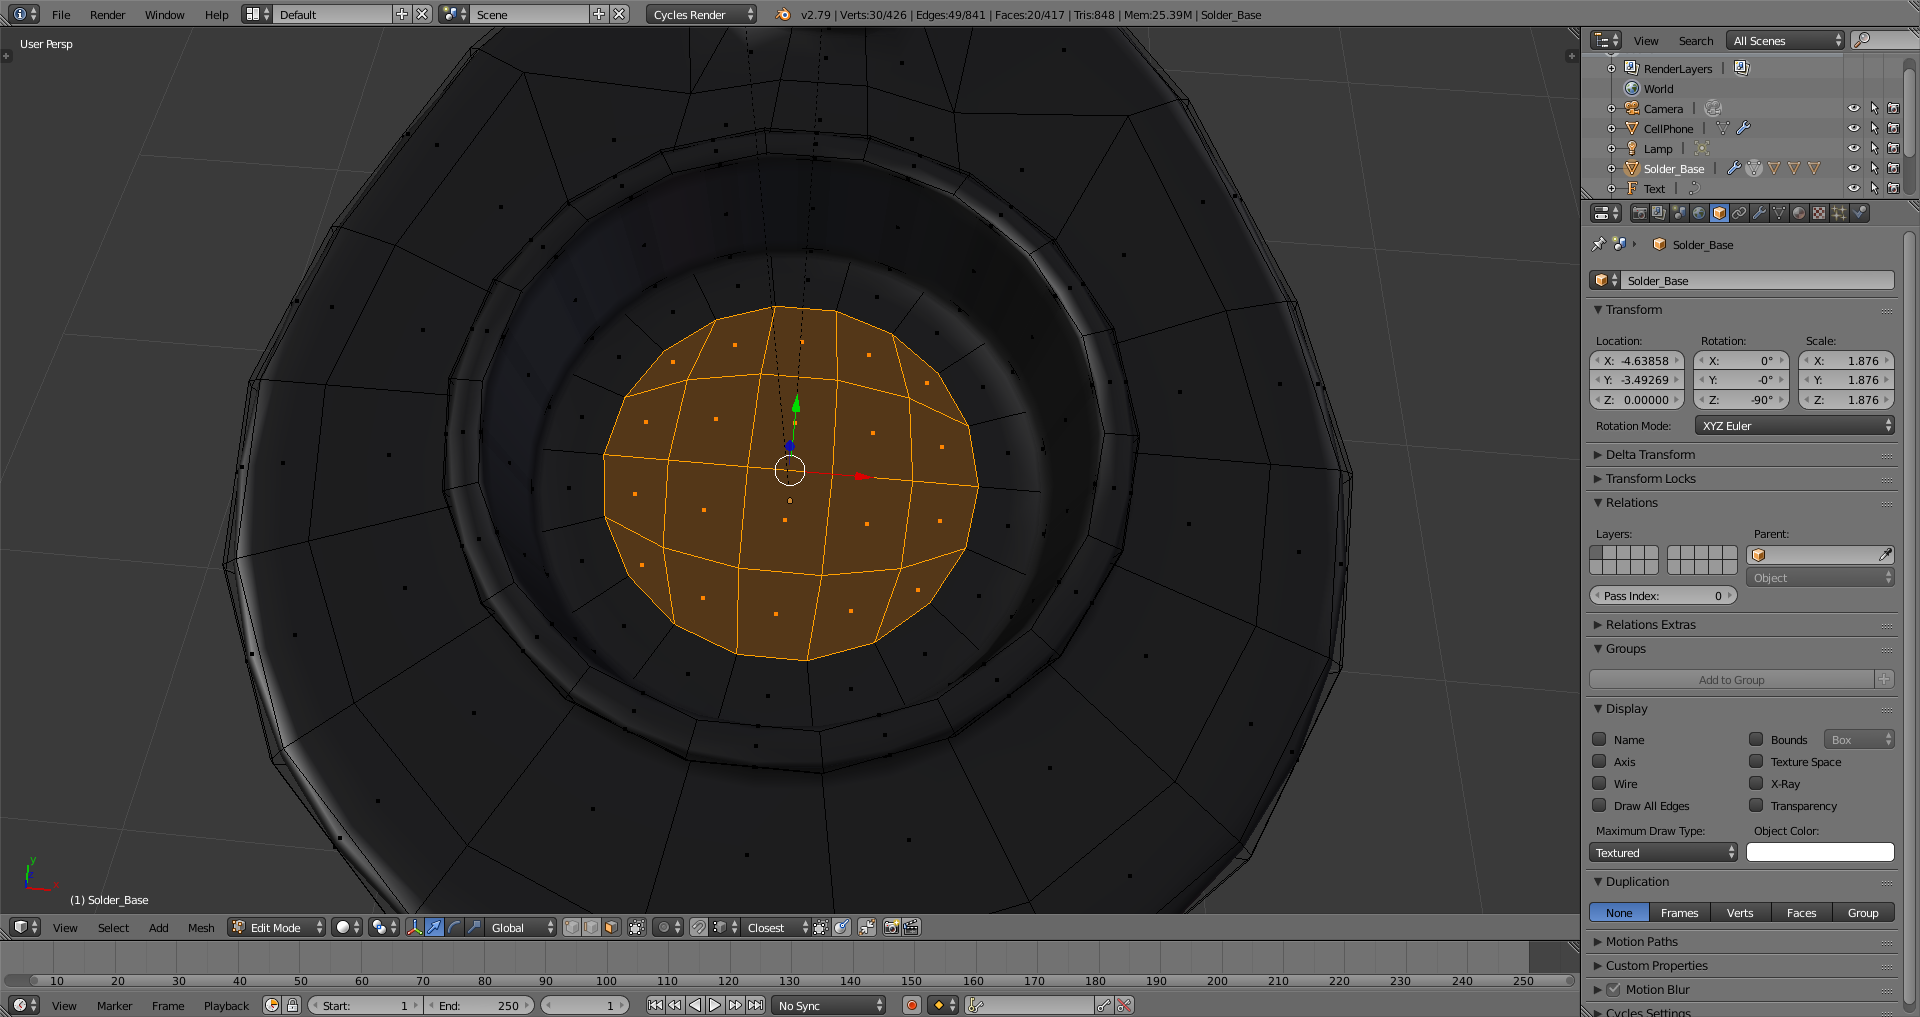
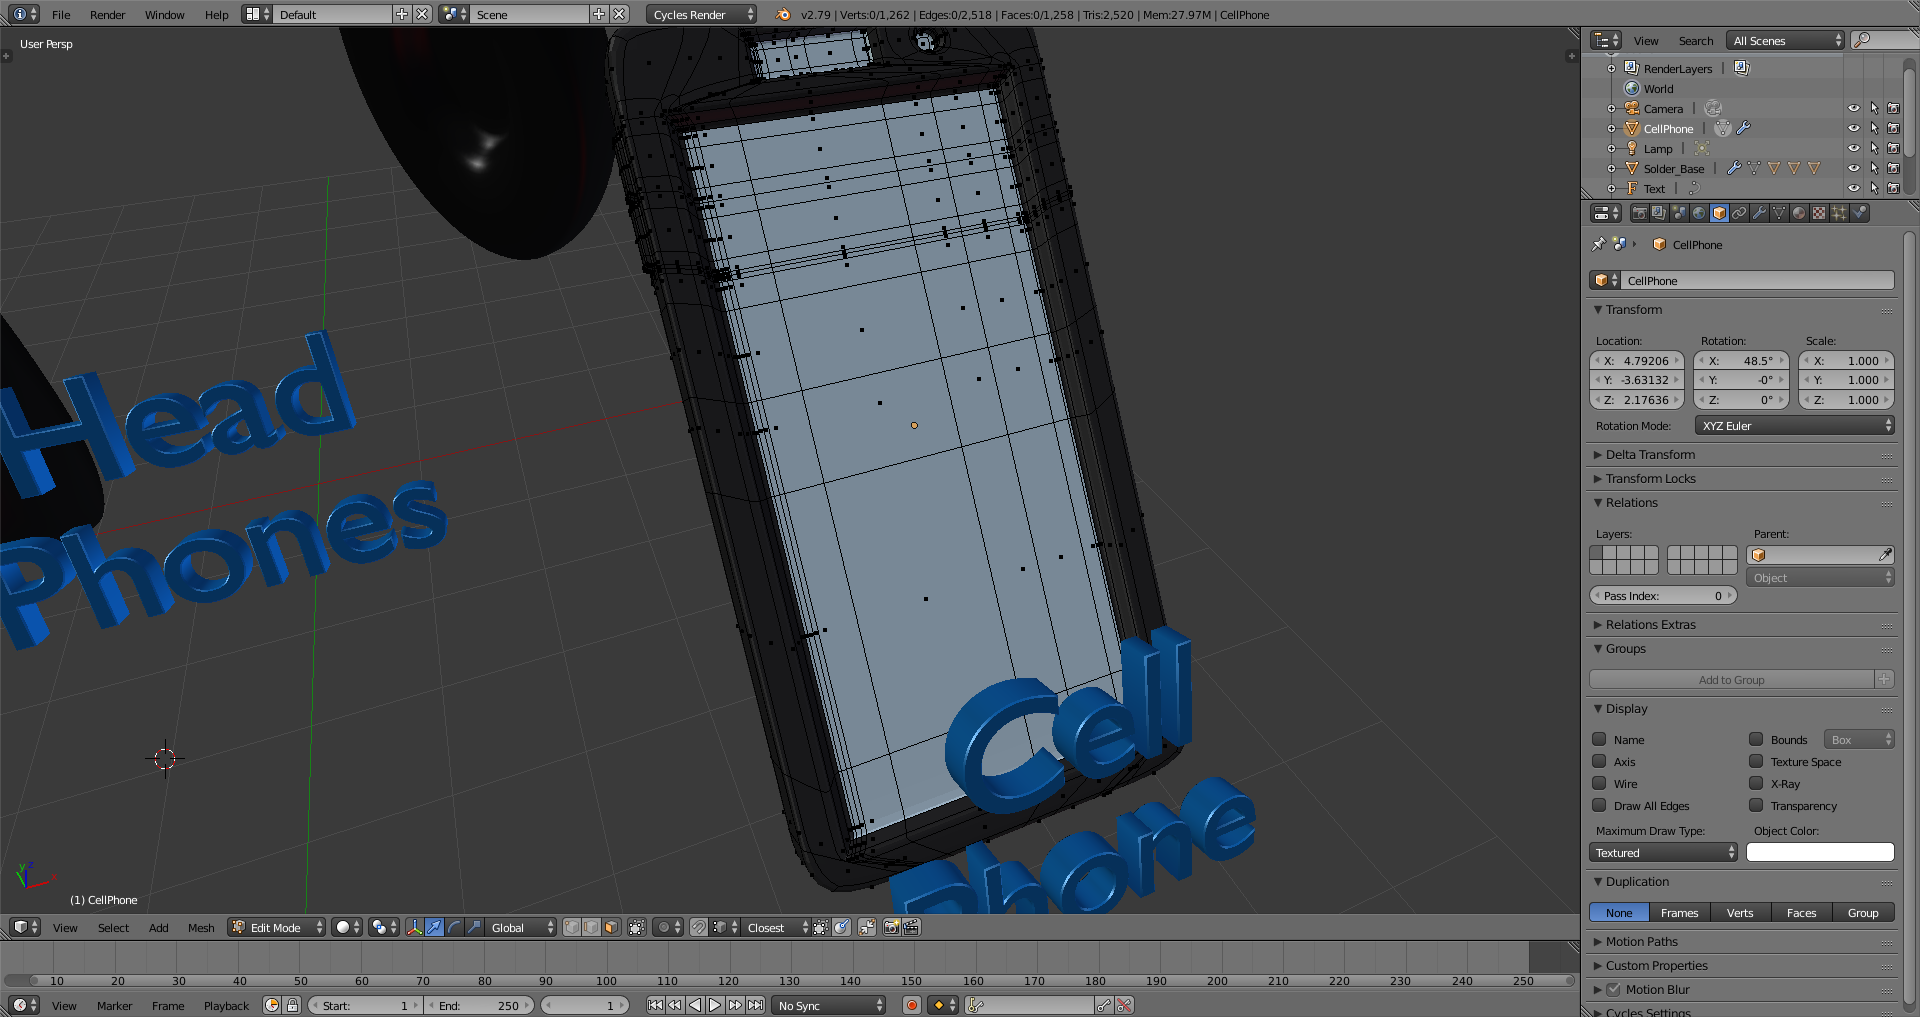
Oops ya, the colors are covering the faces a bit huh. I'm pretty sure I filled the ngons using the "Grid Fill" tool. Here's a zoom in and highlight of those two obscure parts of the picture.
BC1-1801 Week 2 Homework Submission
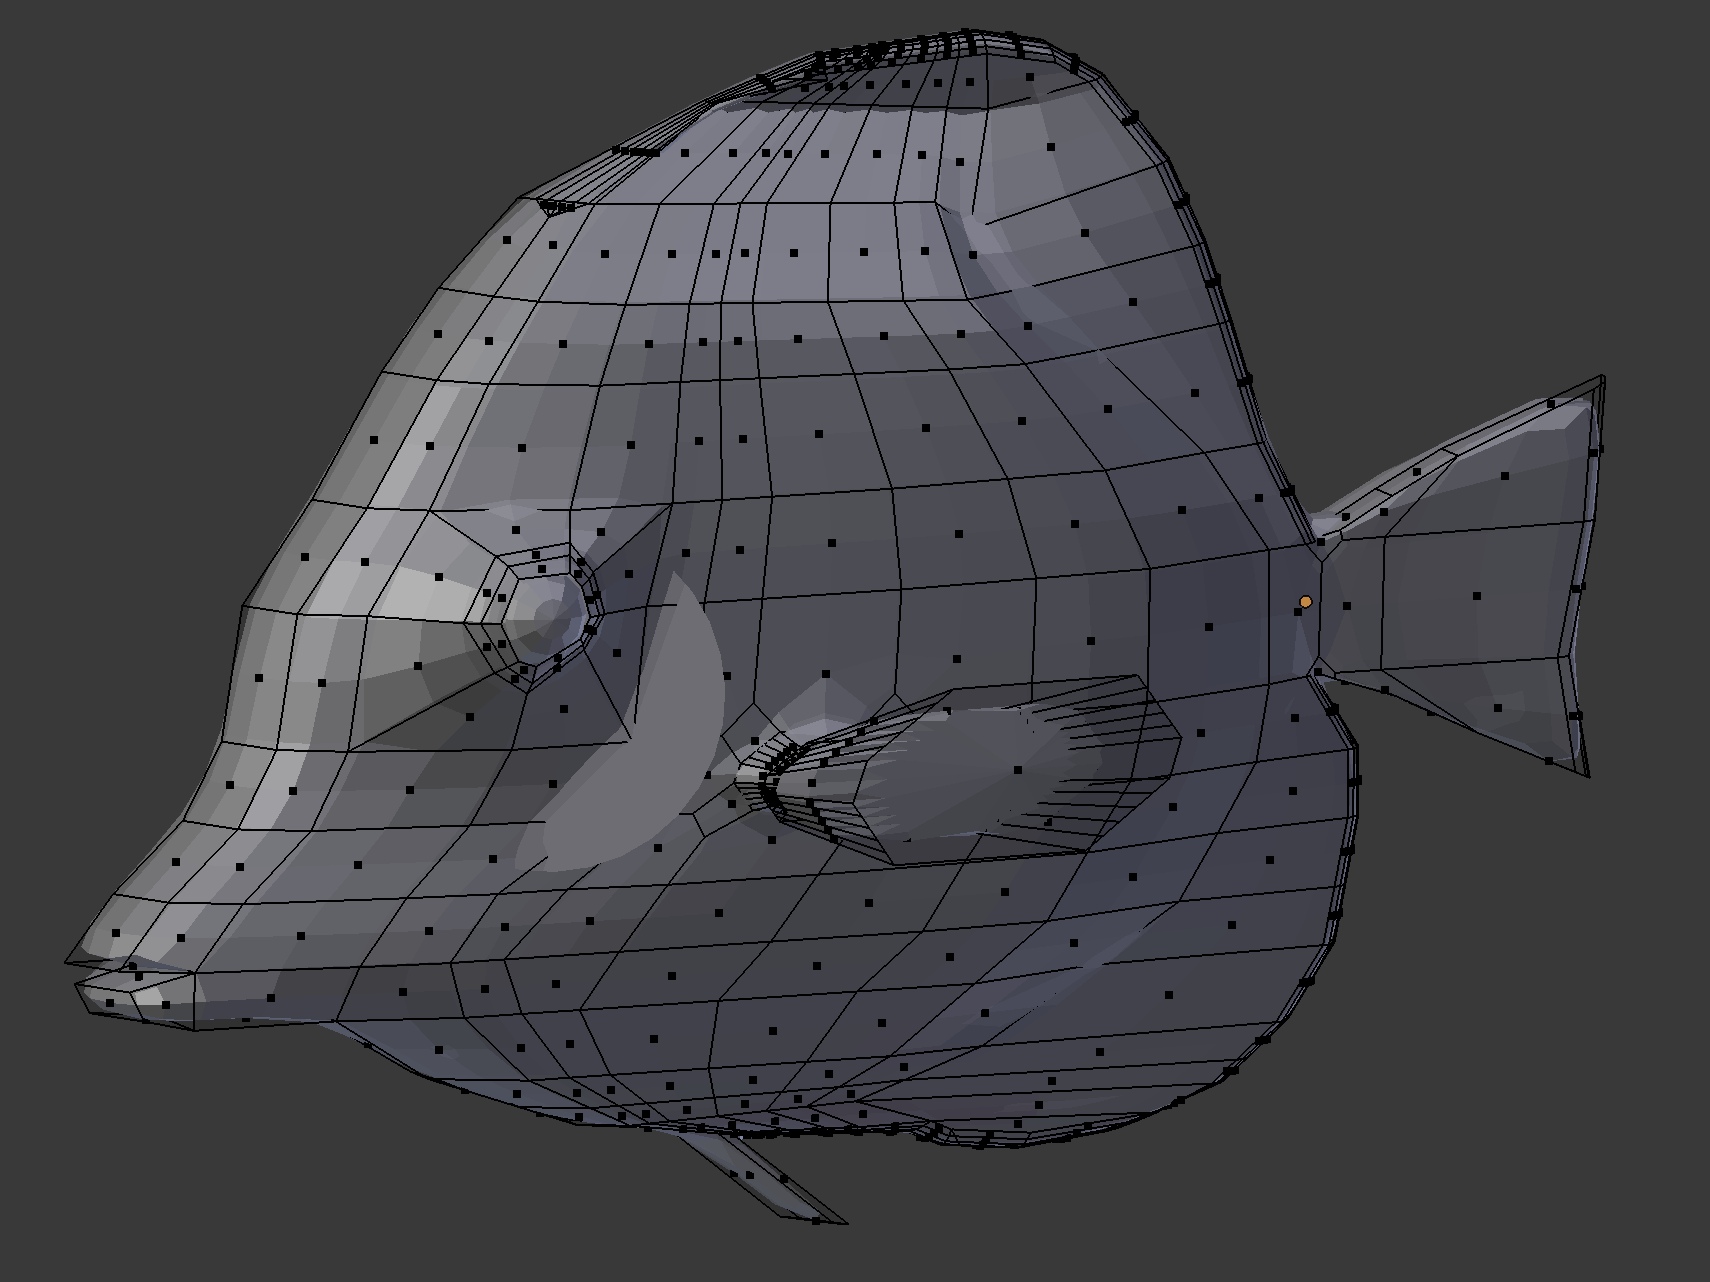
I am just a beginner, this is only the second mesh I have ever done, so there are still problems in numerous areas, but this is all I have time for now. I am still amazed that a cube turned into this. Hope to learn enough to have an improved version of it swim, I would appreciate any comments or help. Thanks.
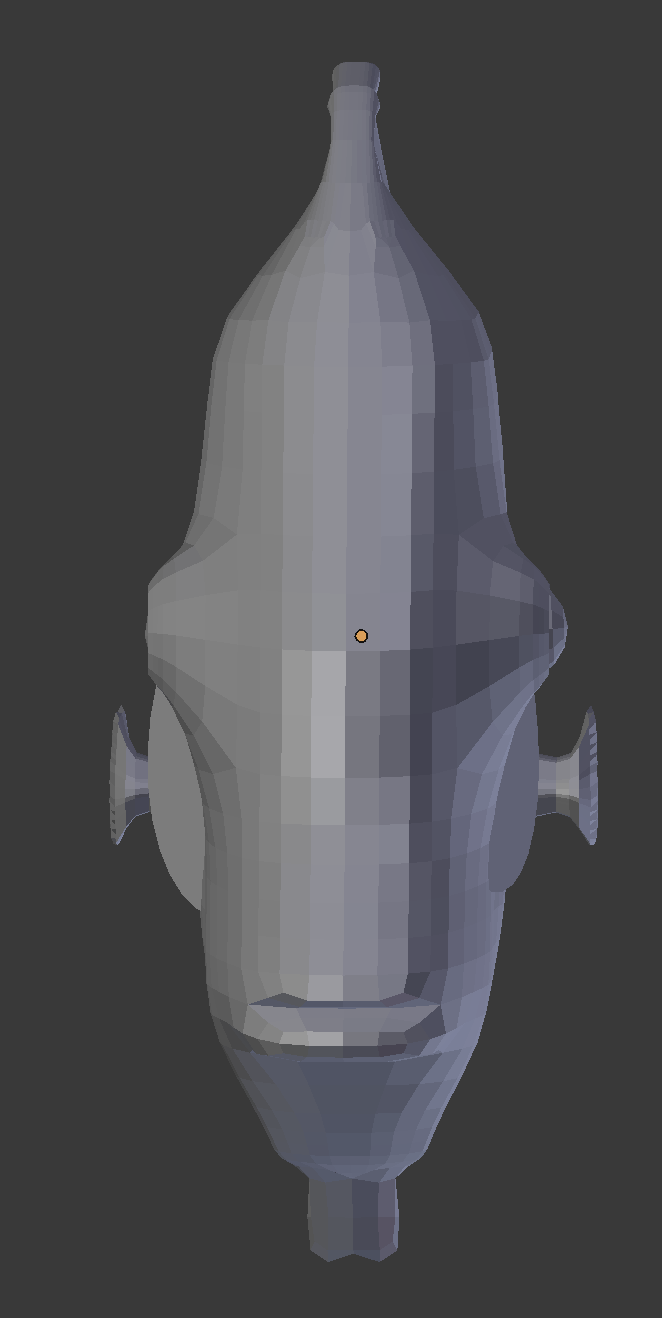
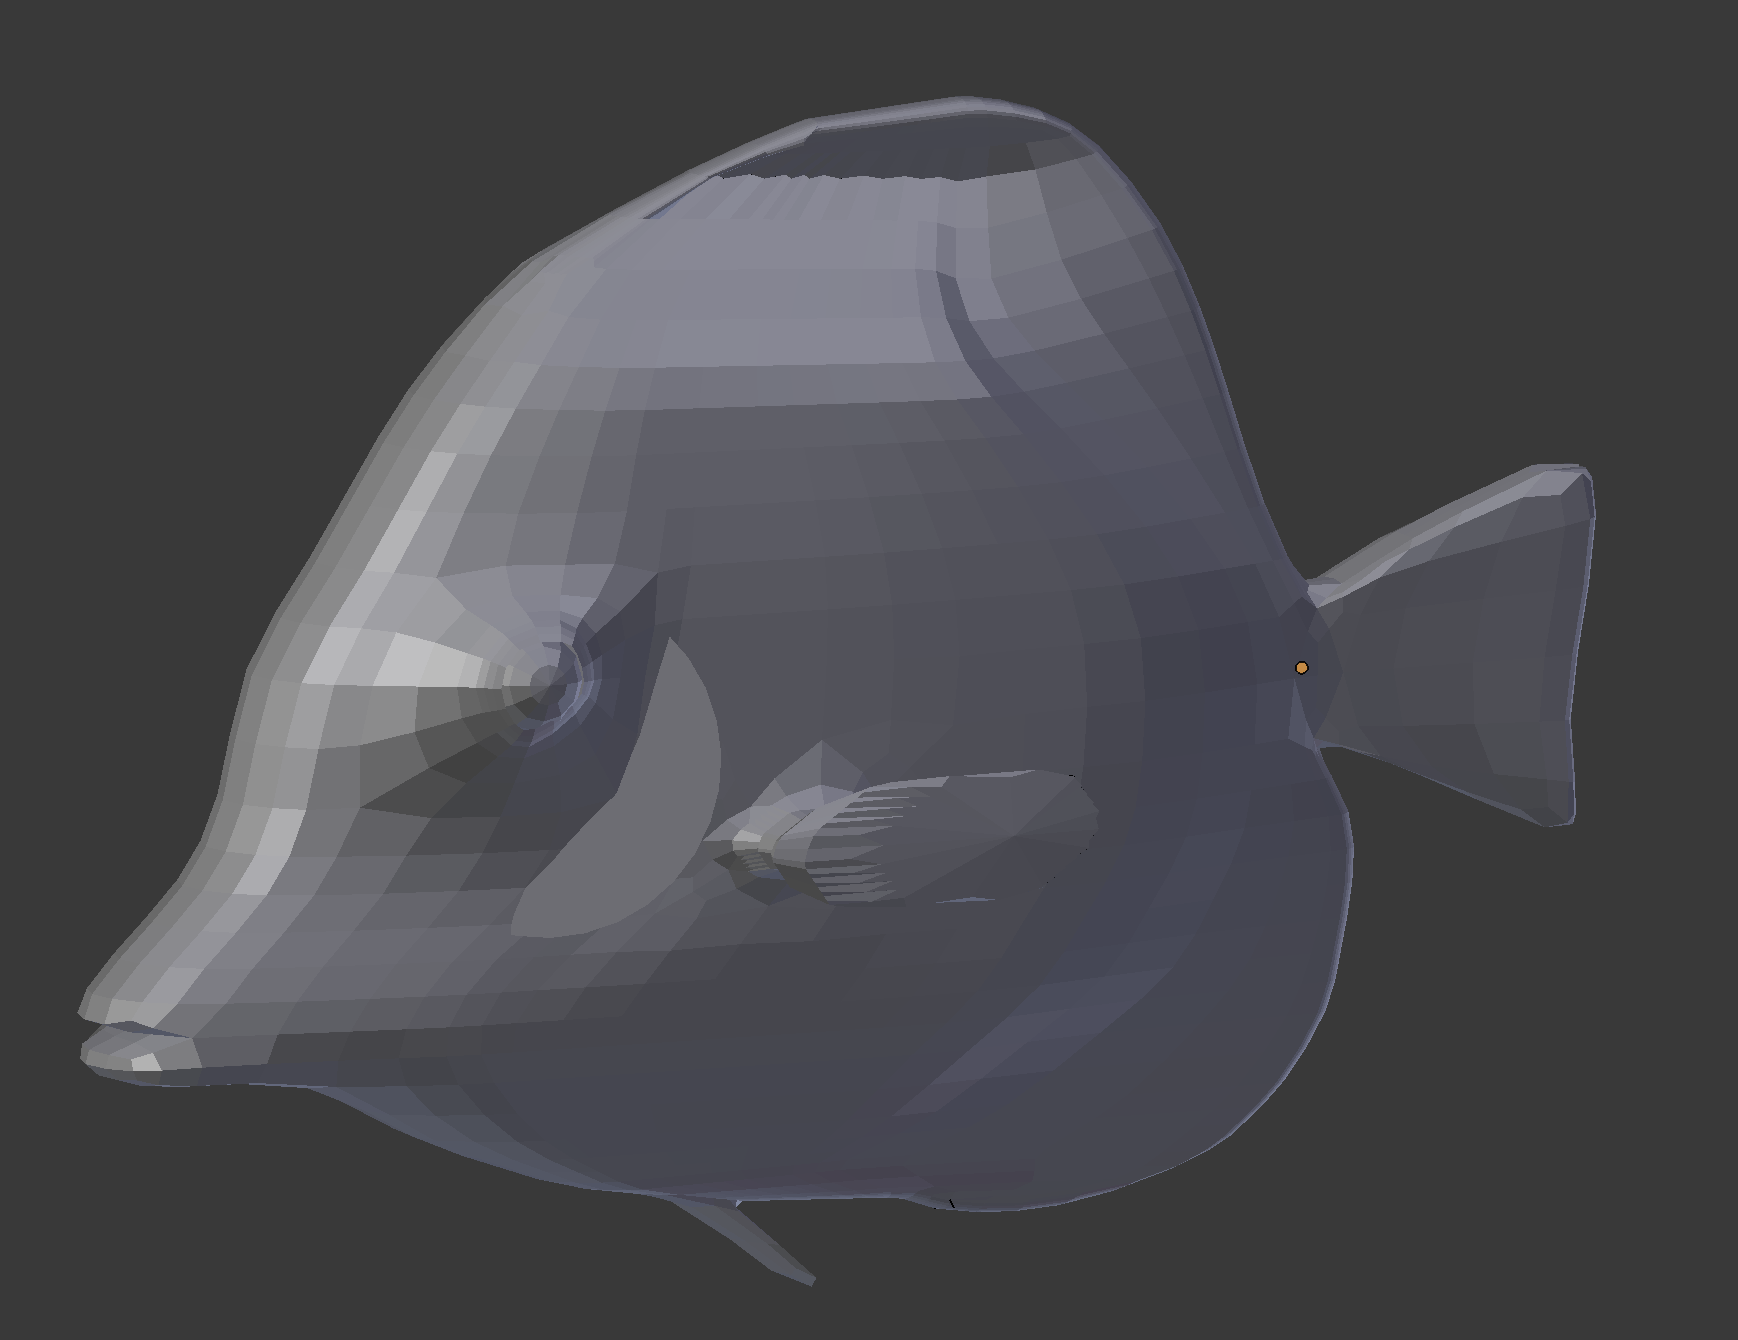
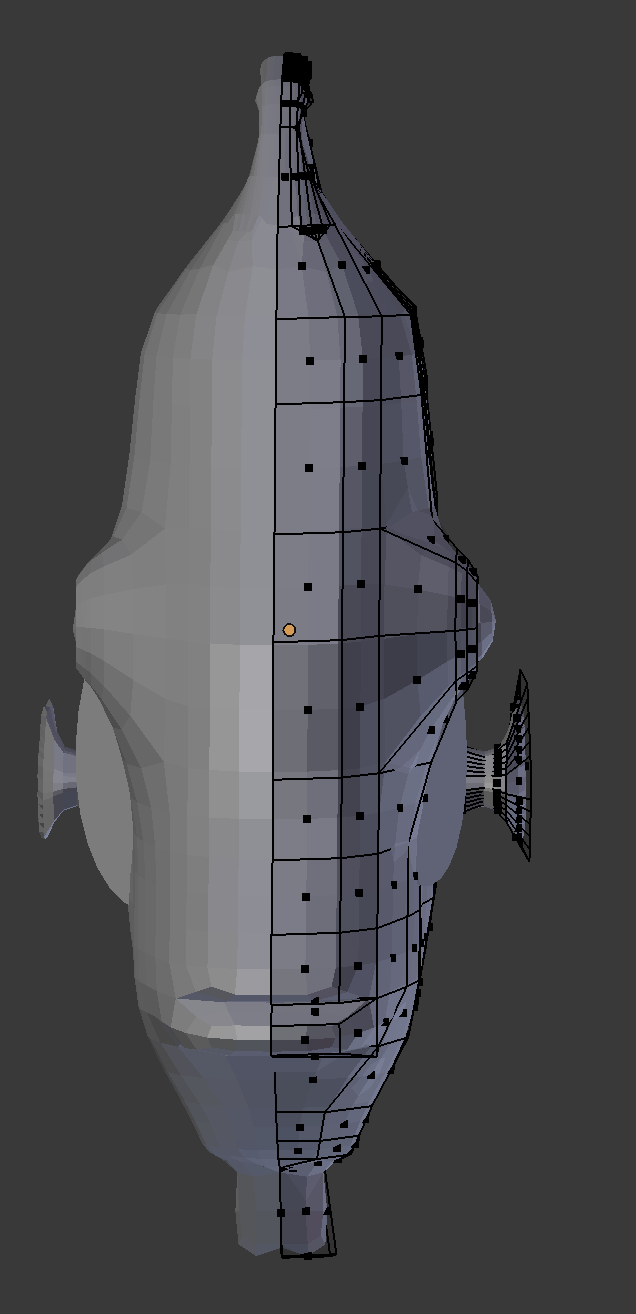
Excellent job bbasecode! This is a perfect execution of the assignment. The coffee cup from yesterday's example was desk-inspiration 😄
Shapes are great. I'm clearly convinced about the nature of each object. Wireframe looks pretty good, but there does seem to be some large n-gons. Like the top face of the soldering iron base and the bezel on the cell phone. Is that just a wireframe display issue?
ttanya53 Your fish, NOOO! I meant to work on that during the stream yesterday. Had the file downloaded, ready to go. I apologize for forgetting.
But thankfully, you've seemed to progress nicely despite getting no help from me. Frankly with this kind of organic object, you've picked a difficult mesh modeling task. And you've hinted at precisely why:
"I am still amazed that a cube turned into this."
It's not easy to make a cube transform into a fish! So kudos for challenging yourself that way. As for giving an actual grade, I'm torn. There's enough mesh issues to warrant a B but the effort warrants an A+ for sure. Either way you should be encouraged. This is way better than the second model I made when starting out!