Starting in March 2020, I began a large stream project to model a comprehensive, highly-detailed Caterpillar 434E backhoe. Please watch the first stream (first 3 minutes of abridged version at least) for an overview.
It's a straight-forward project of building a complex model over an extended period of time. The spin on the project is that I want your help to accomplish it! If I build some parts and you build some parts, we will finish this thing much quicker. Plus the contribution format will include reviews, the potential of having your piece(s) assimilated into the final model. Not to mention large quantities of XP are at stake 🤑
NOTE: This is an involved project reserved for Citizen members.

The general idea is that I kickoff stages of the project via live stream, which is typically once per month. For the time in between streams, you choose a piece of the backhoe and apply what you learned from the stream to that piece. For example, the first stream covered initial block out. So between stream 1 and stream 2, your job is to pick a piece and block it out.
This is the repeating protocol for each Assignment Period (between-streams):
I will reply to this thread after each stream with a [big] assignment post denoted by a 📣 emoji in the title. There I will clarify instructions about each Assignment Period.
We will centralize our collaborative communication between the streams and this thread. Ask any and all questions pertaining to the Backhoe project here.
@theluthier and ppfbourassa I did some small adjustments to Parker's Loader Bucket assembly to remove the 3 collision issues that were on the M.O.L.E. sheet still.
Super small impact but I didn't want to save over the Master Loader Bucket sheet until both of y'all approved. So, I saved a WIP file in our google drive WIP folder called PFBourassa_Loader-Bucket_Blanch-Bucket-Tweaks.blend . It can be made the master file at any time.
Yeah, sorry I meant to tell you before to go ahead and make those changes. Looks great to me!
Will it be enough to update the .blend files on the google drive,so the linked versions will be updated automatically? I will of course give notice when I'm finished.
![]() spikeyxxx absolutely that will be fine. I'm taking a breather from the project for a bit - maybe the next month as I'm beginning to record a new course this week. So there's time for you to finish and notify me.
spikeyxxx absolutely that will be fine. I'm taking a breather from the project for a bit - maybe the next month as I'm beginning to record a new course this week. So there's time for you to finish and notify me.
I might (and even that is doubtful) have started out as being the "most experienced" contributor but at the end I have been surpassed by many...
It's a funny thing about teaching / helping others. My gut reaction is to assume that I should be the most experienced if I'm going to teach. A jolt of self consciousness occurs when a student meets my level or surpasses it. But the reality is that's how it should be: Students surpassing their teachers! That's how we can know real skill is being learned, not just mimicked.
So consider it a badge of honor Spikey! I certainly do whenever I look to you for advice about advance shading techniques / math. Our interaction is always a pleasure 🤝
Cheers @adrian2301 and ![]() blanchsb. You both are rockstars 🤘
blanchsb. You both are rockstars 🤘
I didn't do it for the XP haha. But I'll take it!
The master Loader Bucket file is up to date now ppfbourassa and @theluthier.
It's a sad day seeing a project like this turn to it's final pages. I remember feeling sad like wanting to say goodbye to The Pound during the end of the last stream. But today I remembered: no one has truly parted ways here. We're all still part of the bigger Cookie!
And I imagine more people are going to come on board during the next collaboration project. I am super excited to begin as I am sure the rest of the crew feels similar.
These projects really help me in unique ways because they keep my focus and drive to complete projects! I'm hungry and looking forward to more!
Shawn Blanch (blanchsb). I too am looking forward to the next project and I can't wait. I admit the CAT backhoe was very tough for me, as I was unfamiliar with its mechanisms and had difficulty in finding blueprints for whatever I was working on. Well, we girls don't look at tractors like you boys don't look at fashion, if you get my drift. 😁
Students surpassing their teachers! That's how we can know real skill is being learned, not just mimicked.
@theluthier it takes a great teacher to create great students.
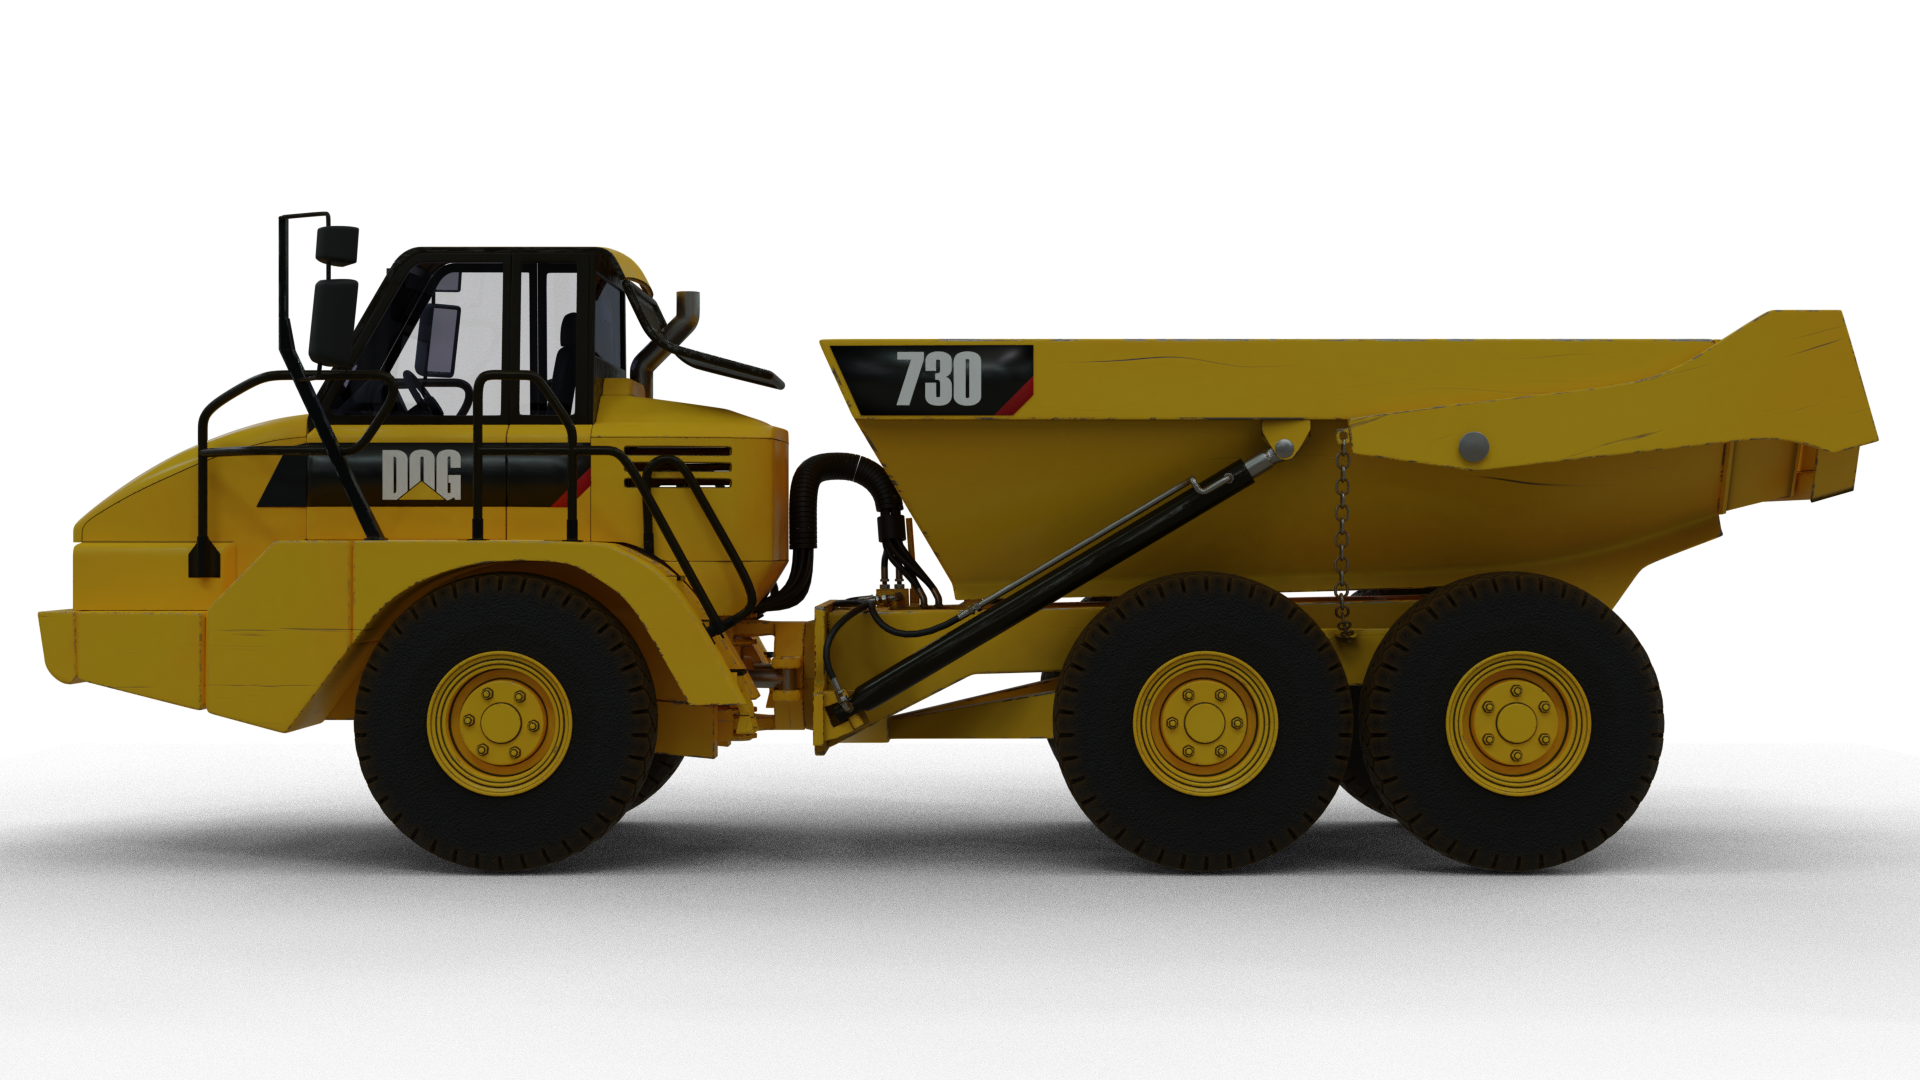
An update on my little puppy. Still got little bits to do, nuts and bolts and brackets mainly.
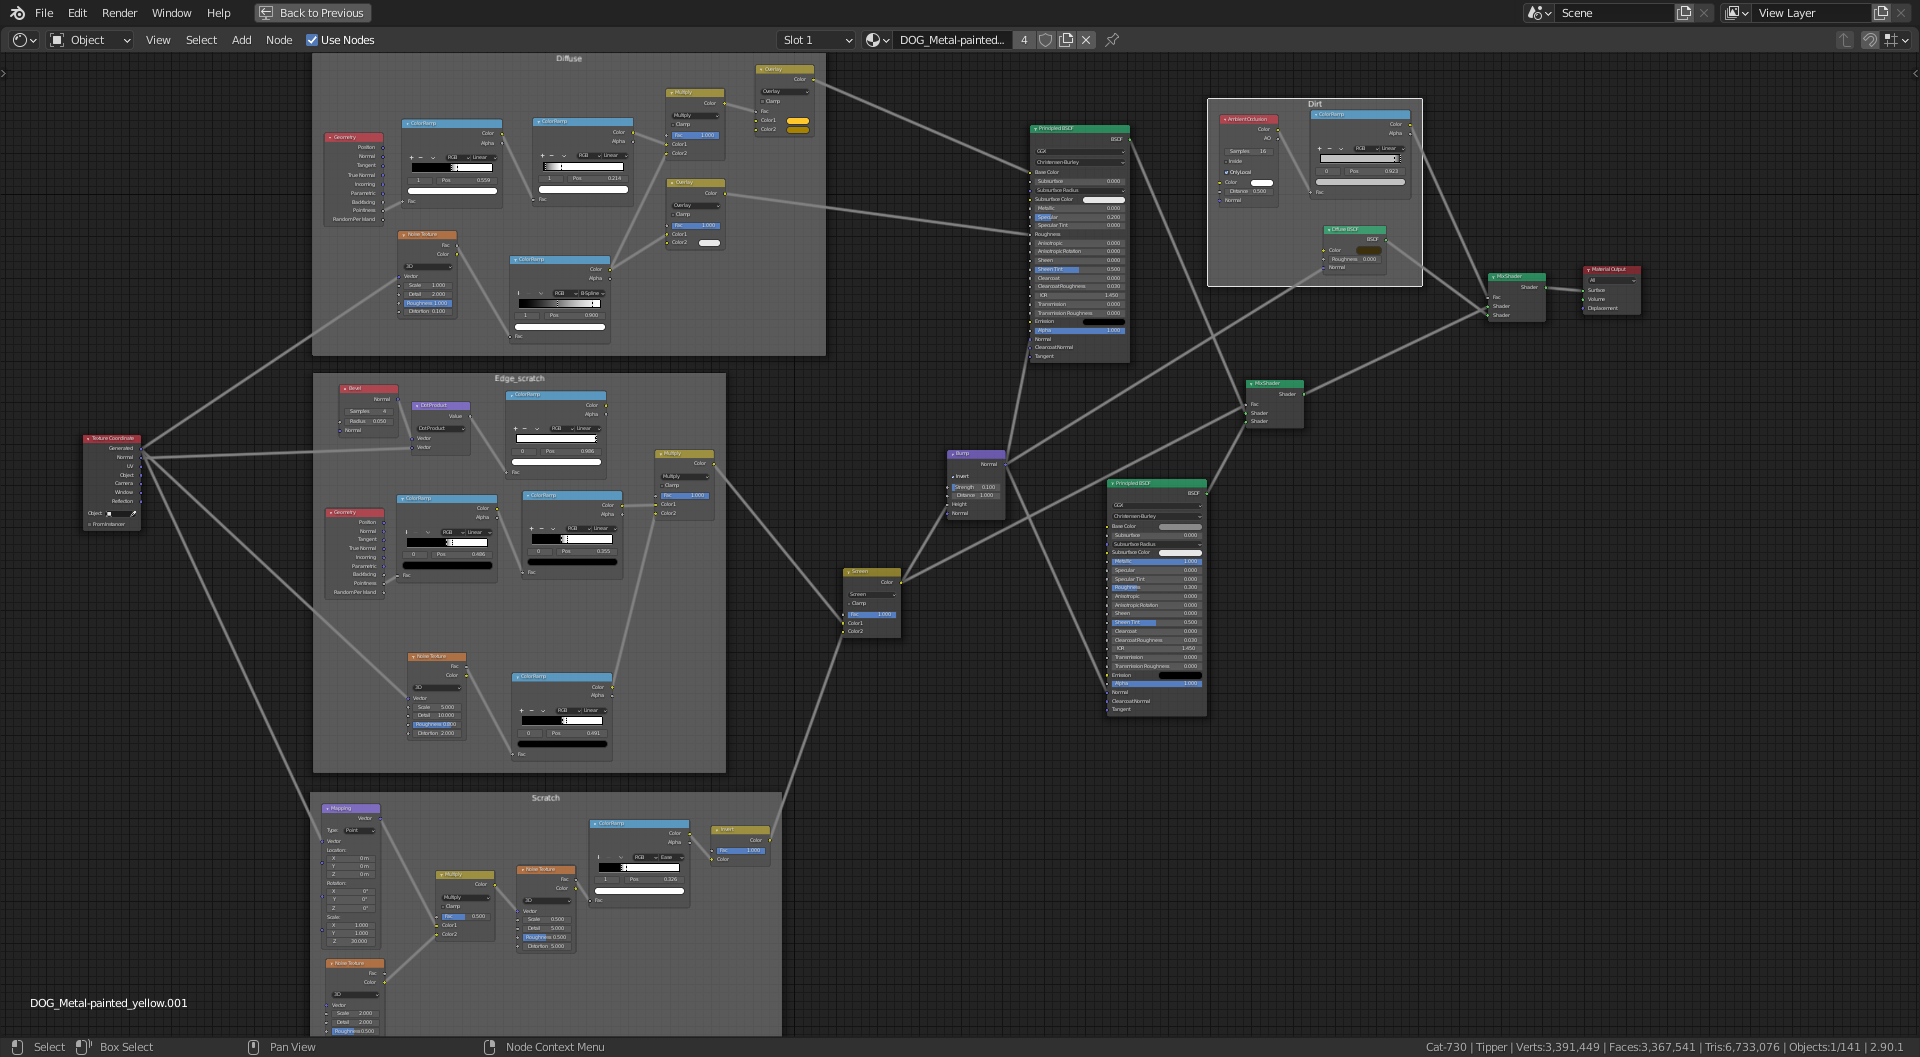
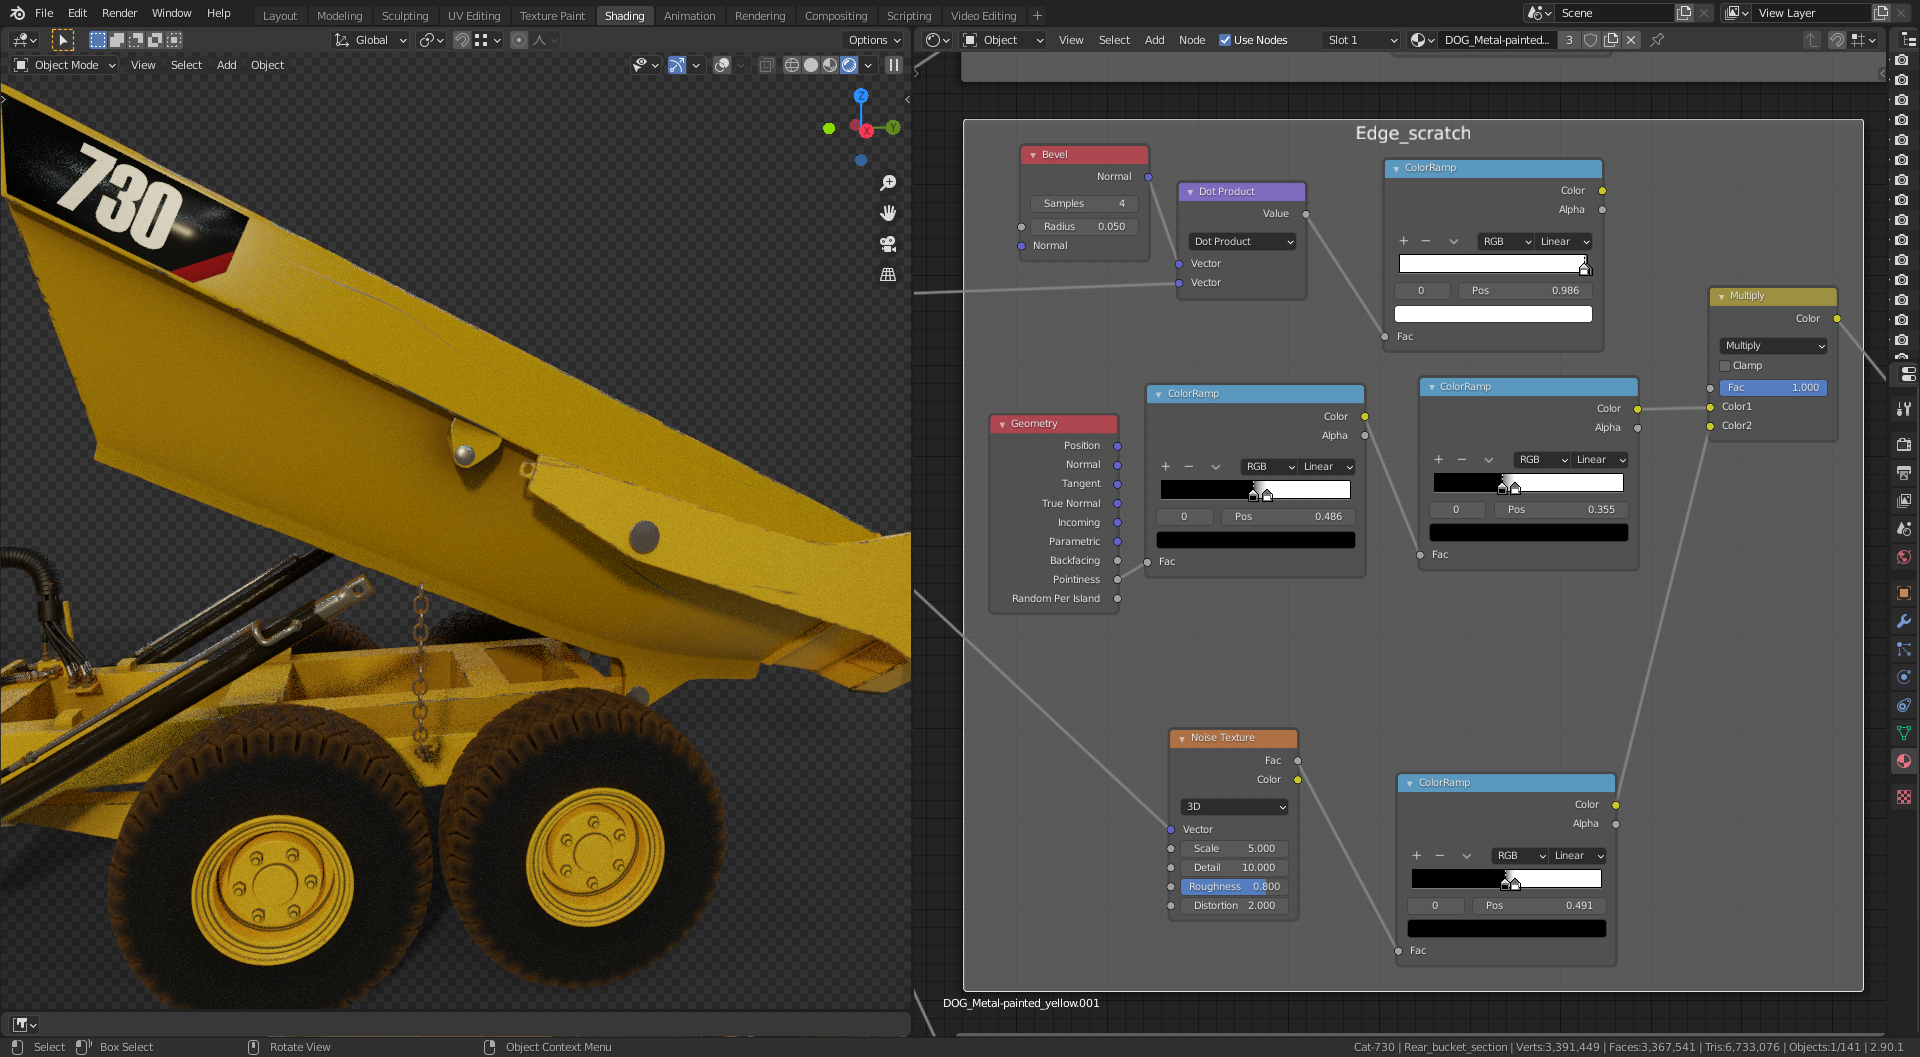
I have a question for ![]() spikeyxxx or @theluthier or anyone else that may know, in regards to the use of the Bevel Node and the Vector Math Node. With this approach when I rotate the tipper it messes up the edge scratch and I get a swirly pattern of scratches all over the tipper. From playing around with it would I be right in saying it is the Normal output from the Geometry Node into the Vector Math Node causing the issue and is there a way of finding out the value of the Normal output and manually enter this into the Vector Math Node so it doesn't change when I rotate the tipper??
spikeyxxx or @theluthier or anyone else that may know, in regards to the use of the Bevel Node and the Vector Math Node. With this approach when I rotate the tipper it messes up the edge scratch and I get a swirly pattern of scratches all over the tipper. From playing around with it would I be right in saying it is the Normal output from the Geometry Node into the Vector Math Node causing the issue and is there a way of finding out the value of the Normal output and manually enter this into the Vector Math Node so it doesn't change when I rotate the tipper??
Note: The long scratches on the side did rotate with the tipper.
The node setup 👇
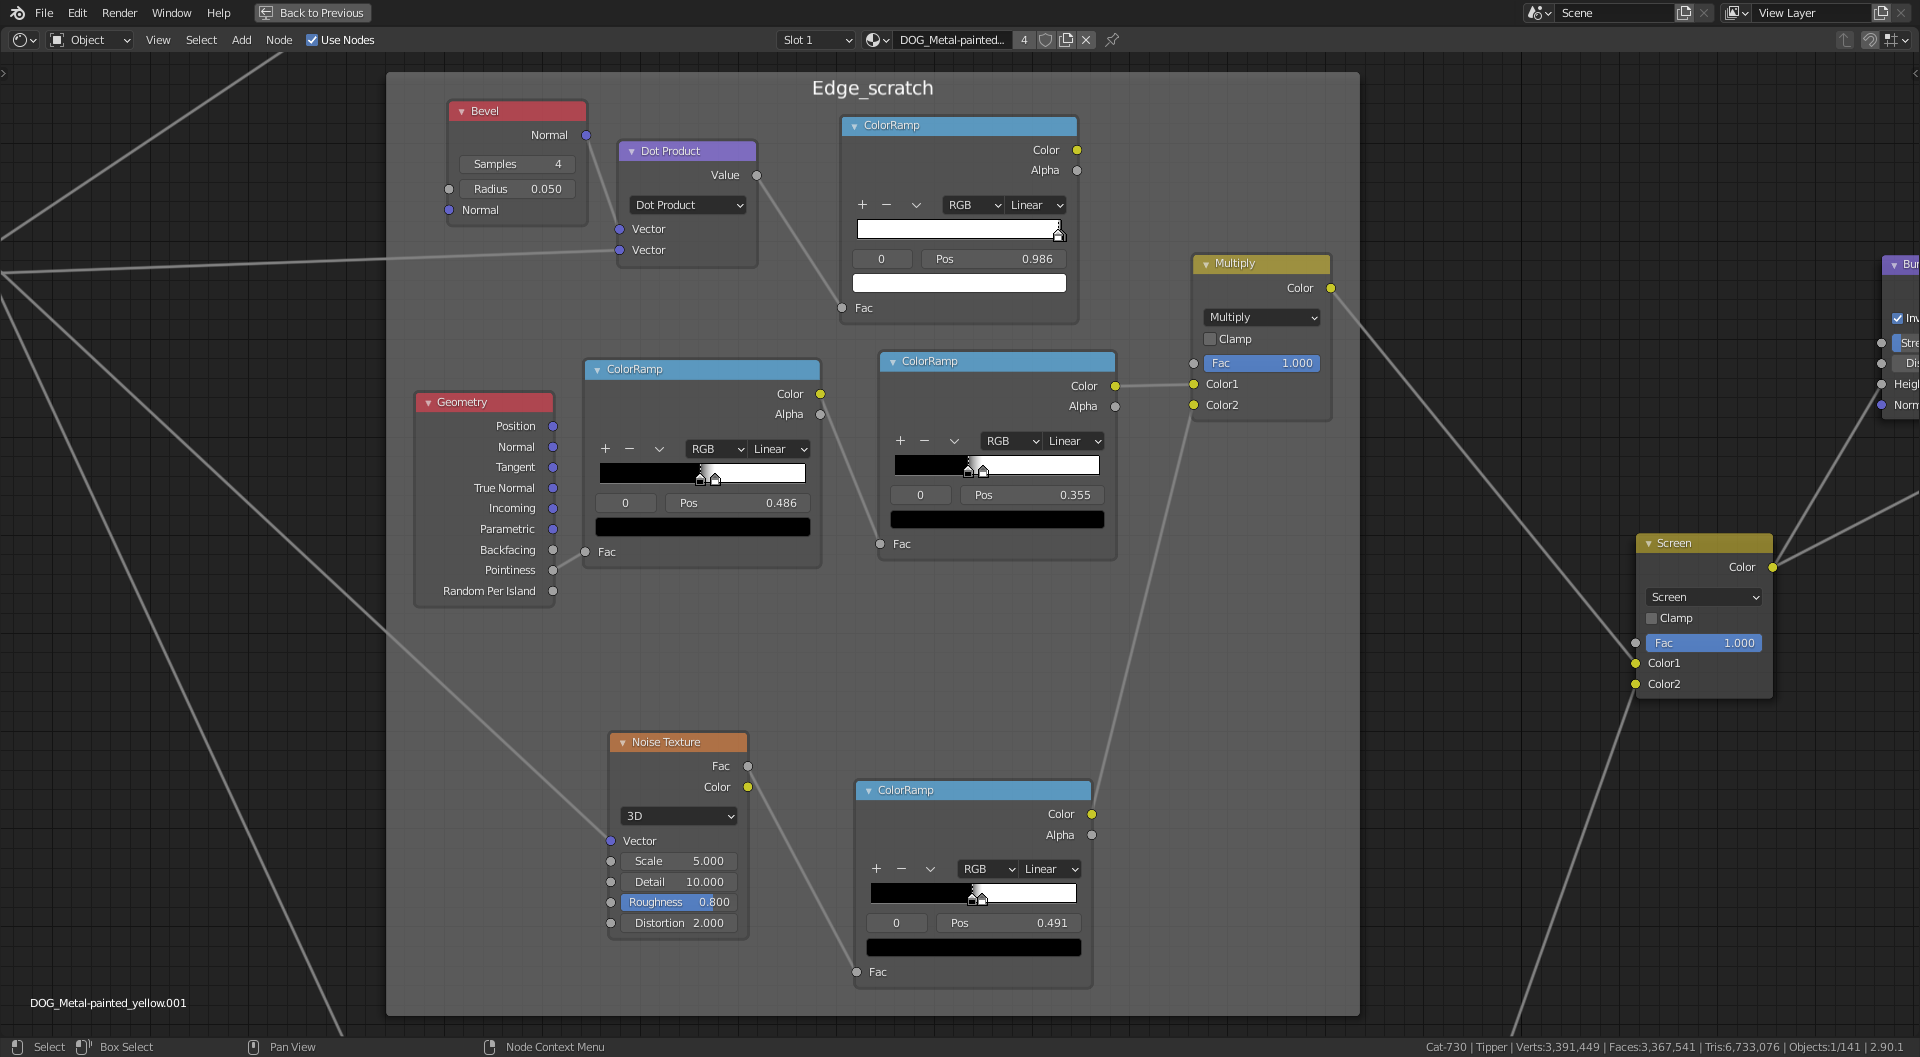
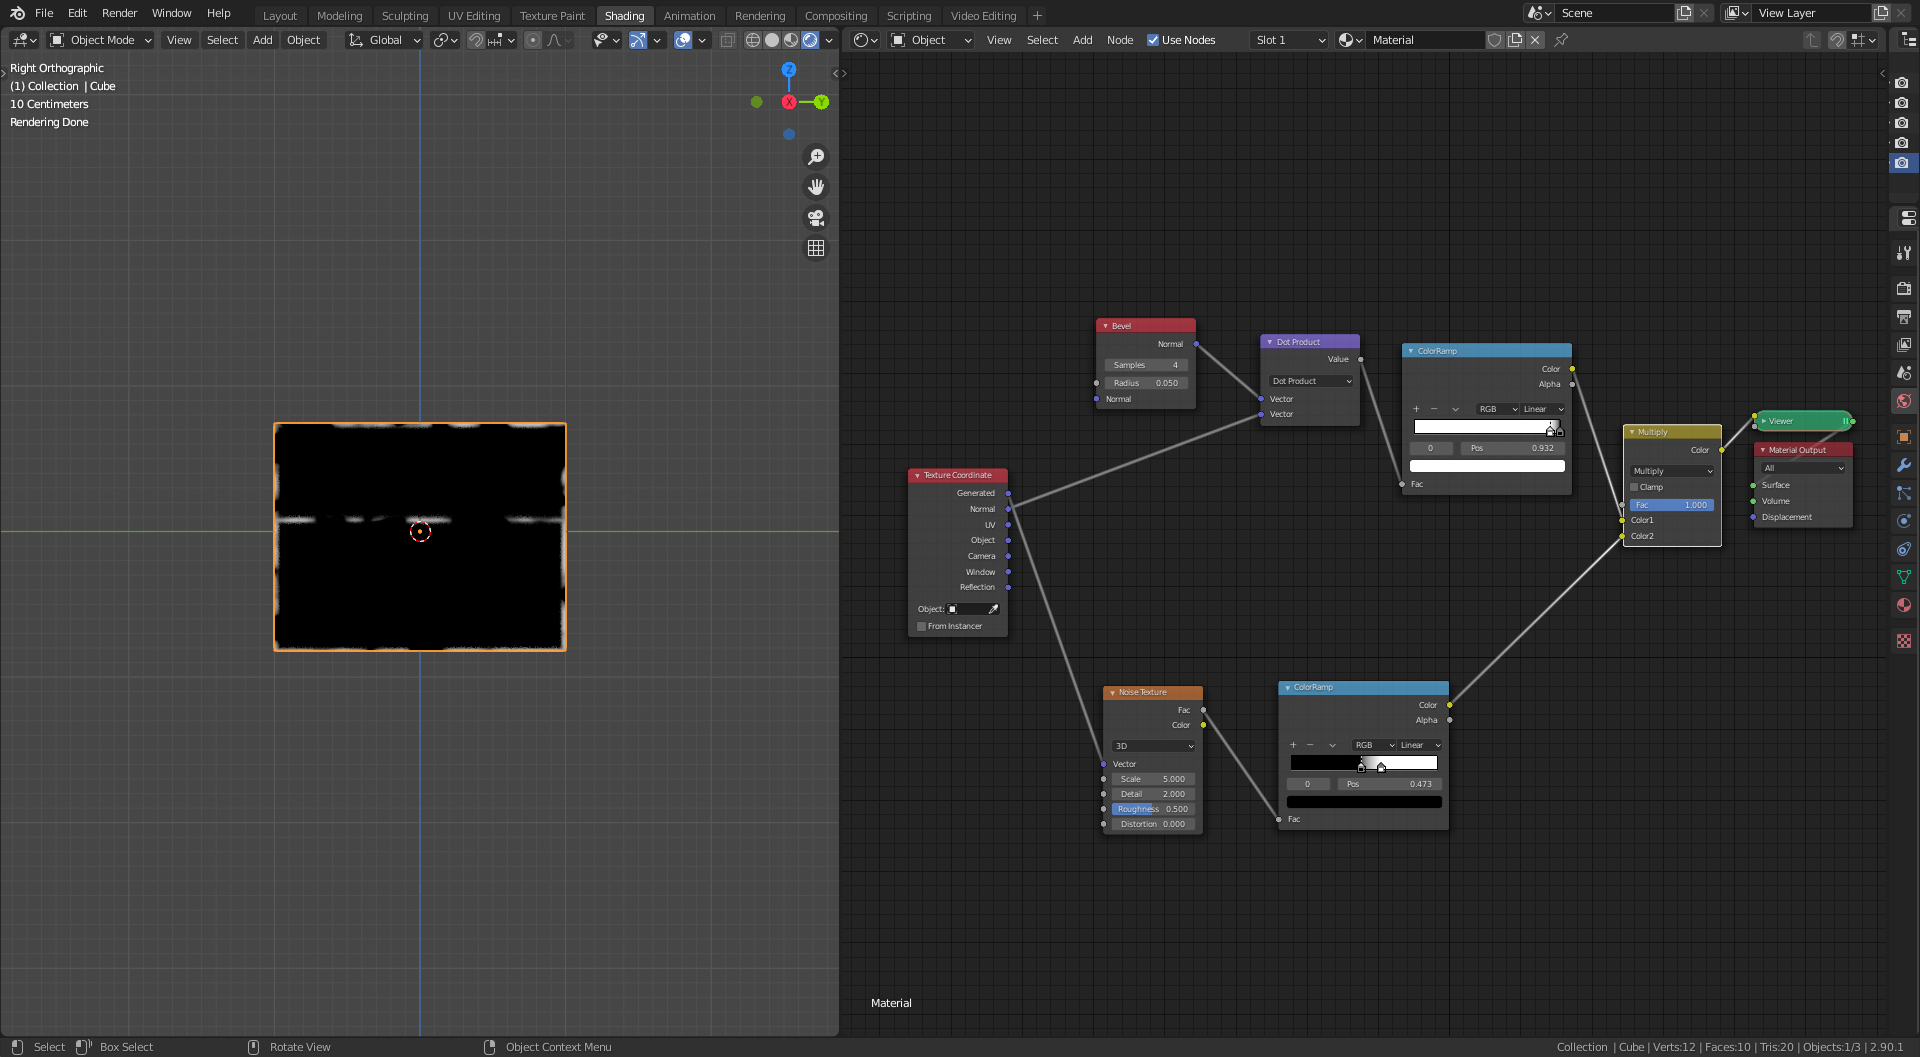
and just the edge scratches 👇 (I have replaced the Bevel Node method with a Pointiness setup to combat this for now)
Hi Adrian, I'm not sure, a link to your .blend could be helpful, but at a first glance, I'd say the problem is that you are using generated coordinates, which take the bounding box of your object (the complete truck!) as coordinate system and then you rotate the tipper, which rotates inside the generated coordinate system and you have a Mapping Node with Z-scale set to 20, but the Z doesn't rotate with the tipper, but stays as "local" Z with regards to the bounding box of the truck.
So the problem lies in the Scratch Node Group...
My guess is, that if you'd make the tipper a separate Object, your shader should work.
Taking the Dot Product between the Geometry Normal and Bevel Normal is perfectly fine! Even better than the Pointiness imho.
I tried swapping to object coordinates same thing happened.
The Z-scale in the scratch frame is to compress the longer scratches on the side which did rotate ok.
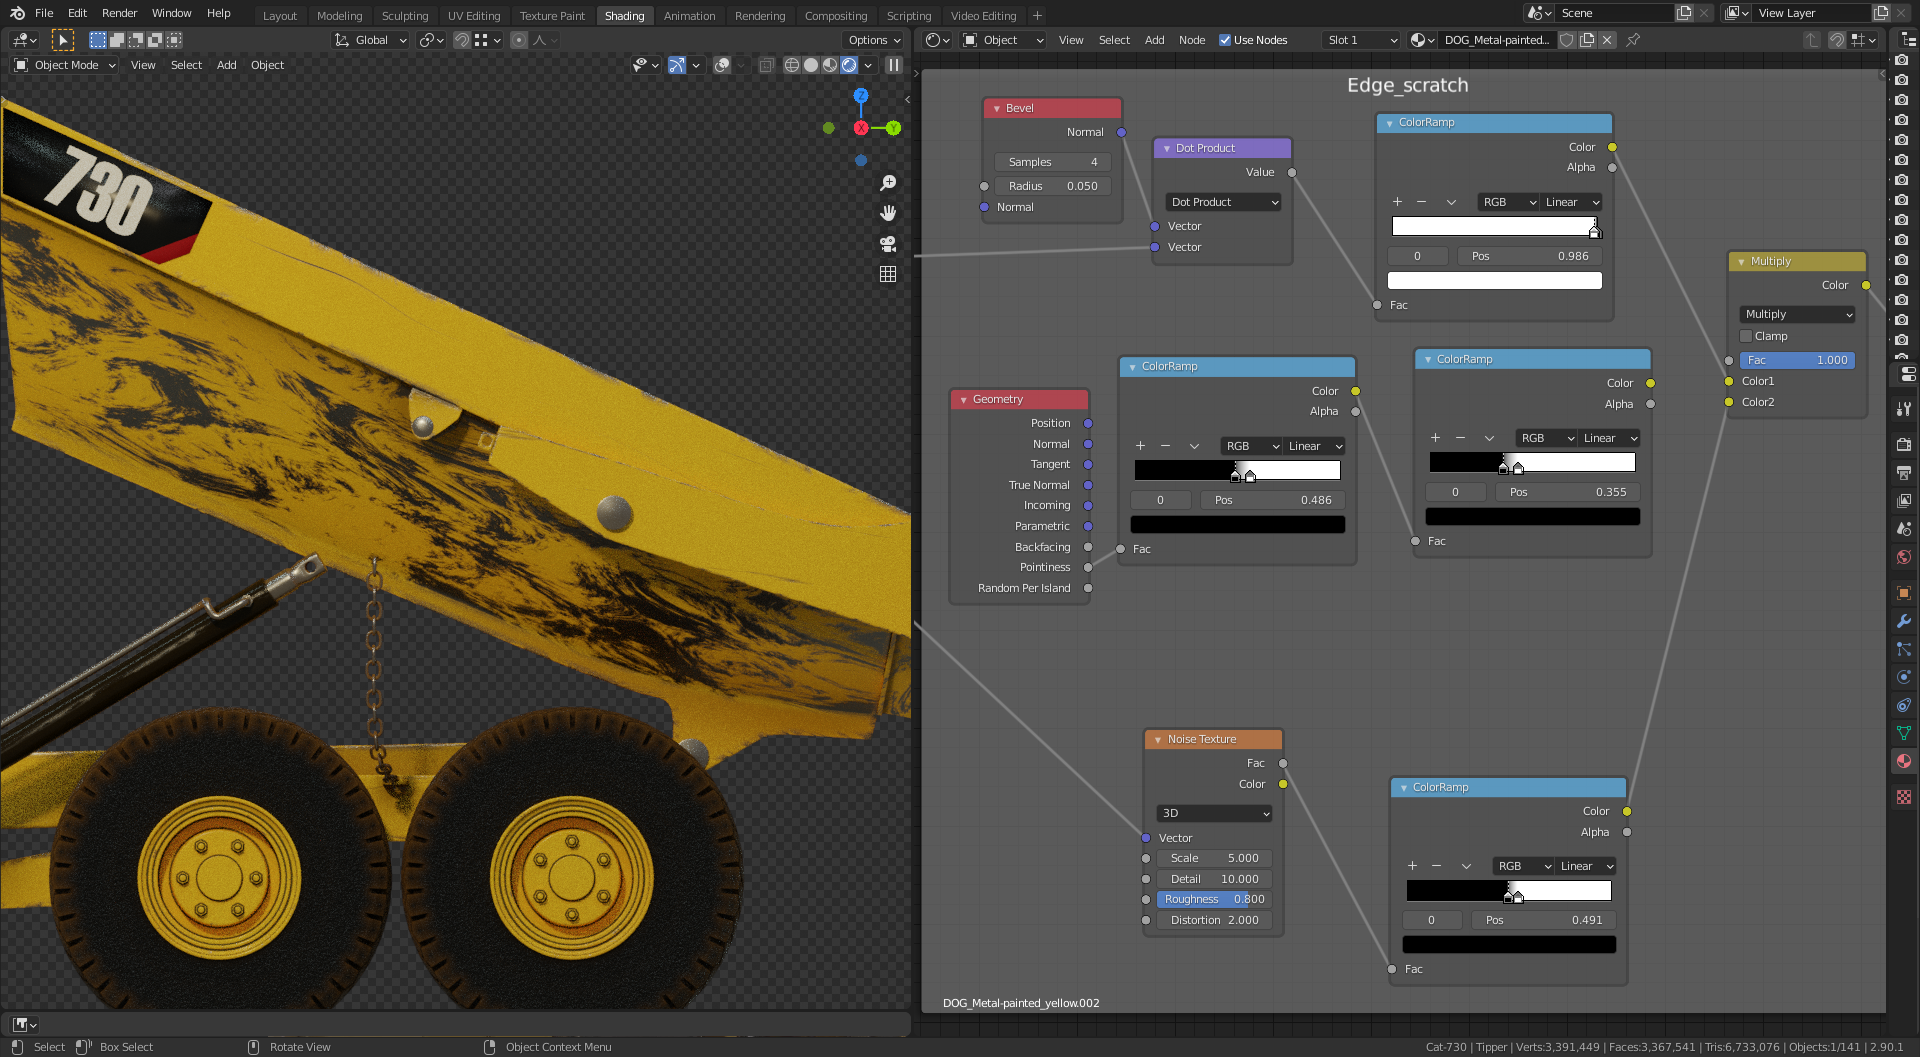
The swirly pattern comes from the noise texture at the bottom of the edge scratch frame.
I am not entirely sure why, as you can see the edge scratches are still there and also the long scratch on the side. This is using the Dot Product which I would prefer to use.
This is with the tipper as a separate object, its own shader.
and with the pointiness
I'm confused 😕
I am confused too :)
Don't know exactly what you want and what is not working, sorry.
But about the Dot Product; this is the easiest way to multiply two vectors. Let's say you have a vector (a1, b1, c1) and you take the dot product with a vector (a2, b2, c2) then the result is simply (a1*a2+b1*b2+c1*c2).
Now know that Normals are normalized, meaning they are of length 1. According to Pythagoras, that means that for a vector (a, b, c) the square root of a²+b²+c² is 1 and therefore a²+b²+c²=1.
If the Normal of the geometry is the same as the Normal of the Bevel Node, (where there is no edge), let's say it's (a, b, c) then the dot product is a*a+b*b+c*c=1. If they are not the same, the dot product is less (e.g. 3*3 + 2*2 > 3*2 + 2*3).
So I 'd say that the Dot Product trick is not causing the problem.
Geez @adrian2301 that looks awesome!
I am not a shader expert by any means but you could always bake in the details when you are happy with them and then attached them to a UV map. (requires UV unrwapping, something ![]() dostovel can speak more about haha).
dostovel can speak more about haha).
That way when you rotate you won't see any different behavior.
There really shouldn't be much of a difference between the Pointiness version and the Dot Product one,,,,????
Thanks aabm3010, but that didn't work either. But I have solved the problem and using an empty works this way as well.
I was playing around this morning, opened a new scene with a modified cube added the edge scratch nodes through an emission node and this was the result.
so far so good, and then rotate
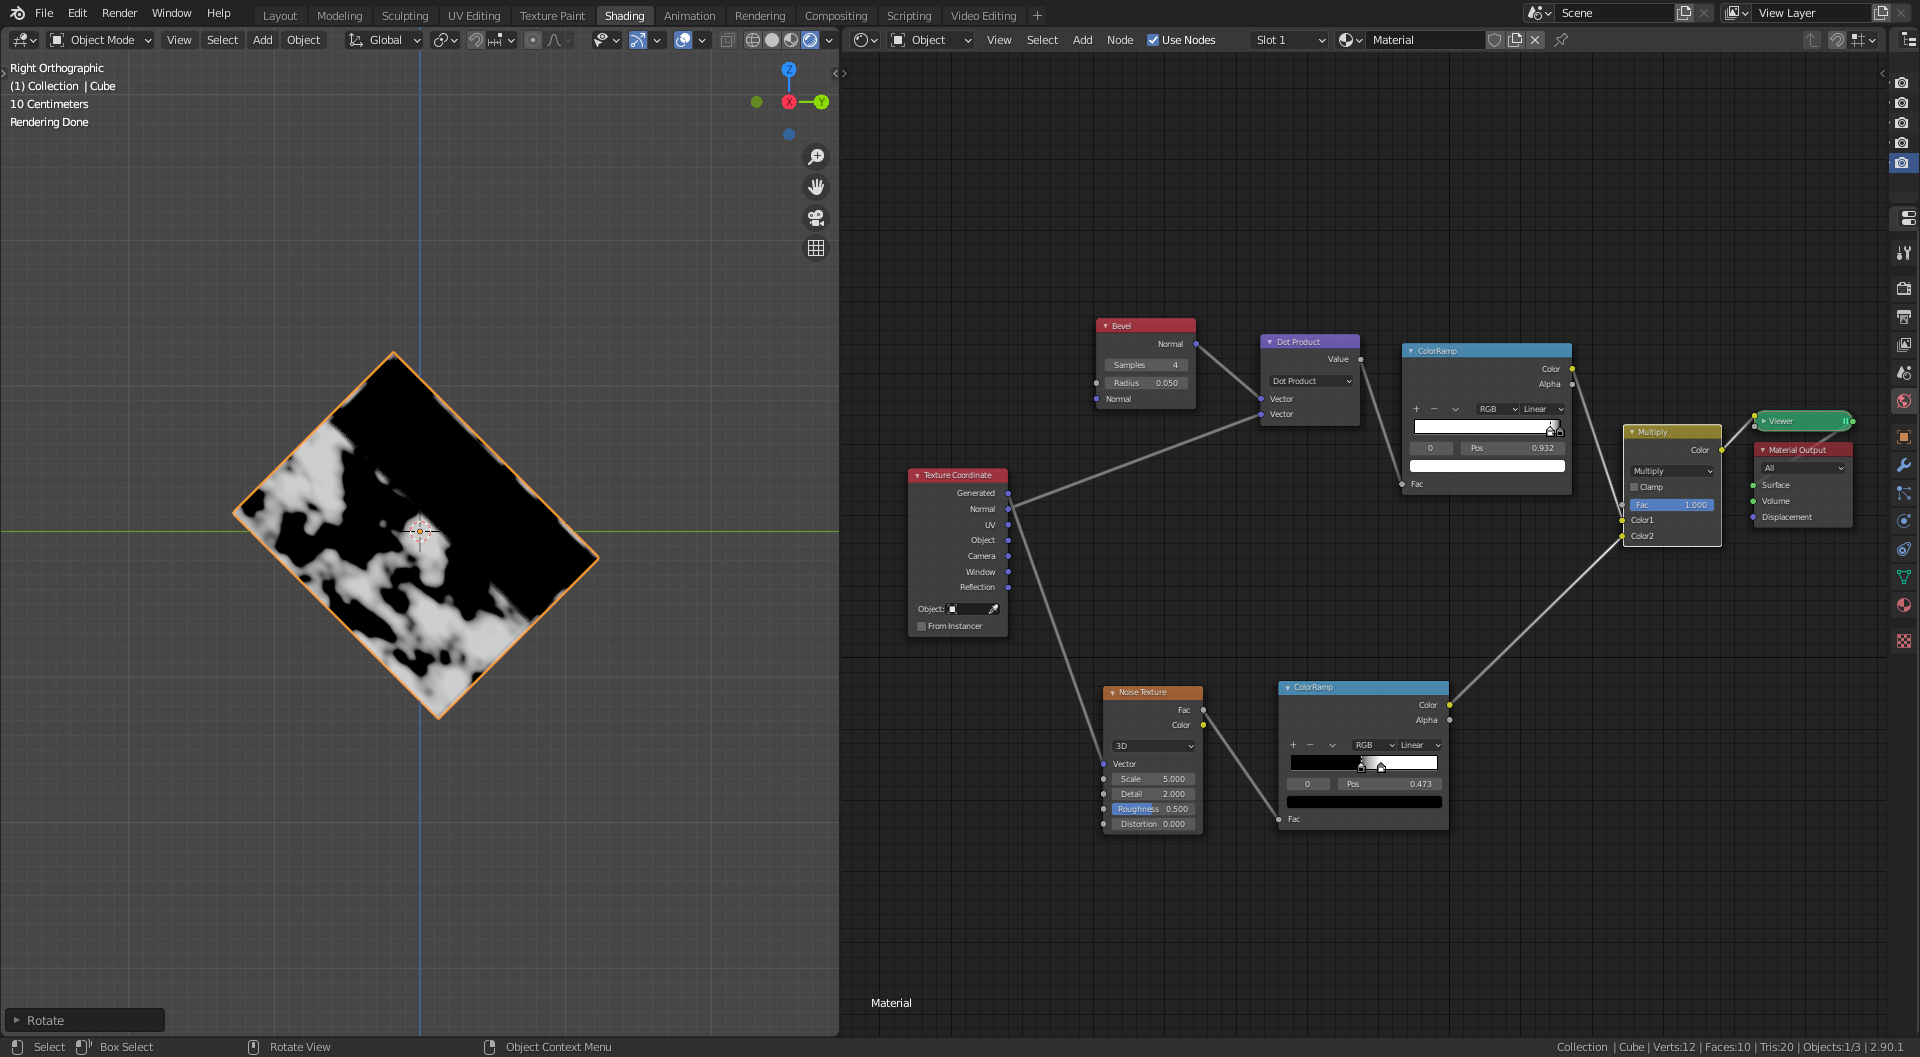
so I know the issue is here some where, try changing the multiply node to add, screen and same or worse
so I add the pointiness node setup and swap between the two just in case there was some confusion and to see if Blenders brain is not as smart as @spikexxx.
Nothing worked.
But then while deleting the pointiness nodes I accidently used the geometry node normal output instead of the texture coordinate node normal output into vector math second input.
and hey presto
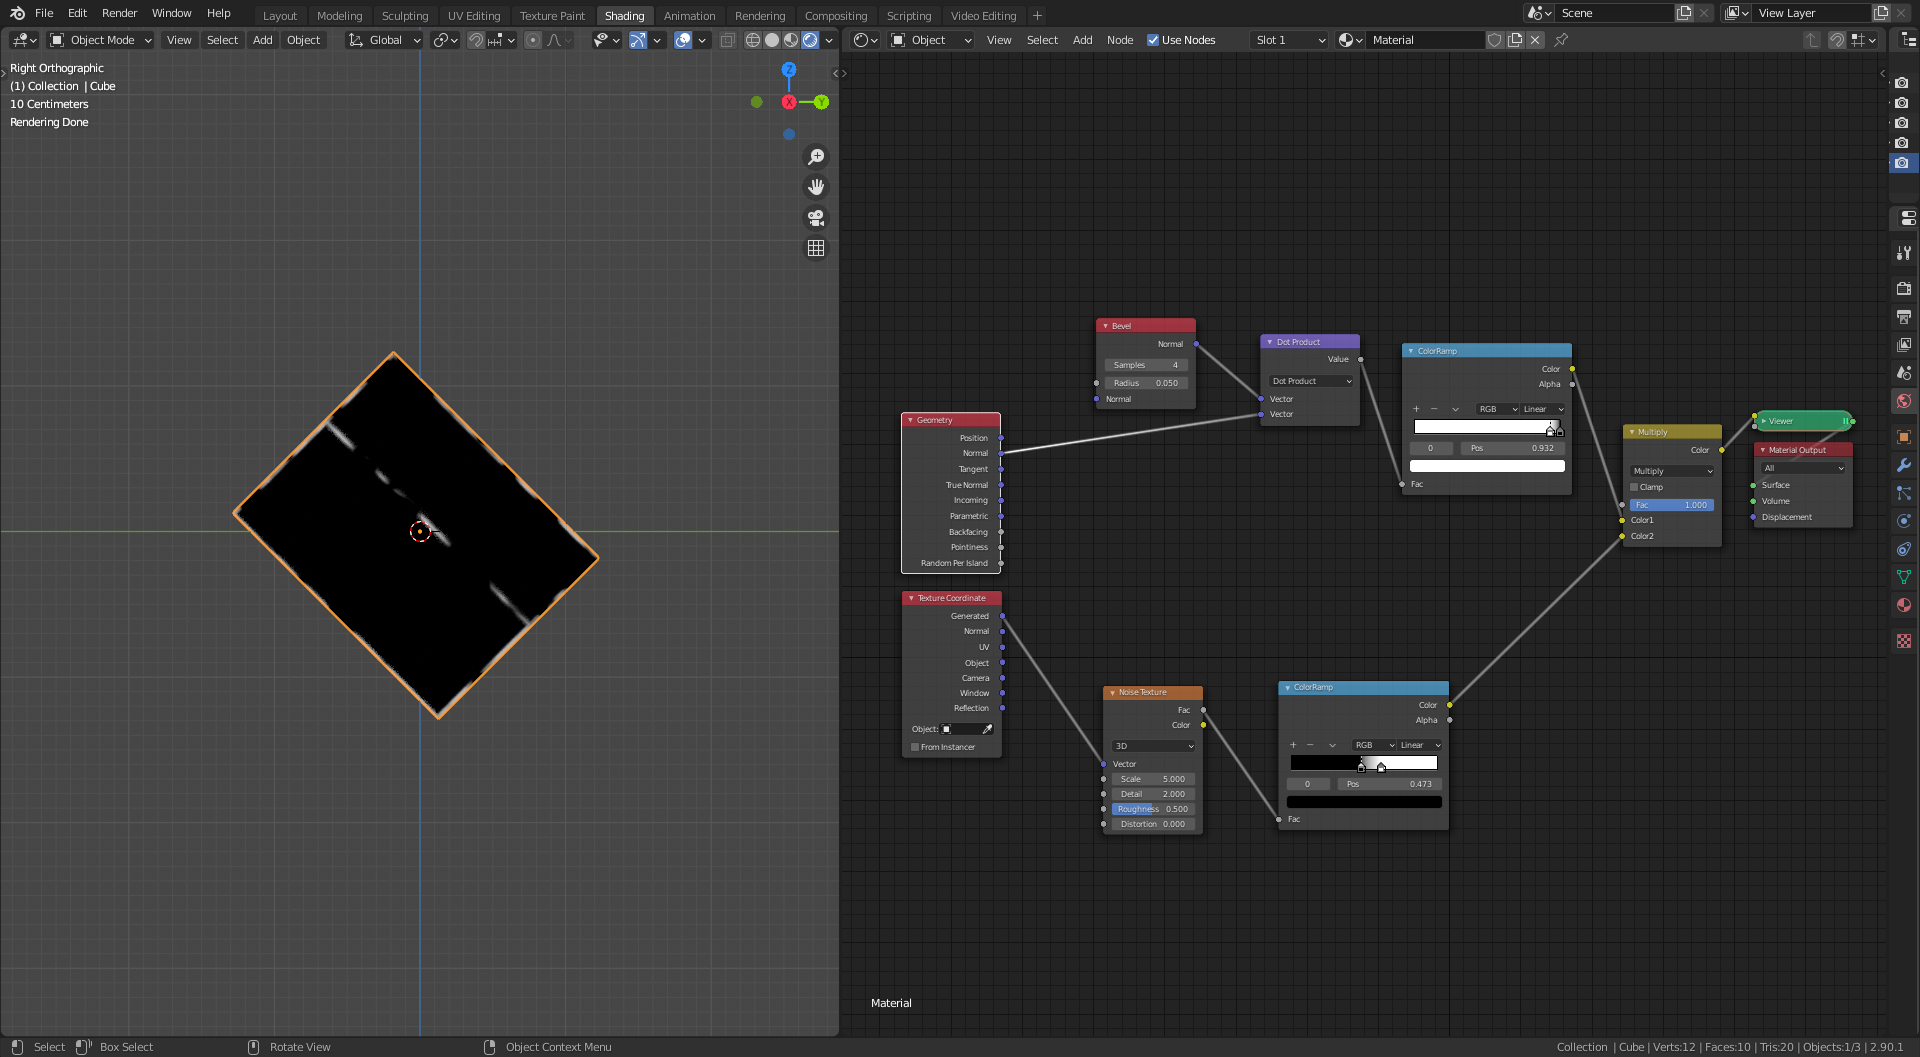 Note the word accidently, just in case you thought I was as smart as
 ![]() spikeyxxx
spikeyxxx
Thanks for the help. With out you all I would have just settled for the pointiness option, I think the dot product option is better.
Oh man, how could I have not seen that!
Glad you got it working now. Lucky accidents can sometimes really save the day :)
WOAH this is looking so good @adrian2301! You're in good hands with ![]() spikeyxxx's shading tips 👌
spikeyxxx's shading tips 👌
I think that makes sense. Since your geometry is tied to the object, correct?