Starting in March 2020, I began a large stream project to model a comprehensive, highly-detailed Caterpillar 434E backhoe. Please watch the first stream (first 3 minutes of abridged version at least) for an overview.
It's a straight-forward project of building a complex model over an extended period of time. The spin on the project is that I want your help to accomplish it! If I build some parts and you build some parts, we will finish this thing much quicker. Plus the contribution format will include reviews, the potential of having your piece(s) assimilated into the final model. Not to mention large quantities of XP are at stake 🤑
NOTE: This is an involved project reserved for Citizen members.

The general idea is that I kickoff stages of the project via live stream, which is typically once per month. For the time in between streams, you choose a piece of the backhoe and apply what you learned from the stream to that piece. For example, the first stream covered initial block out. So between stream 1 and stream 2, your job is to pick a piece and block it out.
This is the repeating protocol for each Assignment Period (between-streams):
I will reply to this thread after each stream with a [big] assignment post denoted by a 📣 emoji in the title. There I will clarify instructions about each Assignment Period.
We will centralize our collaborative communication between the streams and this thread. Ask any and all questions pertaining to the Backhoe project here.
Place your bets... Eevee or Cycles render?
Cycles it is! For 1) I tried Eevee soon after the DOG model was complete and it crashed 2) I use the pointiness attribute a lot which doesn't work with Eevee.
I'm guessing this is all procedural, right? No UVs / textures?
You are correct: all procedural, no UVs. Can you imagine laying out UVs for all / most / even half of these parts...THEN painting textures for it... 😵 I think procedural is 1000% the way to go with something this complex.
I hope you are recording this...plus 1 for teaser video on the metal and painted metal materials creation....I second/third/fourth the idea of a video recording of this process if you have the time
Honestly I've been grinding this assembly animation almost the entire month of January - just trying to get it done - so no recordings unfortunately. However I'm thinking I should make a short course about the animation process (of one part) since it's very fresh on my mind and there's lots of tips/tricks to share about it. Basically a more refined version of the last DOG stream.
I promise I'm not doing anything new with the shading and lighting that I didn't do in this livestream. Sorry if that disappoints but it's the truth. Perhaps a "behind the scenes" blog post would be good for sharing generally about the process, including materials. Definitely some useful tidbits have cropped up along the way.
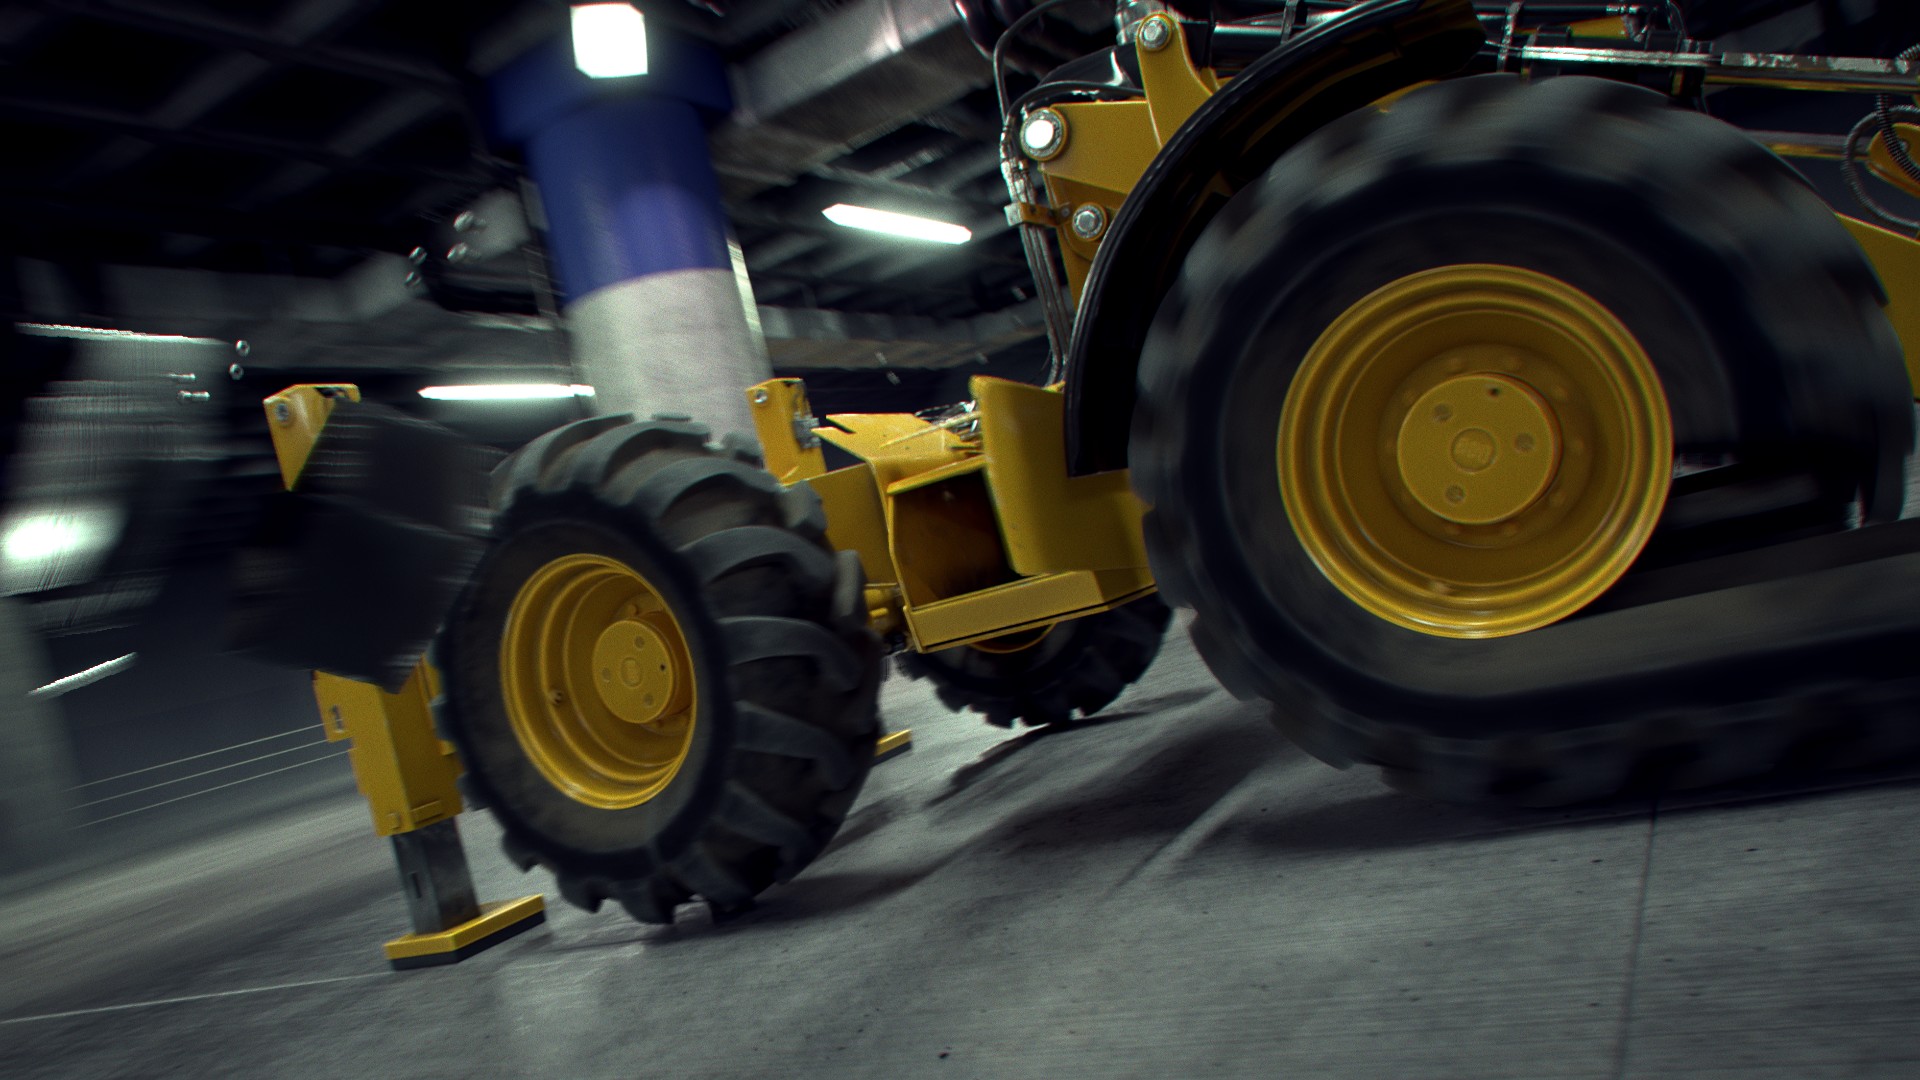
Here's some initial render test clips fresh out the kitchen! They're really quick despite rendering the past 16 hours lol. Still some errors like some parts not animated right and others missing materials AND a yet-to-be-created environment. Mostly these tests are for shading quality and vector blur. Averaging about 5-6 min per frame on my GPU.
I confess that I keep coming back just to look at this from time to time. I may have even stared at the teaser picture for 5 minutes while I was supposed to be organizing some files. lol
![]() blanchsb That's very motivating to read! Everyone's positive comments is fuel for me right now.
blanchsb That's very motivating to read! Everyone's positive comments is fuel for me right now.
I can sincerely say that this model + animation + render is shaping up to be in the top 5 things I've ever worked on in my career. I knew the model as a whole was impressive but going through every nut an bolt through animation and shading...we truly built something special.
I'm very close to final rendering but it may take all of February just to render. At the moment hitting the render button is crashing blender about 25% of the time 😬
Please send thoughts and prayers!
@theluthier Absolutely breathtaking 👍! Please let us know if we can further assist rendering this. Best wishes and prayers for the remaining animation rendering 🙏🙂!
I think I'll call this done:

At least the modelling. Do you want me to make some images for the buttons & co @theluthier ?
Also if you haven't started rendering the wheels yet, I can put some text on the tires...
Spikey, by the powers bestowed upon you by that piece, you are hence forth known as the designated backhoe driver.
Looks amazing ![]() spikeyxxx! Thanks for coming through, sir 🙇
spikeyxxx! Thanks for coming through, sir 🙇
There was a slight misunderstanding when it came to the tires. I chose yours as the final version but when Lampel volunteered to animate their assembly he grabbed Ryzen's tires. An honest mistake since there were multiple versions of parts and I didn't specify which tires. All that to say the tires are animated and shaded so no need to for text imo. Besides Lampel cleverly animated the modifiers so the tire starts flat and wraps around the hub. Looks really cool and might be tricky to add text within that framework.
I'm feeling HYPED right now, Dog Pound! Hope you don't mind a little story time 🤓
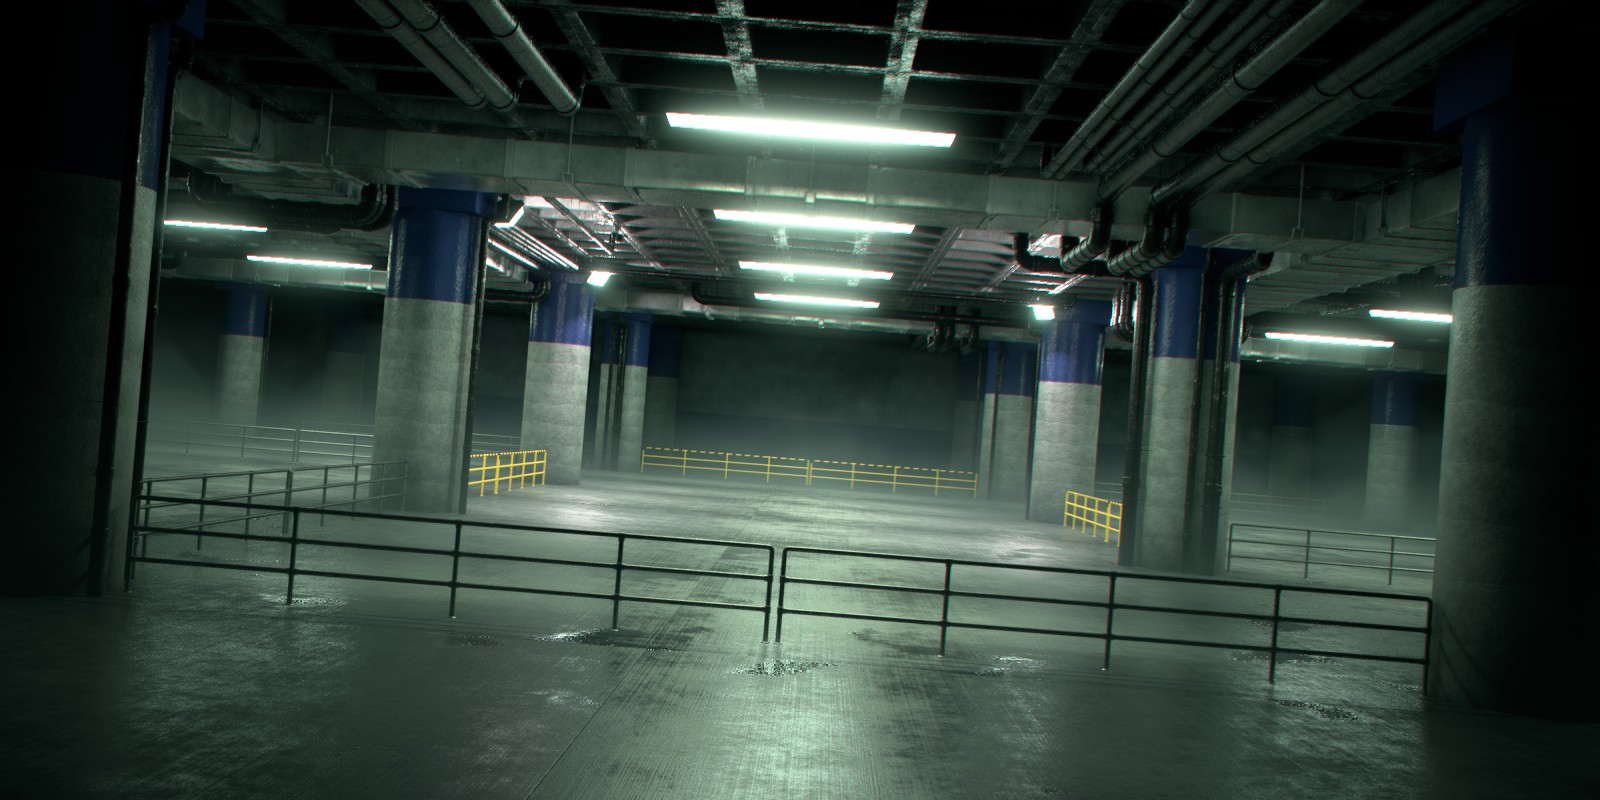
A significant piece of this puzzle - an environment - has been looming over my head since January. While I was very happy with the way the DOG's S&L had developed, 5-10 minutes per frame with no environment made me nervous about what a fully modeled interior would do to render times.
Most of this week I spent modeling a parking garage type environment. Once I blocked it out I tried rendering with a basic diffuse material on the whole environment: Simplest possible starting point. The DOG render times started chugging AND drastically increased in noisiness. Also the lighting changed drastically since everything prior was based on an HDRI which can't contribute to an enclosed parking garage model. True rendering of the whole scene (DOG + environment) was never going to be an option.
So I did what any Blender 2.8+ user would do: Turn on Eevee. I needed Eevee to work.
As I block out some concrete and metal materials I see Eevee keeping up in near real time. Only issue was without global illumination everything was too dark. I fiddled with the indirect lighting settings and it worked brilliantly! Way better than expected. And I could get quick volumetrics that I wouldn't even attempt with Cycles. I realized Eevee can do this. Hallelujah 🙌
So part 1 of the environment implementation was complete: Build and shade it. Now part 2: How do I composite my Cycles DOG with Eeevee Environment? That's the question I struggled through today....
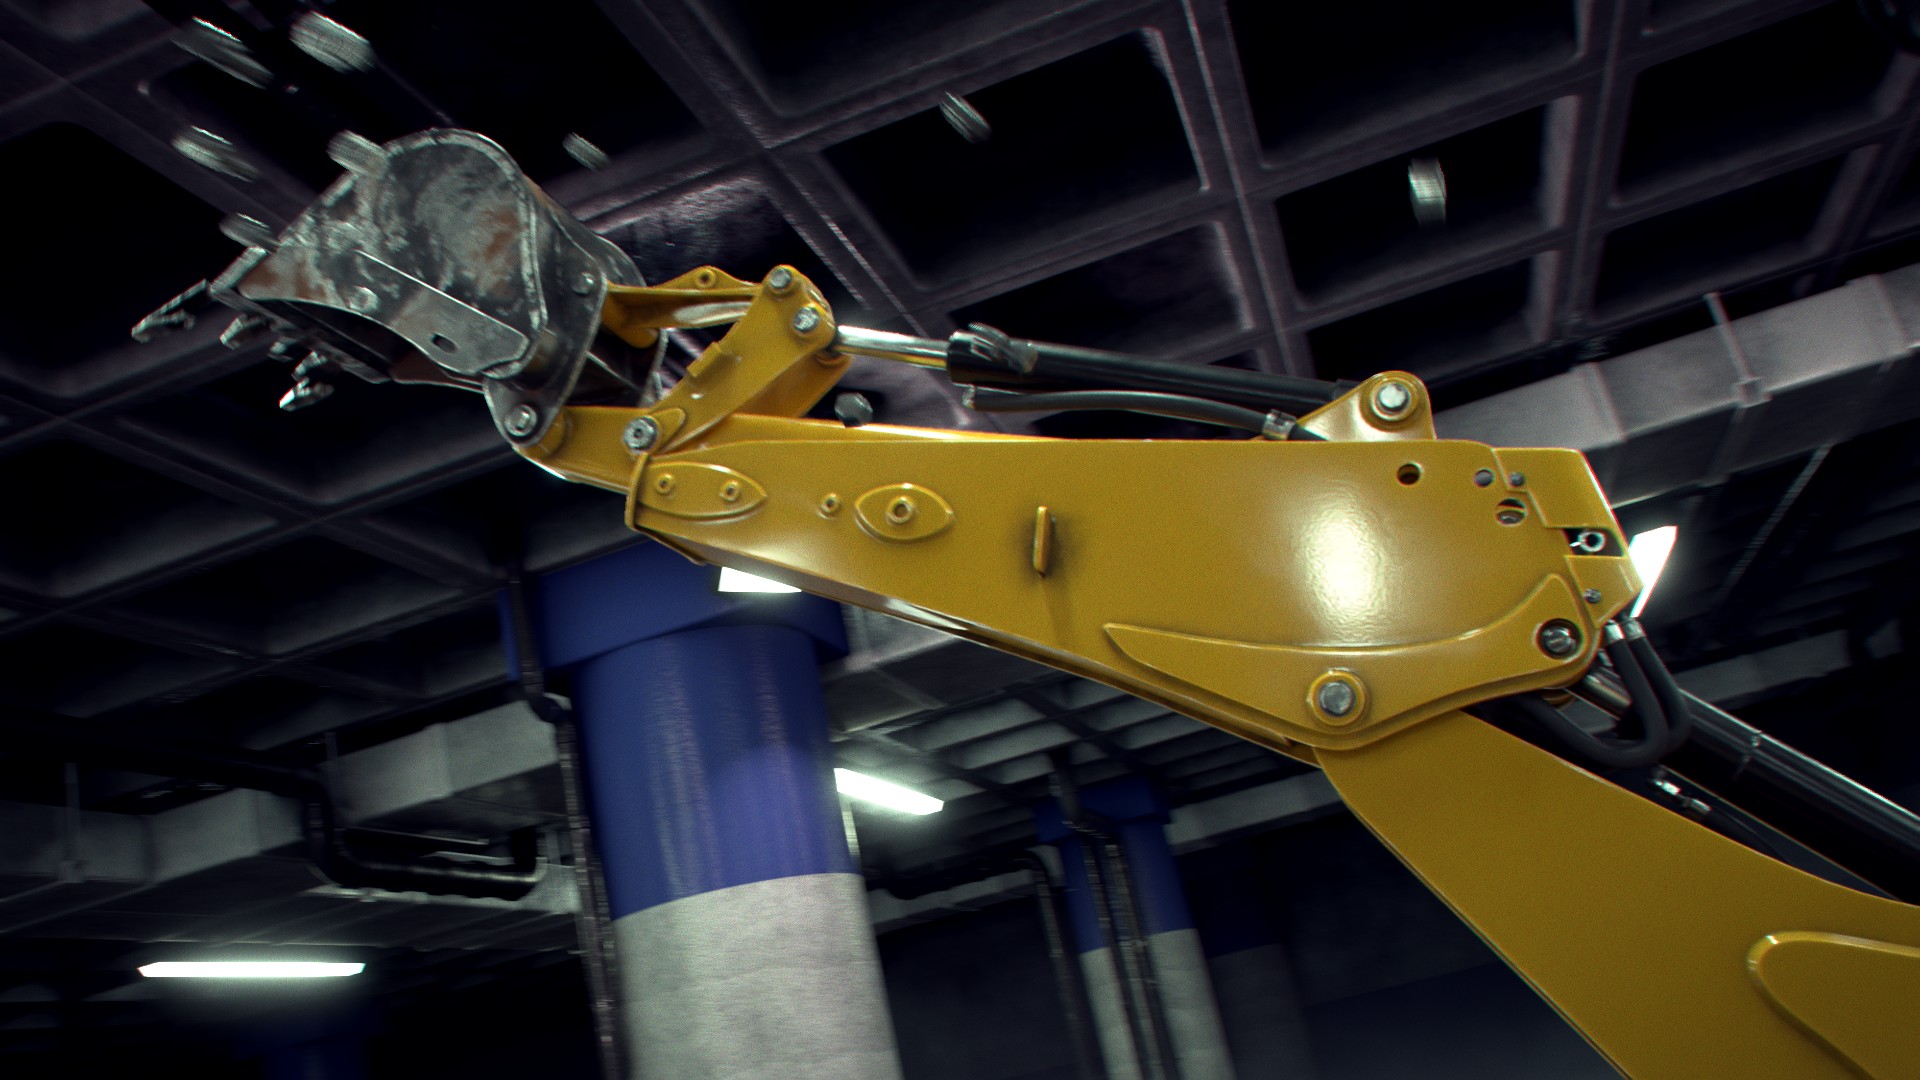
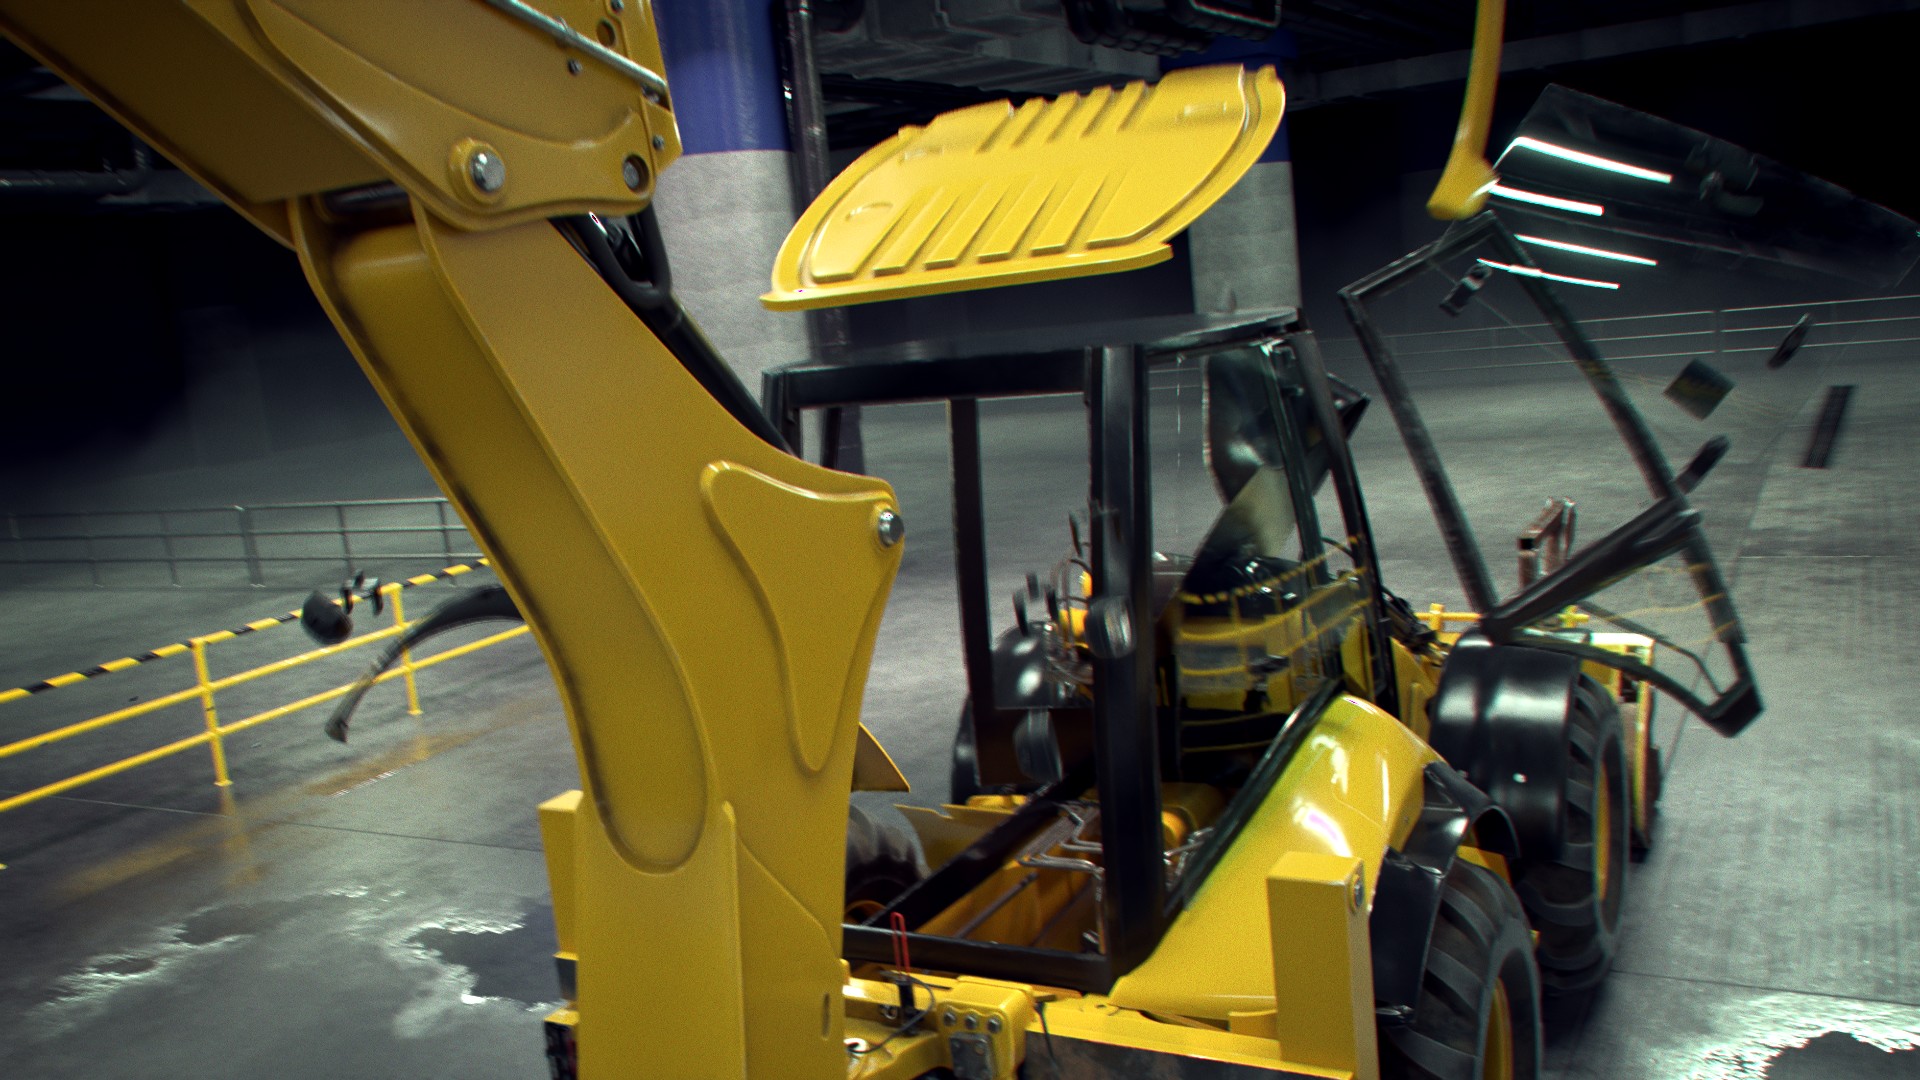
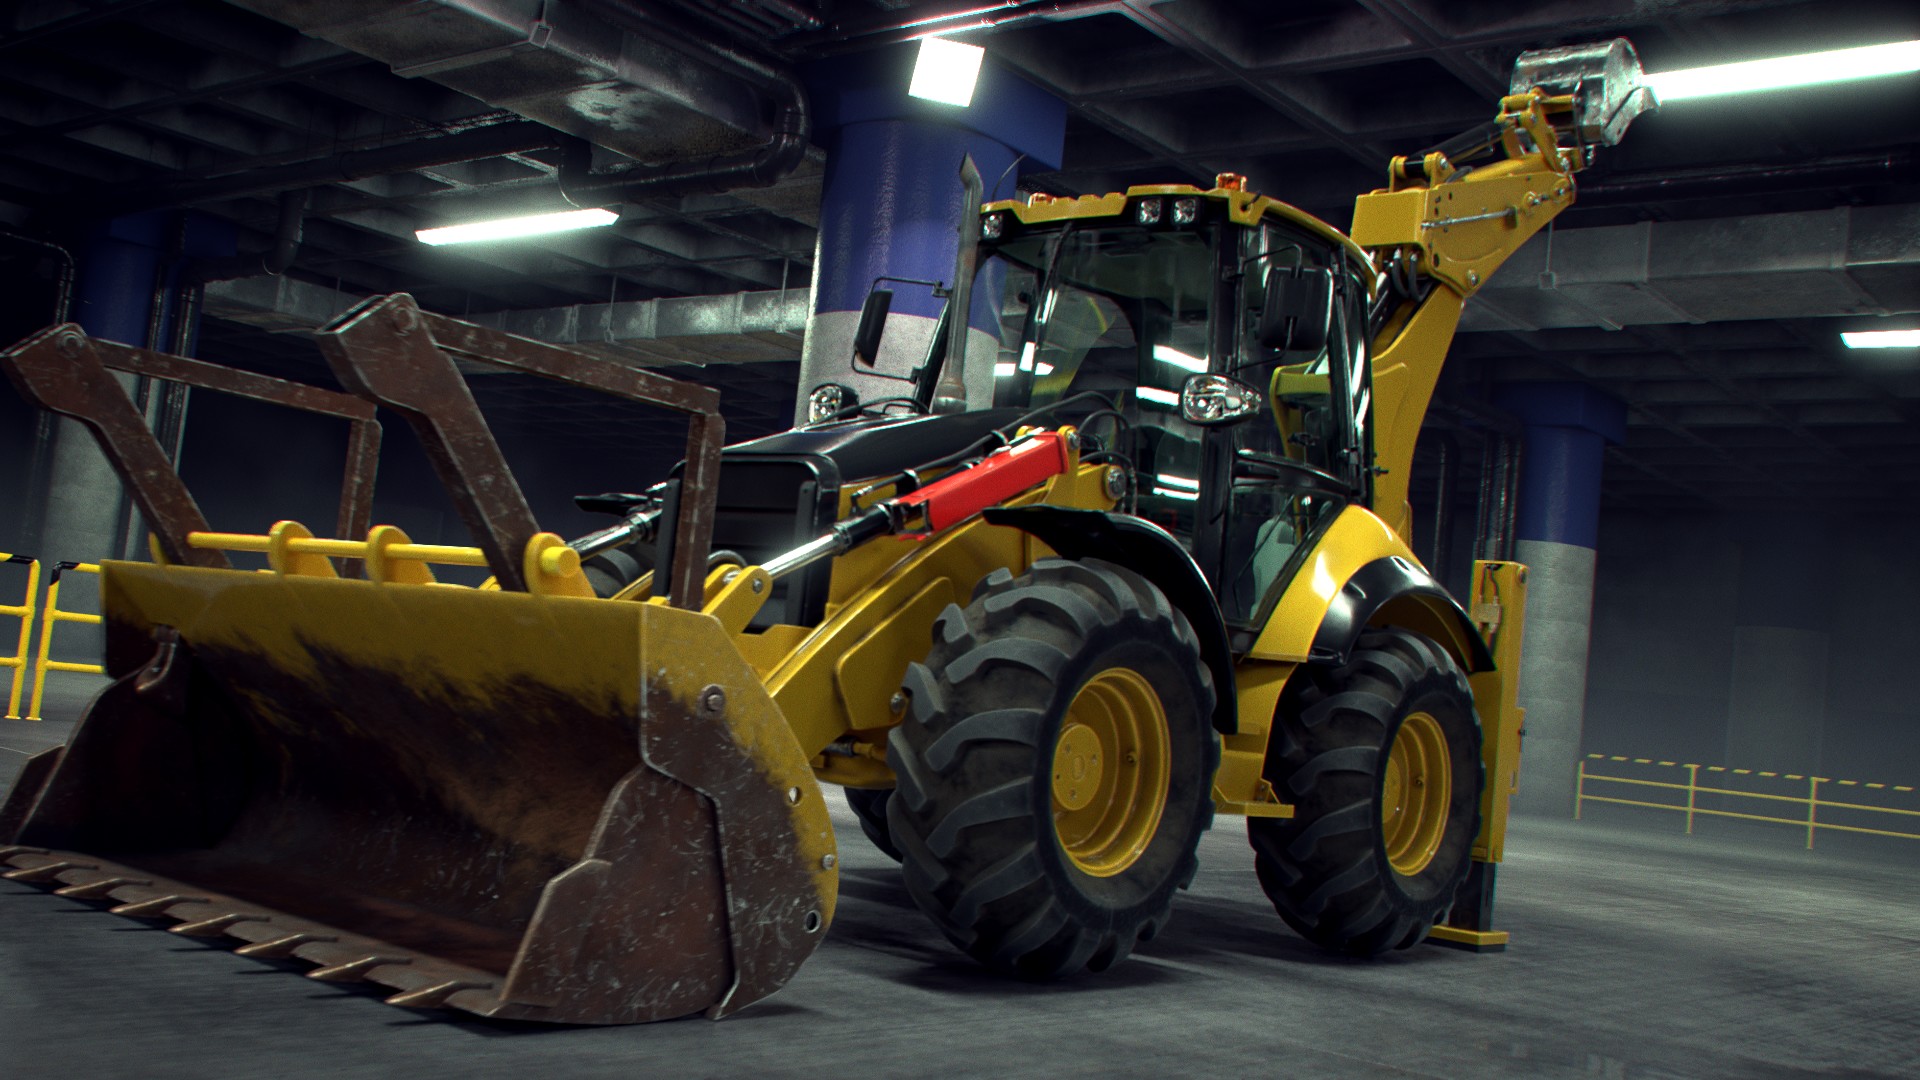
After some trial and errors, I'm SO HYPED to share with you that I figured out a decent workflow! I present to you a final-quality stills of the DOG assembly animation:

What do you think?
I'm not quite ready to hit the big Render Animation on the whole thing yet but I'm really close. This weekend I'll render the Eevee background sequence (only taking 30-40 seconds per frame). Then I'll polish off some final animation / render tasks in preparation for rendering all 2800 frames of the Cycles Dog. I'm expecting 1-2 weeks of render wrangling but then it's done.
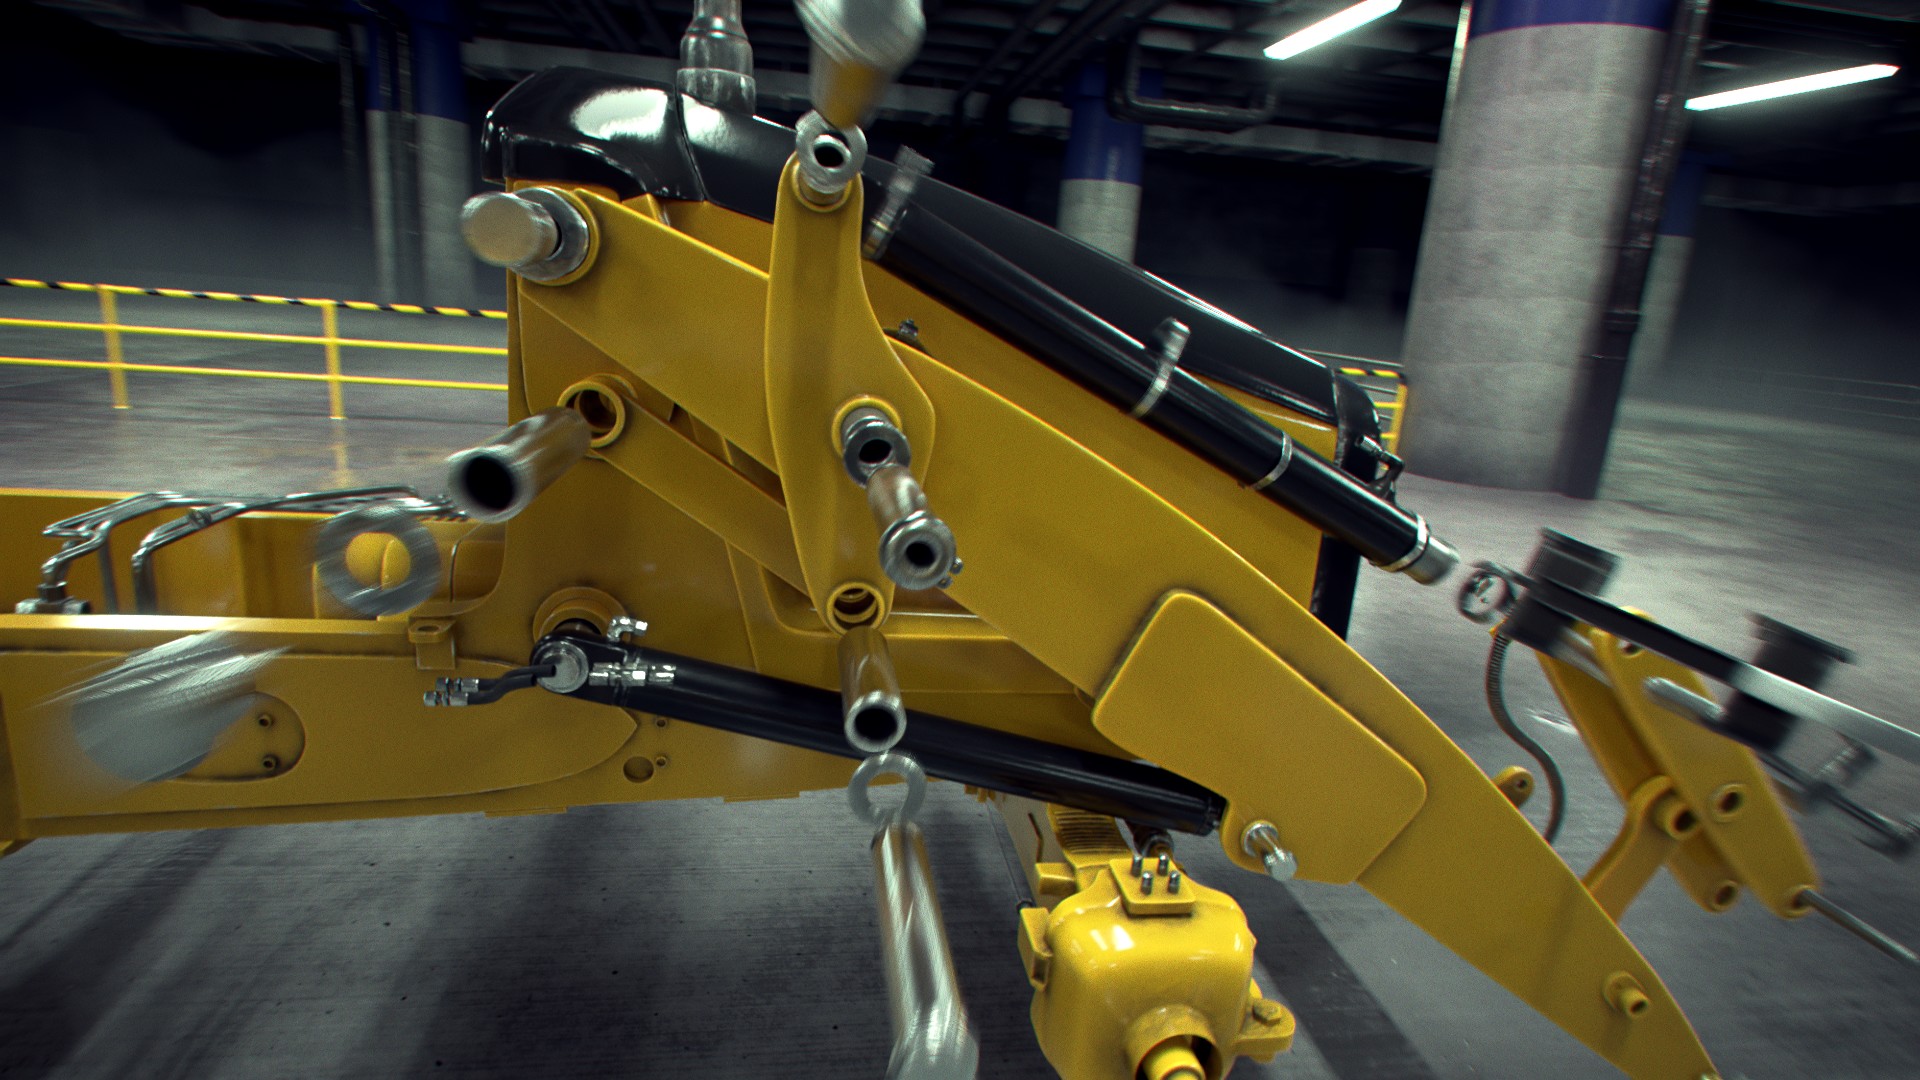
One question I have: What do you think about the digger arm bucket material? I'm trying to decide if I should leave it the way it is (shinier) or use the loader bucket (dirtier / rustier) version. Give me some votes either way 🙏
That is looking AMAZING!
I figured out a decent workflow!
Please share that workflow with us, when you have time,
I'd leave the digger bucket mostly like it is now, so it fits nicely with the rest of the model and still has a nice contrast with the front bucket, And anyway, it's your piece, so you decide ;)
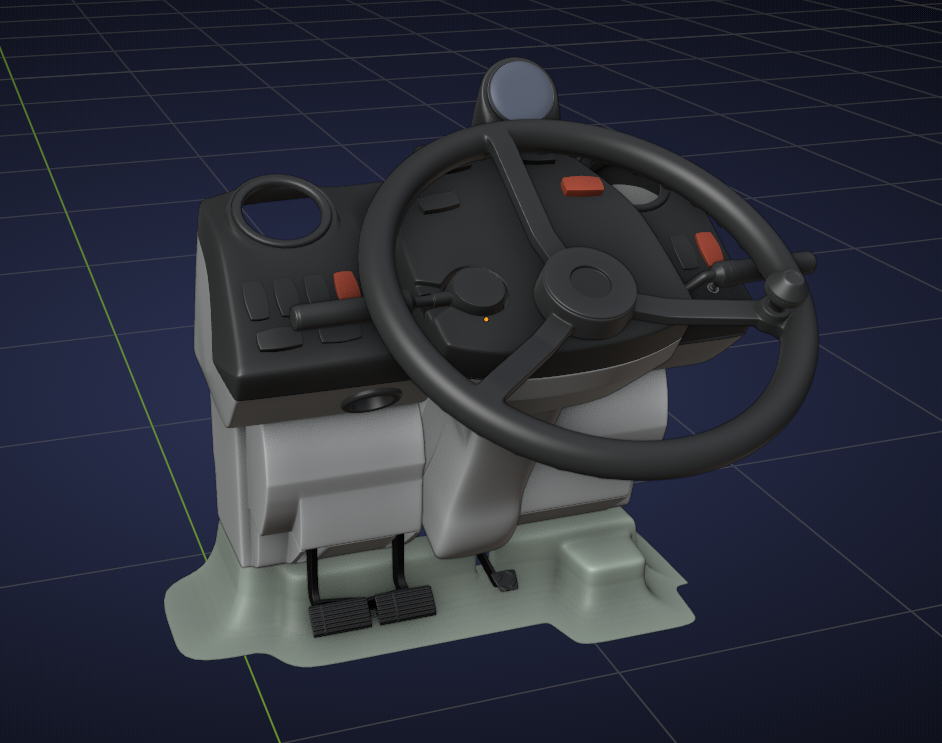
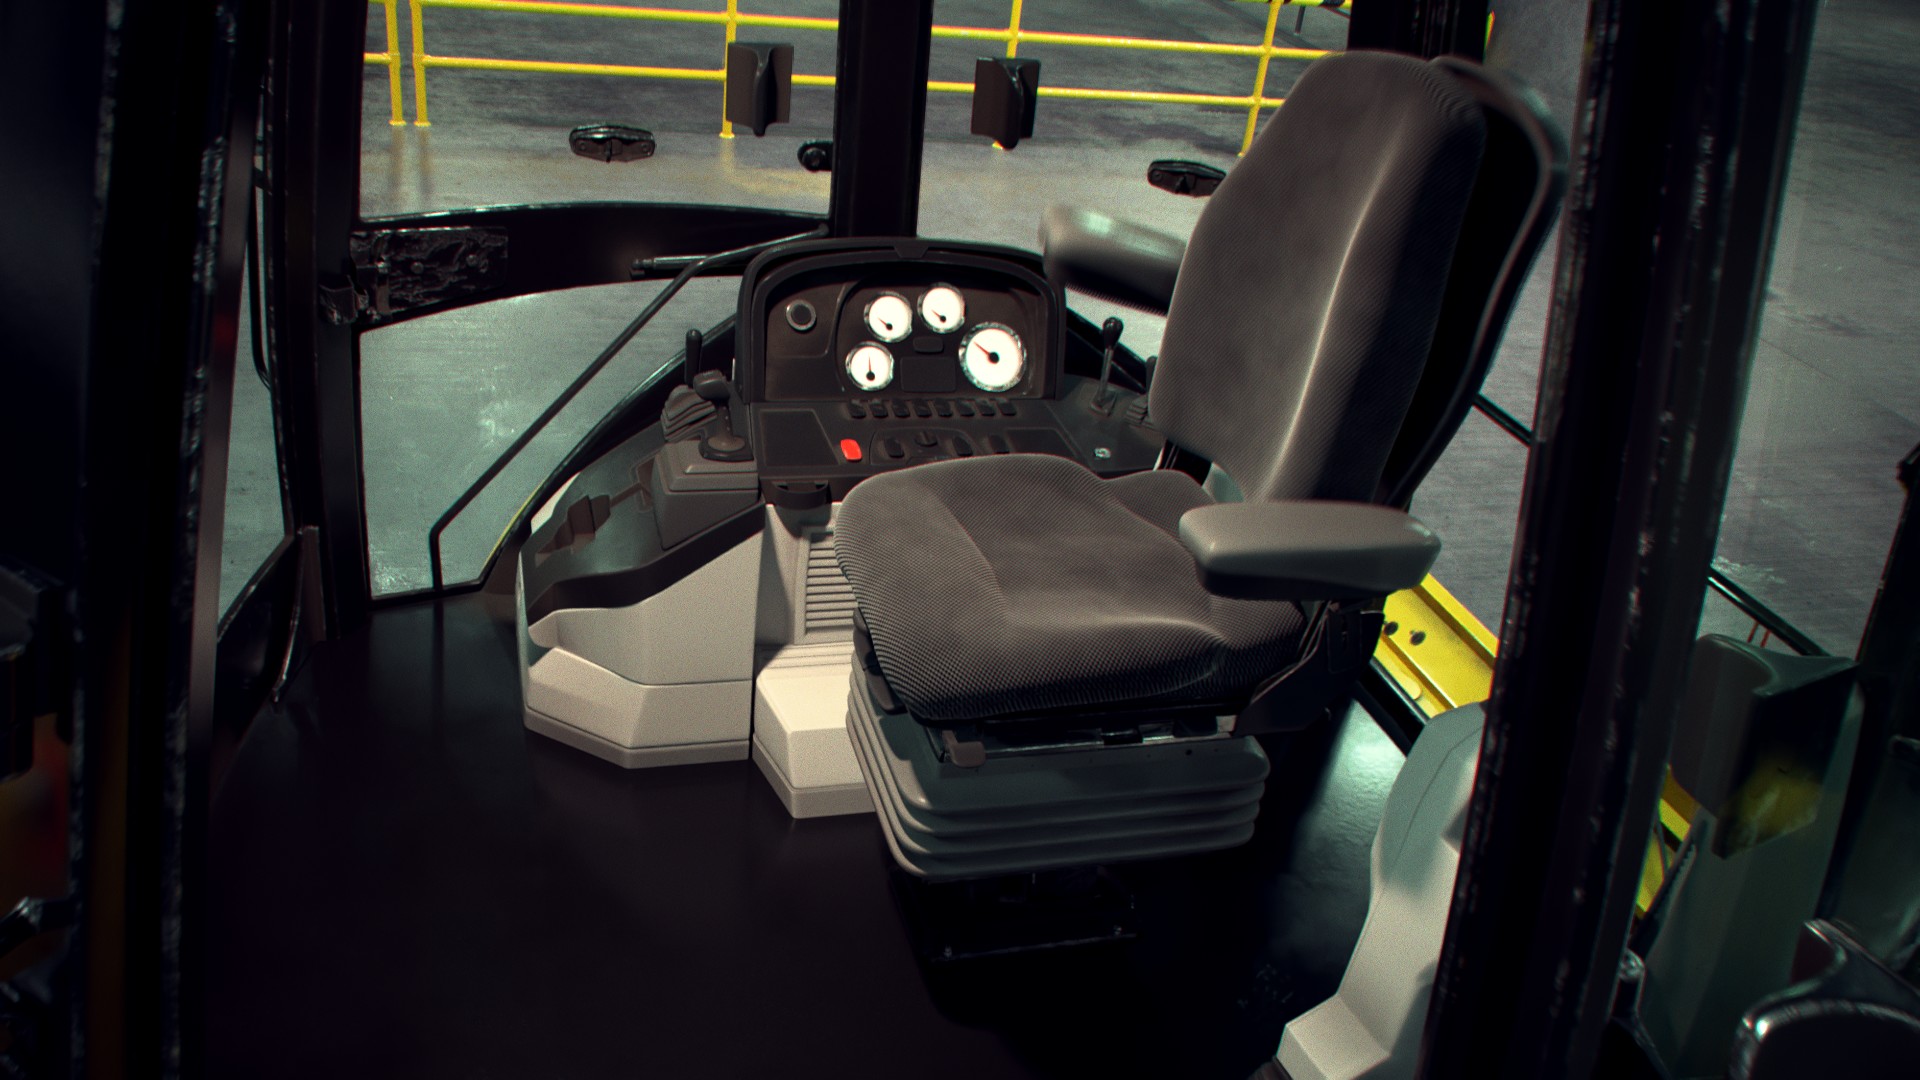
Absolutely looove the cushion material of the seat!!!! So inviting to sit down there!
I knew it was going to be good, but............ WOW.
The digger bucket looks great as it is, so does the loader bucket. I feel you don't want to over do the dirt/rust otherwise the frame will look out of place and to clean. I'm trying to imagine (and Google some images of the backhoe, ahh memories 😊) what level of wear would look best and what would be realistic. Rust needs time to form, the use of the digger arm constantly being scratched by rocks and stones whilst digging would probably mean lots of scratching and worn away paint but less rust. Whereas the loader bucket would get scratched and lose paint but more chance of rust forming.
My conclusion is you nailed it with both buckets. 👍
![]() blanchsb 's seat was looking comfy before, now it's like a plush throne.
blanchsb 's seat was looking comfy before, now it's like a plush throne.
@theluthier Absolutely amazing what you've rendered in EEVEE👍 and an excellent demonstration why it was a good decision of the Blender developers to add that render engine to Blender 😀!
The contrast between the "Loader Bucket" and the "Digger Bucket" is maybe a little bit too big so that I would reduce the amount of rust at the "Loader Bucket" and increase the percentage of rust at the "Digger Bucket" as it can be seen here.
God damn that's a cool shading and lighting job there Kent. So this is what it must feel like to work on a production and see everyone's work come to life through the pipeline. Simply put, me is loving dis group collaborative enterprise yo.
So are you rendering the tractor alone with alpha first? then you did the background scenario and then render that with the same camera motion and then compositing them both on the compositor? Why do it on two passes? the tractor first then the background? Are you going to do the shadows using shadow catchers?
Seeing that environment conforms what I have always feared, just your hero model isn't enough, I always hate modeling something cool only to have it on a simple backdrop, there needs to be an environment, the thing is that's another huge level of work and complexity to work after you're exhausted on working on a complicated model.
Another thing that this confirms is the hassle that is lighting a closed interior, that has always been a struggle for me. HDRI's are a life saver, and when they are useless because everything is encompassed on a close environment, setting up lights is a b*tch man. Not to say about the noise in the scene that becomes unbearable.
About the question, I'd say use the loader bucket (dirtier / rustier) version. Looks great, maybe leave a little yellow paint here and there, looks way too 100% just rusty.
This looks so sweet I could bake a cake with the form of the tractor and eat it.