Blender comes packed with features - Sculpting, Compositing, Geometry Nodes, Asset Libraries - there is so much you can already do with it right after you install a fresh copy.
But after a short while, you'll realize that some tasks could be made better if only there was an extra menu or access to a library of premade meshes, environments, or brushes that you could draw upon.
This is where add-ons and extensions come in.

Blender comes with several add-ons already available, but not all are activated because each add-on will increase the resources the Blender needs to run.
In this article, I'll first give you an overview of what Extensions are within Blender and how to navigate them. Then, I will get to the top five add-ons you probably didn't even know about.
Let's dive in.

You can find these in your Preferences under the "Add-Ons". Favorites include Node Wrangler, Rigify, and UV Layout.
What are Blender Extensions? Let's Get 'Em!
From Blender version 4.2 LTS onwards, a new system for accessing and organizing add-ons was added - Get Extensions.
It was initially panned as a "hat on a hat" (an unnecessary addition or over-the-top approach to something), but its usefulness should not be underestimated!
You'll find "Get Extensions" in your Preferences just above the Add-Ons tab.

If you've just installed Blender for the first time, you'll be asked if you want to connect to the internet.

Note: You don't have to in order to have this running! It is perfectly ok to save your downloaded extensions to a local server or hard drive space - assign this under the Repositories tab and continue offline.
For the sake of this article, I will Allow Online Access so I can show you how it works. First, all the Add-Ons in the repositories you've chosen to access will populate the list. Note the "Install" buttons right of each Add-On! They are not yet installed on your system.

Why Extensions and Not Add-Ons?
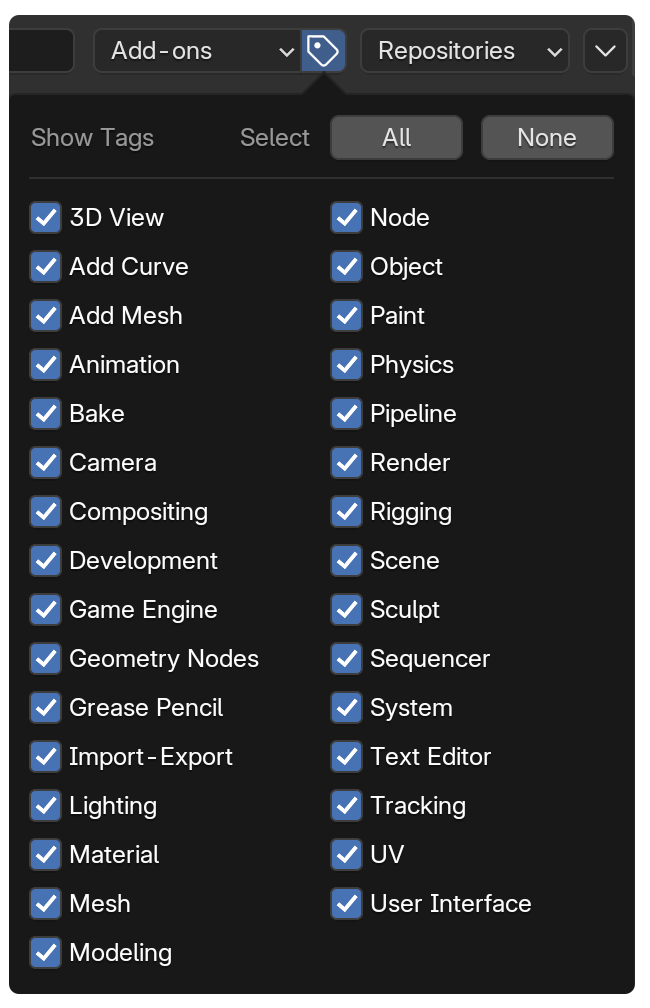
Extensions include Blender themes, which is why they are separate from add-ons, so we'll set our filter for add-ons specifically.

You can filter the Add-Ons you wish to search for by tag - this comes in EXTREMELY handy if you're focusing on an area such as modeling and have no need for Game Engine or Sequencer Add-Ons.
If you see an Add-On, you'd like to try out, first Install it.
y default, installing will also enable the Add-On. In your Add-Ons tab, you'll be able to set up any specific options, and get to using it.

Of course at any time, you can see more about the add-on by clicking on the weblink. You can also brows all the extensions that Blender hosts officially here: Blender Extensions
Sourcing Your Add-Ons From Elsewhere
But what if the Add-On you're after is not in the official repositories? What if you downloaded it from GitHub, or Superhive?
Installing an Add-On still works the same as before, using your "Install from Disk" option! This also exists in the "Get Extensions" tab and works the same way.

Any way you decide to do it, you can download, install and enable Add-Ons. Now, here's my pick for ones you might not know were really useful but ARE:
Five Add-Ons You Probably Didn't Know Were Useful:
1. Right Mouse Navigation:

At first I thought this was there because of the die-hard "Right-Click Select" community who speak in hushed tones in secret meetings about the good old days, but no. It's actually a useful plugin which transforms your Blender navigation into a game-style walk-through!

Why is this useful? Let's say you want to show off your excellent set to a non-Blender user. They know a bit about game controls though, which means you can hand over the reigns and let THEM have a fun time exploring your work!
🍪 Download: Right Mouse Navigation
2. StoryPencil - Storyboard Tools:

Storyboarding is a very useful part of any production workflow. Story Pencil generates all the workspaces and tools you will need to draw and edit a storyboard. It has recenlty been updated for Blender 4.4 so will work fantastically with the new version of Grease Pencil. After activating the Add-On, open a new 2D Animation Preset file, and while in Draw Mode, go to the Draw Menu and select "Set Up Storyboard Session".

🍪 Download: Story Pencil
3. Font Selector:

The process of creating text objects can be more involved than it should be, especially when it comes to choosing a font. This Add-On is EXTREMELY useful! It give you an option to not only view, but preview your selected text object in that font! You can also change it on the fly.
NB: As of Blender 4.4, this Add-On might give you a Register_Class error but it should be fixed soon.
🍪 Download: Font Selector
4. Substance Textures Importer

Workflows and pipelines rarely use a single piece of software, and working with Blender is not different. Substance Designer is stil la very popular tool due to its ease of use and intuitive interface.
It is quite common to see studios use both Blender and Substance together. So interoperability is a priority in these situations. An Add-On such as this makes the importing of Substance files in a wat that Blender can work with a breeze, yet dispite its name, it can handle other file types as well!
Yes - we are aware that Blender is capable of procerudal texture painting - we have two courses on the fundamentals of Materials and Textures to showcase this! Add-Ons like this facilitate existing pipelines in studios where different software is used, and that is why it rates as one of my picks!
🍪 Download: substance textures importer
5. Apply Modifiers With Shape Keys v1.0

Our very own Wayne Dixon knows the terrain when tackling rigging and animation. Not only is he an excellent guide in those areas, but he's also created some Add-Ons of his own which solve common but anoying issues!
Wayne also has a course all about Shape Keys, which showcases some of the issues this Add-On solves.
His latest Add-On may not have a pithy name, but it applies any modifiers to a mesh that has shape keys a task that would take a lot of time to do step-by-step.
🍪 Download: Apply Modifiers With Shape Keys
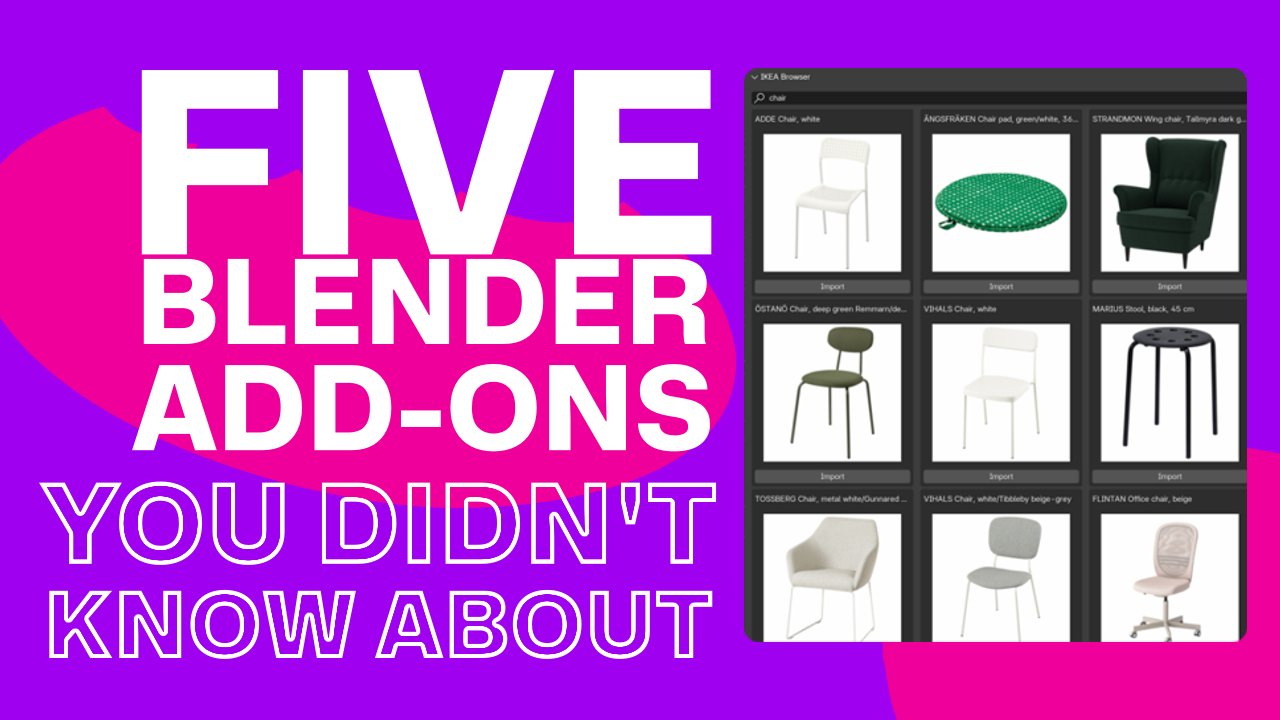
Honorable mention: IKEA Browser

I was not expecting this one to make the cut, but having recently taken several trips to IKEA, I often wondered if there was some sort of virtual way I could lay out a room with its catalogue of products.
Well DANG turns out you can use BLENDER for this!
The premise is deceptively simple: give Blender access to the IKEA catalog of furniture models, and make them searchable in your side panel, then click IMPORT. You can light, position, and even edit your furniture (should you wish) and when you select an item, the IKEA tab gives you some information on it including the price and a handy link to the website.

There are a couple of Caveats to be aware of: The Add-On shows all the products, but not all products have a model associated with them (you will get an error that tells you). Also, the topology is HORRENDOUS (just look at that KALLAX bookshelf - so simple, yet all those Tris!)
So if you're using this to create a scene, be prepared for a bit of clean up!
🍪 Download: IKEA browser
Ready to Add-On to Blender?
Add-Ons can be useful, save you time, or can just be a fun way of using Blender in ways you might not have thought of before. If you want to dive in a little deeper, we just released an awesome course all about scripting your first Add-On!
Happy Blending!
- Paul Caggegi
Great list! I especially appreciate the heads-up on the IKEA Browser's topology—definitely saved me some frustration there. The Right Mouse Navigation also looks like a game-changer for presenting scenes to clients who aren't familiar with Blender's usual shortcuts. Thanks for the practical tips! https://taproad-game.com">TapRoad
This is a really helpful roundup — just the false sun , I had no idea about the Right Mouse Navigation add-on turning Blender into a game-style walkthrough. That alone is worth the read for showing work to non-Blender users. The IKEA Browser mention is hilarious and actually useful, though the topology warning made me laugh. Thanks for putting this together.https://the-false-sun.com/
This is a really helpful roundup — just the false sun , I had no idea about the Right Mouse Navigation add-on turning Blender into a game-style walkthrough. That alone is worth the read for showing work to non-Blender users. The IKEA Browser mention is hilarious and actually useful, though the topology warning made me laugh. Thanks for putting this together, Paul.
My best score in eggy car https://eggycargame.cc is still nowhere near what some players are posting. It's one of those games that looks easy until you actually start playing.
My overall advice is to embrace chaos when playing Ragdoll Drop ( https://ragdolldrop.io/ ). The less controlled the fall, the more damage and fun you’ll get out of it.
I recently tried a writing service for my academic needs, and I was thoroughly impressed! The team delivered a high-quality research paper that exceeded my expectations. The depth of analysis and attention to detail were remarkable, making my work stand out. If you're in need of professional assistance, I highly recommend this service for https://researchpaperswriters.com/ High-quality research paper writing!
Each topic is presented with excellent clarity and transparency, making the information easy to grasp. The content is insightful and highly valuable, offering practical knowledge that genuinely benefits readers. Your website stands out as a reliable resource for anyone looking to gain a deeper understanding of the subject. I truly appreciate the effort and thoughtfulness reflected throughout the work. It is not only informative but also engaging, well-structured, and very user-friendly, making the overall experience enjoyable and worthwhile. https://in.ojolit.com/call-girls/delhi/laxmi-nagar/
I really appreciate your fresh perspective and how willing you are to help when things get busy. https://carmatec.qa