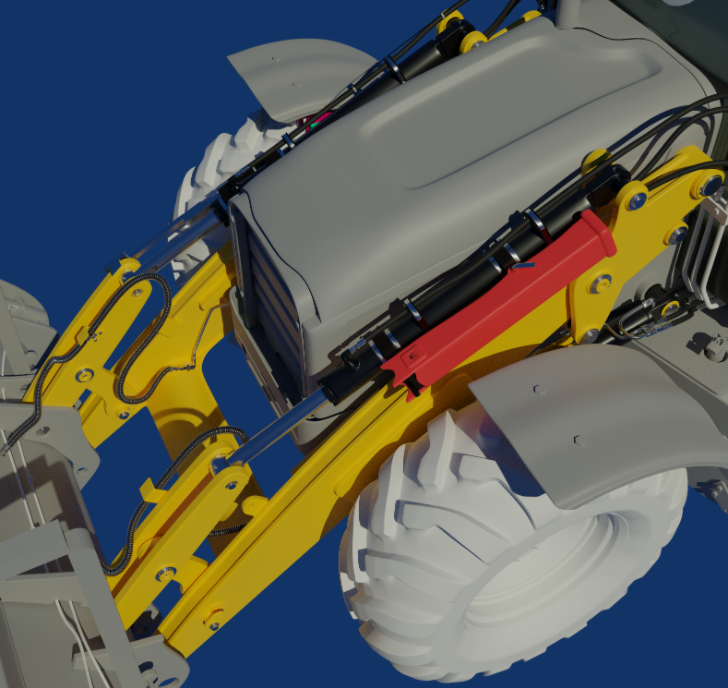
Progress, Questions, and Comments for Loader Arms and Interior Chair on the DOG 434E Backhoe Loader posted here:
I had loads of jubilee clips for the engine. spent ages thinking about how to do this. I just fudged them temporarily, with the intention of revisiting them, but considering they will probably hardly notice. Now you shared this I may give it go.
While working on my loader arm hydraulics I cam across this helpful forum posting that was super cool regarding bezier curves. I thought I would share it just for information purposes:
https://blender.stackexchange.com/questions/58564/curve-bevel-function-scale
Things are coming together. I think I will just make it in time for the live stream. Got a few more pieces to go......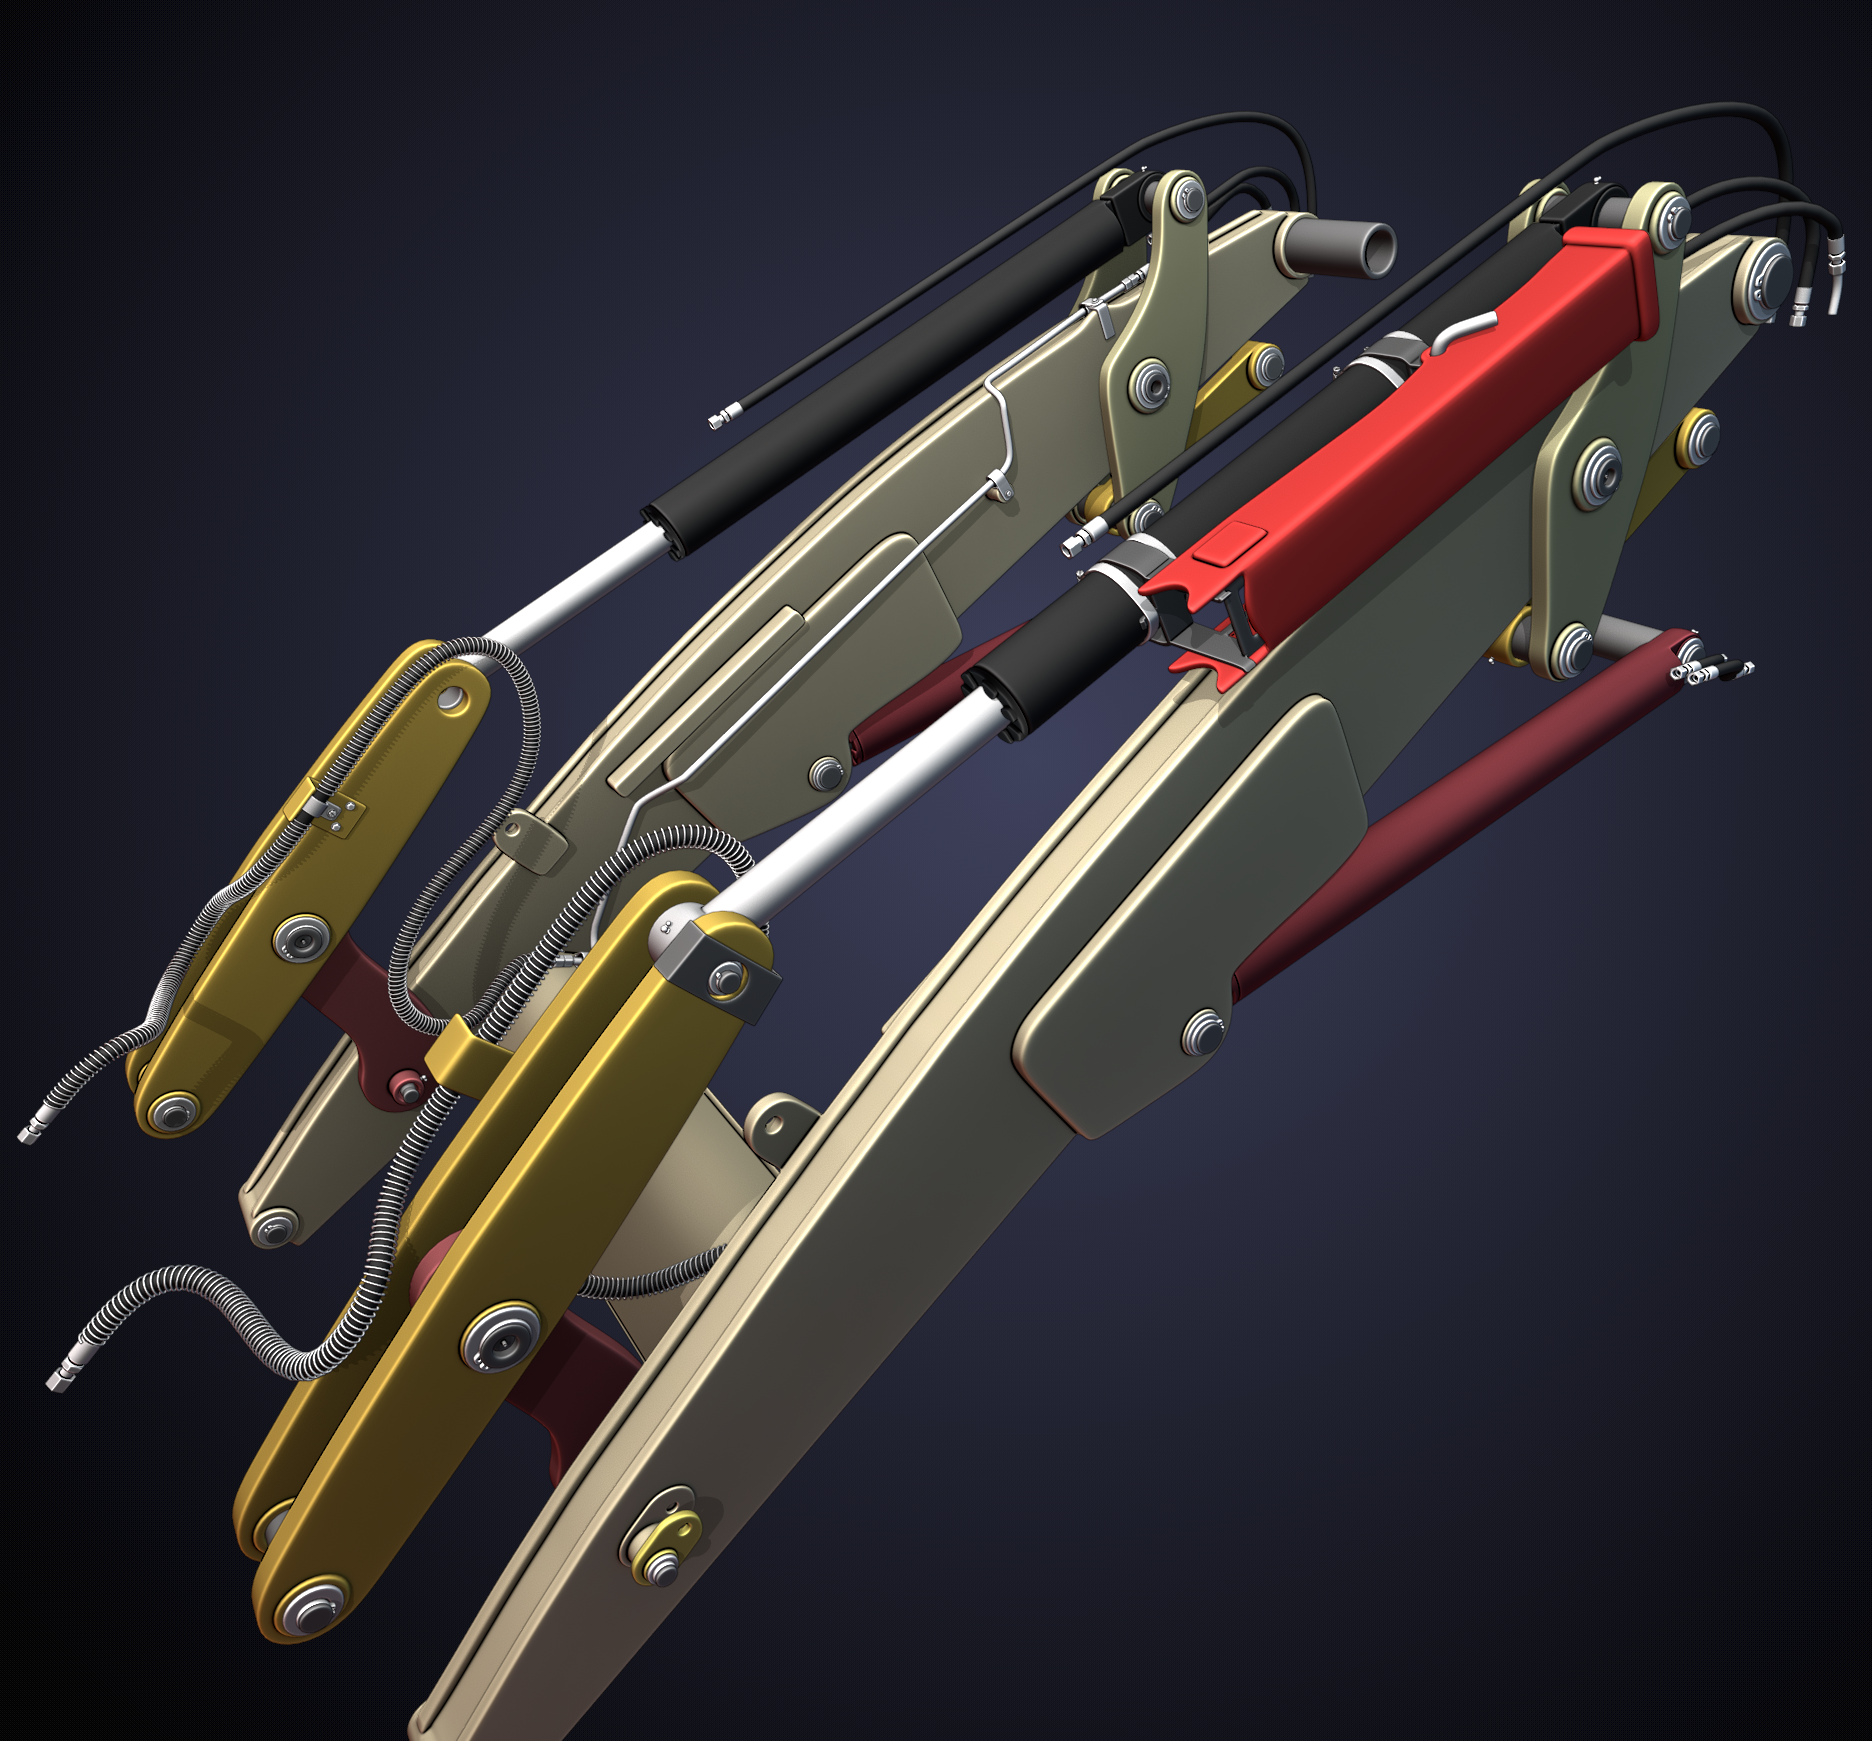
Darn you Mandalorian, and Star Wars. Never watch a series while trying to model haha.
I didn't get as much done as I wanted today but I did finish all of my hyd_piston connections finally. The feed versus return fittings were quite different. One is an actual fitting and the other is welded to the piston. Made for a unique look though.
you can see them on the bottom lift piston cylinder housing. All of my tubing has connections now. Yay! I just need to model in some supports and then the level sensor on the right upper piston housing. It's a shame that piece ins't more eye appealing. I feel like it will make my assembly look bad but the reference dictates it to be ugly haha. Coming soon.
I threw a shiny metal shader matcap on just to see how it is looking under different shading.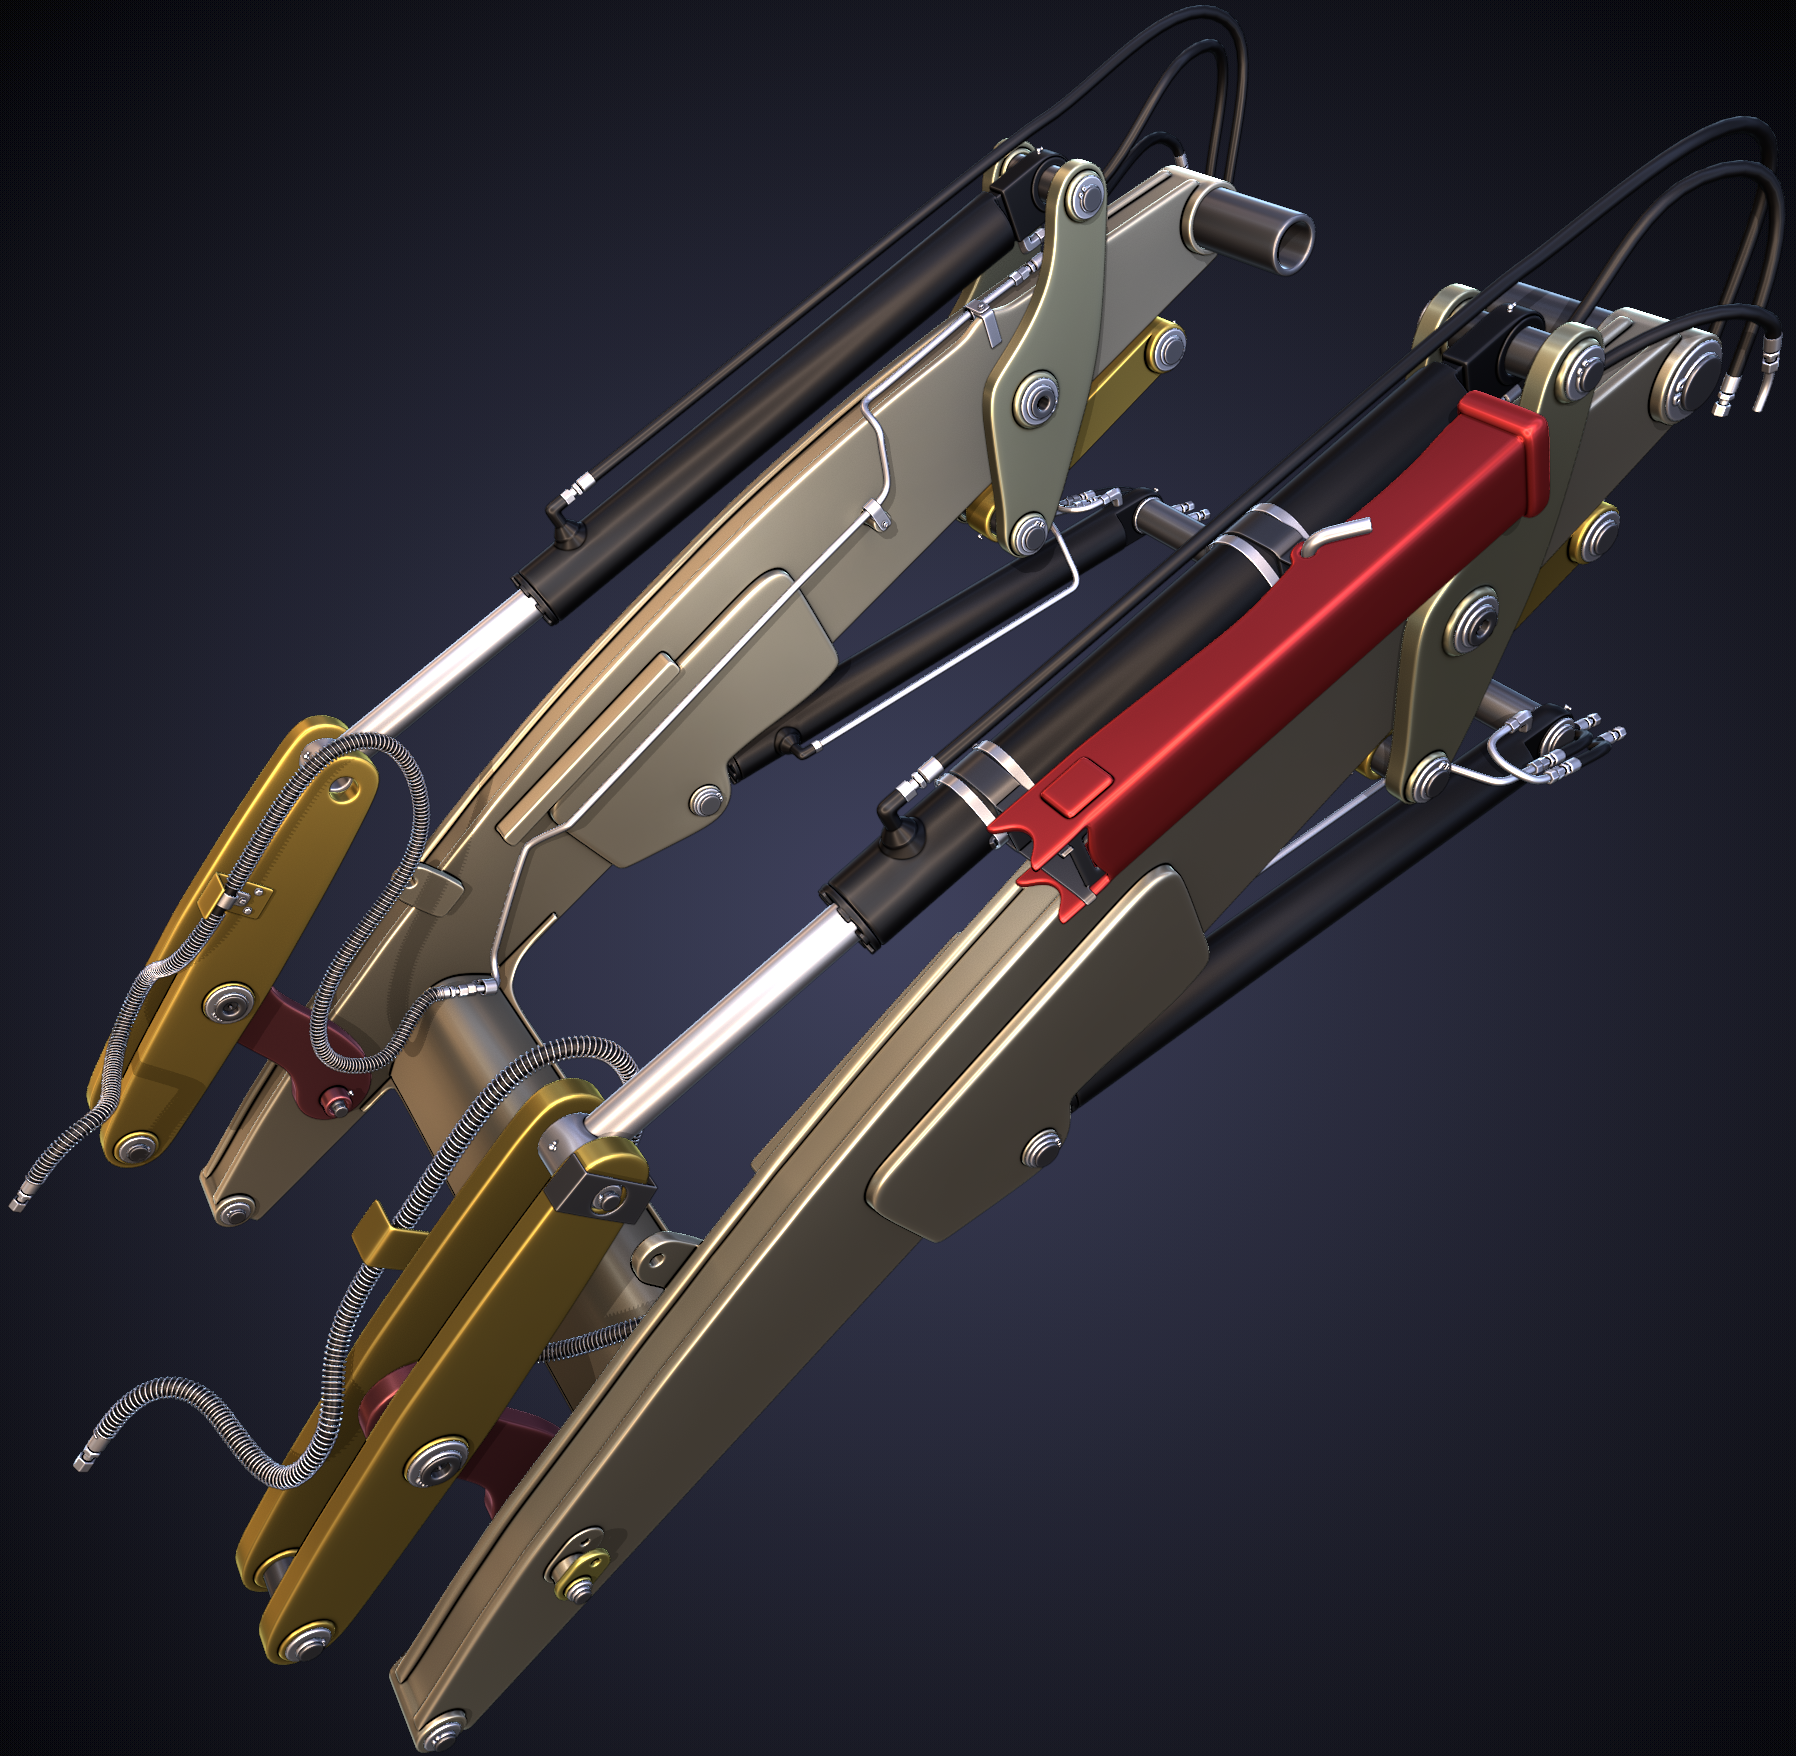
Here comes the "ugly stick" haha.
Got some more of the hydraulic hose supports completed, which I am quite happy about. Still not done with the ugly stick, gotta work on sensor pieces tomorrow, but I should finish the modeling side this weekend, huzzah! It is finally starting to look a little more A-symmetrical, which helps keep the eyes moving around.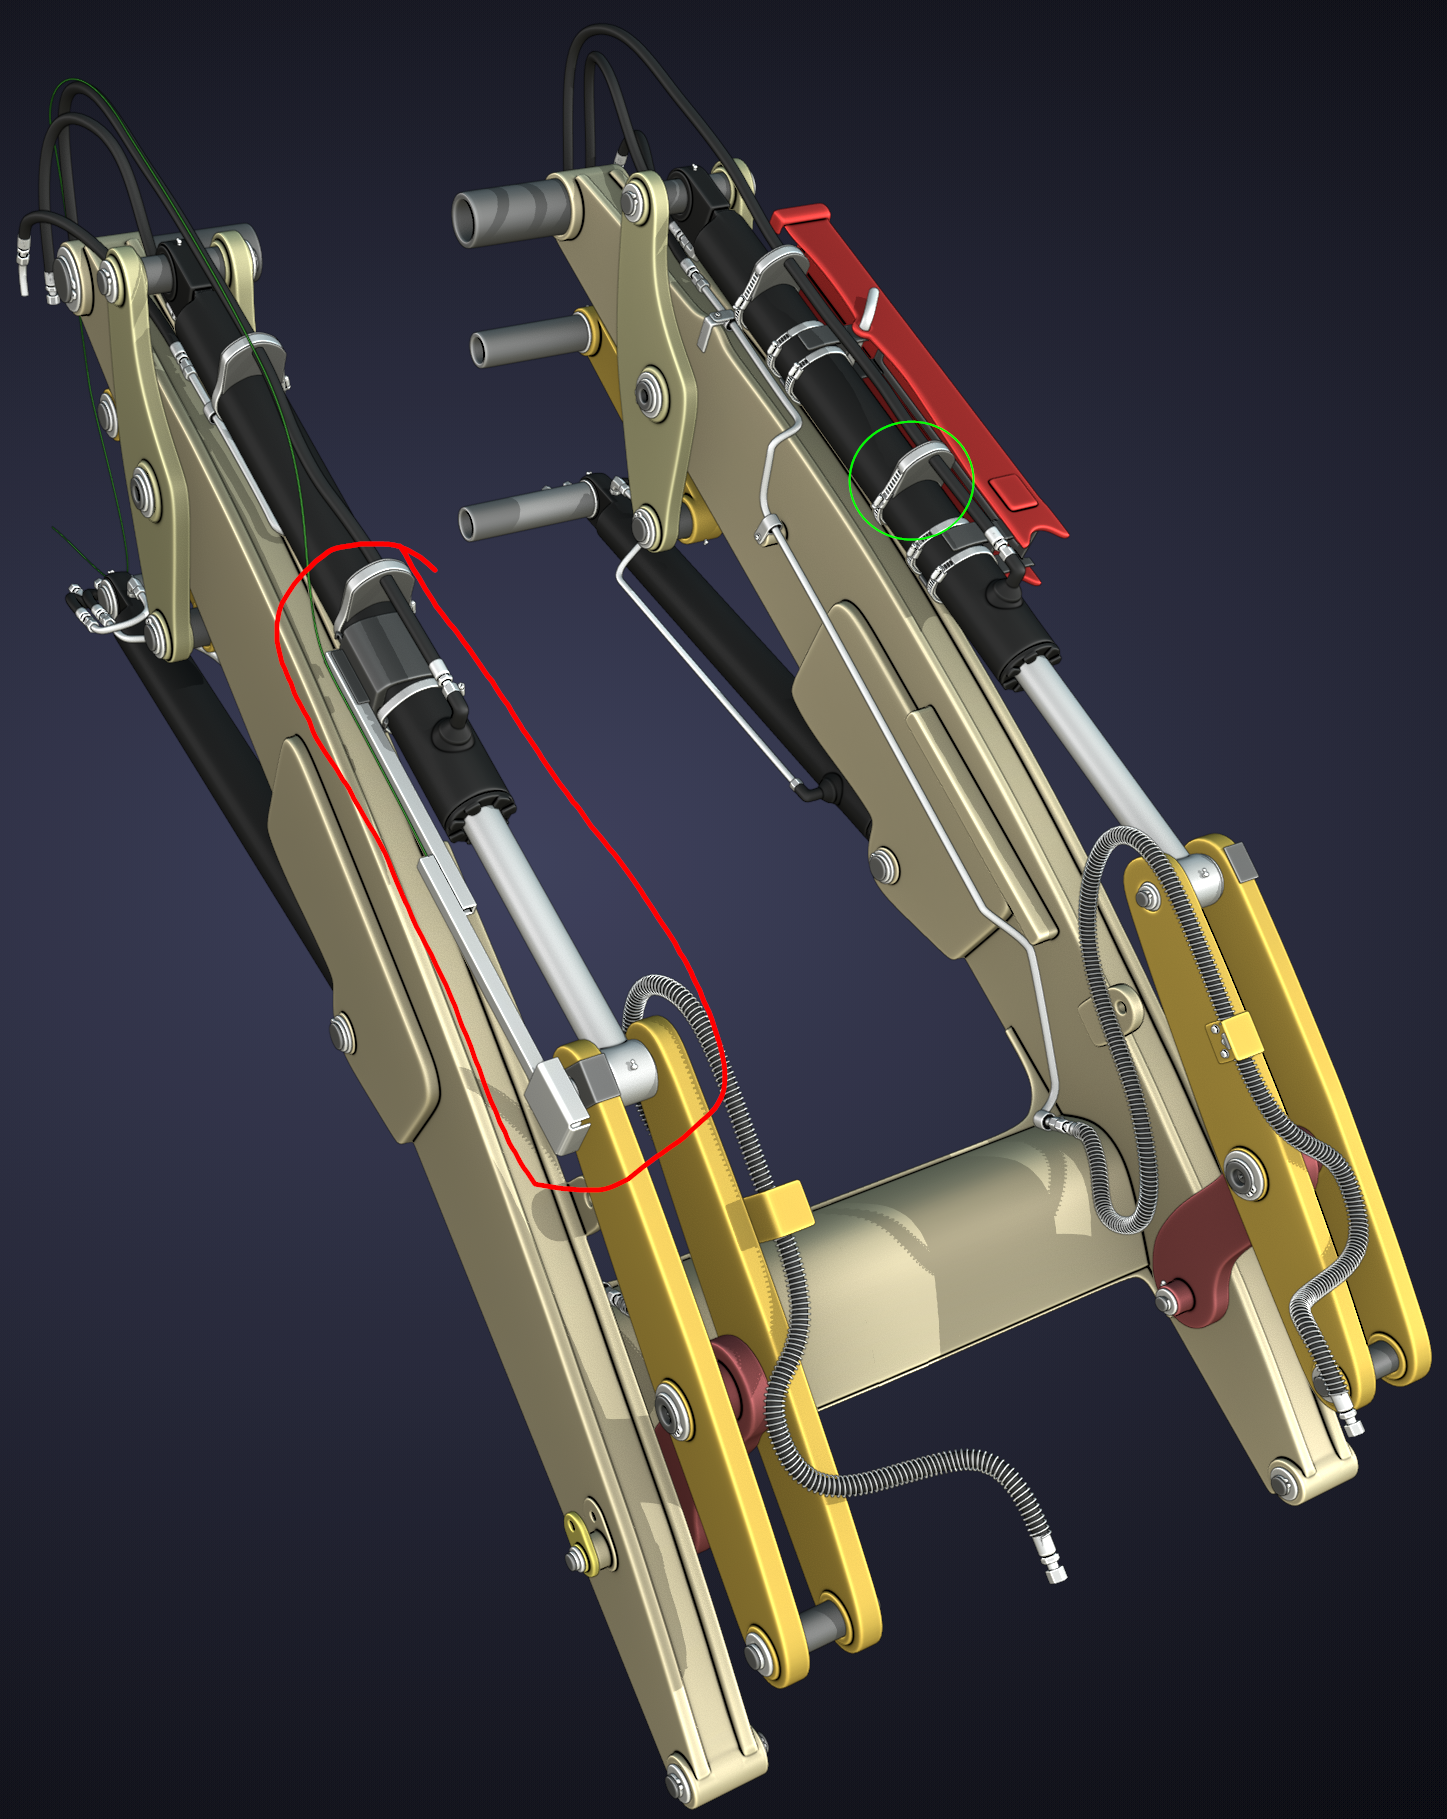
I made some zip ties tonight for the electrical connector. Using mainly an array modifier with a Start and End Cap and then attached it to a bezier curve. I actually got the dimensions from a zip ties bundle being sold from amazon. They had a couple of pictures of calipers on them and dimensions called out. Is it sad I am geeking out on zip ties??? Lol.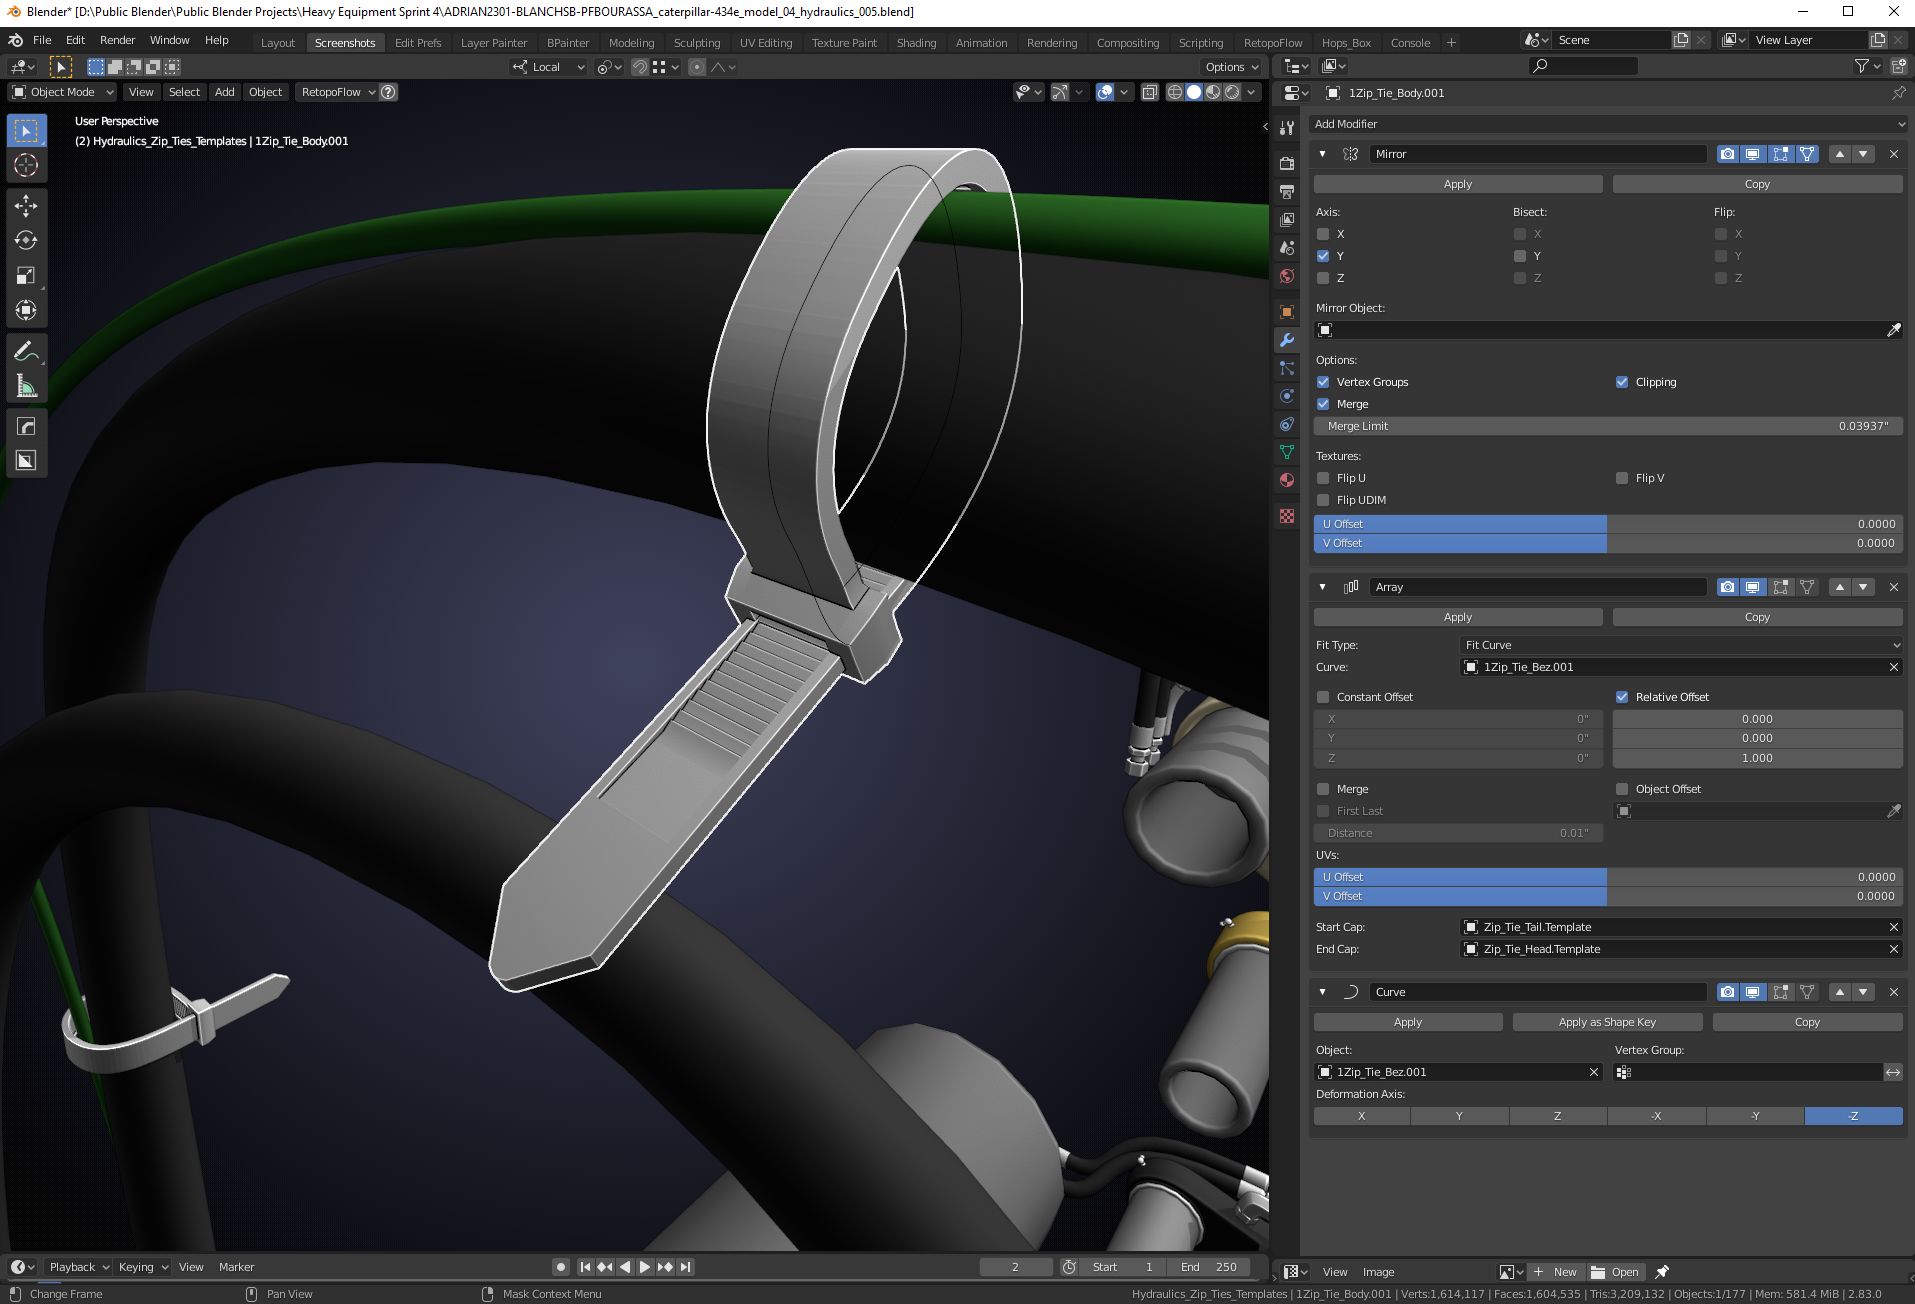
They don't do a whole heck of a lot and they need a few holding edges but the proof of concept is there. Makes it super easy to tighten them too which is a nice touch. They actually act kinda like zip ties!
Weekend work completed.
Now granted the zip ties don't really appear completely in the references but I am not overly comfortable doing cloth style wire covers yet, and that is zip tied to the hydraulic hoses. So I am zip-tying the wire to the hose for now and taking my artistic liberty to do so. I cleaned up the topology on the zip tie and made it so that the head and tail for the array modifier all mesh together well and take a sub-d modifier like a champ. I have more edge loops than I wanted but I got enough done to get it looking good because of all of the teeth and clip detail.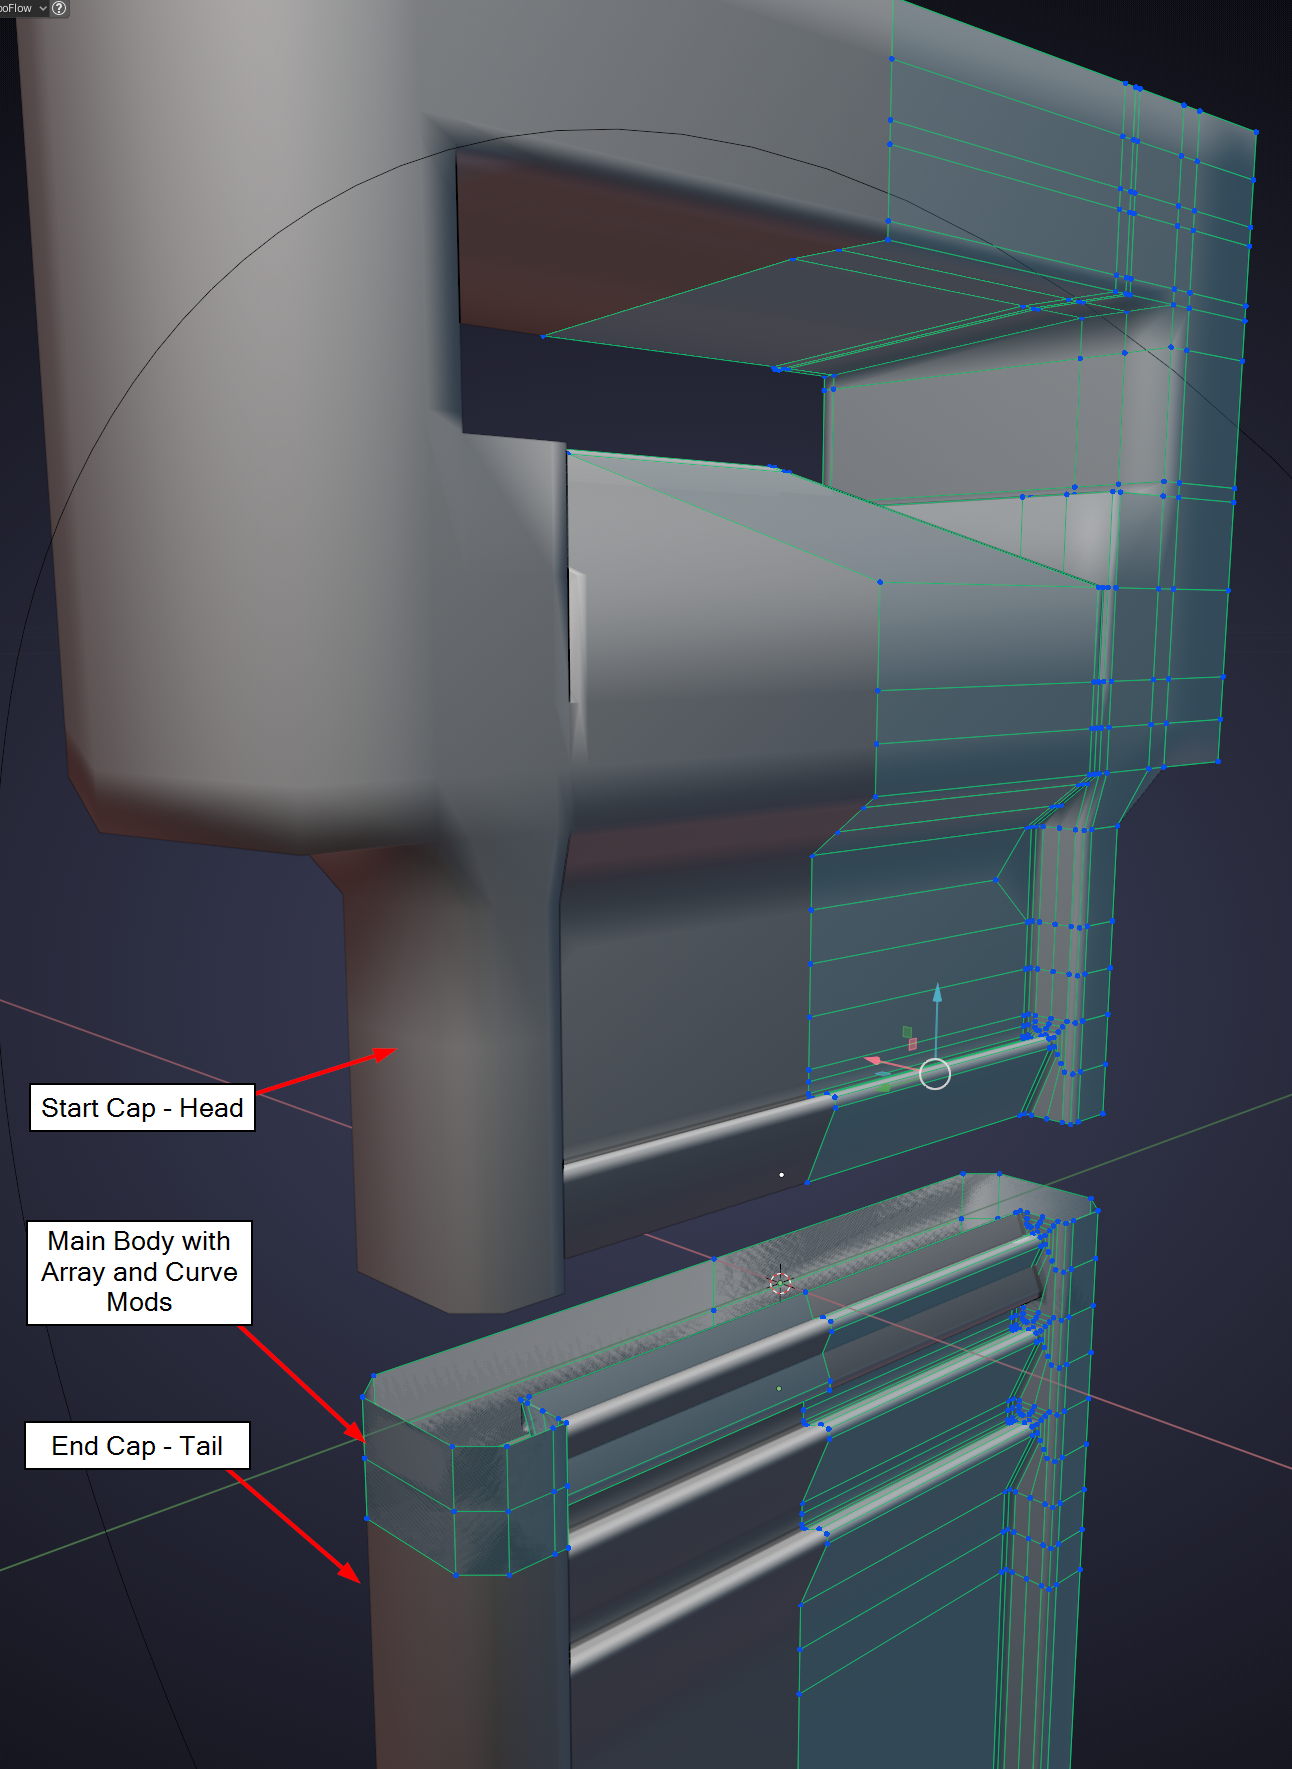
Then I plastered them all over the wire. I had a couple of interesting issues with the curve modifier. I could not get the zip tie to immediately follow the curve like it should have on the Z axis until I rotated the zip tie in object mode by -180 on the Y and Z axis. The it followed the curve exactly how I envisioned it? I guess I want to know what I am doing wrong for next time. It works but the transform must that that way for the zip tie mesh in order for it to follow.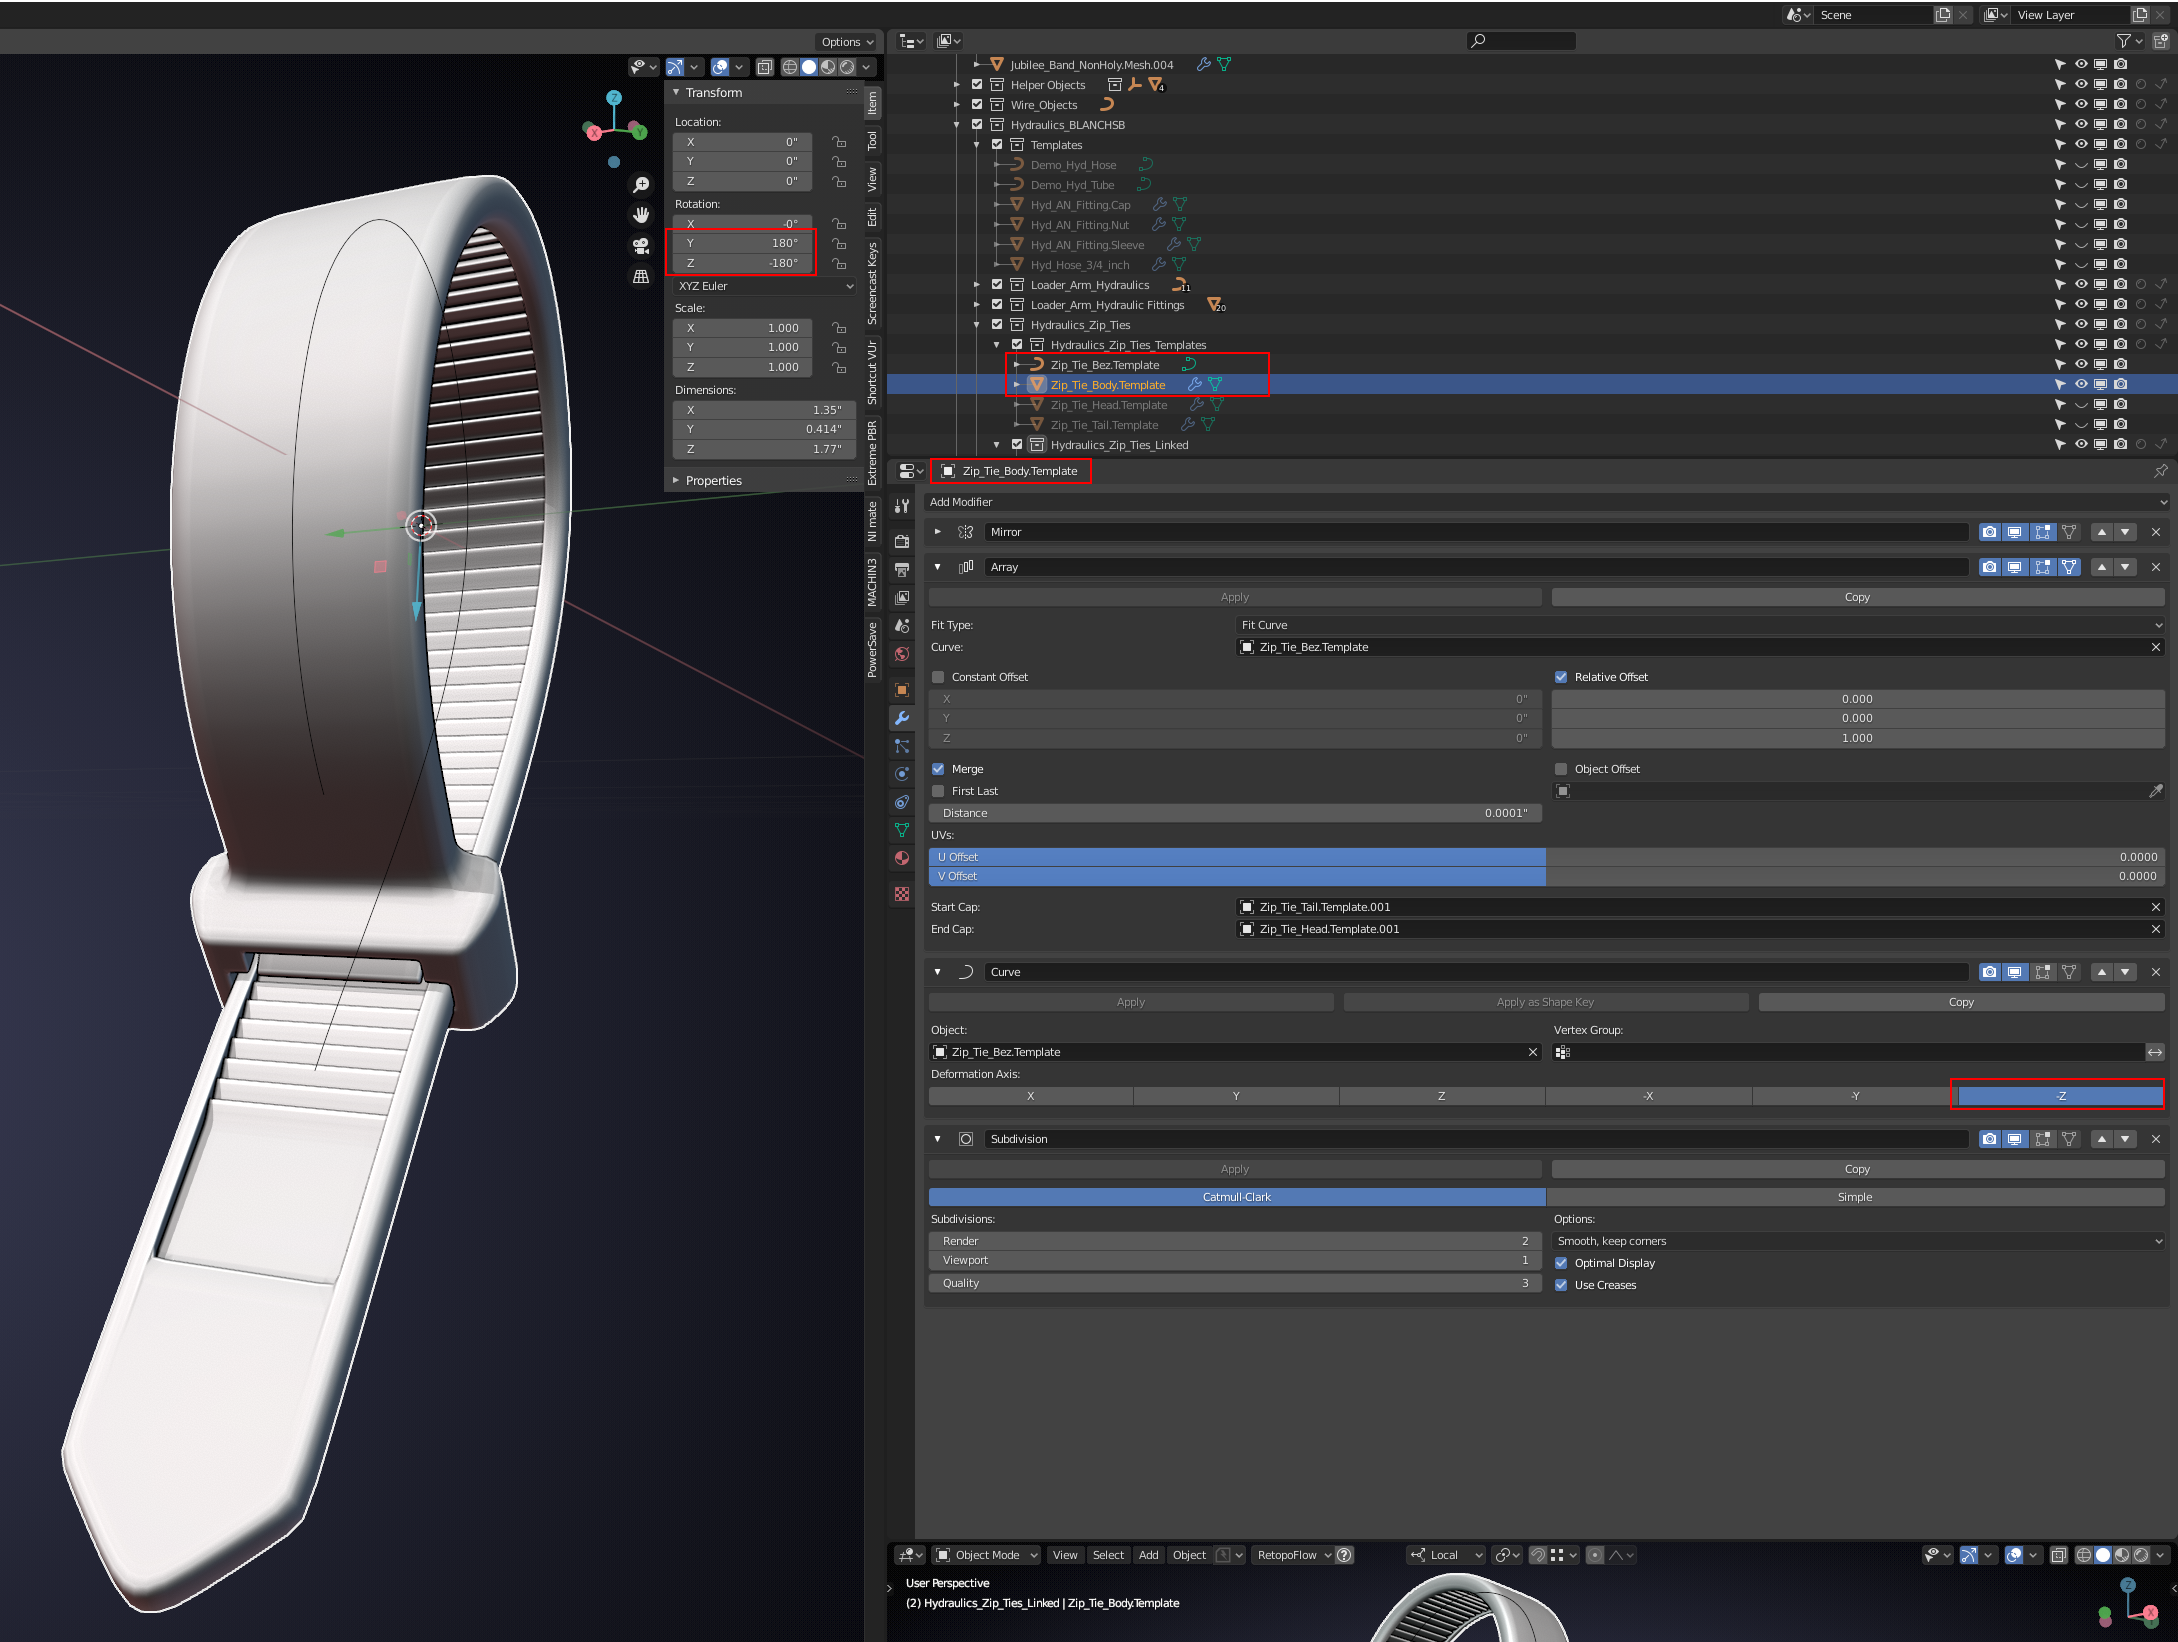
Another thing. As long as I move the curve and mesh together while in object mode I don't have to worry about it coming unglued from the curve. Is this the way I should be doing it?
Final picture of zip tie work: Each one is following a unique curve.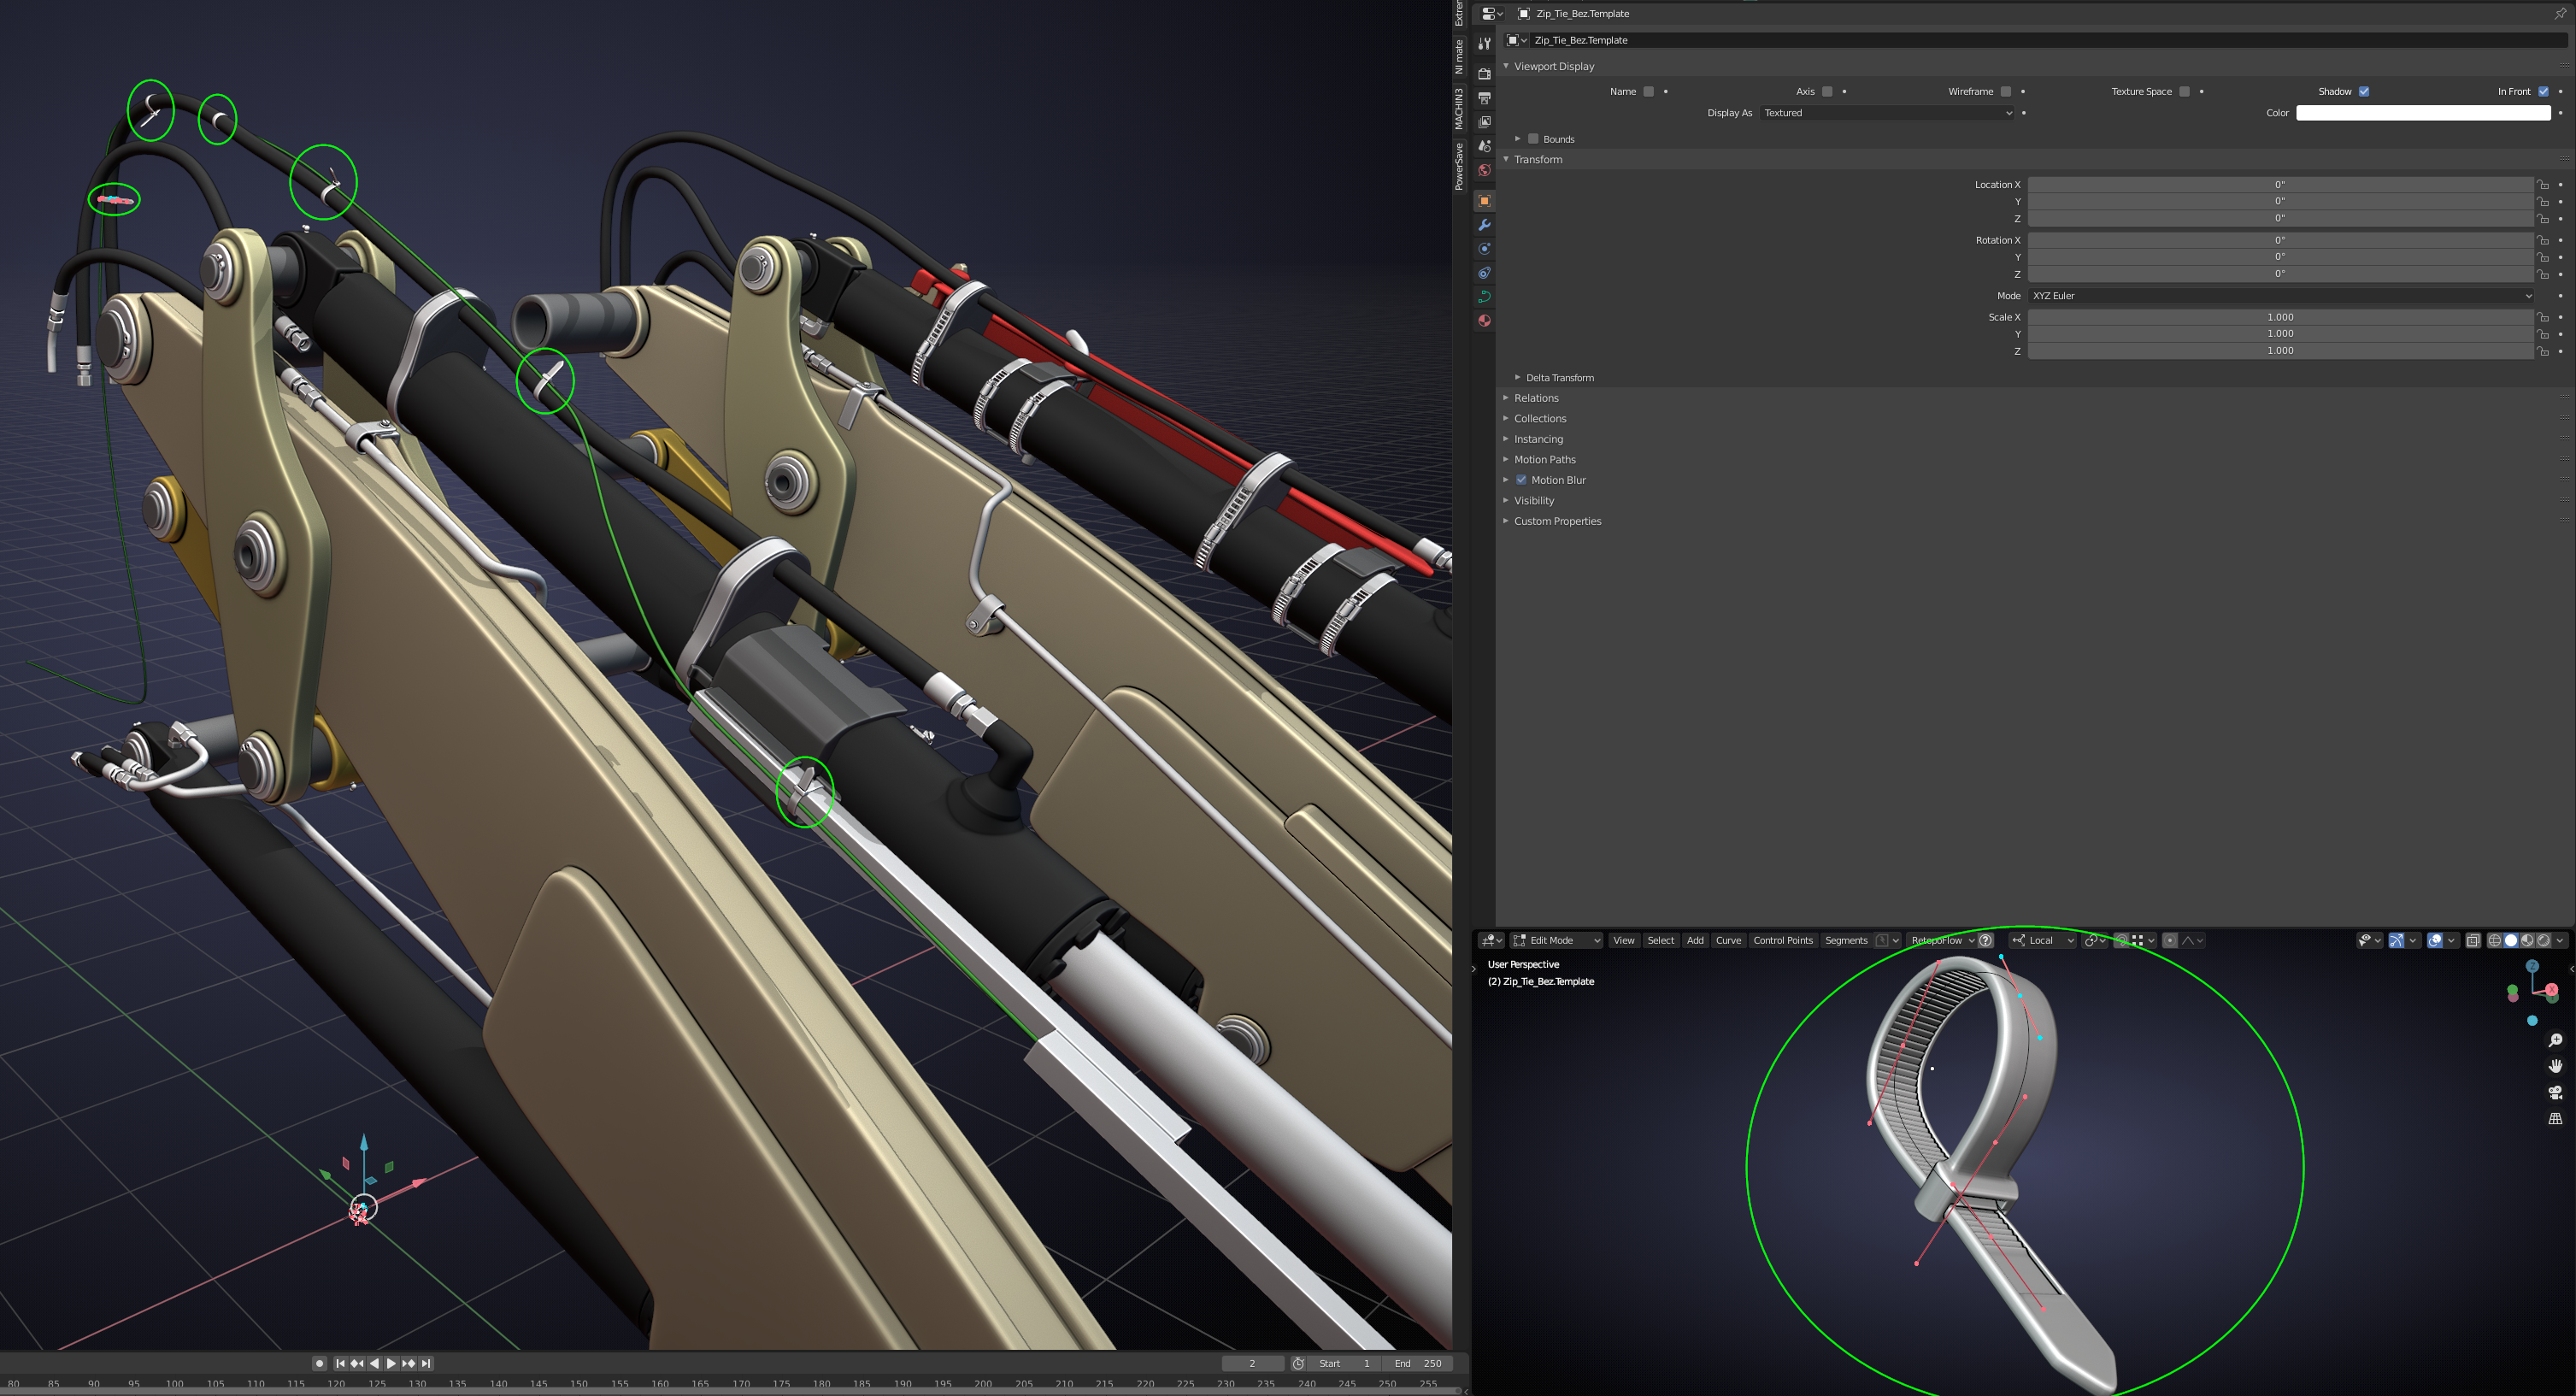
Hi Shawn, about the Curve Modifier, which can indeed give unexpected results:
To set this up correctly, you should make sure that the object's Origin is at the Center of it's Geometry and that it is at the same position as the Curve's Origin. Let's start with no rotations for both Object and Curve.
Now with a Curve Modifier, the Object should be at the start of the Curve and when you move the Object in the direction of the Deform Axis, then it follows the Curve like a train following the train tracks. That's easy enough, right?
But the Deform Axis also positions the Object so, that the Objects (Local) Axis that is the same as the Deform Axis points in the direction of the Curve's (Local) X-axis. As an example, when the Deform Axis is set to -Z, then when moving the Object in (Global) -Z direction, it will follow the Curve and the Object's (Local) -Z-axis is pointing in the direction of the Curve's (Local) X-axis...
A bit confusing, but still sort of understandable I hope.
Now, when you start rotating the Curve (in Object Mode) around it's X-axis, then the Object also rotates along it's (the Object's!) own (Local) X-axis. Similarly for the other axes...
Because the Curve was probably already rotated, the behavior would have been a complete mystery, especially if you are not aware of the above 'rules';)
I hope this is clear, as this is a pictureless explanation, which I am not used to do, but I couldn't think of any pictures that would make this any clearer...
I can definitely do that @theluthier! I just need to re-read ![]() spikeyxxx explanation above another 10 times so I can wrap my head around it before I pass on my bad habits using the curve modifier lol. Once I get it set up properly then I can do a nice little recording. I probably won't re-make the entire zip tie but I can go over using the 3 pieces to get a decent looking final result that moves and behaves quite nicely.
spikeyxxx explanation above another 10 times so I can wrap my head around it before I pass on my bad habits using the curve modifier lol. Once I get it set up properly then I can do a nice little recording. I probably won't re-make the entire zip tie but I can go over using the 3 pieces to get a decent looking final result that moves and behaves quite nicely.
I'll make that my project for this week.
On a sadder note: my initial rigging has fallen behind from all of my additional modeling changes. It served it's purpose but I am really itching to re-rig everything proper once the model is complete. And this time using bones would be in order. I don't want to do that until you say everything is complete on our modeling side with our assemblies though. My only hang-up is the hydraulic hoses will need to dynamically bend when the assembly. Is there a good resource for me to go learn where I can figure this part out?
I will test out your explanation on simple elements first ![]() spikeyxxx and play around with just an object and it's curve modifier until I can wrap my head around it better. I think I am understanding a little more of your explanation but I am feeling like I need to read a little, then do what you say to see the result, then rinse and repeat.
spikeyxxx and play around with just an object and it's curve modifier until I can wrap my head around it better. I think I am understanding a little more of your explanation but I am feeling like I need to read a little, then do what you say to see the result, then rinse and repeat.
To add to the complexity I will add the array after I understand this better.
Isn't it funny how you can make something that looks decent and acts fairly decent without really understanding how it works on an intimate level and just pushing buttons until it looks how you imagined it should?!? haha, yup that is the blender story of my life. It's time for me to demistify the curve mod once and for all. It's time to read the manual too. I'll post back with my findings. And maybe even a nice video again!
My only hang-up is the hydraulic hoses will need to dynamically bend
That is something I tried to do with this project: https://cgcookie.com/u/spikeyxxx/projects/bee-hicle and I couldn't do it. It is possible to hook the ends of the hoses (being Curves) to Empties for instance, but then there wouldn't be any interpolation between the ends...
I guess this is a case for @waylow 'rigging curves' ...
I do remember seeing an old CGCookie tutorial on rigging a telephone cord: https://www.youtube.com/watch?v=raQs9f4x0gw
maybe that technique can be used here? I'll have to re-watch that...
I'll try to watch that after my zip tie project is complete. Thanks for all of the resources ![]() spikeyxxx
spikeyxxx
You don't need empties anymore, you can rig a curve with bones.
It's the same technique but 'hook' them to a control bone instead of an empty. That way they part of the same armature object and easily animated (rather than being seperate objects with non zero rest positions)
I did a really quick demo if this in the second Rigging stream earlier this year.
I can't remember the time stamp but here's the link https://cgcookie.com/live_streams/blender-rigging-tid-bits-2
(NOTE: I haven't read the whole thread but some of the images are looking flipping fantastic. I'm just mentioning this in case I'm way off base with my answer)
I can work with @waylow on the loader arm assembly if that helps. I actually want to learn this part of the workflow. He and ![]() spikeyxxx are already guiding the path. I doubt I’ll have it rigged by the next live stream but perhaps that can be my next assignment @theluthier ?
spikeyxxx are already guiding the path. I doubt I’ll have it rigged by the next live stream but perhaps that can be my next assignment @theluthier ?
Hey Shawn, as @waylow said this could be done with bones, I remembered that we have Bendy Bones in Blender now, so that might be a way to rig the hoses...
There are many tutorials about how to use Bendy Bones... here's one by Jayanam: https://www.youtube.com/watch?v=BsJ3Grq_3GM
It's made with 2.78 but it still works.