Starting in March 2020, I began a large stream project to model a comprehensive, highly-detailed Caterpillar 434E backhoe. Please watch the first stream (first 3 minutes of abridged version at least) for an overview.
It's a straight-forward project of building a complex model over an extended period of time. The spin on the project is that I want your help to accomplish it! If I build some parts and you build some parts, we will finish this thing much quicker. Plus the contribution format will include reviews, the potential of having your piece(s) assimilated into the final model. Not to mention large quantities of XP are at stake 🤑
NOTE: This is an involved project reserved for Citizen members.

The general idea is that I kickoff stages of the project via live stream, which is typically once per month. For the time in between streams, you choose a piece of the backhoe and apply what you learned from the stream to that piece. For example, the first stream covered initial block out. So between stream 1 and stream 2, your job is to pick a piece and block it out.
This is the repeating protocol for each Assignment Period (between-streams):
I will reply to this thread after each stream with a [big] assignment post denoted by a 📣 emoji in the title. There I will clarify instructions about each Assignment Period.
We will centralize our collaborative communication between the streams and this thread. Ask any and all questions pertaining to the Backhoe project here.
I will give the Philips head a go, but I can tell you already that Shrinkwrapping is not the way to go.
My guess is that it will be easiest to also not use a Subsurf on it, because you'll be creating so much geometry with all the holding edges and thinking of the size of those screws it's probably better to keep it simple if you know what I mean...
This is what I would do, unless it's for a hero shot:
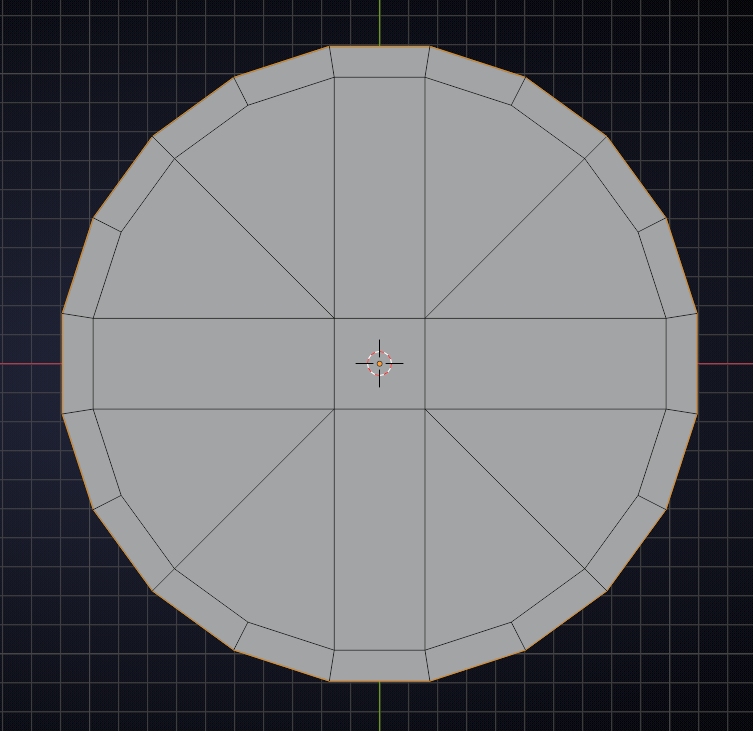
and then extrude and scale the middle cross to get something like this:
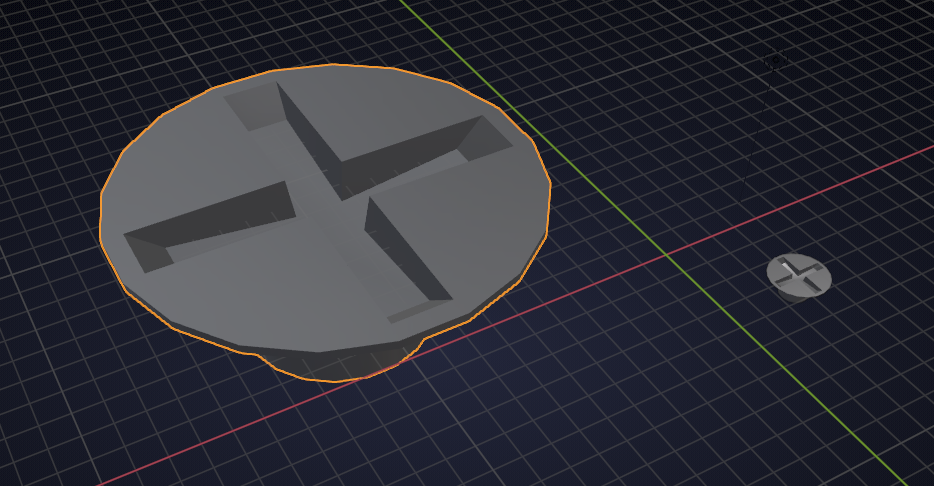
You can still add some bevels if necessary, of course.
This also allows for making it into a 'pozidriv' (had to look up that name):
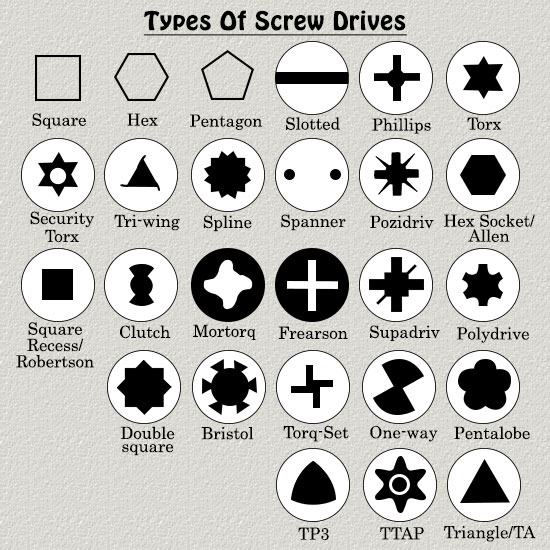
Some homework for the bored...(Guess I actually made a Frearson there...)
![]() spikeyxxx Absolutely we should use your wheels. I just saved a SPIKEYXXX_dog-434e_wheels_MASTER.blend. However it appears that they don't align with the rear hubs. Spikey, if you could duplicate the front wheels to the back and
spikeyxxx Absolutely we should use your wheels. I just saved a SPIKEYXXX_dog-434e_wheels_MASTER.blend. However it appears that they don't align with the rear hubs. Spikey, if you could duplicate the front wheels to the back and ![]() duerer if you could adjust your axle to align with Spikey's wheels, I'll link them into the master assembly and check that off the list!
duerer if you could adjust your axle to align with Spikey's wheels, I'll link them into the master assembly and check that off the list!
Lol, nice catch Adrian! Yeah I wanted to put my brand on my personal masterpiece. It is probably the best work I have done and wanted to etch it for all time.
We want to be able to tell your bell logo from afar so I would say a simple version of your picture, or even a CowBell! or the Liberty Bell, or the BellWorthy Bell. Put your own flare on it!
Definitely needs to be on the engine and the stereo though.
@theluthier and ![]() duerer duplicated my front wheels.
duerer duplicated my front wheels.
Do not take my word for it that they are correctly placed though! Please double check that! According to that basic blueprint drawing they should be more inward. I know I had a very good reason for placing them the way they are, but I can't remember what drawing I used for that. I think I might have used that blueprint and adjusted the scale of the drawing according to some known measurements from the official brochure...
Anyway: check and double-check before making any complicated adjustments!
![]() spikeyxxx You're right with avoiding the "Subsurf Modifier" because handling the holding edges so that they don't distort you the round head rim is difficult if not impossible. So, given that a screws manufacturer would please you to model that screw for a close-up shot, you would simply double to a 40-vertices-circle?
spikeyxxx You're right with avoiding the "Subsurf Modifier" because handling the holding edges so that they don't distort you the round head rim is difficult if not impossible. So, given that a screws manufacturer would please you to model that screw for a close-up shot, you would simply double to a 40-vertices-circle?
PS: I'm wondering what the special benefits oft the different screw head types are from the overview presented by ![]() spikeyxxx 🤔?
spikeyxxx 🤔?
According to the screw types sheet above, a Philips head should be more something like:
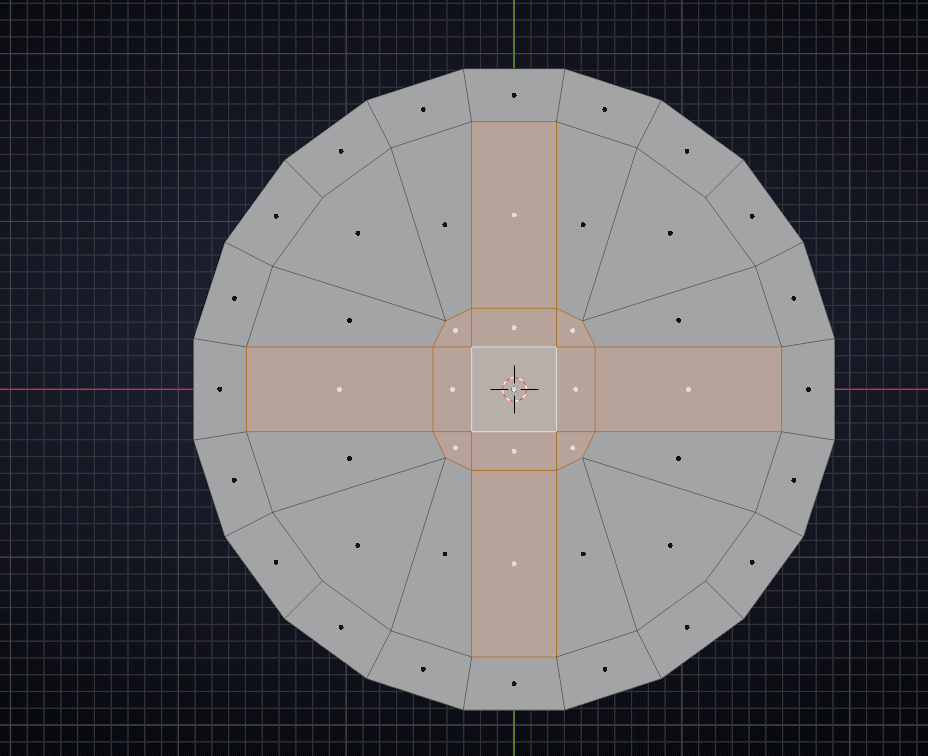
and:
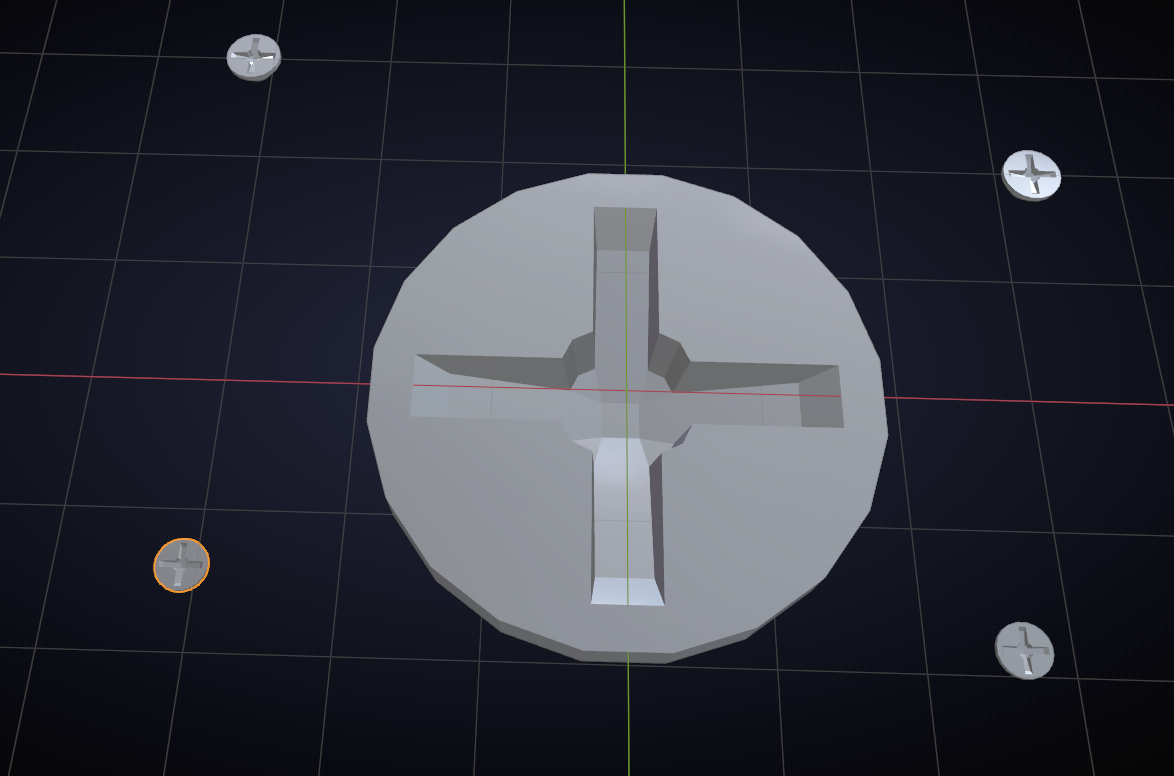
Hm, I'm wondering which Philip gave his name for this screw 😉 or was it the Dutch company Philips 🤔?
@theluthier just saw that you made a Wheels file for me in the Drive..Put my wheels in there and removed them from my axle file, so we don't get confused;)
That is a great update Spikey. I was going to mention the circular center but you beat me to it. What an elegant design choice. If I were trying to tackle these fasteners on your chart I would work from the center out and the add a circle to the outside and scroll the number of sides until the optimal option becomes available for an all-quad topology.
Interestingly enough there is even engineering behind the design of screw heads such as the Phillips.
The Cross with the circle in the center actually helps the "driver" tool disengage when appropriate torque has been applied (i.e. the fastener has touched down and should not turn anymore).
That is often why when you tighten a Phillips fastener your screw driver pulls out without you intending it to when you get it tight. It's meant to prevent you over-torquing the head and breaking it off. Unfortunately with dirty/old screws this becomes a pain point as it gets tight or cross threaded and you end up fighting the fastener all the way down until there is not much of the head left. (especially with drills that re-engage on the head multiple times and wear away the contact surfaces haha.)
My least favorite fastener heads are the security kind. I always get in there with a small flat-head screw driver and break that dumb center circle stud off, haha. Then I can go about my work that someone else wants me to pay them to do, muahaha.
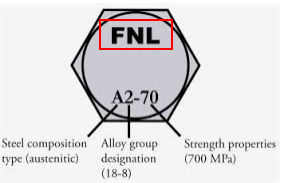
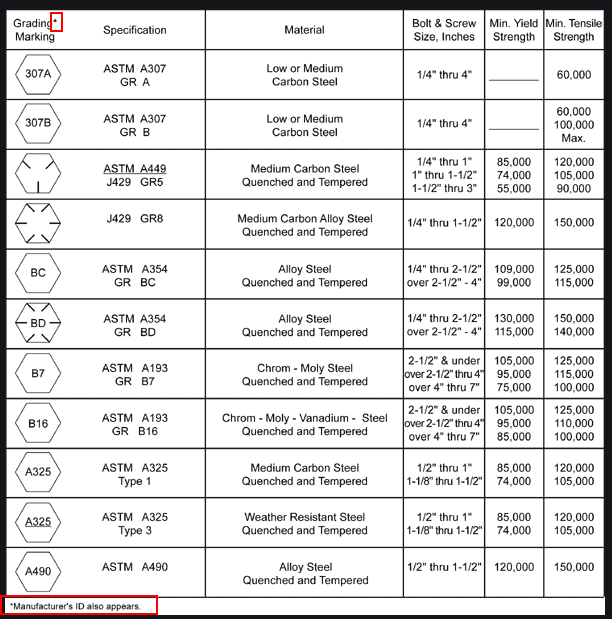
Another fun fact: Most bolt and fastener makers stamp their metal with their foundry initials or insignia. Bolts also have lines or symbols on their heads that tell you about their material
Like Kent said: When you begin modeling something you end up learning a whole heck of a lot about it. (not that we probably need this level of detail) but I thought it would be fun to share. I deal with this kind of stuff at work when people try to use the wrong material for a job it was not intended for (not my every day cup of tea but we come across it from time to time)..
Yes ![]() duerer I noticed you here at 8am, we all arrive at 8am ESP.
duerer I noticed you here at 8am, we all arrive at 8am ESP.
The lines you modelled I think are hydraulics for power steering, the other lines that go to the cab are probably electrical cable for a sensor or something. On your last image above they attach to the left (just in shot at the top of the image) above the round bit. The middle image of the three above are of front and rear axles and are completely different, Before this project I would have modelled one axle and duplicated it for the other, how wrong would that be. But as you can tell I'm no expert. As mentioned previously how far do you go, is it absolutely necessary??
![]() spikeyxxx your lines you mentioned before are the hydraulics and are positioned correctly. You probably have sensor wires some where also, a machine like this DOG will have sensors all over the place, not just the normal engine monitoring on a normal road vehicle.
spikeyxxx your lines you mentioned before are the hydraulics and are positioned correctly. You probably have sensor wires some where also, a machine like this DOG will have sensors all over the place, not just the normal engine monitoring on a normal road vehicle.
I am as I said no expert, but I have worked on cars, stripped engines and that sort of stuff in my youth, so I know what I am looking at but couldn't tell you technical terms for everything.
I think that's what helped in modelling the engine, when I started it I was more concerned with my modelling skills than the engine itself. Knowing something about what you are modelling definitely helps. As @theluthier would agree when sculpting a human head, knowing the anatomy of a face will help enormously. I would say the same for hard surface modelling, I would say it's not vital to know everything but the more you know how it works or what it does will improve the process and understanding of how it all fits together, especially on a project like this.
Fascinating.
Here is my version of a screw, above the stereo.
And I did use subsurf.....
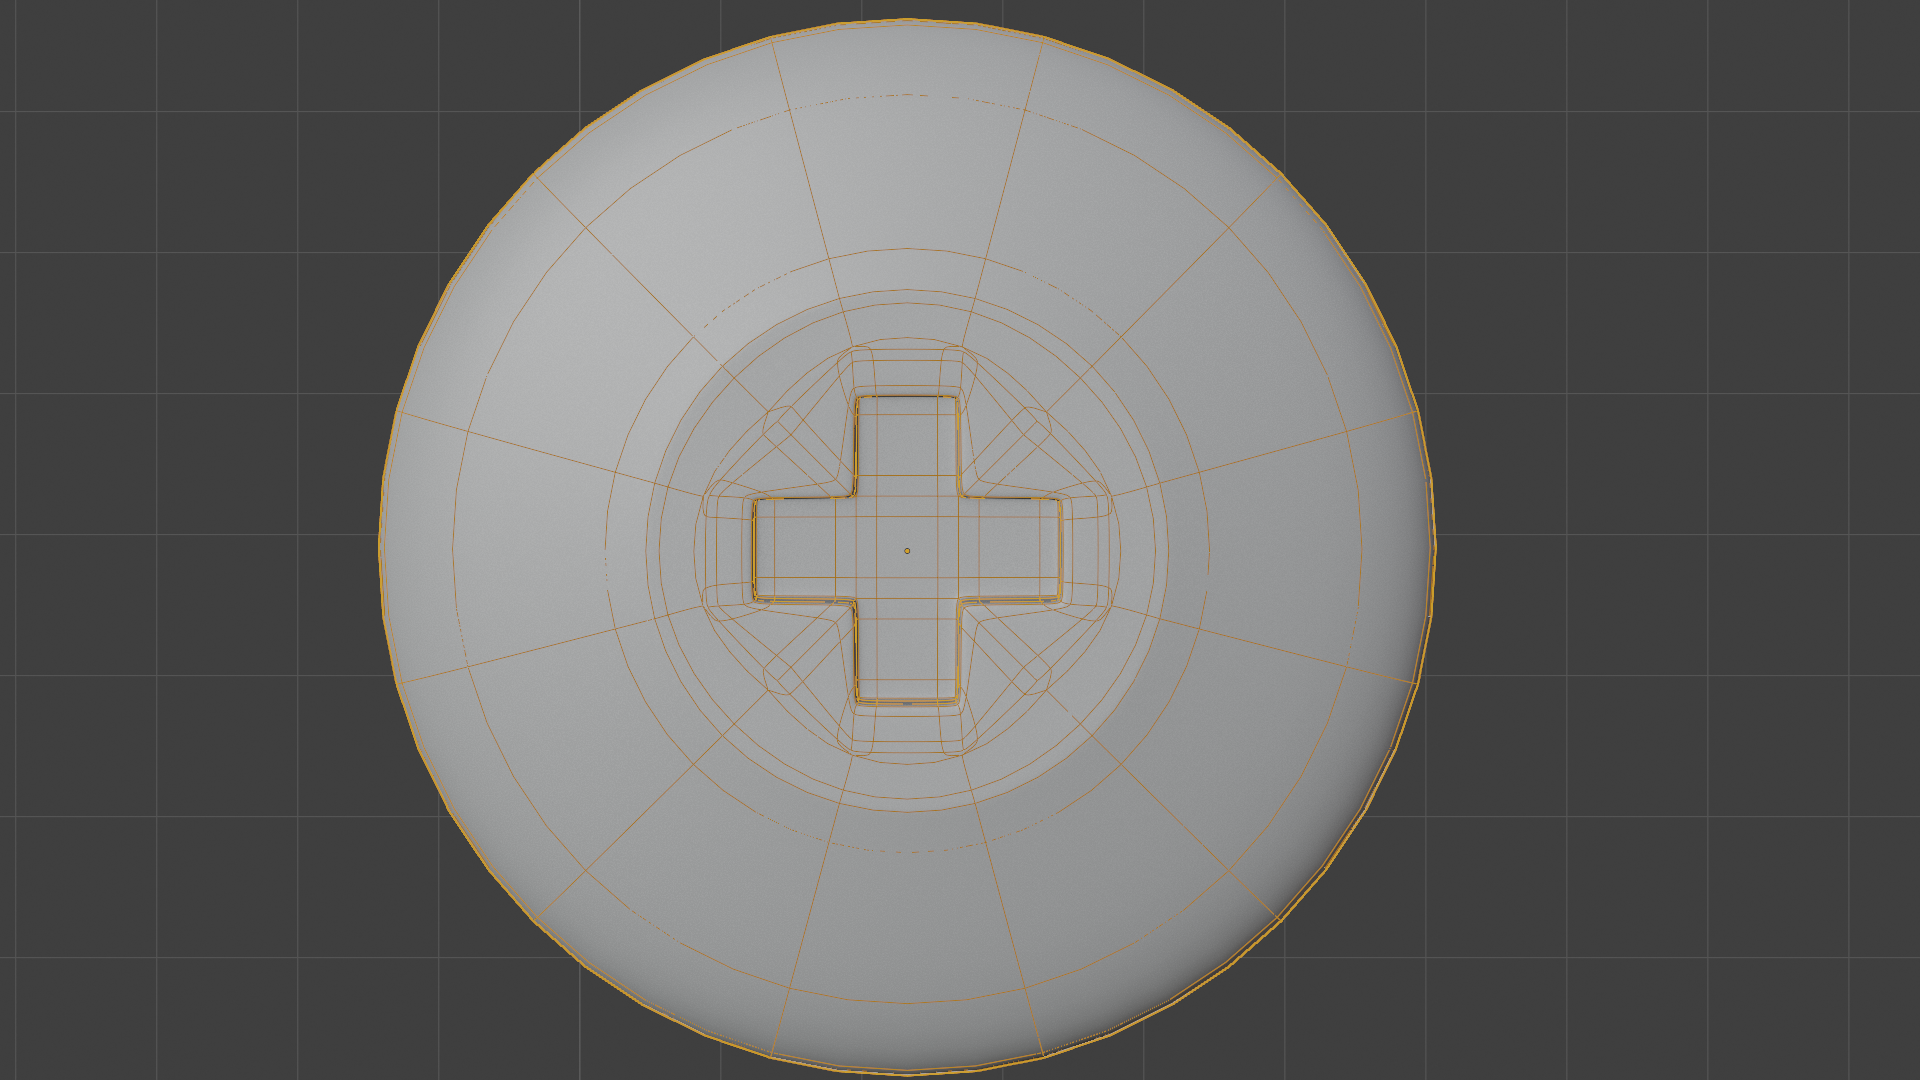
And in position......
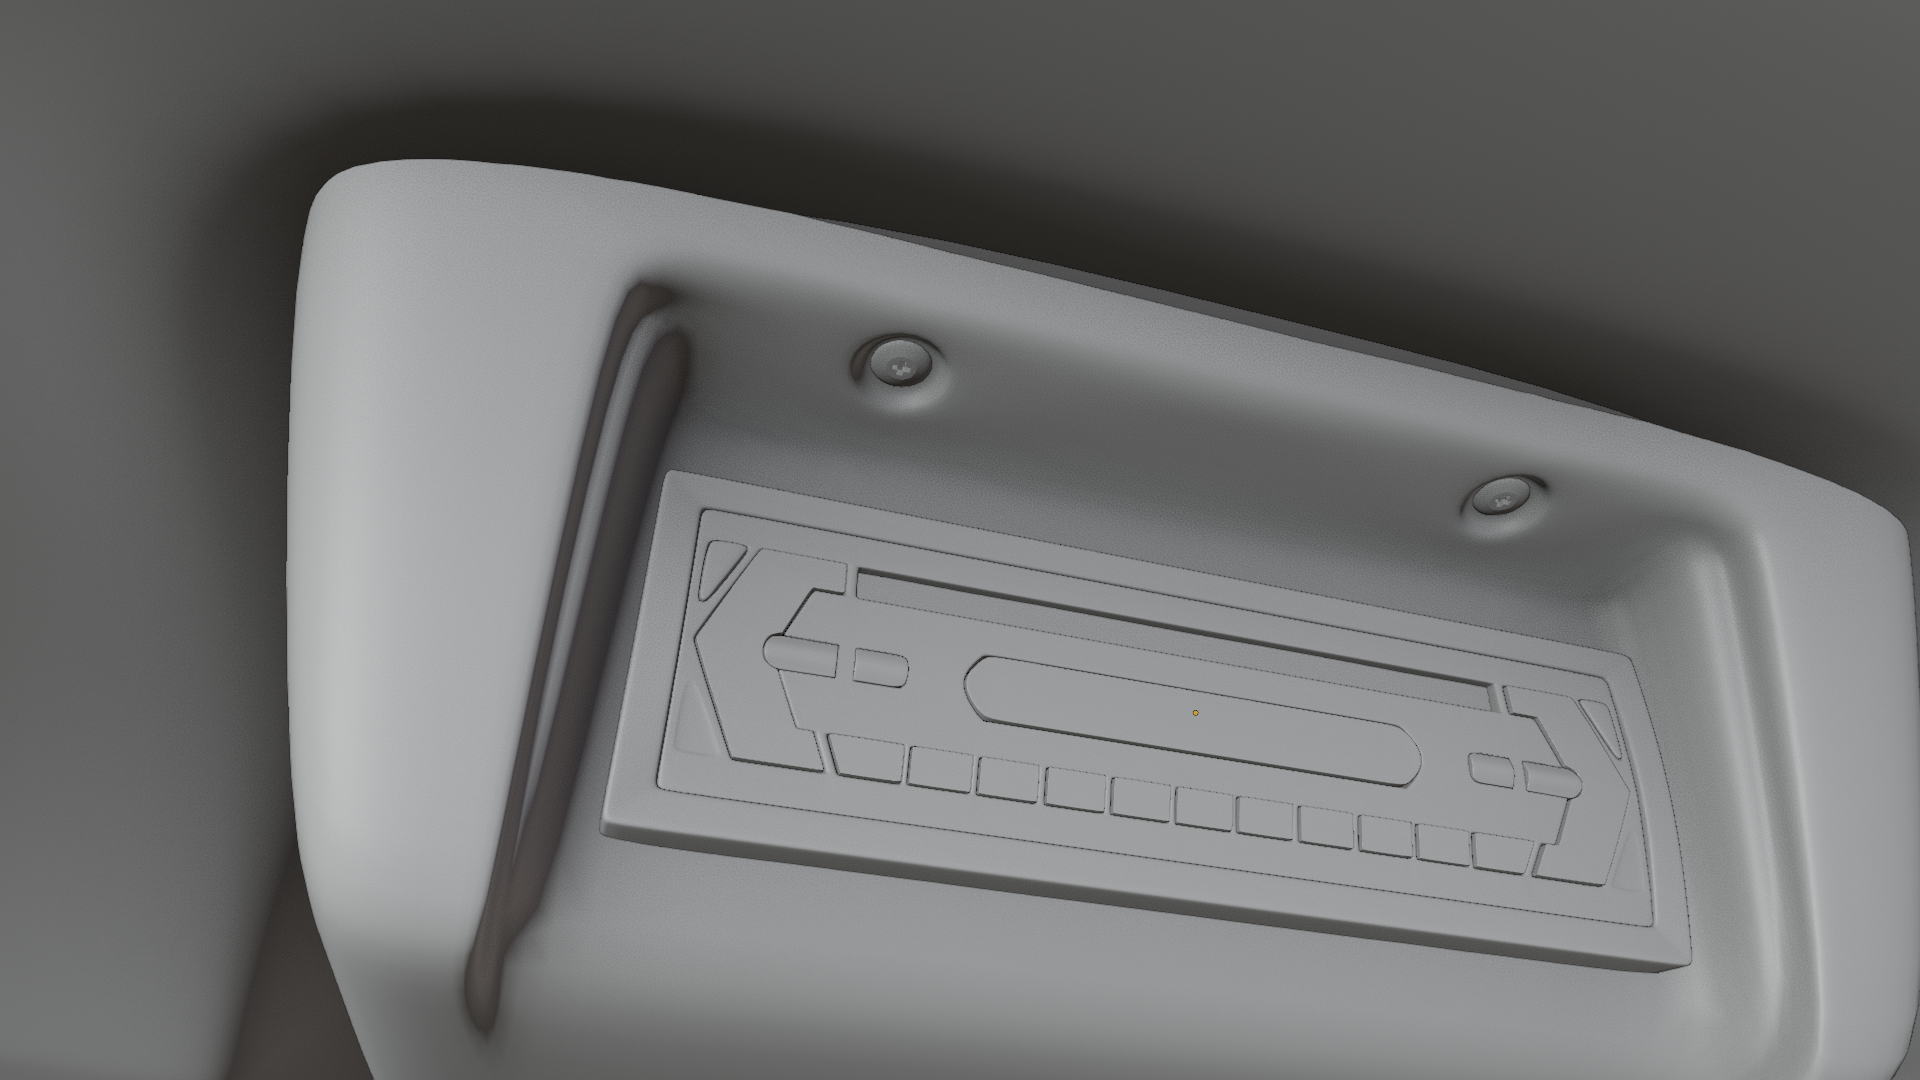
Sometimes we get so involved in what we are modelling I wonder if the hour I spent modelling one screw to get it looking good close up , was it worth the extra verts. Which one are you?? I wouldn't call myself an extrovert, per se, but I wouldn't say introvert either.