The story goes, that when admiral Nelson was shot at the battle of Trafalgar, it was decided to bury him at land and to conserve his body, it was put in a barrel of rum. Now the ordinary seamen didn't know about this and went on with their custom to drill a small hole in the barrel and suck out the rum through a straw.
Since then, in sailor's slang, rum is called 'Nelson's blood'.
I've been using Blender for about six years and still have never modelled a barrel; time to change that.
ssmurfmier1985 You're absolutely right! But I think that's not the idea of this Class...
Anyway, I think painting a bump map won't be be too much of a hassle and I am so used to using procedurals for everything, that it is a good thing to try something new (for me, that is). This is all about learning after all;)
Thanks ever so much for your comment!
![]() spikeyxxx learning new things is always a good thing! working smarter not harder is usually my favorite approach though ;)
spikeyxxx learning new things is always a good thing! working smarter not harder is usually my favorite approach though ;)
Either method will work so go for it I say, gain new knowledge :)
Honestly, I wasn't to happy about the idea of changing the style of my barrel, but I always try to follow advice, or at least give it a try and see how it looks, even it sounds like a bad idea...
Woke up in the middle of the night with an idea on how to approach this and just had to try it out to see if that would work!
This is what I did:
'Alt D'-ed my four planks and scaled and rotated them like so:
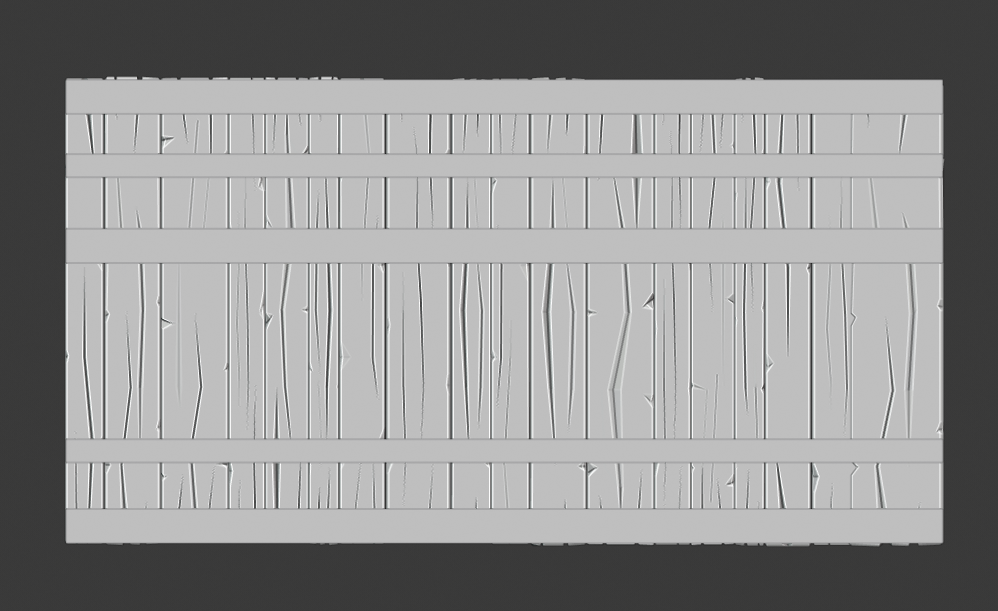
Also added those planes to form the rings.
Added an Empty at the middle of the 'front' left edge of the leftmost plank and parented everything to that Empty.
Then added two Simple Deform modifiers like this:
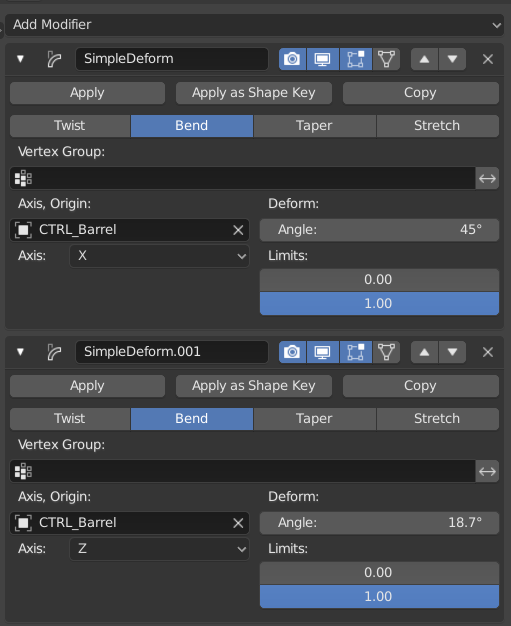
(CTRL_Barrel is said Empty)
The Deform Angles of the second Modifier are slightly different for each plank and 360° for the rings.
Gave the rings a Solidify Modifier.
The result was this:
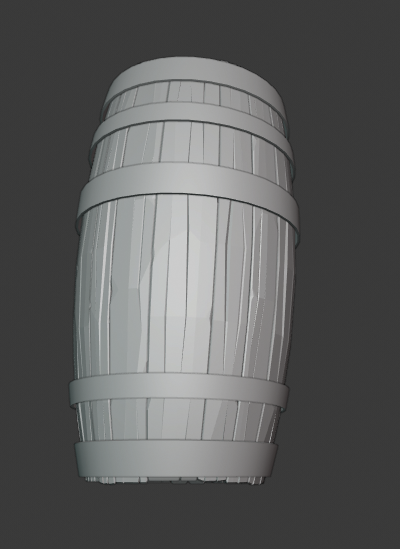
Now I just had to move the Empty to place the barrel in the scene:
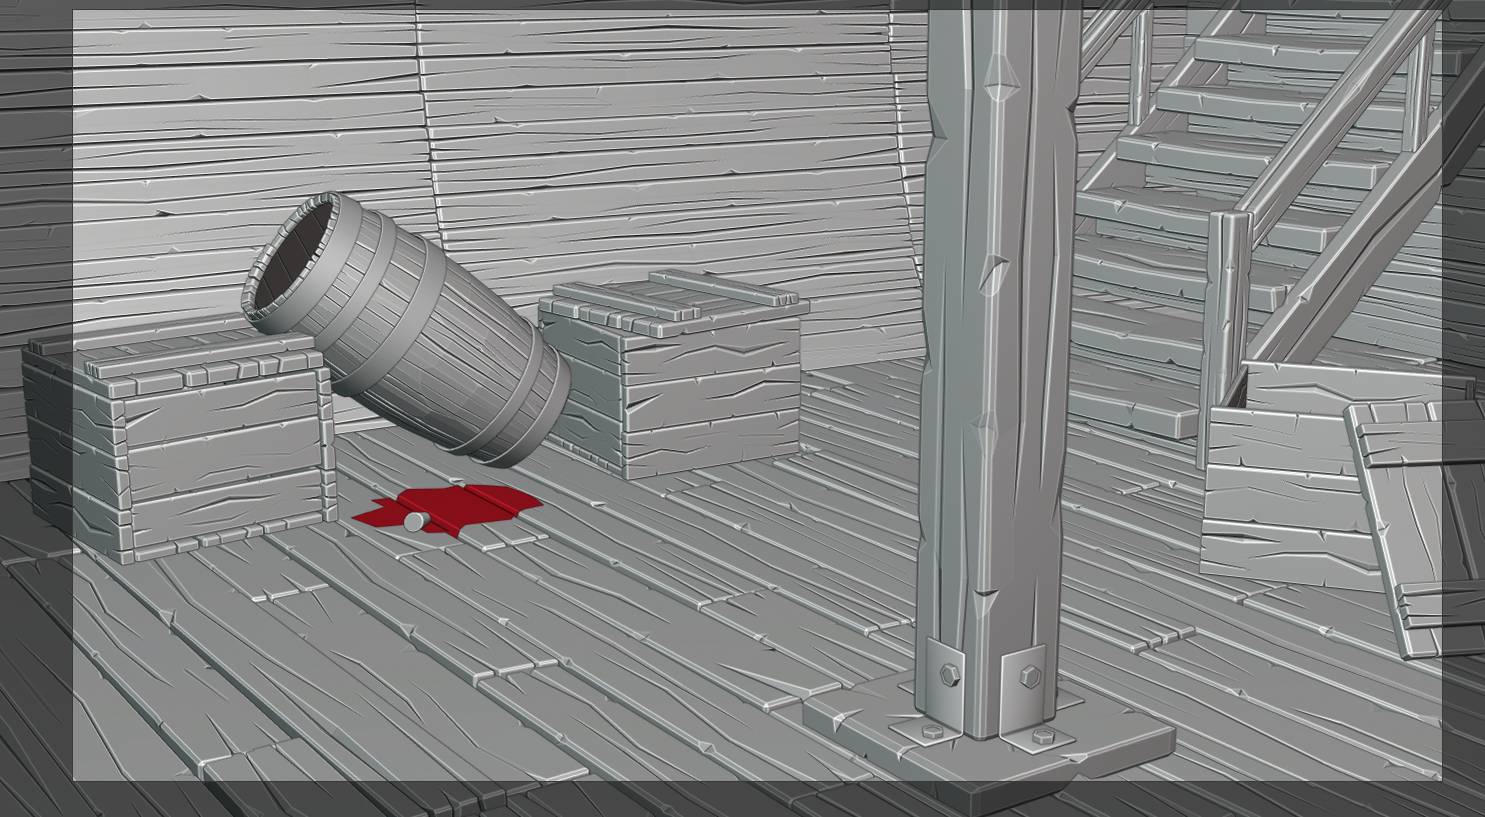
Still need to 'fix' the rings, add 'rivets' to them and make a hole for the 'plug', Make some final adjustments if necessary. But first I'll try and finish my sleep:)
![]() spikeyxxx Looking good Spikey. You could add spikes to that barrel cuz, you know, that's like your thing, Spikey, spikes.
spikeyxxx Looking good Spikey. You could add spikes to that barrel cuz, you know, that's like your thing, Spikey, spikes.
![]() spikeyxxx That is a great solution! Hot dog! And yeah, I can see a little bit of repetition in the boxes, but I think once you light it, it'll be less noticeable. Missing some detail on the top of the barrel, but I'm sure that's a quick fix. Great effort!
spikeyxxx That is a great solution! Hot dog! And yeah, I can see a little bit of repetition in the boxes, but I think once you light it, it'll be less noticeable. Missing some detail on the top of the barrel, but I'm sure that's a quick fix. Great effort!
Looking like a good scene. I like that you thought about the barrel wood type. I can't wait to see how you shade and light the scene.
![]() silentheart00 Yeah, I know about the repetition in the crates, but that's an easy fix, as I am using only three out of four wood planks for that. In case of emergency, I could even use the wooden beam for some of them and that has four sides, in stead of two!
silentheart00 Yeah, I know about the repetition in the crates, but that's an easy fix, as I am using only three out of four wood planks for that. In case of emergency, I could even use the wooden beam for some of them and that has four sides, in stead of two!
I know of all of the repetition, but I am really grateful if you tell me where it is noticeable, so I can fix that!
With the detail on the top of the barrel I guess you mean the top ring? Yes, maybe I was too subtle there;)
I'll get that fixed, thank you!
![]() notcastanza Thanks Ben!
notcastanza Thanks Ben!
I have never done hand painted textures before, so this will be a great practice...I guess that next week I'll be a master at painting stylized wood;) The UV-unwrapping will be a breeze, as its mostly five 'cubes'...but the painting is another story.
Looking forward to it though! I always like a challenge.
![]() spikeyxxx Great result with the modelling. It looks like you used some very similar techniques that I learnt in the treasure chest course by Kent recently.
spikeyxxx Great result with the modelling. It looks like you used some very similar techniques that I learnt in the treasure chest course by Kent recently.
And I wouldn't say that only using 5 unique planks to form the whole scene is lazy - as Kent says , it is working smarter , not harder. When it comes to unwrapping and texturing, that clever work will save you so much time :) And you have done it so well that you can't notice any repetition unless you really look for it.
After having taken a few days of rest, I started UV- Unwrapping the wooden 'Cubes'.
This was a lot more difficult than I anticipated, mainly due to the different scales of the wooden planks!
I ended up with this:
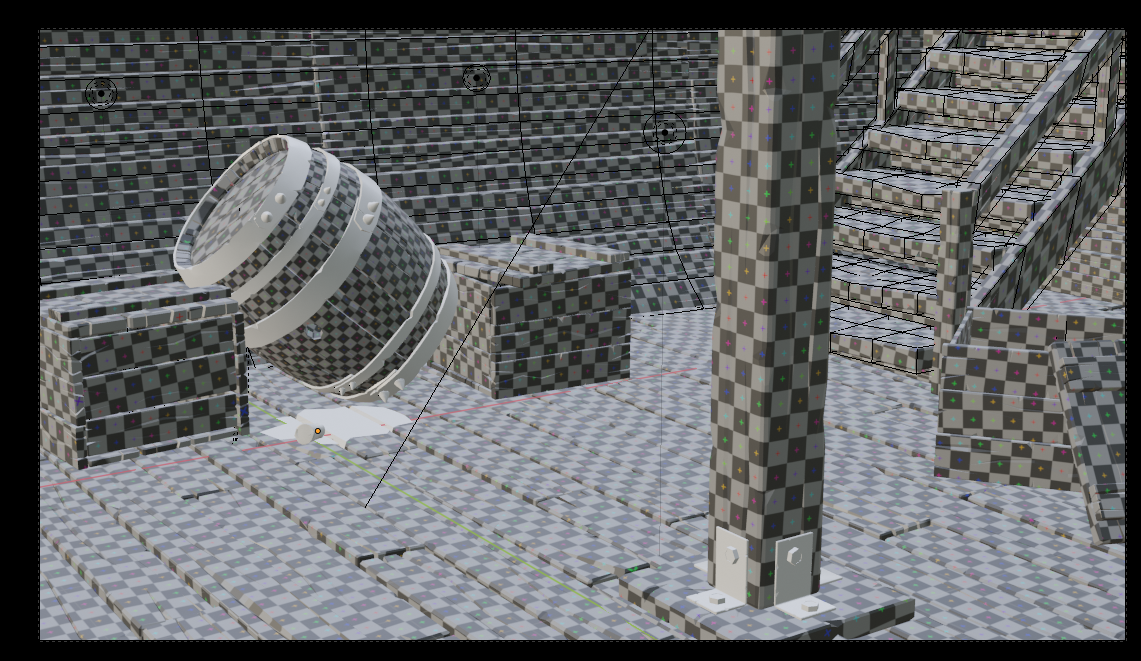
I'll put the rest of the pieces on a separate Map.
It's not a perfect Unwrap, but I think that I can work with this.
This is what I did (after several failing attempts):
I put all linked duplicates in a different Collection (how I love Collections!).
Then I put seams on each of the unique wood pieces.
So, all of the wood pieces had seams.
Then, in Object mode, I made everything a single user and applied the scale.
Selecting all the wooden pieces which had seams, I went into Edit Mode (another great feature of 2.80!) and Unwrapped them.
Averaged Island Scale and Packed the Islands.
Slightly adjusted the Margin and made a New Image of 8192 by 8192, with the Generated Type set to Grid.
In the Shader Editor, made a New Material with the newly created Image plugged into the Principled Shader (Selected the Principled Shader and pressed CTRL T, thanks to the 'Node Wrangler Addon!).
Again, in 2.79, this would have been a lot more work!
Unfortunately, I can't re-establish the Links now, due to the Scaling, but the alternative would be to either modell a lot more planks, or to put a Lattice on almost every plank and use the Lattices to give the planks their fitting shape...
![]() spikeyxxx Sorry I'm late to grade your week 1. But you probably noticed that your submission was among the notables. With the quality of modeling and scope, you've definitely earned an A+. I've only one note to offer and that's the noticeable faceting on the barrel polygons. If you smoothed the normals and highlighted specific edges to be sharp, that'd be the cherry on top.
spikeyxxx Sorry I'm late to grade your week 1. But you probably noticed that your submission was among the notables. With the quality of modeling and scope, you've definitely earned an A+. I've only one note to offer and that's the noticeable faceting on the barrel polygons. If you smoothed the normals and highlighted specific edges to be sharp, that'd be the cherry on top.
I can't wait to see everything textured and shaded 🤩
@theluthier Don't worry about the late grading, I know you've got a lot of submissions to grade!
I am proud of my A+ and of being one of the notables!
Thanks for the great advice, it was bugging me a bit, but I really need extra eyes to see what needs to be fixed.
Also, I have a lot of problems with presentation, but in this case, that might be o.k....
Thanks again, you are really inspiring, and I think my next project will be a stylized church organ. I already wanted to make a realistic one, but now I got the taste of doing stylized! (I have worked as an organ builder, so I know how they are constructed!)
![]() spikeyxxx Oh and I meant to thank you for being so present in everyone's homework threads. In some cases even modeling other people's objects to illustrate your advice - that's next level help!
spikeyxxx Oh and I meant to thank you for being so present in everyone's homework threads. In some cases even modeling other people's objects to illustrate your advice - that's next level help!
*Just make sure you don't burn out by being too present*. Doing a sweep through the threads with unread replies once a day is plenty. I feel like you're keeping a constant watch and you don't need to be that active :)
@theluthier Thanks, I won't 'burn out'.
I've got a lot of time and I really like to help!
So today, I didn't get very far, but learned a lot!
Started painting the floor.
Then I discovered that I had made a mistake with laying out my UV's. The barrel was overlapping part of my floorboards...
All that painting had to be re-done!
But then again, I need the practice, so that wasn't too bad.
Still no good at hand painting, but this is the result so far. (I know it looks awful..):
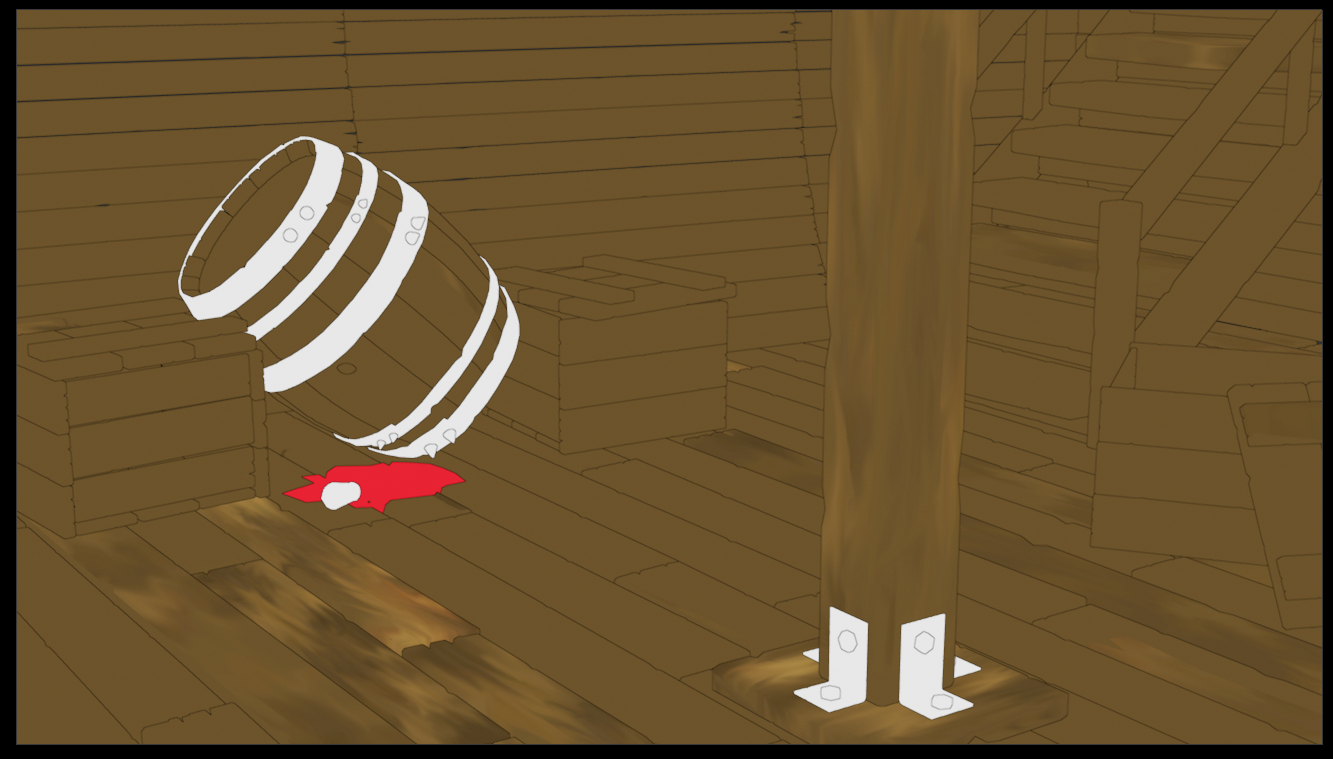
I thought I'd give it another try tomorrow;)
Tested out some lighting, to see how that would look and found that with this kind of lighting, almost all of the paint details get lost!
Maybe I'll have to use more contrast?
Also, painting them singularly, they weren't so bad, but from the Camera view....
Tomorrow's another day with new hopes!
Here's one of my renders (luckily this is eevee, so I could do 23 test renders in not time!):
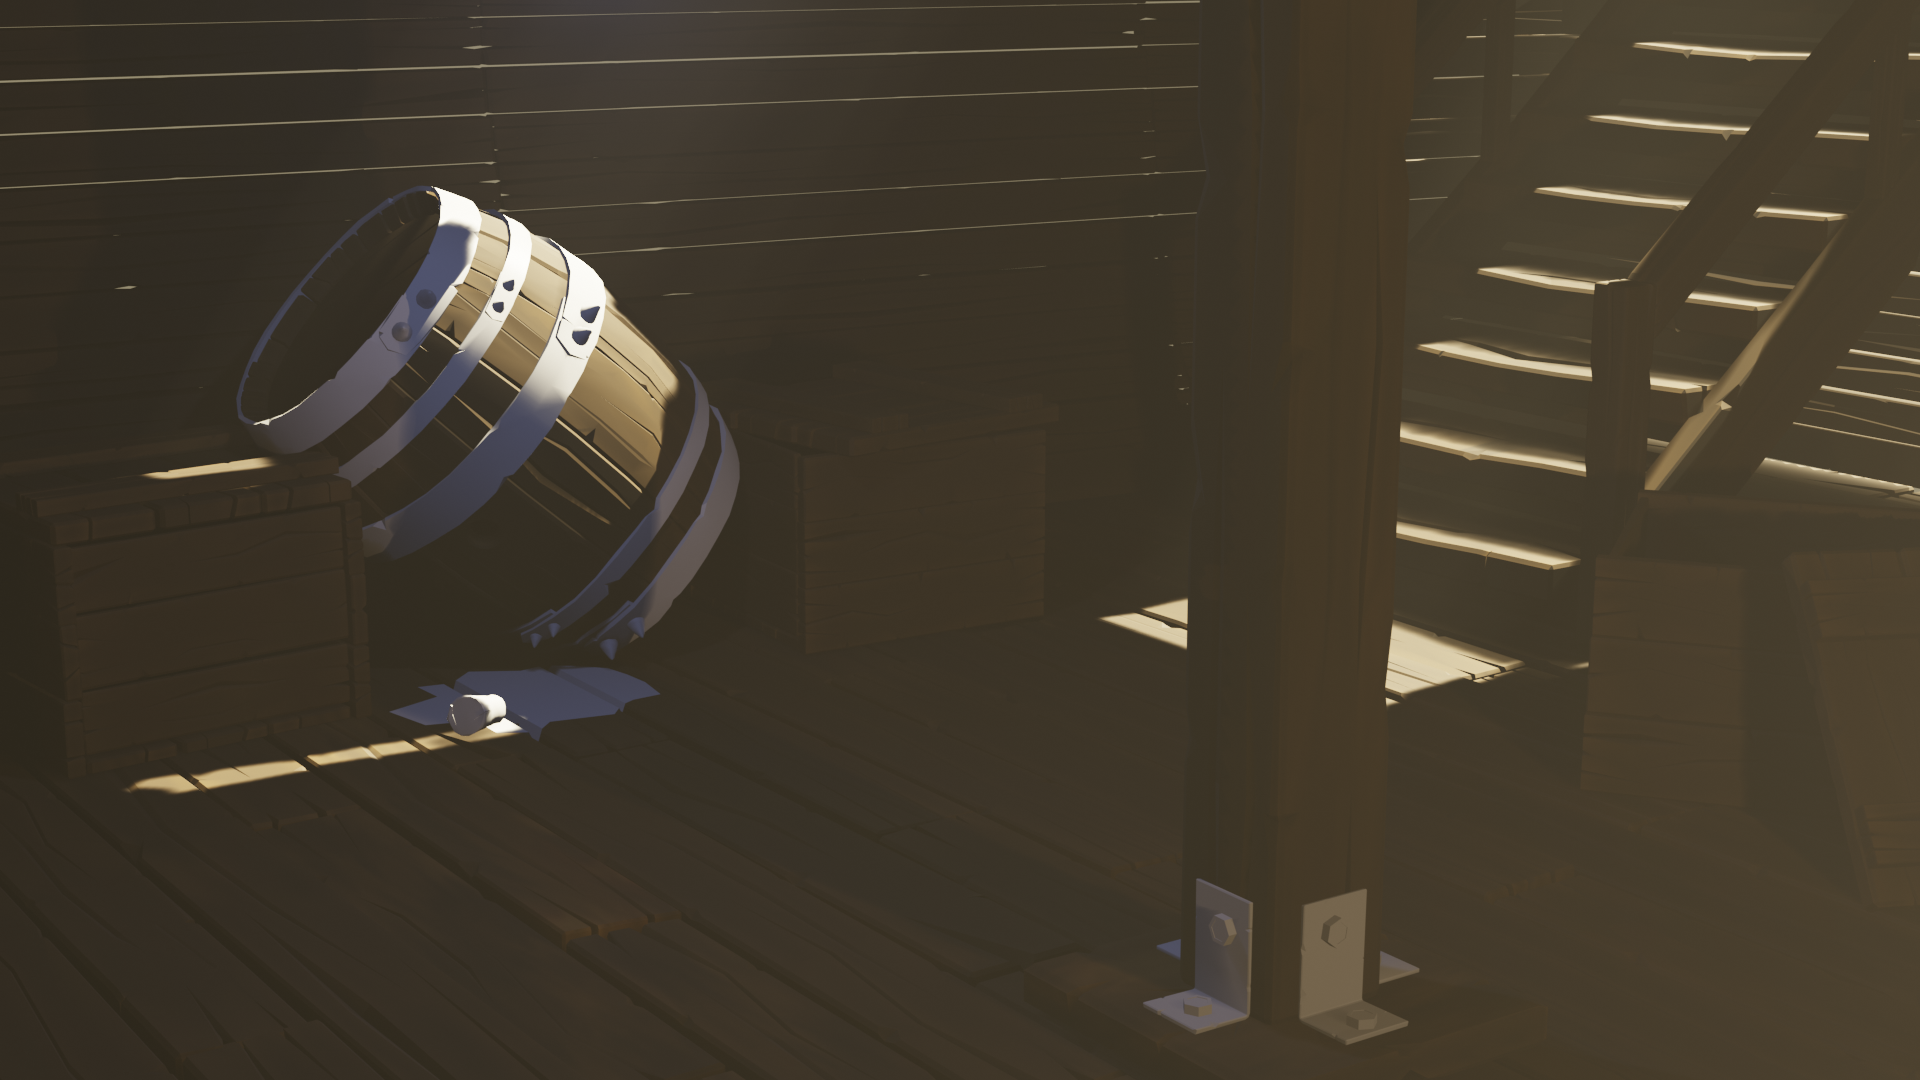
Still no good at hand painting, but this is the result so far. (I know it looks awful..)
No way, it does not like horrible so far. It looks to me like you're headed precisely where you should be for an appealing result.
It sounds like you're using one texture map for the whole scene. While you could do that, I personally would chose to separate textures according to object: Like a texture for the barrel, another for the crate, and then another for all the environment pieces (wood/wall boards, support beam, stairs). Just something to keep in mind for future projects.
Are you painting each floor board separately or using the data sharing trick?
@theluthier I had to unlink everything, due to the fact that almost all planks are scaled differently...
So I'll have to paint every single piece of wood, but that's cool, because it's a great way to get better at painting!
I thought about using separate maps, (That was actually my gut feeling, so I should have done that from the beginning. But it's good to try something and see it doesn't really work. Although there is a looot of wood to paint, I think I have enough time to start all over, so) I will try that tomorrow. At least I won't have to use an 8K texture then;)
And it's easier to correct if I make another mistake, which will certainly happen.
Thanks for the advice!