Long time member and fan of CGCookie, seriously studying Blender and CG art. This is my polybook, where I'll be sharing works-in-progress and things I learn as I practice modeling and shading and related Blender wizardry.
Current project as of October 2021: 1957 Chevrolet passenger car.
![]() jakeblended Looking good so far! 🔥
jakeblended Looking good so far! 🔥
Just thinking out loud, couldn’t you just close the mesh with a big n-gon, apply the Boolean and then delete the n-gon again..?
Wow that’s a lot of geometry...
Keep up the good work Jake! 😎👍🏻
Thanks! I might try your suggestion of temporarily solidifying it just long enough to try to apply the Boolean; but I think I'll wait until the end when everything's modeled and I'm cleaning up. If push comes to shove, it doesn't absolutely NEED to be applied - we get to cheat like that when we don't need it to be game-ready. :)
To solve the poly count I'm considering turning down my subsurf levels on some parts. I need it cranked up for the nice and close-in WIP shots naturally, but for the final composition some of the smaller pieces especially won't need it to be nearly that high. I bet I could trim it down considerably that way.
Okay, today I finished the second component - which also is a funky curvy piece but was really nice and simple to do, it only took me an hour and a half or so. The window holes are cut completely through, I've got a piece in there that I intend to add an emission shader to so I can have nice lit windows for the end composition.
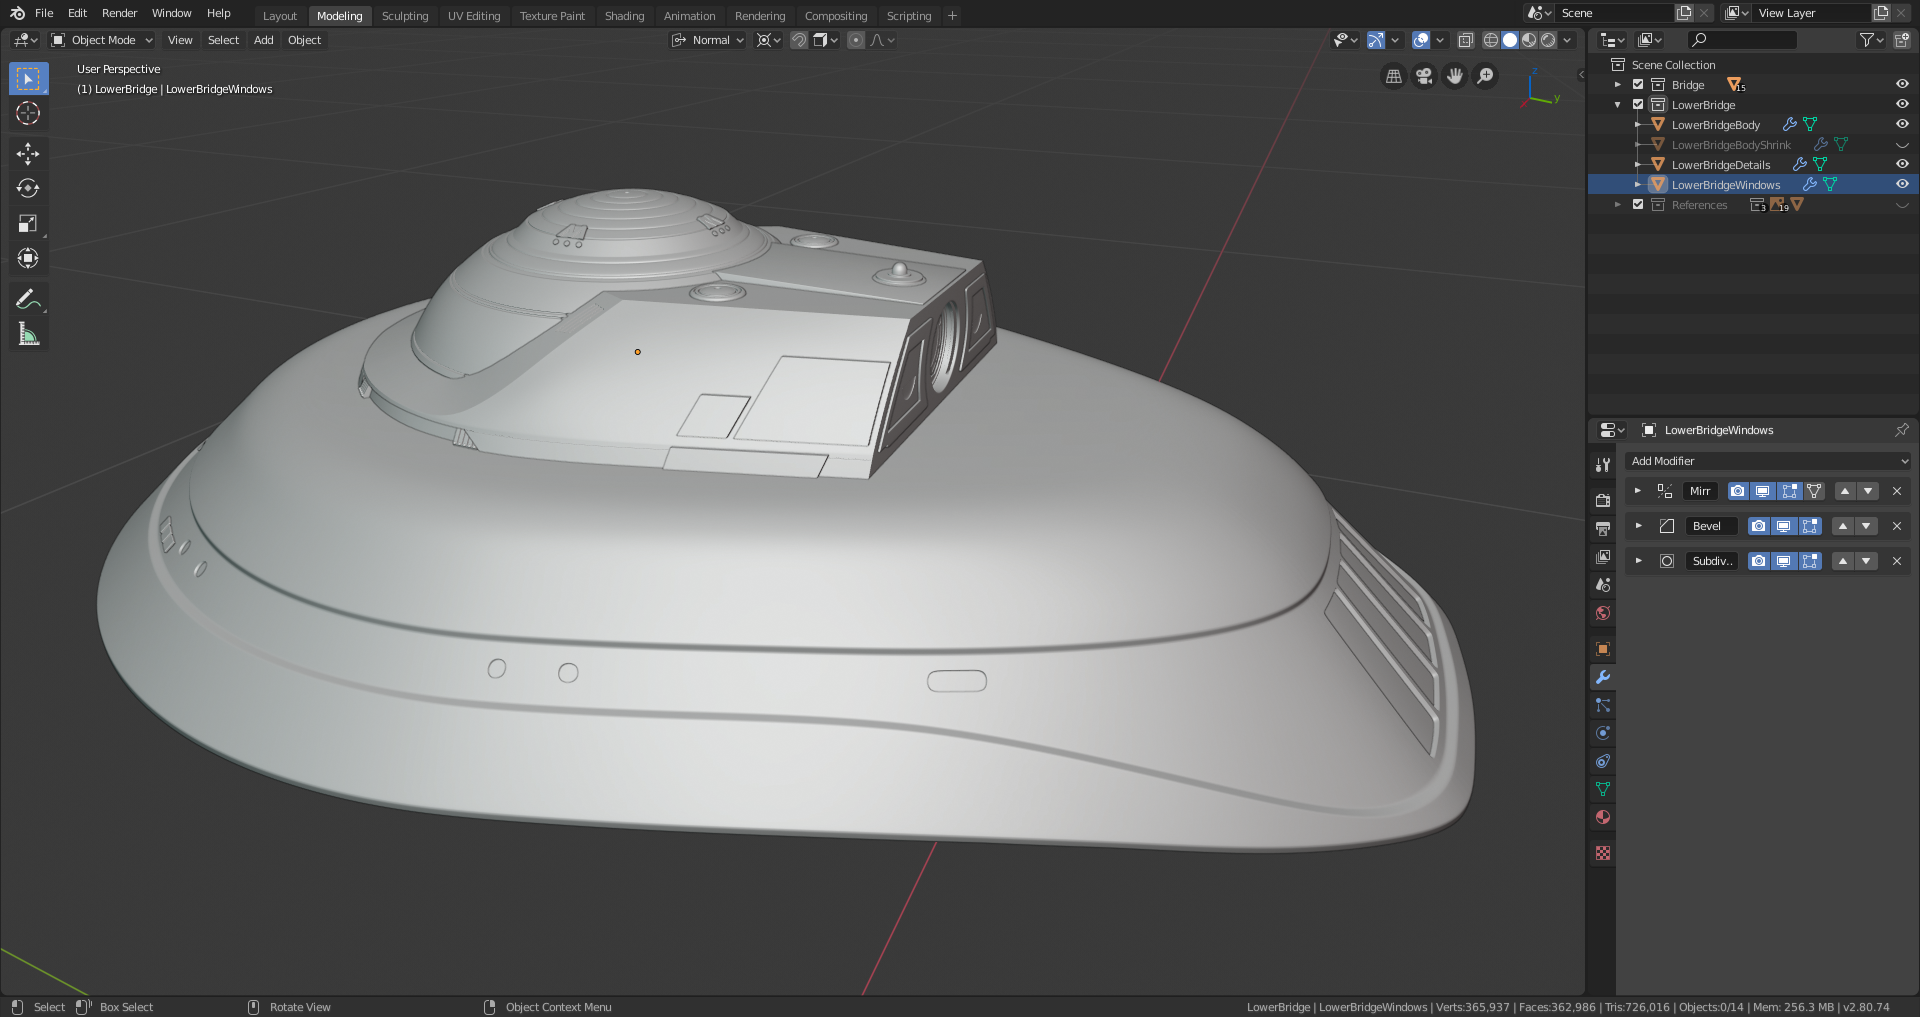
And I've started working on the third piece. This one IS another weird combination of odd flat angles and curves. But hopefully I learned enough struggling with that first piece that it won't be too hard of a battle.
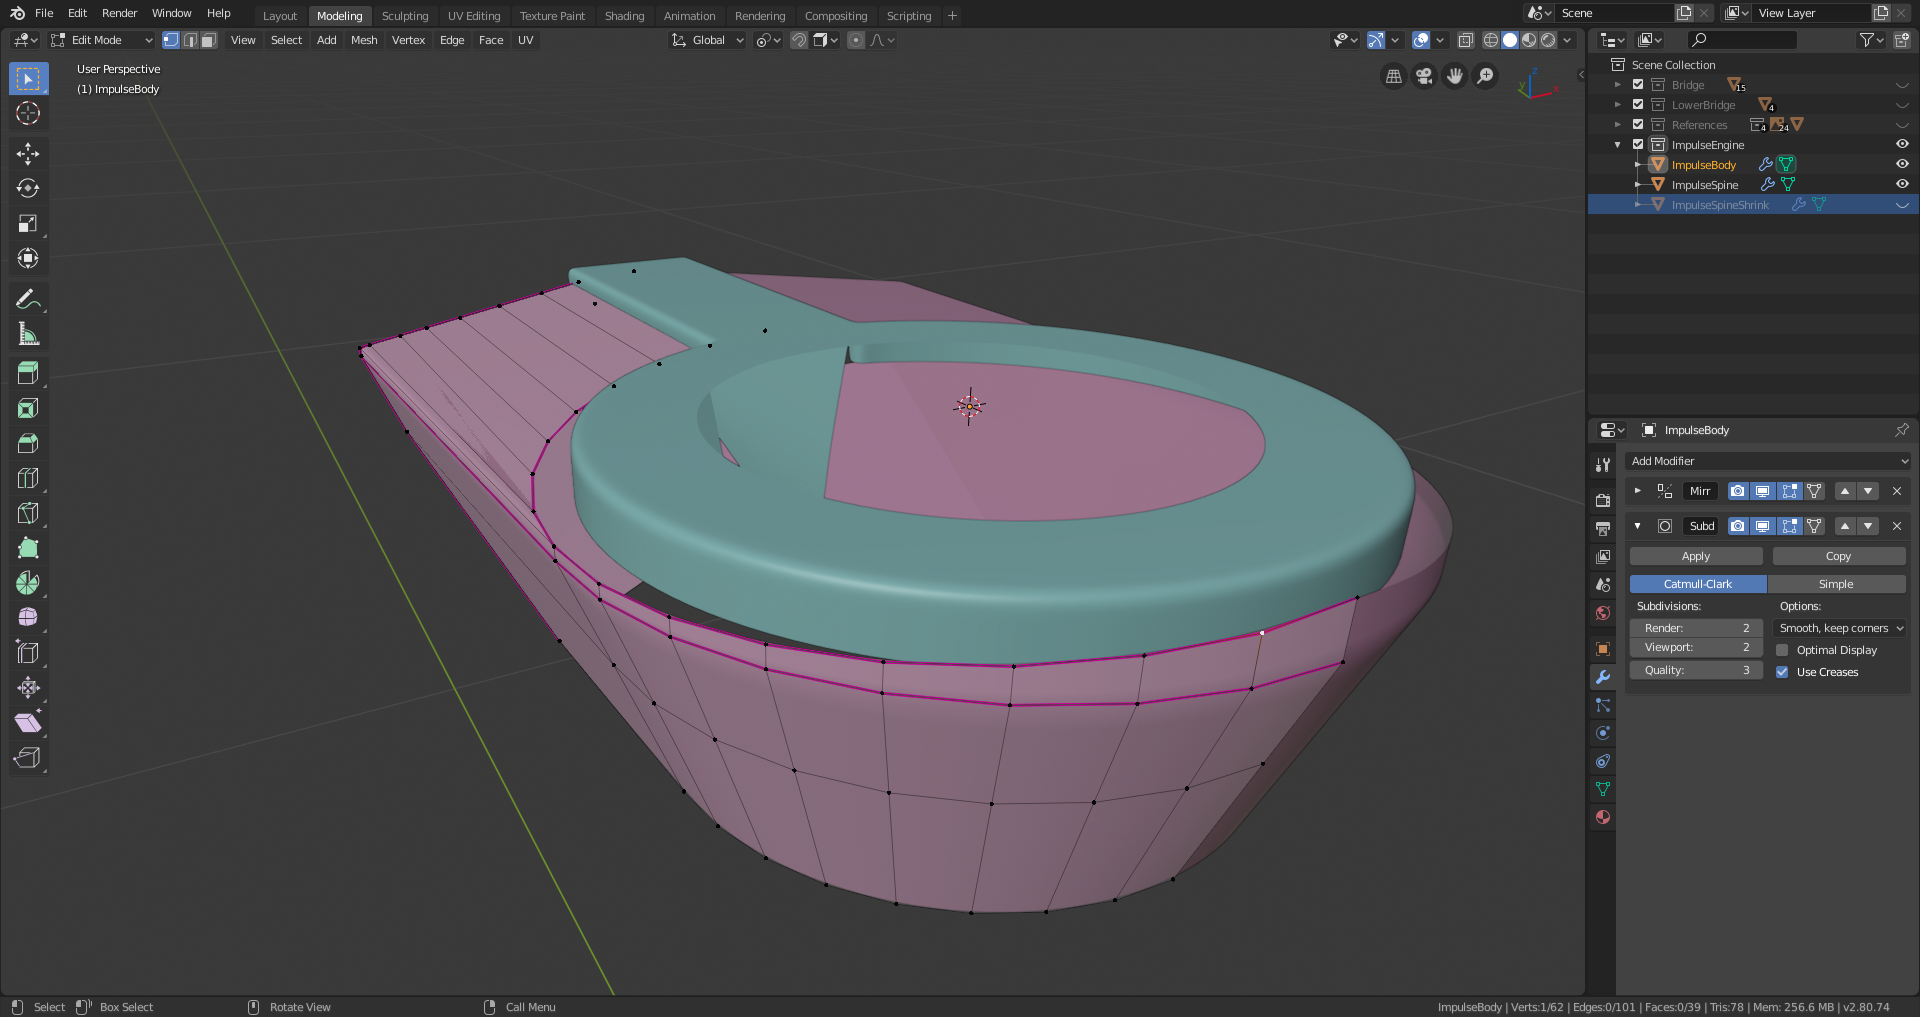
Hoo boy.
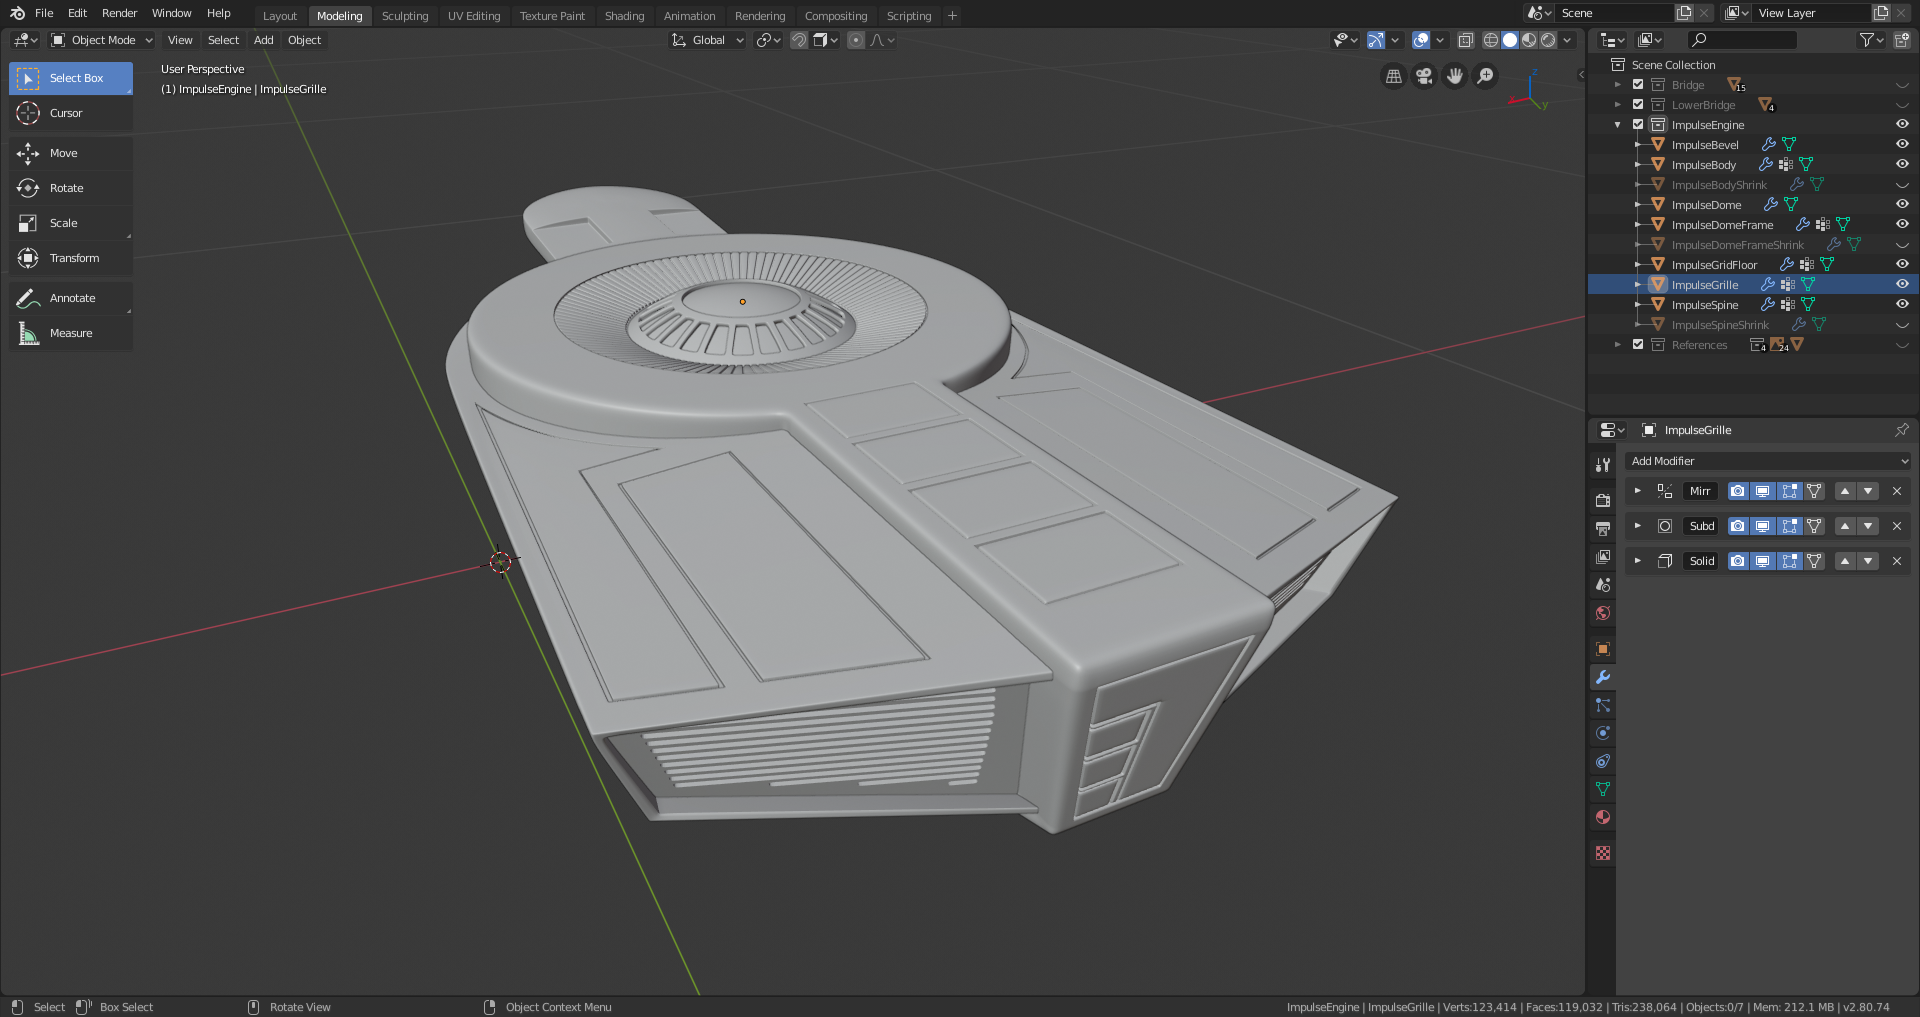
This piece was less of a pain than the first one, but all that detail took a while. A great while.
Next up:
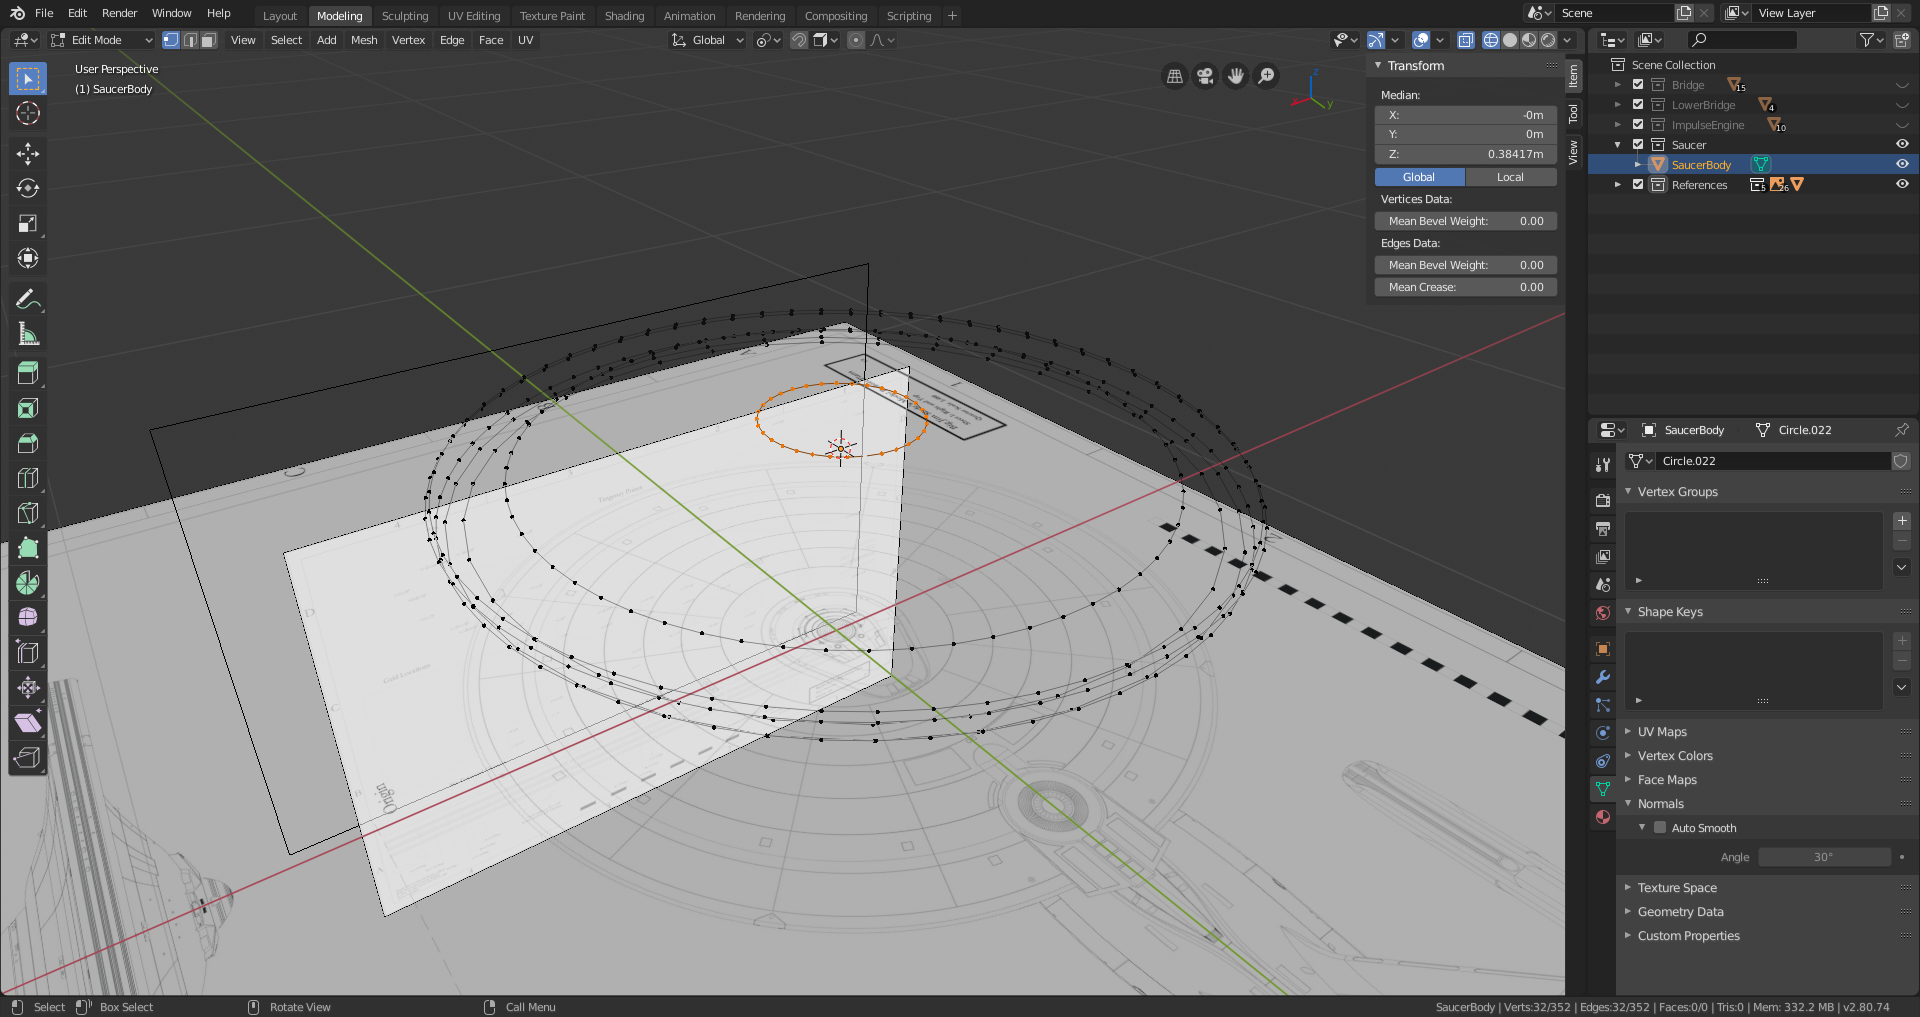
Okay, so I expected this part to go quickly - and it was really easy to block out, it only took minutes. But just modeling those grid lines into the surface has taken me all day.
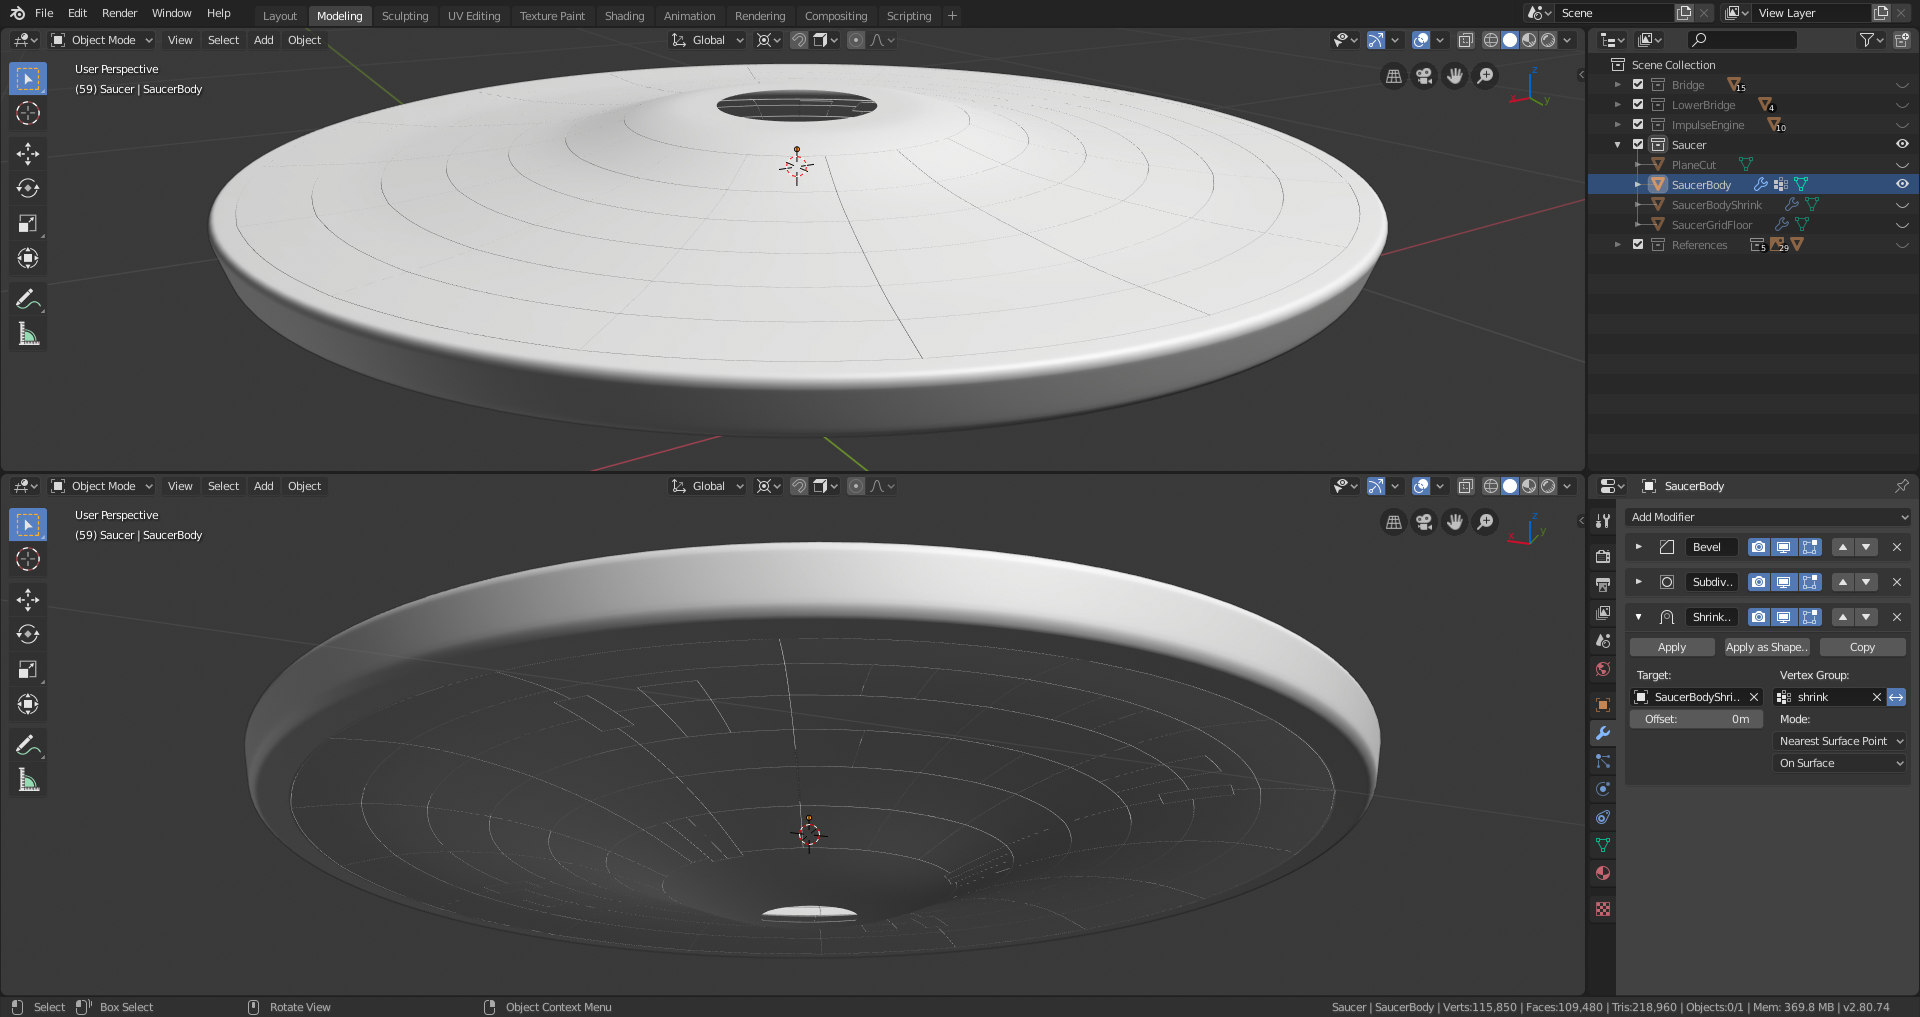
Like with the first component in the very beginning, I had to keep starting over and trying different things. The subsurf modifier just does not like to make things easy when chiseling small, sharp-cornered details like this into curved surfaces. The bevel modifier really helps, generally, but it also has issues when used in combination with a shrinkwrap. Surrounding topology is super important if you want all your nice smooth outside curves to stay nice and smooth and curvy. You can't just add as many holding edges as you need to fix subsurf artifacts because even when using a shrinkwrap, too many edges too close together WILL create unwanted effects on non-planar surfaces.
The way I got this working is, there are no faces in the bottom of those grooves - only sidewalls. The bottom is filled with a second mesh piece that's just a copy of the shape of the flat, unaltered surface shape that's been separated and moved downwards slightly (or upwards, in the case of the grooves on the bottom surface), and intersecting the sidewalls. That completely eliminates subsurf artifacting in the bottoms of the grooves, and left me only needing to deal with the hull surface topology.
Seems like a whole day wasted for such a simple solution in the end, but I suppose it wasn't wasted if I learned something.
Tomorrow I need to detail the rim and cut some windows there and on the bottom surface, and make the gizmo that caps the bottom of this part of the hull, and the whole dish-section will be complete. Still plenty of work to go....
![]() jakeblended What matters is you found a solid solution, and you will never ever forget it because you worked so hard to get there! Will always be on the back of your mind if you run into similar issues in the future, so I say your time is well spend 😊👍🏻
jakeblended What matters is you found a solid solution, and you will never ever forget it because you worked so hard to get there! Will always be on the back of your mind if you run into similar issues in the future, so I say your time is well spend 😊👍🏻
Can’t wait to see the pieces together!
Sorry about no screenshots last night; had some internet issues. Nevertheless the work got done, with the finishing of all the windows, details, and the gizmo on the bottom, the entire saucer part of the ship is finished, modeling-wise.
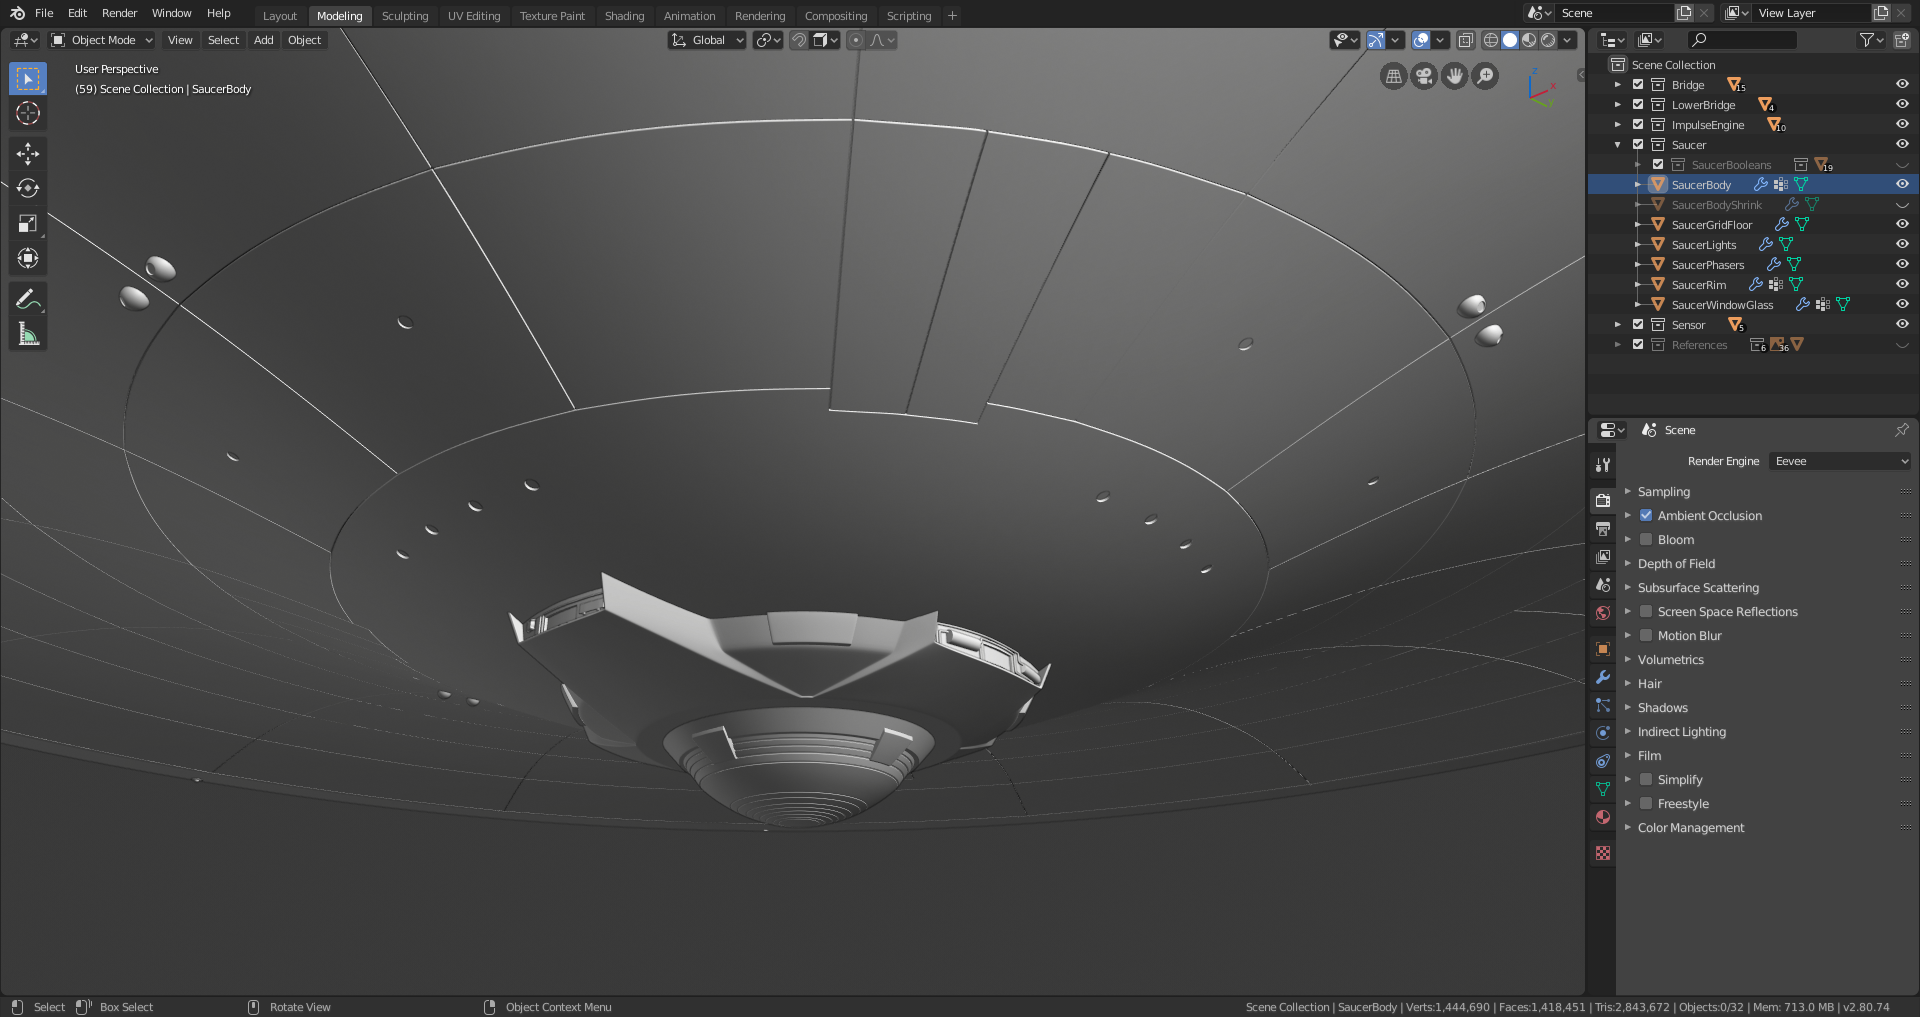
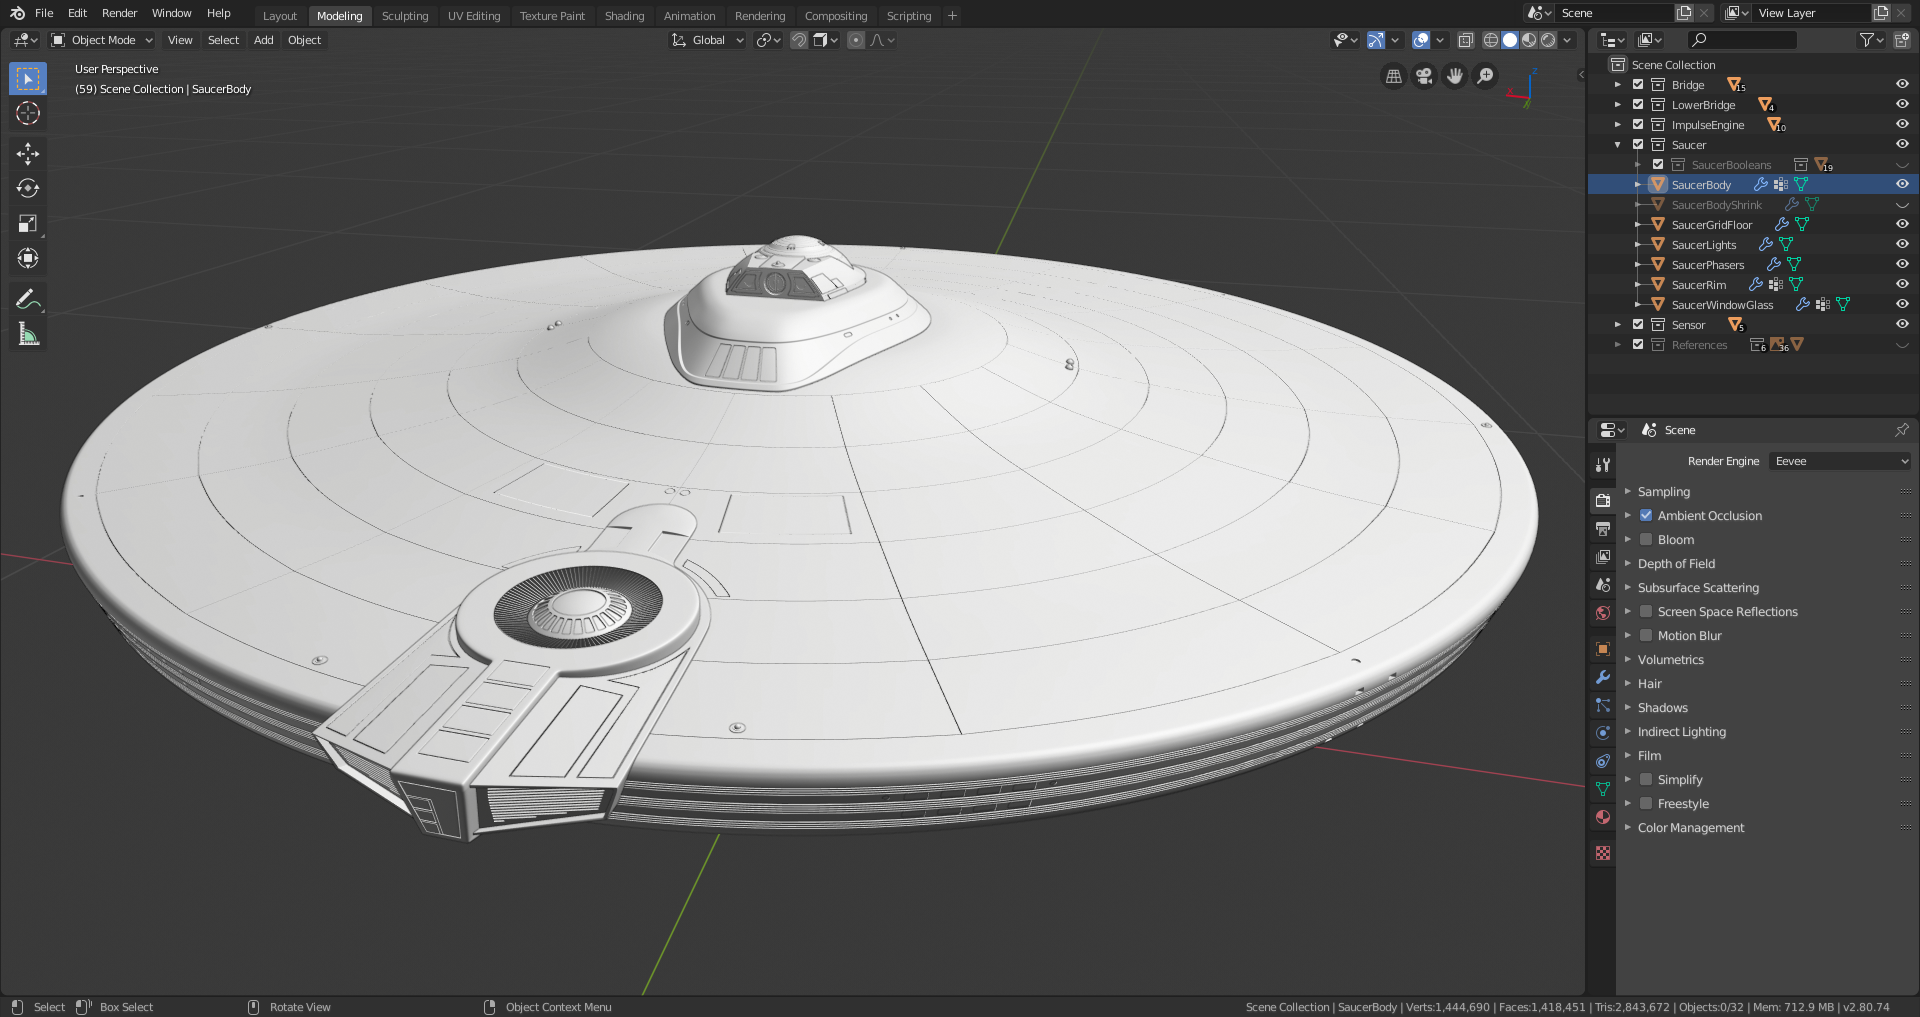
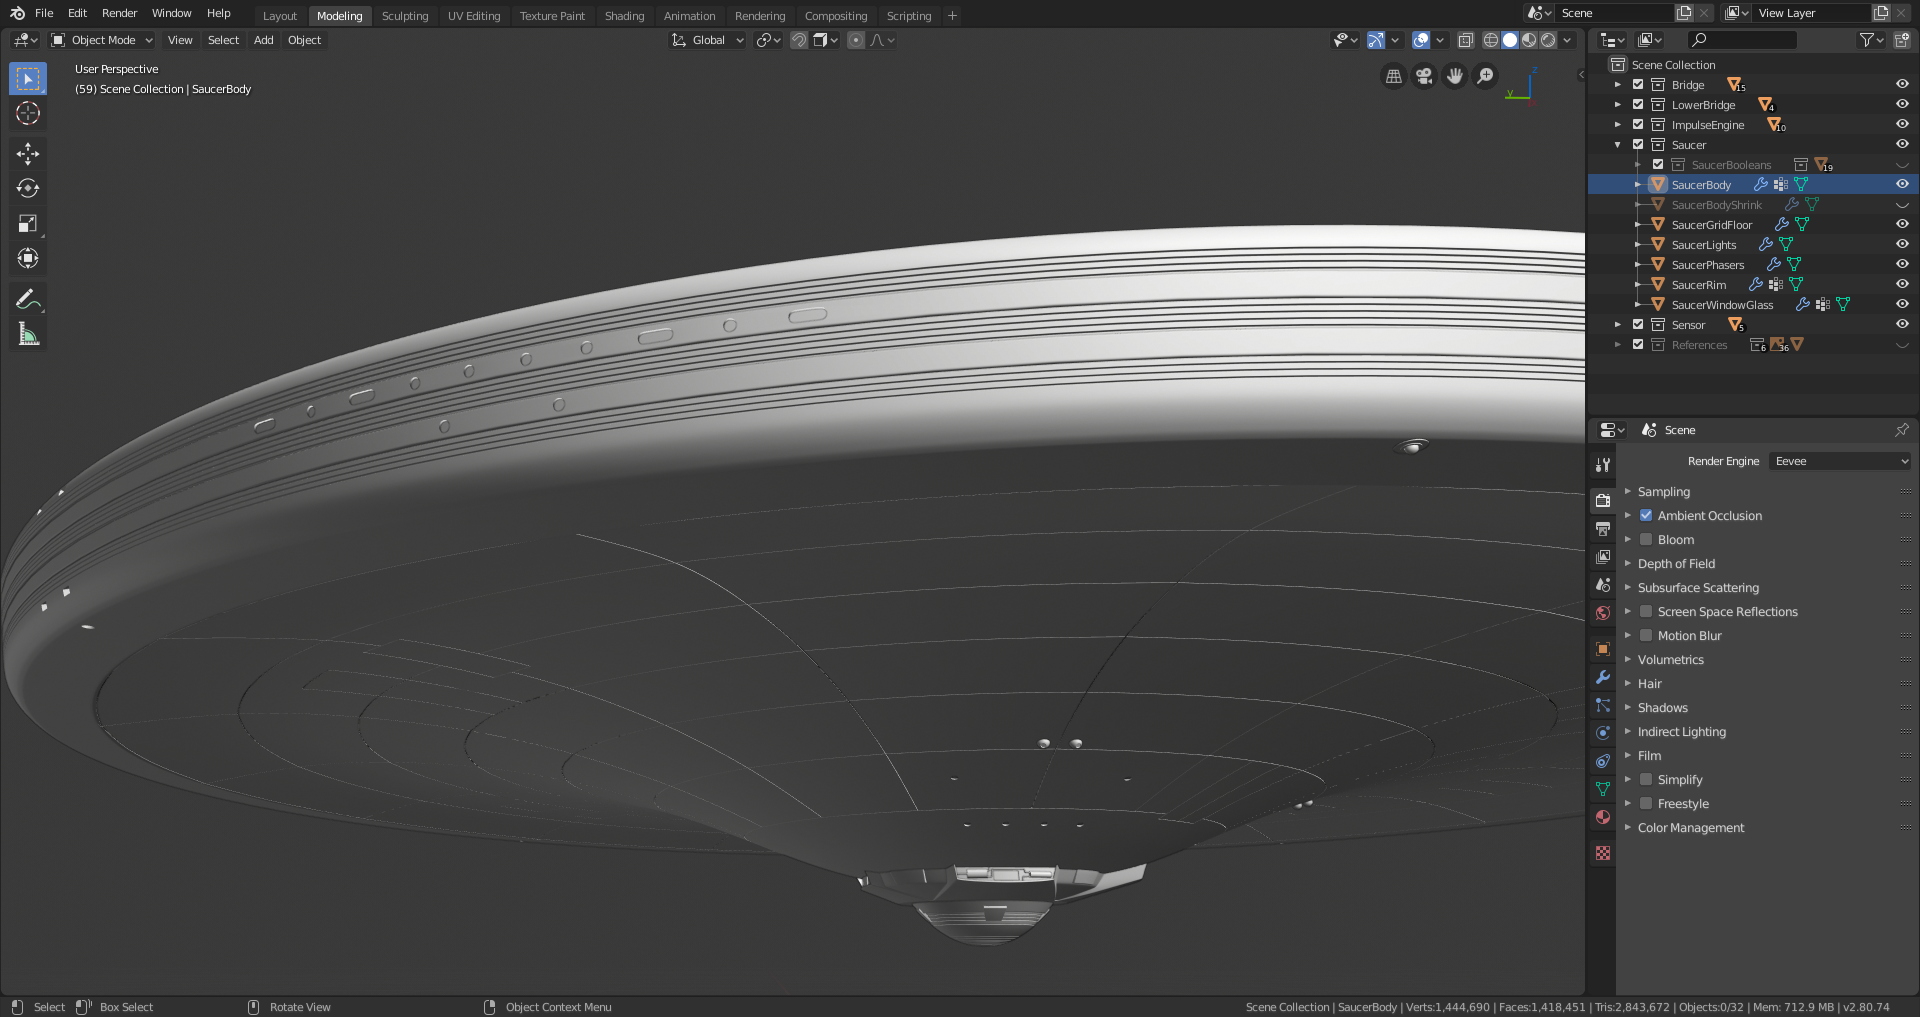
I'm starting to love Booleans the way Oscar loves trash.
Anyway, I *believe* this marks about the halfway point in all the modeling. I could be wrong though; we'll see. I'm confident this project could be finished by the contest due date. In time for the live critique, though? Not so sure...I'll have to really hustle, but I MIGHT be able to squeeze it in...
So now, moving on down the model. Next part up is the neck.
Thought I'd finished the upper neck section between yesterday and tonight, but the more I look at it, I'm seeing some unevenness on the surface that I think I want to fix. I'll do that tomorrow, and then start on the lower neck section.
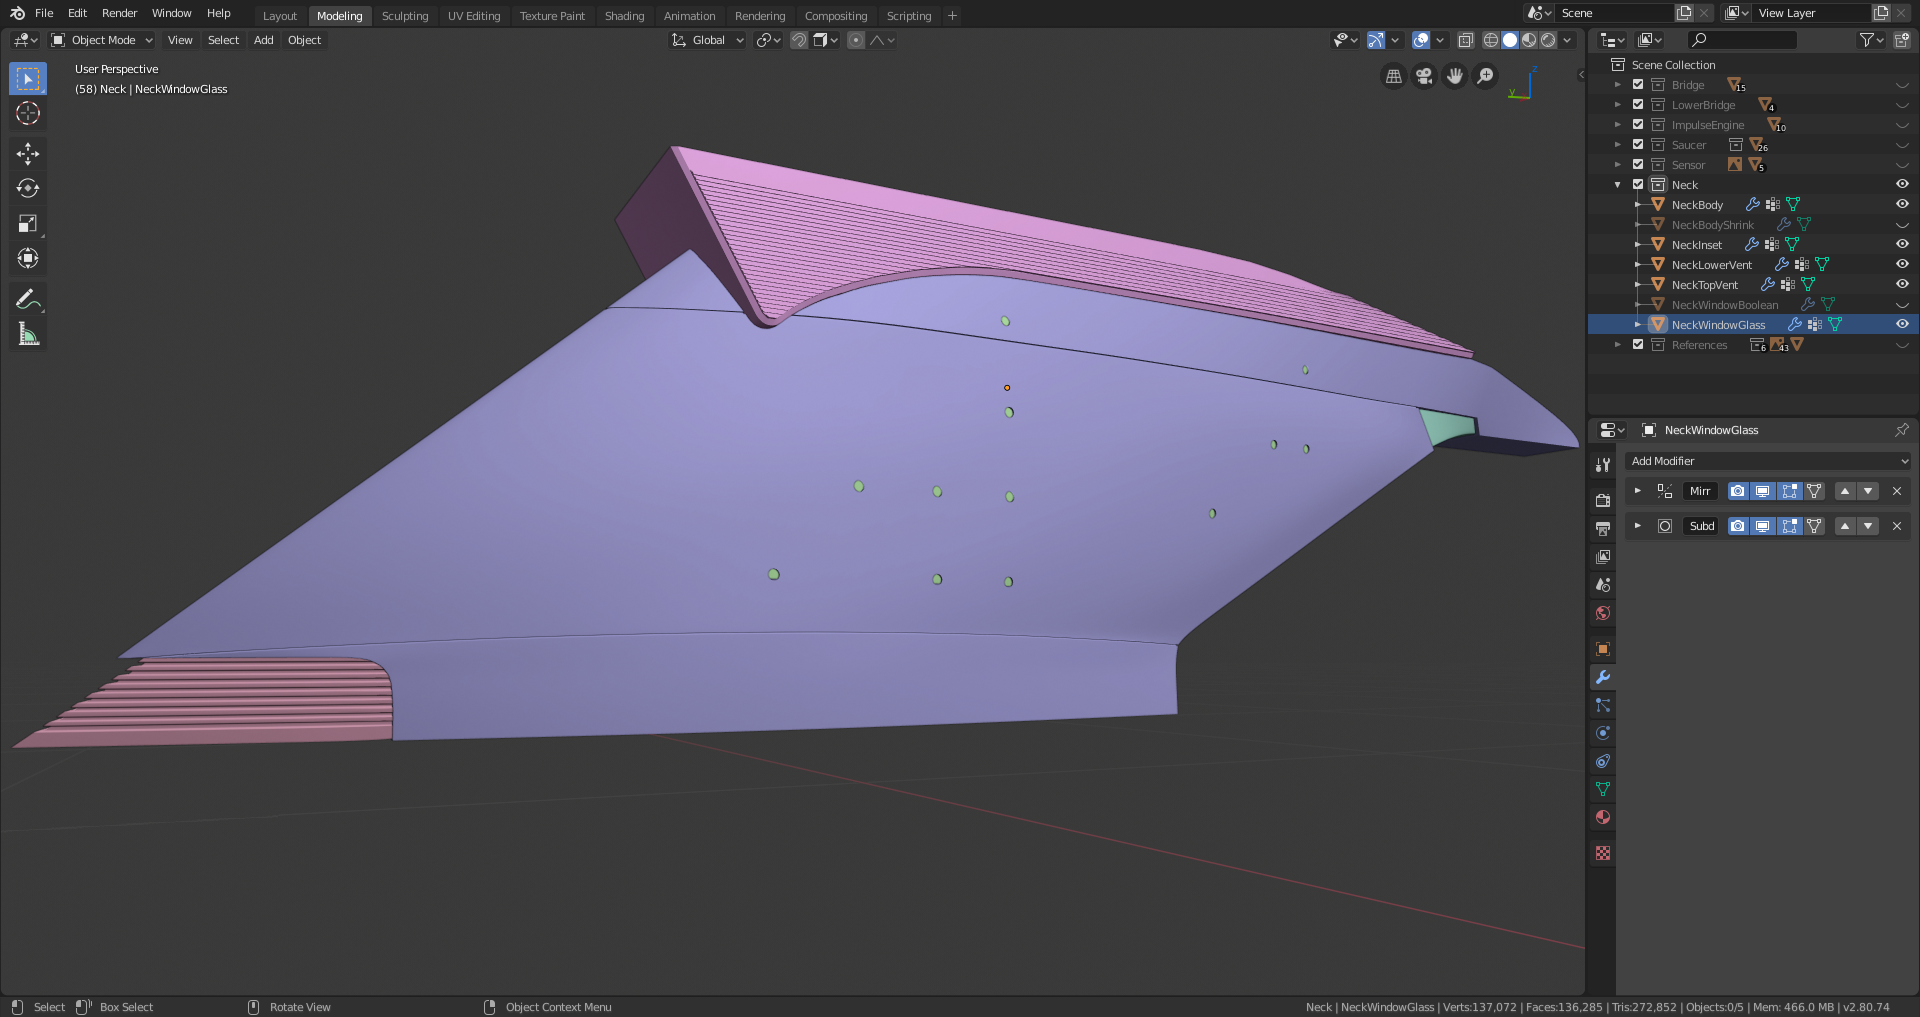
I smoothed out the surface of the upper portion and completed almost all of the lower portion, the torpedo bay:
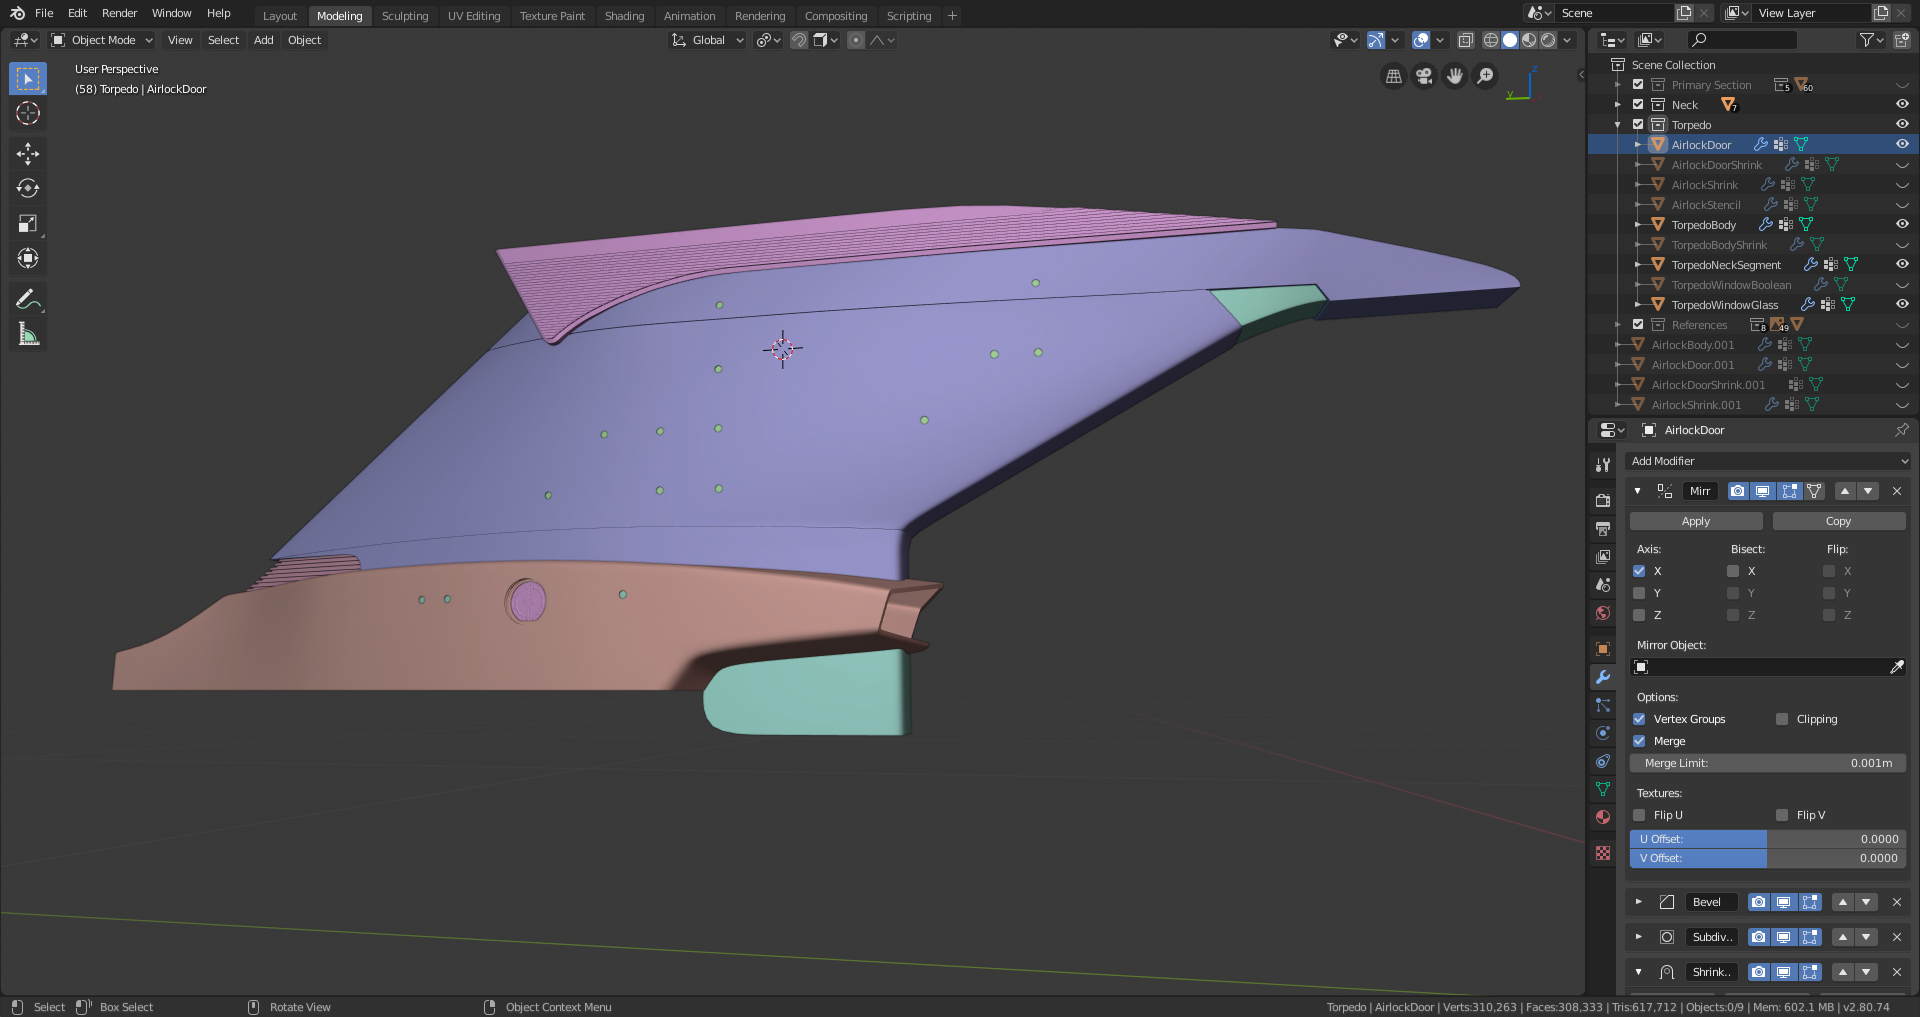
The windows are Booleans as usual, but the airlock has interior detailing so I couldn't cheat on it, I had to actually cut it into the mesh. Luckily I only had to cut the hole itself; all the airlock geometry I just copied and merged in from the one I already modeled on the back of the bridge, early on in the project. I'll have to do this one more time, as there's another airlock on each side of the lower hull section as well.
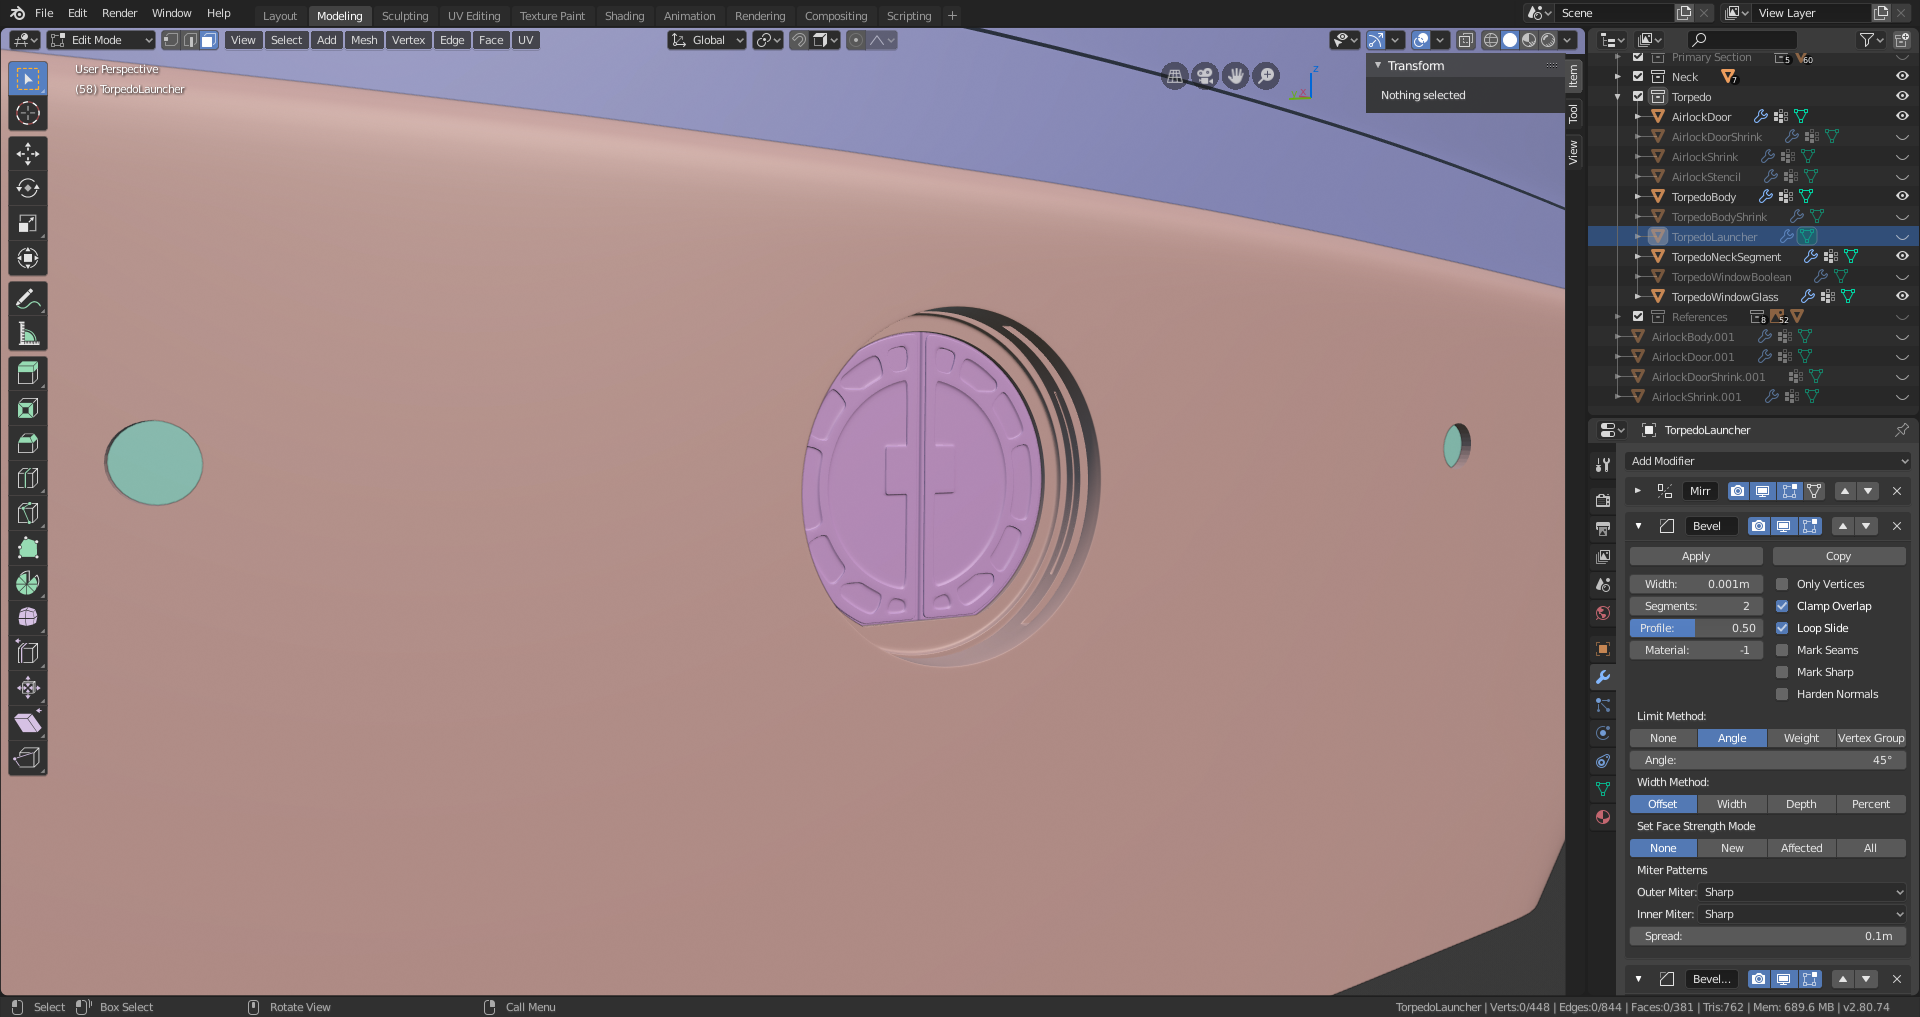
Of the lower neck section, I just have to make the front of the torpedo launcher. It's not exactly greeble-y, but it's got a lot of small details and will take a little bit of time to model, but I think I should be able to finish it tomorrow.
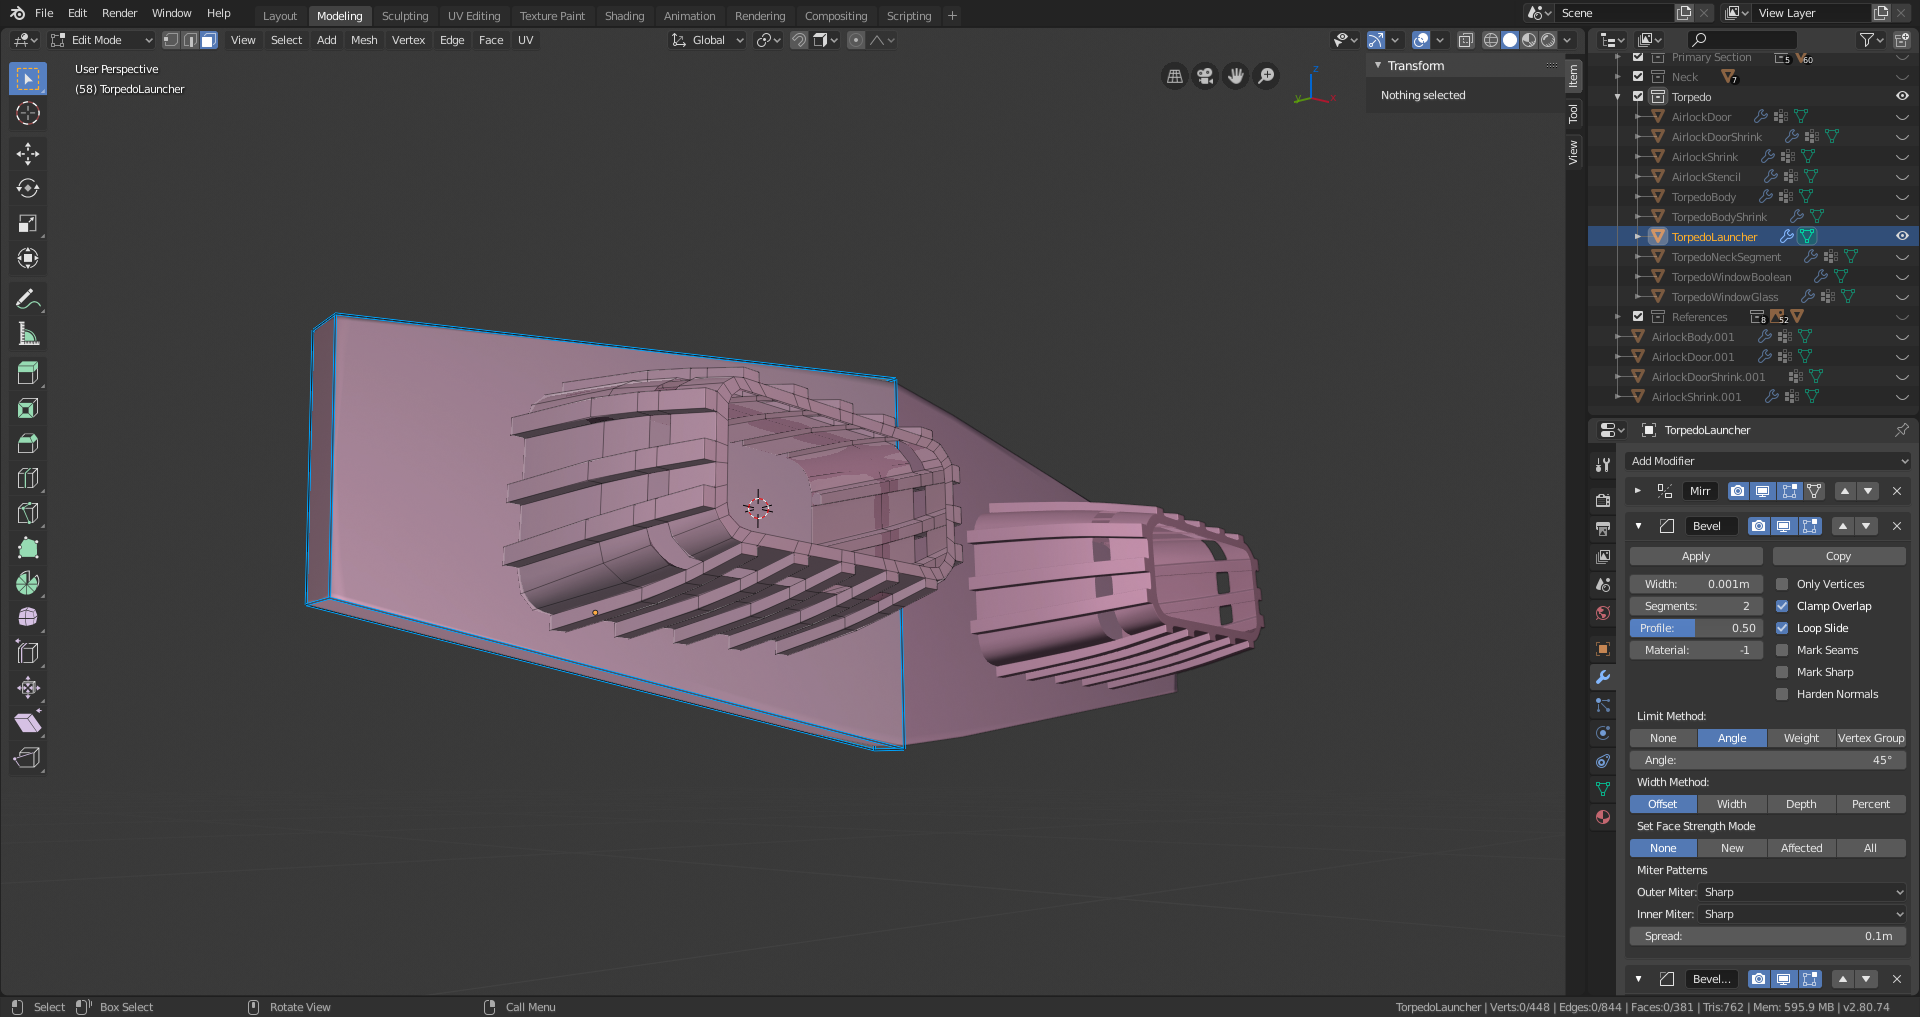
After that, it's on to the secondary hull. I'm on schedule to finish by the contest due date, but very apprehensive about making it in time for the critique. It'll be close if I make it. Expecting some rough weather over the weekend too, that might cause problems. But, I'm thinking happy thoughts!
All right, launcher detailing done, and with that the neck section is complete.
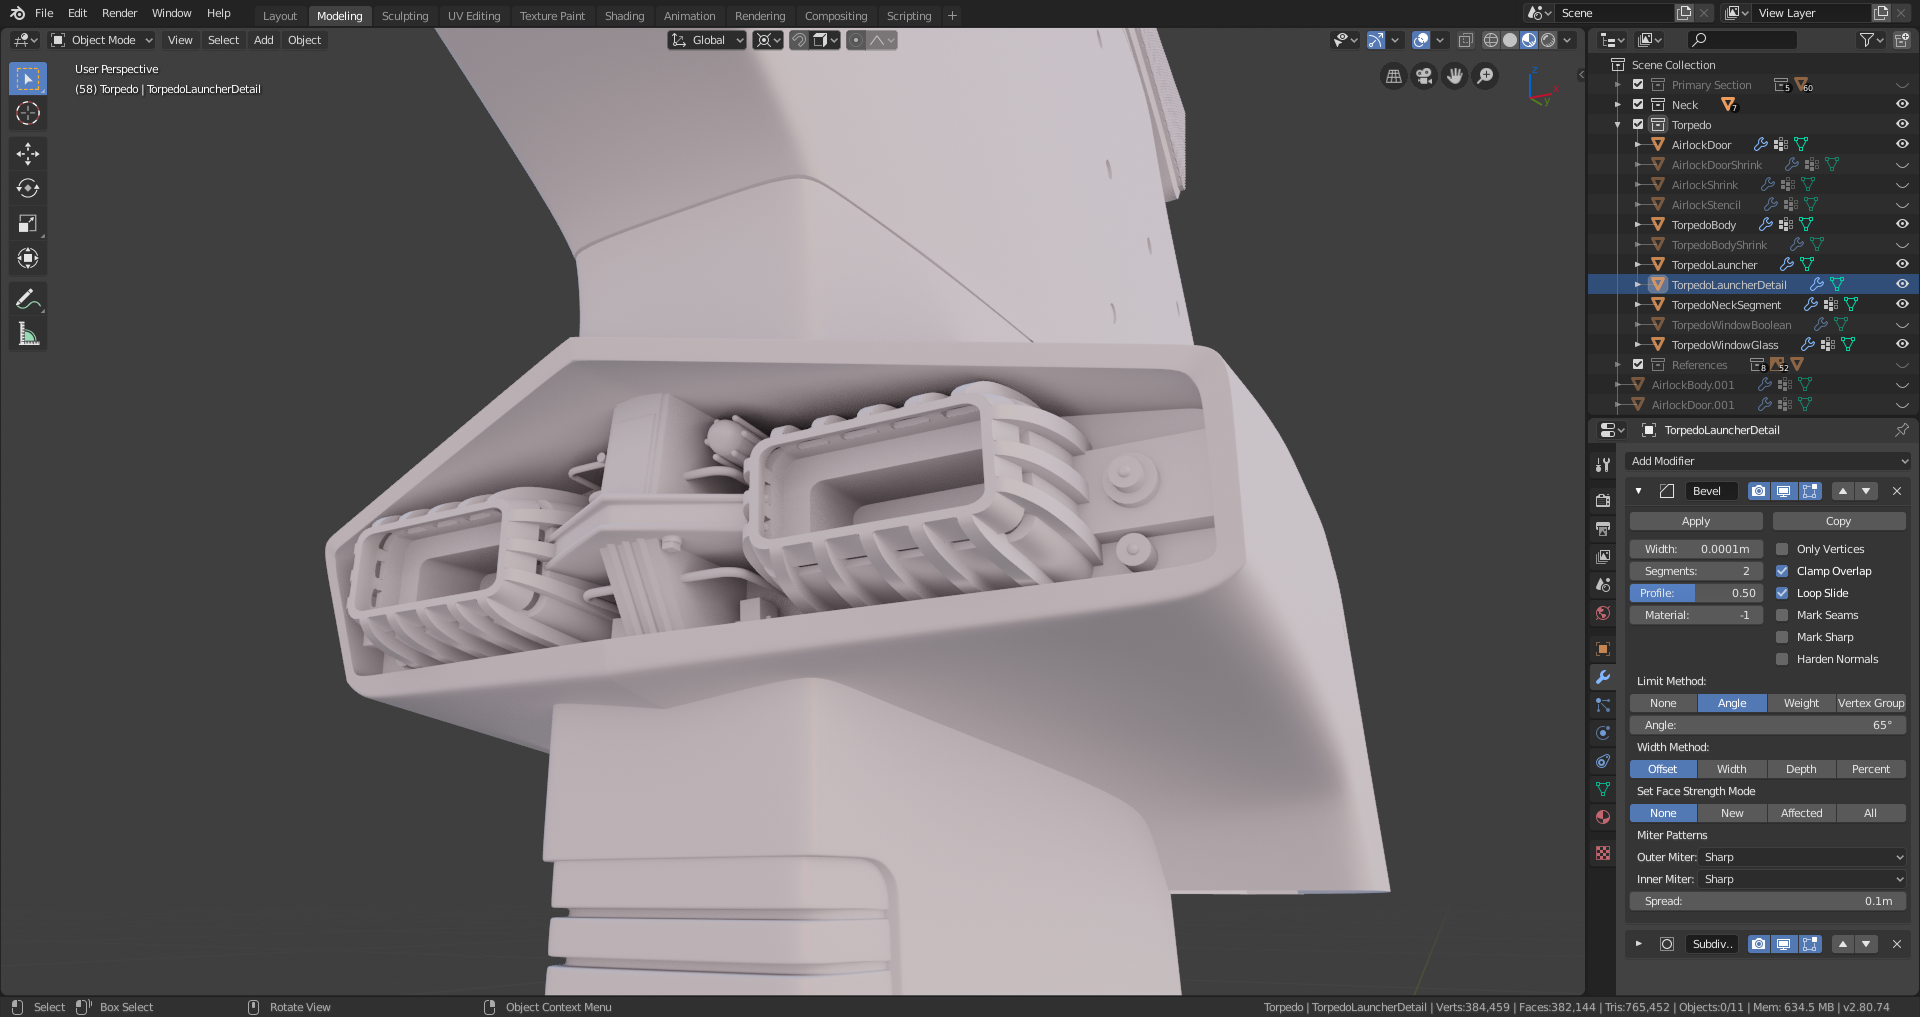
LookDev mode makes that look very satisfying! I love LookDev mode. I love so darn much about 2.8.
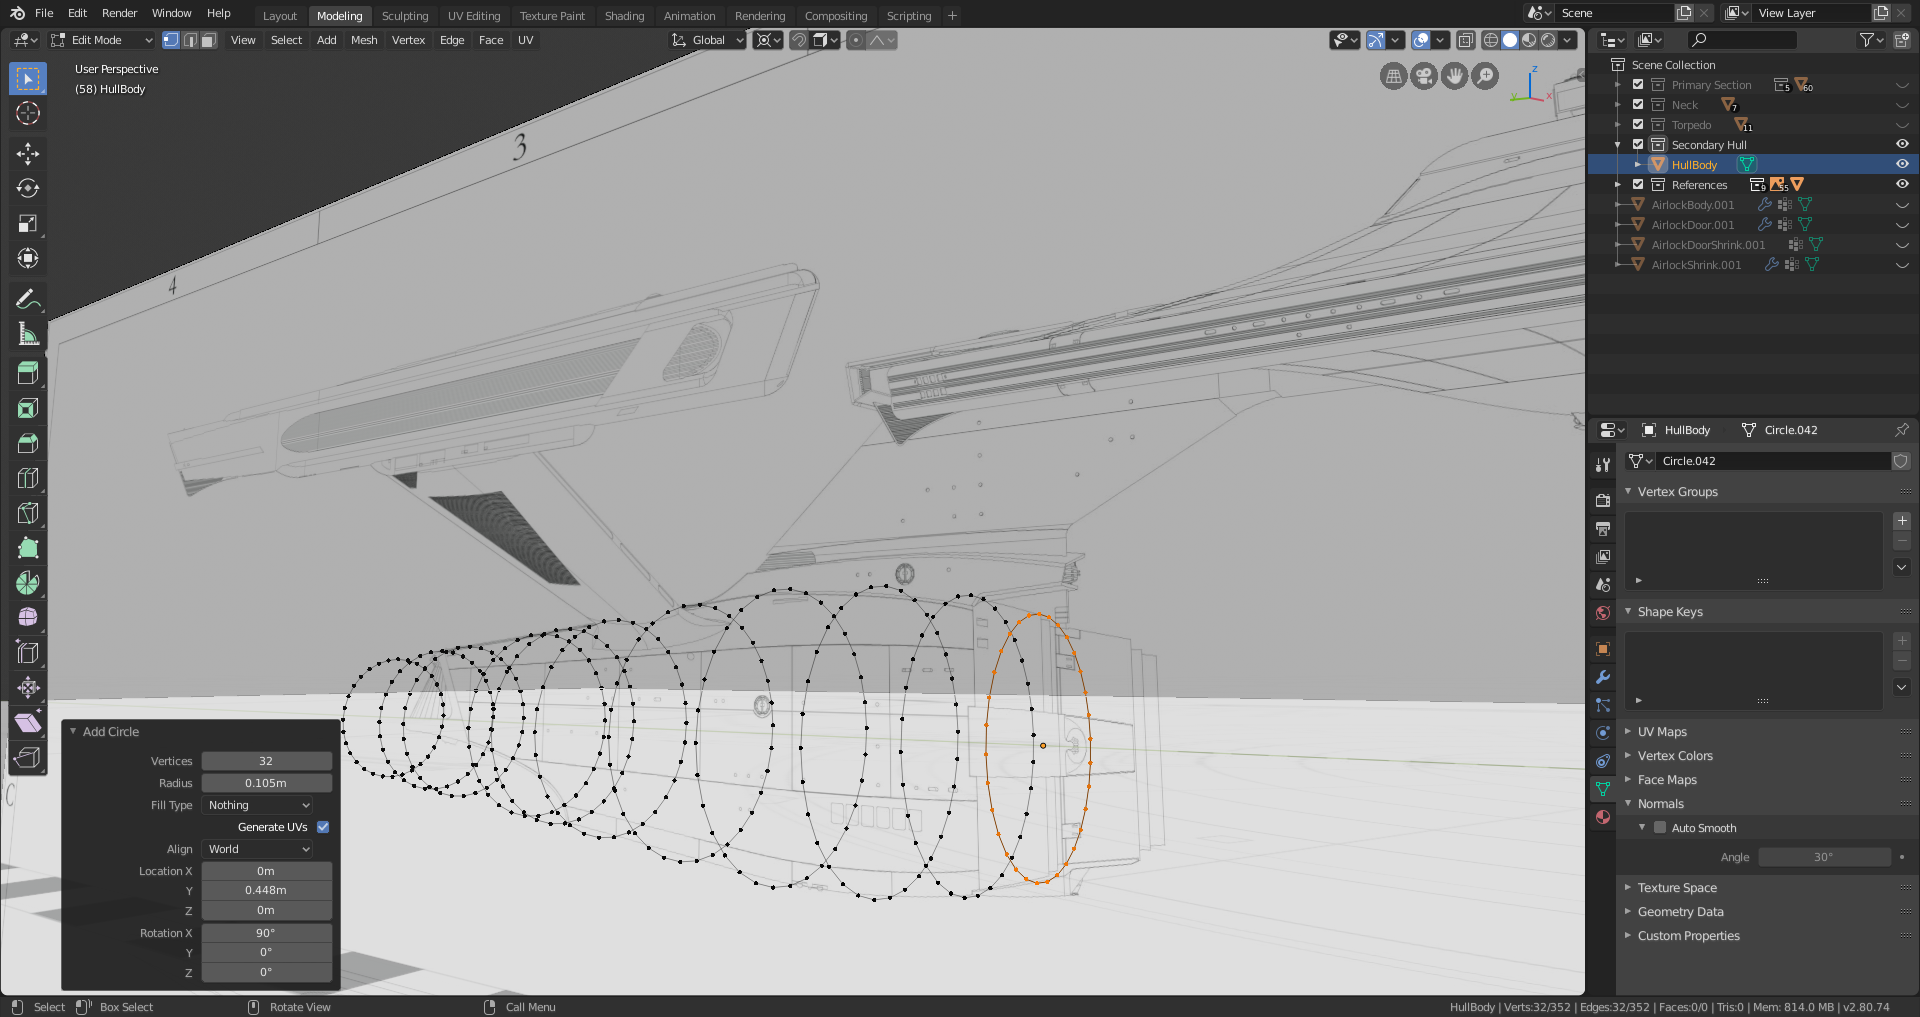
To be honest, I expected to be able to do more on the next section than just lay out the guides and a few frame circles, but that's all I was able to do today. This part might take me a couple of days - but I'm still hustling as best I can to make the critique, keeping in mind I still have to shade this mess AND build an actual scene by the 21st. I think I can I think I can....
![]() jakeblended How are you maintaining correct topology? It seems like good edge flow would be impossible with all those shapes stuck into other shapes. Could I please see the wireframe?
jakeblended How are you maintaining correct topology? It seems like good edge flow would be impossible with all those shapes stuck into other shapes. Could I please see the wireframe?
![]() williamatics Sure:
williamatics Sure:
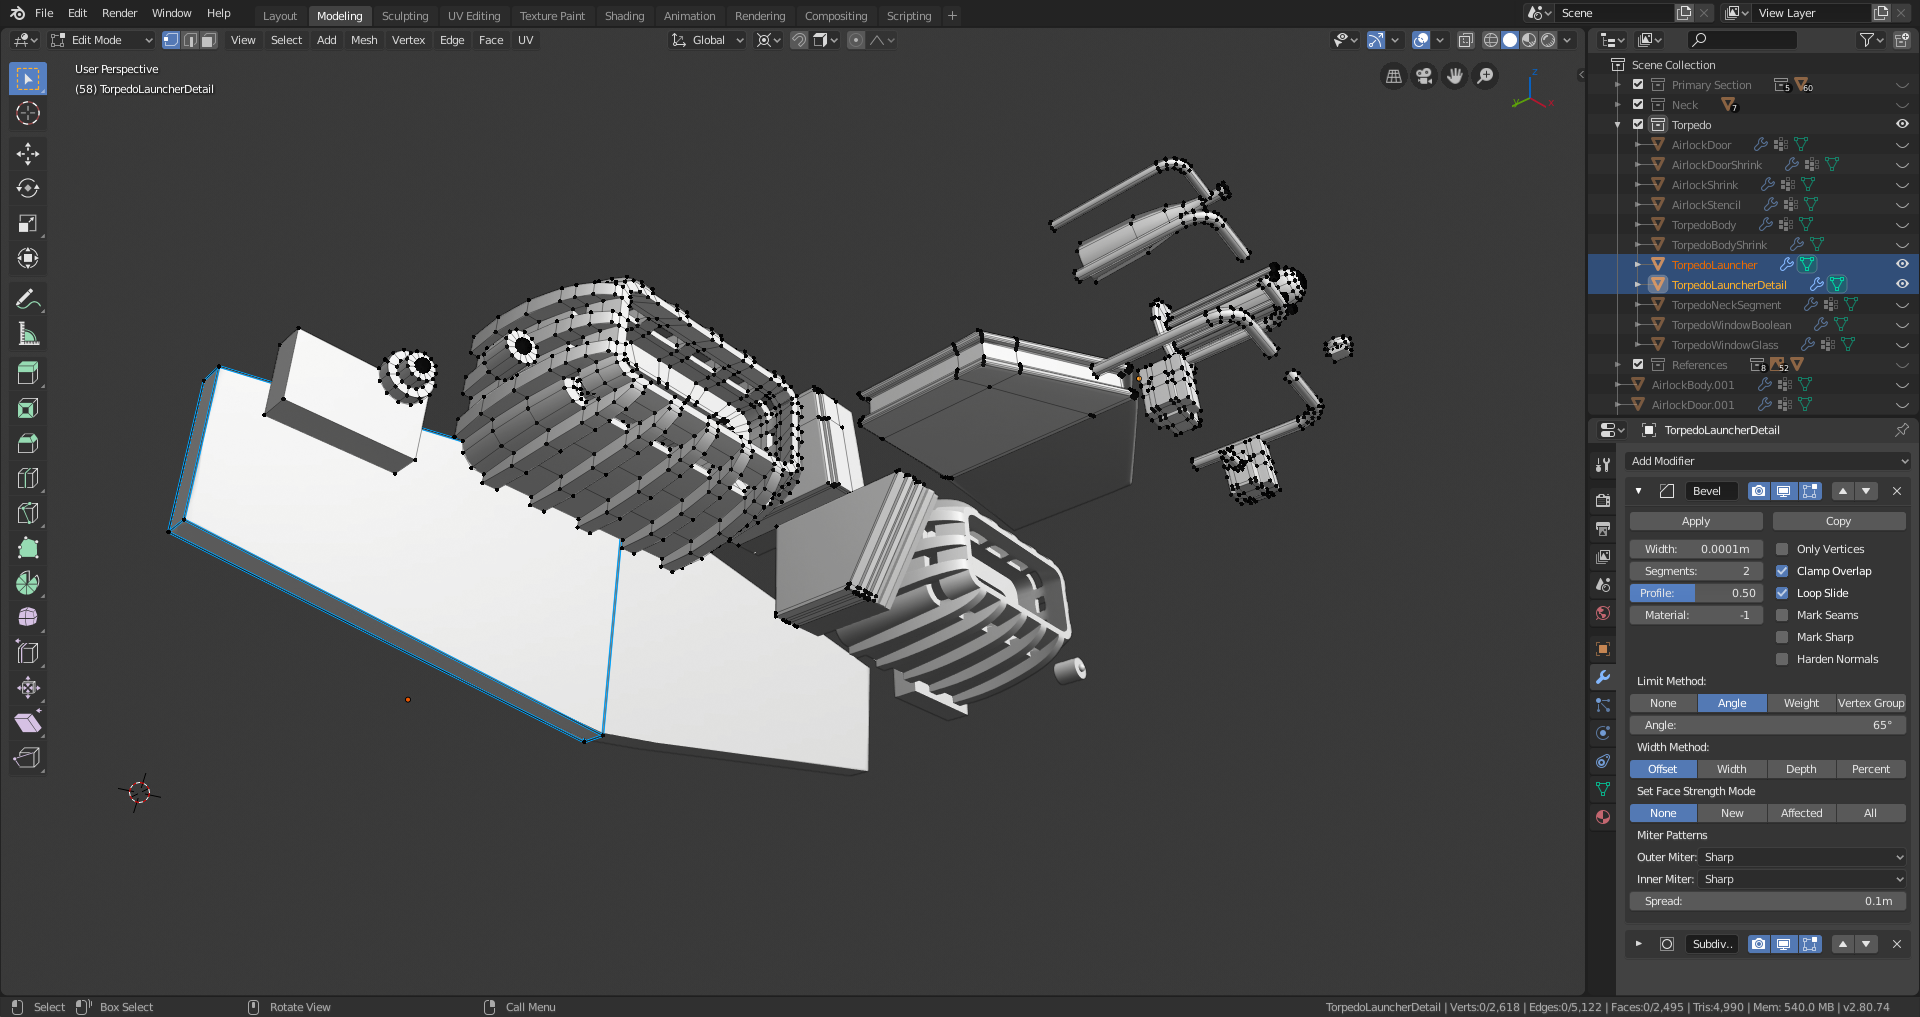
The "secret" is, it's not one contiguous mesh. It's all the same mesh object, as far as Blender is concerned (well, two objects - the small tubular parts together make their own second object); but the object is composed of separate mesh pieces whose surfaces intersect when they're put together but aren't actually connected to each other.
I can get away with this in this case because this model is not intended to be a game asset. As you can see from the earlier screenshot, Blender's lighting interprets this kind of arrangement just fine, with no weird artifacts. And since the separate pieces are all "joined" to the same object, your modifiers still work on all of them as intended, with the only real exception being that your bevel modifier won't create bevels where separate parts intersect, so you'd have to actually model a bevel into one of the pieces if you wanted that.
I use this same general method for most of the ship components.
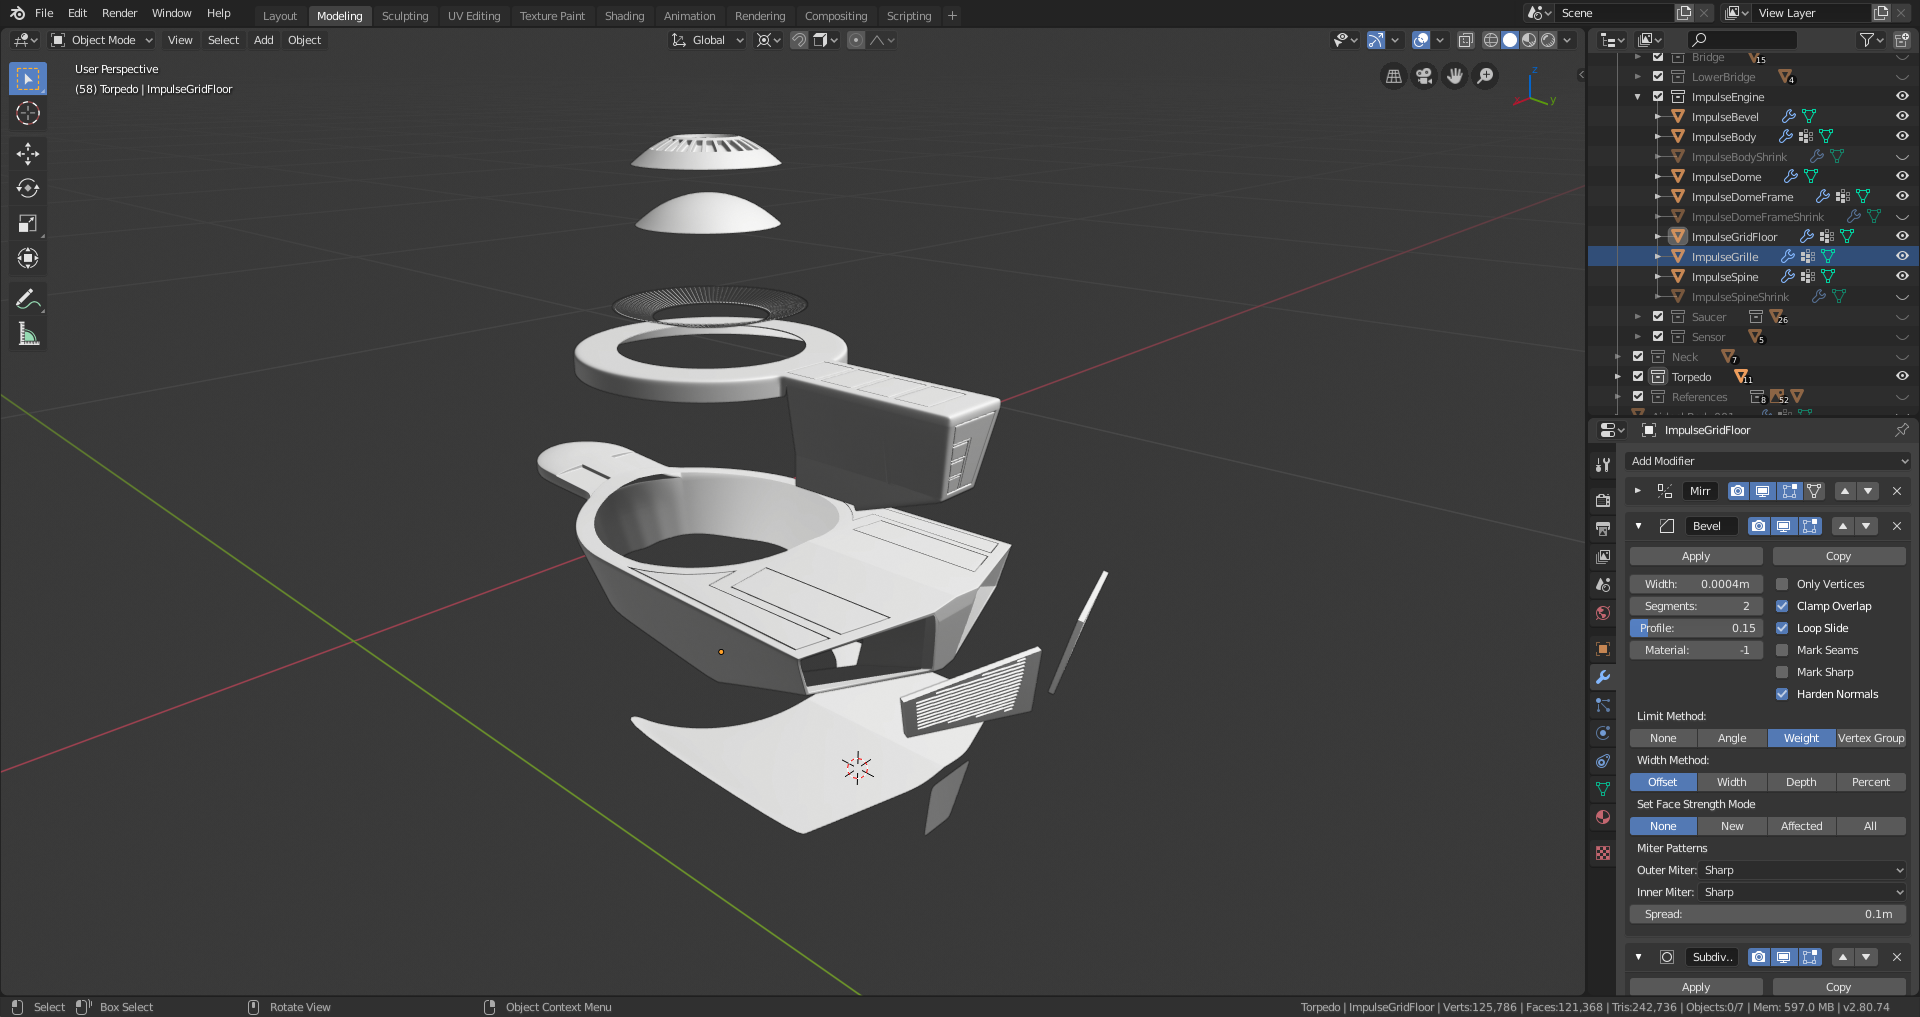
Although usually each "piece" is actually a separate object, rather than separate meshes joined into a single object. The only reason I did that for the torpedo launcher is because it's made up of so many different little pieces, it would clutter up the Outliner, plus I'd have to think of names for all those individual little bits. Joining them all into only one or two objects (without actually merging the meshes together) was more of an organizational choice on my part. The other thing you have to consider is that all separate mesh pieces that are joined into a single object have to share the same modifiers. That's why I didn't join the little tubes into the rest, but made them their own object - I didn't want them using a Bevel modifier like the rest of the pieces. You could also join them anyway but use a vertex group to exclude them; either way works.
For windows, I use objects modeled into the shapes of the windows I want, combined with a Boolean modifier. See here:
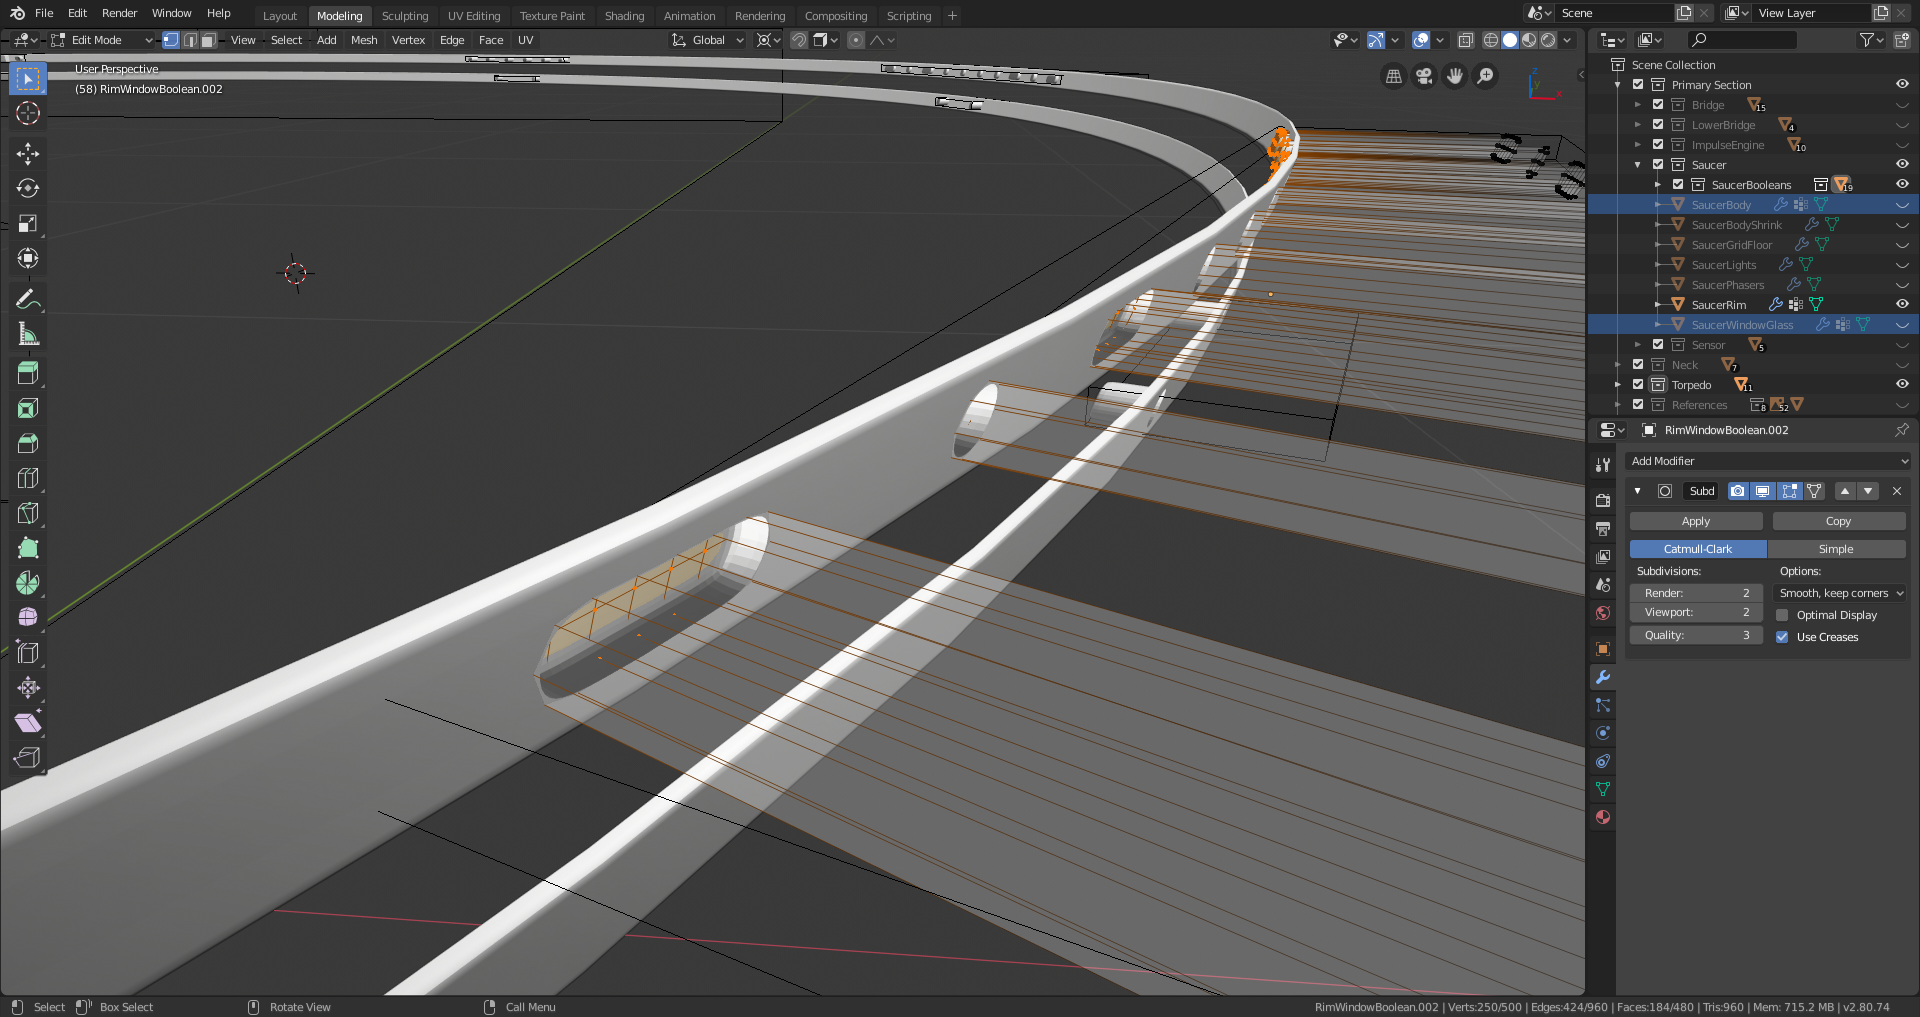
Here, the "Saucer Rim" object has the Boolean modifier, with the windows object as the affecting object. The "trick" is, the Boolean modifier is never applied; like the Subsurf modifier, it just lives permanently in the modifier stack. The windows object is simply turned invisible. So the mesh of the Saucer Rim object is never actually cut - the principle of non-destructive modeling. The downside to this method is, when it's time to UV-unwrap the mesh for texturing, those windows don't actually "exist" and therefore they don't appear in your UV map. You can't texture the inside of the Boolean cut differently from the rest of the object. That's okay for me in this application because only a sliver of the "window frame" is actually visible and it would be the same material as the rest of the spaceship hull around it anyway. But if you need details inside your cuts, then you need to actually apply the Boolean and clean up your mesh issues the "hard way".
For the window glass, I use basically a copy of the surface the Booleans are cut into, separated and scaled back just slightly so it intersects the cut, like so:
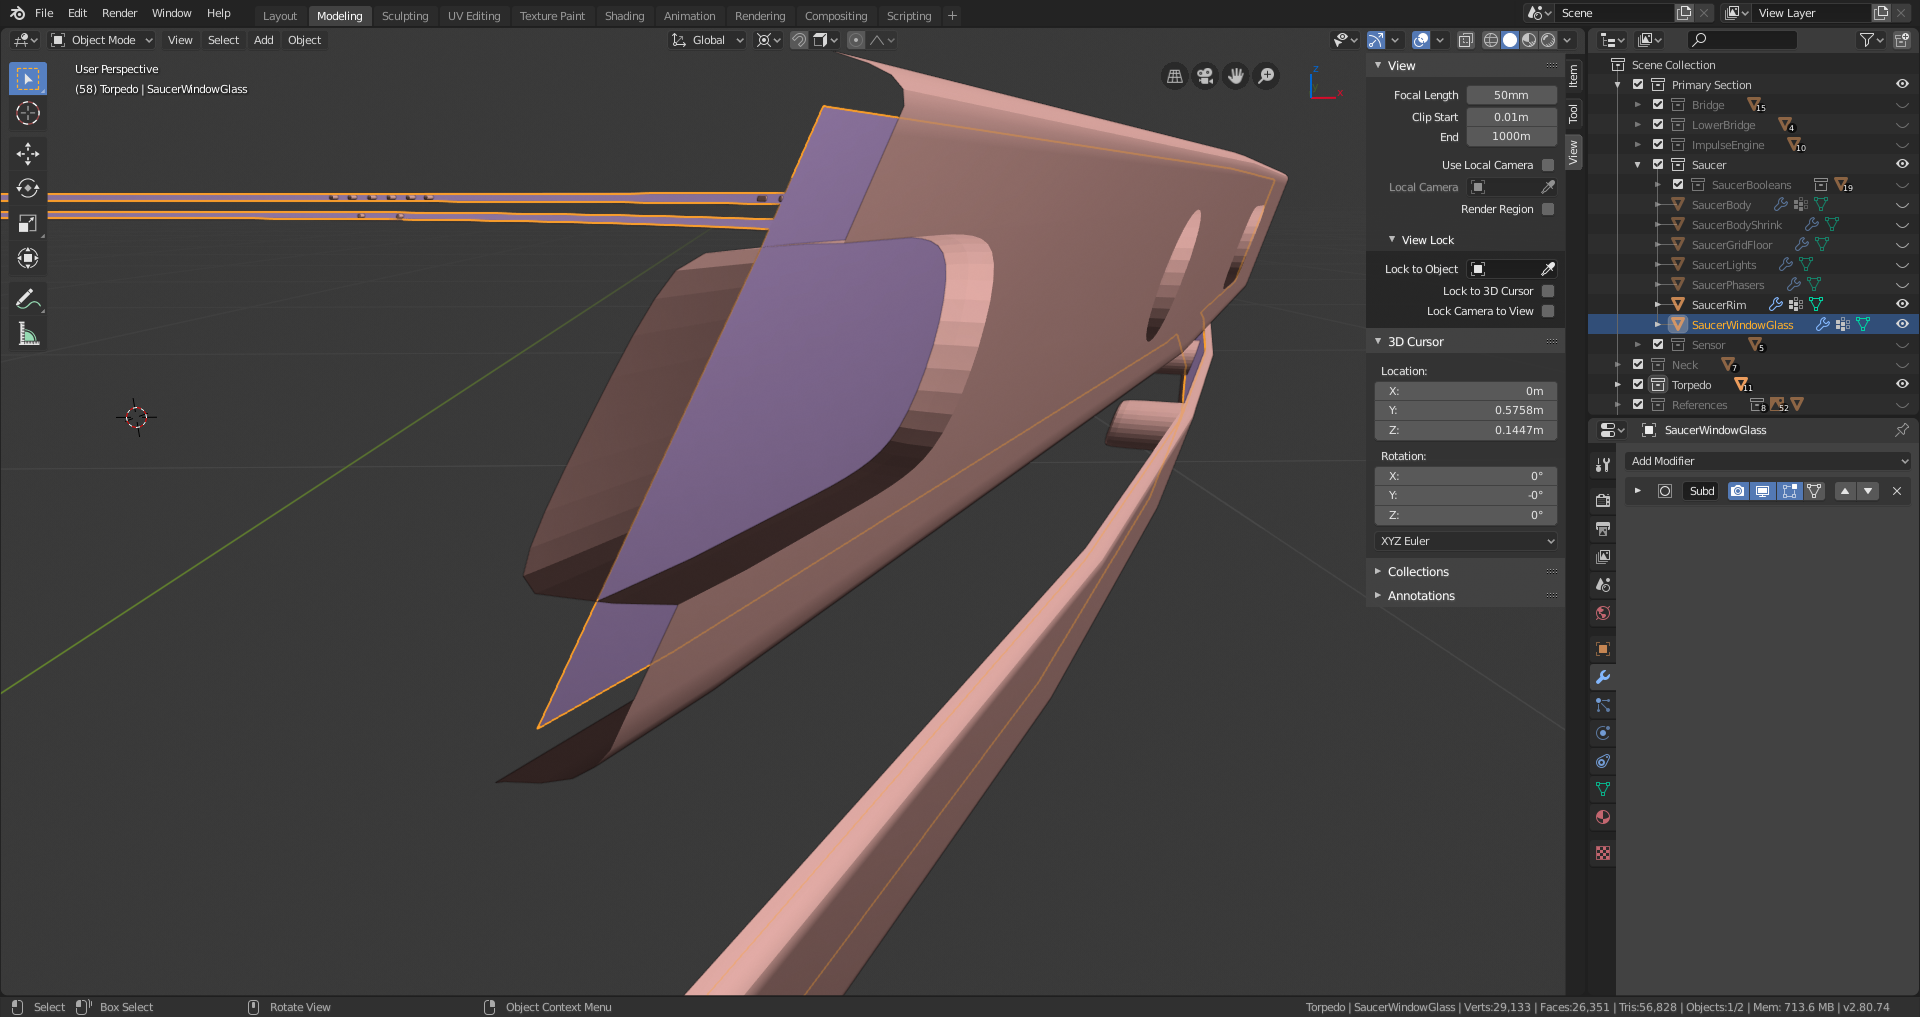
This both reduces the profile of the window cuts and solves the problem of the fact that the window glass does need to be a different material from the rest of the hull. When it's time to shade, I can give this "glass" object some emission and presto - lighted windows.
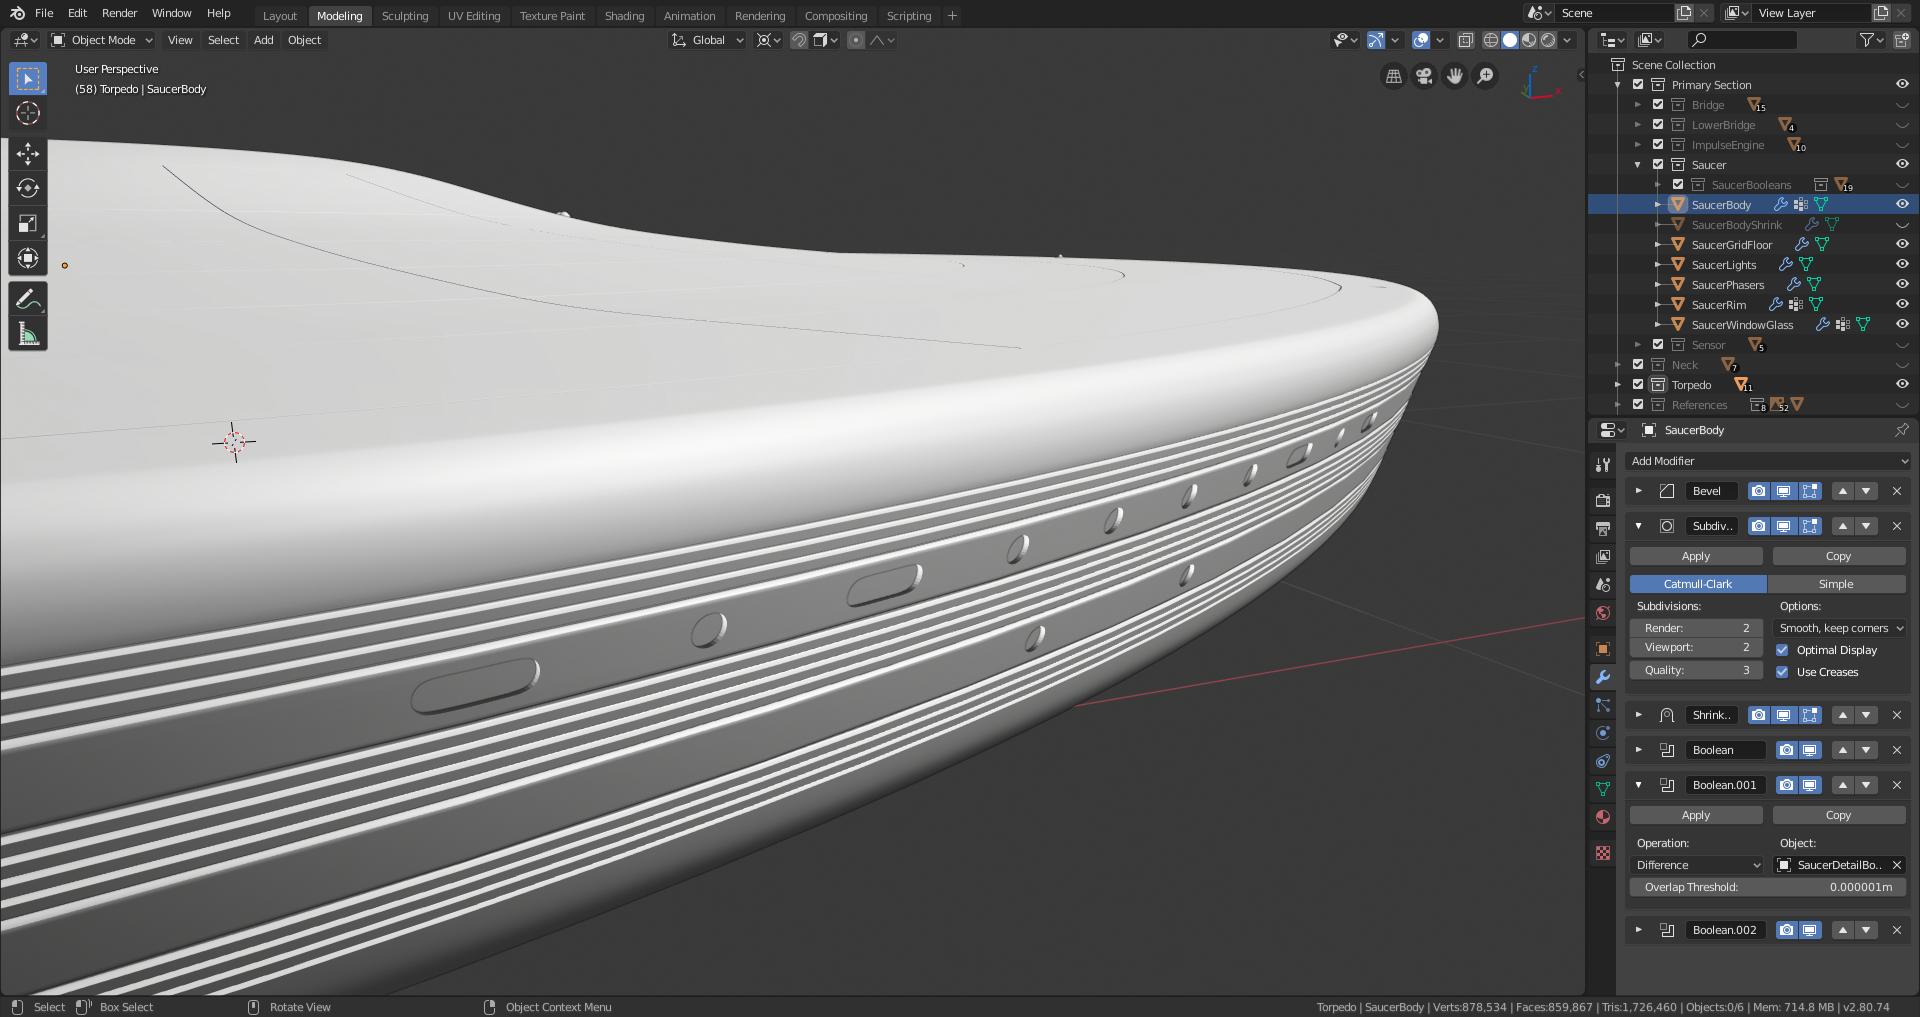
The Booleans plus the glass:
I got an okay amount of work done on the lower section today.
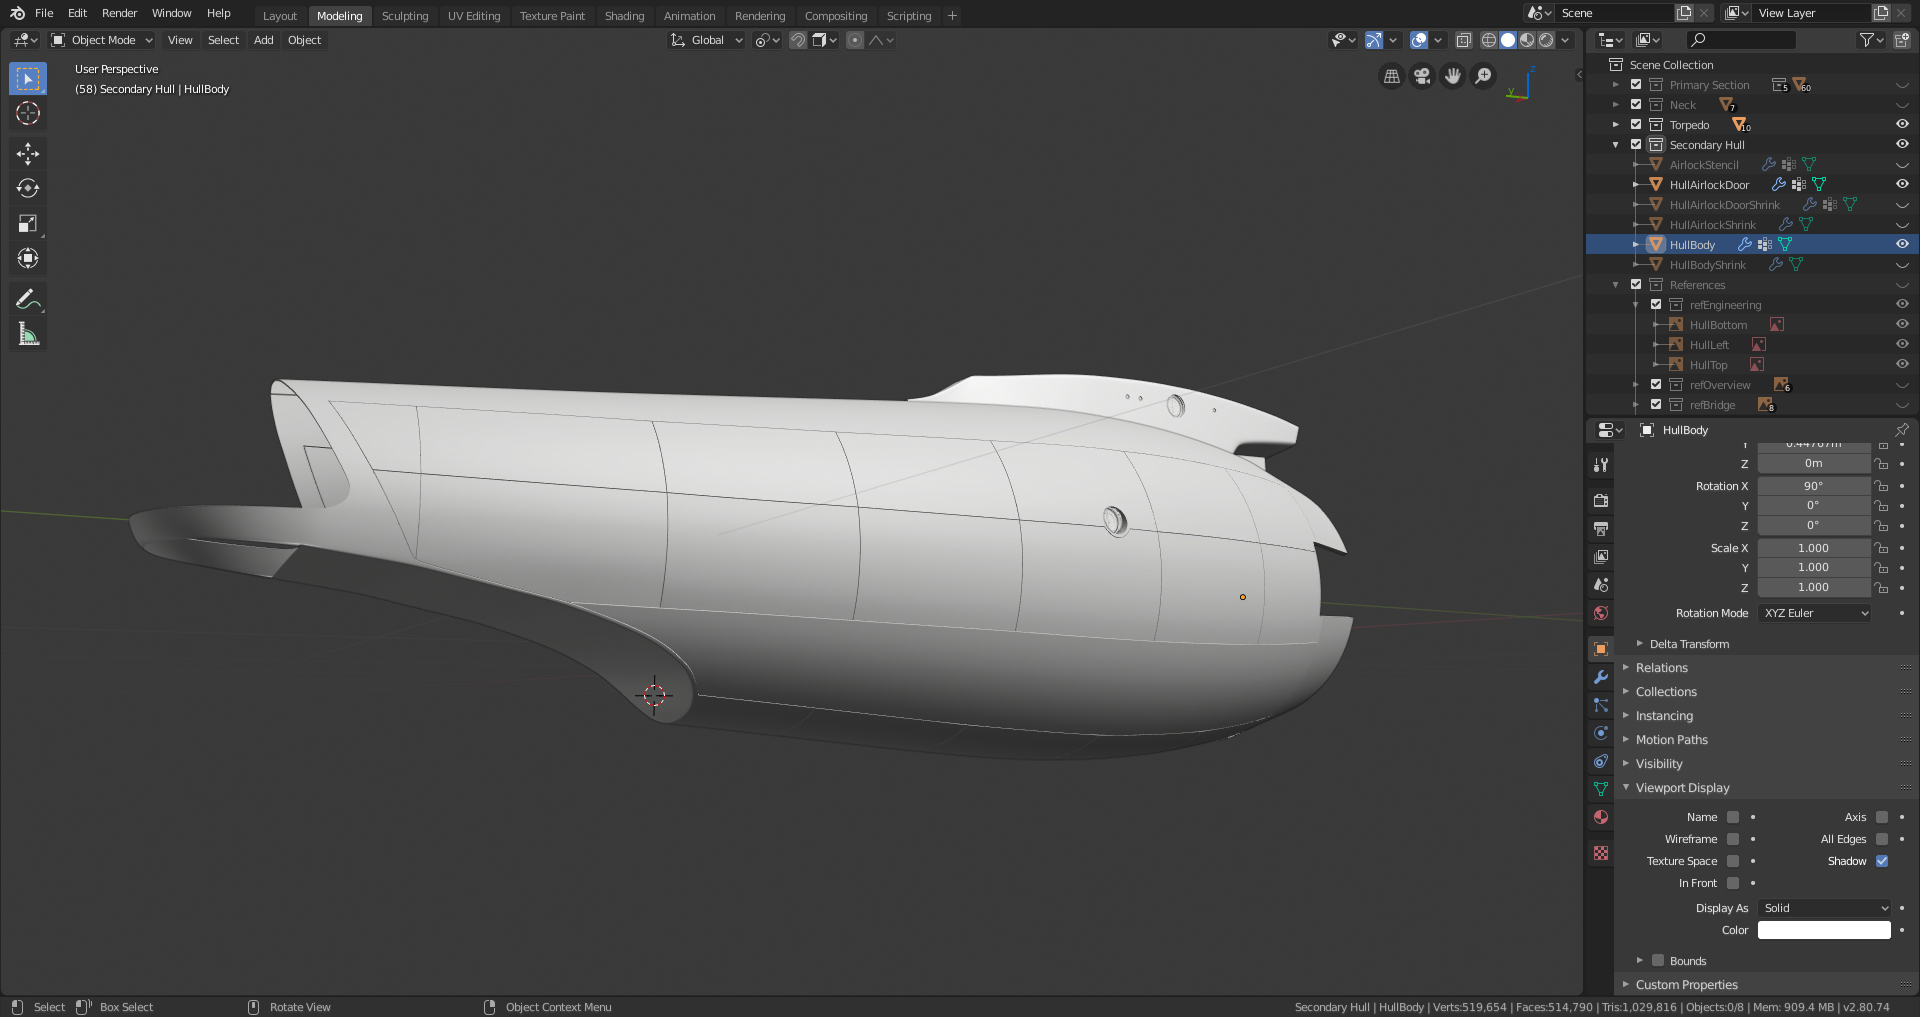
Tomorrow I need to finish this part. I have to at least get the front and back end details done, and the windows. If I'm lucky, I might be able to start on the engine struts. I'm trying my best to work as fast as possible without leaving anything out. I've hit something like a stride workflow-wise, but the calendar is my mortal enemy at the moment and it's a fairly even match.
Well I did not get as much done as I wanted today. Been dealing with electricity issues all day from the tropical storm - I'm not in an area where I'm in any danger, but my local power grid is just kind of dodgy and susceptible to problems when it rains all day long. Still, I got SOME work done. I finished the front details:
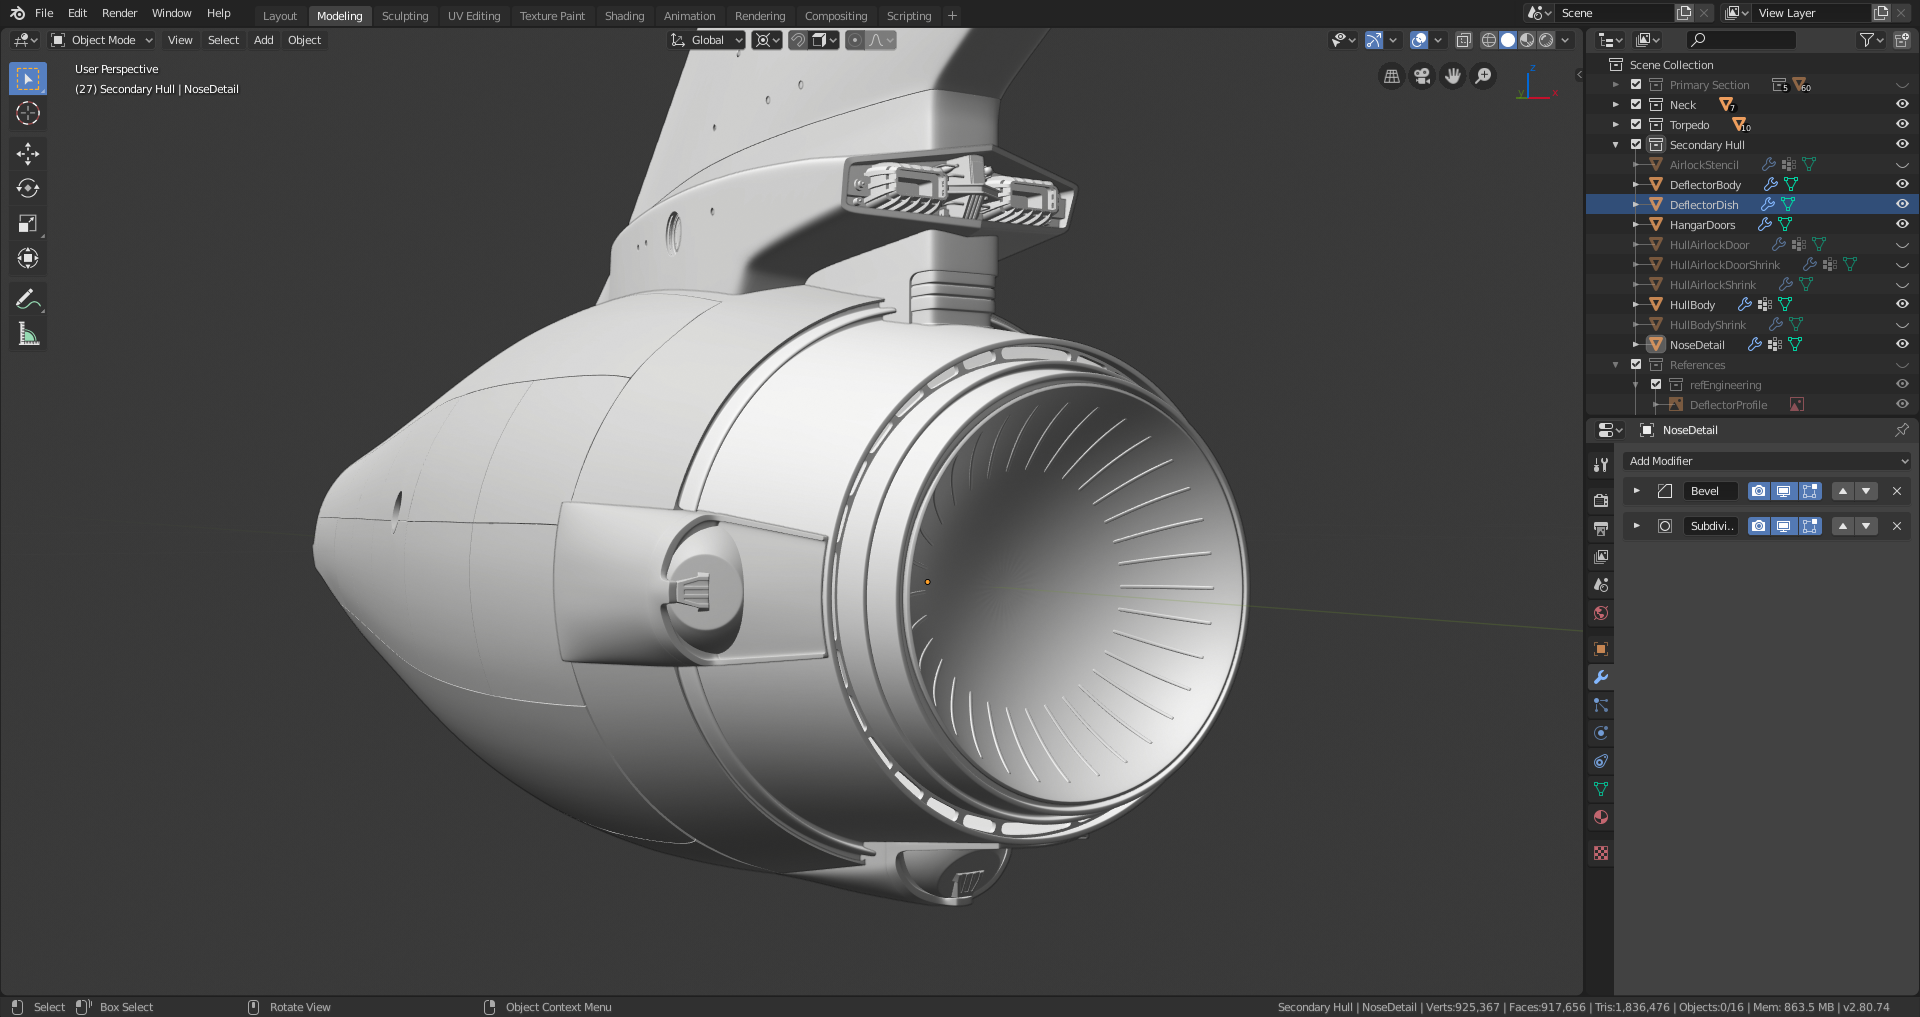
And I got the tail all blocked in at the very least.
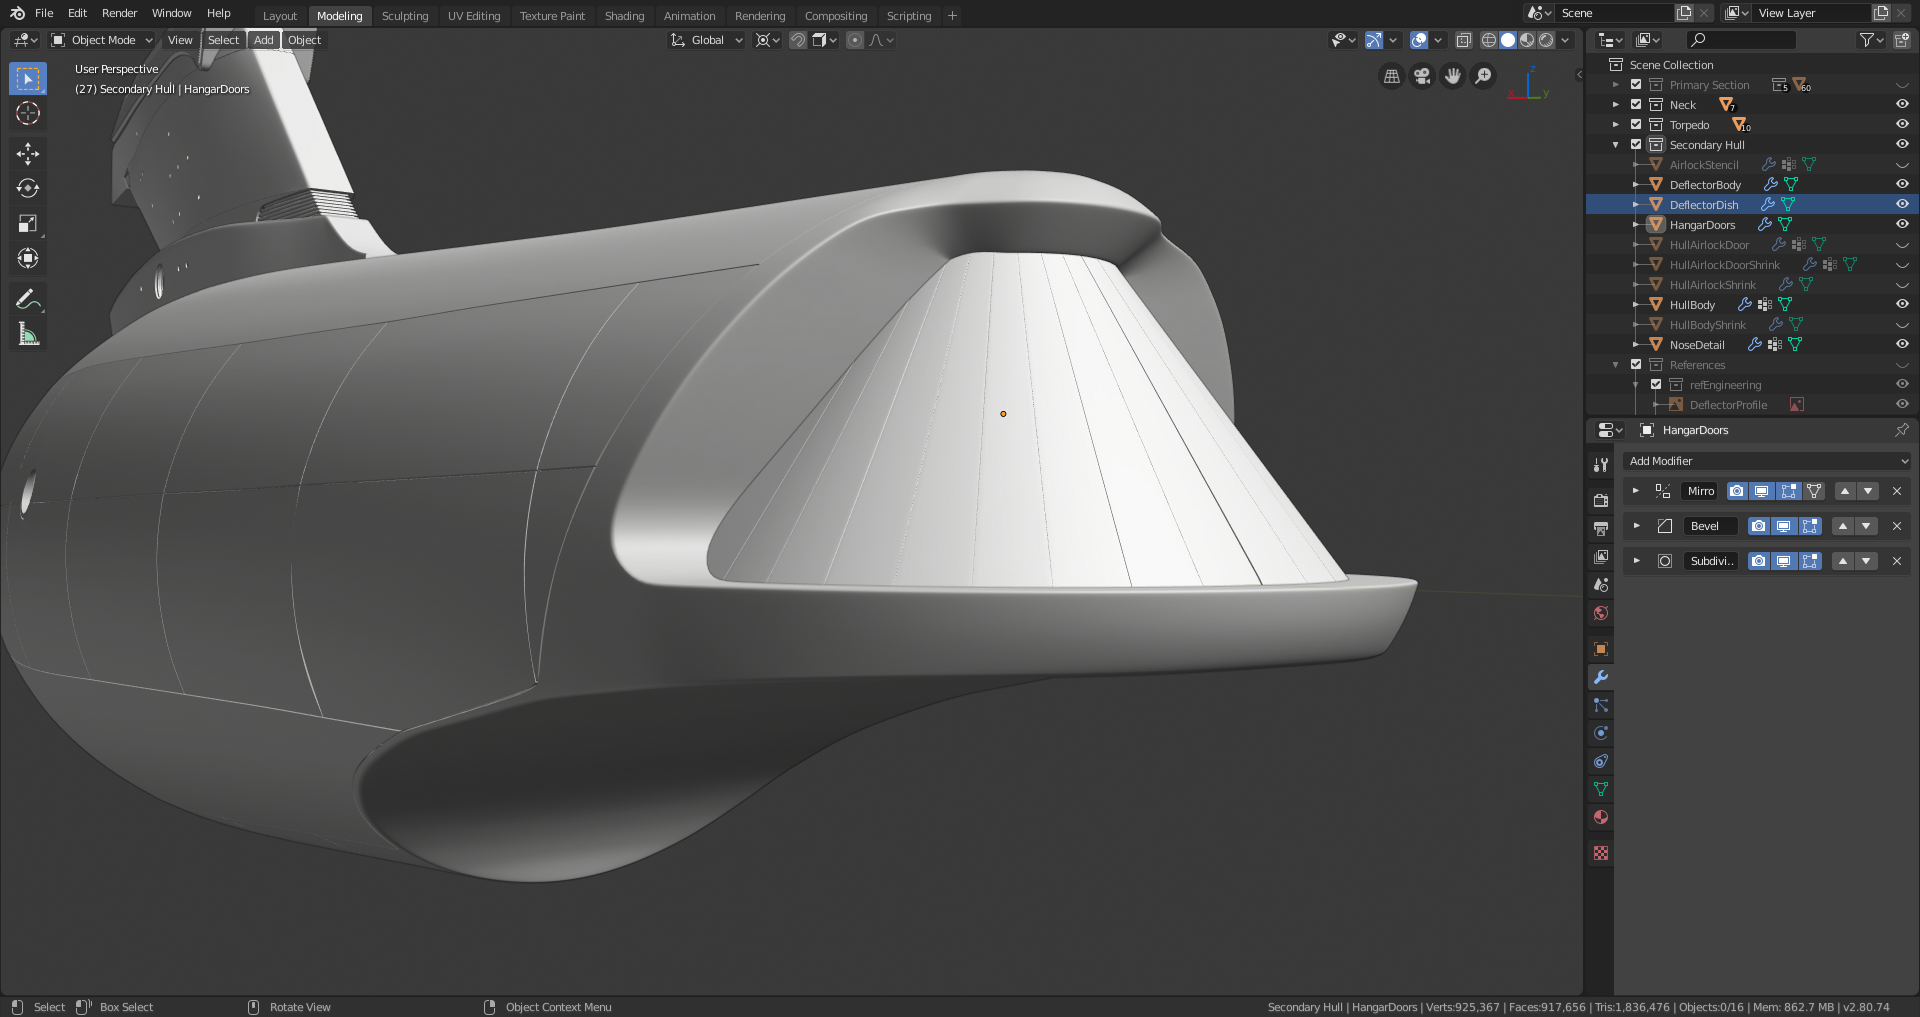
But there's a lot of greeble-y stuff on either side of those doors that I have to model; and I didn't even get started on the windows and other small body details. Have to get all that done tomorrow.
![]() jakeblended the back-thruster part looks great. You’ve been doing some badass hard surface modeling on this project, keep it up 😎👍🏻
jakeblended the back-thruster part looks great. You’ve been doing some badass hard surface modeling on this project, keep it up 😎👍🏻
Psst... secretly hoping you will share a screenshot with all the parts you have modeled so far assembled 😉
Okay, tail end detailing done, along with all the windows, weapon turrets, and other bits and bobs. Secondary hull is complete.
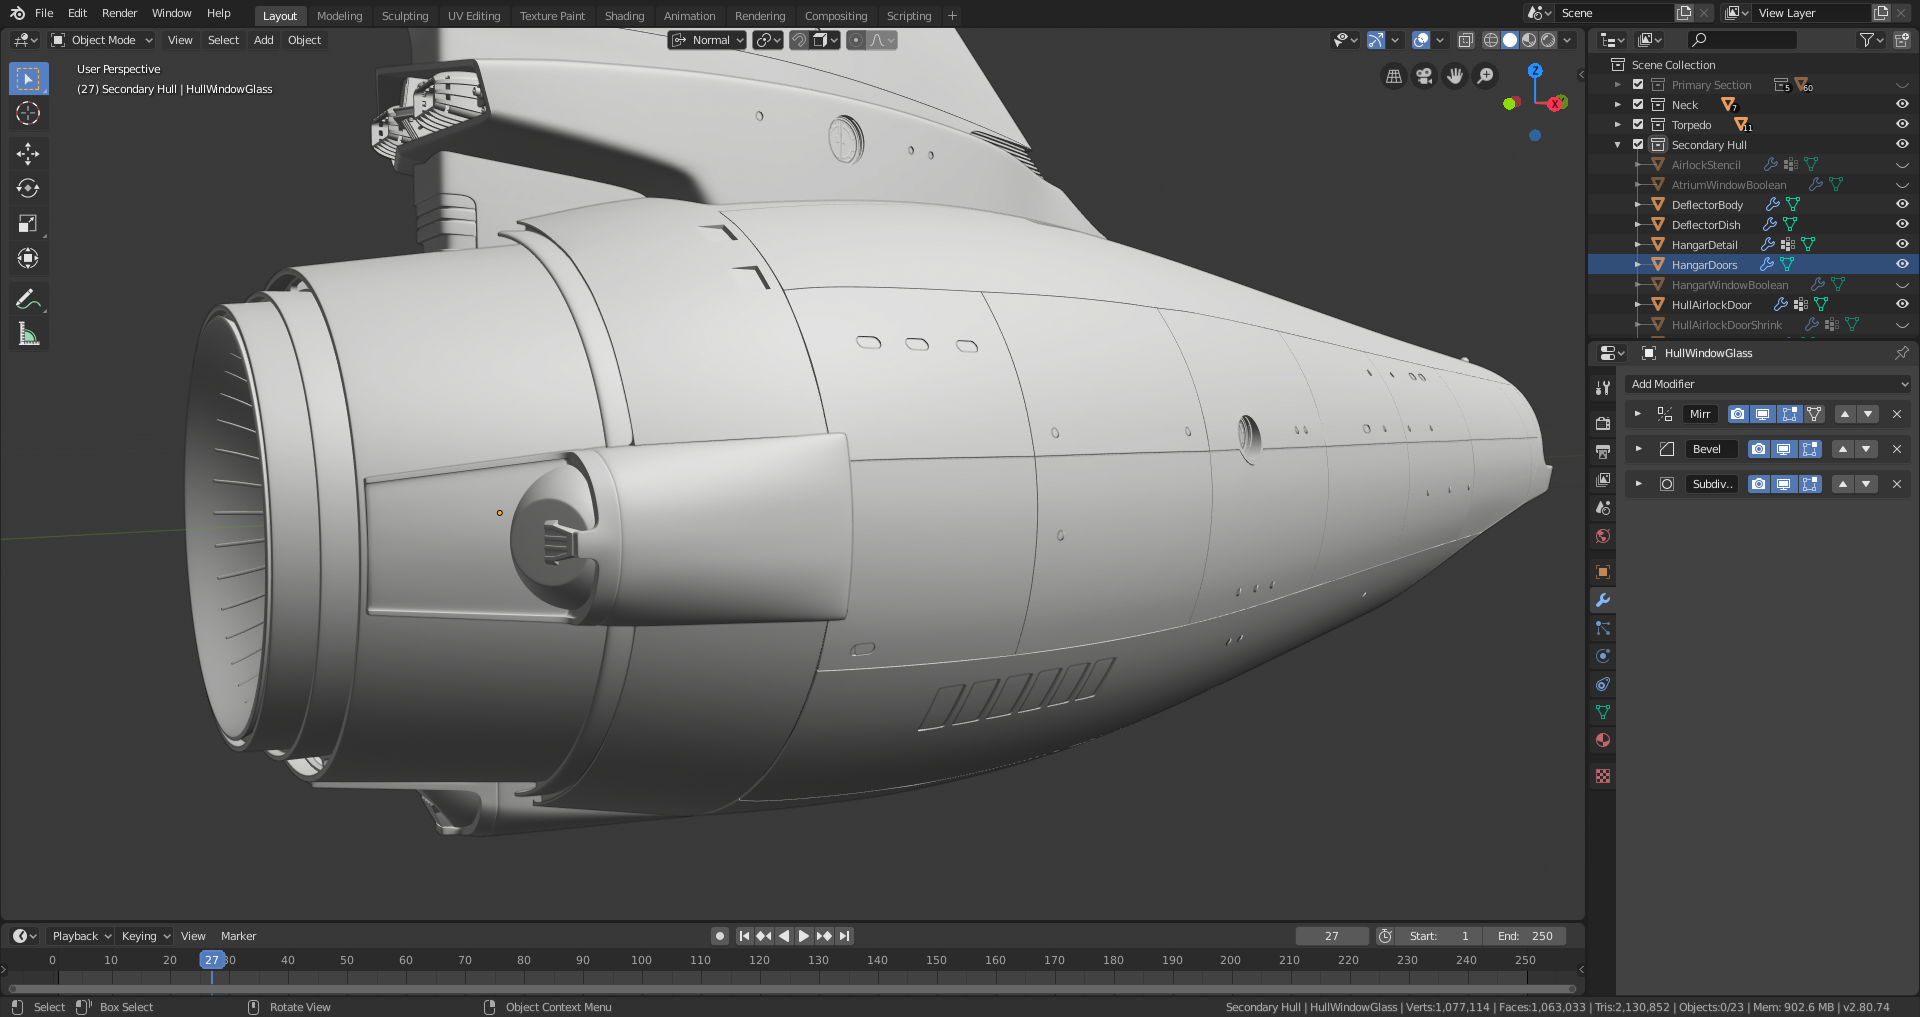
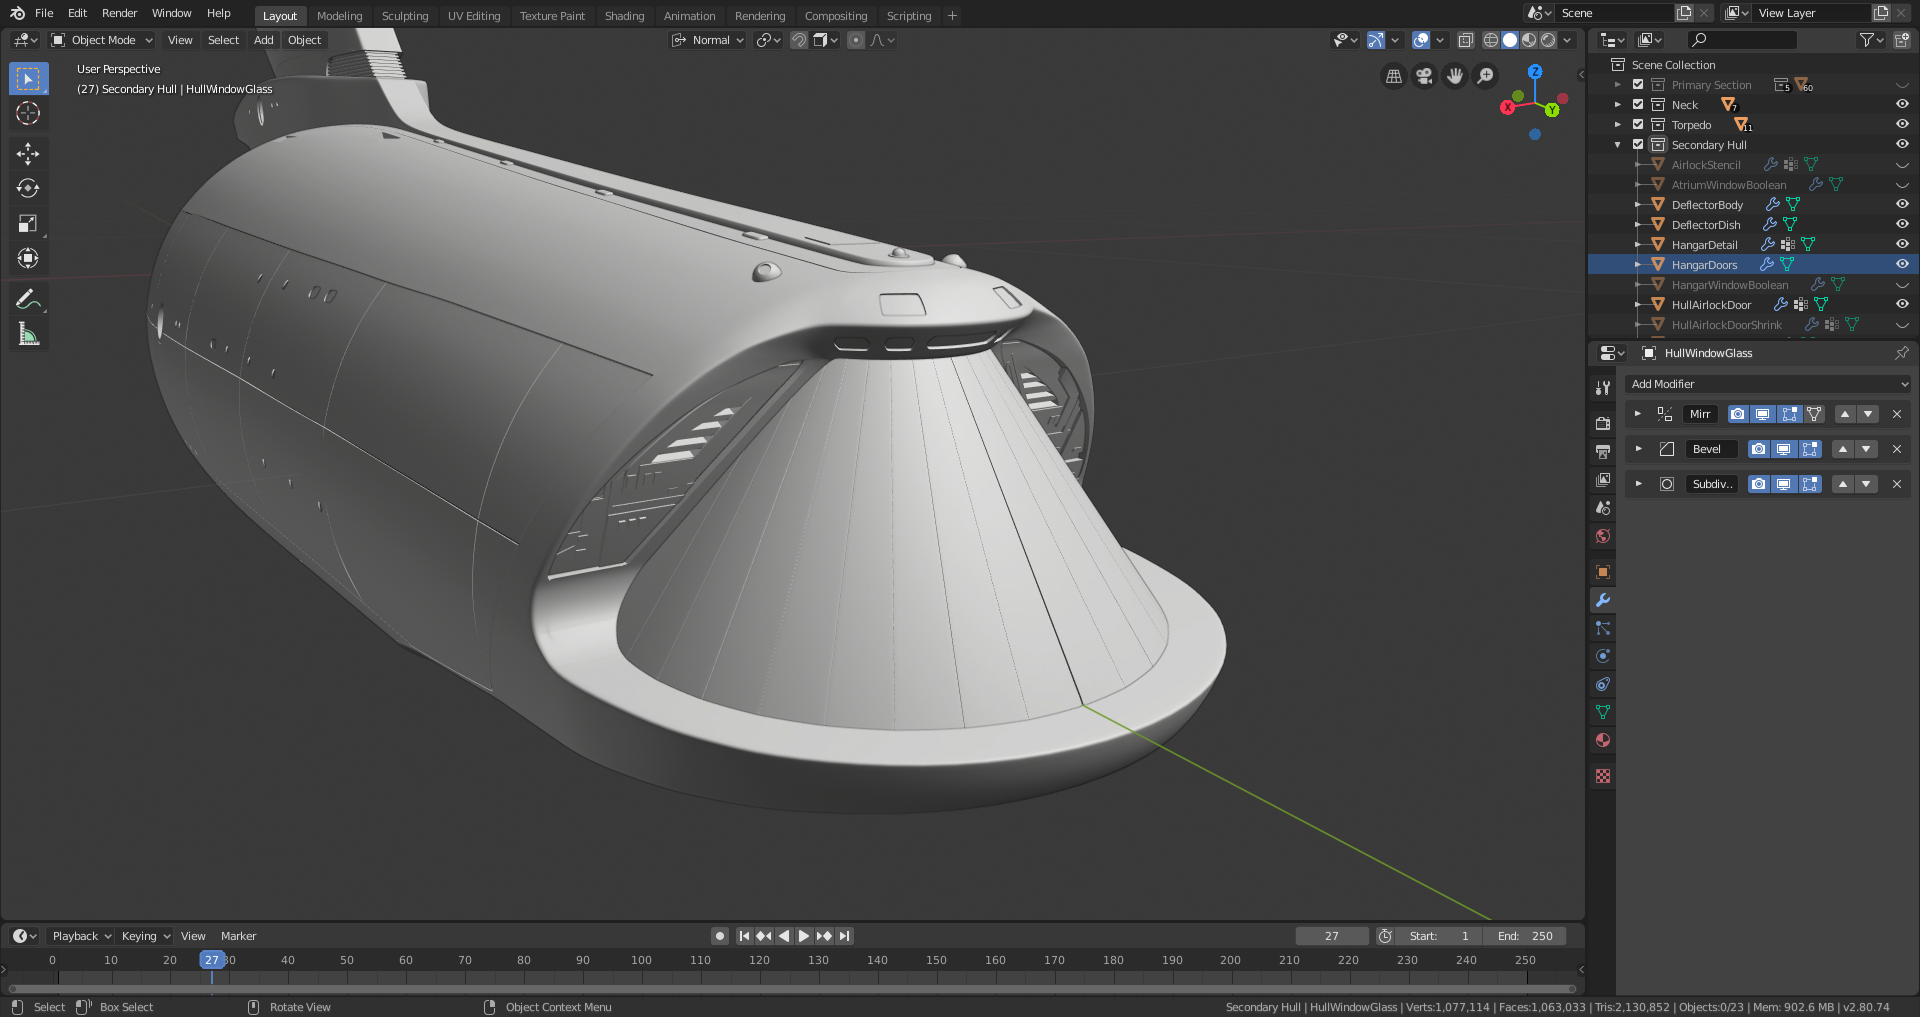
Next up, the engine towers. The final parts! Let's see if I can get them done in only a couple of days. Still a long-shot to have a fully completed scene by the 21st, but not giving up yet.
All right. Finished the struts and working on the engines now.
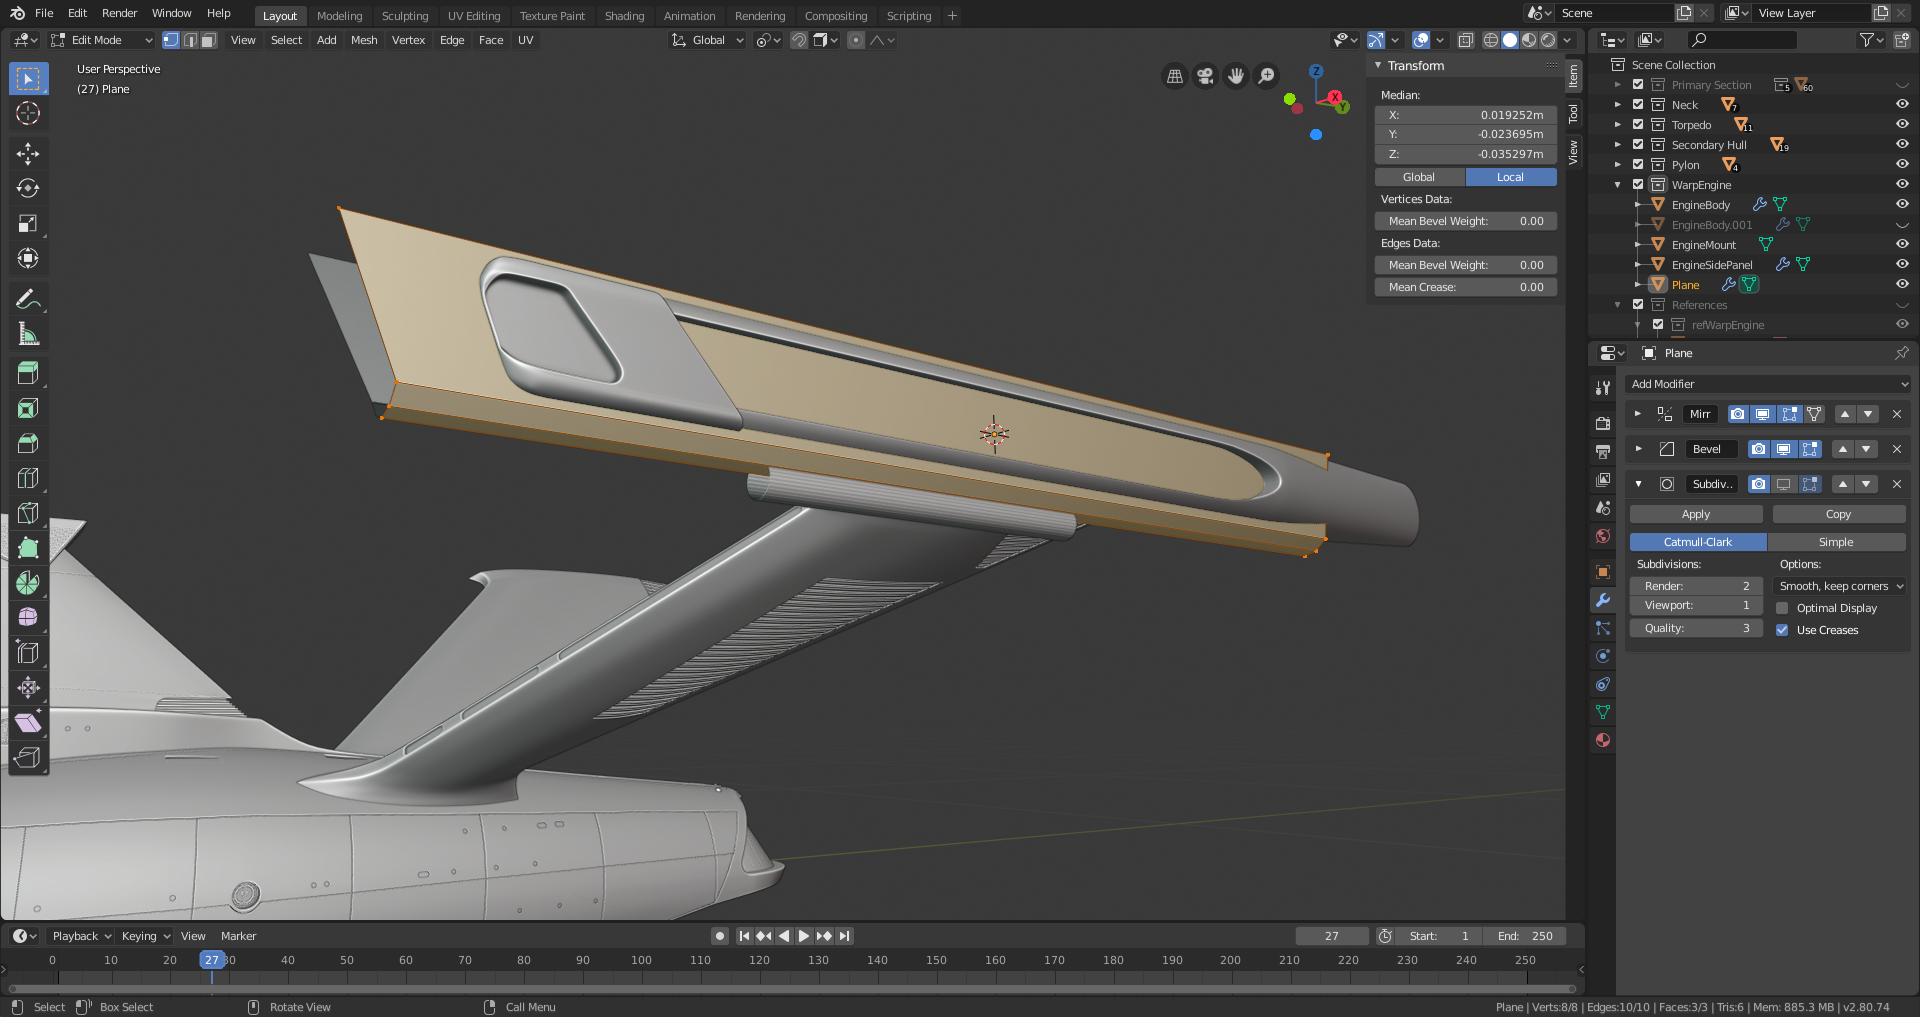
If I'm really lucky, I might have this last part finished tomorrow! If I do, then I'll go back over the whole thing to make sure I didn't forget anything, or miss any stray bad geometry. Can't wait to grab some screenshots of the finished model!
Then, it'll be shading time. I've got my work cut out for me, if I want my shading to be as accurate as I've tried to make the mesh...