Just starting my individual thread.

ppfbourassa. Here is a decent close up of the front of the bucket. There are some unique angles of the 434E on this youtube video:
That's a great angle! I re-did mine to bring it closer to this, but there is still work to be done.
And I shifted my holes around so they match your arms.
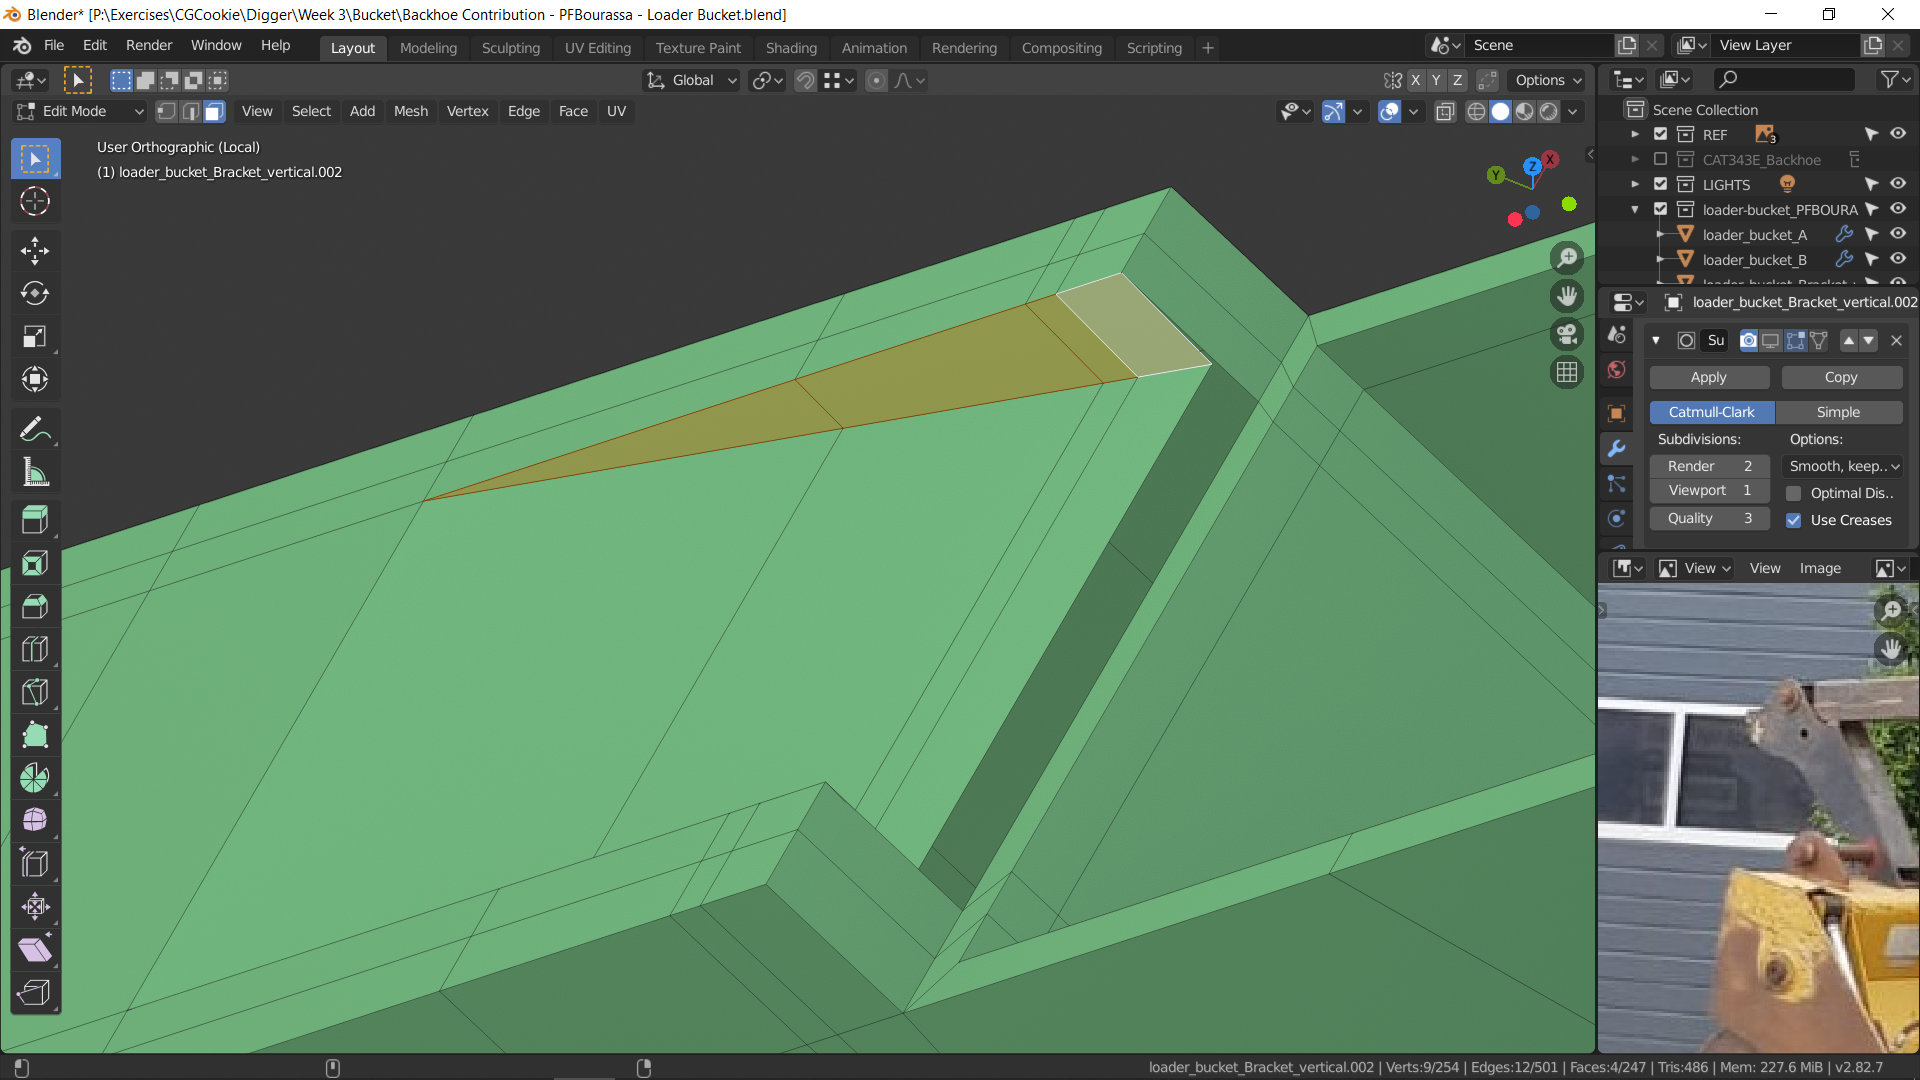
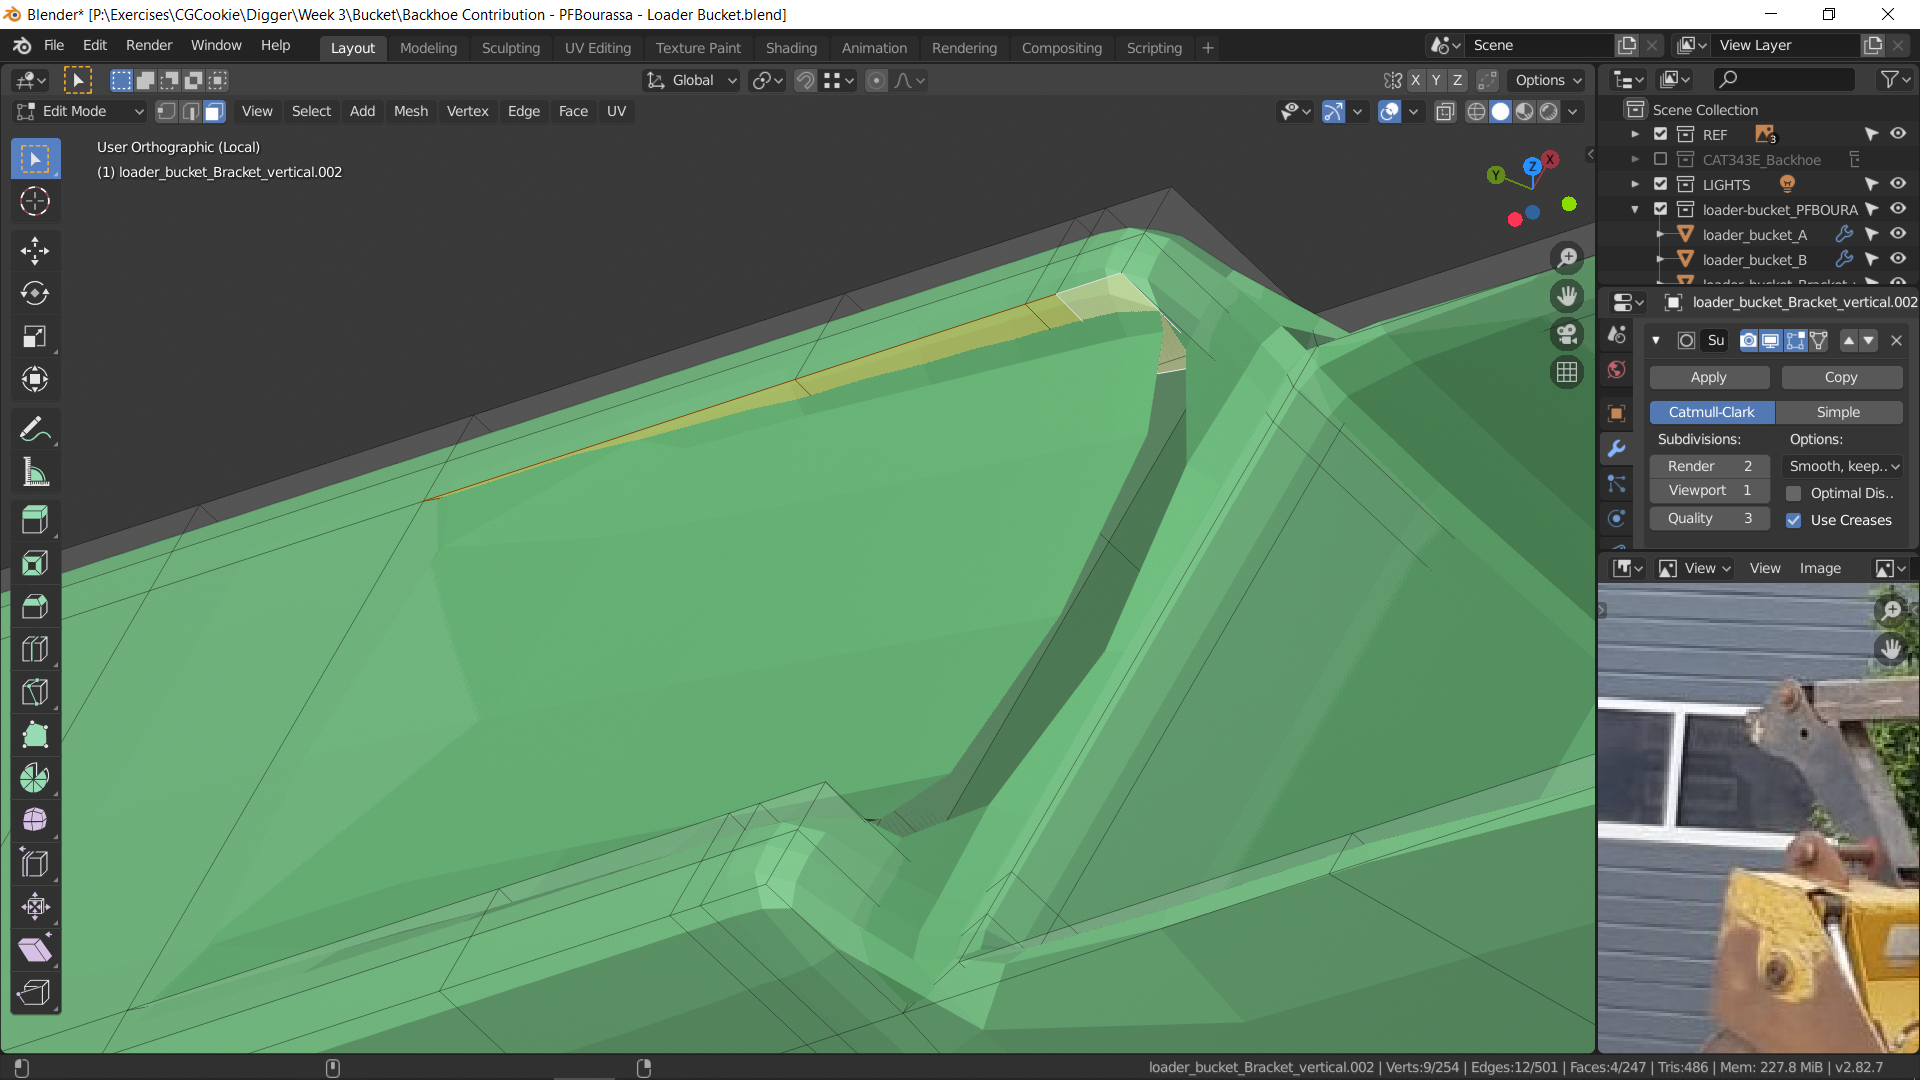
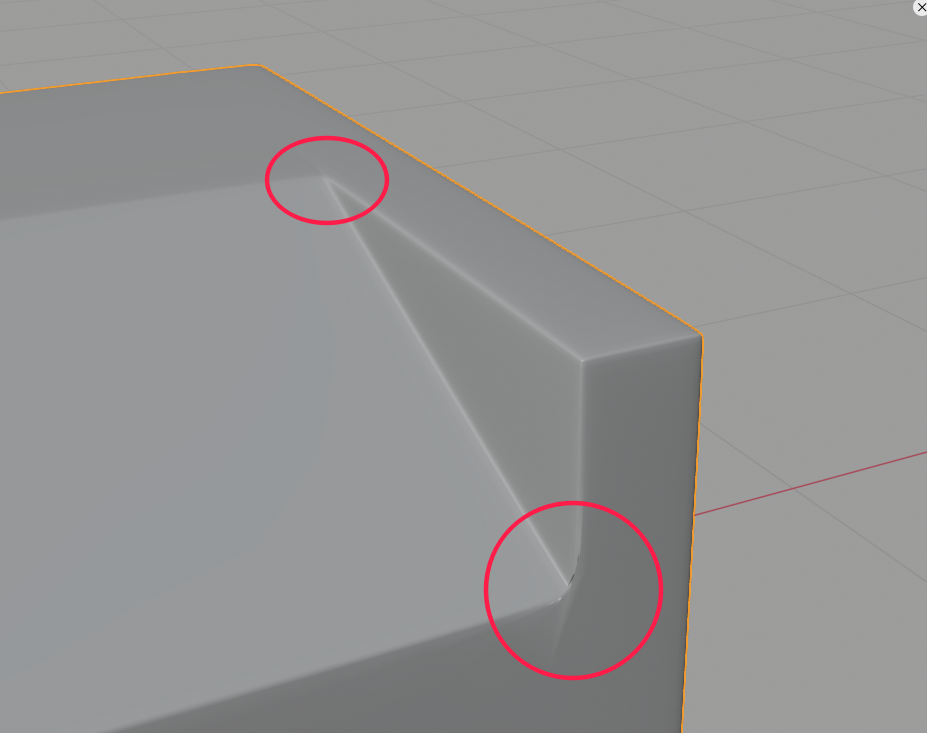
I'm having trouble with shapes like this in a few places. I'm not sure how to get it to subdivide nicely.
I suppose it depends on how rigid you need the triangular edges to be. I think if you added holding edges to them it would smooth nicely as a hard-edged shape.
Is the smoothing meant to be more broad though? As in not hard edged but more of a scallop? Perhaps posting a photo of the shape you're after will help me give best advice.
@theluthier It is meant to be sharp. The shape is in the screenshot, but it's just rotated differently. It's actually a little hard to tell what the shape is, but my best guess is a fairly sharp slope inward.
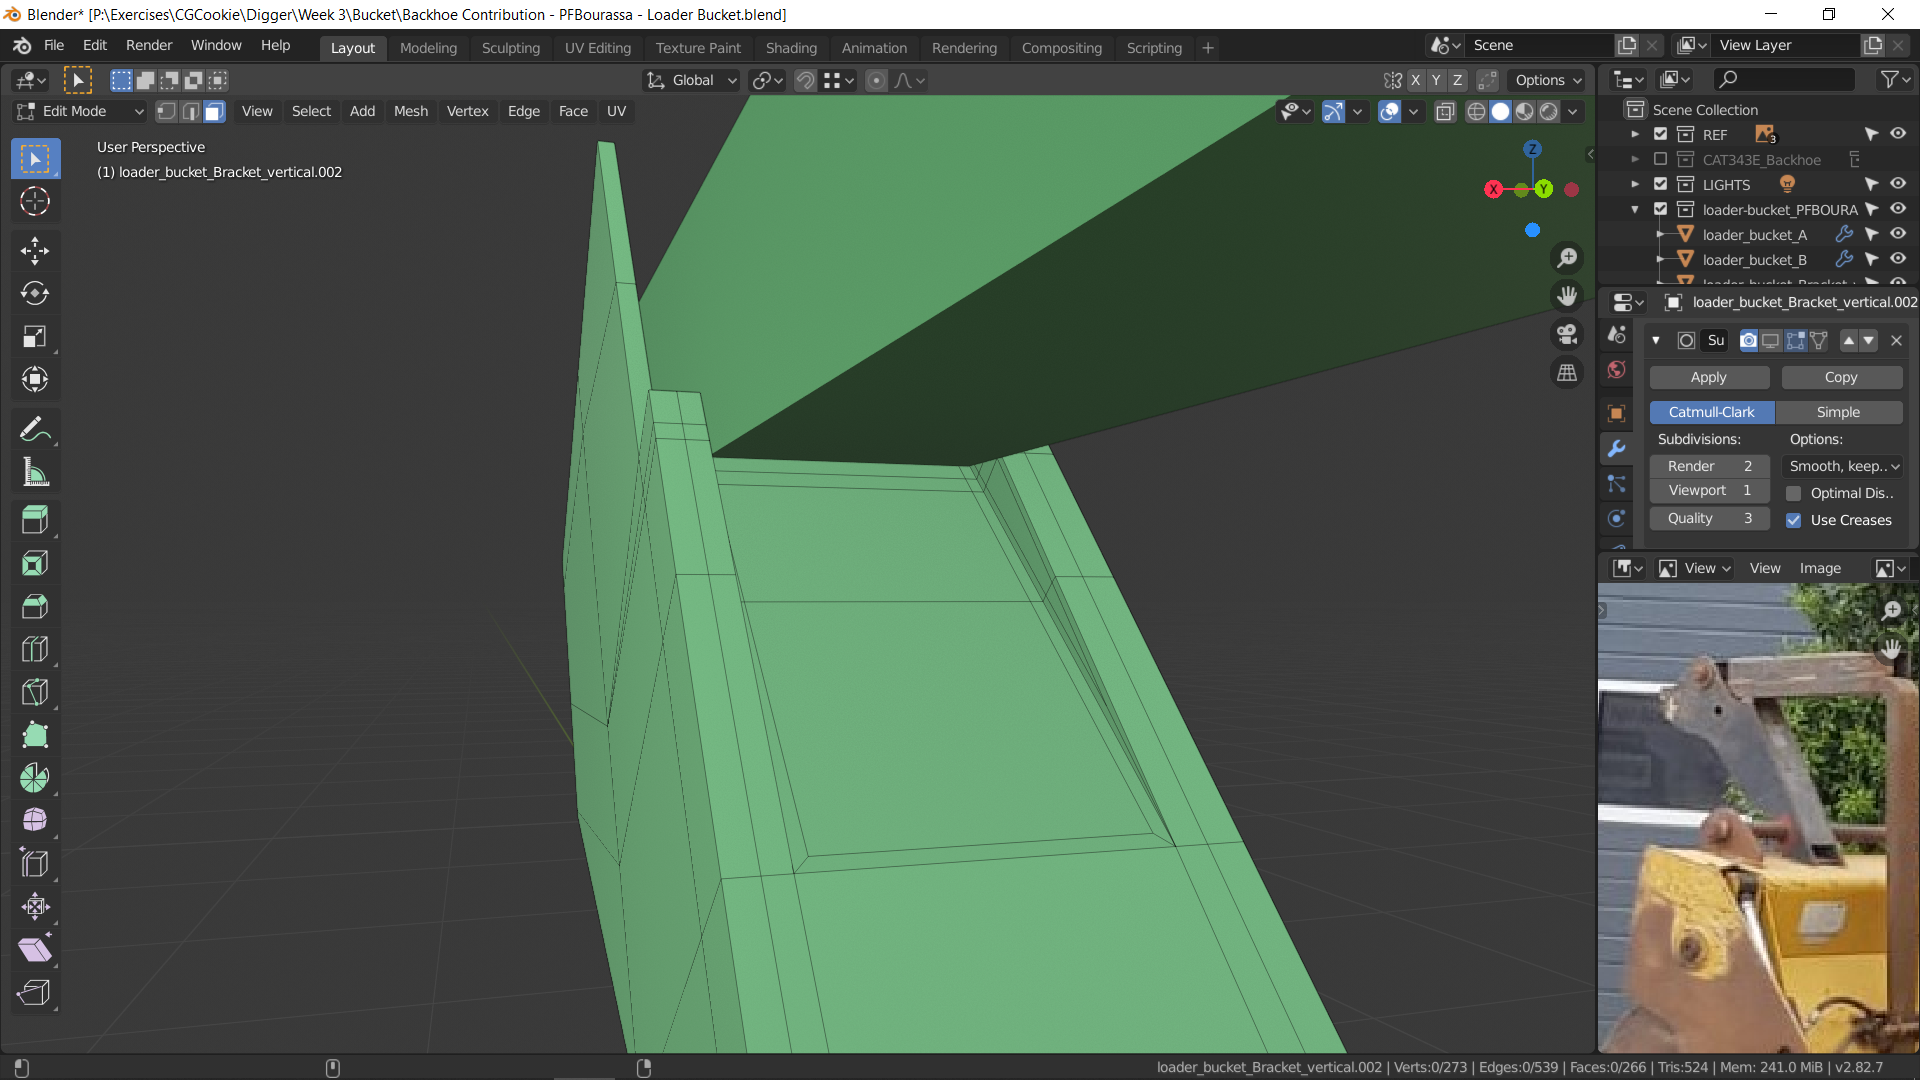
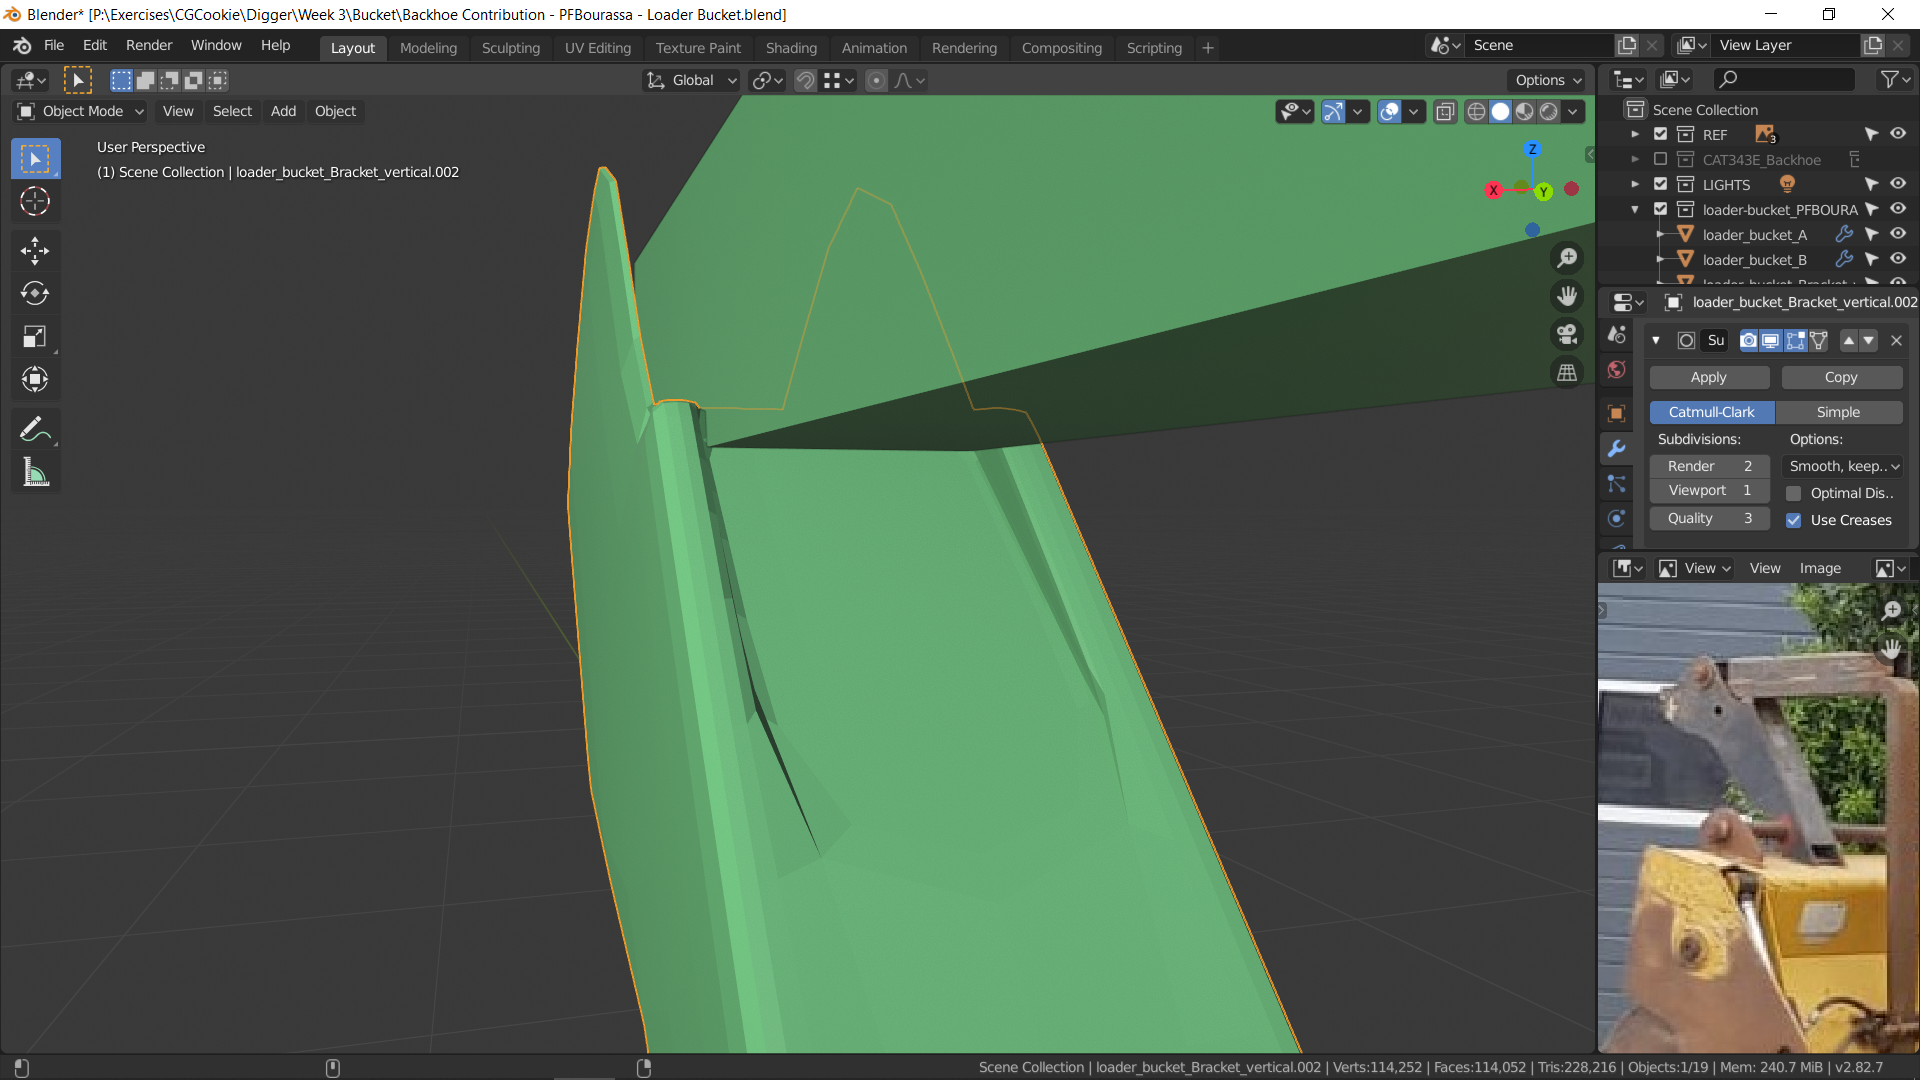
In this example, I tried creating holding edges by beveling the flat surfaces in a little.
I think it's giving me trouble because it's inherently triangular, and I'm trying to keep good topology.
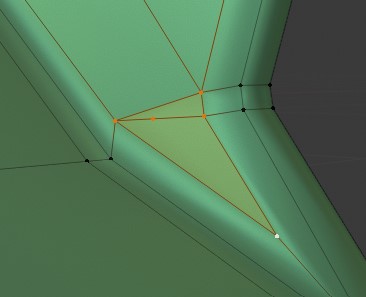
Here's an example I was struggling with before. I found a hacky solution for this one.
Here's an example trying to match your situation. Starting with the basic shape first:
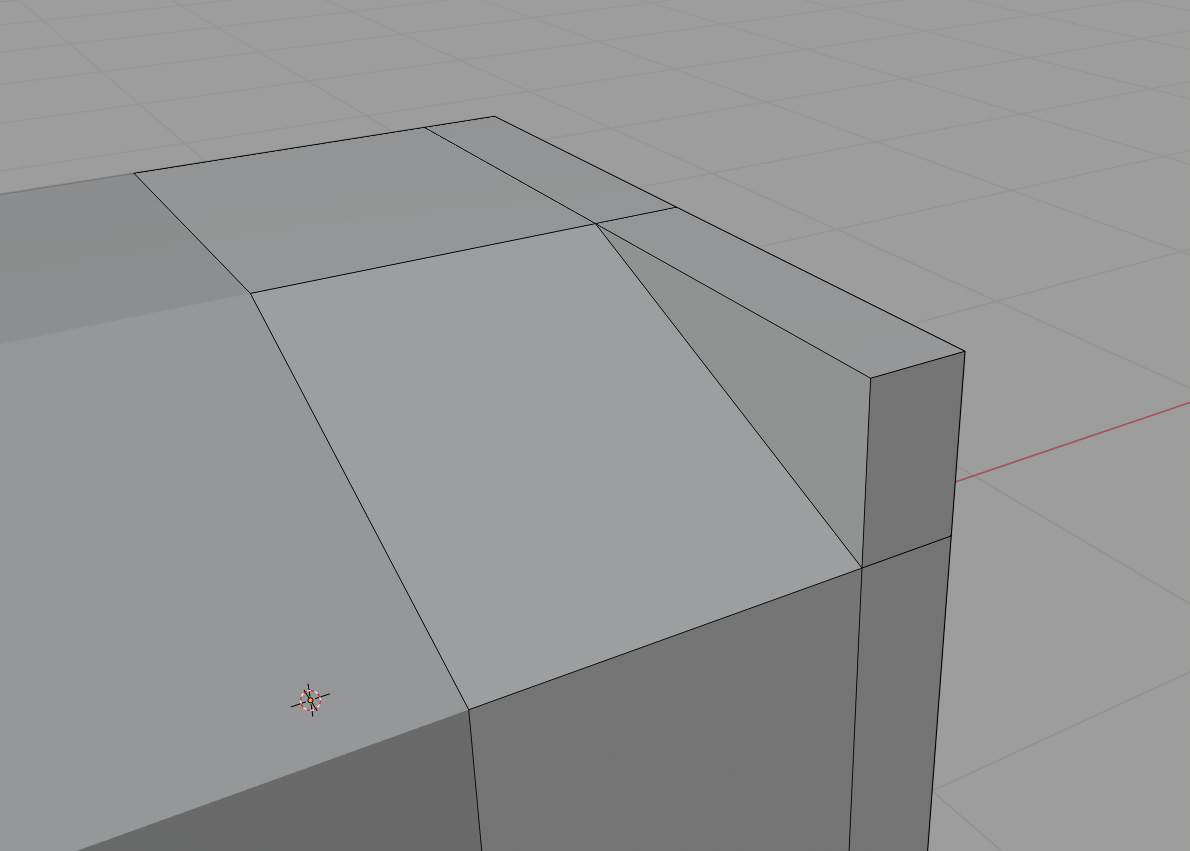
This is where I like to select all edges I want hard and use the bevel operator to establish quick holding edges that I can clean up later:
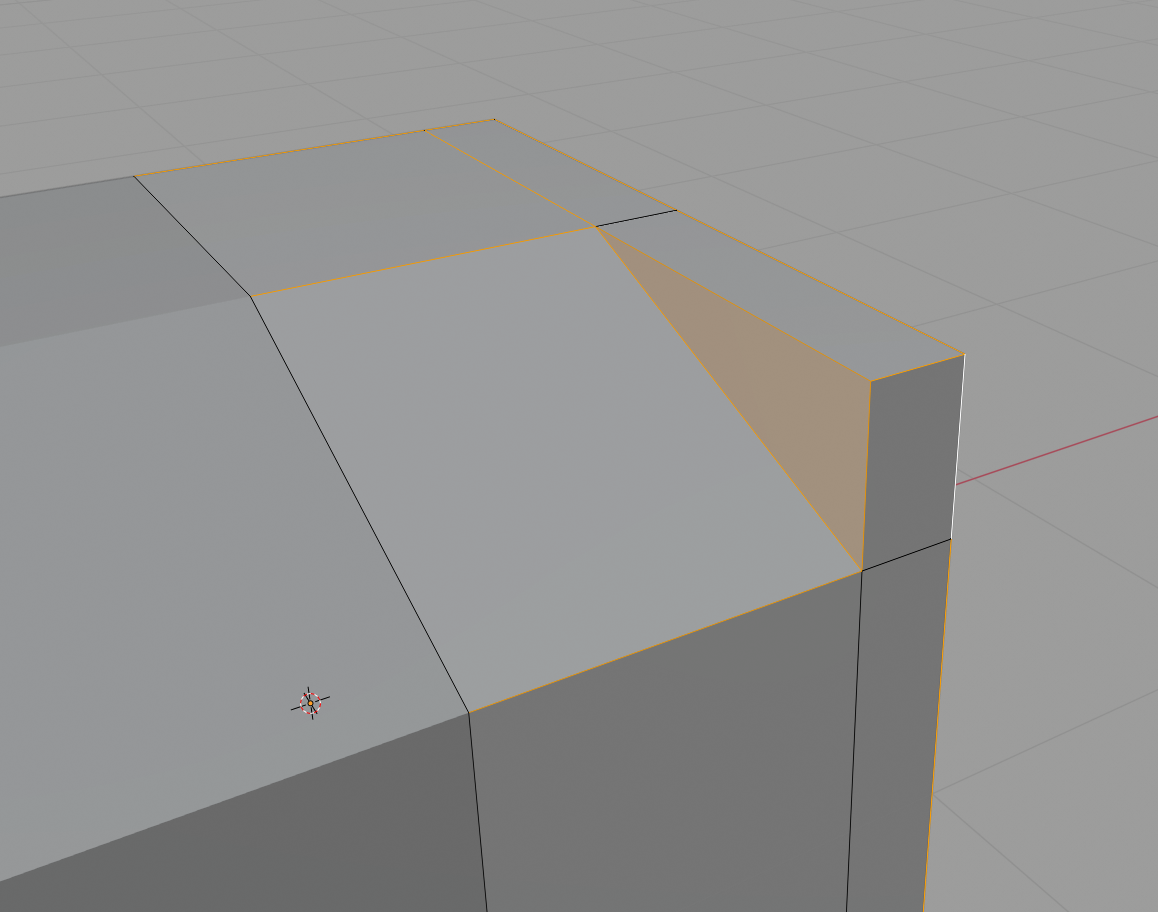
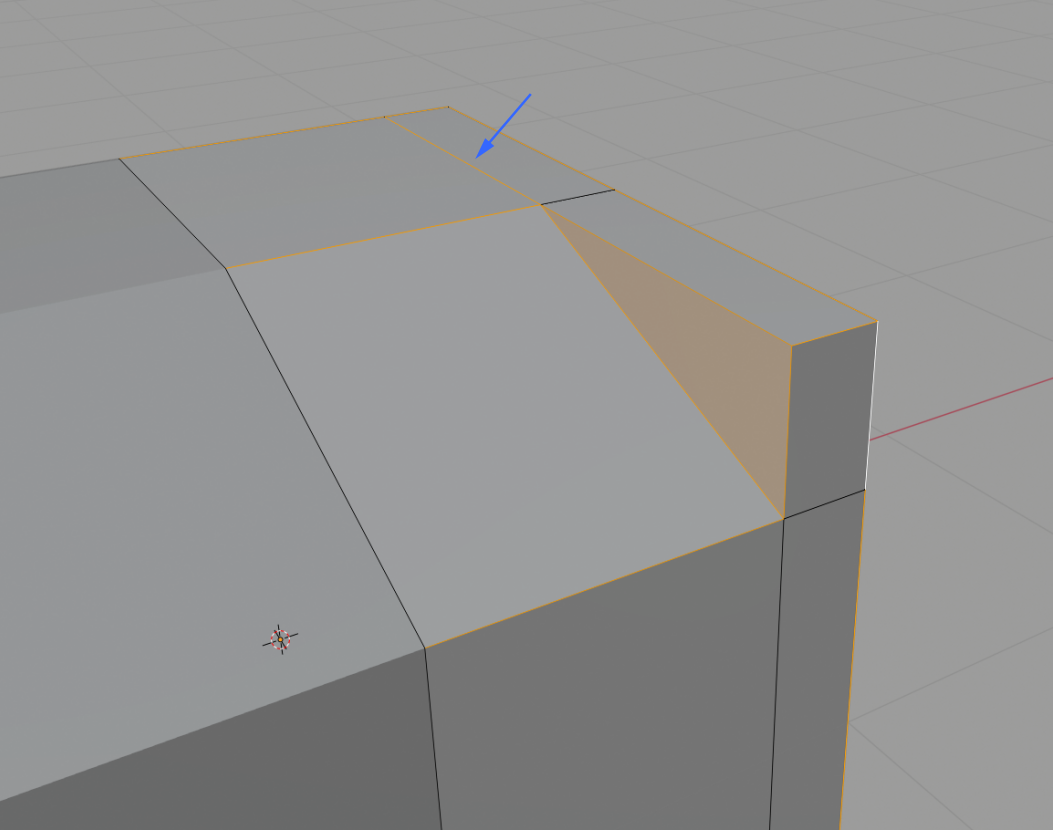
This gets us most of the way with only the corners needing cleanup. Note the blue arrow pointing to a "utility edge". This is not meant to be hardened but I overshot the triangular corner so the bevel operation is clean as it exits the corner. I can simply collapse this next:
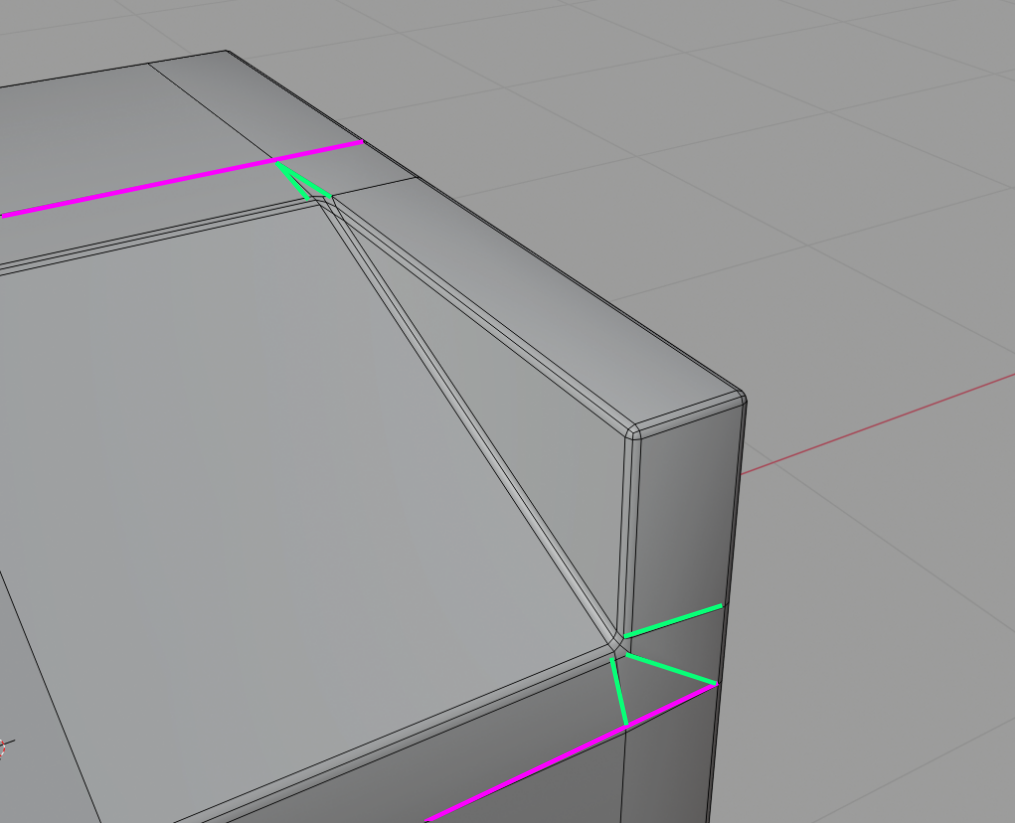
Add the secondary (magenta) edge loops so the cleanup doesn't stretch awkwardly far. Collapse the upper triangular corner and spread out the lower triangular corner.
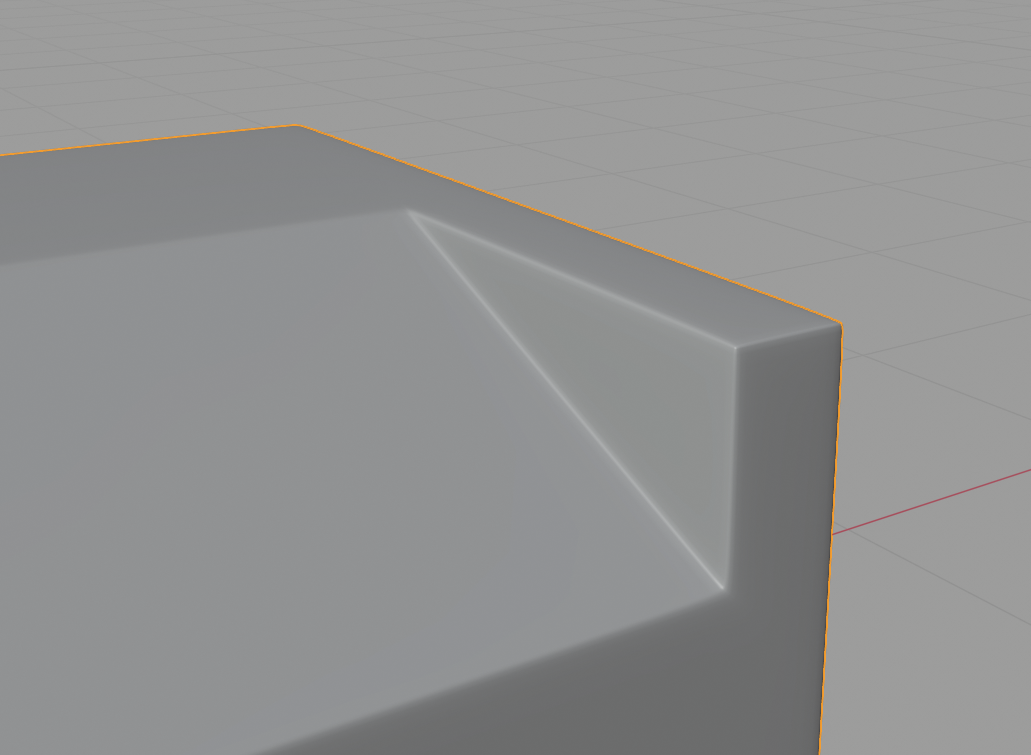
Hope that makes sense. I made a note to possibly demo this example during next week's stream.
@theluthier Thanks!
This is the best result I've gotten so far. It still looks curved in a way I don't want, but that might be a problem with my other geometry. 
Oh man ppfbourassa I need to shift the top pieces on the loader arm over a little. See my forum posting for some of those changes. Sorry bro. It's gonna be the best move I think and I should not have to shift them over again after this.
![]() blanchsb
blanchsb
My plan is to do the cables in green, and leave the blue stuff off for now. I think they are more closely linked to the arms, and we can attach them during rigging.
Dog Pound,
What is your interpretation of the orange areas?
The flaps on top seem like they might just be there to allow room for the pistons. Not sure if they should move... or how exactly they are attached.
The thing on the side looks like a control panel, but I don't see what it would be connected to.
In the photo reference, 1-2 looks like a sticker, so maybe that is too?
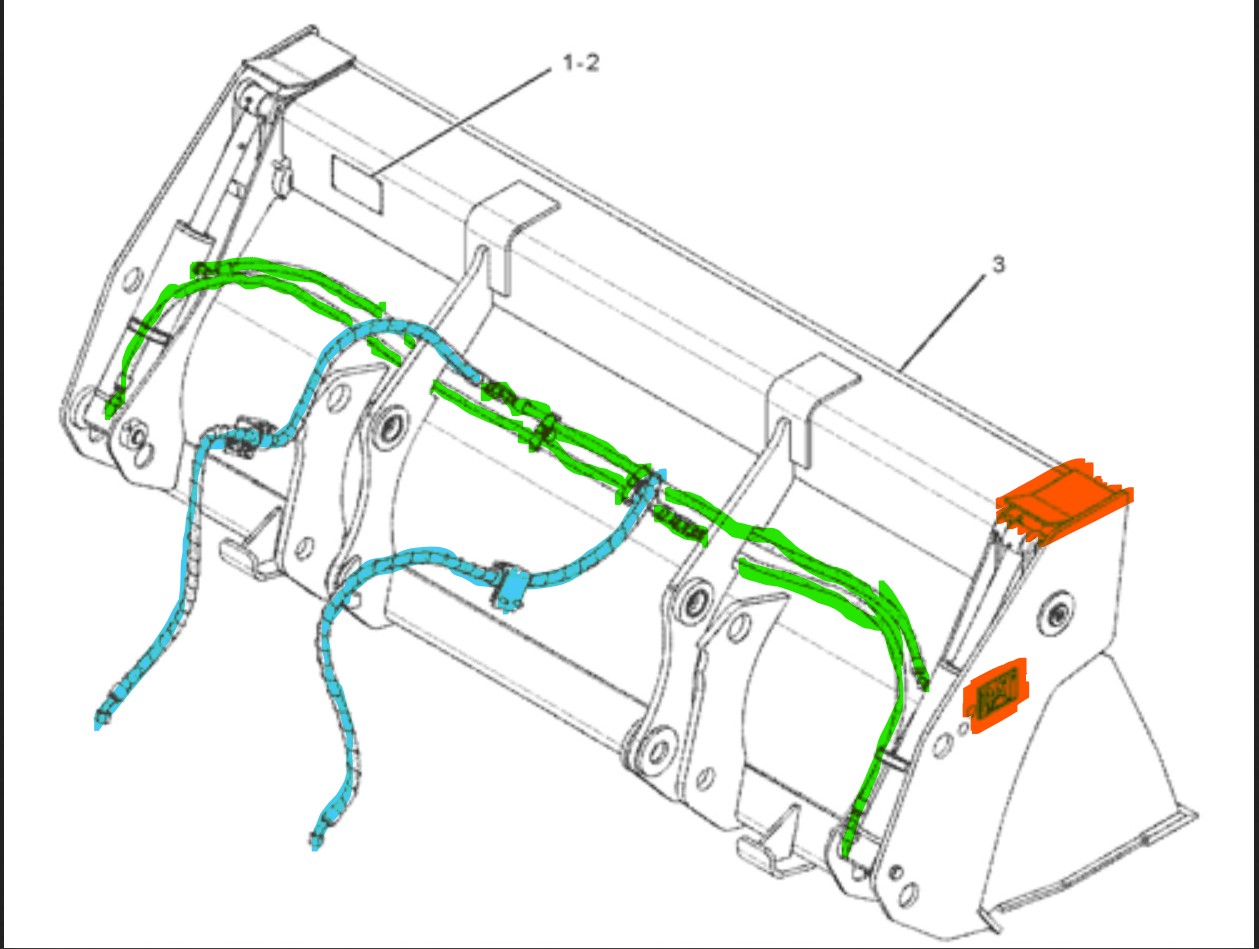
The top orange piece is just a cover for the hydraulic as far as I understand it. The 1-2 piece is probably a data plate describing the loader bucket. Containing info like part number, serial number etc.....
Yeah do the green hydraulic lines. when you work on them can you place a couple of empties where the T-union is going to be where the blue lines join in? Then could you send me the file and I will bring my blue lines over to them so that when we both submit they should just join up.
Maybe I can sneak some easter eggs into those stickers :)
I'll stop at the T-union and place an empty.
ppfbourassa I think ![]() blanchsb is correct, the top piece looks like a cover. As for how it is attached, at first look I would say it is hinged, and clipped some how to keep it closed. So I found this image which on the nearside shows this part where the flap is but the far side shows it more to the centre of the bucket, so I'm guessing here, this is under the flap. But I could be wrong. This is obviously not a 'to scale' drawing.
blanchsb is correct, the top piece looks like a cover. As for how it is attached, at first look I would say it is hinged, and clipped some how to keep it closed. So I found this image which on the nearside shows this part where the flap is but the far side shows it more to the centre of the bucket, so I'm guessing here, this is under the flap. But I could be wrong. This is obviously not a 'to scale' drawing.
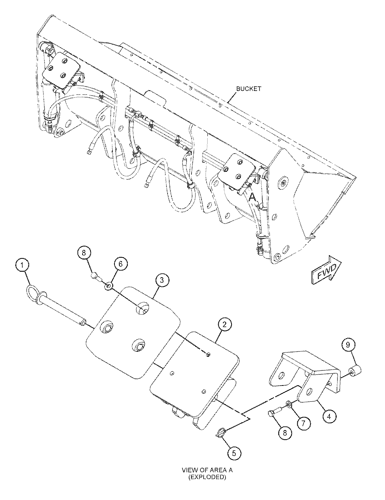
Notice #1 is a pin which passes through the holes on the underside of #2 and also the holes in #4. This doesn't show the cover but it would suggest from the description on the site optional attachments can be attached here.
@theluthier I haven't brought this up before because I felt weird about advertising on here, but I've started making Blender tutorials as well: https://www.youtube.com/channel/UC2dUqlvtSjrSLjsjFfrF-0Q
Since you brought up the possibility of working for CGCookie, I just thought I'd throw an offer out there.
Modeling isn't my specialty (hence learning more by working on this digger) but Motion Graphics is, and I'm hoping to fill the gap for grease pencil tutorials as well. Let me know if this is even a remote possibly :)
Thanks!
Grease pencil is something I think has gotten a major upgrade in 2.8 but I still don’t know much about it and would love to know more. I’m gonna take a look at your channel ppfbourassa .
Yup well worth my time. Great video content Parker. And you have a great voice!
Thanks Shawn!
Any specific grease pencil topics you'd like to see?
I learned a lot just watching you work. I have to wonder if there are different options for fill though. That seems terribly painful. I'd almost do the stuff in Affinity and then bring it over. Oh.....actually that would be cool to see if there is a way to turn vector graphics into grease pencil. Is that even possible?