Just starting my individual thread.
![]() blanchsb Grease Pencil is being developed pretty heavily still, so I imagine that fill tool bug will get fixed soon.
blanchsb Grease Pencil is being developed pretty heavily still, so I imagine that fill tool bug will get fixed soon.
I *think* there is a way to import .svg files and convert them to grease pencil.
You might have to convert to curves, then into grease pencil strokes or something. I need to try it out in the future.
Yeah I believe you are right. I think I can convert svg to curves. I will see if I can cover that part in my tutorials actually, but I don't mind you doing the same if your interested. I don't consider anyone stepping on my toes regarding content creation.
Then curves can be converted to grease pencil if I remember correctly? Maybe I can do some playing around over the weekend and have something fun to present. I have a great icon to demonstrate and there is our DOG logo too!
There is so much potential with grease pencil that I have yet to tap to be honest. This video told me that I was missing out on something awesome:
https://www.youtube.com/watch?v=kpY-WVQUxYw
I would love to see this kind of stuff and maybe going from grease pencil to mesh. I know there is content covering this but perhaps you know more gaps than I do since I will be honest that I know very little on the topic.
I feel like Grease Pencil and 3D workflow is one area that could have some great results when taught correctly.
![]() blanchsb I bumped my hoses up to .25 inches, and adjusted the fittings to match. I couldn't find where you asked, but just wanted to let you know.
blanchsb I bumped my hoses up to .25 inches, and adjusted the fittings to match. I couldn't find where you asked, but just wanted to let you know.
Awesome! I got caught up with car repairs on our van this week and had to do some door work.
I will make sure my fittings line up to your Tees hopefully by Tuesday.
ppfbourassa I have a couple of questions. Is your master file up to date?
It looks like it still has the boulder.
Also something strange is that both your WIP and MASTER file have different names for their collections, is that on purpose? No biggie if it is.
Another thing I noticed is both WIP and MASTER are offset from the world origin for some strange reason.
I got my fittings completely lined up with yours after working a little tonight. Should be easy for me to adjust if you make changes now that I have made individual hydraulic tubes and fittings.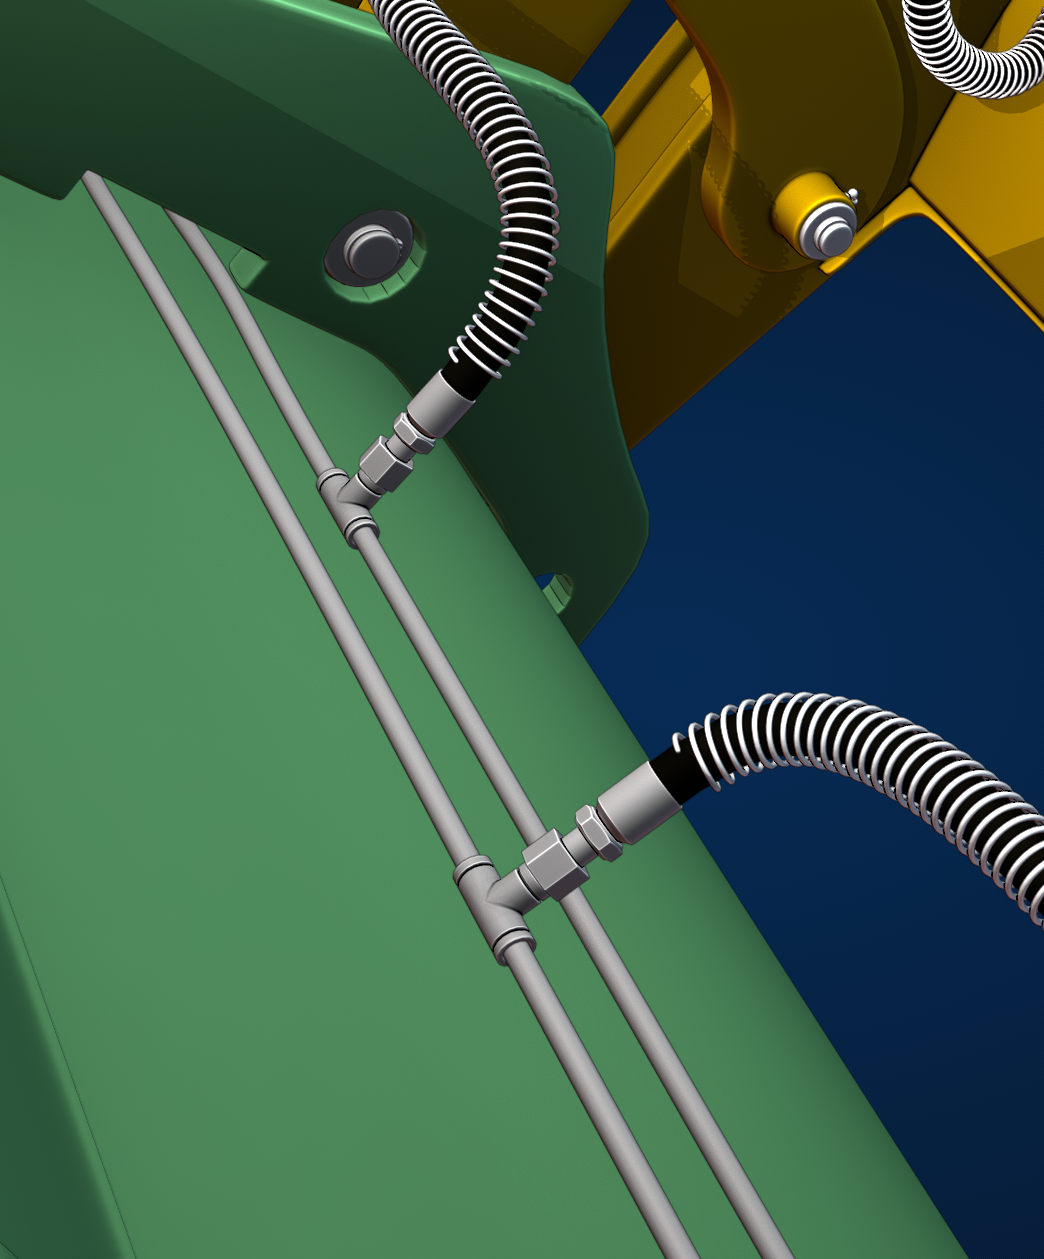
![]() blanchsb I'd been saving to the WIP folder (I think that cuts down on how many times others need to download. Or maybe those are just backups. Anyway...) I saved my latest work to the Master folder now.
blanchsb I'd been saving to the WIP folder (I think that cuts down on how many times others need to download. Or maybe those are just backups. Anyway...) I saved my latest work to the Master folder now.
I'm not sure about the name change. Maybe because I started on an older file. I added "MASTER_" to the front of the collection, but I think the DNA will still be different, so may have to link it up again. Sorry about that.
Also not sure about the offset at all. Definitely not intentional. I put the 3D cursor at 0,0,0 and saved it again. Is the Collection Instance located at 0,0,0? Loading the assembly file on my machine, it looks correct now.
Fittings look great! Mine look super simple by comparison. Should my cables have the springs around them? The reference is so blurry, I'm having to guess about details like that.
Yeah ppfbourassa I think it would perhaps be best to keep the Collection with the same name structure on both the WIP and Master.
I don’t think yours need the spring guards. My rear hoses don’t have them. They are for the center loader hoses because they are pinch-able and need to be able to extend a lot which makes them susceptible to going places they shouldn’t.
![]() spikeyxxx I think you are correct. My 3D cursor was probably not at world origin. I thought that linking they would go wherever they originally were in 3D space but that was my mistake.
spikeyxxx I think you are correct. My 3D cursor was probably not at world origin. I thought that linking they would go wherever they originally were in 3D space but that was my mistake.
funny thing I could clear the location with Alt + A and it snapped back to world origin on
![]() spikeyxxx is right about linked assets being placed wherever the 3D cursor is located.
spikeyxxx is right about linked assets being placed wherever the 3D cursor is located.
I'm not sure about the name change. Maybe because I started on an older file. I added "MASTER_" to the front of the collection, but I think the DNA will still be different, so may have to link it up again. Sorry about that.
Changing the collection name will break links of that collection in other files. I'll go over how to troubleshoot broken links in the stream tomorrow.
So, yes I was able to confirm it was indeed the location of my 3D cursor that was affecting where your assembly was importing when I inserted it as a linked Collection ppfbourassa
I adjusted my master copy to make the hydraulics line up better with yours. That part should be done tonight. I also need to make the hinges for the loader arms to bucket transition breach your support wall openings then you can adjust your support walls and shift them over as necessary. I'll try to find time for that tomorrow evening. We have a couple of collisions there.
Okay Parker ppfbourassa
Here's where I yam.
Got my pins pushed out to show a better interaction with your bucket assembly, but I forget how that interaction is supposed to go down and I am short on time during my vacay? Are you able to help me a little with this part?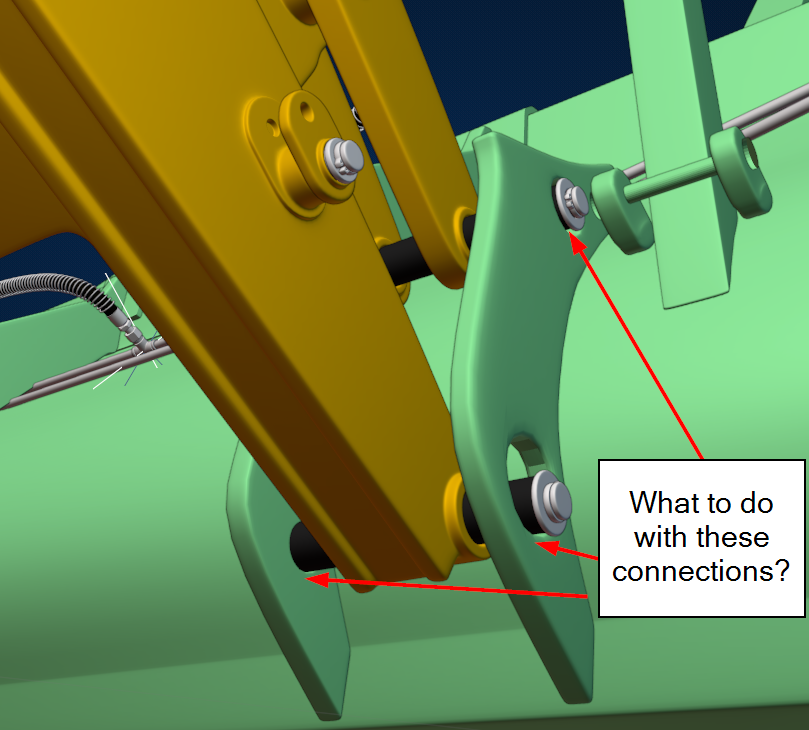
And I noticed this collision. Hopefully you can slide that brace over.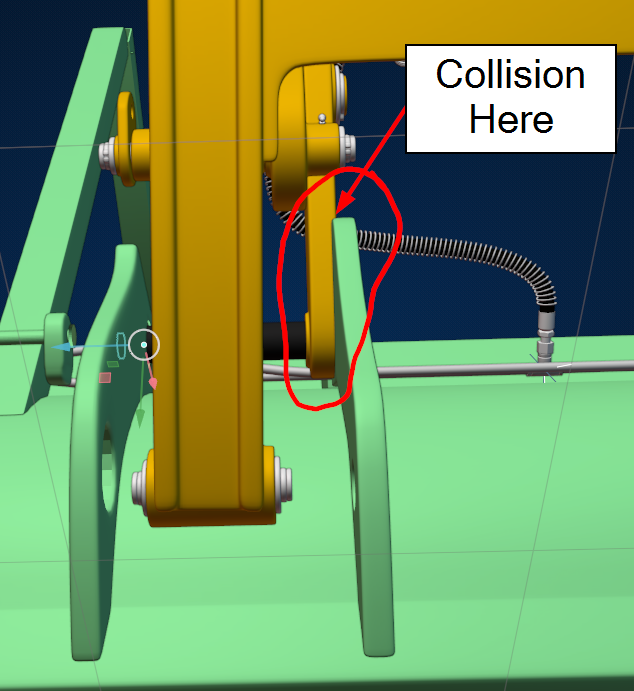
I'll try to check back in tonight and tomorrow if you have any input for me to change stuff.
Hey ![]() blanchsb
blanchsb
I'm not exactly sure how these link up either. From what I can see in the reference, I think the diameter of those holes are closer to my wide holes than what you have. Maybe I'm wrong, but I think we should swing wide.
I just know they need to form a hinge, so the centers of those circles need to be alignd, and I guess something on either side of the hole to stop them from sliding around.
As for the collision, those fins are easy to move on the X axis. No biggie.
One of the issues is that your Brace's holes are different on each side: One side the hole is small whereas the other side is large. I'll take a look at more reference to see if I can find answers.
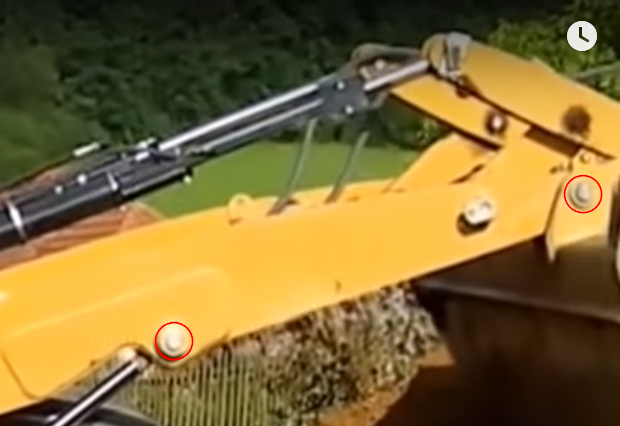
I'm going to say that on the outside bottom connection for the Outer Bucket Brace: the hole size looks the same as the hole size for the hydraulic lifter. I made the pins the same size already.
In regards to placement for the braces. I made come commentary in the image below. Hopefully that makes sense.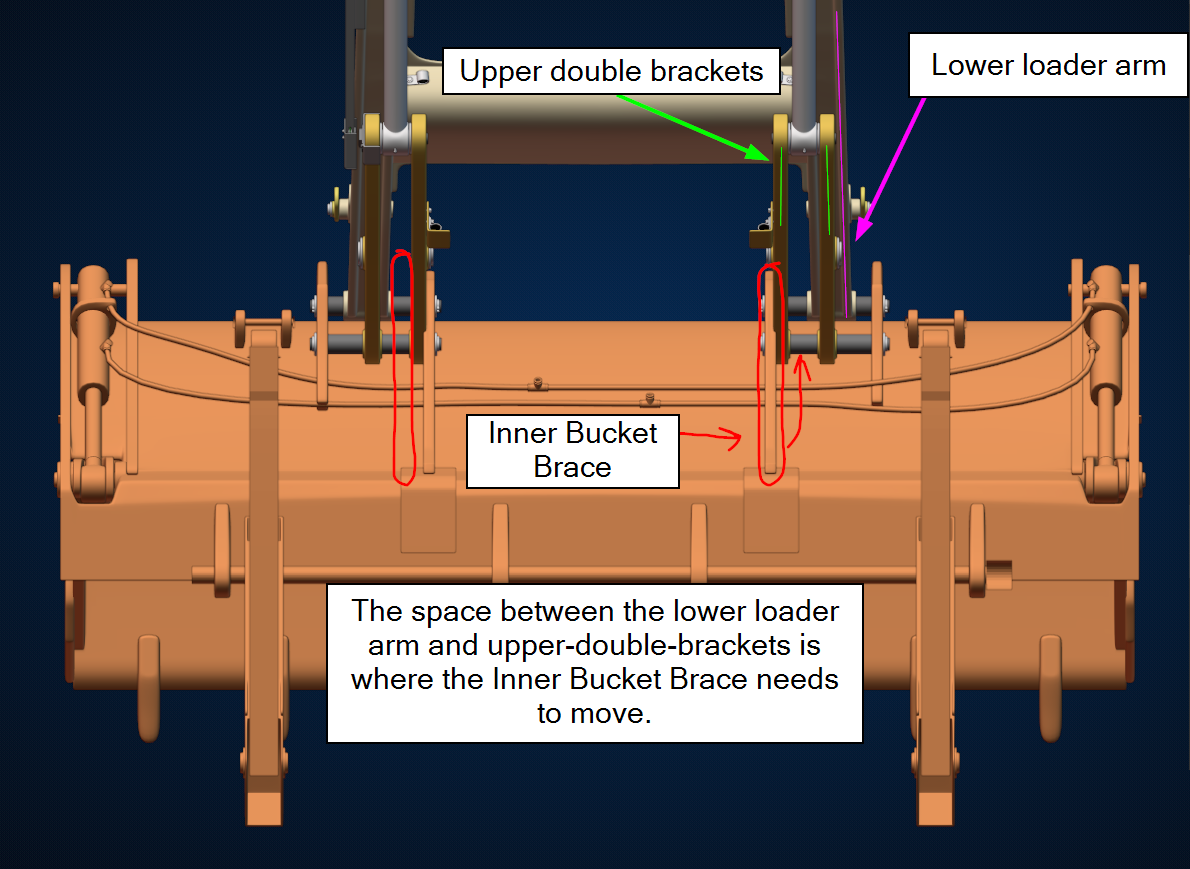
ppfbourassa I have re-updated my pins to hopefully guide where the Bucket Braces need to shift to: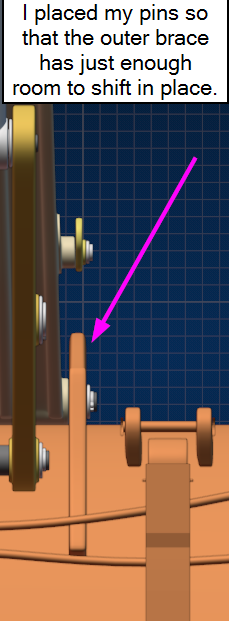
The inner bucket brace has enough room to go in-between as well.
I just shifted your whole assembly over in the X direction to show what it "would" look like in both of these pictures