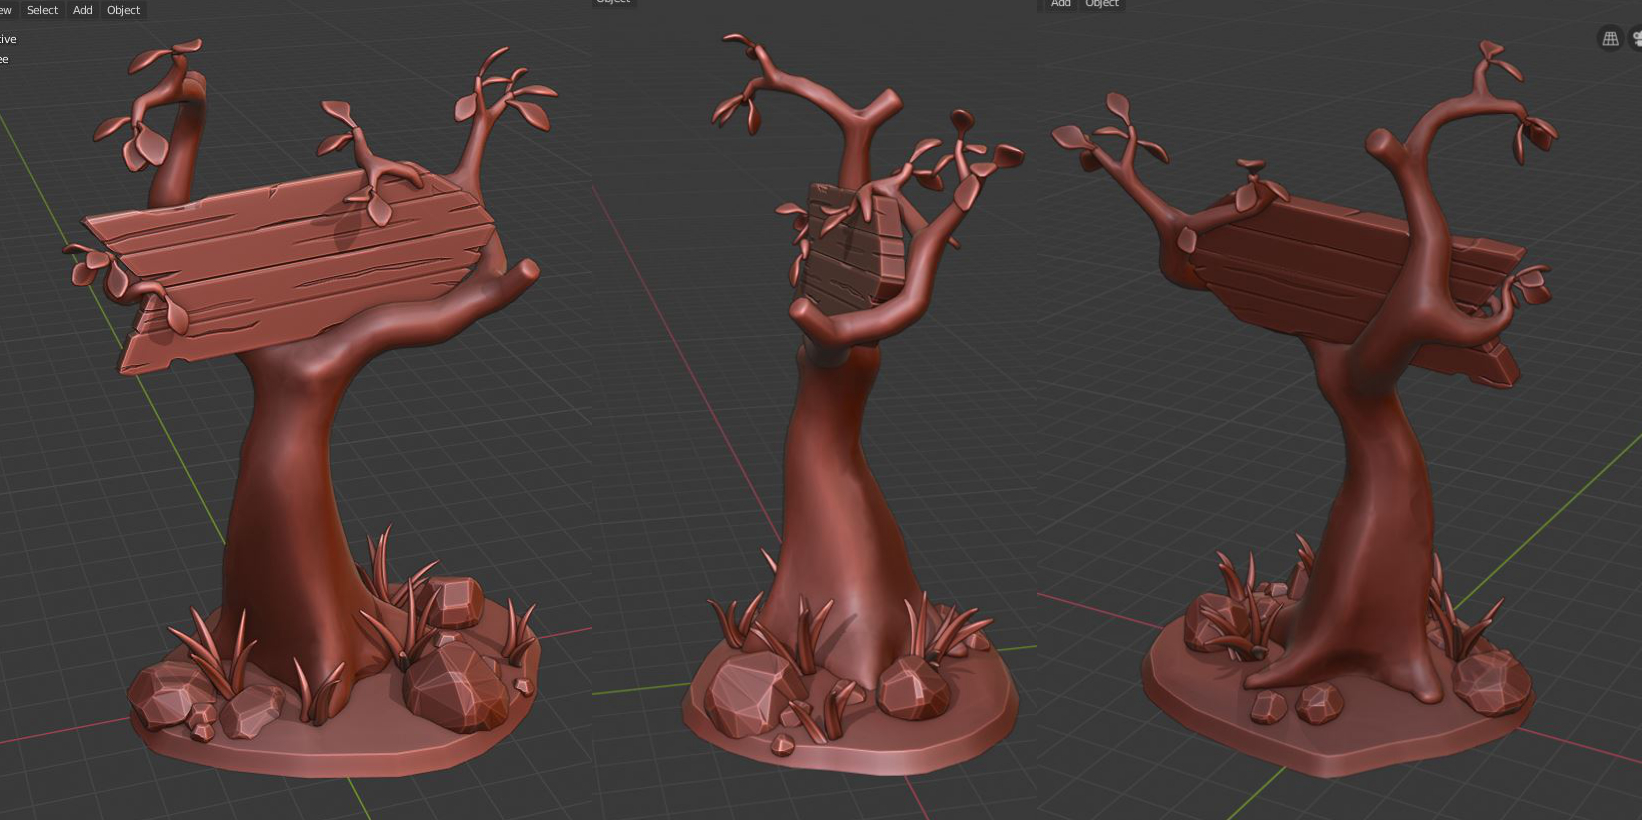
For this assignment I would like to create a sign with an enchanted forest/fairy tale vibe.
I started learning Blender recently for it's sculpting tools, so creating something low-poly should be pretty good for me ;)
The sign so far has been fairly easy especially with the nice treasure chest tutorial to help out.
The grass blades I created with a bezier curve where the taper and bevel is controlled by other paths linked to it in the Object Data tab -> Geometry menu.
The tree is harder. Right now it is a Skin modifier object with a minimal subsurf. I'd like to see if I can create it without the Skin and Subsurf.
Every time I start this project I want to just go in and sculpt everything, lol. So we'll see how it goes :)
Really nice job! Also you are the first one to choose the sign, as far as I know :P
Nice work! I don't think @theluthier has anything against sculpting as long as you retopo it to fit the stylization. I could be wrong, but that's the impression I'm under.
Great concept. My eyes keep wandering of to the right though, wondering where the sign is pointing to....
Beautiful wood detailing!
![]() spikeyxxx eyes to the right, yup, that's the plan, hopefully the curve to the small tree helps that. Probably not best for composition, but I want the sign pointing somewhere!
spikeyxxx eyes to the right, yup, that's the plan, hopefully the curve to the small tree helps that. Probably not best for composition, but I want the sign pointing somewhere!
![]() silentheart00 Thanks for the info. ! I also remembered I can use sculpt mode without dynotopo on, lol. That helps too
silentheart00 Thanks for the info. ! I also remembered I can use sculpt mode without dynotopo on, lol. That helps too
![]() jack07 Thanks! There is at least one other person doing a sign:
jack07 Thanks! There is at least one other person doing a sign: ![]() dieterweireldt and it looks great!
dieterweireldt and it looks great!
Worked out some more details on the tree and base area
-I tried some different methods to create trees: 1. start with a cylinder and model it out 2. create a path that has object data modified by a bezier circle 3. messed around with the addon "Sapling" 4. Just tweak the method I'm using which is skin out some vertices and decimate the mesh later on.
- For me, I still prefer skinning out the tree, decimate and push vertices around in edit mode or sculpt mode. All methods seem to come out with similar poly counts. I'm sure there are better ways to tackle the tree though.
- Using Planar Decimate on roughly shaped rocks is very fun :)

![]() clintjohnson Awesome!
clintjohnson Awesome!
And I totally agree with you, composition wise probably a 'no go', but the 'arrow-ness' of the sign just works.
Love the rocks!
![]() clintjohnson I love your creative spin on the sign! Awesome :)
clintjohnson I love your creative spin on the sign! Awesome :)
Using Planar Decimate on roughly shaped rocks is very fun :)
This sounds like an awesome technique! is ‘planar’ just a setting in the decimate modifier? And how ‘rough’ should the rocks be formed, which primitive did you use? The rocks look great so I would love to know :)
ssmurfmier1985 Yes, Planar is a setting under the Decimate modifier. Instead of choosing Collapse (default) in the Decimate options, I clicked Planar, checked "All Boundaries" and increased the angle limit to 15-20% (this one depends on sculpted shape of the rock).
To create a rock for Decimate: Add a sphere -> sculpt mode. Dyntopo (doesn't have be high resolution) and select the Scrape brush with a completely flat falloff. Use the scrape brush to create flat sides on the sphere. Once the general rock shape is done, do the Decimate as explained above.
Here's the tutorial I found that explains the method: Low Poly Rocks
The first sign I've seen! Very nice work so far, Clint. And yes, like ![]() silentheart00 said, I'm fine with you sculpting + retopology. Whatever your workflow, I like what I see.
silentheart00 said, I'm fine with you sculpting + retopology. Whatever your workflow, I like what I see.
Is this ready for grading ![]() clintjohnson? The only thing missing here is an "officially" declared homework submission post like this one. When I grade I look specifically for the bold title at the top of the reply "Homework Submission Week 1".
clintjohnson? The only thing missing here is an "officially" declared homework submission post like this one. When I grade I look specifically for the bold title at the top of the reply "Homework Submission Week 1".
Alternatively you can update your thread's description with this label above your final week 1 image, like this thread.
Either way I assume a student is still working until officially declaring the submission in one of these ways. So I'll check back later today to see if this is 100% final :)
HOMEWORK SUBMISSION WEEK 1
"Mouse Hollow Woods" sign. I plan on making some nifty text and image of a mouse on the sign. The name actually came from a random name generator - looked like a fun one to use.
Sorry @theluthier , wasn't completely sure yet how to submit, or more likely I wasn't paying attention! Thank you for the examples!
![]() clintjohnson Wow! This is by far my favorite sign. I love the stylized look. My only critique is the sign should be pointing left haha (I'm a south paw). Did you pull that straight from thin air or from reference?
clintjohnson Wow! This is by far my favorite sign. I love the stylized look. My only critique is the sign should be pointing left haha (I'm a south paw). Did you pull that straight from thin air or from reference?
![]() clintjohnson nice one. like the rocks. gonna check that tutorial out. only thing i would say is not consistent with the detail is the tree itself. on rounded object the wood crevices are bit harder, but certainly doable. cant wait to see this textured. :)
clintjohnson nice one. like the rocks. gonna check that tutorial out. only thing i would say is not consistent with the detail is the tree itself. on rounded object the wood crevices are bit harder, but certainly doable. cant wait to see this textured. :)
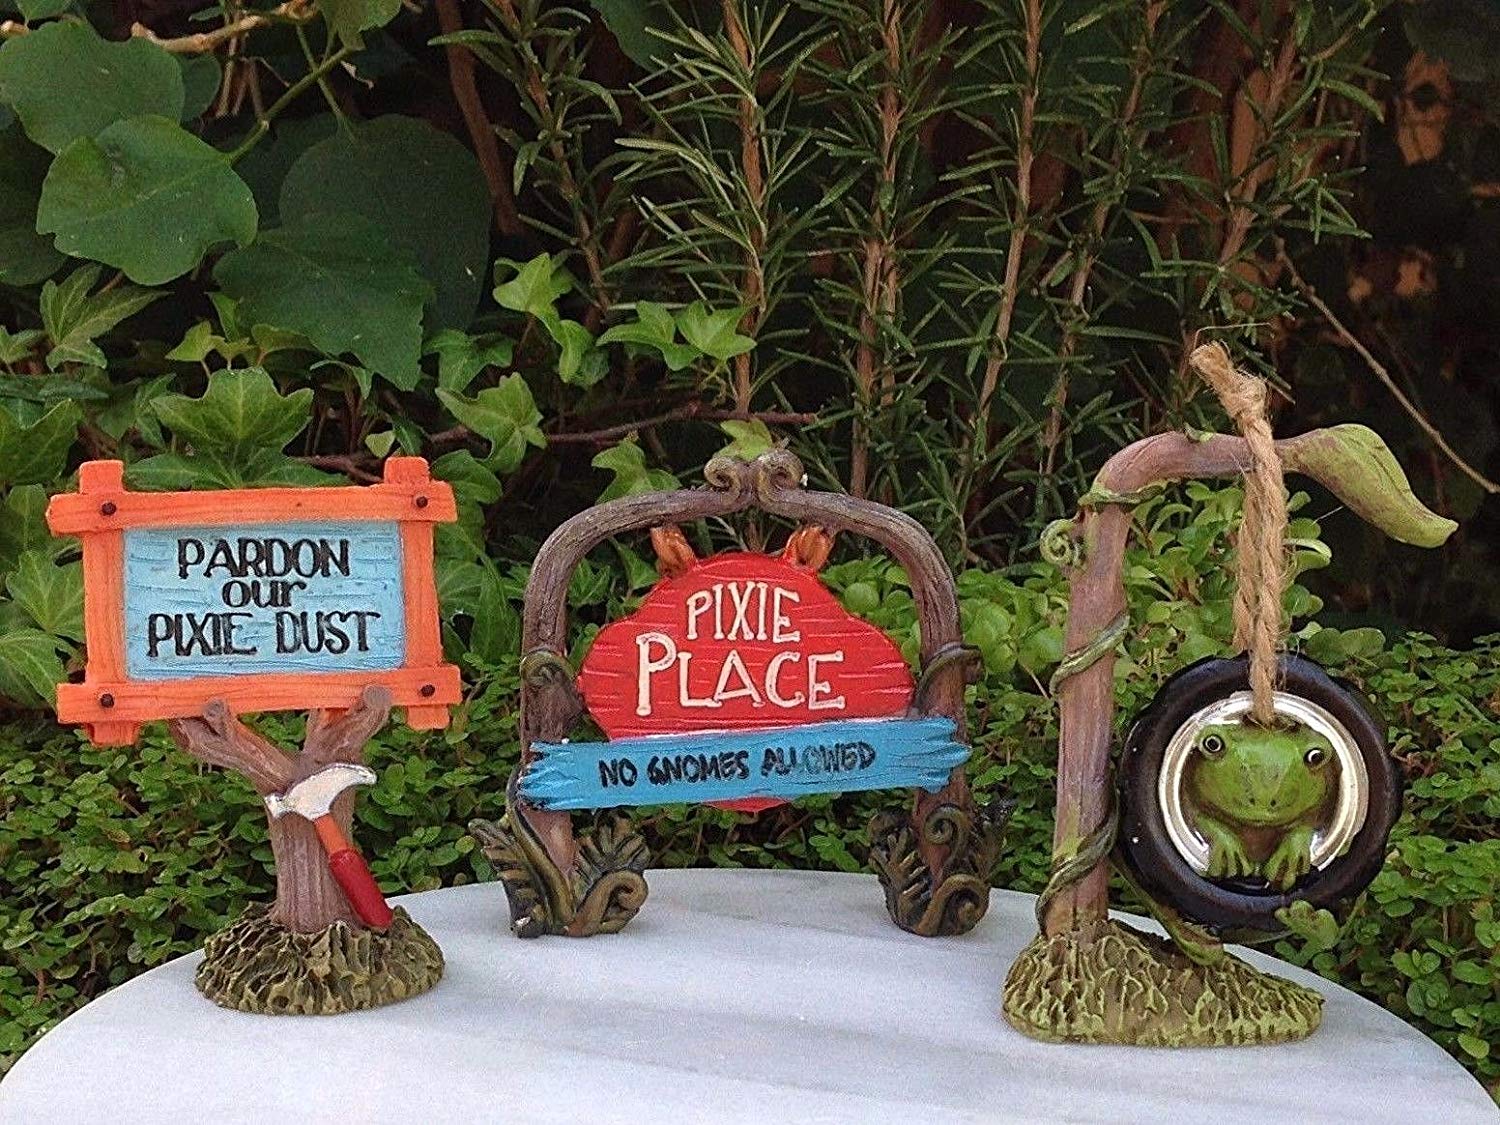
![]() blanchsb Thanks blanch! Yea, it's funny how our dominant hand can affect art, lol :) As for reference, I found several miniature signs that I used for inspiration, like these:
blanchsb Thanks blanch! Yea, it's funny how our dominant hand can affect art, lol :) As for reference, I found several miniature signs that I used for inspiration, like these:

![]() louhikarme Hi Kaj \o Ahh yes, the tree.... I've messed around with cracks, knotholes, etc. and mainly got frustrated, lol. I'll be tackling it again this week though, along with the ground. Thanks for your help!
louhikarme Hi Kaj \o Ahh yes, the tree.... I've messed around with cracks, knotholes, etc. and mainly got frustrated, lol. I'll be tackling it again this week though, along with the ground. Thanks for your help!
Sorry theluthier , wasn't completely sure yet how to submit, or more likely I wasn't paying attention! Thank you for the examples!
![]() clintjohnson Not to worry - I copied and pasted those instructions in several homework threads 👌
clintjohnson Not to worry - I copied and pasted those instructions in several homework threads 👌
You may have already seen that I included your work among my "Notable Submissions" from week 1. I really like the unique interpretation of the sign project. The details on the wood plank sign, the faceted appeal of the rocks, the way the sign is nestled into the tree limbs...I think it's great.
It's an A in my book. This will look awesome textured!
![]() clintjohnson This idea prognostizes a very nice atmosphere in later phase, loving the involvement of artistic visions.
clintjohnson This idea prognostizes a very nice atmosphere in later phase, loving the involvement of artistic visions.
Especially thanks for explaining the usage of Planar settings in Decimate modifier
Here's some paint work ->
I still don't know how to really render stuff, so the pics are with a matcap on.
I've played around with putting the sign text on via a decal, but with terrible results :( May have to just grind it out and paint it on.
I'm definitely struggling with the UV - paint process. This is my first time messing with texturing besides Kent's awesome treasure chest tutorial (which I've went over many times this week...). I'm learning blender mainly for sculpting/modeling and then exporting out to 3D print, but I figured it would be good to learn more than sculpting. Right now, after many hours of frustration, I'm not sure I want to do this stuff again, lol. Maybe later on it'll all sink in :)