I’ve spent a lot of time texturing things in Blender, and I recently found out that I could have spent a whole lot less time...while getting the exact same (or better) results with the help of some addons.
Here are some of my favorite addons that will save you time, too!
10. Extra Image List (Free on GitHub)
Have you ever had to scroll through a really long list of textures with tiny thumbnails in the image editor to pick the right one?
Well, Extra Image List makes finding textures a much easier experience by giving you a persistent list in the sidebar, bigger thumbnails, and a large thumbnail search view.

You can also quickly see which textures are saved with a fake user and which are packed right into the file, as well as quickly delete unused images. It’s free on GitHub, so give it a try and see if it helps speed things up for you.
9. Import Images as Planes (Free - in Blender by default)
It’s as simple as it sounds! This neat Blender addon lets you import an image as a mesh plane with the correct dimensions and texture automatically applied.
You can edit the material options on import to use the image alpha as transparency, animate through an image sequence, set absolute dimensions, and anything else you’d likely want to do with an image on a plane.

There’s really not a lot to it, but - boy, does it come in handy! It’s bundled right into Blender, so all you need to do is check it on and save those settings.
8. NodeCustomBuilder ($4 on Blender Market)
Not only does this addon's title pack three words into one (so you know it means business), NodeCustomBuilder also saves as many nodes as you want into one click.
It’s like a library for node setups!
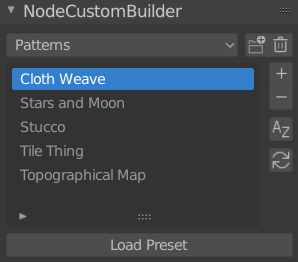
This addon is very simple to use, unobtrusive when you’re not using it and does exactly what it says it does. It even works between .blend files!
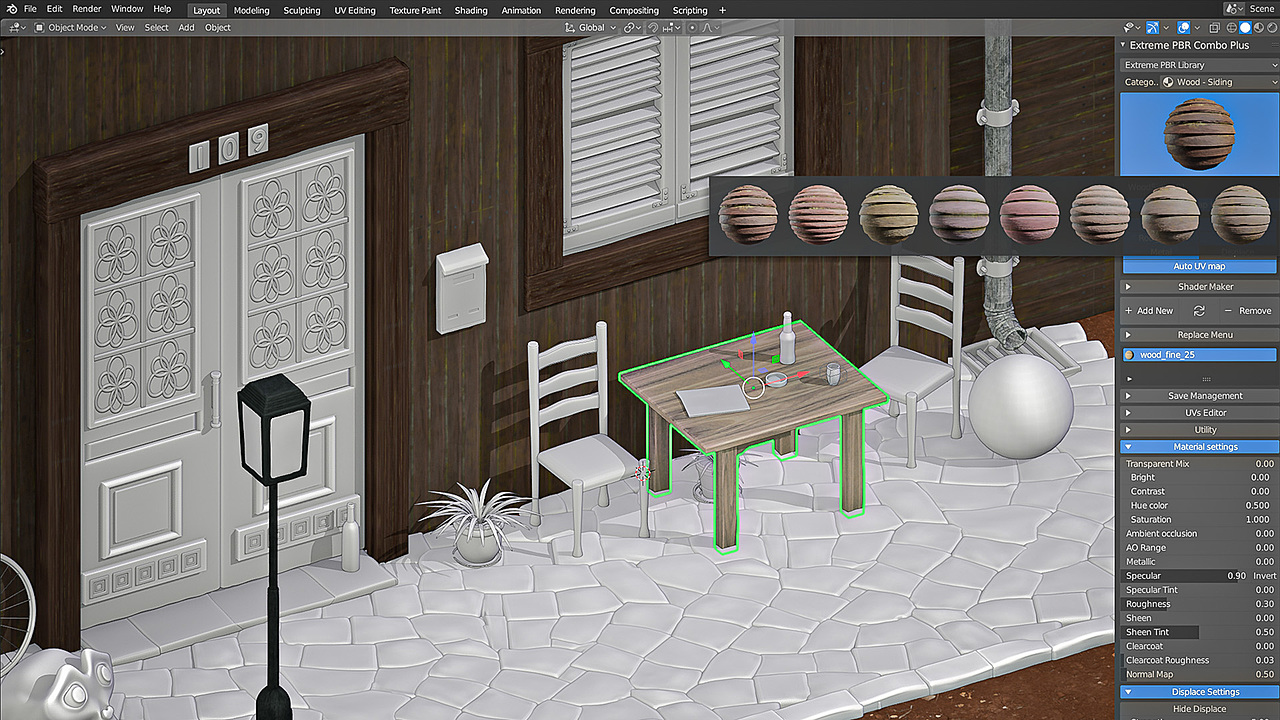
7. Extreme PBR (from $39 on Blender Market)
One of the hardest parts of texturing is...finding the textures in the first place!
When you have to separate out albedo, roughness, normal, and metalness maps, the challenge gets even harder. And that’s not to mention the time it takes to plug all those texture nodes in.

Extreme PBR has been one of the top-selling addons on the Blender Market for months now, and for a good reason.
It comes with over 1,000 surprisingly good materials and it’s easy to add your own.
The controls in the sidebar panel allow you to easily switch out materials, set and manipulate UV’s, edit the material properties, add displacement, and do pretty much everything else you’d need to do to quickly texture a scene.
6. Rapid PBR Material Creator ($10 on Blender Market)
Sometimes, tileable textures just won’t do the trick and you need to customize them yourself using Substance, Quixel, or Photoshop. Creating and setting up materials with your custom textures isn’t hard, but it does take a few steps that may as well be automated.
That’s where Rapid PBR Material Creator comes in.
Just point it at a folder and create your material with one click. You can also update all materials in one click if you've made changes in another program and want to see that reflected in Blender.

I do wish it was smart enough to make multiple materials out of a folder with multiple PBR texture sets, as having everything in separate folders does take some extra organization, but as it is it works great (especially at the price of $10) and is easy to use.
5. Node Wrangler (Free - in Blender by default)
If you watch a shading or compositing tutorial and it doesn’t start with enabling node wrangler, that's probably because it’s just assumed that you're already using it.
The most-used feature is Ctrl-Shift-clicking on any node to preview it, but what’s less known is that you can also use Ctrl+Alt and either the plus, minus, multiply, or equals symbols to instantly add a mix node of the corresponding type.
You can also add mapping nodes or all your PBR textures at once, reload all your images with a click of a button, or quickly switch node types with Shift+S. It may be an old addon, but it’s definitely kept up with the times and is as useful as ever.
4. TexTools (Free on Github)
Originally a super popular 3DS Max script, this addon is a set of tools for UV manipulation and texture creation. There’s a heck of a lot packed into this one, and it’s completely free.
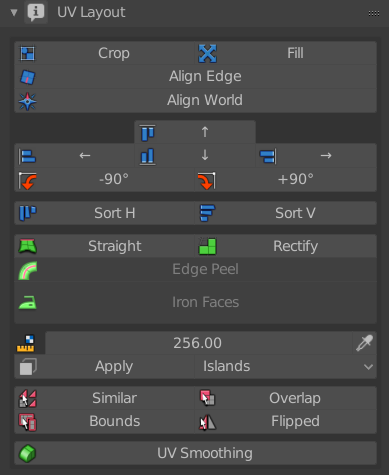
The first section lets you set the image size and padding, switch between your UV sets, reload all your textures, or add a test grid.

The Layout panel is filled with operations you can use to align, flip, rotate, or scale your UV elements any which way. My favorites here are Rectify which just aligns everything to the X and Y, similar to the UV Squares addon, and the ability to automatically sample the texel density and set all your islands to the same density in one click. That is SO helpful.
You can also quickly select your islands based on similar topology, whether they’re overlapping, flipped, or are on the boundaries of the mesh.
The Baking panel is like an addon in and of itself. It lets you bake all of the important maps like normal maps, AO, Material ID, Curvature, Diffuse, and a whole lot more. Just select one or more objects and hit bake!
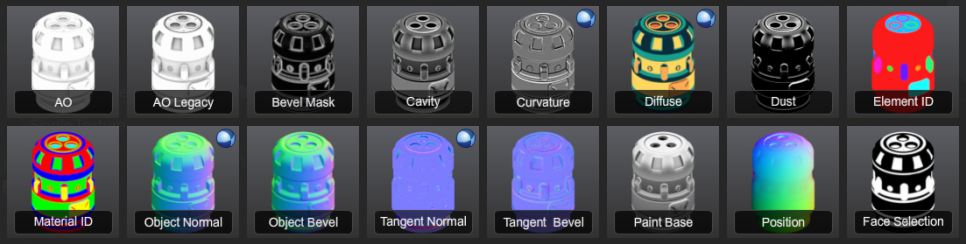
It even explodes your mesh for you, so you can bake your ambient occlusion correctly and your normals won’t get all mixed up. In one click! How have I not seen this until now!
TexTools also lets you do weird stuff like create a mesh out of UV islands, which you can then morph back onto the object. Seems like it would be cool for creating clothes or something, but I haven’t really found a use for it yet. But it’s fun to do. Anyway, I’m a new fan of TexTools, it’s free, go grab it, and donate a couple of dollars to the developer Hendrik Schoenmaker so that he can keep it supported.
If, for whatever reason, this addon doesn’t meet all your UV needs, check out UV Toolkit, UV Squares, and Texel Density Checker. They can be really handy to have as alternatives.
3. DECALmachine ($40 on Blender Market)
When I first saw an early demo of this one, I thought it was black magic.
I had a decision to make: was making great-looking hard surface game assets super quickly really worth making a deal with the devil? I considered it, but it turns out...it just takes 40 bucks.

DECALmachine uses shrinkwrap projection, normal data transfer, clever parallax mapping, and a handful of other tricks to let you easily add details to your mesh objects.
Each decal is easy to edit afterward, so you can do some cool tricks with stretching and cutting corners to make them fit most use cases.
It comes with 108 great decals that are ready to use, but it also has a super easy to use decal creator so that you can add your own.
It’s streamlined for a low-poly workflow for a game engine, but you can just as easily use it for high-res animations. You can either keep the decals on the mesh or bake them down to PBR textures which you can use in any software.
If you do any sci-fi or mechanical modeling, definitely grab a copy of DECALmachine.
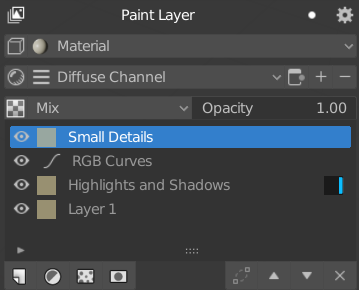
2. BPainter ($39.99 on Blender Market)
Texture painting with layers in Blender. Finally!
That’s already cool enough, but Bpainter takes things a step further with full-blown adjustment layers, procedural layers, and layer masks, all within material channels so you can quickly switch between painting your diffuse, metallic, or roughness, or any other types of maps.
The way it’s set up is super flexible and it works with any workflow and node setup, not just the basic Principled Shader PBR setup.
Does it turn Blender into Substance Painter or Photoshop? Not quite, but it’s one heck of a step in the right direction. Beyond just layers, Bpainter puts everything else you need for painting right within reach - color palettes, brush settings, textures, and more.
It takes the handy things that are usually hard to get to and makes them easy to use while organizing the less used settings so they don’t take up so much space.
The result is a super intuitive UI that has everything you need.

The latest version for Blender 2.8 also comes with a map generator, so you can quickly bake things like AO and Curvature to use for layer masking and other cool things.
Of course, you can combine all your layers when you’re done painting, so you can export your model to any other app. You can even assign different material channels to different RGBA channels, which, for a game artist, saves a lot of time.
If you plan on doing any texture painting in Blender whatsoever, save your sanity and grab a copy of BPainter first.
1. UV Pack Master (Free on Gumroad)
This addon tops my list because it’s saved me quite a few hours of work, and it’s useful on just about every project. Whether it’s characters or hard surface stuff, hand-painted or mostly procedural, you almost always have to pack UV’s.
I try not to use addons when I record tutorials so that everyone can follow along, and so I once packed three hard surface game weapons into one map by hand and it was… a little painful.
UV Pack Master Pro would have made that whole process an absolute breeze.
 Blender's pack - decent, but no mirrored UV's and extra wasted space
 UV Pack Master - mirrored UV's and concave shapes!
Its packing algorithm supports concave shapes instead of just bounding boxes, so it’s better than Blender’s default by far. It’s also pretty fast thanks to multithreading.
What really makes it work for me though is the fact that you can lock overlapping islands together. In most models, you want to mirror some UV’s to save texture space but leave key pieces unmirrored so that it still looks asymmetrical. By locking overlapping islands, you can pack your mirrored pieces and unmirrored pieces all at the same time!
Among other features, you can set a pixel margin size, which is fantastic. Other packing methods usually use a percentage based margin, and good luck converting that to pixels to get it to exactly the right size.
The pack still leaves empty space around the edges sometimes so there is room for improvement, but am I going to be lazy and accept "pretty good" instead of "perfect"? If it saves me hours of work, you bet I will!
Texel Density Checker https://www.artstation.com/artwork/3oVB8E.