Making one or two things move in Blender is pretty easy, but if you’ve ever needed to make more complex effects, things can sometimes get messy or, in some cases, downright impossible. Recently I’ve discovered these Blender 2.8 addons that I think you’ll enjoy, which can help make rigging and animation in Blender a bit easier.
10. SpriteHandler

When you think of animating in a 3D software, you probably don’t think of pixel art and sprite sheets. If you’re into making games though, there are definitely times where you’ll need to cross that divide between 3D and 2D. There are a few sprite related addons out there, and I’m always attracted by fun names like Get Sheet Done, but the best and most fully featured one I can find is called SpriteHandler.
SpriteHandler makes it extremely easy to import and play any sprite sheet. Just add it as an object, set the X and Y grid numbers, adjust the timing, and you’re good to go. If you set the shader to diffuse and the transparency type to Alpha Clip, you can even have your animated sprites interact with lights, shadows, and other objects!
You can also use sprite sheets to randomize a material per object, convert a sprite sheet to mesh objects (it creates a mesh that's in the shape of the sprite, not just a plane), and of course render out any animation as a sprite sheet you can use in Unity, Unreal, or elsewhere.
Cool, right? It’s a bit niche, so not everyone will need this, but if you do it’ll save you quite a lot of time.
9. Text FX
One of the areas where Blender can be said to be a little bit behind is motion graphics, in particular when working with Text objects. The addon Text FX makes animating text a breeze and adds quick controls for effects that you’re likely to want to use. You can animate numbers counting up or down, make a timer, a typewriter printout, or that cool matrix style scramble effect.
There’s also an addon called Text Effects, which is an entirely different addon that can’t do those effects but can do intro style transforms really well. I'd recommend checking out both.
8. Wiggle Bones

Follow through is a pretty important concept in animation. Most of the time your objects should respect inertia, but it can get pretty tedious to keyframe all those secondary and tertiary bones if you really only care about one of them and the rest just need to react believably enough.
Wiggle bones is a small addon by Shteve that makes any bone jiggle around based on it’s movement or rotation. You can even chain wiggle bones together! There is some weirdness here and there as Blender’s dependency graph is not an easy thing to mess with, but overall it’s fast, easy, and super unobtrusive when you’re not using it.
You can also check out Jiggle Bone, which was the original implementation by Simón Flores that now also works with 2.8. Another alternative is Spring Bone by Artell. It looks like it’s still in early development, but it has collisions with other bones, which is extremely cool!
7. AnimAll
You can animate just about any property in Blender from modifiers to render samples and even node values. There are just a couple things that you can’t animate which, if you could, would make creating certain cool effects a lot easier.
AnimAll is a really old addon by Daniel Salazar that lets you animate some interesting things. For instance, vertices! Just select some vertices, insert an AnimAll keyframe, go forward a few frames, move them somewhere else, and insert another keyframe. Just like that, you’ve animated your mesh without using any shapekeys. You can also animate bevel weights, creases, vertex colors, vertex groups, shape key vertices, and, my personal favorite, UV’s. Animating your UV’s can help you make lots of awesome effects like flowing lava or switching between 2D facial expressions.
AnimAll is included in Blender, so all you need to do is check it on and it’ll be there when you need it!
6. X-Muscle System

Have you ever seen those fancy animation breakdowns where they show the anatomy of a character or creature and it’s so detailed that you can see muscles moving? For basic stuff you can use corrective shape keys to get a similar effect, but for rigs that need lots of detail and total flexibility in any direction, you can now use muscles thanks to X-Muscle System.
The way it works is pretty simple. Select two bones, create a muscle that binds one end to each of them, and then tweak the parameters to your liking. There’s a lot you can do here, from customizing the shape of the muscle in edit mode to pinning it to different parts of your armature. You can make any type of muscle you can think of, including jiggly ones and ones that deform along with the bones. Once you apply the muscle system to the skin of your character, the skin deforms properly as the muscles slide, squash, and stretch underneath.
5. Animaide
There are a thousand tools for moving vertices in Blender in all different sorts of ways, but not that many tools for moving our other favorite points in space - keyframes!
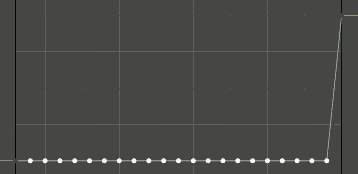
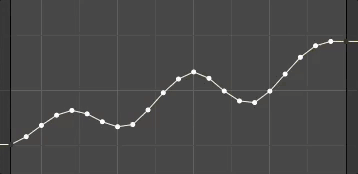
Well, the addon AnimAide by Ares Deveaux brings some of those clever concepts to the graph editor. After installing the addon you can use these sliders in the graph editor to ease your keyframes between two points in 14 different, incredibly helpful, ways. There are also hotkeys and pie menus if you really want to get serious with it.

There’s also a second panel called Anim Transform which lets you move your object in the 3D view and all of the curves will shift over accordingly so you can play the same animation in a different spot. That is magic.

You can tell it’s made by animators for animators because there’s no extra fluff and no gimmicks - just a handful of well thought through features that work every time.
4. Dynamic Parent
There are very few things that I found more frustrating when starting to animate than switching between parents. It seems simple enough to have a character pick up an object and pass it off to another character, but even that can turn into a headache. It does take a few clicks to set up the constraints, but if you happen to click Set Inverse or Clear Inverse at the wrong point in the process, you can hopelessly lost trying to get it back into place.

It’s worth doing that a couple times so you can understand what’s going on behind the scenes, but after that learning period, install the Dynamic Parent addon by Roman Volodin and just click when you want an object to switch parents. It’s super simple and it works well.
The one quirk in the 2.8 port is that it appears under the toolbar, not the sidebar. But if you scroll down one post in the BlenderArtists thread, I posted how to get it into the right spot. It’s just changing two lines of text and then you’ll be golden.
3. Auto-Rig Pro

Rigging is tough, and making a complete character or creature rig that works well is not easy and takes quite a lot of time. Auto-Rig Pro promises to make that task much more simple.
It has a smart rig feature which auto detects the correct placement of bones based on placing just a few little circles on the shoulders, neck, ankles, etc. It’s pretty intuitive and you can do it all in front orthographic view since it calculates the right volume depth for you. It also auto detects fingers and rigs those with the right rotations and everything, so all you need to do is put the circle on the wrist.
Of course, no auto-rigging system is perfect so you’ll likely need to do some manual weight paint adjustments, but for any normal character it’s pretty minimal. One cool bonus feature is that it can generate a bone picker map, so you can select the right bone if things are getting crazy in the 3D View.

One thing I really appreciate about this addon is that Artell, the developer, has made sure that it works well with other addons and goes out of his way to encourage his users to support those other developers as well. For example, it works hand in hand with X-Muscle System, Voxel Heat Diffuse Skinning, which by the way is also awesome and worth checking out (I mean, if the name voxel heat diffuse skinning doesn’t make your Blendy senses tingle I don’t know what will), X-Pose Picker, and more.
You might wonder if it’s worth purchasing if Rigify, another auto rigging addon, is free and included in Blender. Despite having that free alternative though, Auto-Rig Pro holds the title for the #1 best selling addon on the Blender Market and still holds a five star rating, so there’s definitely a demand for a more advanced solution. Auto-Rig Pro seems to hit the nail on the head for most users. If you rig a lot of characters, it’s definitely worth checking out.
2. Bone Layer Manager

Do you remember how Blender layers used to be a grid with dots, and then when we switched to collections everything made a lot more intuitive sense? Well, rigs and rigid bodies are the last things to still use that old system. That means that unless you created a rig from scratch yourself, and sometimes even then, you might completely forget what bones are on what layers. It can be a total crapshoot to try to find what you’re looking for.
Bone Layer Manager comes in to save the day here and lets you assign names to your bone layers. It also gives you an intuitive sidebar UI for adjusting rig properties and messing with constraints. Now, you can put all your face bones on a face layer, IK arm control bones on an Arms IK layer, helper bones on a helpers layer, etc., and you’ll never have to guess what’s where.
1. Animation Nodes
There are quite a few awesome rigging and animation addons out there, so it was tough to narrow it down this list to just 10. But as far as I know, the #1 in this category wins by a landslide. If you haven’t guessed it already, that would be Animation Nodes by Jacques Luke.
Procedural creation is the future, we’re all aware of that, and just check out our Nodevember video with Simon Thommes about procedural shaders if you want to see what insane things are possible when you let people plug stuff into other stuff and do math in between. Instead of colors and textures though, Animation nodes lets you control objects, vertices, text, sound, and even time itself. Effects that were just not possible to do in Blender before are now relatively quick to create!
If you’re more into modeling then motion graphics though, I’d recommend checking out a related addon called Sverchok Nodes. For node based rigging, check out the ongoing development of a tool called Ghost IK which looks very interesting so far. Motion Tool should also get a shoutout here since it does node-based motion graphics as well but can be a bit easier to use than animation nodes. With less complexity comes less freedom though, so whether you’d want to try it or not depends on the project.
To continue the node hype, The Blender team has already announced their Everything Nodes project, led by none other than Jacques Luke himself. While I highly recommend Animation Nodes, I’m even more excited about the features coming to Blender official later on that might make this addon irrelevant. Who knows how long that will take though, so grab a free copy of Animation Nodes in the meantime and let me know what you make!
Does everyone need these addons?
No! If you’re brand new to animation I would actually recommend not installing any of them just yet. Instead, check out the animation courses by Wayne Dixon. He’s been a professional animator for years and years and breaks down the difficult concepts in a way that’s easy to understand. If you go through his lessons and exercises, you’ll get super fast at animating simple projects.
Animation Workflow and Body Mechanics
What are your favorite animation or rigging addons? Did I miss any?
For modeling, texturing, and shading addons, check out the previous articles:
Thanks for sharing this very helpful list, Jonathan!