Beginner's Overview of 3D Game Asset Creation in Blender
Aug 8th 2024

If you’re like me, there is a good chance you have a Steam library rivaling that of an actual library with games that will never be opened.
However, of the games you play, have you ever stopped to wonder how those worlds are populated or who the people are that develop them?
“Video Game Artist” is a broad term that describes a large percentage of the people behind the scenes creating all of the content that populates your favorite games.
These individuals' skill sets can range from a pretty broad array of abilities to hyper-focused specialties and everything in between. Artists are not the only ones working on games, but they are the ones who pour all of their efforts into making them look pretty. Otherwise, we’d all still be playing text-adventure games.
Let's breakdown and de-mystify some of the steps that go into making video game art for 3D games, so that we can see how much love and care is involved in every model you see on screen going forward.
While there are many ways to achieve 3D art, there are common “stages” that artists and assets go through to help streamline the process.
Working out what you're going to make in 3D

Before we start with any of the creation process, we first need to know what it is we are going to create!
If you’re lucky enough to have concept art provided, this stage just became a lot easier since someone else has done a lot of the hard-thinking for you! If that’s not the case, a Google search for a couple of references close to what you’re looking for will often do the job as well.
The key here is that we have designs and references handy, so that we aren’t solely building from what’s inside our head. What works well in the mental space doesn’t always translate well into our 3D environment, so even having something scribbled down into a concept image will be a greater help than trying to create a mental image.
Modeling in Blender

We need to start building in 3D once we know what we are trying to build! In Blender, you’ll have an arsenal of tools at your disposal. The biggest obstacle is knowing in what order we will want to achieve things to facilitate a steady workflow.
Where I normally start is the “High Poly” stage. Here, I model with no restriction on polygon count. I can model in the details as much as I want, because this asset isn’t going to be the final game model.
Once I’ve completed my high poly, I’ll take this and start to remove unnecessary polygons.
Everyone has their own way of accomplishing this, but I usually will remove edge loops that do not alter the silhouette of the model.
In this “Low Poly” stage, we are looking to only keep detail that will change the overall silhouette of the model. This is a pretty loose stage, and takes a bit of practice to really get comfortable with.
The unfortunate consequence of retopologizing too much or removing necessary polygons is that we could have baking artifacts later when we texture, so I am often more conservative with how much I remove in this stage.
Setting up our UVs for our 3D asset
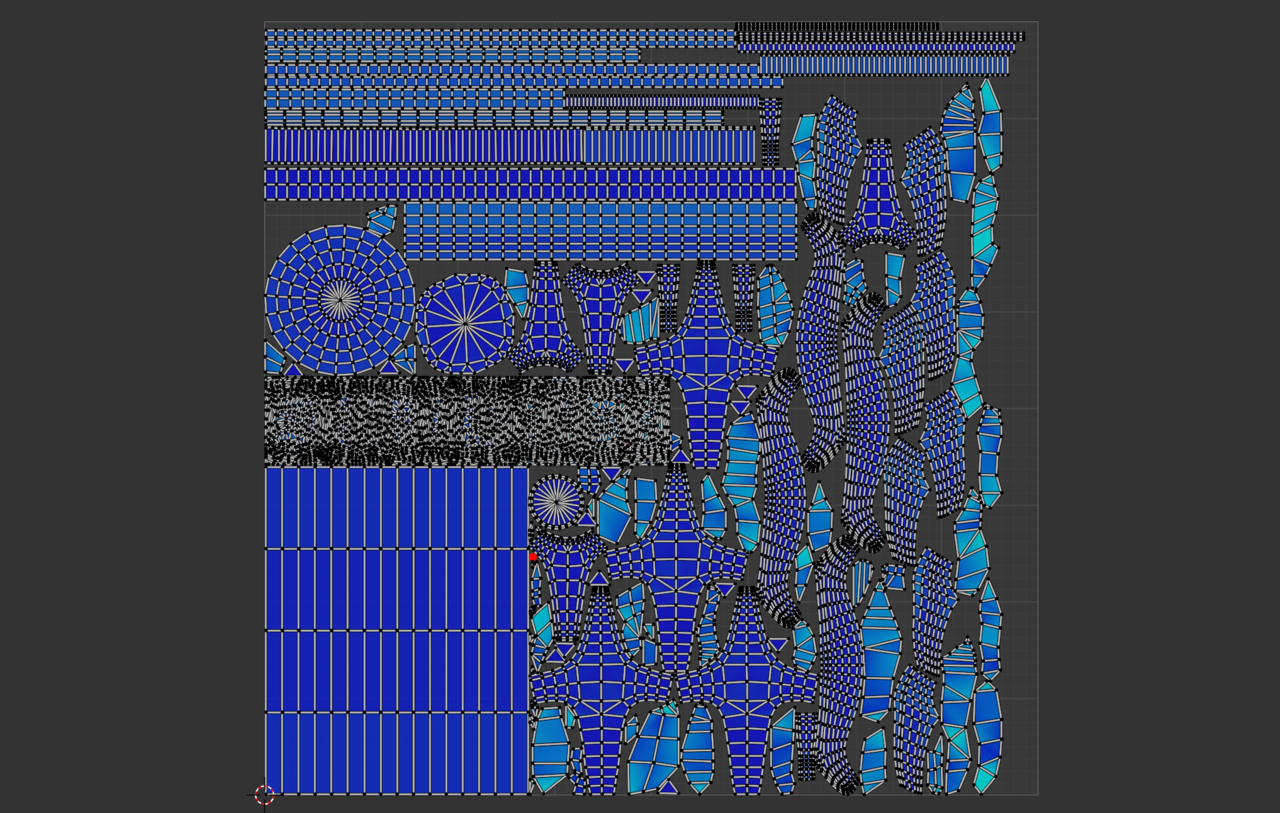
Before we are able to start adding texture to our model, we need to tell the model how we wish to display the images on its faces.
We’ll use the model’s UV coordinates to determine how the textures will appear. This involves creating seams to separate parts of the model, unwrapping the islands that are created from our seams and straightening everything out so that we minimize UV skew and distortion.
That can sound somewhat cumbersome and is often the stage in the workflow that most people strongly dislike. I find it oddly cathartic and enjoy putting on some music or a podcast to listen to while I get into a flow state, so to each their own!
If you also hate doing UVs, check out this video on 26 essential Blender UV unwrapping tips.
The Texturing Process for a Game Asset

After the low-poly model has been UV unwrapped, we can begin the texturing process. There are countless texturing applications, each with their own advantages. I personally have been using a new software called InstaMAT to do all of my texturing, since it’s pretty powerful and it comes with a free commercial license.
First, we need to extract the high-quality details from our high-poly model. This process is referred to as “texture baking.” The software will cast rays from the surface of the low-poly onto the high-poly and return with the surface information it received. This process will generate useful images that we can use to start texturing.

We can use these images to give our model some “texture”, hence why we call these textures.
Here is where we can make the surfaces appear like any type of material we want, and give them characteristics to help contextualize the model for the environment in which it will be used.
Each texturing application will operate differently, with a common theme of “layering” the effects that you add to your texture. If you are familiar with layer-based image editors like Photoshop or GIMP, you’ll get the idea.
Further 3D Mesh Retopology

At this point, we’ve completed the workflow. Now, if we weren’t able to reduce the polygon count for our low poly to what we needed, here is where we can continue to do that.
This stage is often optional since it is reliant on the polygon budget that has been set out for this model. Since we no longer have to worry about baking or texturing, we can continue removing edge loops and faces as we see fit. Once the target poly count has been hit, we can consider this model done and ready for our game!
Making art for video games can be a tremendously rewarding experience, but as we’ve seen it isn’t without a reasonable amount of effort involved.
The process of getting from start to finish can vary wildly between assets and artists, depending on the needs of the project.
Some assets may require more effort in one area or allow you to skip other stages entirely. For this reason, there is no one “true” workflow for building game art, but instead, there are common stages that every asset may go through at one point in its development. Each stage takes time to fully understand, and will take several iterations before you’re going to be comfortable with it all.
Are you looking for more game art resources?
Check out my course RELIC, an introduction to creating 3D video game art.