Here's my homework for week 1. My intention was to take pictures as I went along to show my progress but I ended up in a groove and forgot to grab the pictures...
I based the design off of a sword from an MMORPG that I used to play.
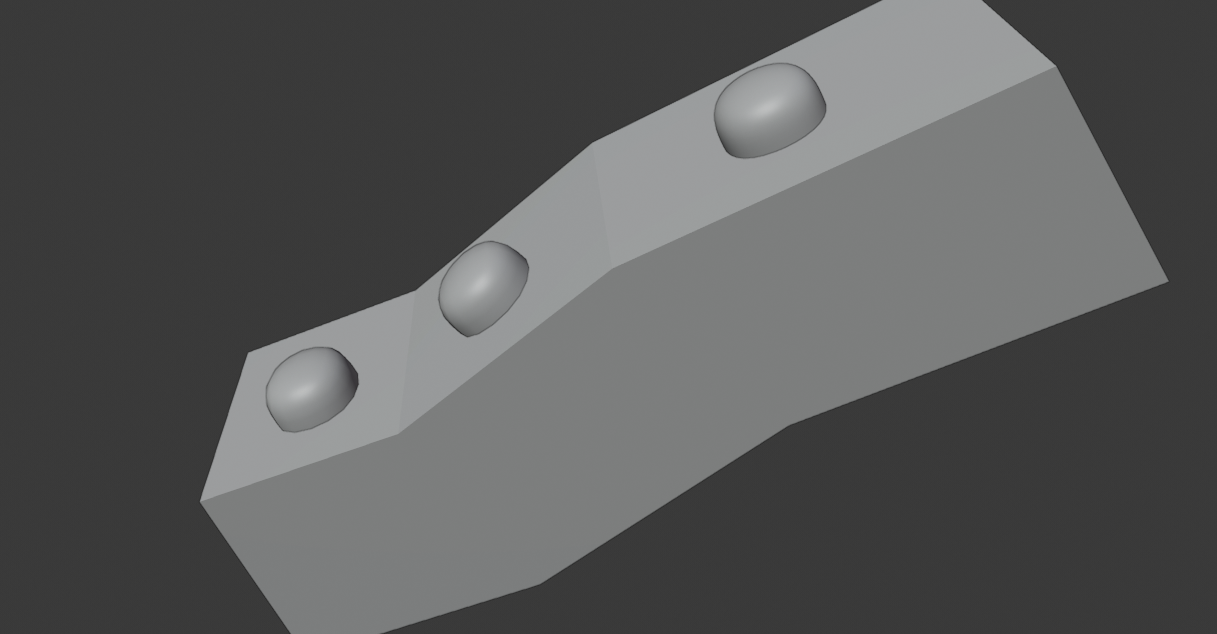
I need some advice.. I'm wondering what the best way to orient these gems to match the angle of the guard? I can eyeball it but I figure there's gotta be a better way.
Hi Lee, the good news is: there is an exact way to do this.
The bad news: it's not very easy to explain. But I will give it a try anyway.
Here is the result:

Go into Edit Mode of the Guard.
Select a Face, where you want to put a gem on.
Go to the Transform Orientations (Middle top of the 3D View, where it says Global).
In the dropdown menu, click the +.
Now it should say: 'Face'.
Go into Object Mode and select the gem.
Go to Object (top left) > Transform > Align to Transform Orientation.
Move the gem into place.
If you set the Origin of the gem where it should connect to the surface, you can even use Face Snapping.
Repeat for every gem.
I hope this is understandable.
Try it and feel free to ask if anything is unclear.
Nice start.
You should also make sure that your gem object is facing up (z+), has no object rotation and "Align Rotation to Target" option is enabled to work with Face Snapping. It's much easier that way.
Welcome to the class, ![]() leverett! Your sword model is progressing very well. Spikey's advice is spot on. Here's a part of the treasure chest course where I similarly stuck rivets to a curved bracket.
leverett! Your sword model is progressing very well. Spikey's advice is spot on. Here's a part of the treasure chest course where I similarly stuck rivets to a curved bracket.
I think I'm going to call this good for now unless someone spots something goofy with it. I'm going to try and get through that Treasure Chest Course and then maybe make an extra credit sword if I have time.
Week 1 homework
![]() leverett Good effort! Depending on how dinged up you want it, you could add more, or maybe a couple of dings in the guard. Otherwise, keep going!
leverett Good effort! Depending on how dinged up you want it, you could add more, or maybe a couple of dings in the guard. Otherwise, keep going!
![]() leverett Your sword turnout out great! Form and structure is good and I think your details are consistent and balanced for the most part. A few dents and dings on the crossguard edges and pommel would be the cherry on top. But still you earned an A this week for sure. Keep up the good work and this will look great textured and shaded!
leverett Your sword turnout out great! Form and structure is good and I think your details are consistent and balanced for the most part. A few dents and dings on the crossguard edges and pommel would be the cherry on top. But still you earned an A this week for sure. Keep up the good work and this will look great textured and shaded!
Thank you ![]() silentheart00 and @theluthier
silentheart00 and @theluthier
I'm having a bit of trouble determining where the seams need to be. I think I got the handle and the guard setup OK but the blade looks like a blob and not what Kent's looked like in class.
![]() leverett It looks like you blade seem has a gap in it somewhere, cause the UV island to not separate into 2 halves but become a blob instead. Check once more that your seam is continuous around the blade, then unwrap again.
leverett It looks like you blade seem has a gap in it somewhere, cause the UV island to not separate into 2 halves but become a blob instead. Check once more that your seam is continuous around the blade, then unwrap again.
@theluthier and ![]() spikeyxxx Both of those tips seemed to do the trick, thank you. The other thing I had to do was apply rotation and scale in object mode.
spikeyxxx Both of those tips seemed to do the trick, thank you. The other thing I had to do was apply rotation and scale in object mode.
I knew I was going to struggle with this week. I had to go back and recreate the UV map because I found a bunch of doubles. But I'm also seeing weird bleeding on some sharp edges.
I've tried adjusting the bleed value from 2 to5 to 8 (it won't let me go higher) and doesn't seem to make a difference. The blade isn't the only place I'm seeing it.