Oh right....guess I need one of these!
Homework follows.
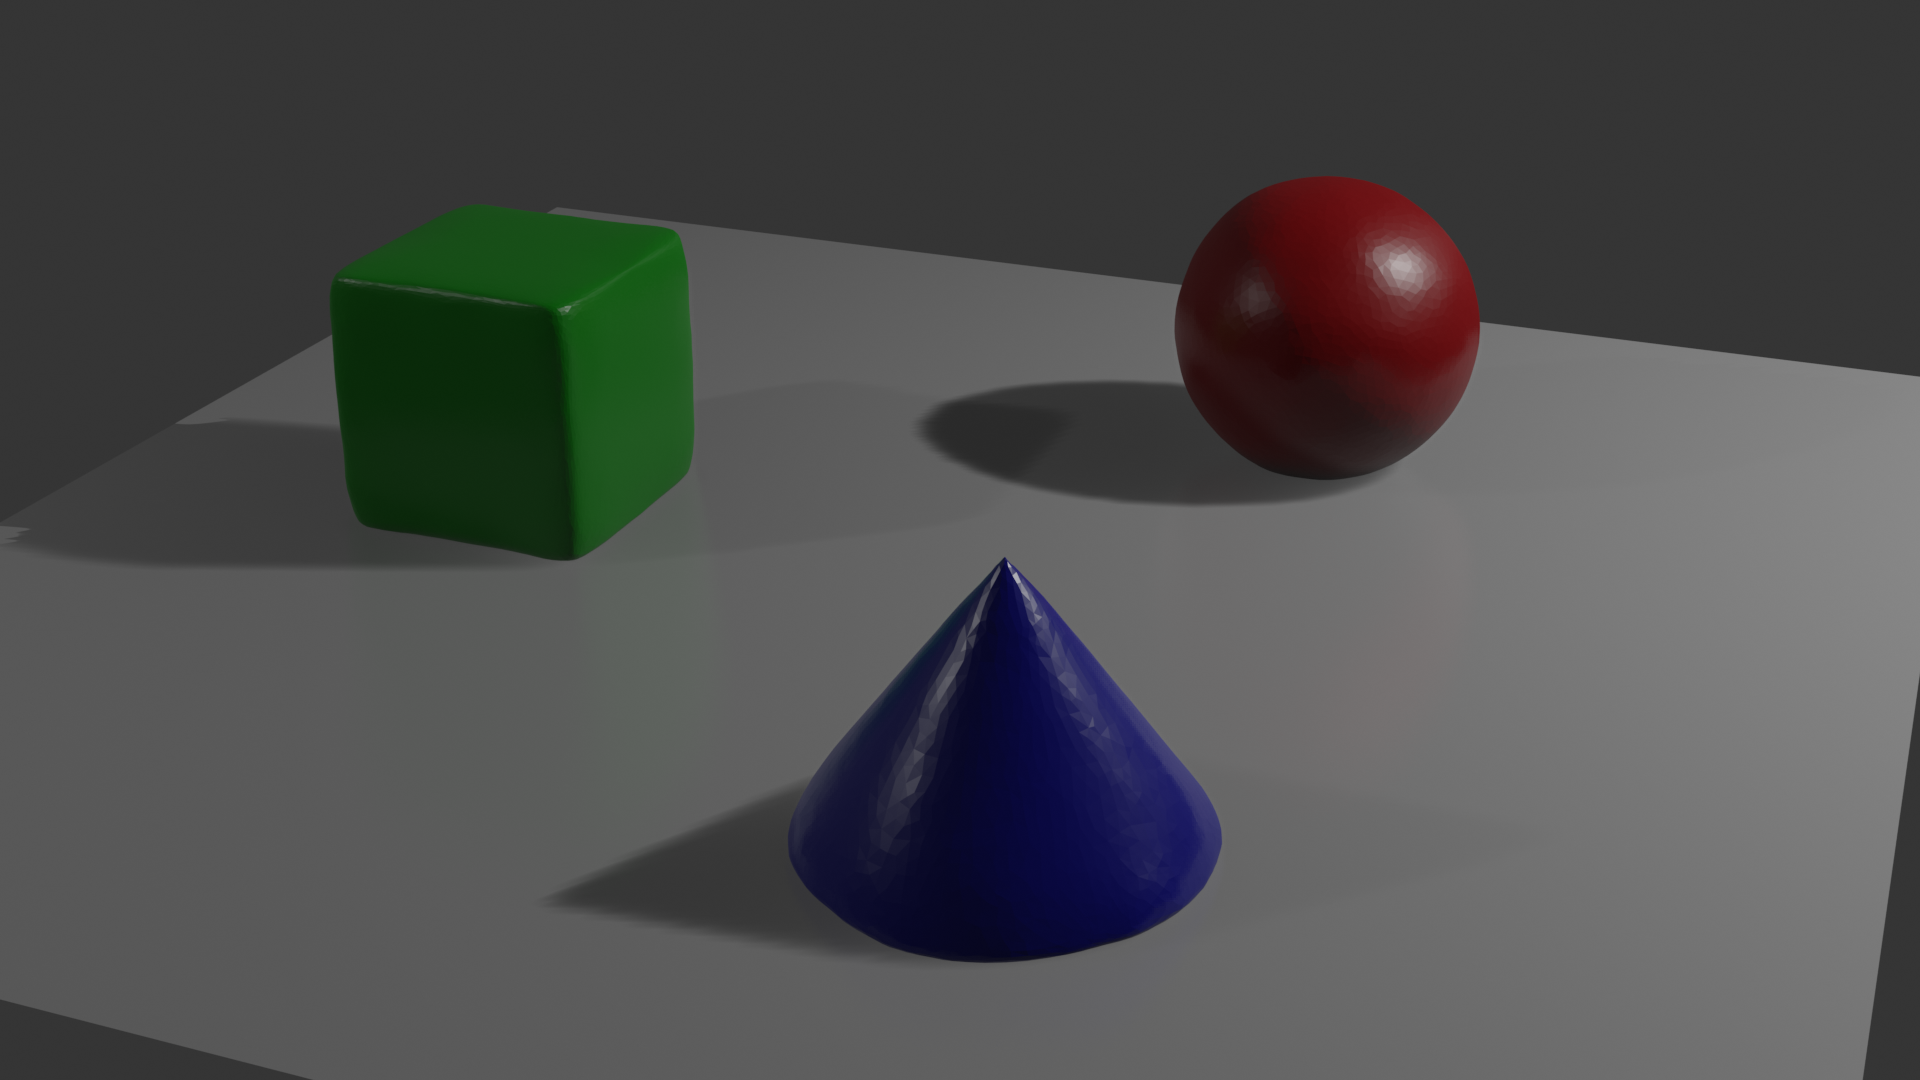
WEEK 1:

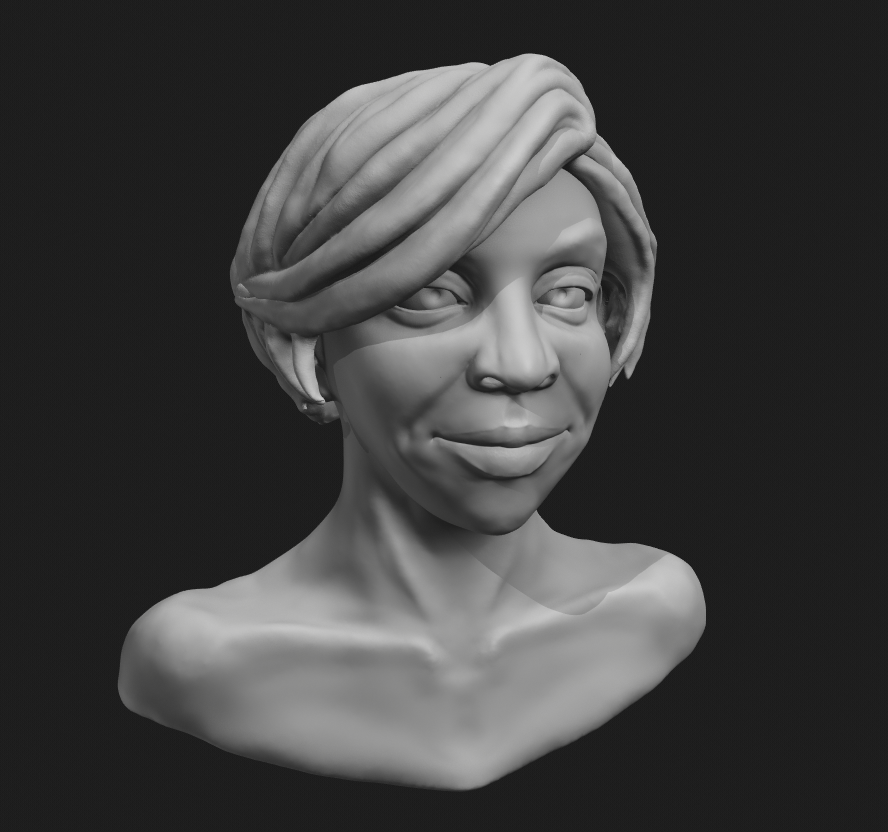
WEEK 2:

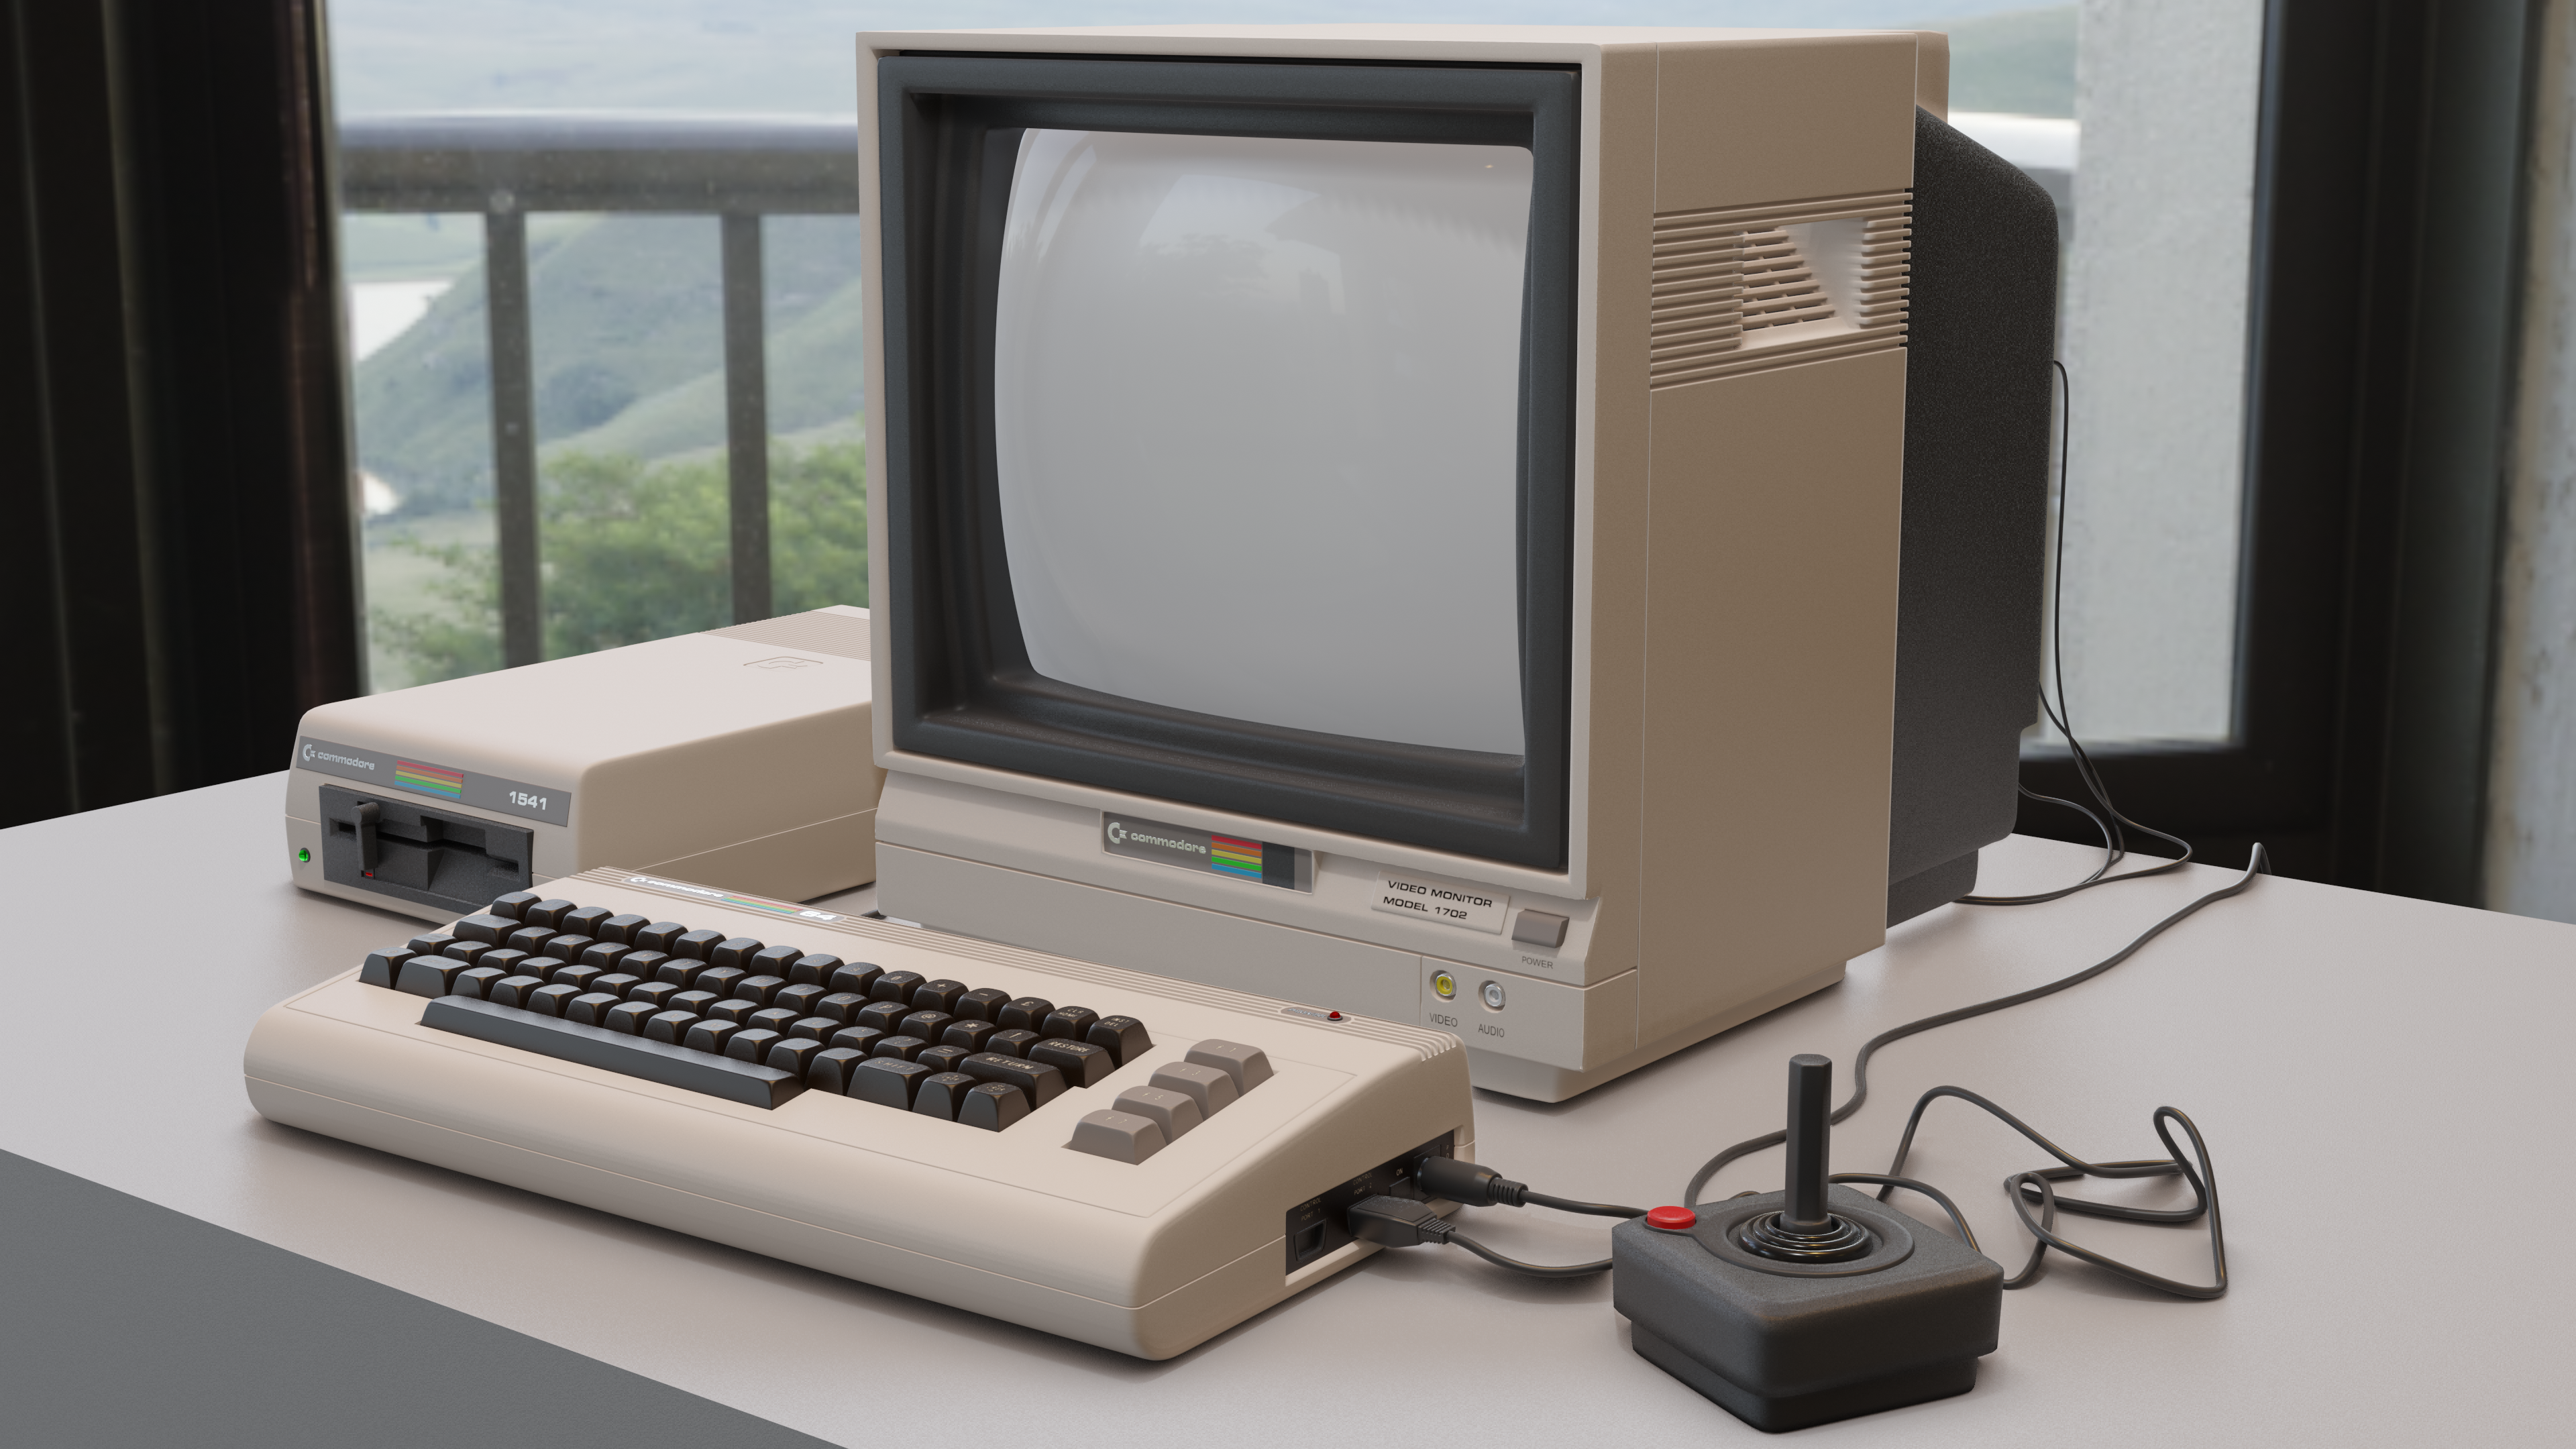
WEEK 3:
Under - the - wire, yikes.
Okay so, I didn't get everything done that I wanted to. I didn't have nearly the time to model and properly shade an actual desk, nor to make the floppy disks I wanted to add for some flavor, nor to add some kind of image to the monitor screen. There's also some texturing missing, but hopefully it's not TOO obvious (it shouldn't be, unless you're like some kind of aficionado of this computer. But, this CAN be a finished shot, and so it will have to be.
Rendered with EEVEE this time. I still think I could make this look awesomer in Cycles if I really wanted to.....but this isn't bad at all; plus I can do stuff in EEVEE that would've been laughably ridiculous to even think about in Cycles, like rendering these images at 4K! Open the images in a new browser tab to see them full-size.
By the way, does anybody know how to hide the HDRi from the camera for rendering in EEVEE? You can't do it like in Cycles. Is there some special procedure?
![]() jakeblended Awesome! Firstly I thought it is Cycles. If you want to disable hdri in EEVEE you can find this option under Render tab in Film dropdown. It's select called Alpha, set it to "Transpatent"
jakeblended Awesome! Firstly I thought it is Cycles. If you want to disable hdri in EEVEE you can find this option under Render tab in Film dropdown. It's select called Alpha, set it to "Transpatent"
I've added a packed .blend (minus the HDRi) for the Commodore 64 to my OneDrive folder if you want to take a look at my not-the-best topology. You also get to peek behind the models and see all the stuff I left off back there.
![]() nekronavt Ah good, it is very simple after all! Thanks for that tip.
nekronavt Ah good, it is very simple after all! Thanks for that tip.
![]() jakeblended Jeeeeeeeez someone went the extra 30 miles, didn't they? Utterly fantastic work Jake, keep at it.
jakeblended Jeeeeeeeez someone went the extra 30 miles, didn't they? Utterly fantastic work Jake, keep at it.
ssmurfmier1985 Thank you Miranda! Signing up to CG Cookie, as simple a thing as it is, has been one of the best "investments" I ever made. This place is great.
![]() jakeblended I wholeheartedly agree!!!
jakeblended I wholeheartedly agree!!!
WOW. That final render is STUNNING!! I reallllly love it! 😍 How did you make it look so real??! Mine always turn out cartoony. Gonna snoop around you blend file for sure. Awesome job Jake! One of my absolute favorites this week 😄
![]() ullreym We had a C64 when I was very little, but I remember it and the games very well. We didn't have the branded monitor though; we had it hooked up to our television. Made it fun to sit back on the couch and play games, though! I had originally planned to have some floppies sitting on the table next to the disk drive, and I was going to put some classic game labels on them. Deadlines are such killjoys!
ullreym We had a C64 when I was very little, but I remember it and the games very well. We didn't have the branded monitor though; we had it hooked up to our television. Made it fun to sit back on the couch and play games, though! I had originally planned to have some floppies sitting on the table next to the disk drive, and I was going to put some classic game labels on them. Deadlines are such killjoys!
And notice I put an Atari controller in there.. There -was- a Commodore branded joystick, I found out while looking for all my reference images. But back then we actually used an Atari one - well, come to think of it, it may have been a knockoff of some kind, but it was closer in appearance to the Atari one than the Commodore one. I guess plug-and-play is older than people think.
![]() jakeblended ............ A++ 🤩
jakeblended ............ A++ 🤩
Everything about this is awesome: Details, model quality, textures, shading, lighting. Wow!
![]() jakeblended wow this is really amazing. all the details are there . trully a great job everything is zo mooi good . love it
jakeblended wow this is really amazing. all the details are there . trully a great job everything is zo mooi good . love it
@theluthier
............ A++
YESSSS
Thanks, Kent! The coveted ++ at last! But it was about exhausting, I think I will take it nice and easy again for this week's assignment. :)
Here is a big thing that I -think- helped with the realism (less cartoony). BUMP!
Most of the plastic on those objects has grain. If you look at almost any kind of plastic in the real world in fact, unless it's actually shiny, glossy plastic, has a grainy surface of SOME level on it. I think that grain is very important with plastic, because the Roughness setting on the Principled shader isn't enough by itself. The Roughness setting dulls reflections; but light interplays with that physical, rough grainyness in a certain way that just dulling the reflections alone can't duplicate. I'm not sure how to explain it better than that.
If you look in my render you can see there is a very coarse grain on the joystick base for example, so it's easy to see. But the other objects, even though you might not be able to see the grain directly with your eyes, it's still there and it's still producing the light effect.
Here's how I add grain. There's probably other ways and there may be a science to getting real-world accuracy, but this method works and it's very simple:
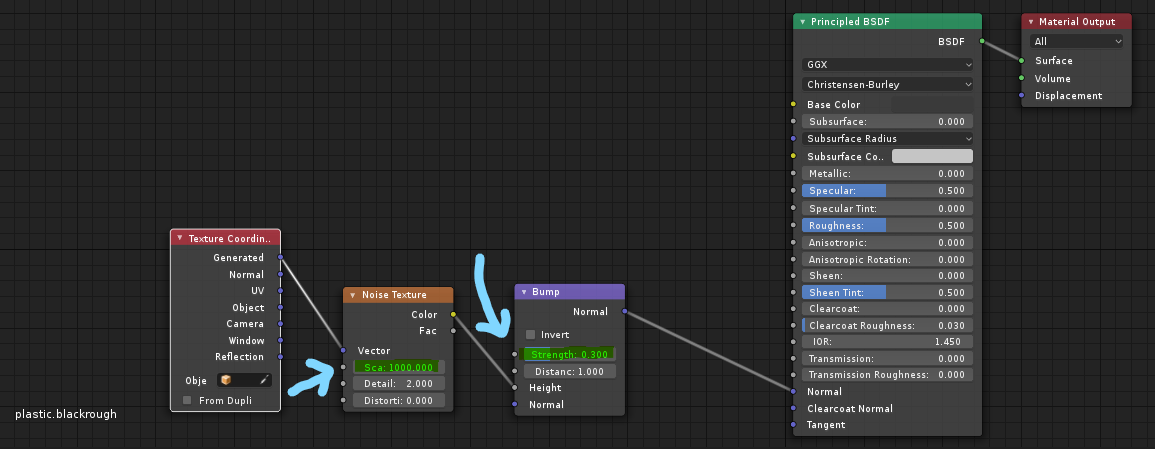
Just a Texture Coordinate node as the vector for a Noise texture (Generated works just fine, there's no need to UV unwrap for adding grain unless you really really want to). The Noise texture's Color is plugged into the Height of a Bump node, and the Normal of the Bump plugs into the Normal of the Principled BSDF. And that's all there is to it. The Scale of the noise texture controls the size of the grain, while the Strength value of the Bump node controls how high the grain stands up off the surface of the plastic. So play with those two values to achieve the effect you want.
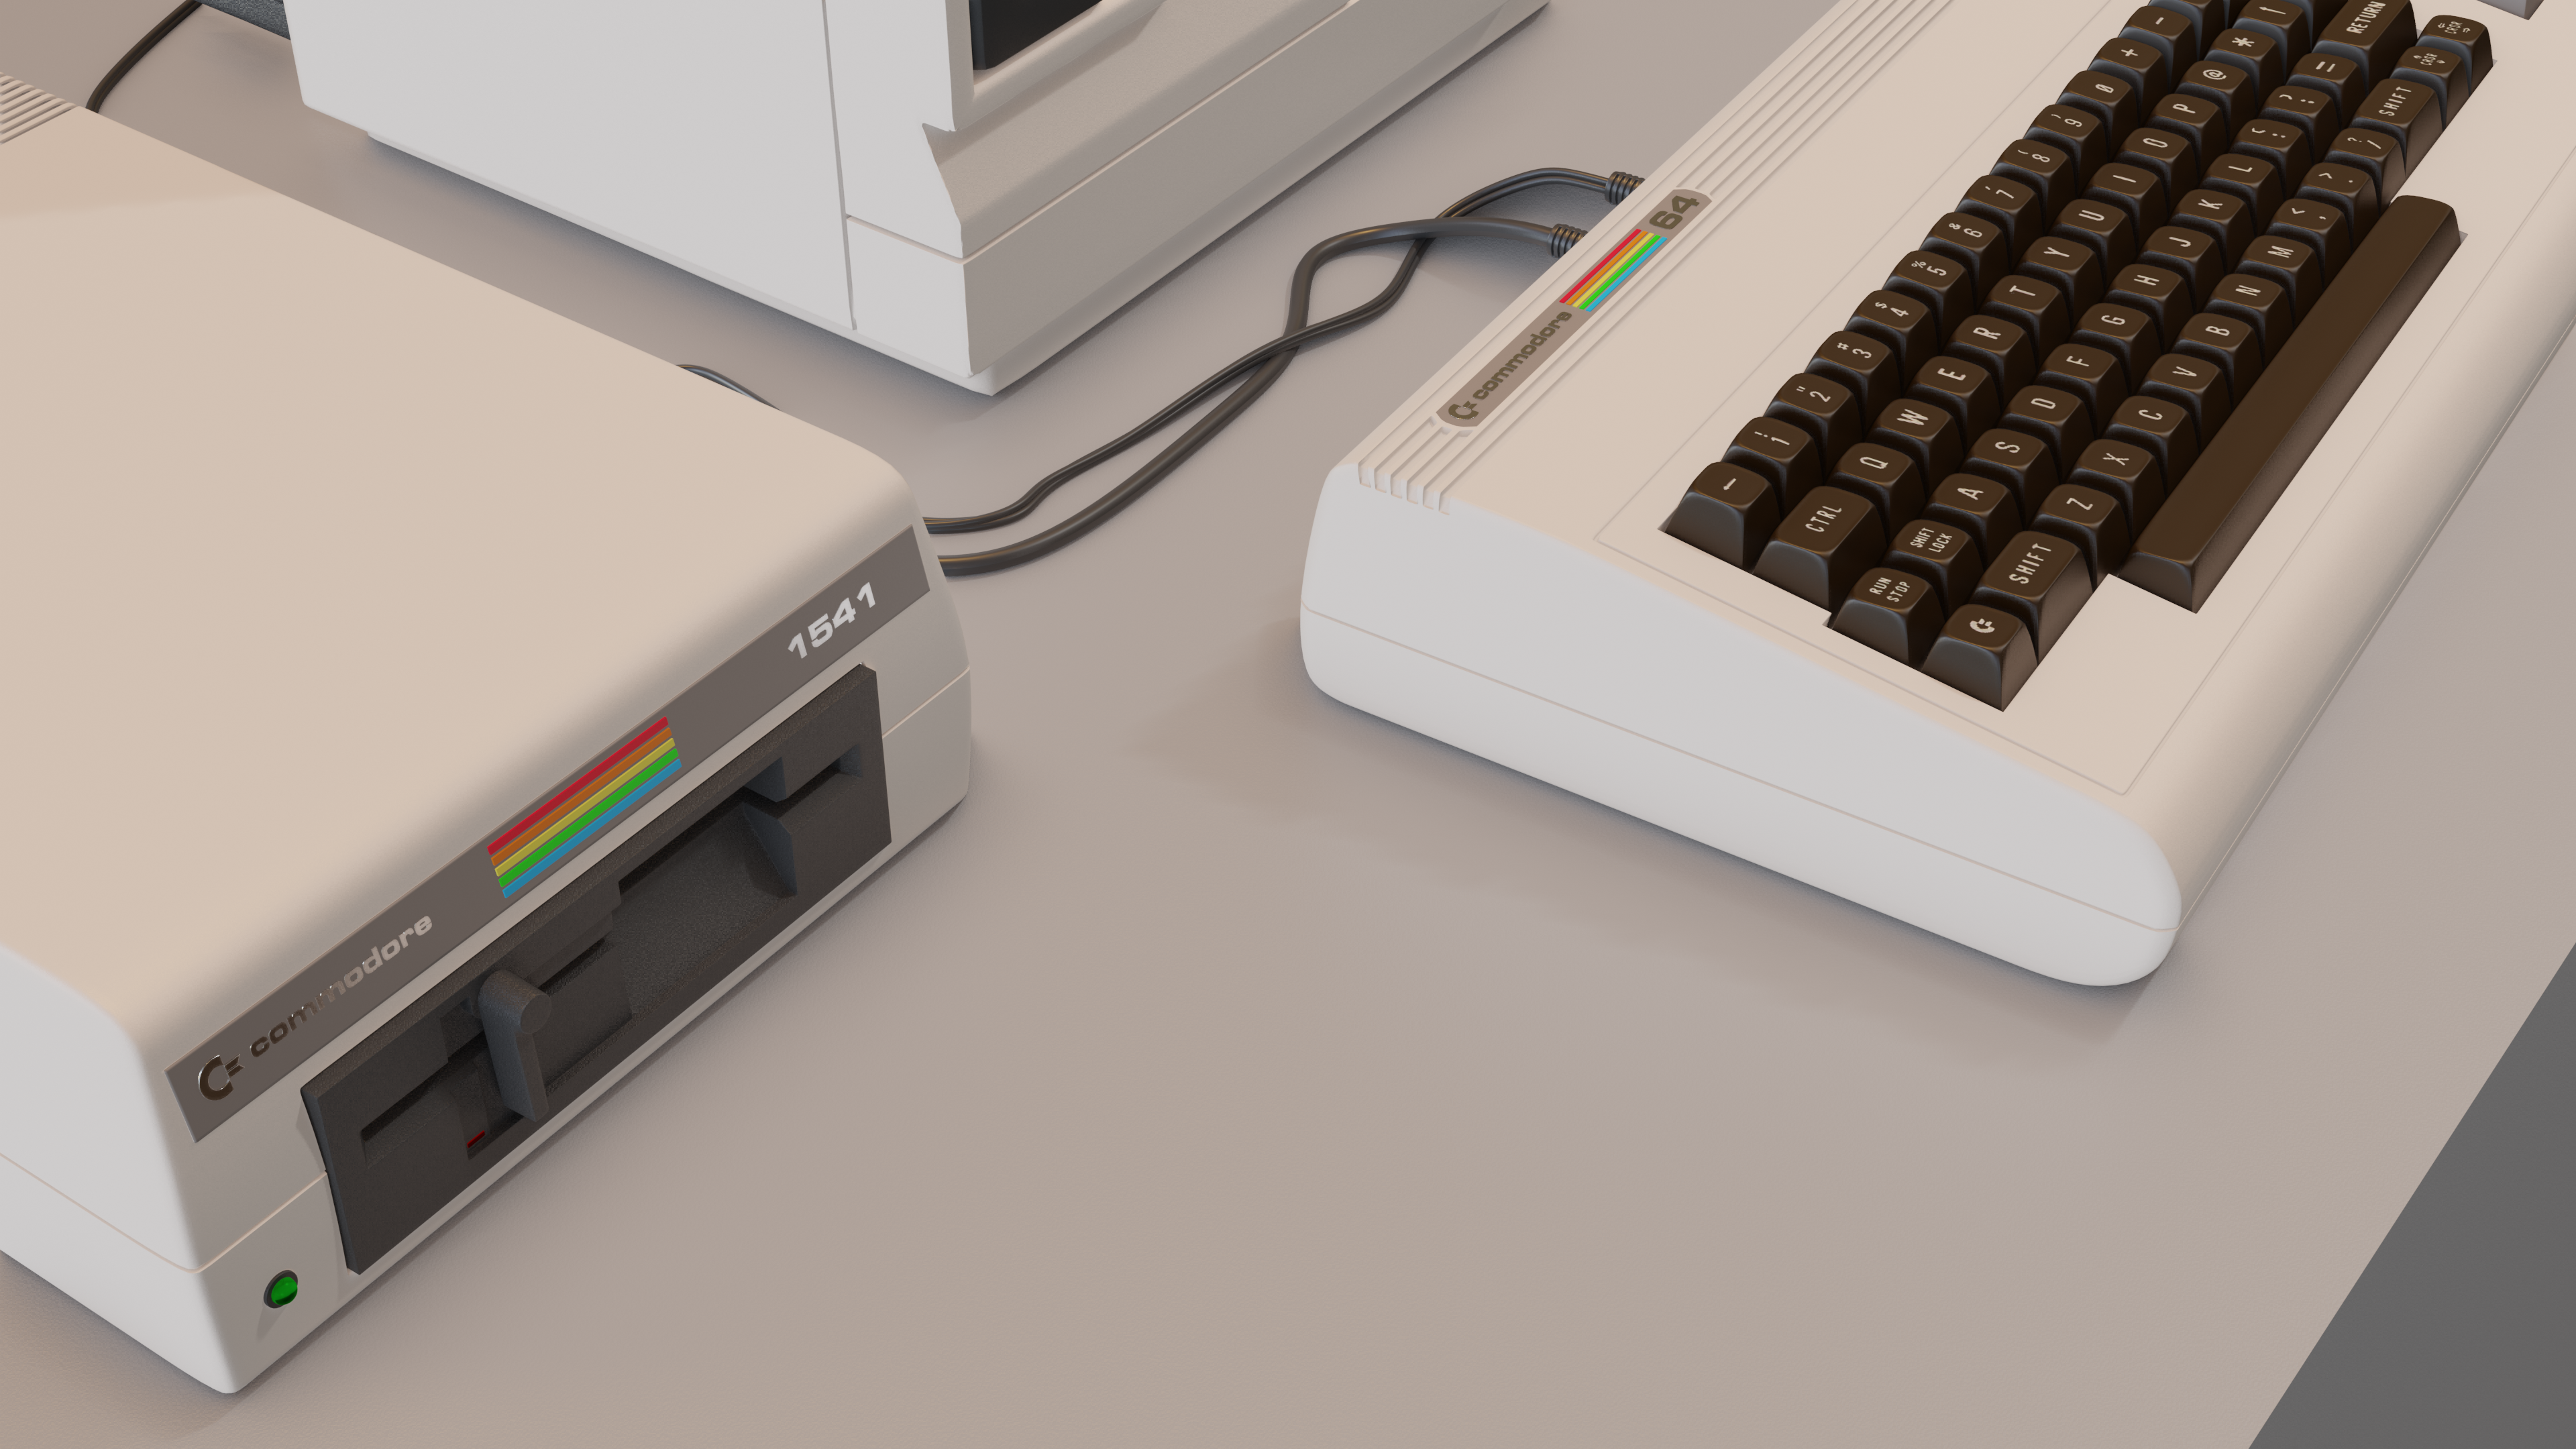
Here is another screenshot, this time up close. Not only can you see from this angle that I cheated and didn't model any feet on my computer parts (heh), but you can see the different grain in the different kinds of plastic. You may want to open the image in a new tab to see it full size.
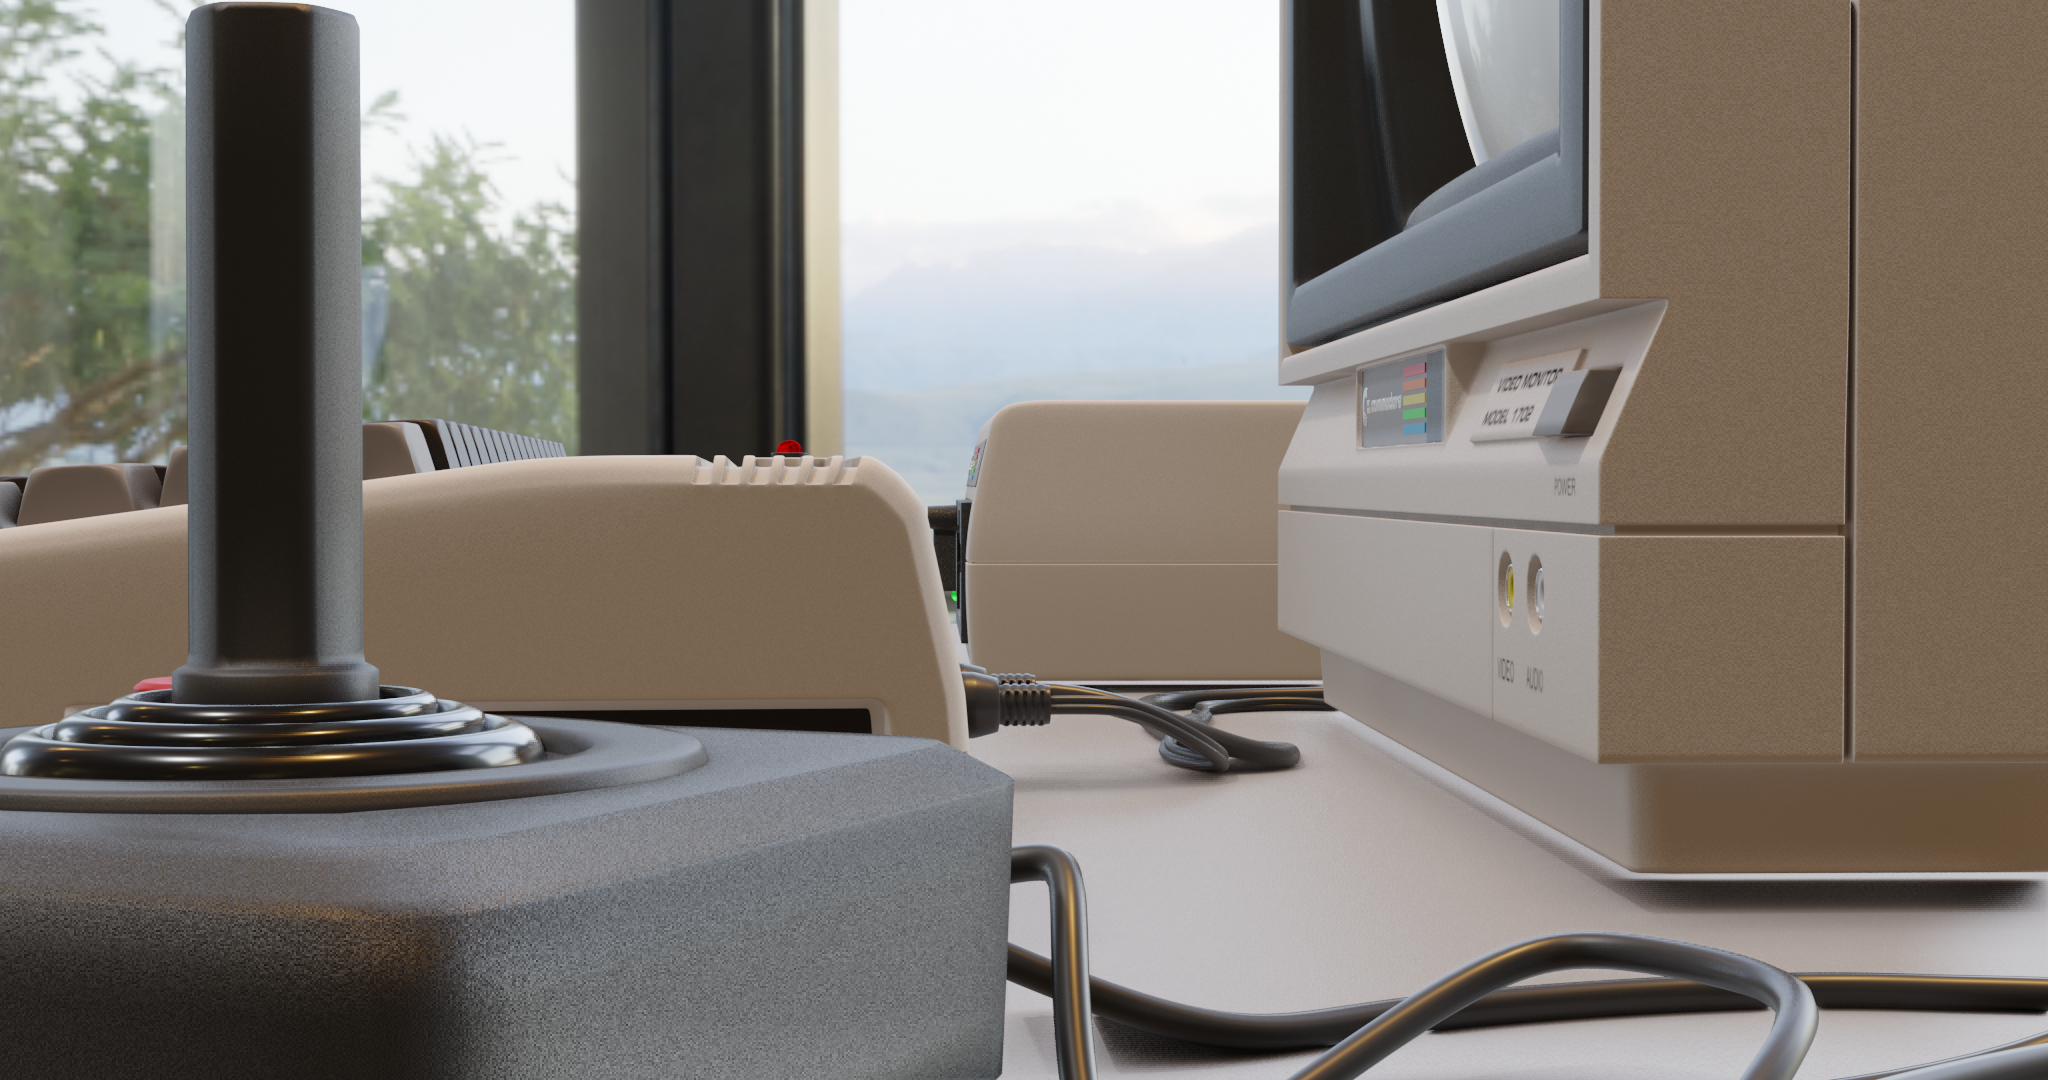
The joystick base has a very coarse grain, while the joystick handle has a very very fine, almost imperceptible grain - but it is there. The side of the monitor and the computer keyboard, on the other hand, has a moderate grain. Even the table surface has a subdued grain of some degree, as they do.
Rubber/soft parts, like the bellows boot on the joystick and the cables, don't have any grain - rubber tends to be smooth like that, and the Roughness value on the shader works just fine for these.
Hope this is useful for you - and everyone else!
Really this is an amazing job here, those little lines for ventilation on the TV and the details for the cables and the connectors on the font of the TV love how detailed it looks and how realistic, the lack of a proper desk or clutter I did not notice till you pointed that out
![]() jakeblended This is really really useful! The setup is easy enough that I can follow everything you mean. Looked at your closeup and I can see the differences in bump you pointed out. Gonna try it out 😊 Thank you so much for taking the time to explain this so extensively and comprehensibly!!
jakeblended This is really really useful! The setup is easy enough that I can follow everything you mean. Looked at your closeup and I can see the differences in bump you pointed out. Gonna try it out 😊 Thank you so much for taking the time to explain this so extensively and comprehensibly!!
Yeah! My very first computer I bought from my new paper rounds. Exelent job! 😘😂
![]() jakeblended I cheers to that advice. Realism weighs heavy on tiny, seemingly ignorable touches like the fine noise on plastics. Thanks for sharing, Jake!
jakeblended I cheers to that advice. Realism weighs heavy on tiny, seemingly ignorable touches like the fine noise on plastics. Thanks for sharing, Jake!
And I can imagine week 2 took a lot out of you. An easier week 3 is more than understandable 👌