I've decided to make a sketchbook, that will double as a timeline journey of my CG Cookie experience. Showing my learning progress and my final results for some of the amazing courses on here. I will also post my WIP's and personal projects for those who want to take a look.
So without further a-do , I present my Journey, from joining CG Cookie back in early 2015 untill the present 
MAY 2015 - Jonathan Williamson's "Introduction to Hard Surface Modelling" Tutorial - My result :
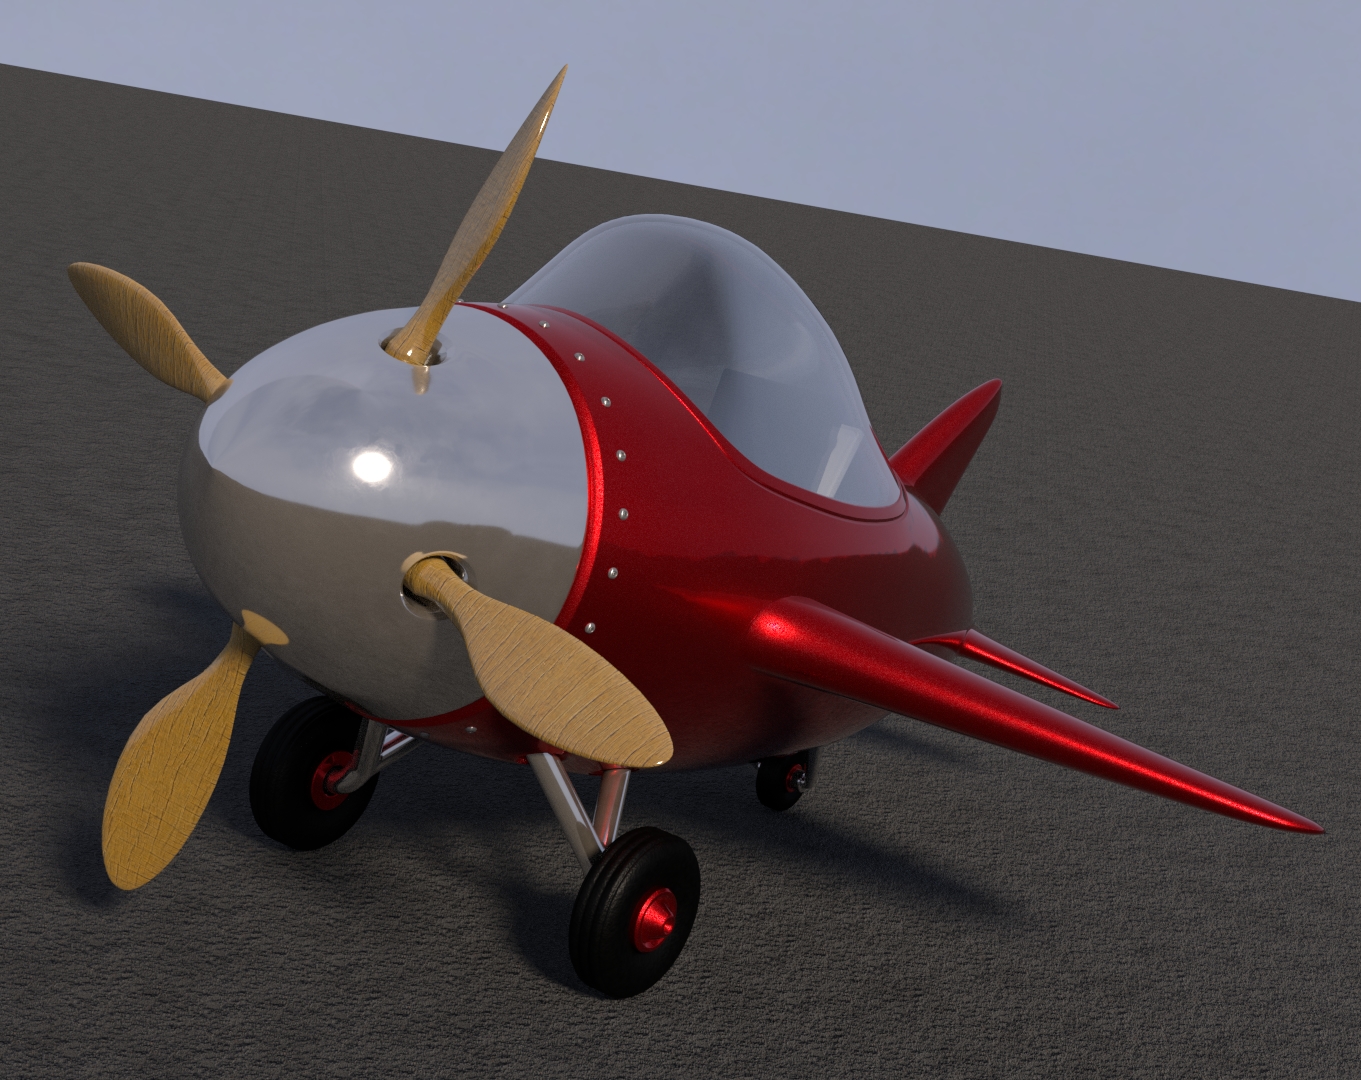 My first adventure into the world of both 3-D Modelling and Blender. At the time, the fundamentals courses did not exist so this seemed like a good place to start. If you are new to this, like I was , then it will seem very overwhelming at first, because there is so much to take in. But stick with it as Jonathon does an excellent job of explaining it all, and this tutorial is so well planned out because It takes you through so many features and techniques of modelling whilst still keeping it as simple as possible.I would thoroughly reccomend doing the following fundamentals courses first for modelling: https://cgcookie.com/course/blender-basics/8
https://cgcookie.com/course/mesh-modeling-fundamentals/3
and then following them up with The Introduction to Hard Surface Modelling tutorial that can be found here : https://cgcookie.com/course/introduction-to-hard-surface-modeling/5
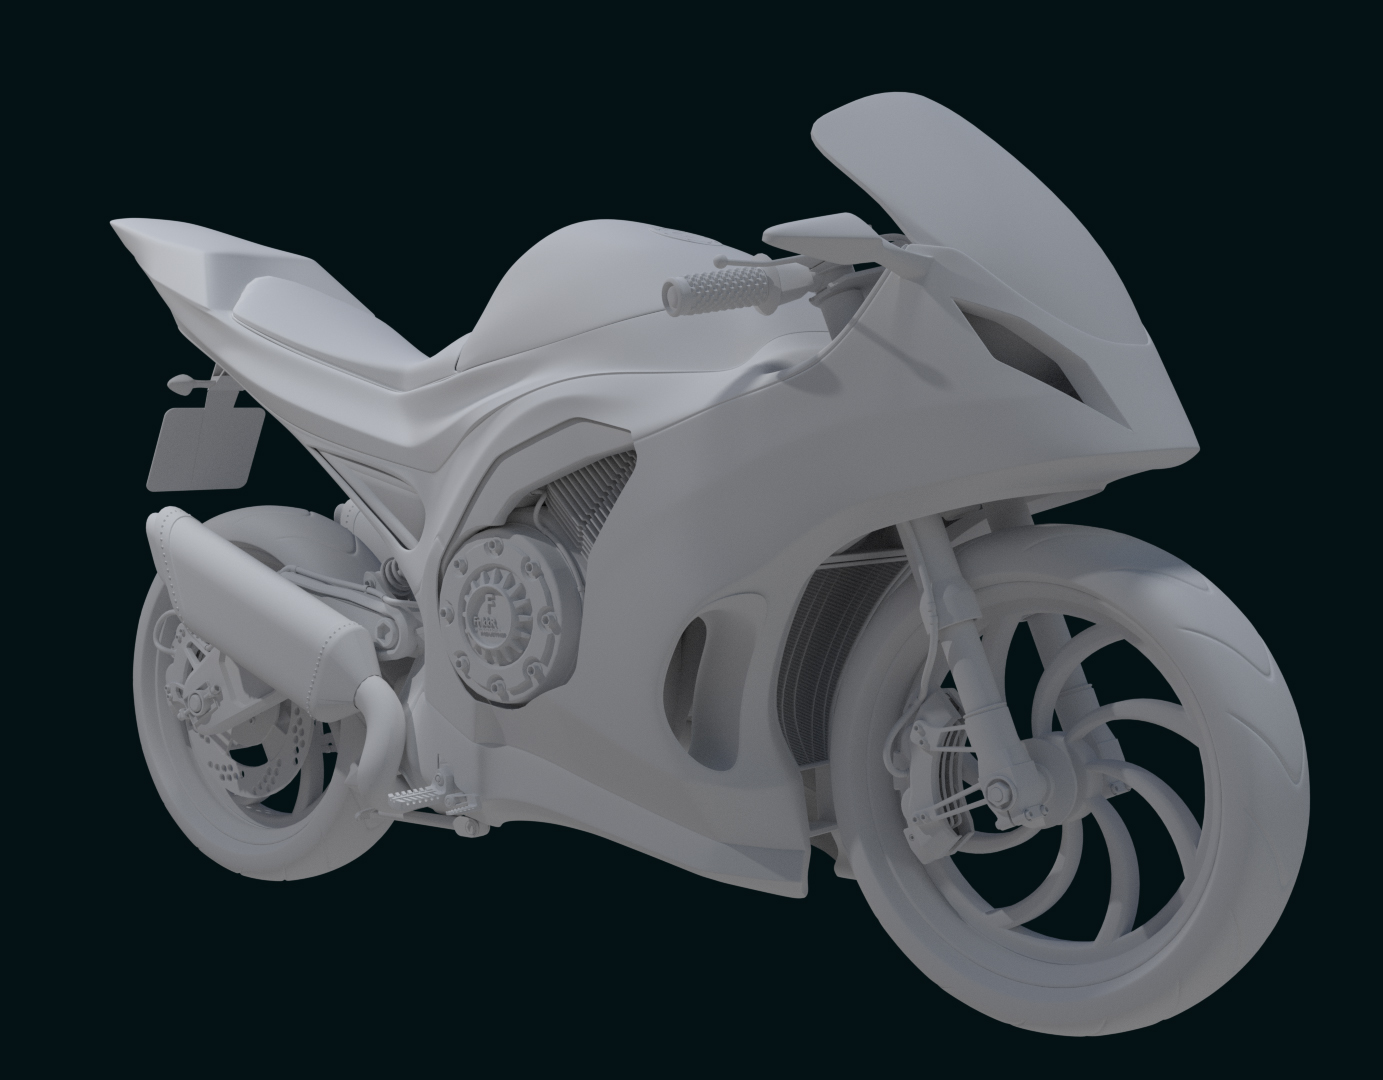
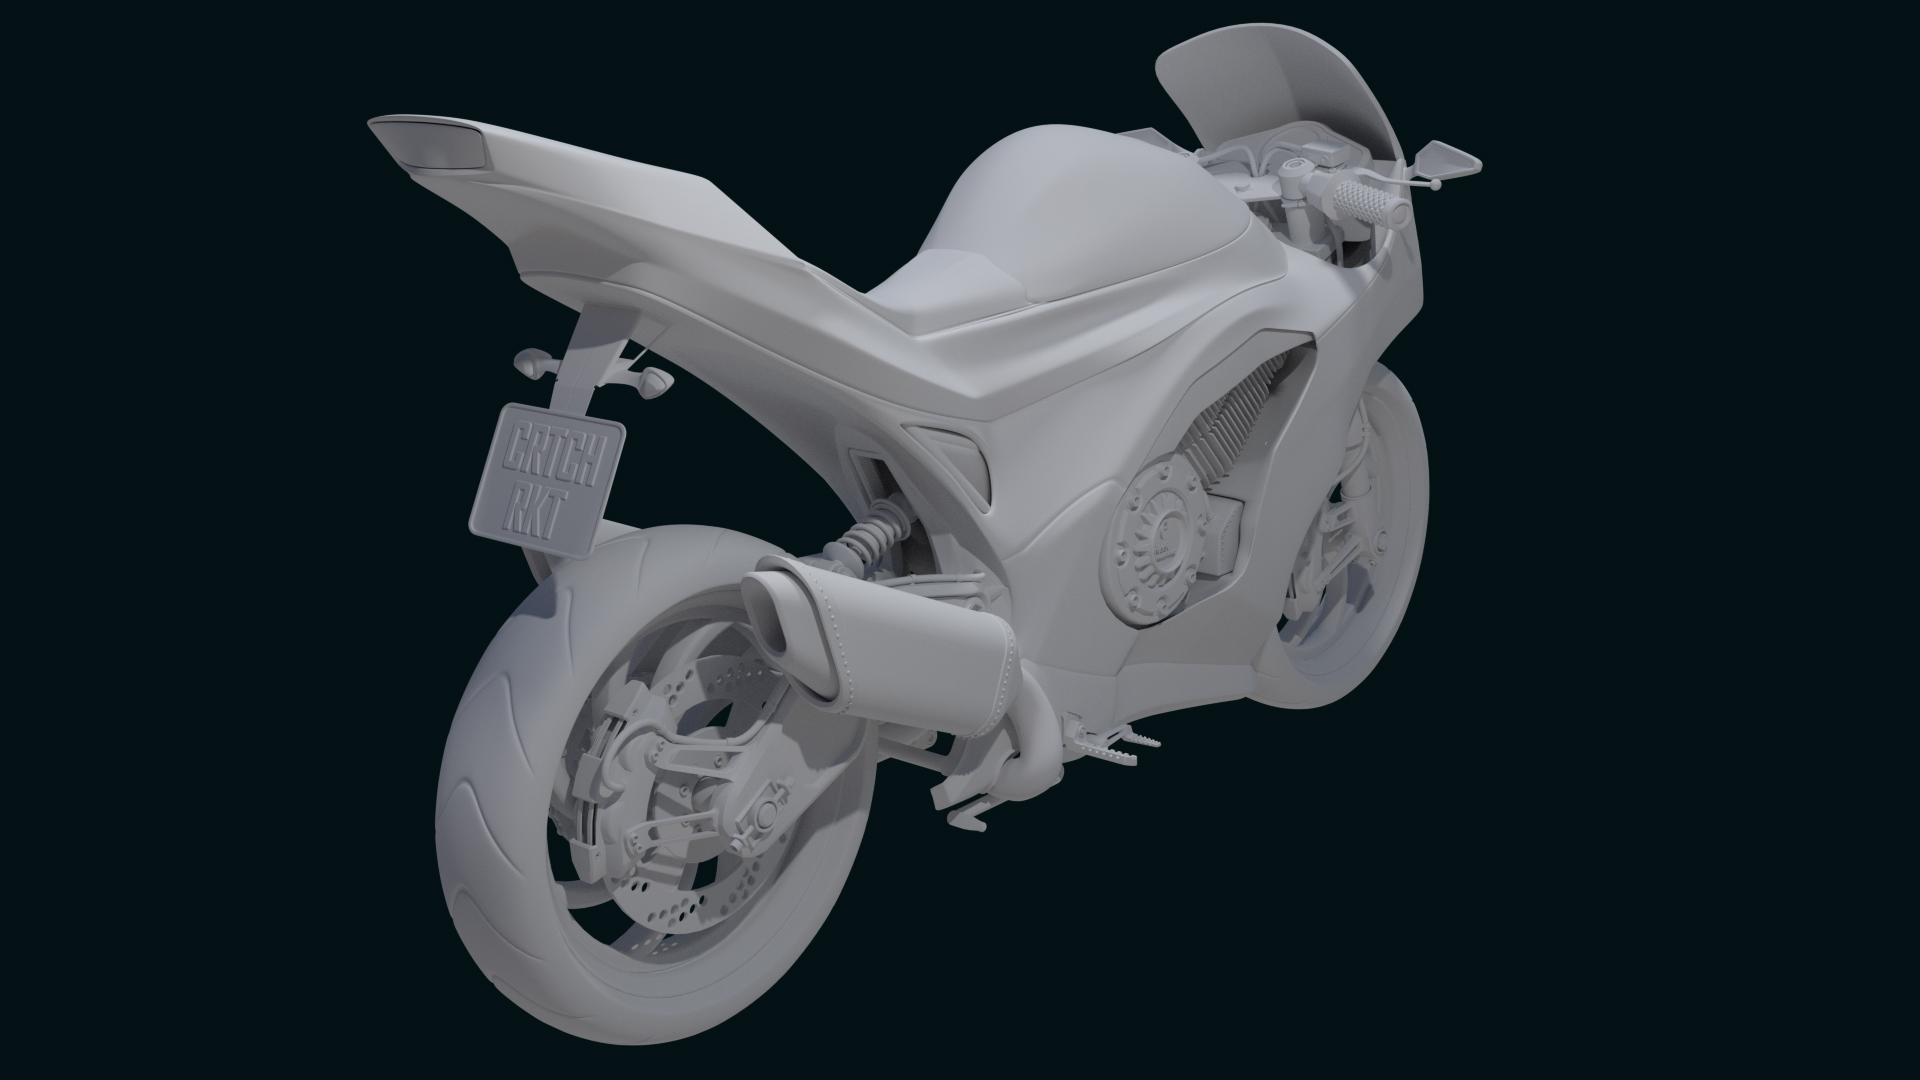
JUNE 2015 - Chris Kuhn's "Modelling a Motorcycle" course
So by the time I had completed the Toy Plane , I had found out enough about Blender to know that it is extremely powerful and has a lot of seperate features that need to be learned one at a time. Modelling, Texturing, Shading, Rendering, Compositing, Sculpting, Rigging and Animation to name a few. CG Cookie caters to all of these by providing many tutorials for each one. But perosnally, I felt it was best to stick to what I had learnt, and get a good foundational knowledge of modelling before branching off into the everything else. After all, Modelling is going to be the one thing you are guaranteed to do in every project, nomatter where you take it. So I decided upon the Modelling a Motorcycle Tutorial ,to strengthen and expand upon what I had already learnt.
This was another great course, and I felt like I was starting to get a rythm going. Towards the second half of it , I also got the courage to try some of my own ideas, rather than following the tutorial exactly. I would reccomend that you try to do this once you get comfortable enough because It gives a great feeling of achievement and lets your creative side out to play. You can see from my model that a lot of features, such as the brake calipers, handlebars, radiator ect are different to Chris' model - a good sign that I was learning
Chris does a great job of showing different approaches to modelling an object, and he is so fast and efficcent so you can learn a few tips to speed up your modelling too. The resullt is amazing and I really felt I had got to grips with Blenders modelling interface and was getting a feel for how Blender works and thinks.
This one is still technically a WIP as I didn't know about rendering/shading at the time so Im saving it untill I can render this one out really well before I go back to it .
The Course can be found here : https://cgcookie.com/course/modeling-a-motorcycle/4
MAY 2015 - Piero digital art course
So whilst I was working through the Blender tutorials, I decided to buy a Wacom tablet with Photoshop and try my hand at digital painting. It seemsd a waste to have acess to the tutorials by being a citizen on CG Cookie and not use them. I also knew that Photoshop and digital painting plays a good part in Blender with texturing so I was eager to learn.
I took on the Piero course by Tim Von Reuden as I knew I was going to eventually tackle the Piero Blender course so it may help me get my head into birds aswell as learning the basics of digital painting.
The course was great, it was amazing to see Tim bring something to life on the page, and he really has a good talent for it. I learnt a lot from this course, as my result showed, considering the fact that this was my first ever attempt at digital painting, and my first use of a graphics tablet. I found it really hard to get a natural painterly feel to my piece - a technique that seemed so natural to Tim - But I just kept being too perfect, using layer for every change, and crisp lines wherever I went. This unfortunately really showed in my finished piece as it looked too much like an illustration rather than a concept painting. However, for a first attempt, I was pretty chuffed with what I created thanks to Tims teaching.
For those wanting to get into digital painting, I would reccomend the Digital art fundamentals course to get you started. It is a fairly quick but informative course that will give you a good foundational knowledge of the basics so you can go on to doing more complex courses like the Piero course with confidence.
Fundamentals of Digital Painting can be found here https://cgcookie.com/flow/introduction-to-digital-art/3
The Piero course can be found hehe: https://cgcookie.com/course/piero-concept-art-course/2
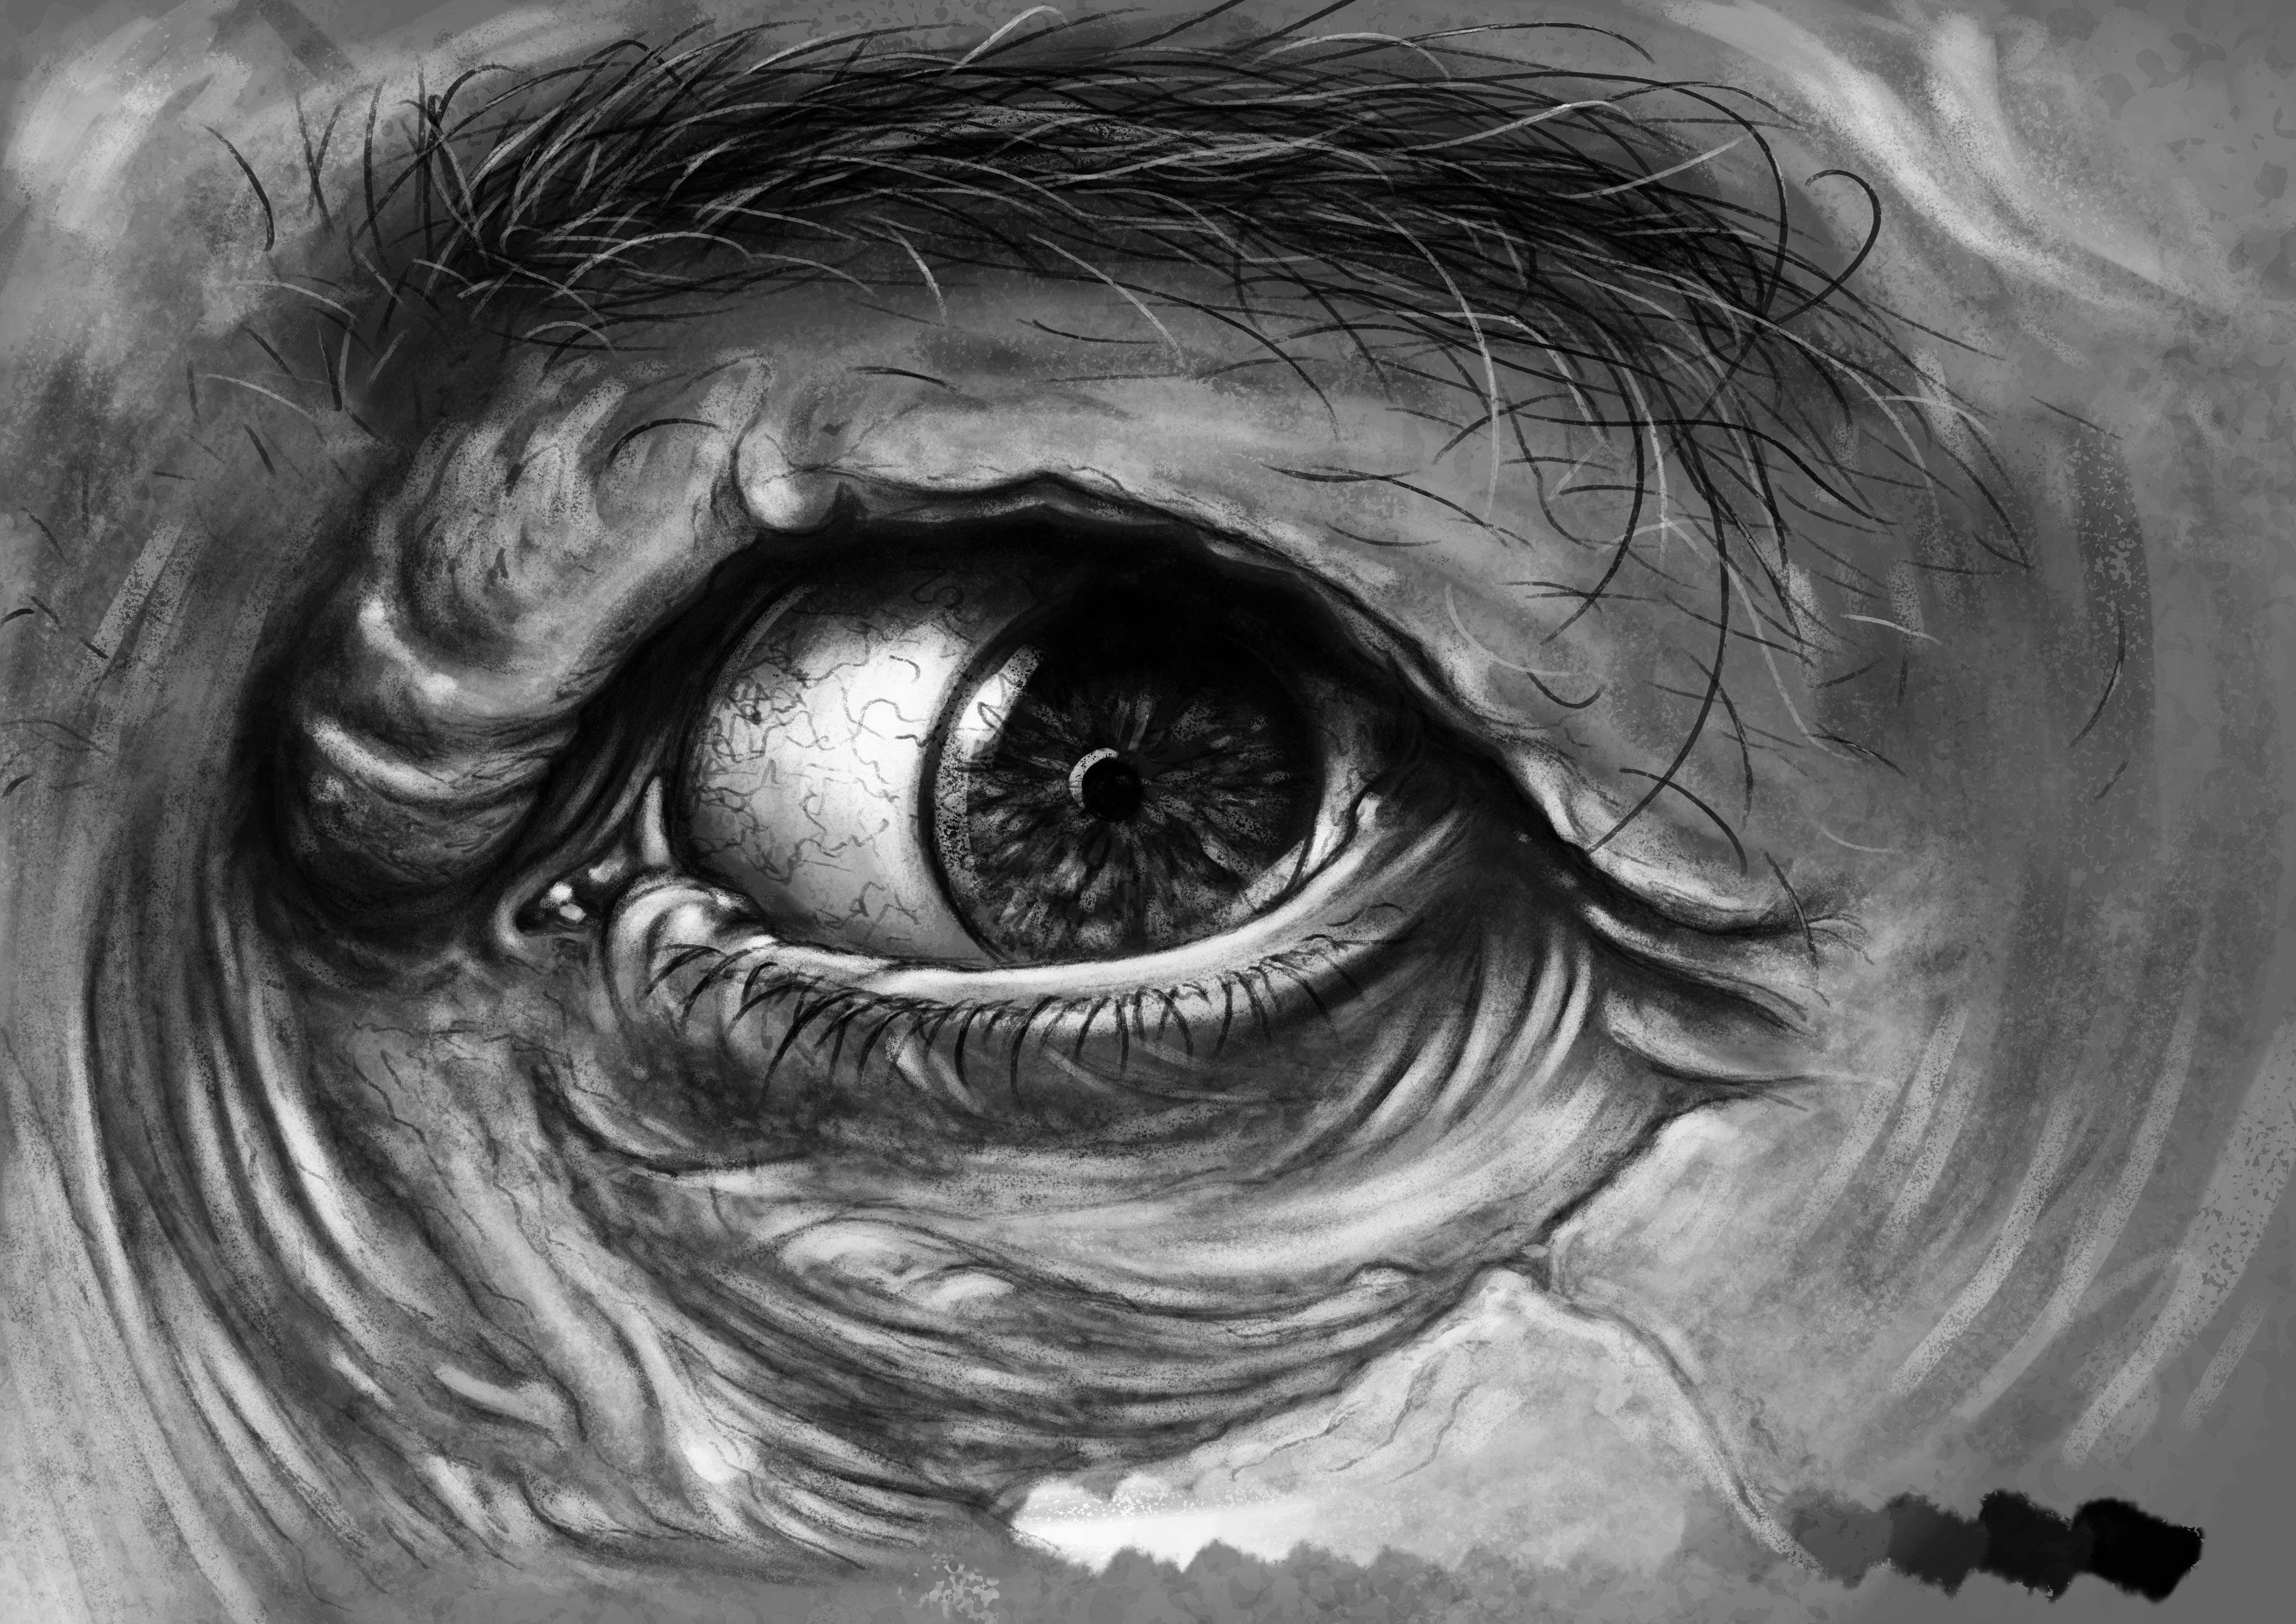
JUNE 2015 - Eye excercise (Basics of digital painting)
After feeling that my first piece of digital art was too clean, I noticed that the fundamentals courses had just been released. As I was working through the Fundamentals of digital painting course that I mentioned in the last post (see for link) , I came to the detailing video and the eye excercise. I was eager to try this but I made sure to set myself rules to keep me from getting all "perfectionist" on it again. So I limited myself to only a few leyers, and a time limit. Tim once again did a great job with the tutorial and my finished attempt speaks for itself. I was pretty proud of this one for what little time I spent on it (approx 1.5 hrs) given what little experience I had.
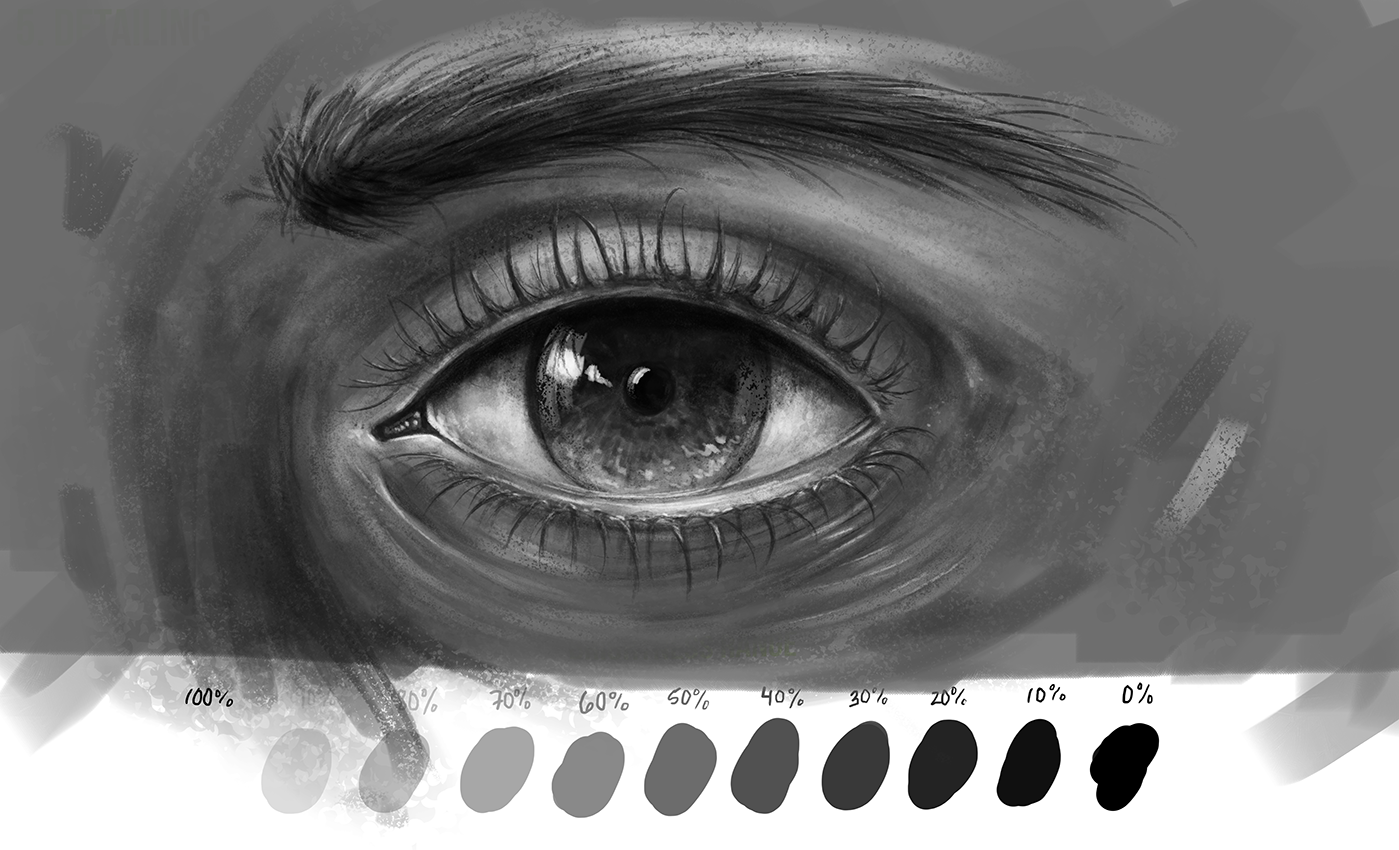
After my attempt with the tutorial and Tim's help, I was confident enough to try another attempt without help, so I found an interesting reference picture of an older mans eye and gave it my best shot :
JULY 2015 - Short Film Character Production 3-D Piero course
Back to 3-D Blending again and I wanted to start a few long term projects to do in the background whilst I did the shorter ones. As a result, this one is still a WIP (yes nearly a year on! ) , but Ive tried to follow @theluthier Kent Trammell's advice as closely as possible which meant taking breaks from this course to study other tutorials such as Nathan Veghdals epic Humane Rigging DVD (A must if you want any chance of getting your head around rigging) https://store.blender.org/product/humane-rigging/
Anyway, let me tell you that wow this Piero course is long, and very very in-depth. But everything balances out and what you get out of it is so worth it. If you do any of Kent's courses, you may sometimes wonder why he goes so far with his work. By that I mean he is so thorough and sometimes you question the point when what he is doing seems to make hardly any difference. But when you see his final result, you soon learn why. This guy really knows his stuff, and it shows in his work....and will do in yours if you stick to his methods and do it the right way. Which is incidentally the Kent way.
All in all, this course is a great way to learn a lot of different workflows and parts of Blender. It covers sculpting, modelling, UV - Unwrapping , texture painting, hand painting UV textures, shading, rendering, rigging, scene building, lighting, material setup, animation and more. There really is'nt much of Blender you wont have explored in great detail when you have this course finished.
Course can be found here : https://cgcookie.com/course/short-film-character-production/1
My current progress :
JULY 2015 to DEC 2015 - Modelling and shading a Sci-Fi Helmet.
Although the Piero course was going great, I sometimes found it all a bit overwhelming as there is so much to take in, and since I had started it as a long term background project, I decided to also give the Sci-Fi helmet course a go.
This tutorial is split into two, The modelling course and the shading course.
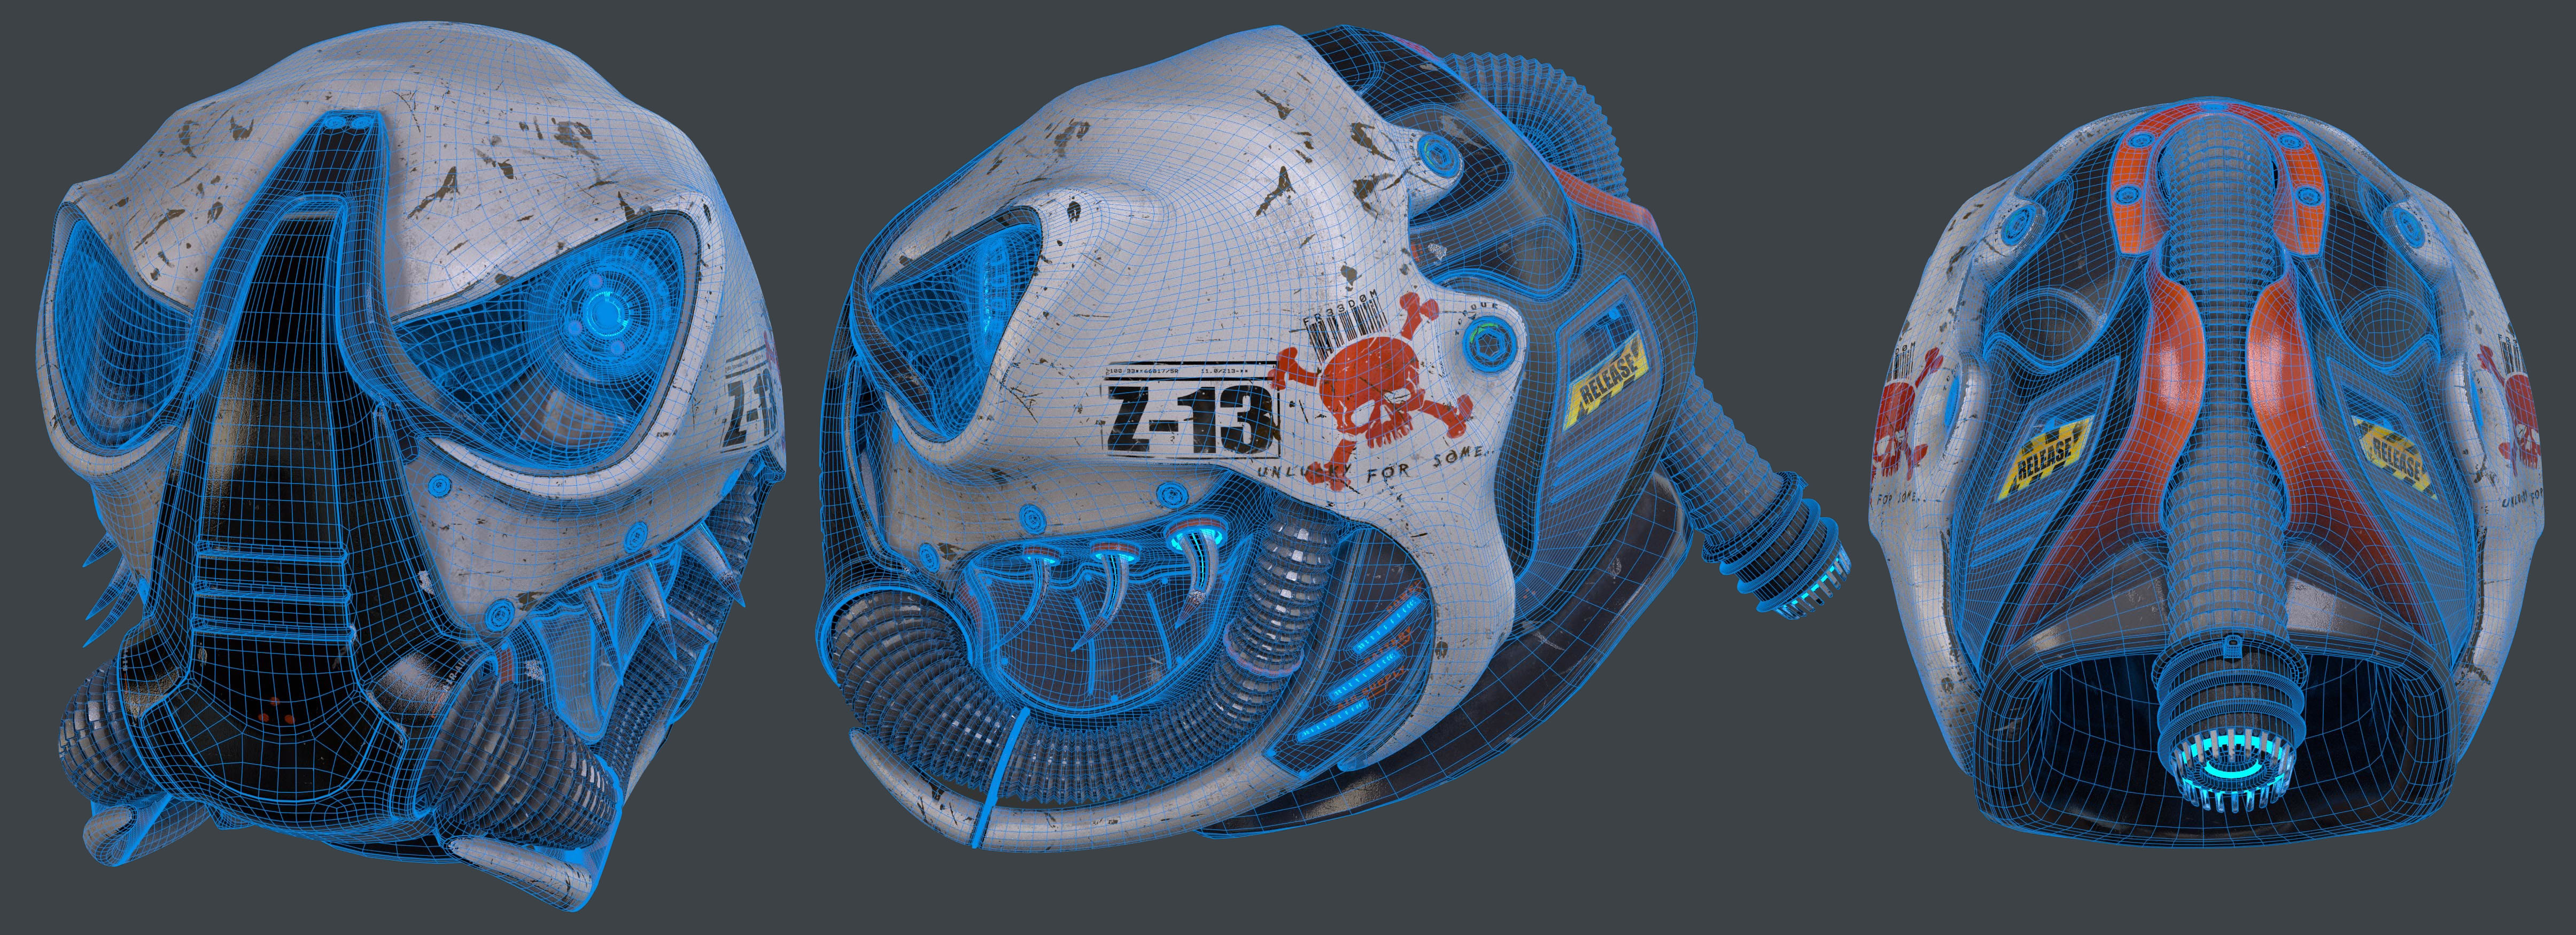
Combined, both courses take you through the process of creating a Sci-Fi helmet from a basic sphere primitive, to a full render. The course was a great way to learn a workflow for sculpting an model from scratch, completely from your imagination and then re-topologise it to create a render friendly, super crisp model, full of detail.
In the modelling course Kent really pushes you to unleash your creative side and sculpt from your own imagination, rather than copying his model - a concept that I tried hard to stick to.
Starting with a simple sphere , you use the grease cut function to cut chunks out and give your model an initial shape. Following that up with a detailled look into some of the main sculpting tools and techniques, Kent guides you through the process of detailling and polishing your sculpt. Next you add hard surface details with the "kit bashing" workflow and a final polish takes your sculpt to the re-topology stage. At this point, Kent reccomends that you watch the re-topology videos by @jonathanwilliamson in his weapon retopology tutorial , found here in the archives : https://cgcookie.com/archive/hard-surface-weapon-retopology-in-blender/3
With the re-topology complete, you have an epic, perfect sci-fi helmet, ready to be shaded and brought to life in the shading course.
In this, Kent takes you through the method of unwrapping and texturiung your model, then setting up materials and shaders, to first create a "fresh out of the factory" look for your model, and then shows you how to make it super realistic and battle worn, so it looks like it has seen a lot of action with scratches, grime and general wear and tear. You also learn how to paint decals onto your model with stencils in the texture paint mode, and add LED lights and lenses to give your model a detailed and well polished feel.
These two courses are great to get you into a comfortable workflow that will allow you to create models consistently from initial ideas in your head, to fully finished renders.
The two courses can be found here :
https://cgcookie.com/course/modeling-a-sci-fi-helmet/3
https://cgcookie.com/course/shading-the-sci-fi-helmet/2
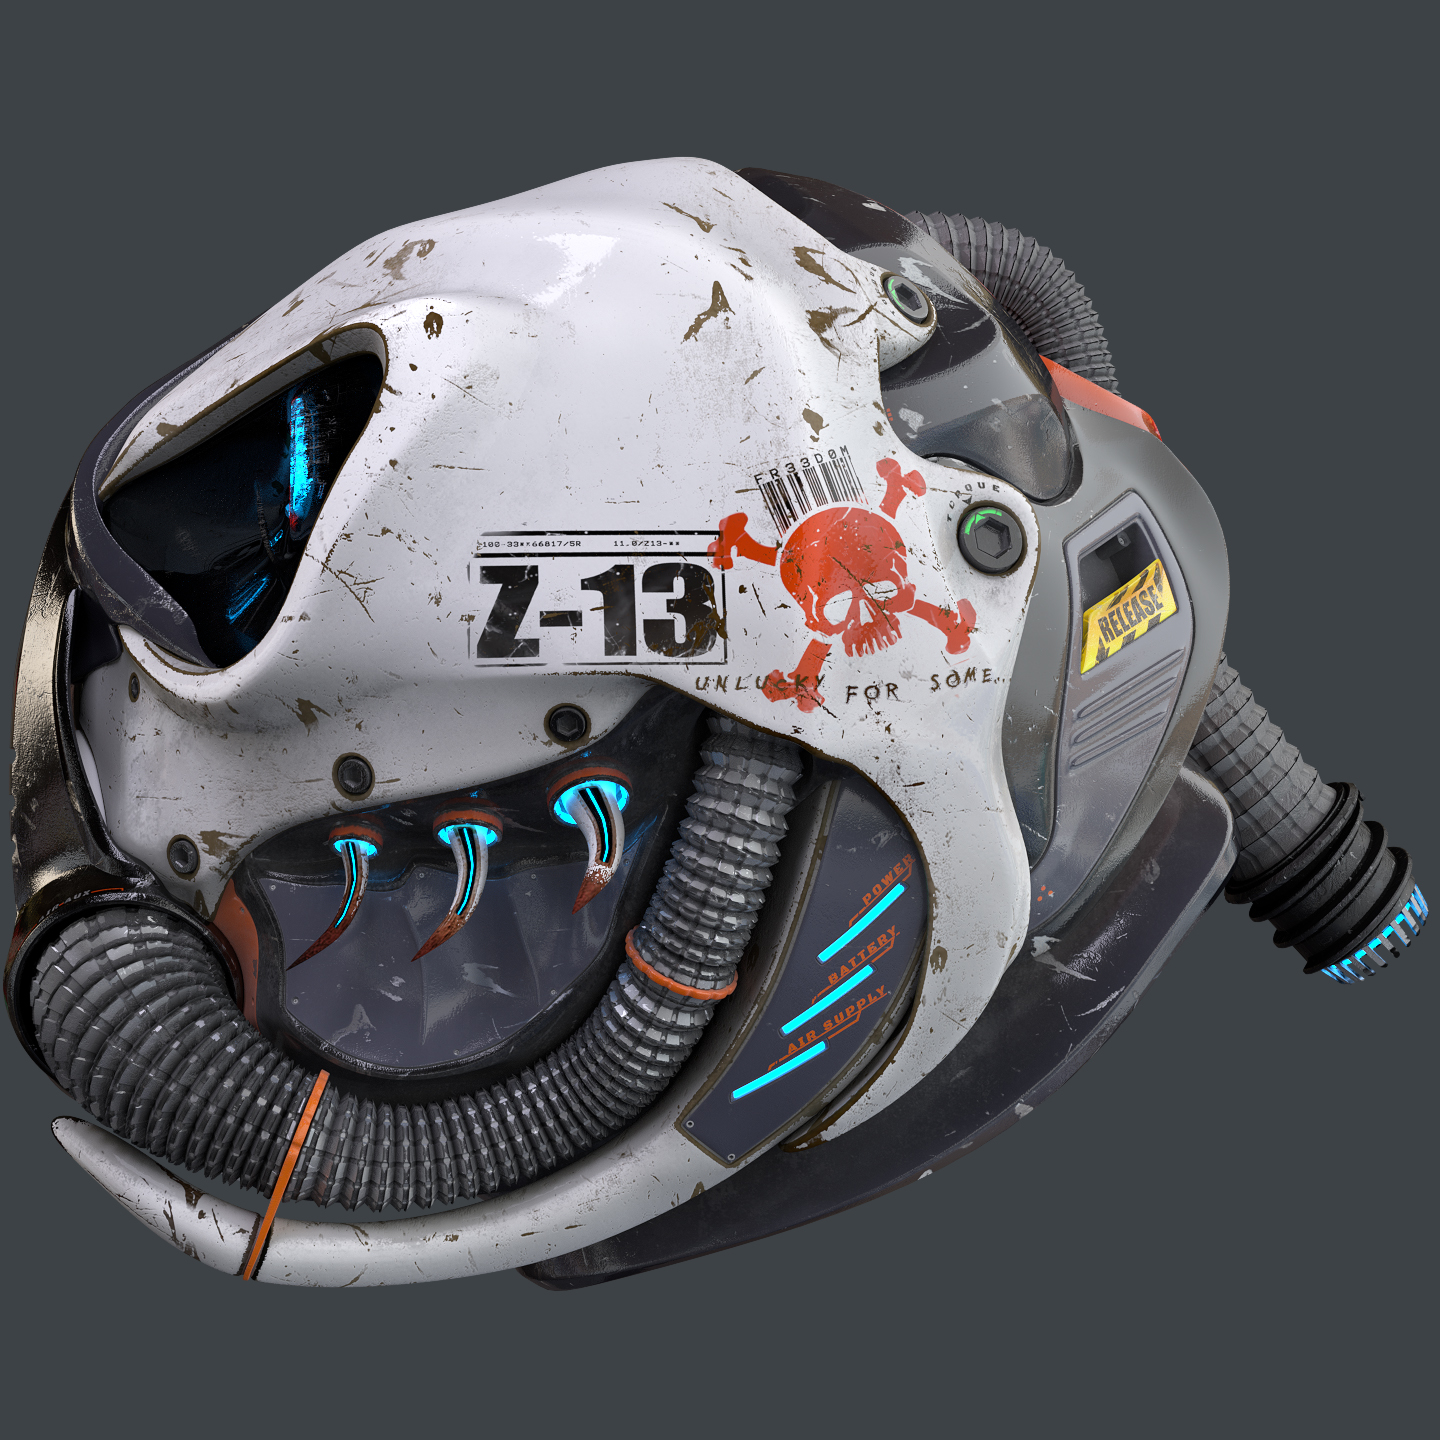
With my own model, I created a story in my head so I could work with an idea I had, that would combine hard surfaces and crisp edges, with some more orgainic elements for something that I feel, turned out to be truly unique
The story:
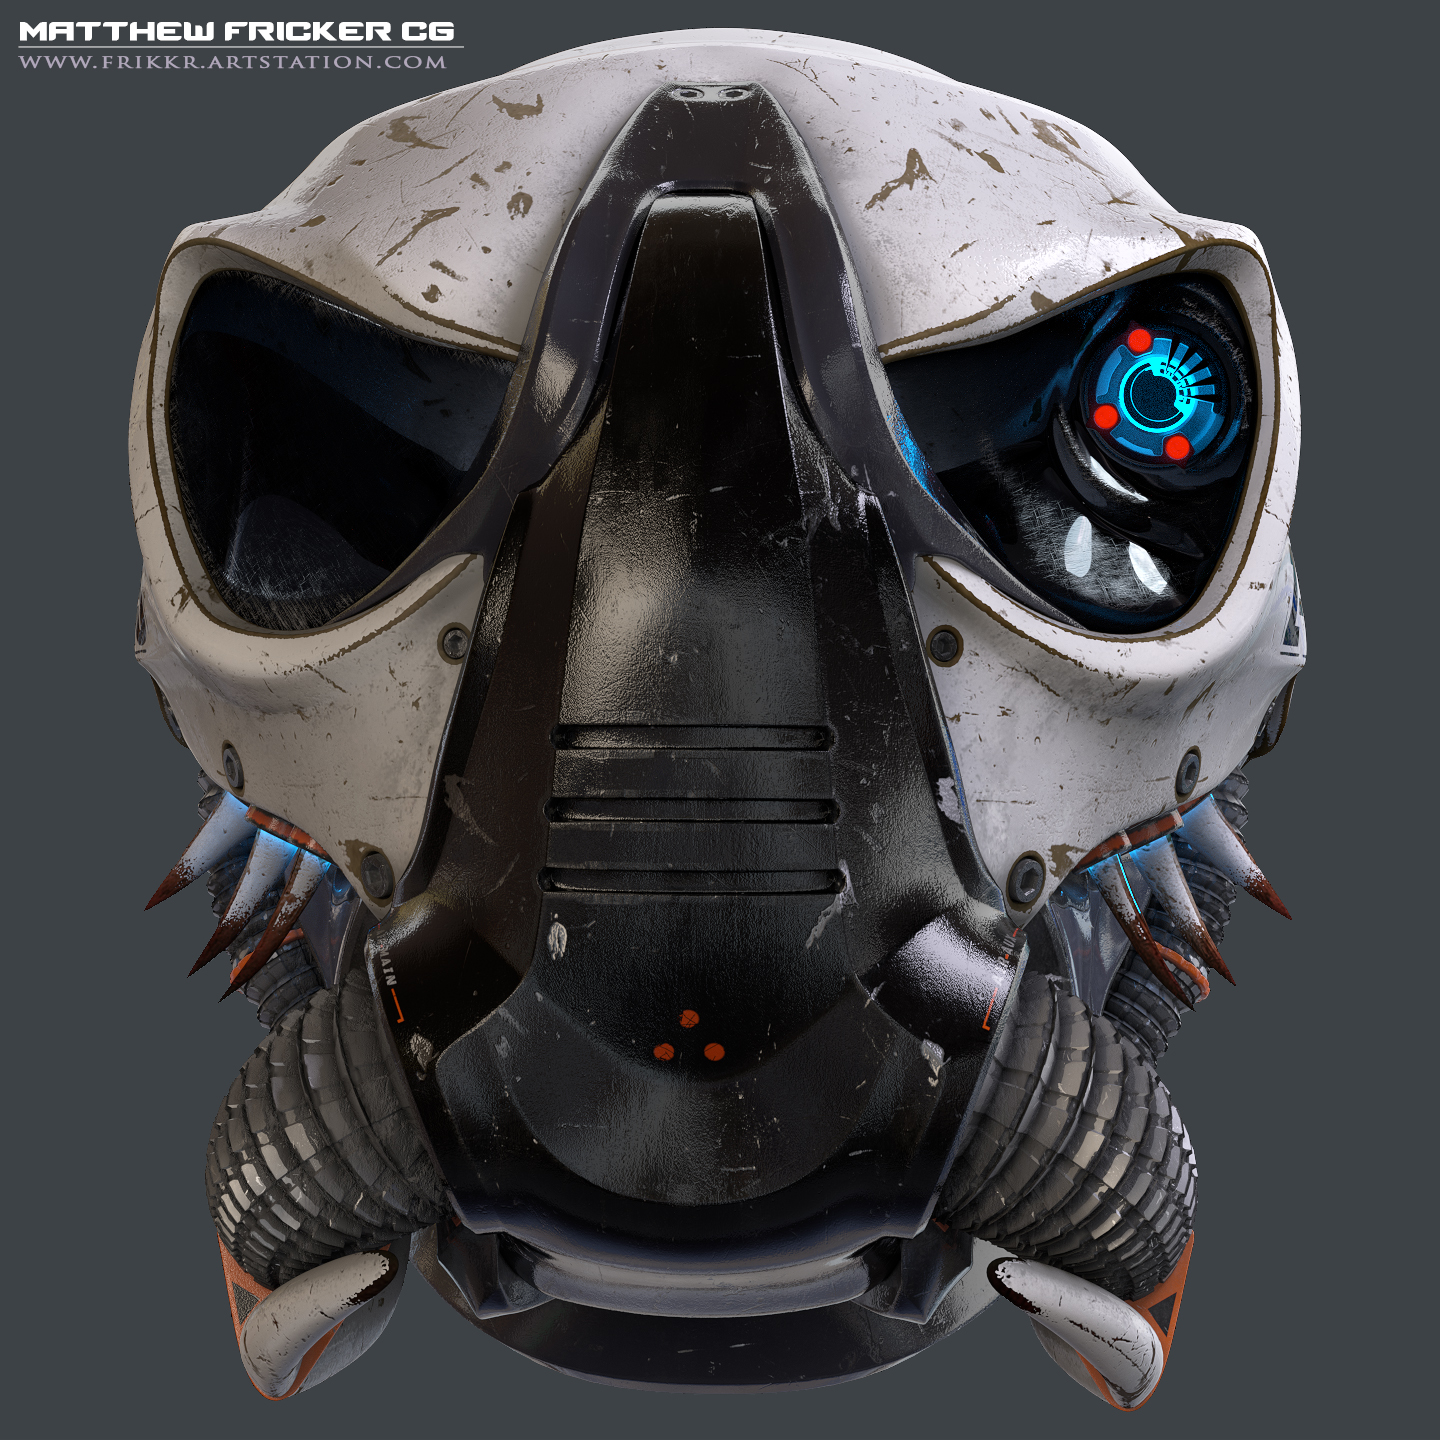
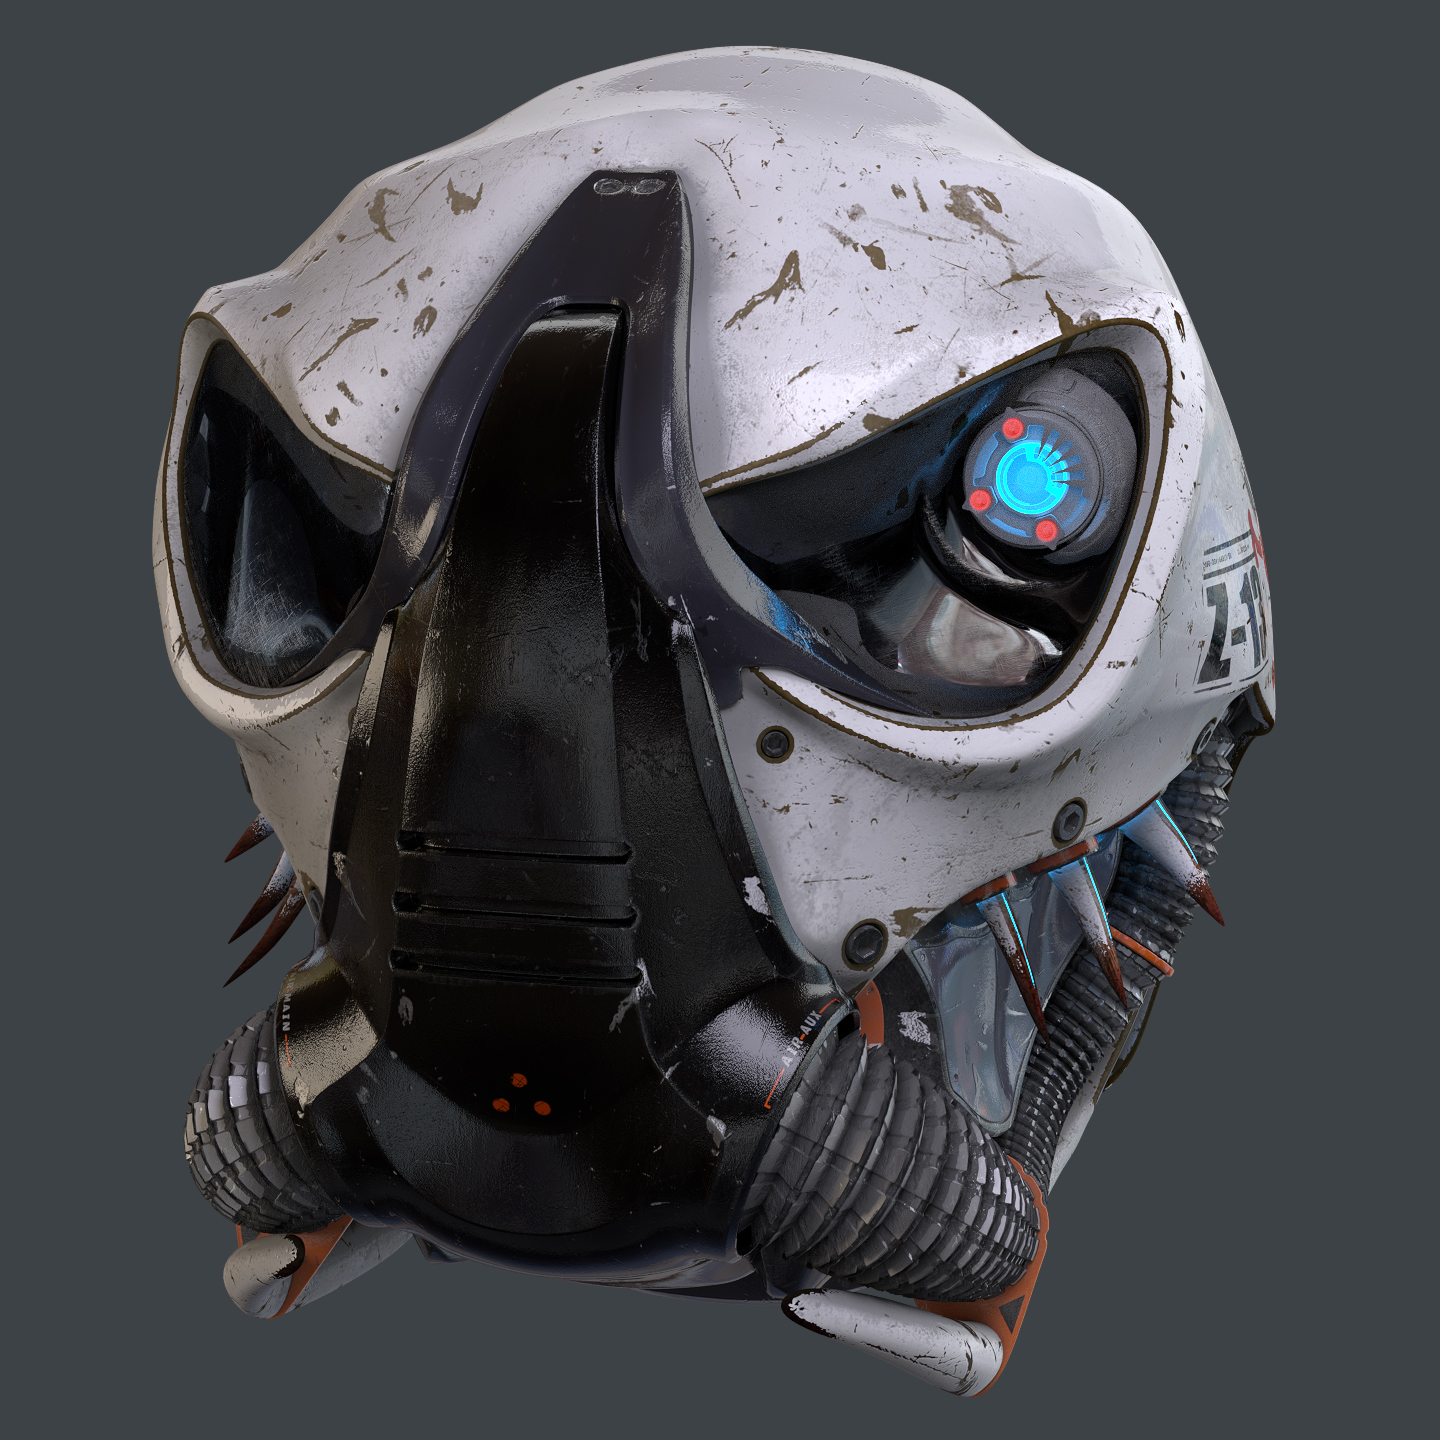
“The Shakii are vicious animals, renowned for having skeletal structures made from one of the hardest materials ever seen. As a result, they are hunted by the Freedom Division , who combine the Shakii’s skulls, tusks, teeth and bones with state of the art technology, to make helmets and armor to protect their army of brutish warriors"
The result :

AUGUST 2015 - CG Cookie 2D Summer Contest - Post apocalyptic character.
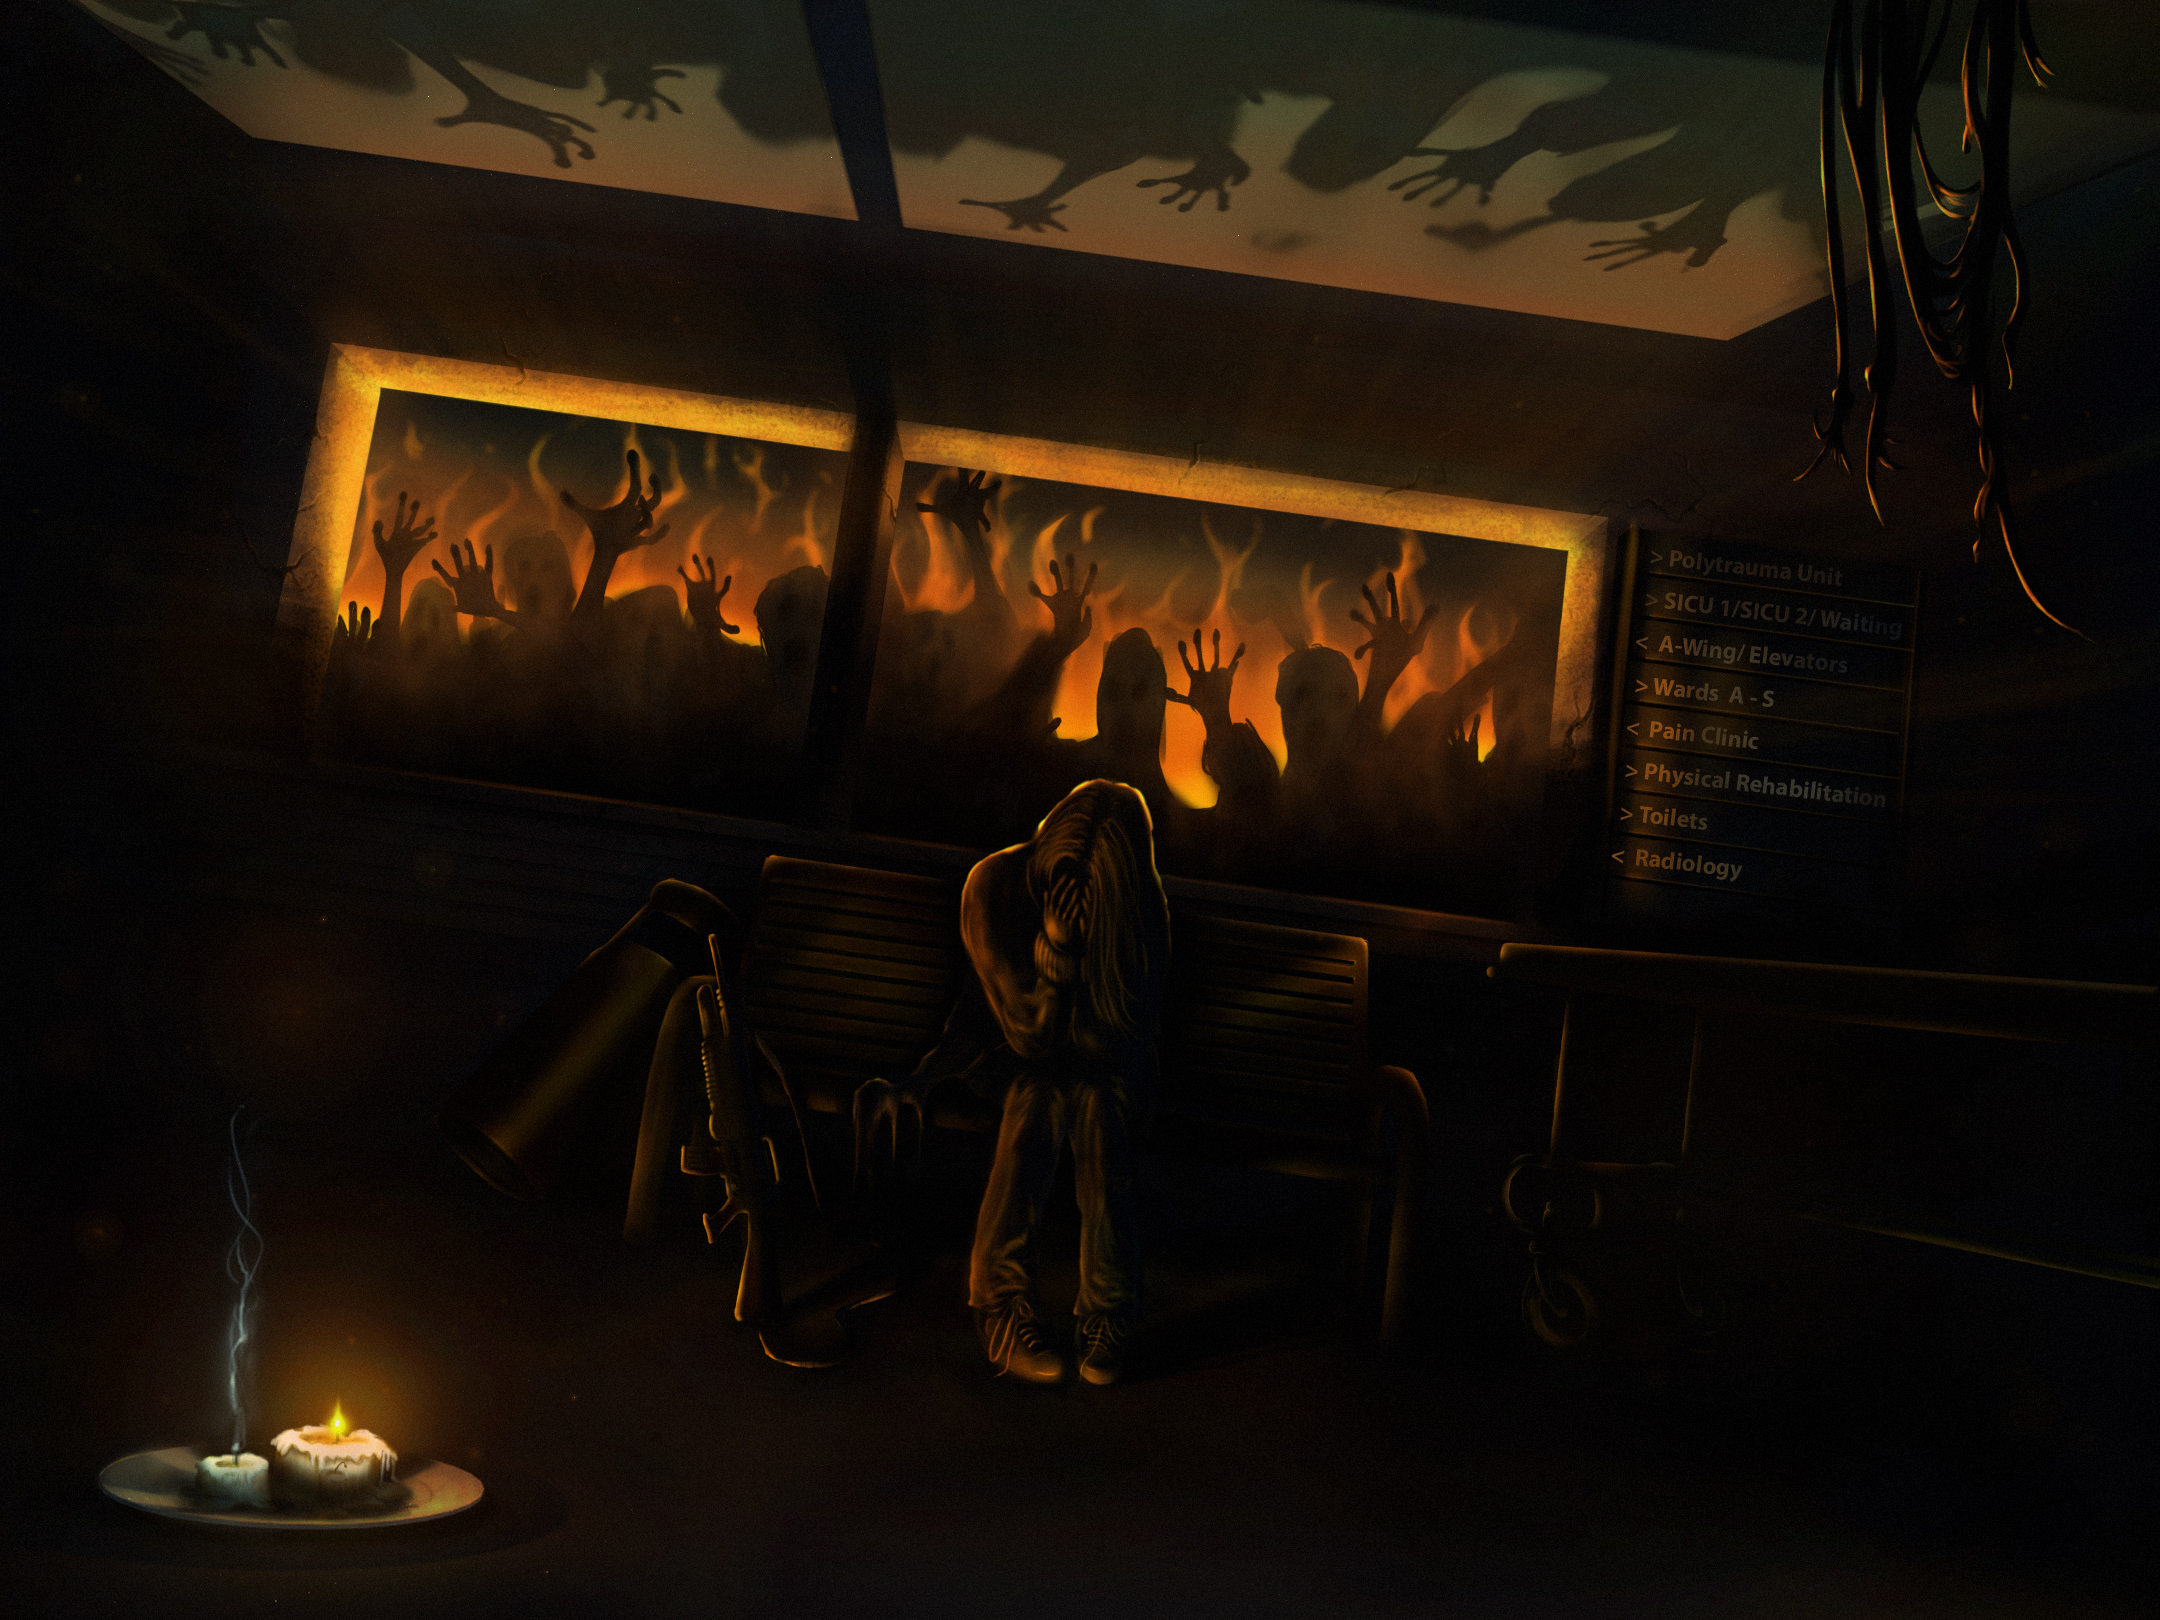
So next up, I saw the CG Cookie summer contest. Unfortunately I joined too late, with less than two weeks of the five remaining. Still, I saw this as a chance to push myself to work at digital painting for a week or so. Although the contest was character based, I decided to stick to what I know as I suck at characters and was in no way good enough to do anything decent. So I came up with a story and created a scene with a chartacter in it. My submission is below , and all the entrys to the competition are here : http://community.cgcookie.com/t/2d-summer-2015-contest-final-submissions-thread-over/2294
I decided to try a different approach with my entry. In movies and games, we nearly always see the main character triumph. Kicking serious zombie butt always makes for good watching and game-play, but what about the other end of the spectrum. What if it all gets too much? When you run out of ammo, faith, motivation...and friends? When you realise that bullets just aren't enough? Or maybe they are, but whats the point when you have lost everything? And it all gets too much and you just give up? This is the theme that formed the story of my entry titled : "BURNT OUT..."
OCTOBER 2015 - CG Cookie 3D Epic pumpkin contest
So the Piero course and Sci-Fi helmet took up all of August and September, but when i saw A Blender competition on here, I had to get involved. At this point, I had only ever used cycles once, for a short time to texture Piero's Beak and feet. So all the texturing and shading you see in my pumpkin submission was panic-learnt throughout the month of the competition, or the result of playing around with nodes. I also had no Idea about the compositor at this time so my submission fell short in that respect. I was also not experienced enough to create a submission that was a strong enough contender, but I was really proud of what I achieved. The pumpkin and candle was sculpted using my knowledge gained in the Sci-Fi helmet course. I really liked how the pumpkin turned out as I built the shader myself, I tried to get the glow coming through the pumpkin where it had been carved thinner, but still keep the pumpkin texture on the thicker parts where the glow would not be very intense. I also tried to be clever with the bottle label which I hand painted in Photoshop :).
All in all, I surprised myself at how much I learnt from just experimenting and asking for help in the forum. And it filled me with confidence that I was learning and getting better and better in Blender, with the help of CG Cookie and the forum community
Check out all of the submissions here : http://community.cgcookie.com/t/3d-blender-halloween-2015-final-submissions-epic-pumpkins/3269
And the three winners : http://community.cgcookie.com/t/blender-pumpkin-contest-winners-announced/36563
Also, Well done to ccodywinch who came second in this 
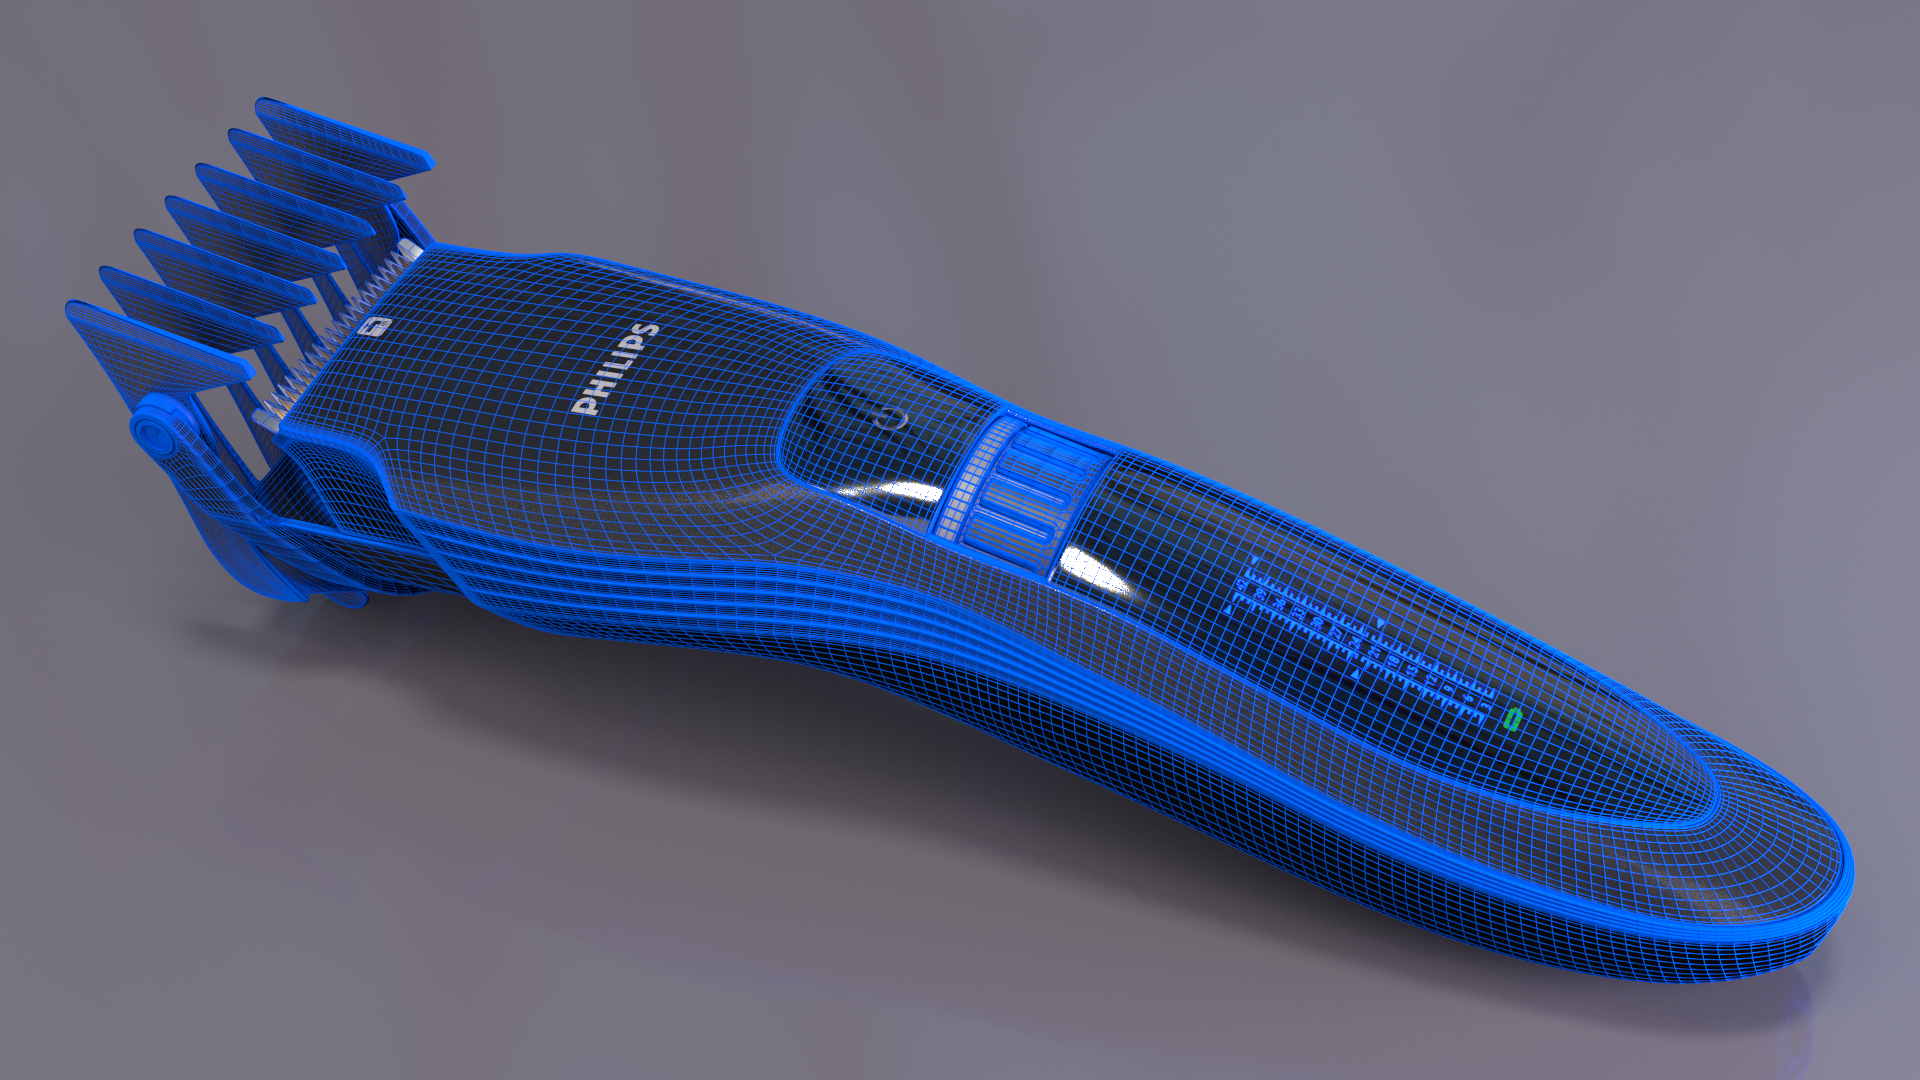
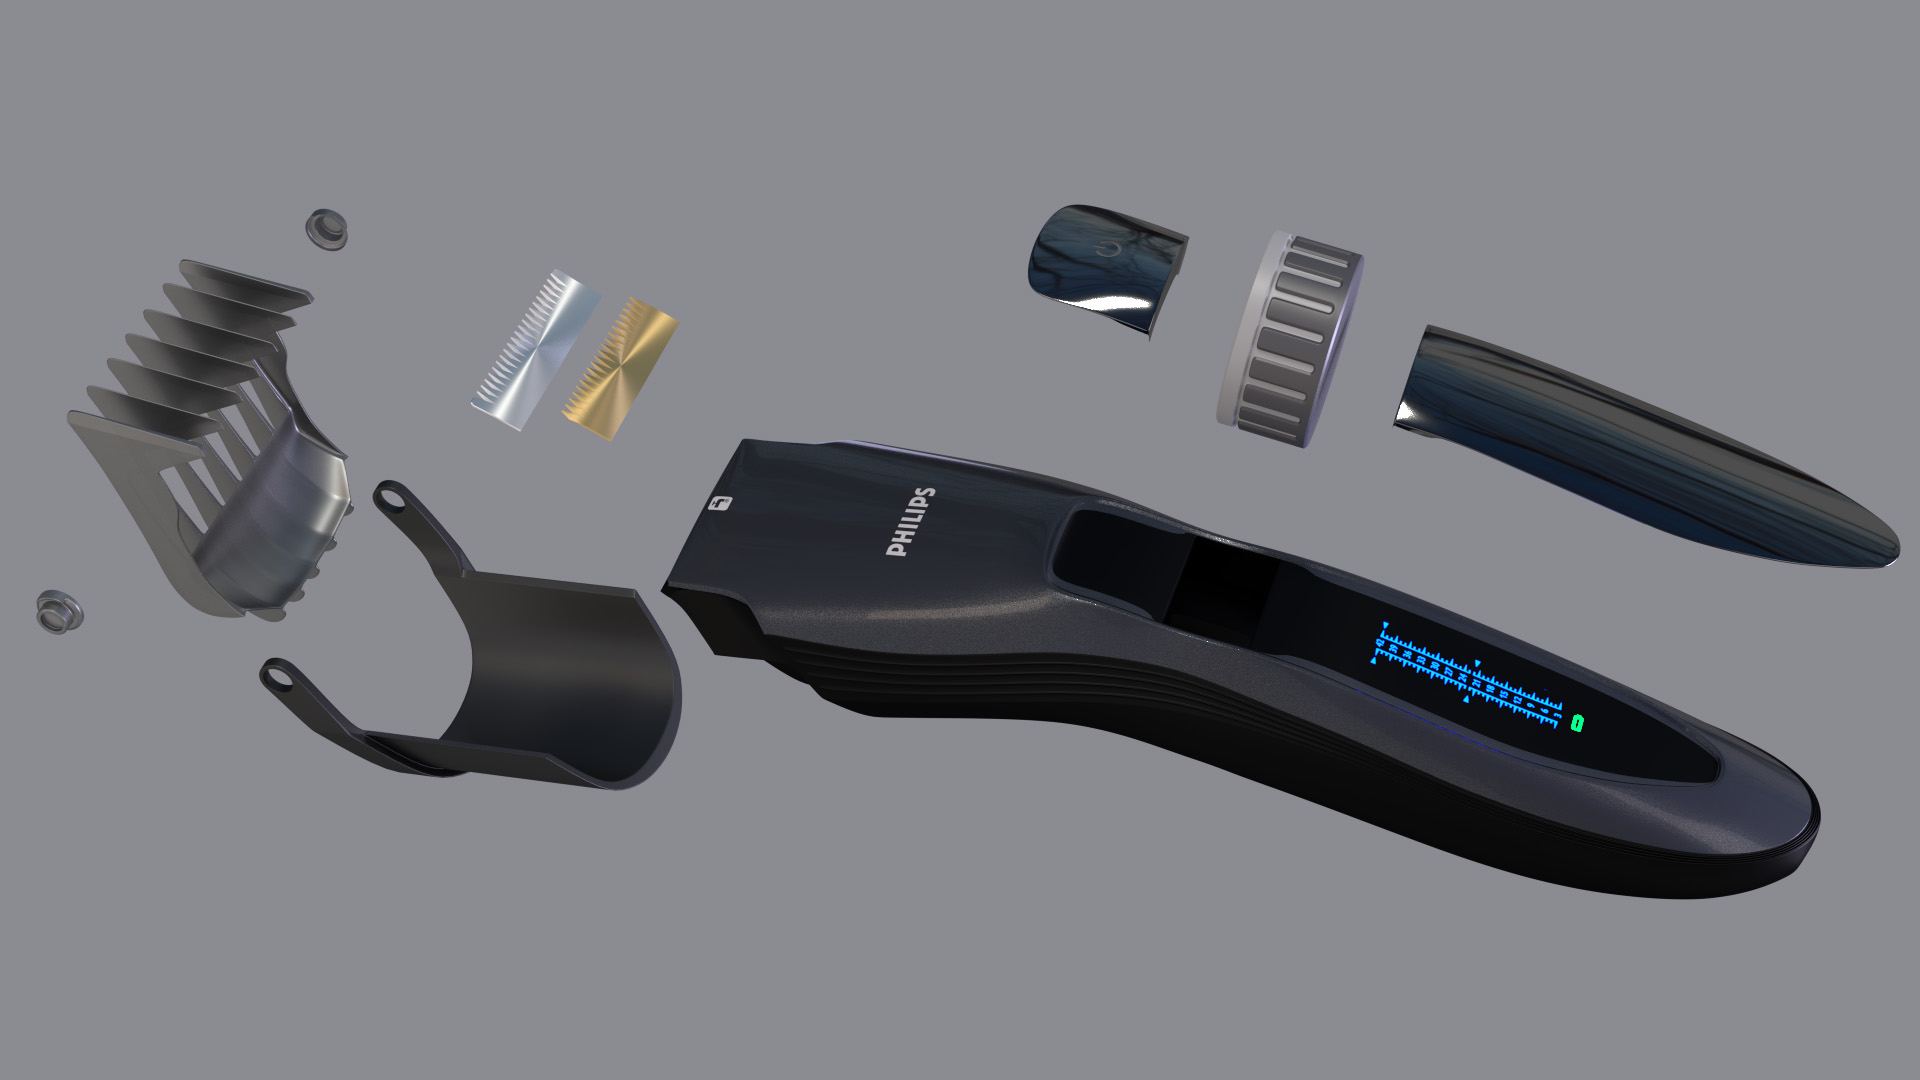
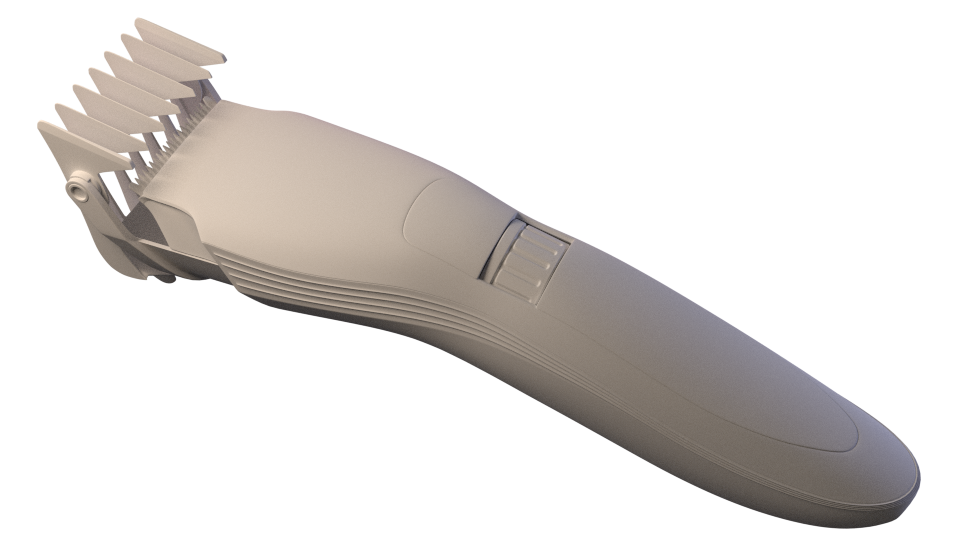
DECEMBER 2015 - Personal project -Hair clippers
So I was still working away at both the Piero course and the Sci-Fi helmet course, but I was at stages in both of them where I wasn't doing any modelling at all for long periods of time, and as a result, I was learning lots of new stuff but I wasn't practicing what I had already learnt. I was scared that I could begin to forget things, and I was also eager to try my skills on a personal project with no tutorial to see if I had actually learnt anything!
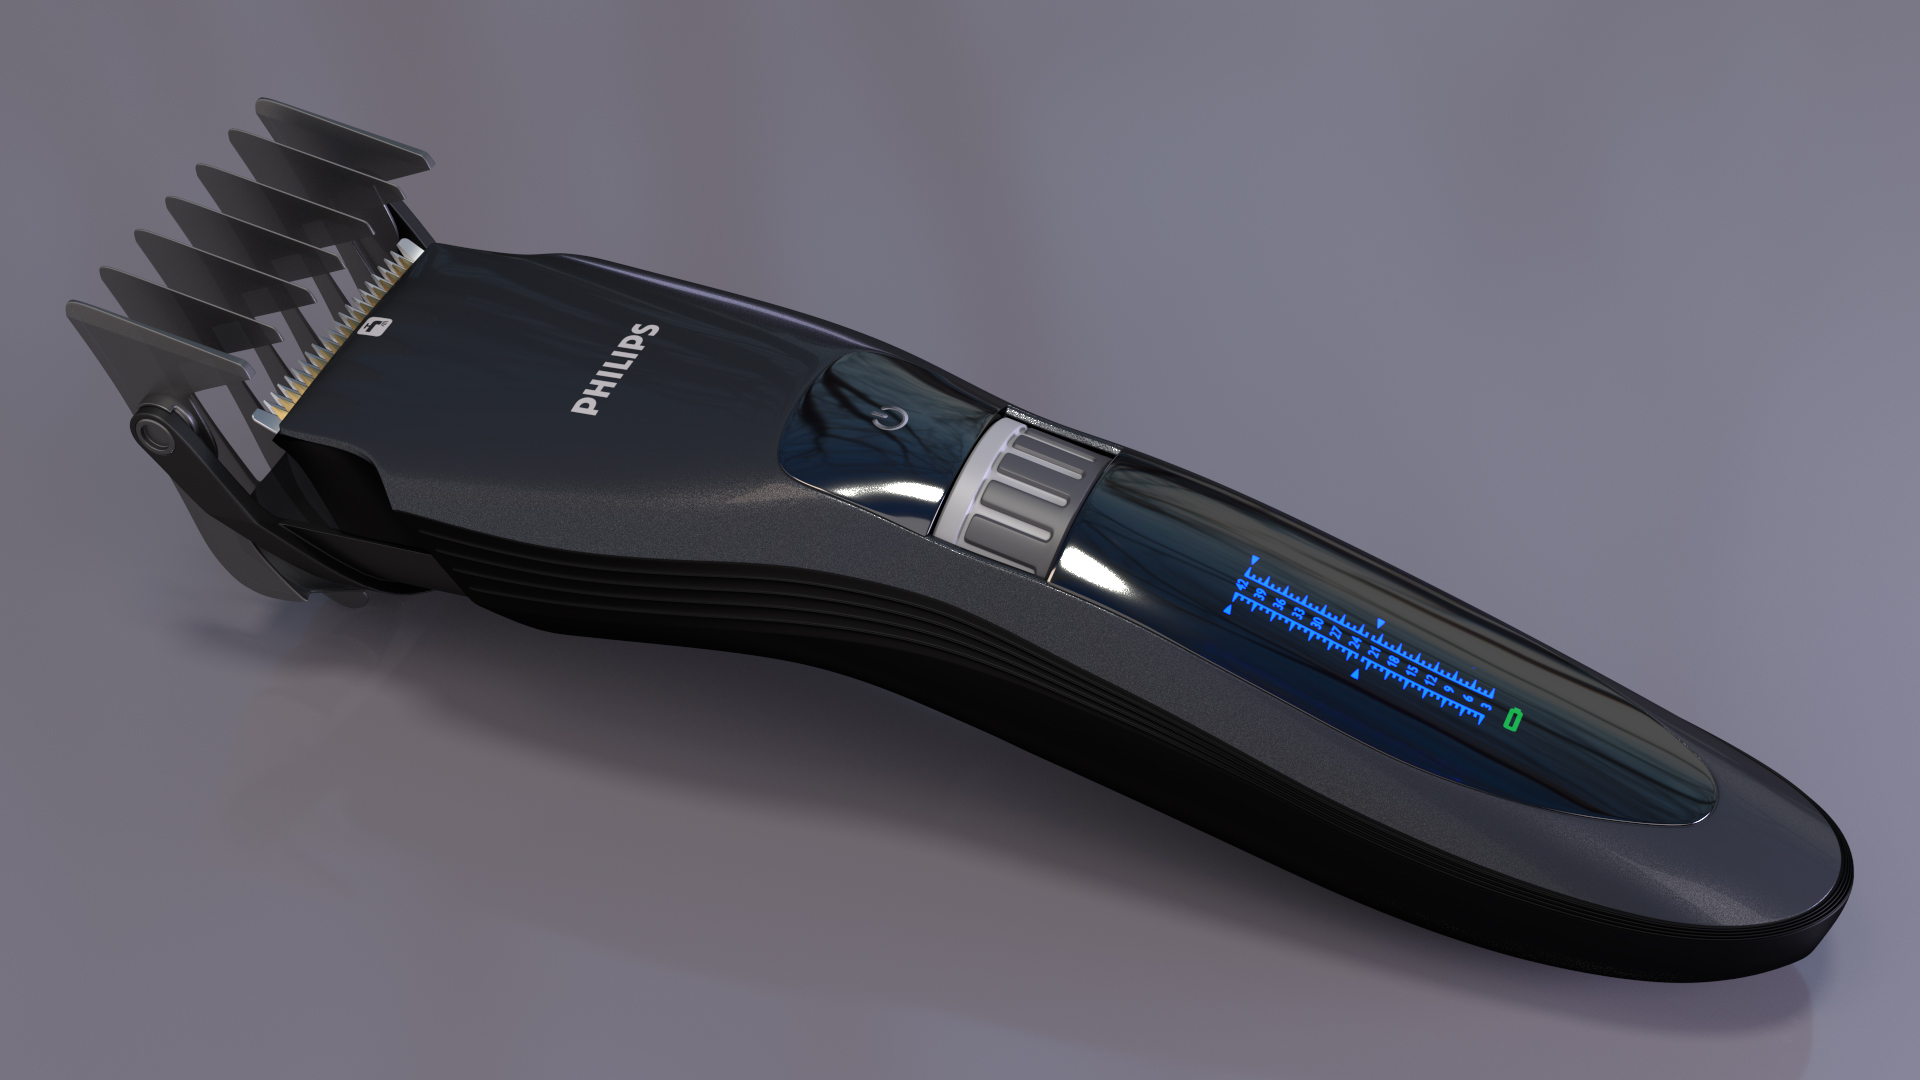
I came up with an idea to make "mini-models" . The concept here was to take objects from my house and try to model and render them relatively quickly without asking for too much, or ideally any help. This meant I was practicing the workflow of modelling to rendering and repeating it on a fairly regular basis. I decided to do this on a wednesday night and a few hours over the weekend so that it would fit nicely in between my tutorial learning.
This was the first of my mini-models, my hair clippers. I only had to ask one small question on the forum, thanks @anthony_c , but the rest was all me. It turned out pretty good since I didn't dwell on it for too long as I felt that it would go against the whole point of the mini models if I spent too much time tweaking things for ultra-realism.
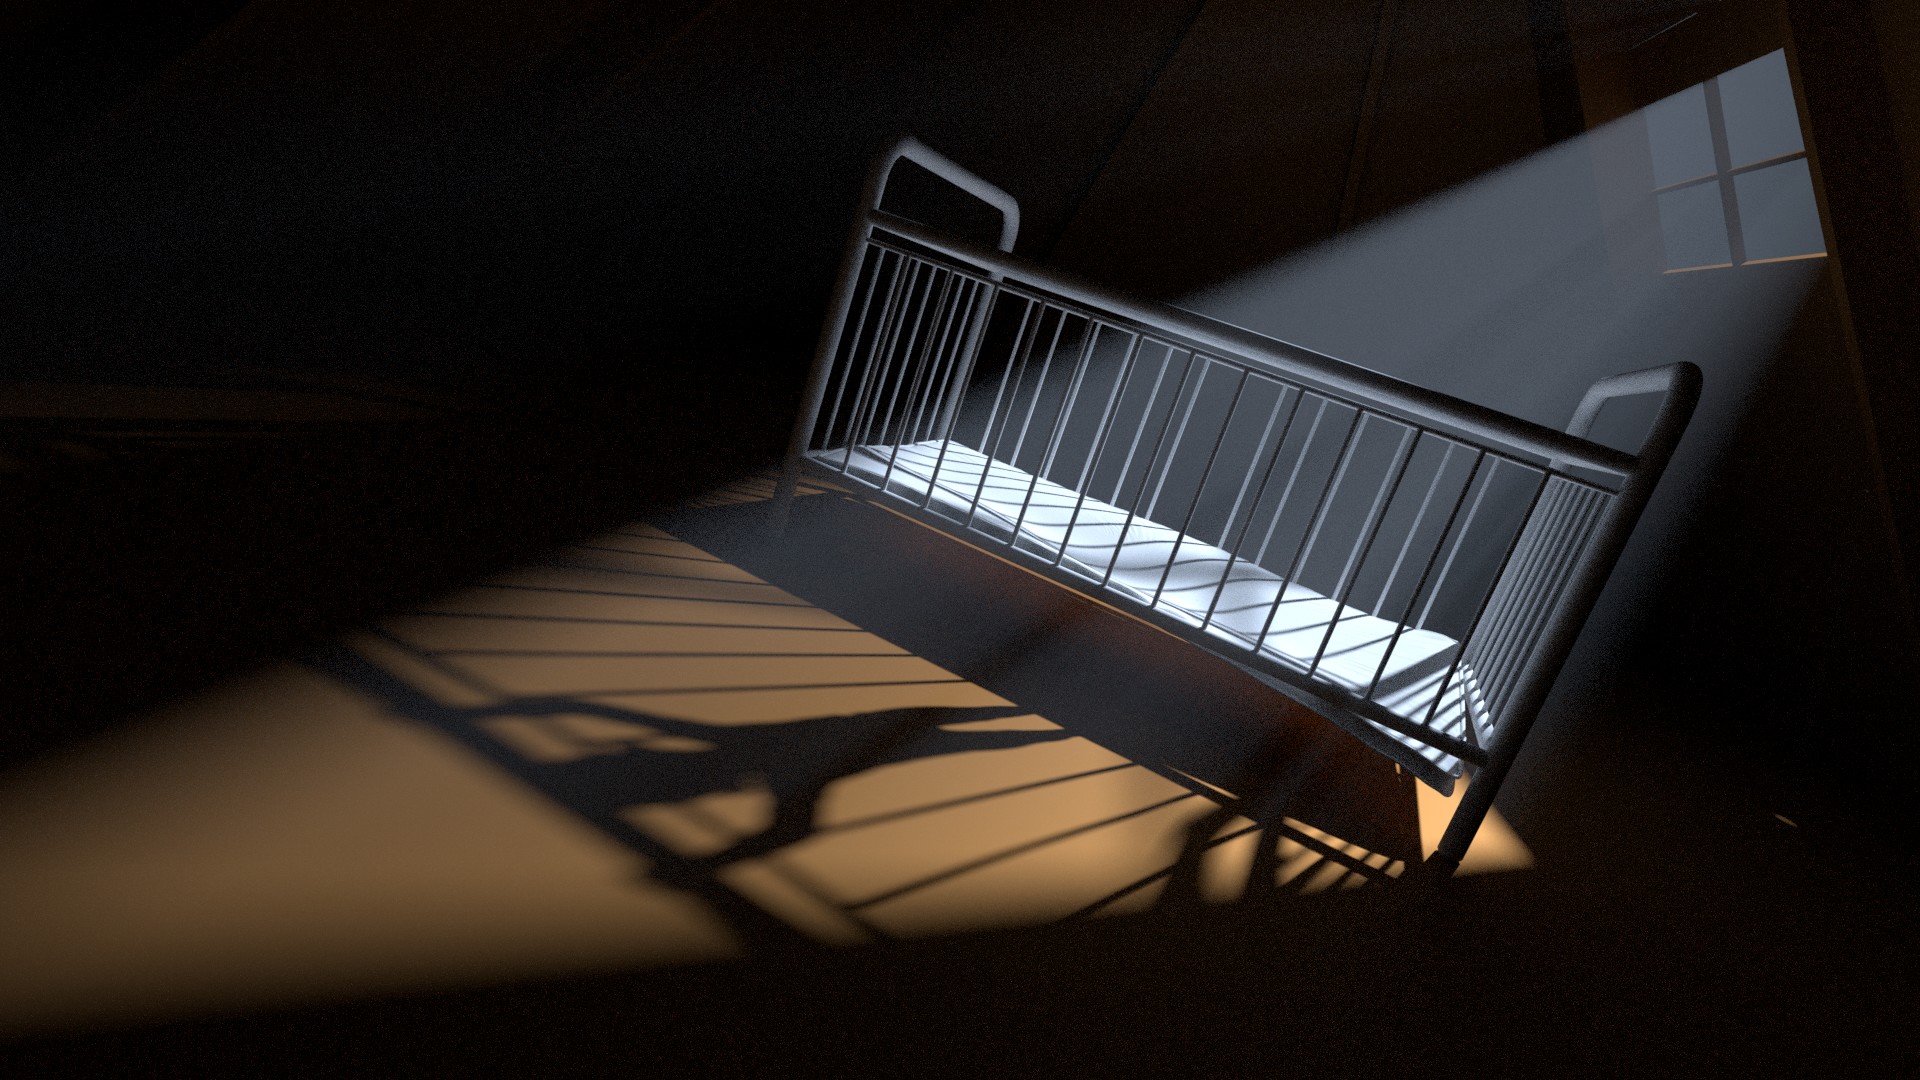
APRIL 2016 - WIP - "The nursery" Background blitz competition entry.
So ive entered a small competition on an adventure game forum that I am a member of. The brief is to create a background or location that could feature in an adventure game. The only real rule is that it must be in some way based on the theme : "The nursery"
As usual I coud'nt help myself and went dark and creepy, but why not! The competition ends on the 1st May so Ive still got time yet. Ive got the scene blocked in, camera angle set, lighting sorted and the main composition modelled and textured. The idea is there is a shadow of the baby but no baby in the cot......
Hoping to go mental with cobwebs and a few toys on the ground and in the shadows but not too much more as I don't want to distract from the scary bit. Also got the mobile to finish.
I also want to add that this was a great way to test out the Cycles Material Vault by Reynate Martinez that I bought recently. Some of the textures in this scene are derived from it (although ive tweaked them a bit) I can't reccomend this enough if you are serious about Blender. It gives you a great selection of materials that you can add to your scene and use them straight out of the box, or tweak and change them till your hearts content. Its also great for learning how to make your own materials and how they work as you can go into each materials node setups and study/add to/tweak them. The CMV also comes with a lot of extras and Reynate has really worked hard to make this an amazing package.
Go get it here : http://www.cyclesmaterialvault.com/
Anyway, back to my WIP , here is the rough dialogue to set the scene :
"The old Leary place?! Why the hell are you going up there?!" . "I need some old documents that I think will help my investigation, I heard they lefte everything in there when it was abandoned" . "And you know why it was abandoned ,don't you? " . "nope..." . "it was home to The Leary Family in the 30's , they had already had 4 kids when they unexpectedly had another, it was unplanned but they decided to keep it. There wasn't much space left in the house but they managed to clear out an old room and turn it into a nursery. The story goes, that as soon as that baby was born, darkness descended upon the house. The Learys were convince that the baby was posessed. One day, they lost the plot and smothered it to death in its cot, then they went out into the forest and hung themselves. The Bodys of the other children were never found. The officers conducting the investigation found the house so disturbing that they recovered the babys body and left instantly. Nobody has never been back there" . "yeh ok, enough of your silly ghost storys, im going up tonight. And besides, even if theres any truth to your story, Its old documents and files Im looking for. I wont be going anywhere near the nursery. If they are still in the house, they are bound to be in the attic..."
And some WIP's

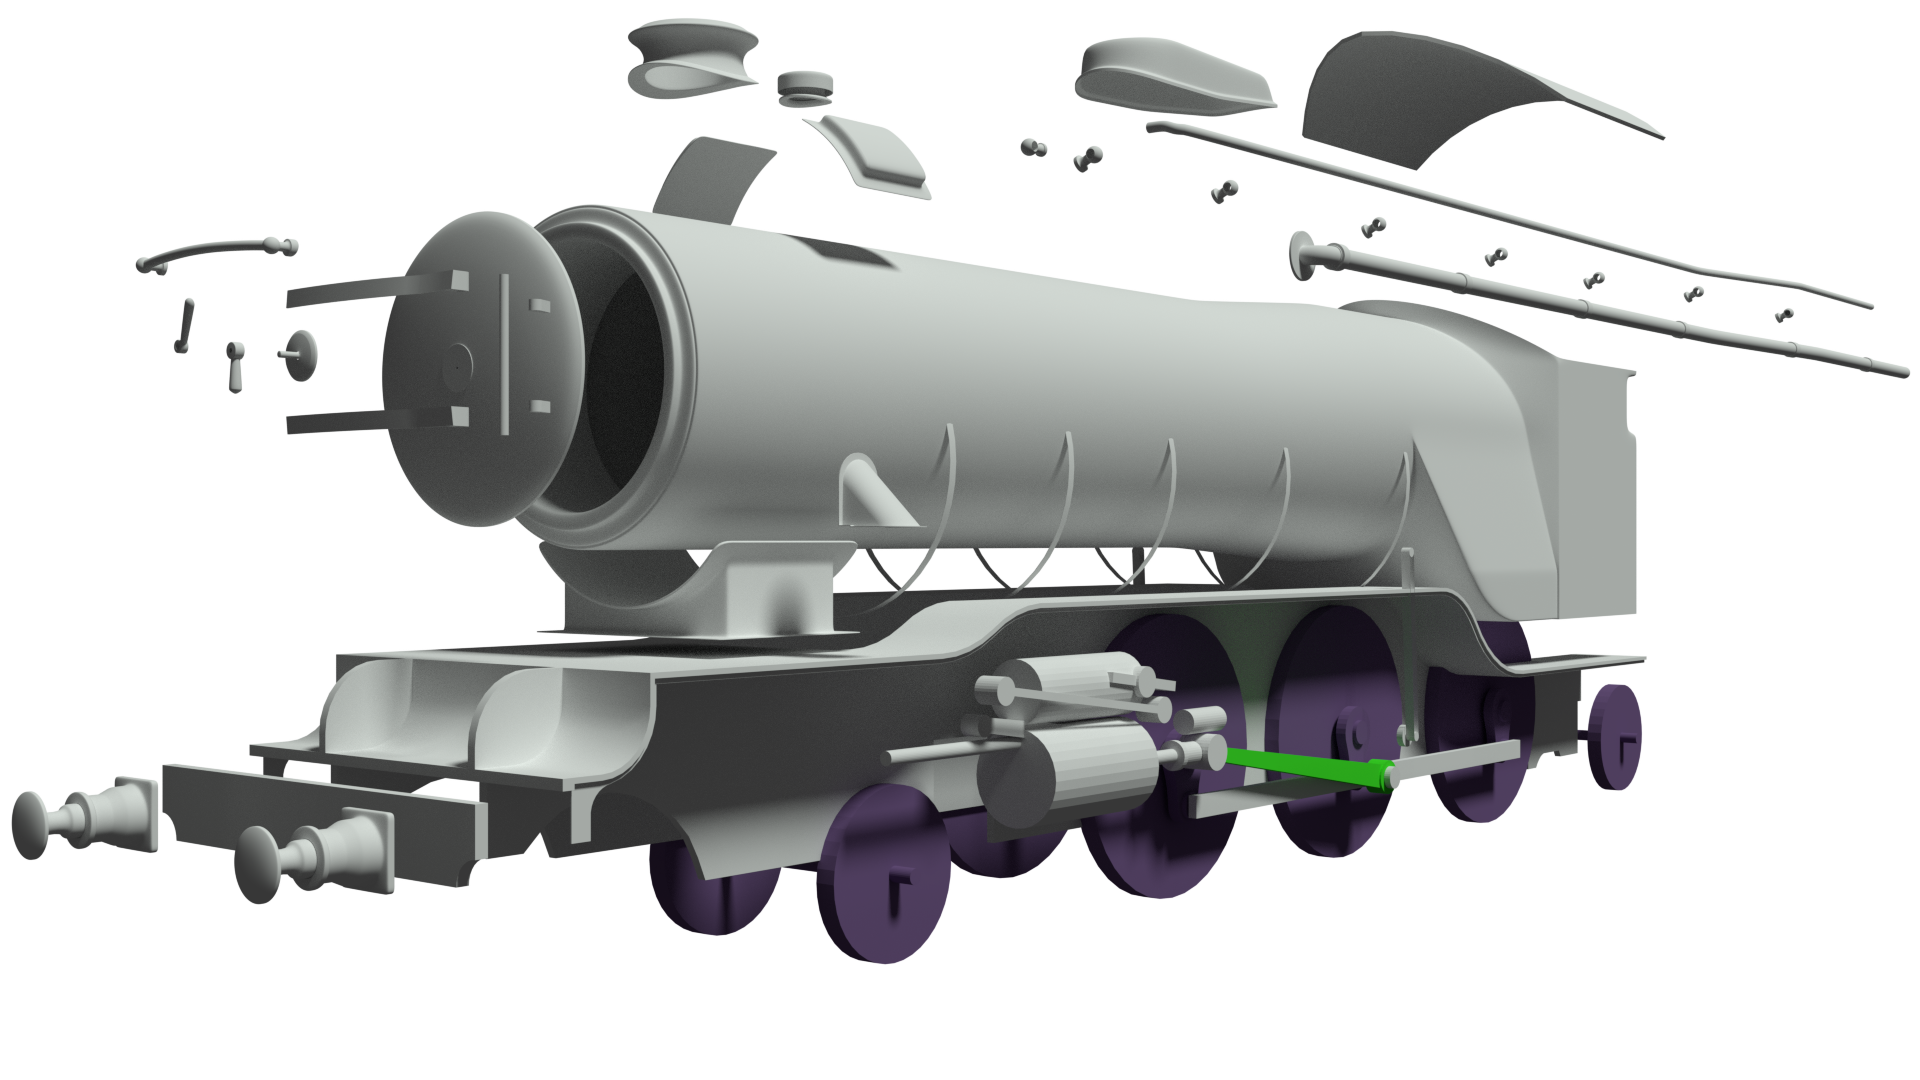
Another WIP that I have been working on for a while. This was a follow on from my "mini-models" hair clippers but I got into this a bit too much so its now a "massive-model" .....
This one was started as a way to practice modelling something from photos, rather than something I had in front of me. I also wanted to do something that I was not very familiar with and hadn't realy seen much of in person. I also went for a train because it was a completely different scale to the clippers.
Unfortunately, as soon as I got into this, my mission to make a model that was a close replica, became as obsession. So in addition to trying to add every detail as closely as possible to what I see in the photo. I also have made this model so that every piece fits together perfectly. There are no pieces that are "crashed together" or protruding through eachother, and every object matches up perfectly with the next. There are still a lot of details to add, bolts, hoses, stuff like that , and the cab needs a lot more work. I might also add the coal cart thingy at the back that I knew the name of and have now forgotten. Anyway this is one of those "take your time and do it right" models so ill keep chipping at it until its done ,and done right
Needless to say as soon as I saw the "train wheel rigging" tutorial by Chris Kuhn found here : https://cgcookie.com/course/rigging-train-wheels-within-blender/1 then I had to rig this thing for animation. Chris' rig is a great way to alternatively rig something, without bones, and it was a lot of fun. The finished rig however, is quite simplified, compared to what I found when I started looking for videos of real train wheel mechanics, so as usual I had to adapt my attempt to make it realistic to the model. It was hard to find a video of a "Green Arrow" wheel closeup in action, and even harder to rig it realistically (there are a lot of parts that depend on eachother and move together in so many different ways) but I percivered and got it working. Im at the stage now where I can start to model the initial block in of the mechanism.
However, I haven't touched this thing since Christmas as I got distracted by other projects but hopefully I will get back to it properly soon

Ok i'm calling this one done for now, as I have run out of time for the competition deadline, and have got to that stage where my knowledge/experience has ran out and i'm just clicking buttons to see what happens.
Big thanks to @anthony_c for putting a special effort into giving me a hand with final compositing and rendering issues. And Anthony, I decided after giving out some advice to a fellow member about doing fundamentals courses first and not trying to run before he could walk, that I was being a total hypocrite as I realised the reason I had no understanding on compositing , was that I had missed out the "fundamentals of compositing" course when I worked through the fundamentals course last year. So I spent today working through that and now have a much better understanding of render layers and compositing basics.I would thoroughly recommend it to anybody who is about to try compositing for the first time or is (like me) struggling to get their head around it. Big thanks to @theluthier for this course which can be found here : https://cgcookie.com/course/fundamentals-of-compositing/1
Unfortunately that left me short on time to do much with compositing the final piece but I think its ok and have taken on board your great ideas and advice Anthony.
Thanks again to yourself, and ![]() me1958424 and ssilver593 for their valuable input, and of course the CG Cookie team and its amazing forum community for all your help
me1958424 and ssilver593 for their valuable input, and of course the CG Cookie team and its amazing forum community for all your help
I'm off to submit my entry.... **EDIT** BTW It Won!

Custom bone shapes done, just got to mirror the rig and then I'm on to mesh skinning
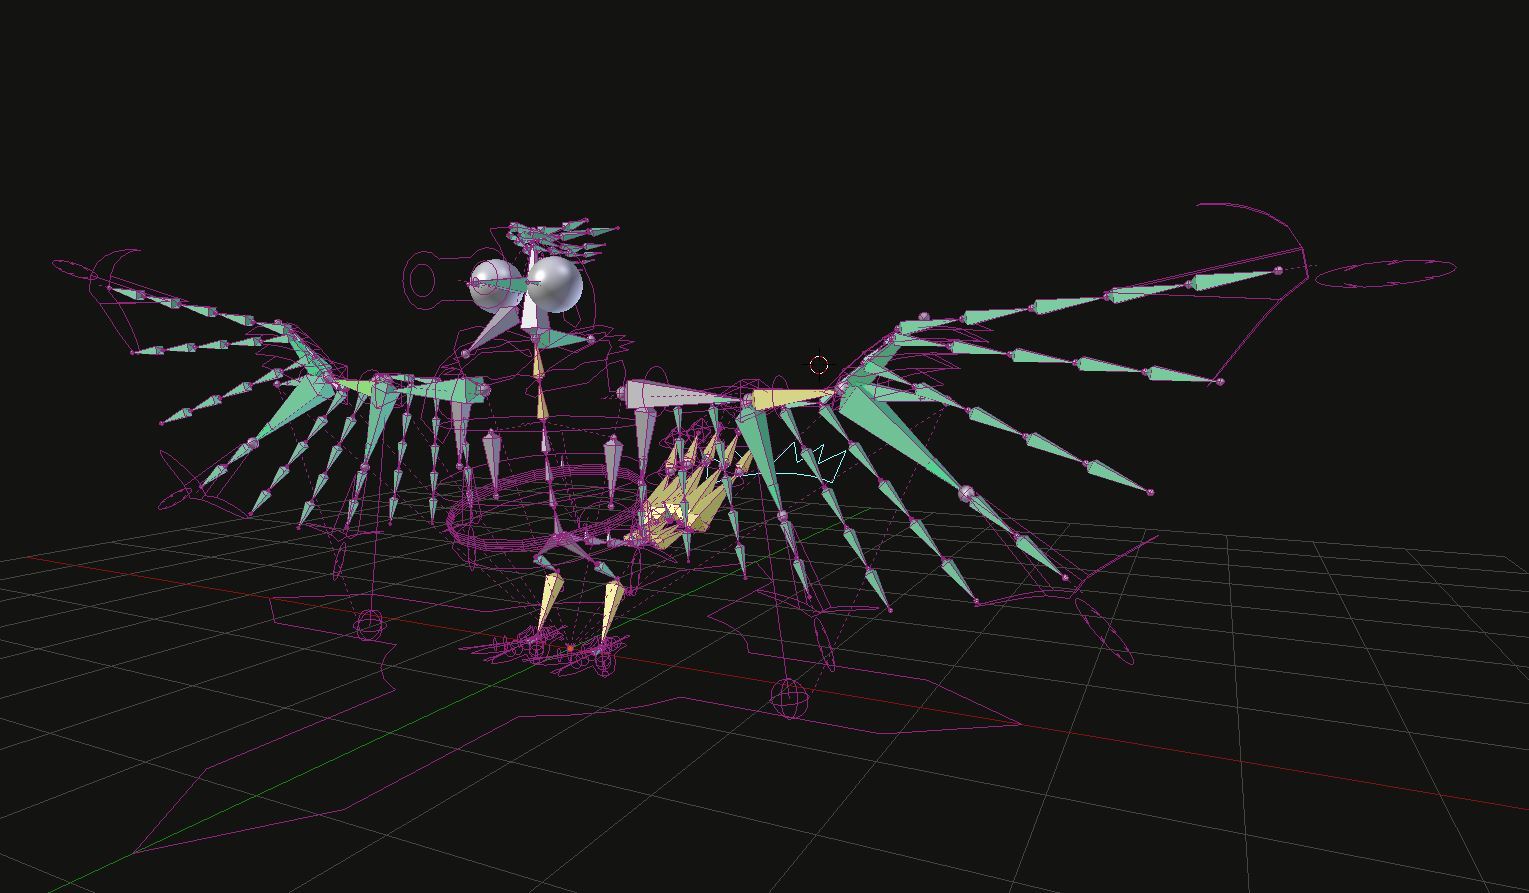
Rig mirrored and finished now time to skin the mesh to it
UPDATE**
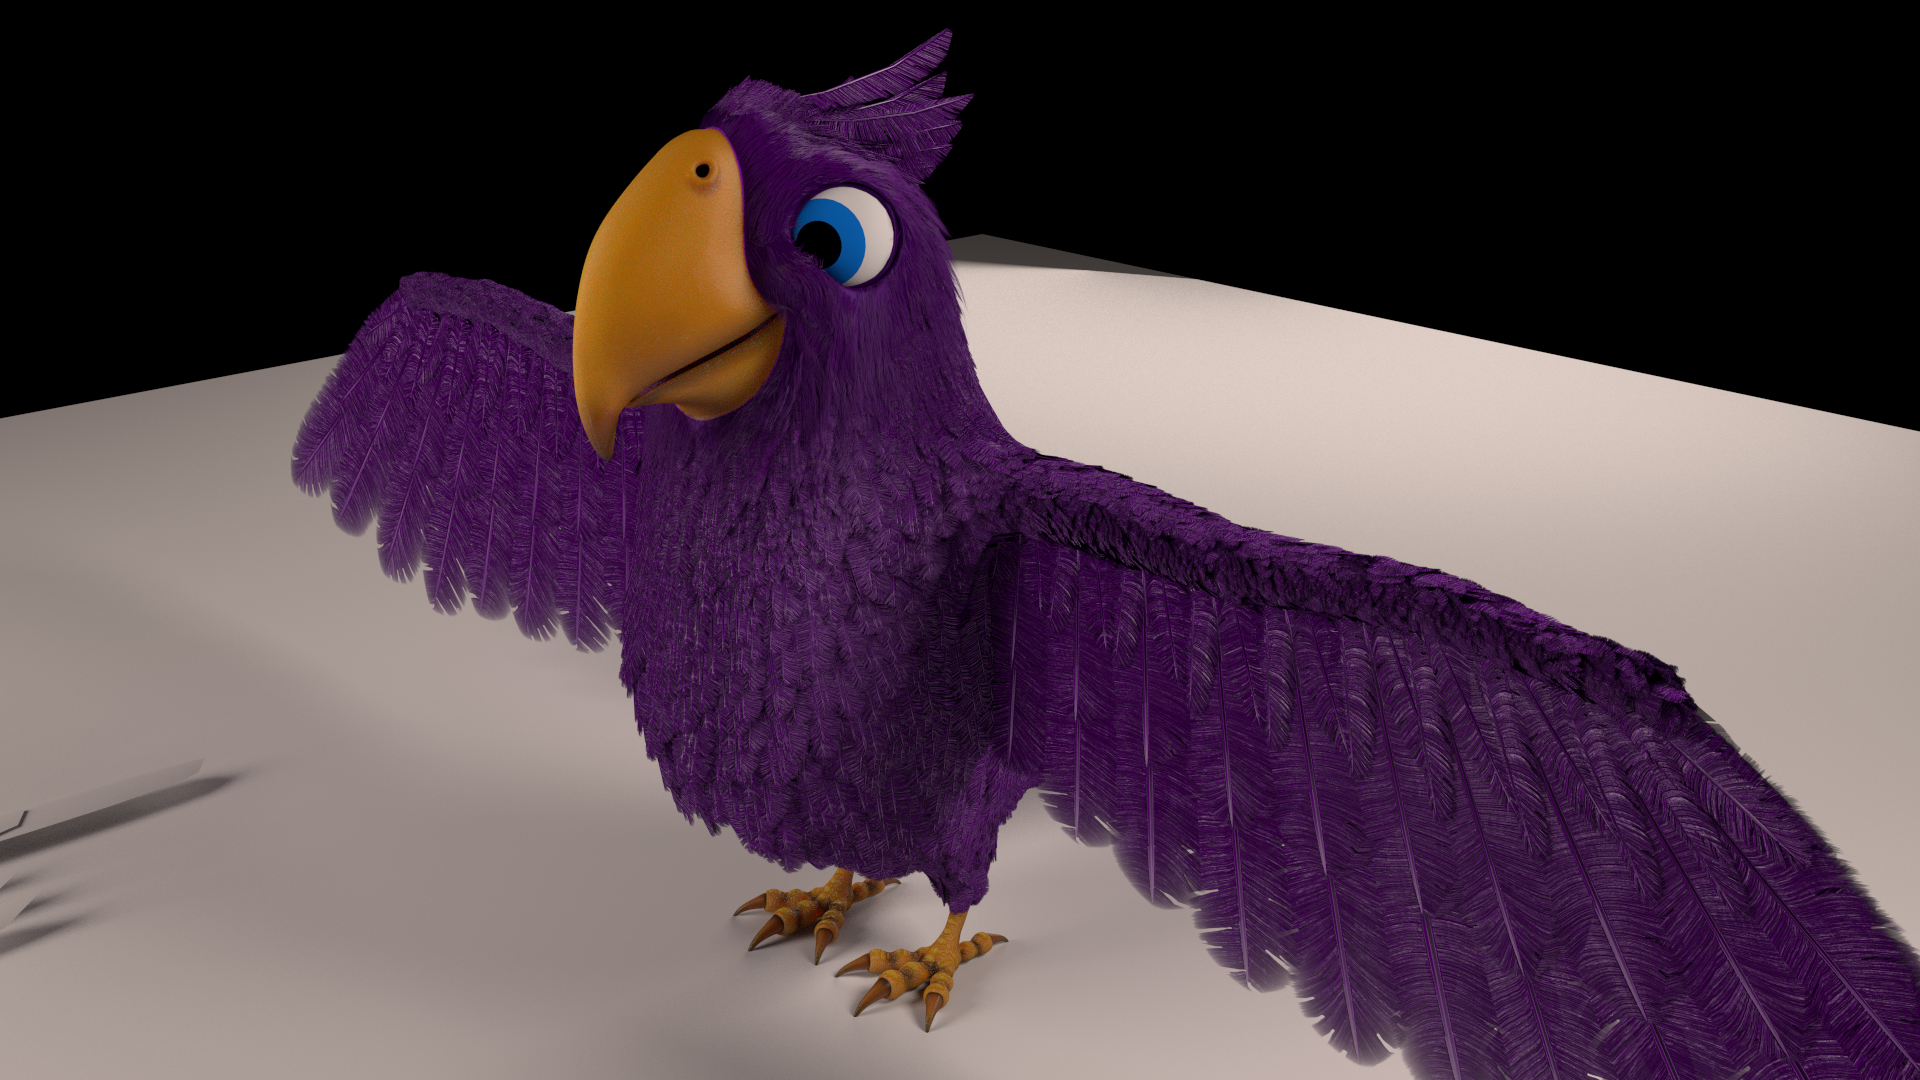
Flump (His new name) , Is alive!
Anyways, the initial skinning of the body is done, I now need to weight paint it to solve some deformation issues so I decided to give him an extreme pose to get an idea of what needs done.

The chest feathers are having bald spot issues on his fat belly, the shoulder deformations need attention and the legs have stretched weirdly from the rest pose so I need to work out whats going on there.
Then its on to face rigging and then I think I'm ready to learn how to animate him
Finally getting to the stage where I am seeing that all my hard work and frustration is beginning to pay off
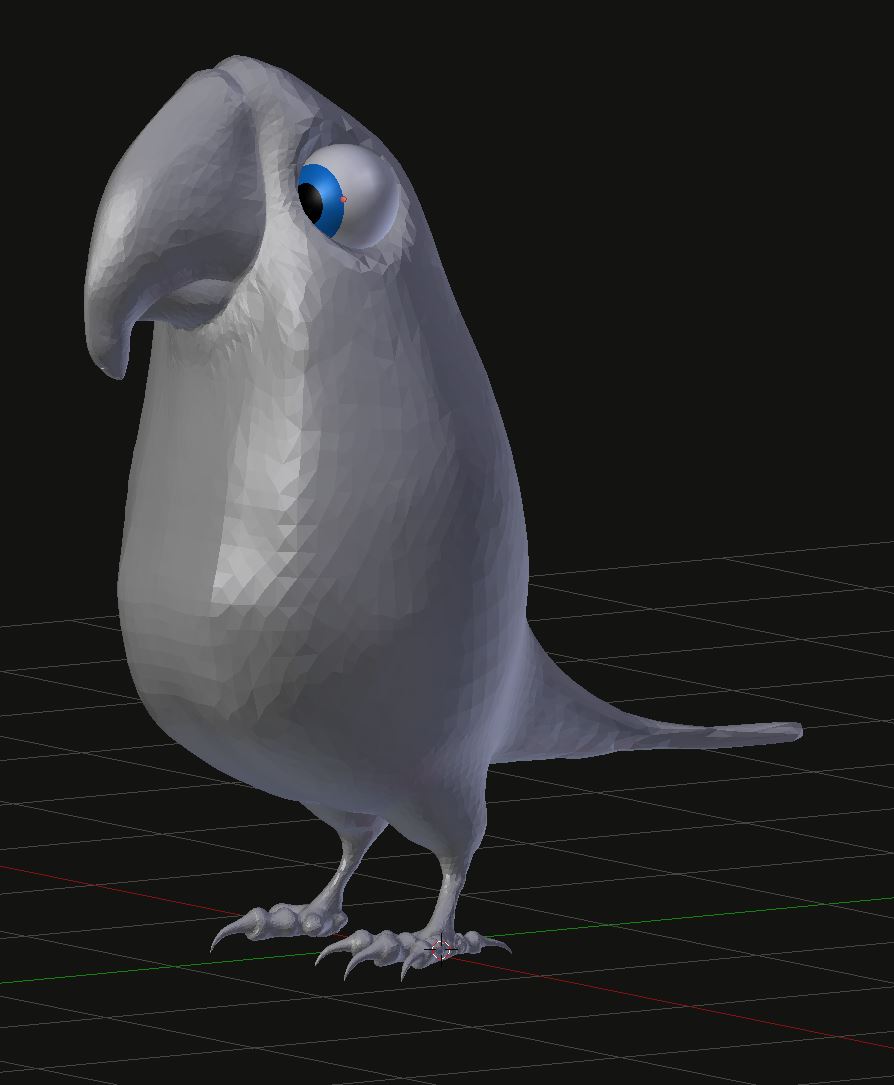
And to think that he started out as a simple sphere that was initially sculpted into this :
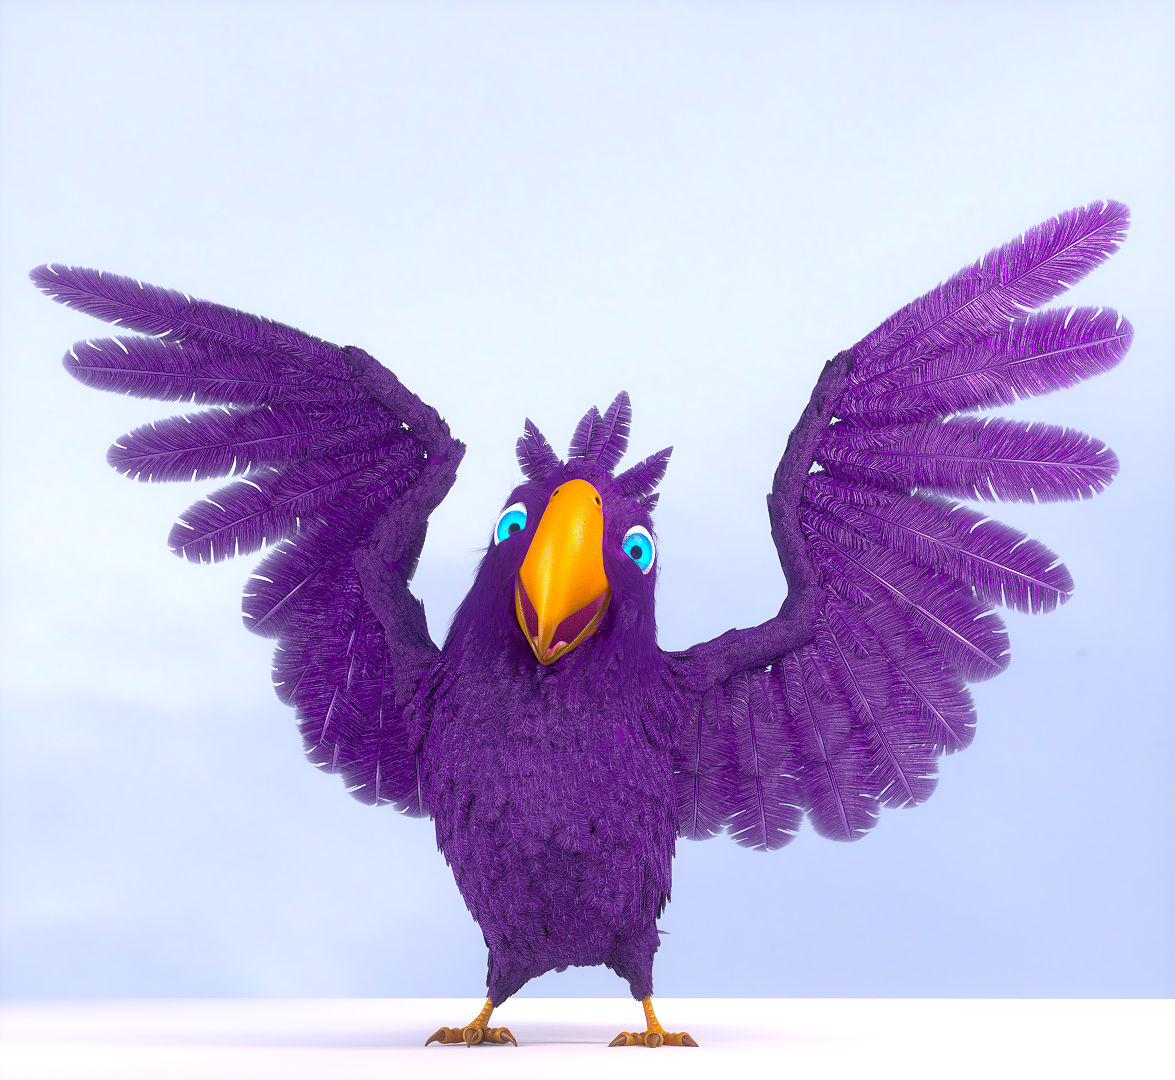
So the Piero rig, including the face is finally done! He is now fully rigged and animatable. The face rig was surprisingly difficult but I got there in the end.
Still a few feather issues but I am going to leave this project for now and begin learning animation. I will sort the feathers when I return to it.
In the meantime I am going to play about with the face rig and see what expressions I can get out of him. For a start, here is "Yay the rig is finished"

And Piero (Or Flump as I'm calling him) is finished and ready to animate....when I learn to animate that is.....

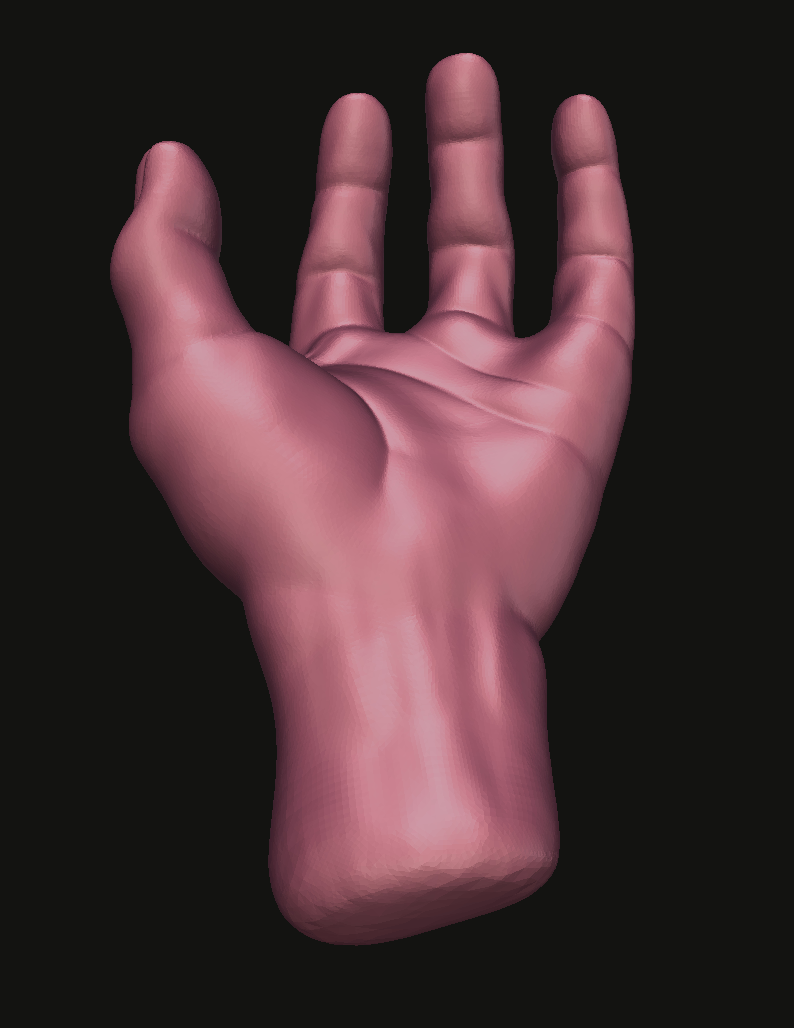
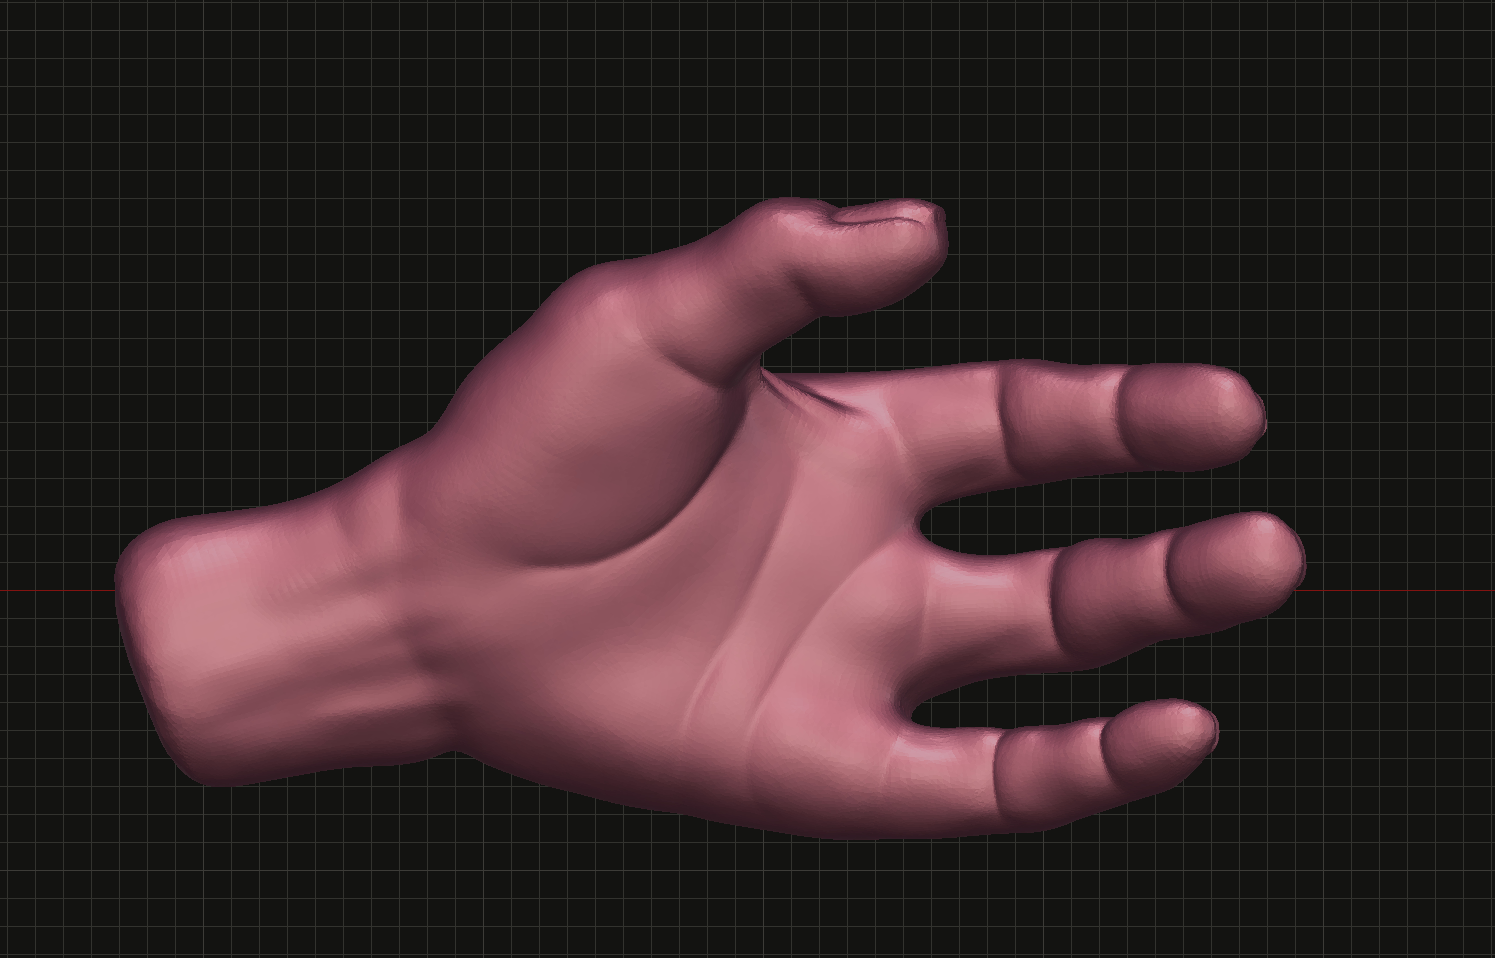
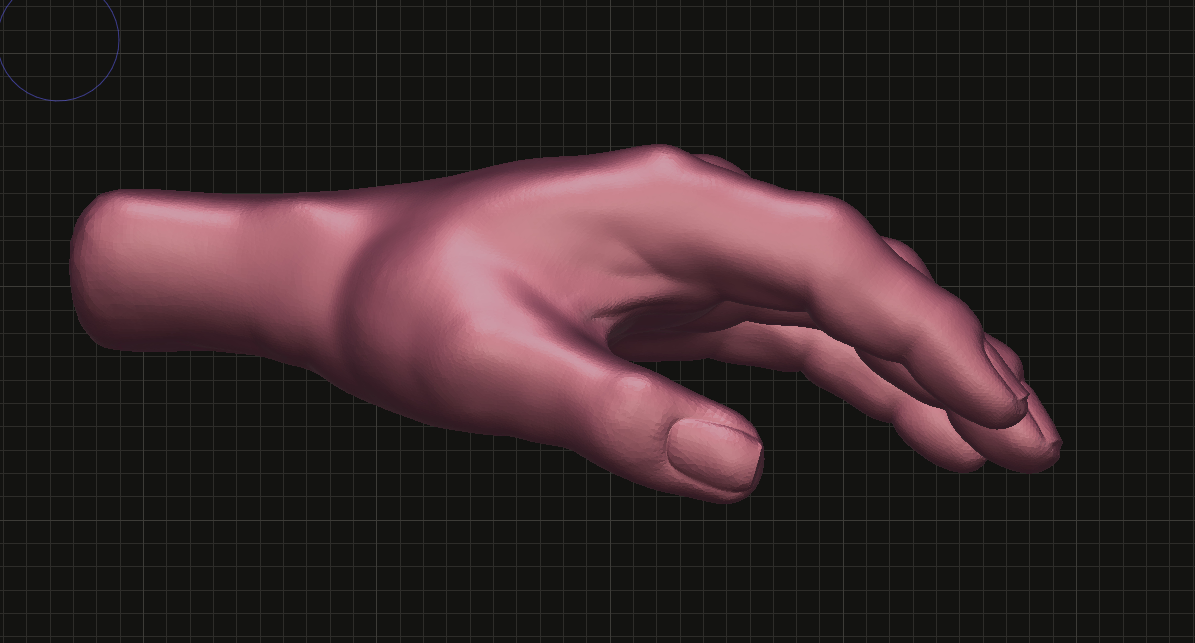
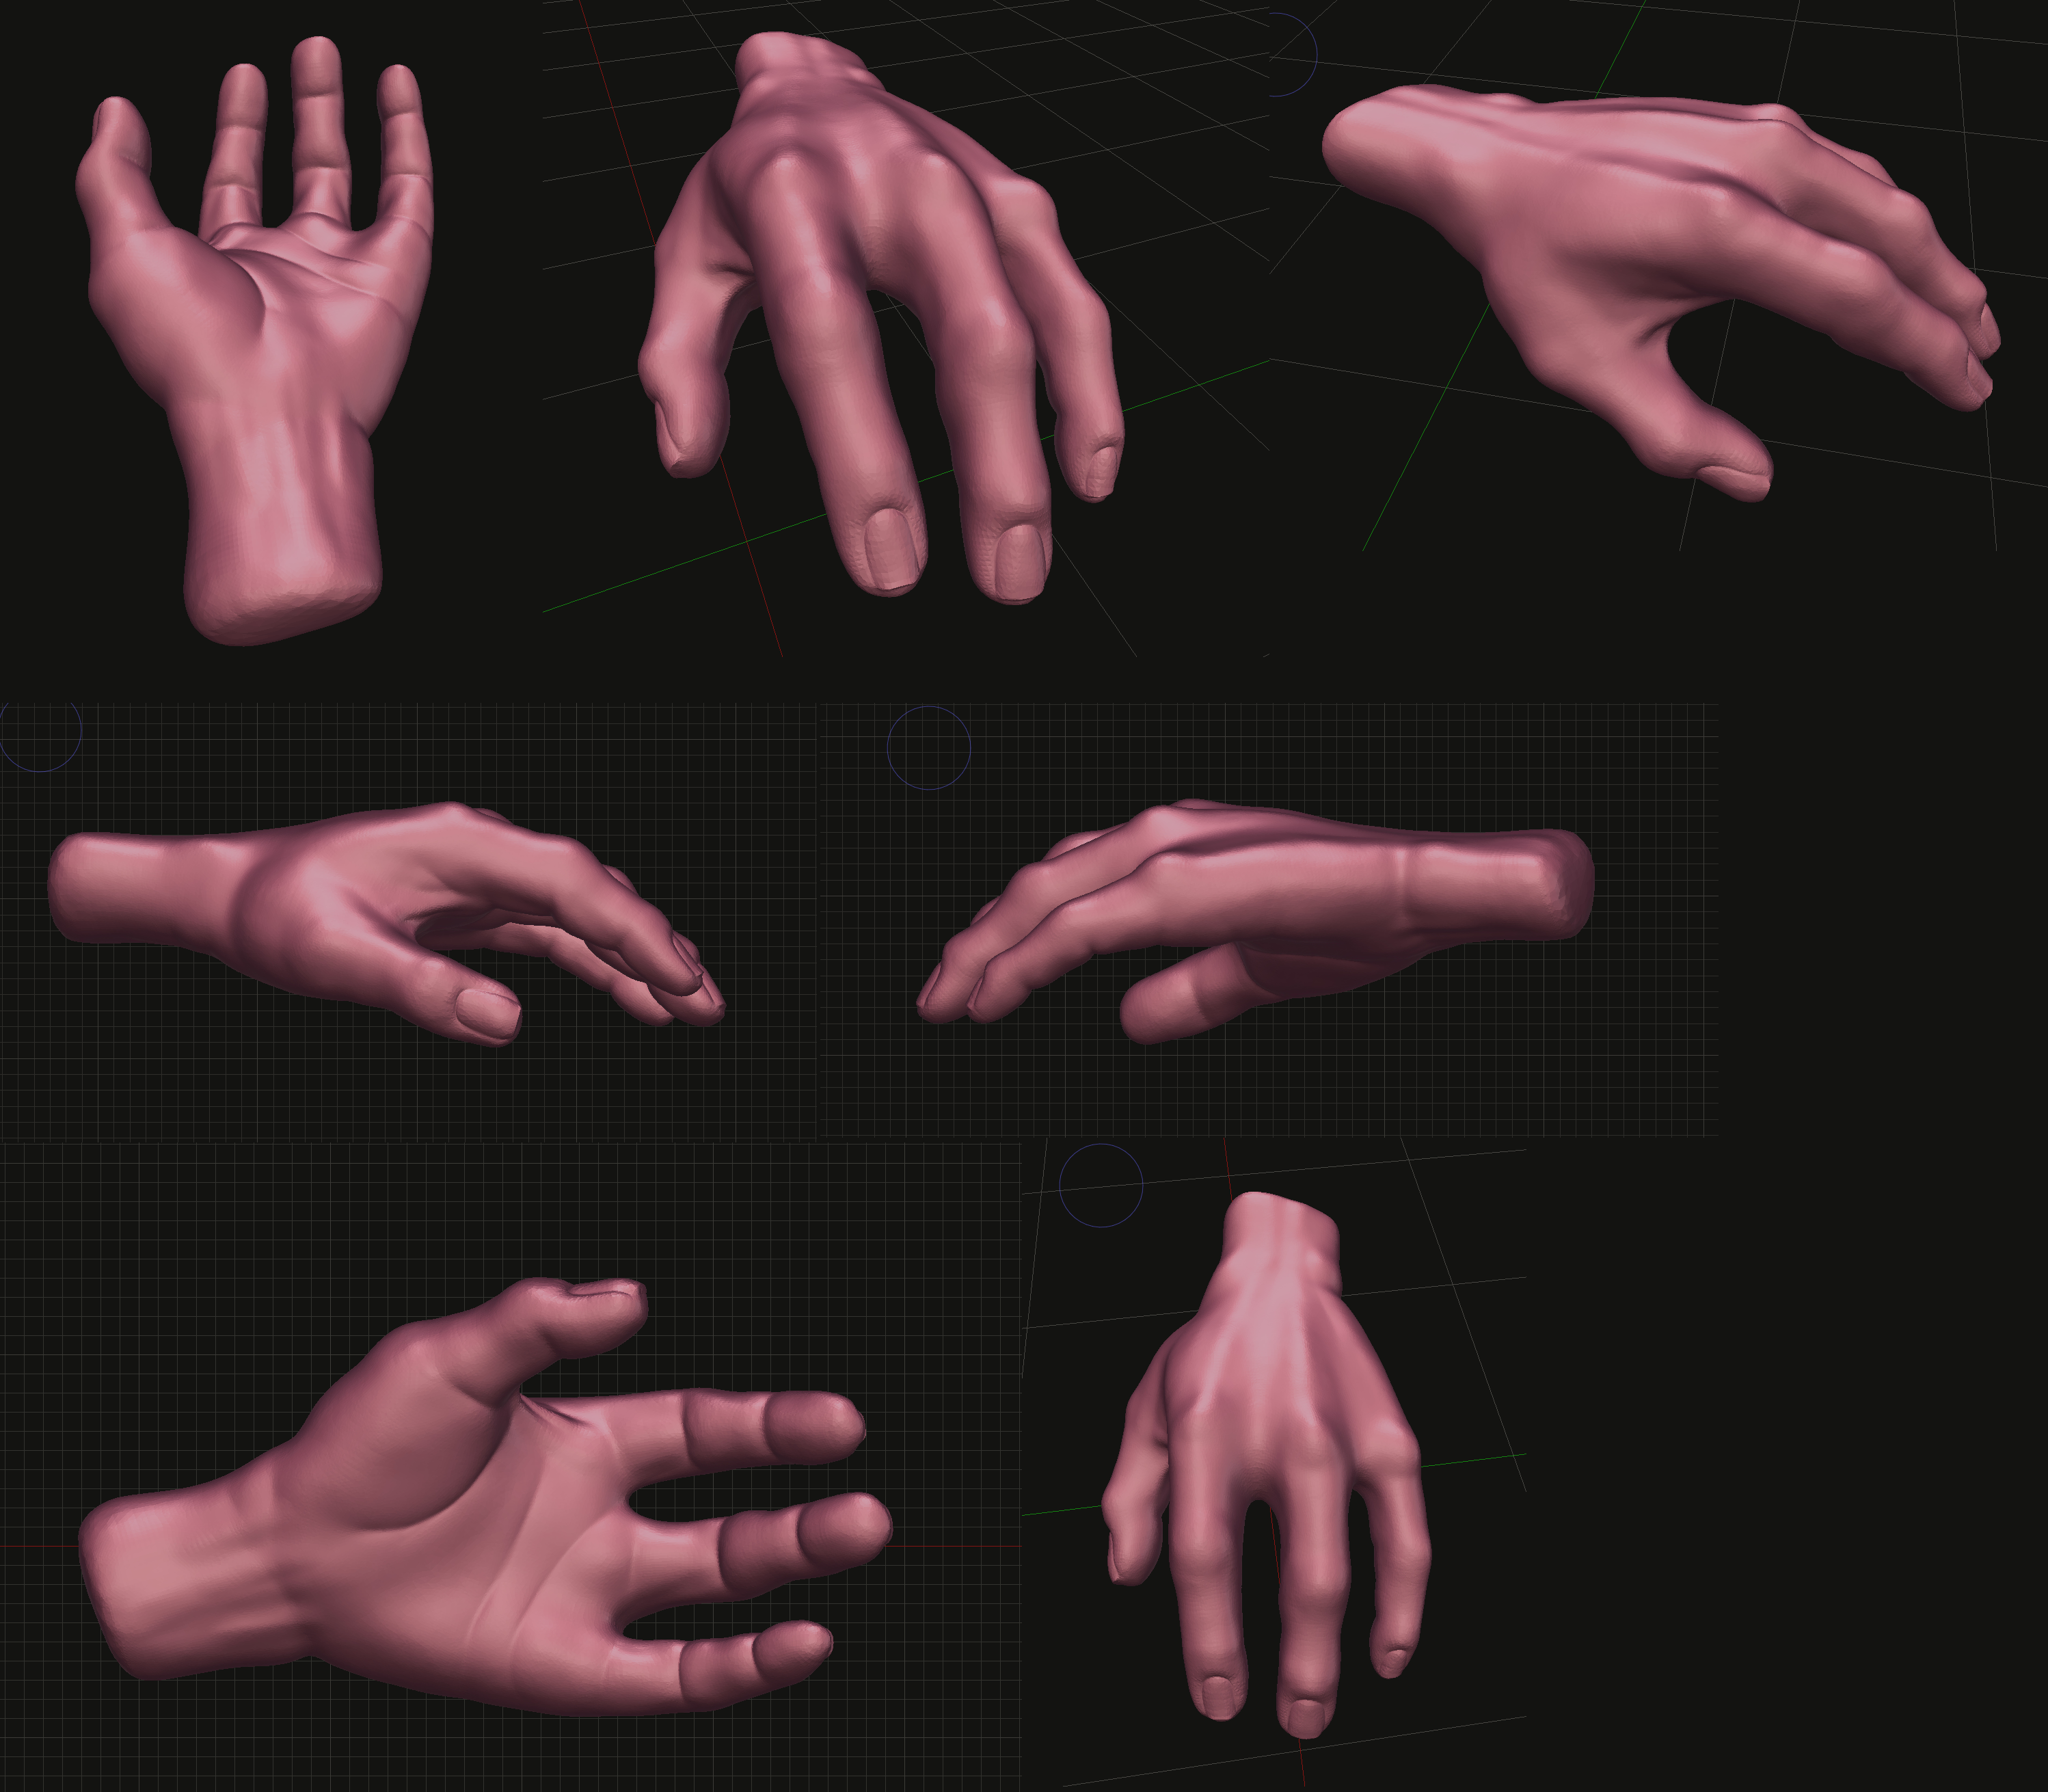
Some sculpting work on various projects.....
(Yes the hand is supposed to only have three fingers! )

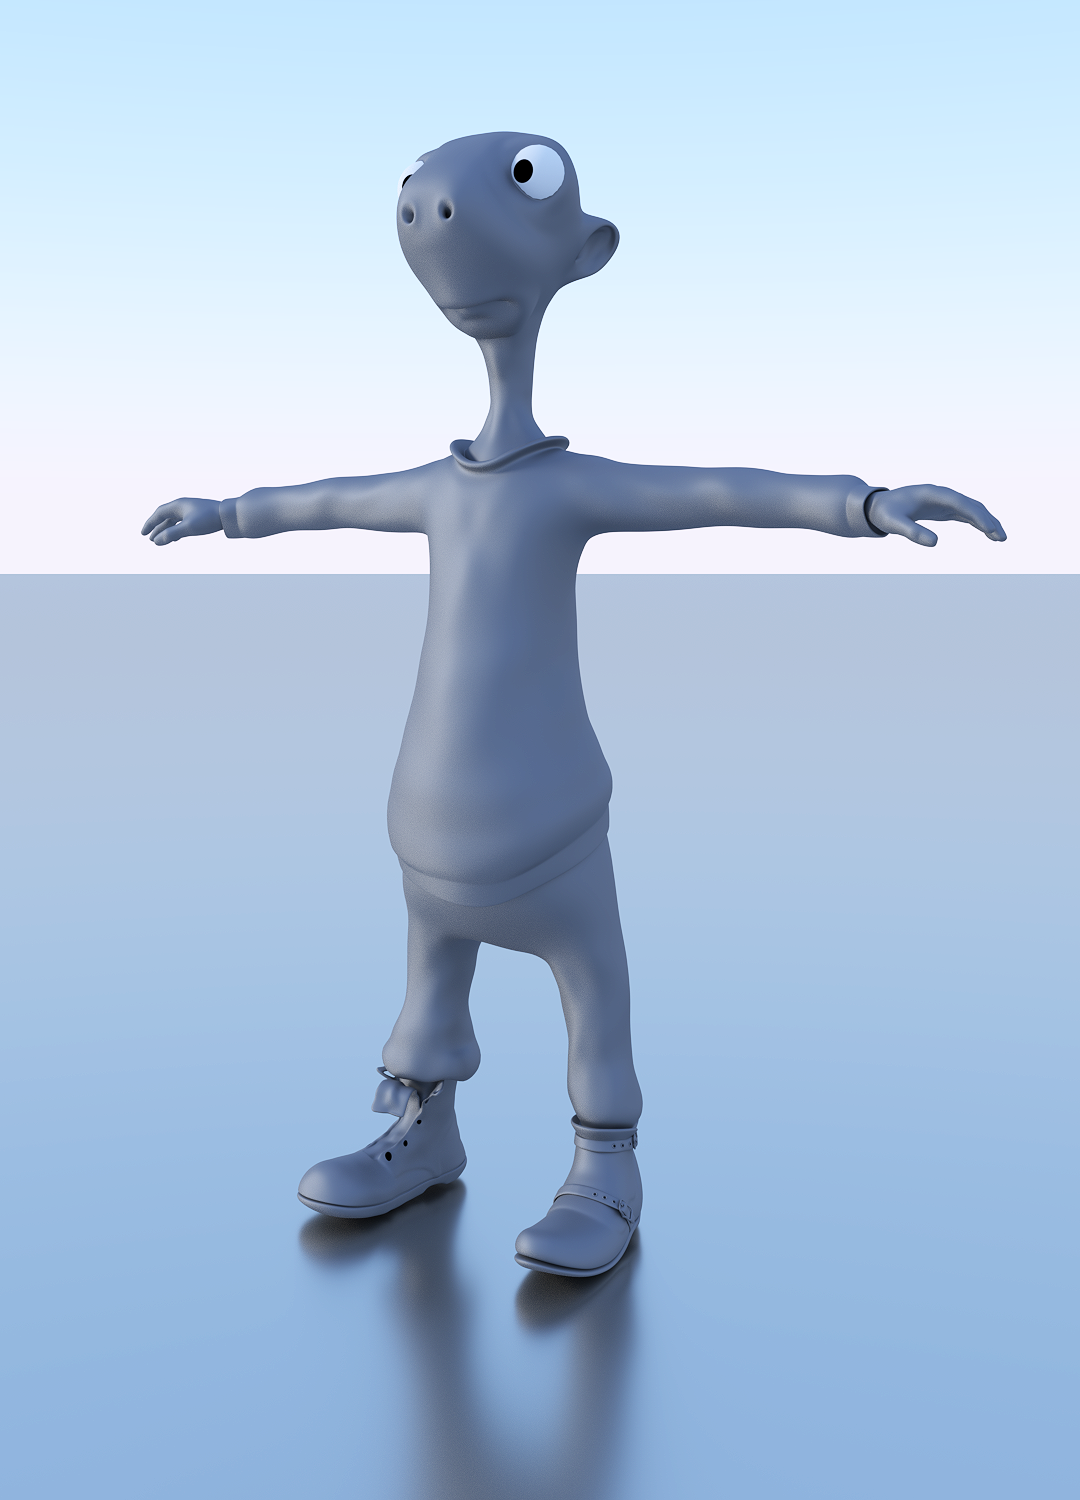
Some work on the Protagonist for my upcoming Point and click computer game, this is Huw, and I am creating him with the help of @jonathanwilliamson 's great course : https://cgcookie.com/course/introduction-to-character-modeling/2
With no previous ecperience of creating humanistic characters, this was a great way to get myself into a workflow to create all the characters for my game.
And here is Huw at present (WIP) :
My result from Andrew Price's Cherry blossom tutorial.
Unusually for myself , I just worked along side it rather than tried to do my own unique design - mainly because this was such a quick tutorial and I finished it in a few nights.
Anyways, it was a great way to quickly learn the basics of modelling and texturing a flower, DOF , the displacement modifier and lots of tricks and tips. I would thoroughly reccomend Andrews tutorials if you want to learn quick workflows and not spend ages on the one model as all of his tutorials are about 1 - 1.5 hrs long. I use them frequently to keep up a start to finish workflow to keep my memory fresh as I tend to take on big projects that mean I end up on one part of the workflow for weeks on end and start to forget the rest.

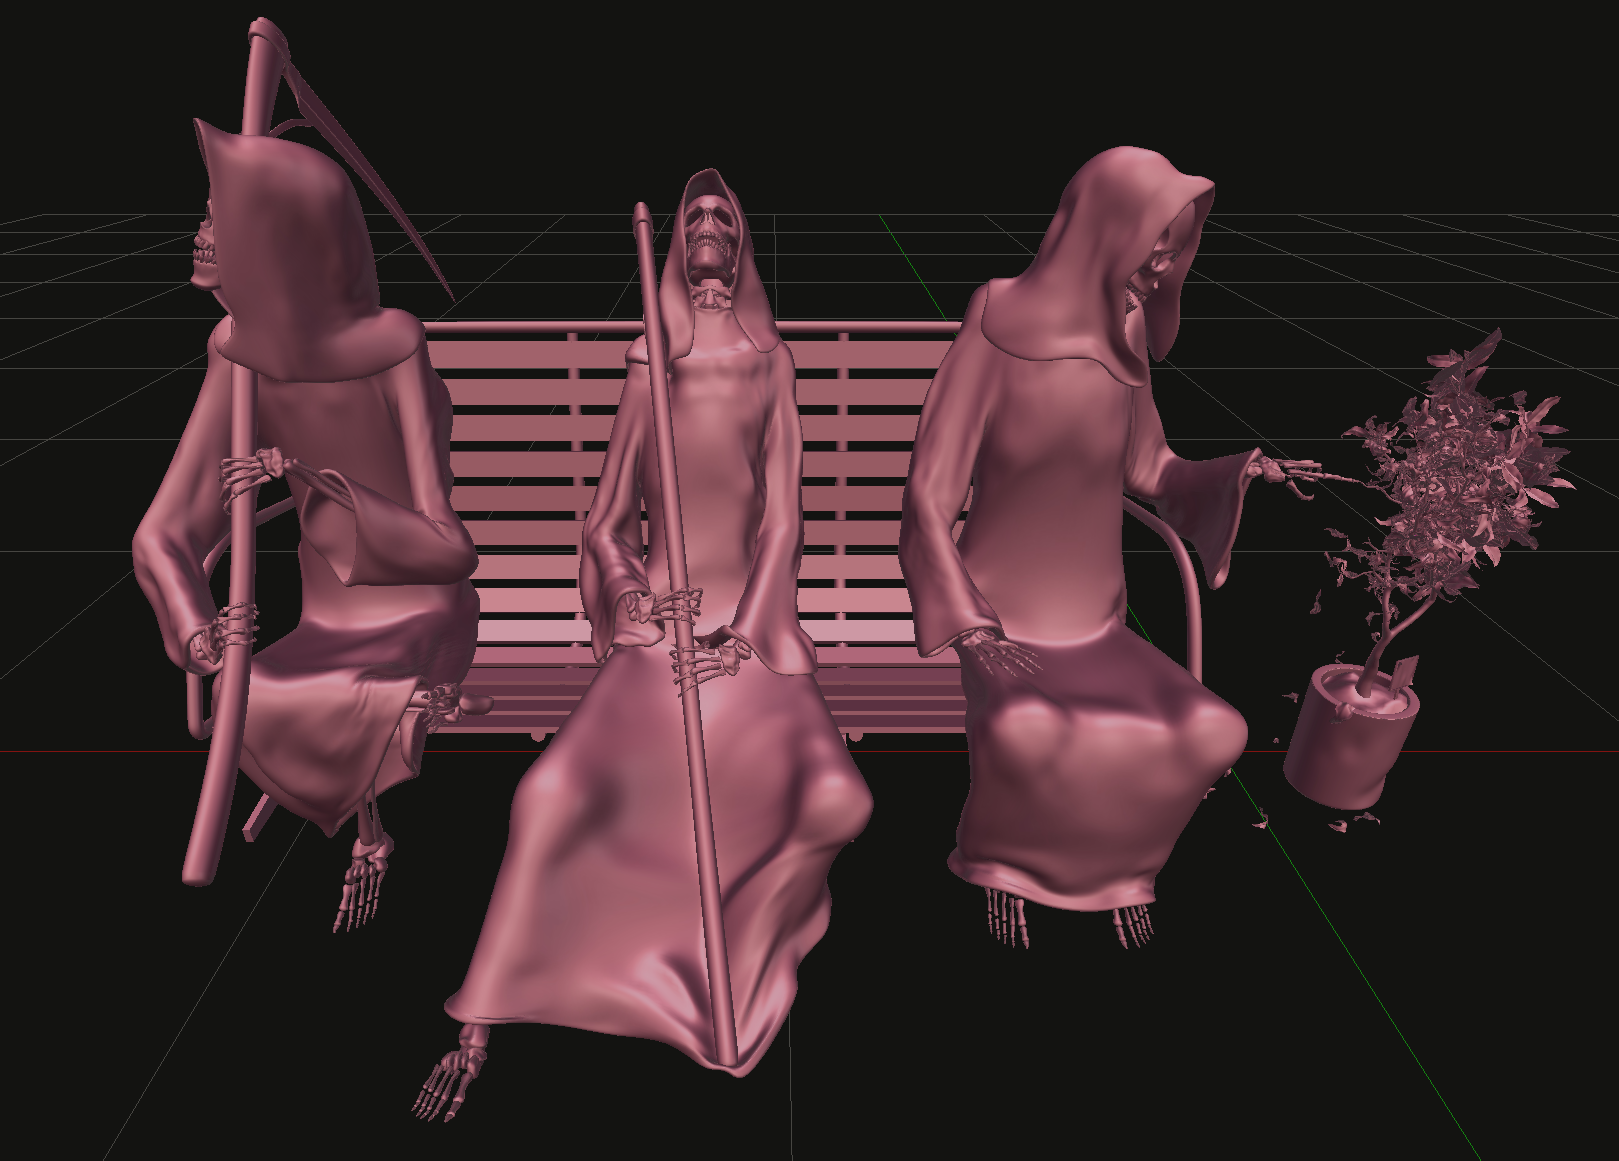
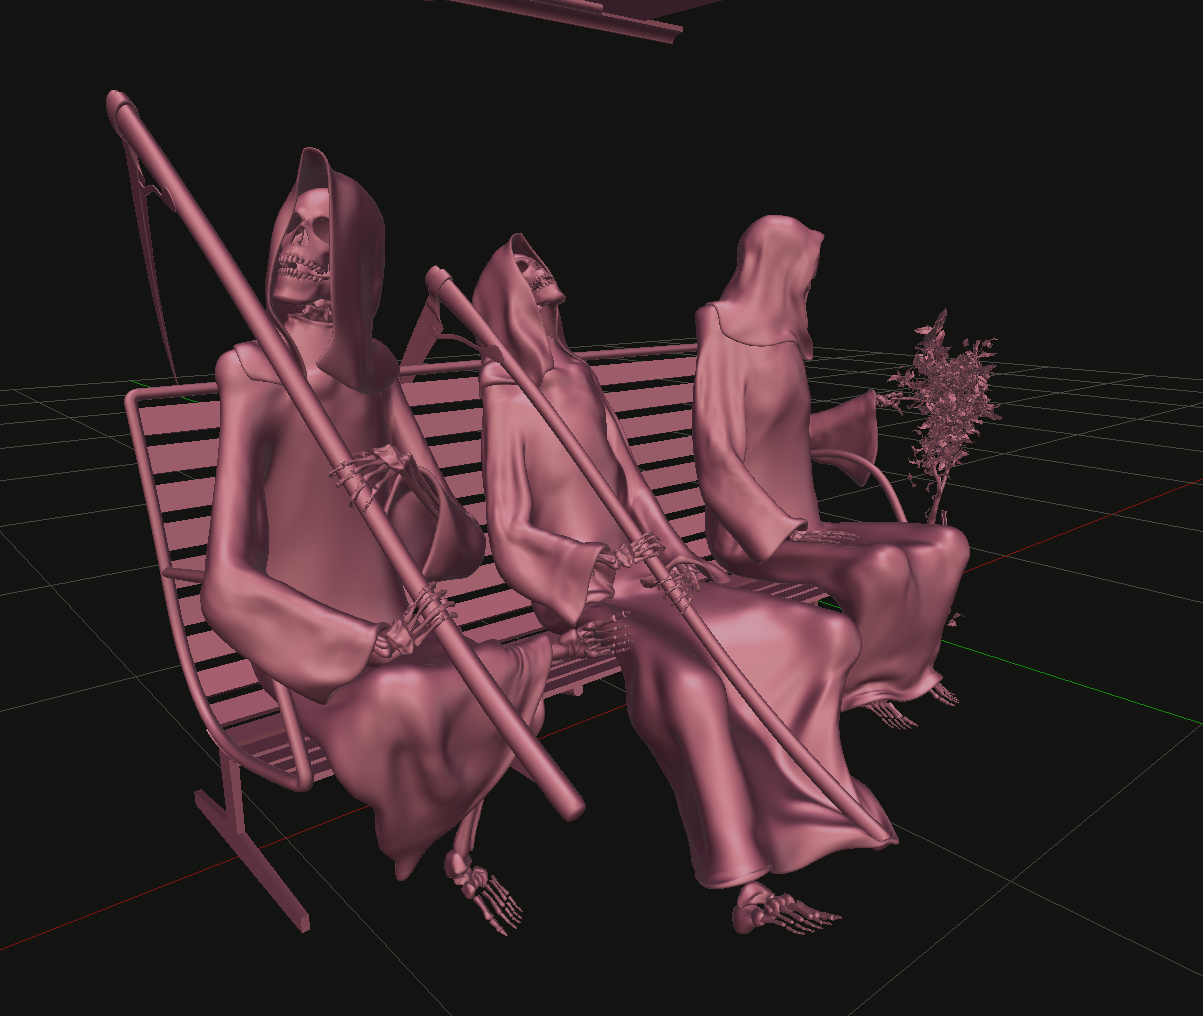
Here is my entry to the 2016 CG Cookie Halloween Contest :

"In modern times , as life expectancy increased due to advances in medicine and technology, the demand for grim reapers grew smaller and smaller"
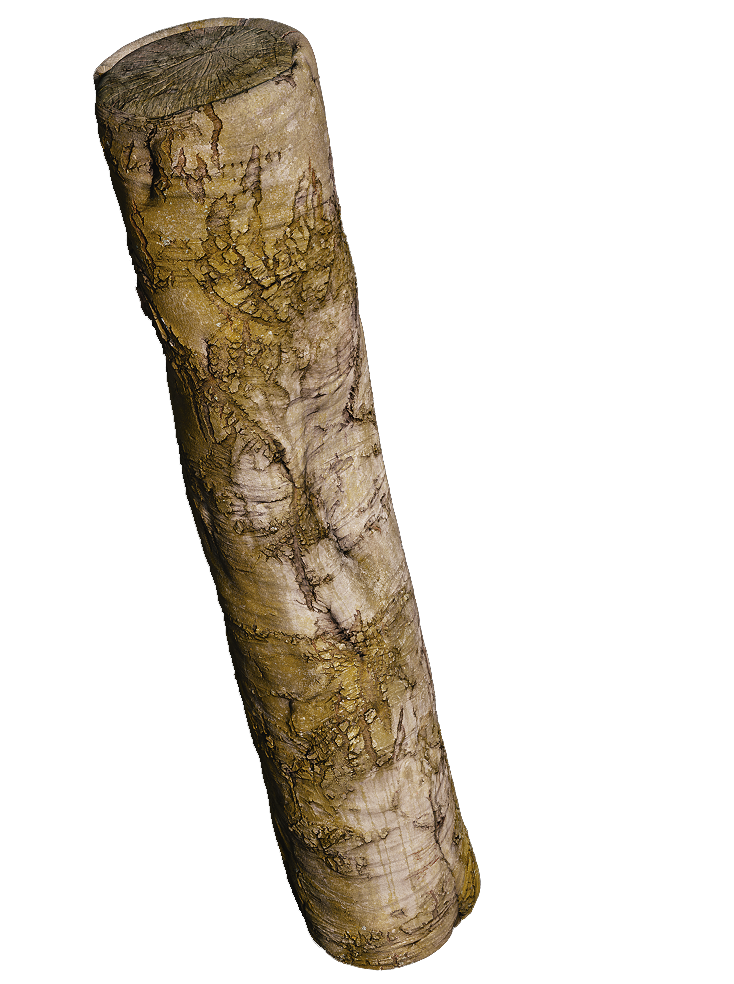
So today I had a play around with textures from Textures.com . I used a photo-scanned displacement (with subsurf lv6) and a normal map for the bark, and I made my own displacement map from an image of the end of a log for the cut ends. This is all new to me especially displacements so I just wanted to experiment.I did a small amount of sculpting to give it some shape quickly. While I was at it, I had a go at post processing in Photoshop as it is also something I have barely touched on. Here is a comparison with the original render (left) and Post processed on the right.
The 3d scans from textures.com only come with an albedo, displacement and normal map (not sure why) so the material setup is simple and missing AO, specular, glossy maps ect, but I think it looked pretty good for a quick experiment. Lighting setup is only a sunlamp as i was in a rush.
Just an update on what i've been up to recently other than trying to learn animation. Below are my two entrys to the CG Cookie contests from November and January. Both my entrys won First place which I was very shocked with but also very proud that my hard work paid off.
November 2016 - Grim Reaper Contest
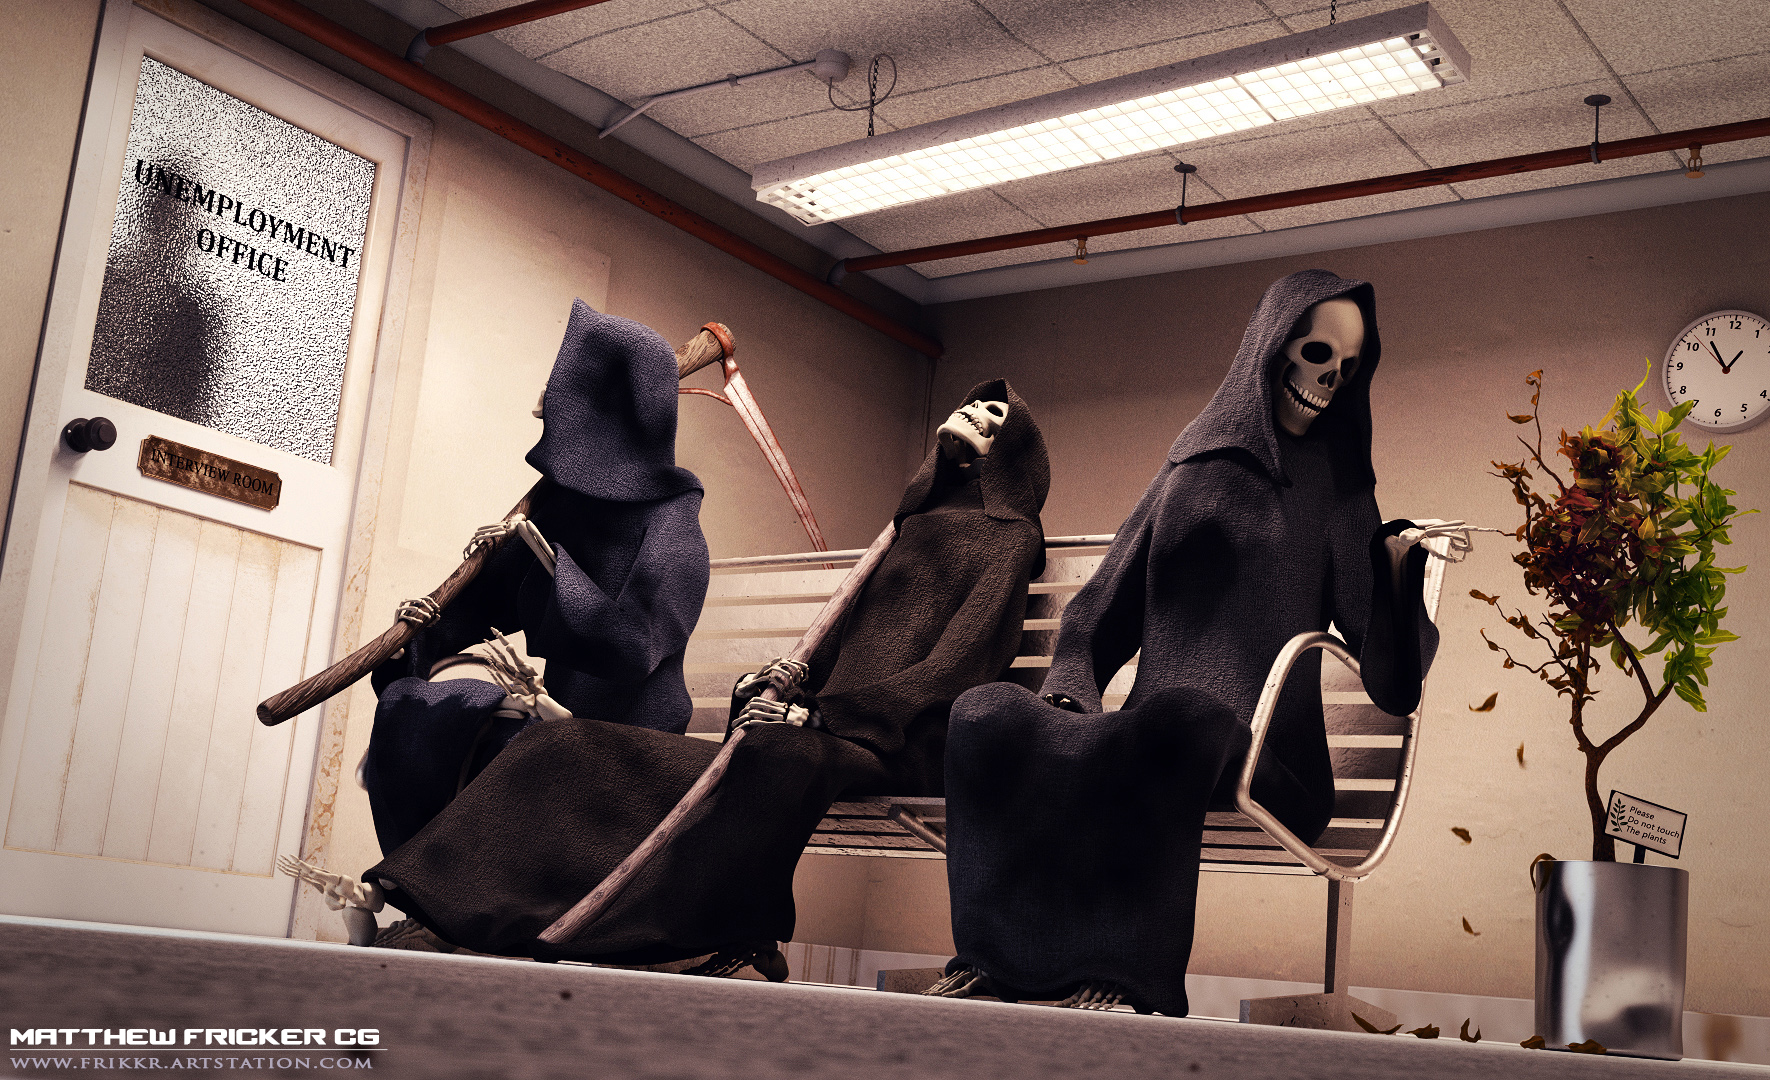
"In modern times , as life expectancy increased due to advances in medicine and technology, the demand for grim reapers grew smaller and smaller"
And the 3D Sketchfab fully interactive model :
https://sketchfab.com/models/f2bf9afedab44e7d899bce11814a523d

January 2017 - Re-design the winter Sleigh Contest
Rudolfs nose just didn’t shine bright enough on that fateful Christmas eve of 1908, and poor old Santa failed to spot the bridge through the thick fog. All the reindeer perished in the unfortunate tragedy which resulted in a very grim Christmas indeed.
Fortunately, Santa bounced when he hit the ground – as most jolly fat men do, and he survived to tell the tale.
So here we are, a year later , and Santas head elf has engineered him a brand new, steampunk sleigh. And don’t worry, Old rudolf still made it along for the ride….. well, sort of…

And the 3D Sketchfab fully interactive model :
https://sketchfab.com/models/704571fe592a4b0f93ced47c7696dd4c