Is the stress/shading issue shown in the screenshots fixable without a ton of remodeling?
I want to use a Blender conversion of a Howie Day model by Greg Ellingson in a personal project, but if the fix requires hours of work, I'll move on and use a different ship model instead.
I've tried flipping and recalculating normals. I've tried auto shading, shading smooth, shading flat and clearing sharp. I've tried removing loose verts, edges and faces, removing doubles, removing zero faces and getting rid of dispensables using the Instant Clean addon.
It looks like I would have to delete a fair amount of geometry and rebuild it, which is a deal-breaker for using this model. But I thought I would ask here just in case there's a simpler way to fix this.
NB: My modeling skills are infinitesimal; everything that I can do is based on repairing other people's meshes. I've only learned what I needed at the time.
I will try to attach a link to the original model, but since I'm not willing to spend more than an hour or two trying to fix this, please don't spend a lot of time working on a solution.

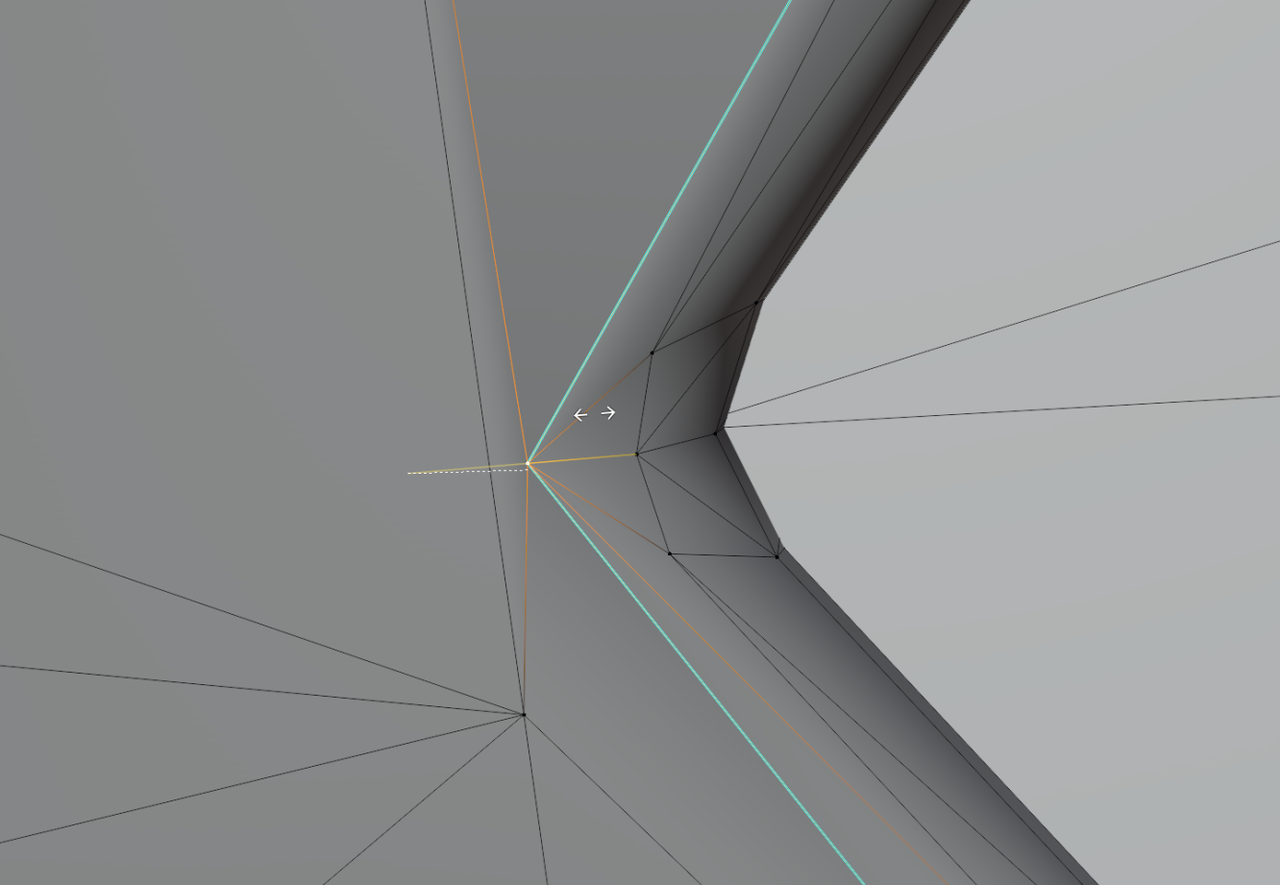
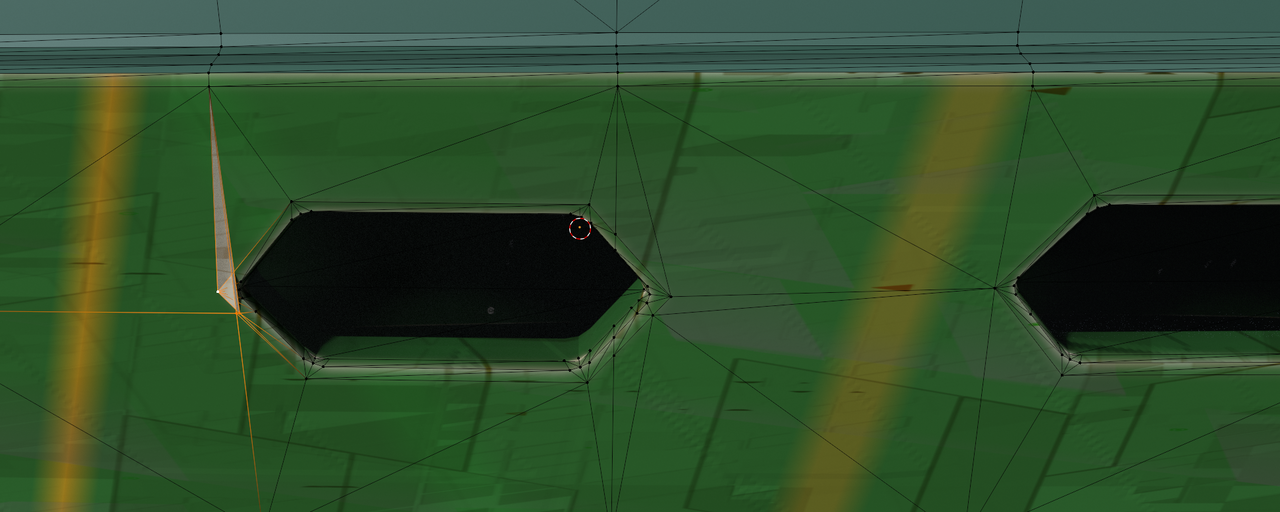
That geometry is super messy and bad. But at least is just three problematic parts that look very easy to solve. You have a lot of overlapping faces so it's just a matter of making them not overlap. You could try selecting the vertices and double tap G to slide them out of the way. At least it looks as if that is possible, you'd have to try and see. Also there might be interior faces so switch to face selection mode and see if you have very squashed faces where you'd think there's an edge there.
Thank you for the tips. Using what you guys said to try I was able to fix one of the windows in my screenshot, but not the worst two. After an hour and a half of tweaking geometry, I could only get partway on either of the other two windows.
At this point the time investment required for this model isn't worth it, so I will find another model or work a different storyline.
Thanks for taking the time to help me! I did learn some useful techniques so it's been a worthwhile effort.
Cheers!
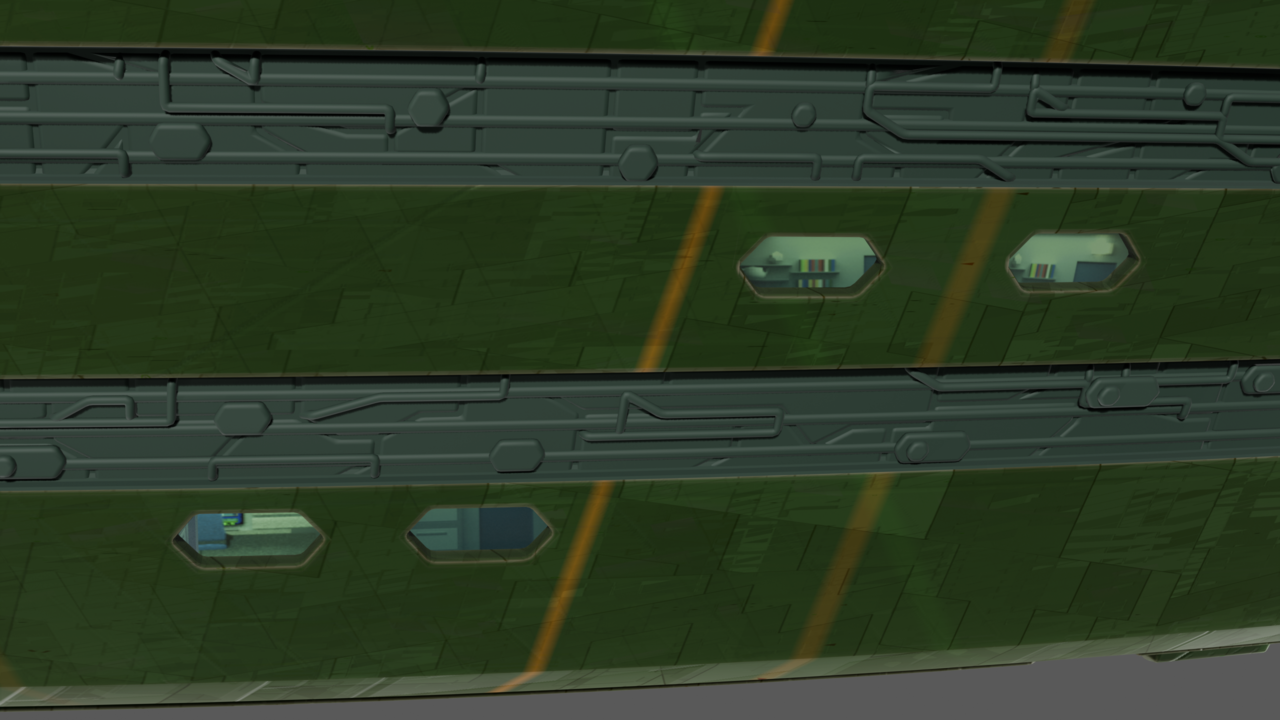
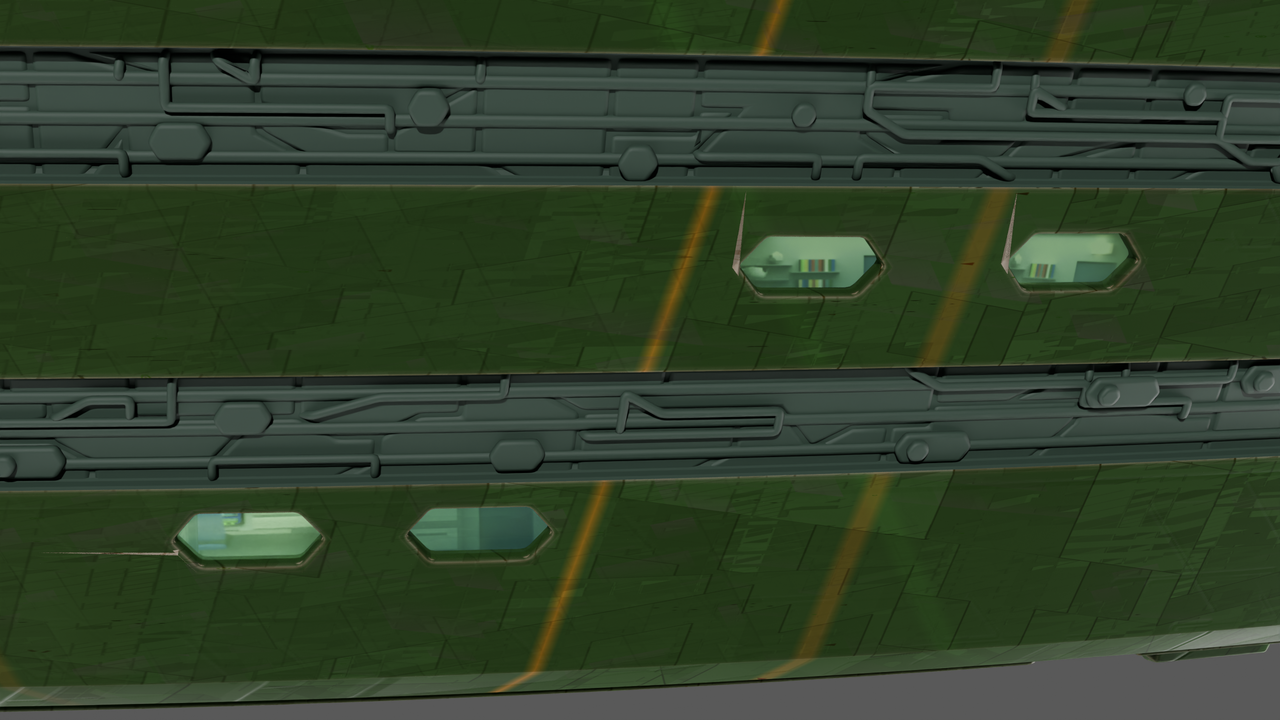
Here's my best effort so far.
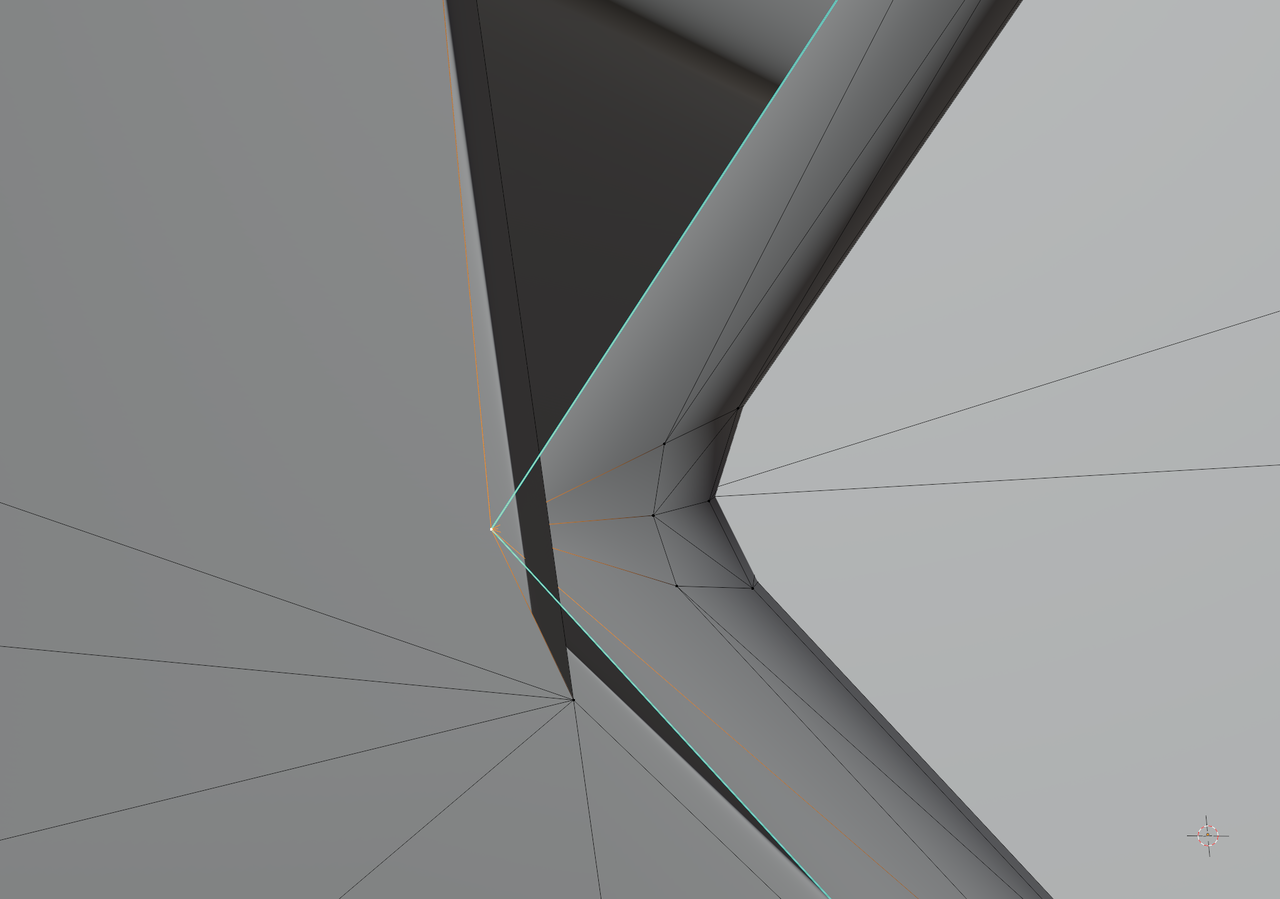
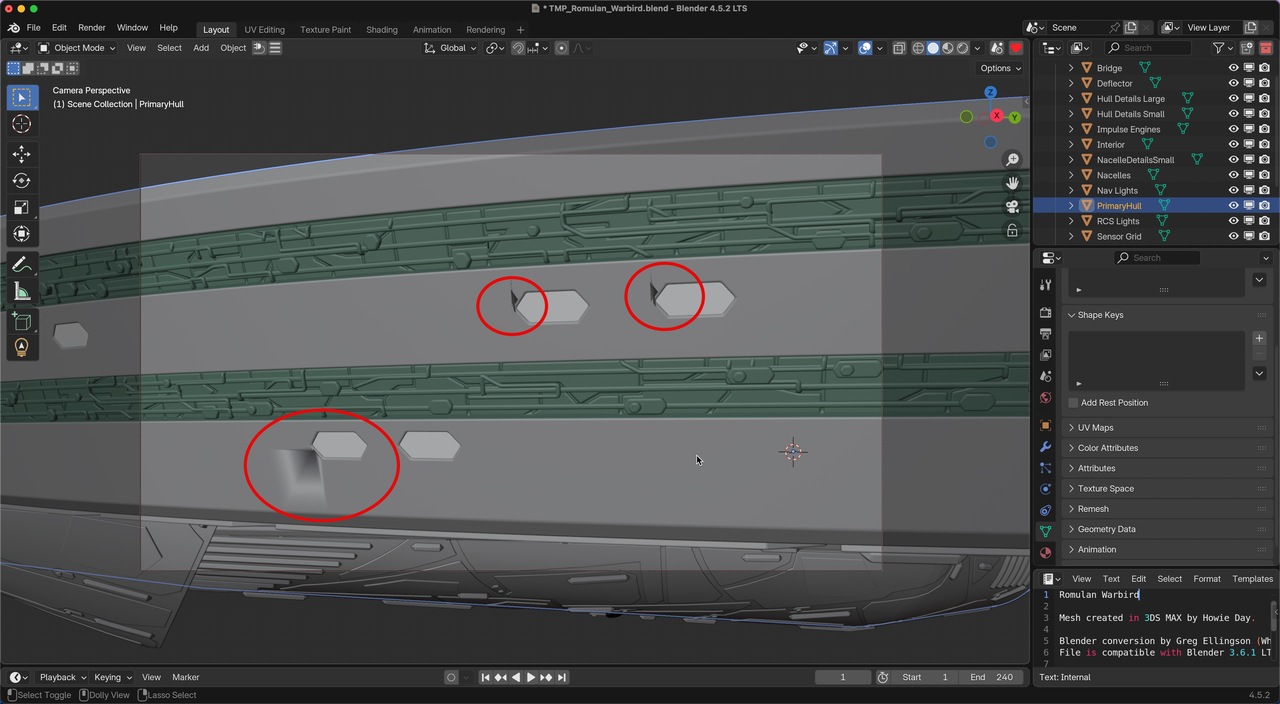
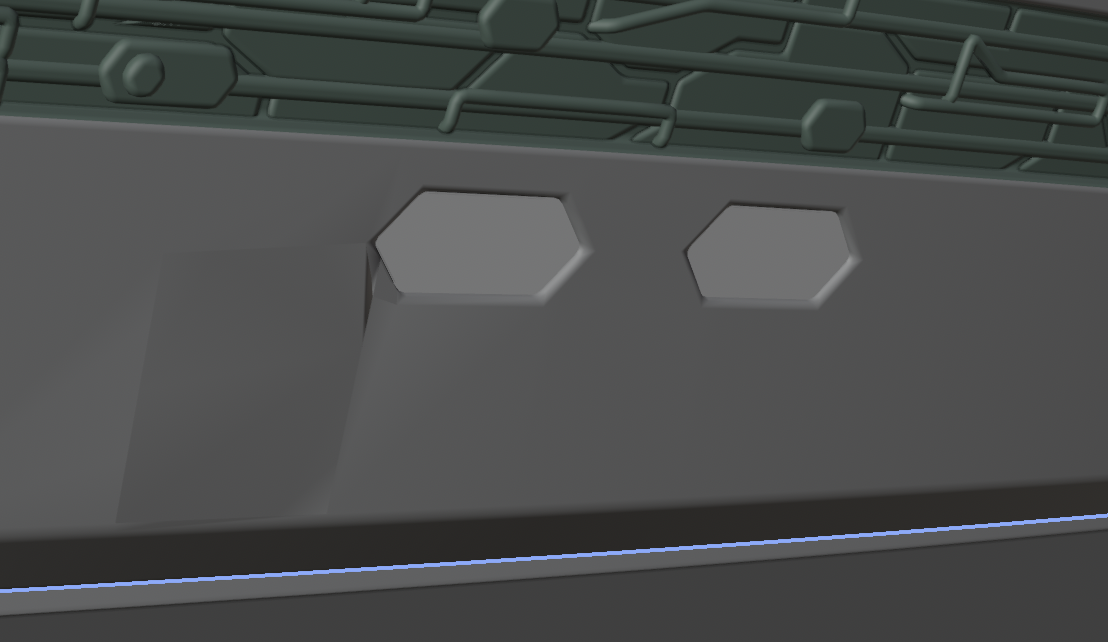
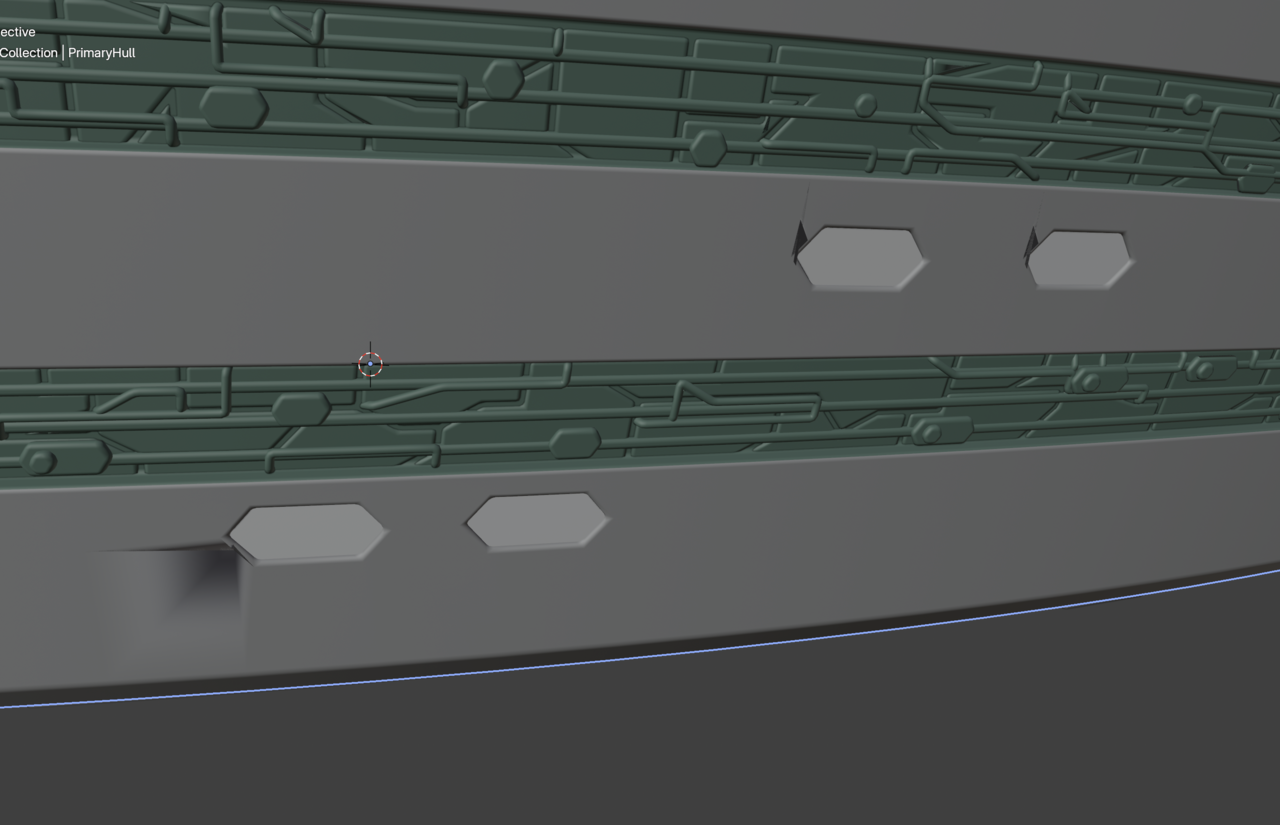
The worst window in Object mode:
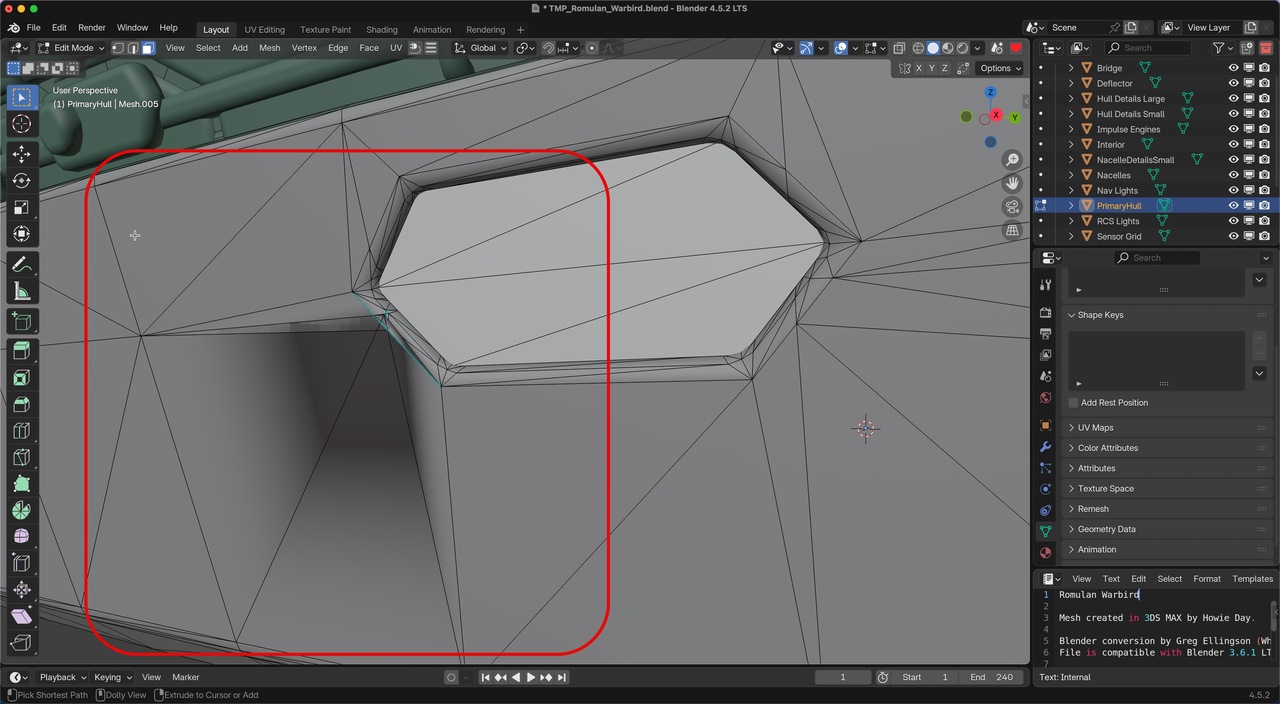
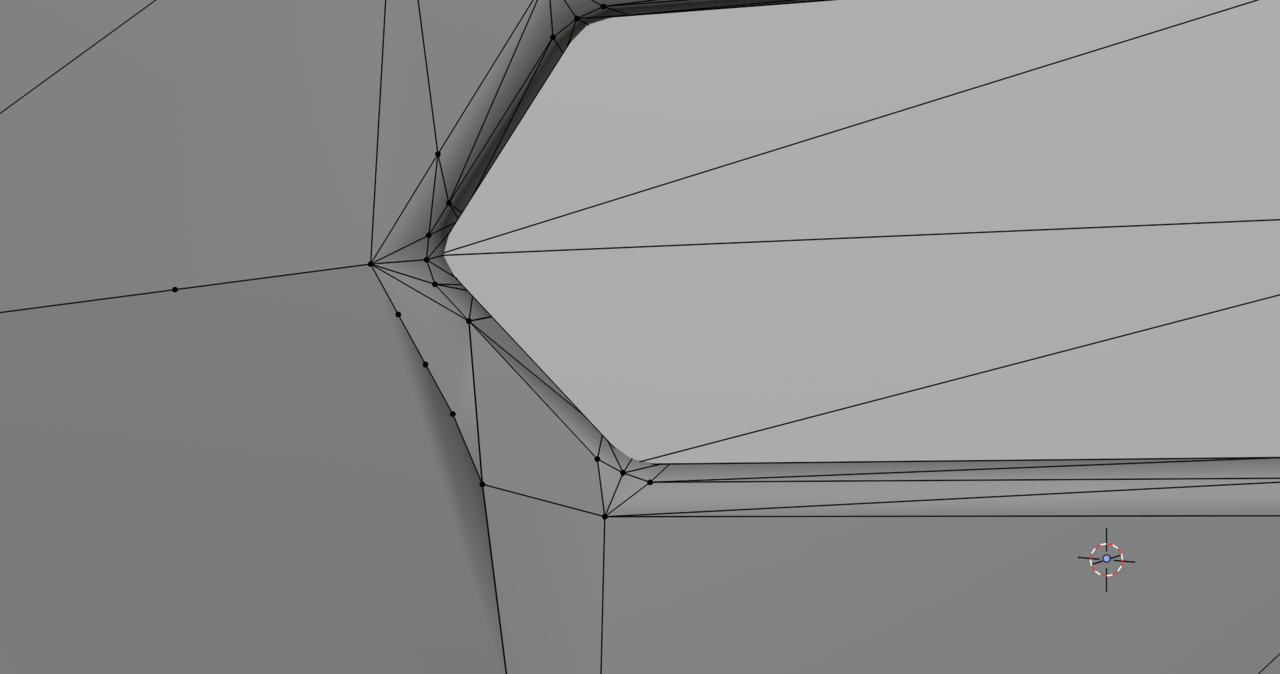
The worst window in Edit mode. I had to subdivide to get rid of a lot of the horribleness:
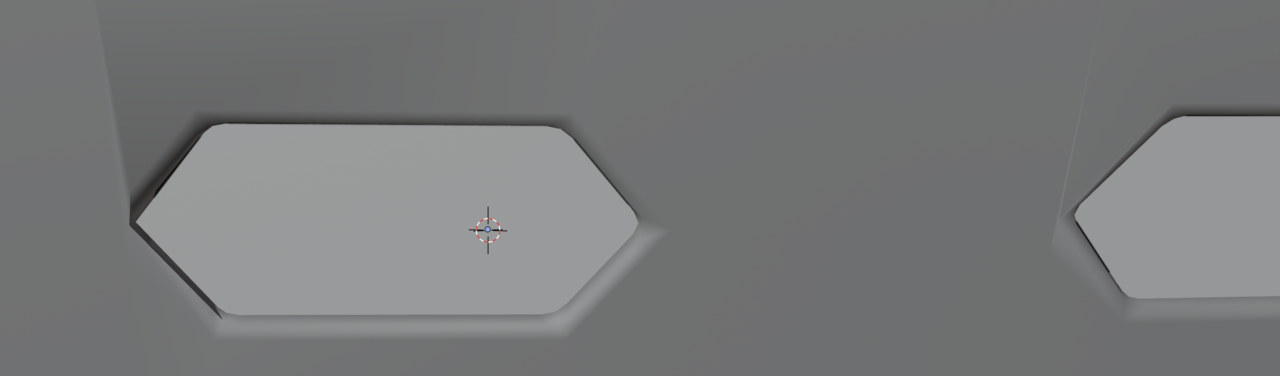
The other two windows in Object mode:
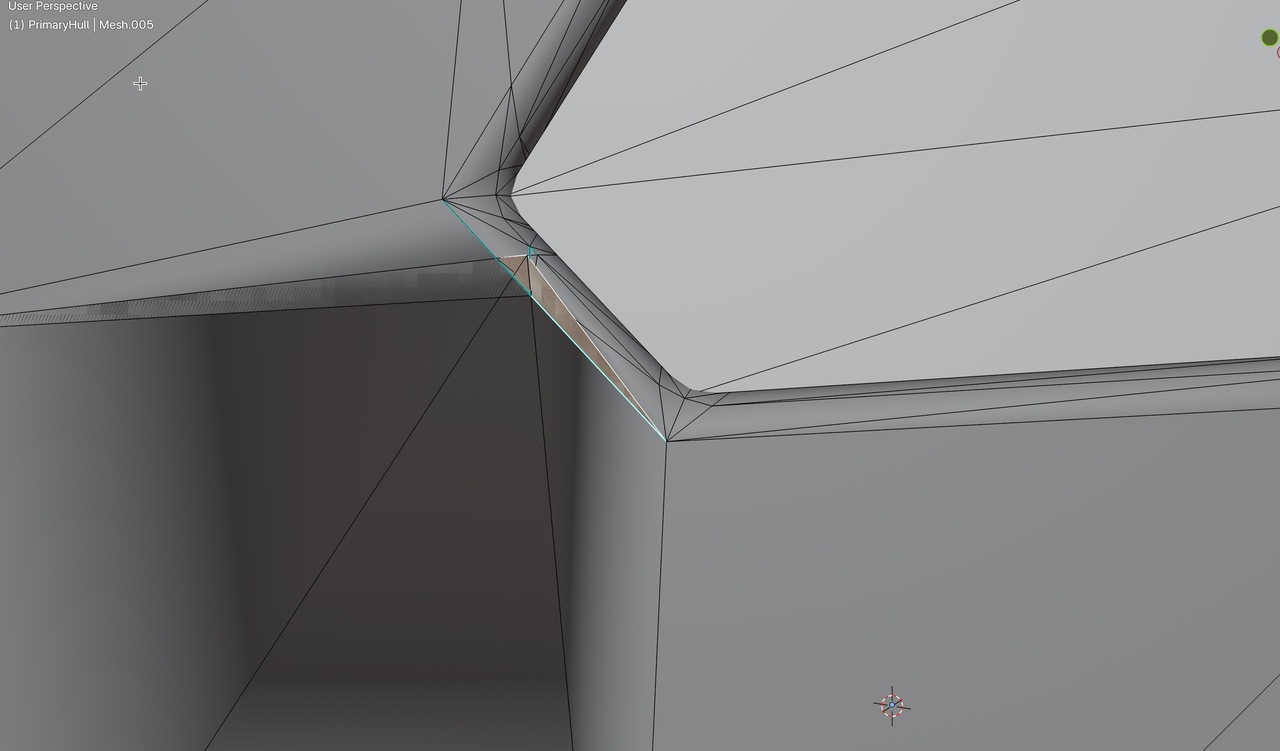
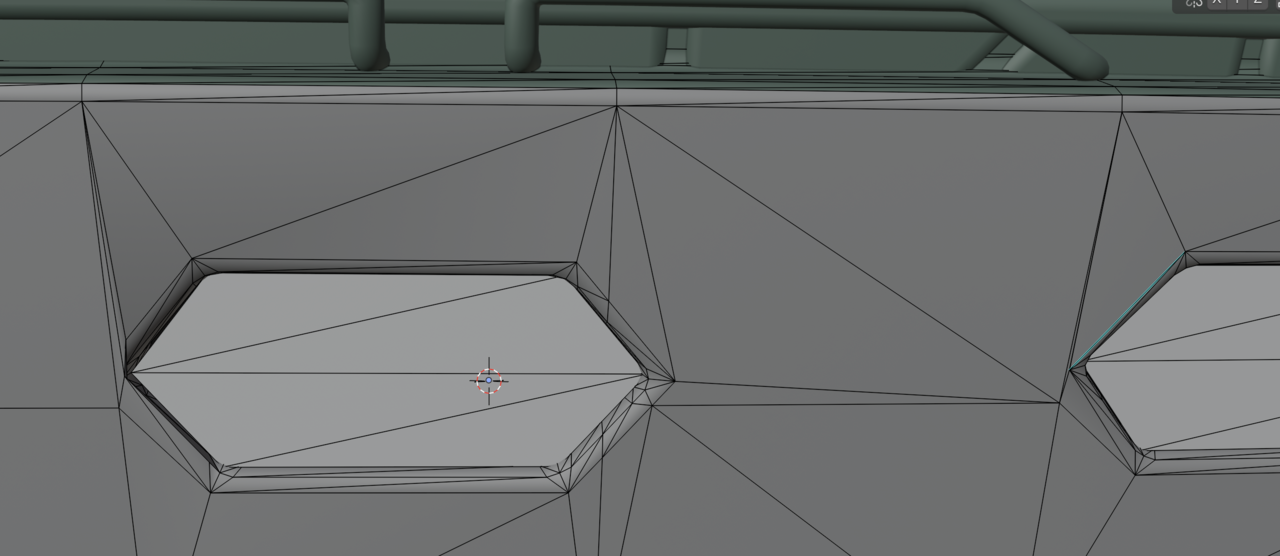
The other two windows in Edit mode:
I felt like I was moving toward success by getting this far, but I hit a dead end both for ideas and execution.
Repairing meshes at this level of detail is a struggle for me. I'm not a 3D artist that models. I do set design and animation. But I have found out that some basic skill at modeling and texturing is required to get things to look good when I'm using someone else's models. This one, though, has exceeded what little knowledge and skill I possess!
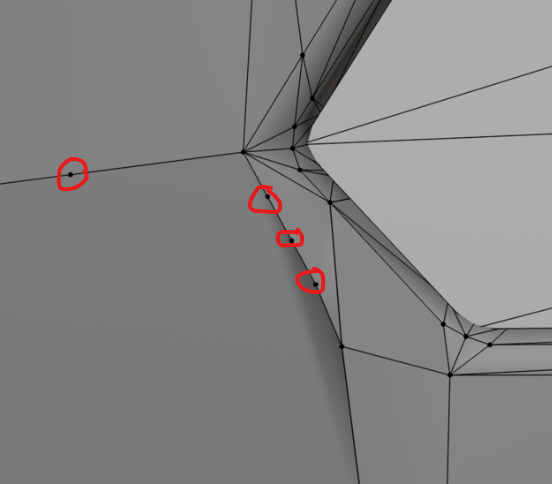
I see at least 4 verts that don't seem like they're connected to anything other than the straight line they're on, 3 of which are on that edge with the shading issues. are you trying for extra low poly model? if not, ideally, you wouldn't want more than 5 edges connecting to a single vert becaue the more you have there, the more pinching and artifacts get introduced. (or is this already triangulated?)
Hey Jeff,
I don't have any experience with imported Models from other Programs, but Clearing Custom Normals Data can also help (getting a fresh start, as far as the Normals are concerned). For instance here:
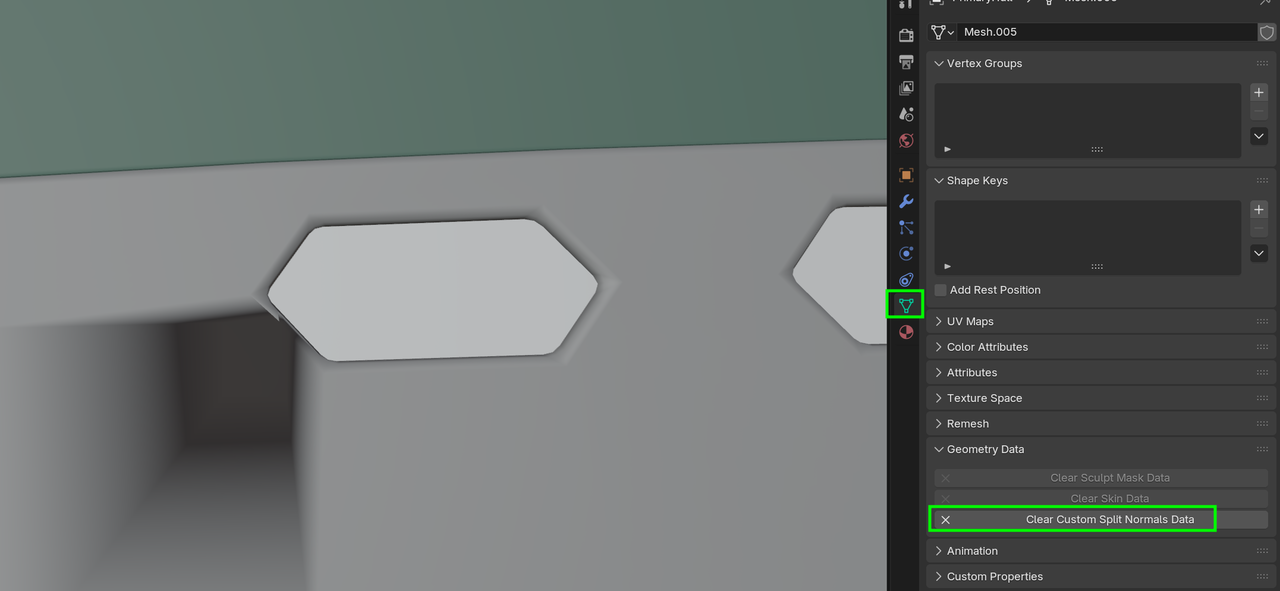
Results in:
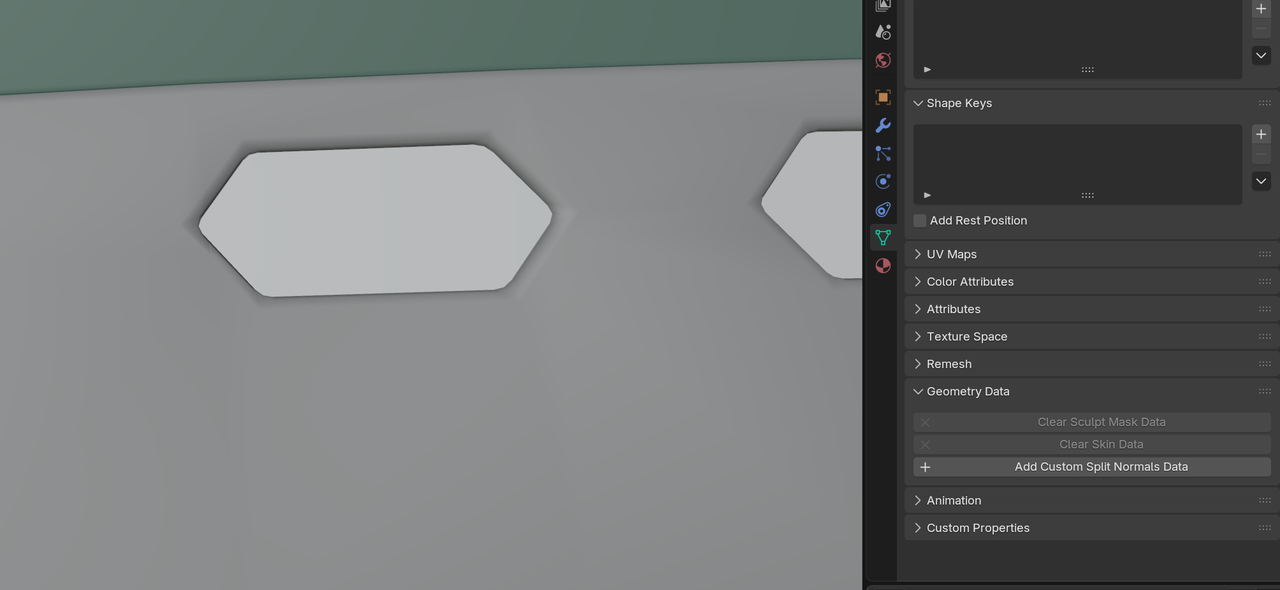
You might still need to Slide some Vertices around, but it'll help.
New info much appreciated! My replies:
@ Grady, @ Omar
I see at least 4 verts that don't seem like they're connected to anything other than the straight line they're on, 3 of which are on that edge with the shading issues. are you trying for extra low poly model? if not, ideally, you wouldn't want more than 5 edges connecting to a single vert because the more you have there, the more pinching and artifacts get introduced. (or is this already triangulated?)
As Grady points out, these bad boys are just hanging there causing trouble, making those faces ugly, You can dissolve them with Control + X, sometimes it doesn't work so you may need to delete them for reals.
I added those extra verts by subdividing the face. After moving some verts around with double tap G, the window frame improved but I still had big square ugly shading. Subdividing let me shrink it down to small sliver ugly shading. The model's materials hide the shading enough to make it usable. I'm not going for a high or low poly model. I just want it to look good in my renders and animations. Based on Martin's a reply, I will start over with the custom normals cleaning and see if I can avoid subdividing.
@ Martin
I don't have any experience with imported Models from other Programs, but Clearing Custom Normals Data can also help (getting a fresh start, as far as the Normals are concerned). For instance here:
That's impressive and certainly good enough for my needs! Did you make any adjustments before clearing the custom normals data? (And I had to reduce the clip start to 0.001 to be able to see close enough to access some of the vertices and move them around. I set it to 0.1 afterwards to continue working on the model's materials.)
I'm going to start over and try just clearing the normals data. Fingers crossed! 🤞🏻
I apologize for the huge font in the quotes. I don't see a way to make it smaller. And apologies if I tagged someone who's not involved in this thread. I didn't see the name I wanted in the drop-down list, so I just used first names.
My tag is spikeyxxx, so ![]() spikeyxxx (no Space after the @, but always at least 1 Space after a tagged name).
spikeyxxx (no Space after the @, but always at least 1 Space after a tagged name).
But I read everything anyway, so it's not really necessary to tag me; Martin or Spikey are totally fine as well.
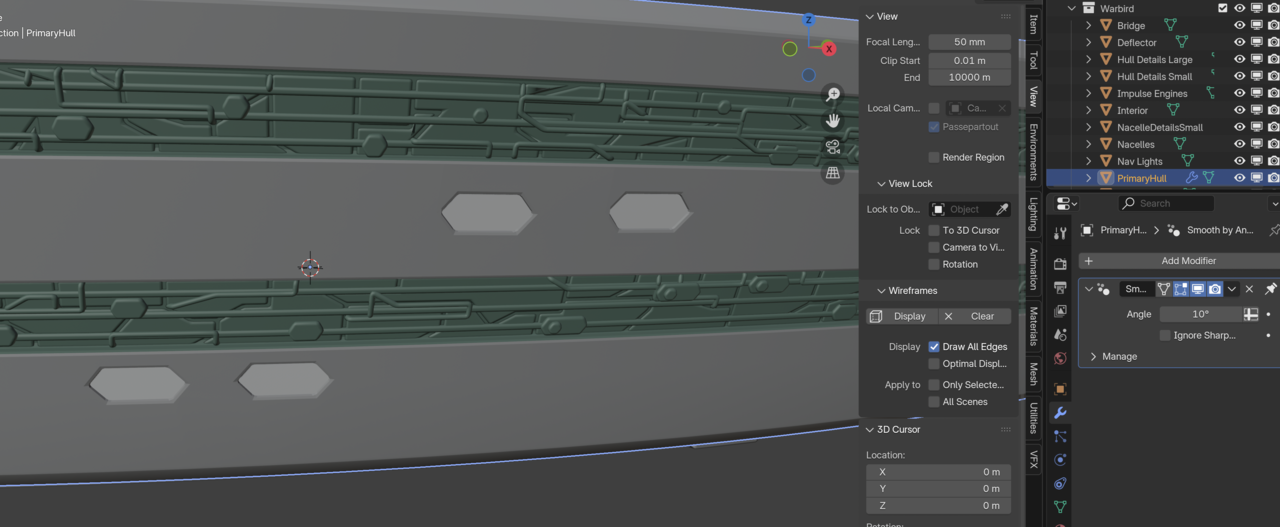
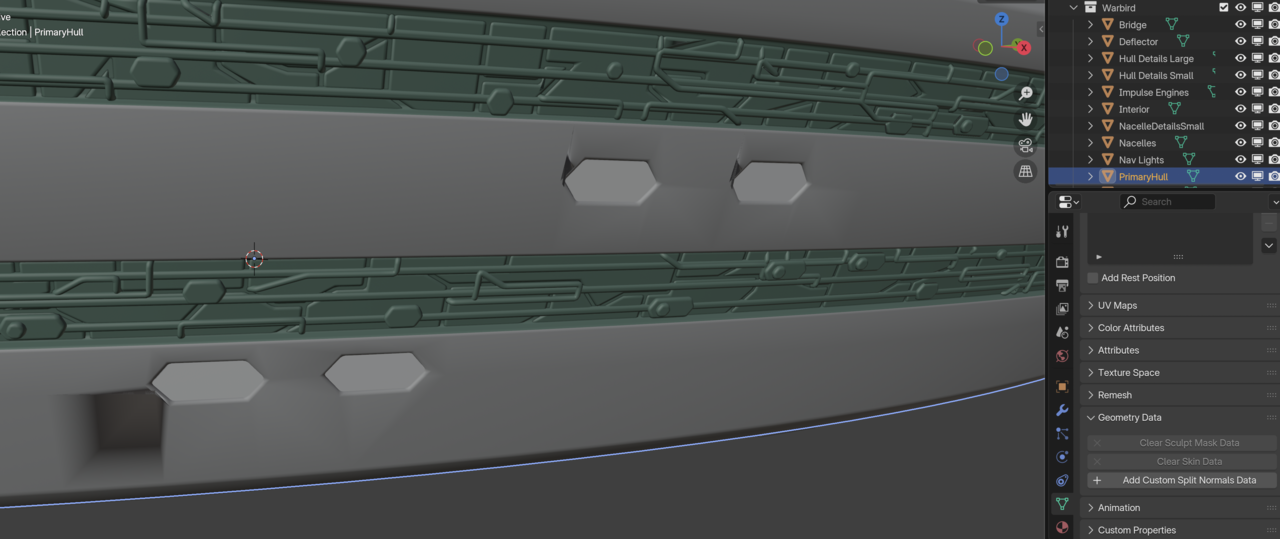
I'm using 4.5.2 LTS and this is what I get when I open the file and select the PrimaryHull object, then select Clear Custom Split Normals Data:
Open the file:
Clear the custom normals data:
It's not exactly the result I expected. 😀 I thought maybe an addon might be borking it, but I started Blender in factory startup mode and I got the same result.
Success!
Steps for the really bad window:
Oh no!
Cycles isn't playing nice with the geometry.
Eevee Test Render:
Cycles Test Render:
Is this happening because Cycles raytraces all of the nooks and crannies of the geometry and Eevee only raytraces what the camera can see directly? I'm going to add a light probe for the Eevee render and see if I can duplicate the Cycles result.
Thanks, Martin!
May I get an explanation for what Merge at Last does and what led you to think of that operation as opposed to deleting overlapping faces and sliding verts?
I was able to fully get rid of the last of those artifacts in Cycles by doing the delete-slide thing. But your method seems simpler and easier if I can understand why you chose it.