Sorry to bother you, but I’m having some difficulty w/ the command functions of course section: Blender Basics An Intro. to Blender 3D 4.5 LTS— (Lesson 04) Adding, Deleting, and the 3D Cursor. Specifically, the section of Lesson 4 dealing with the tool in the “Toolbox” that allows you to add primitive objects like a cube, cone, cylinder, and two different types of sphere. I have no problem adding a cylinder (or other primitive) to the 3D viewport. My problem lies with the “snapping” of one object to another. If I imitate what the instructor does in lesson 04, I can generate a sphere, and then a cone. I can hover the tool over the cylinder and project the placement grid (curser) over the cylinder. I can place cones, on the top, bottom, and sides of the sphere, but they do not connect (snap) to the cylinder like they seem to in the video. They are still separate objects, close in proximity, but the cones are not attaching to the cylinder’s surface. Can you help? What am I doing wrong? An example of what I’m talking about is circled in red, and attached below.
Thank you for your assistance in this matter.

Hi Andy AAeJax ,
The problem is, that the default behavior is, that the Cone is being created from the Corner and that is, what is being Snapped to the Surface of the Cylinder. (Hold ALT to create the Cone from its Center).
(And please add a proper screenshot next time and not a photo of your screen.)
Hello AeJax,
I appreciate the help, but I'm afraid I still don't understand. Do you mean hold "ALT" so that the cone starts at the center of the cylinder (example below)? When I do that, it looks nothing like the example(s) in the video. 
No,
When you hold ALT, when creating the Cone, it'll start from the Center of the Base of the Cone, instead of at its corner. You can see this more clearly from tiop View:
Look at this Lesson again from the beginning and if you then still get it to work, forget about it; in my experience, you play with it once, when learning about this Tool and then never use it again (it's not very practical), so your not missing out on anything 😉
Thanks Spikey and Omar Domenech, I appreciate you getting back to me so quickly. I’ll look over the lesson tomorrow, and see if I can correct my mistake— I have been holding”ALT”, but maybe there was a step I missed. I’ll do as you say, review the material, and not get hung-up on the details. I was just afraid that if I didn’t master this, I wouldn’t be able to render anything in blender- good to know that at least with this particular tool, that is not the case. Thanks again for all your help.
Ah ok, I recreated this. I have thge cylinder here, and I have selected my Add tool, and switched it to Add Cone.

I place my cursor over the face where I want the cone to snap.

If you click and drag, it will scale non-uniformly from a corner point...

but if you hold down Alt, it will scale from the center

If you hold down Alt and Shift, it will scale from the center AND scale uniformly

Click to commit the area of the base, and then move your mouse outwards to give the cone height


Hope this helps?
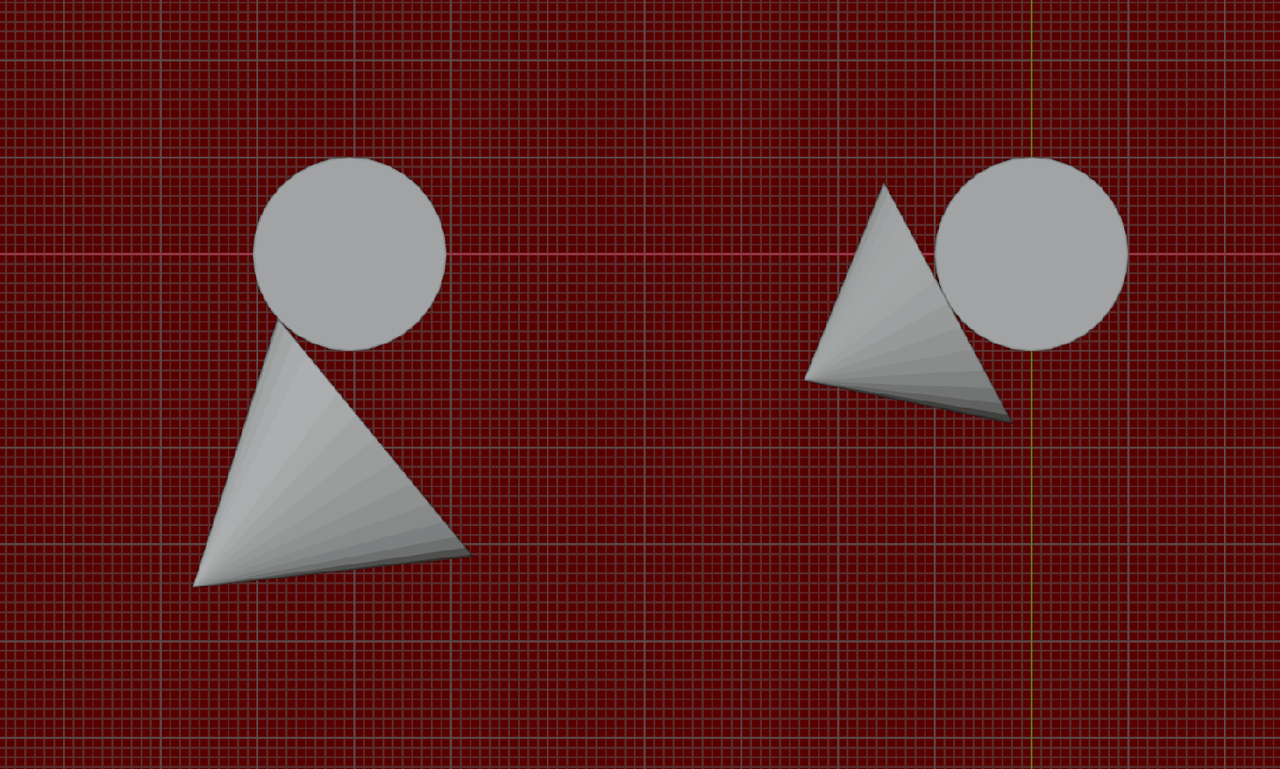
Hello Paul Caggegi,
I really appreciate you taking the time out to help me. Judging by the example you sent me, I think that I am doing it correctly. Like you demonstrated-- I started with a cylinder, went to my "Add Tool" and select the "Add Cone", placed my curser over the area of the cylinder I wanted to "Snap" it to, left clicked and dragged it diagonally from the corner point while holding "Shift" and "ALT to scale the cone, uniformly, and from the center. I then left clicked to commit, and moved my mouse "outward" to heighten the cone. My result is as follows--  I mistakenly thought that the "snap" function meant that the cone should contour, and attach, itself to the cylinder-- That they would become, one, solid object. I guess I was mistaken. What do you think? Did I do this right? Please let me know when you can. Thanks again for the help!