How do I fix this issue? After using Grid Fill I’m getting this bulge at the four corners. If you look carefully, you can see it, and even after applying subdivision it’s not getting fixed.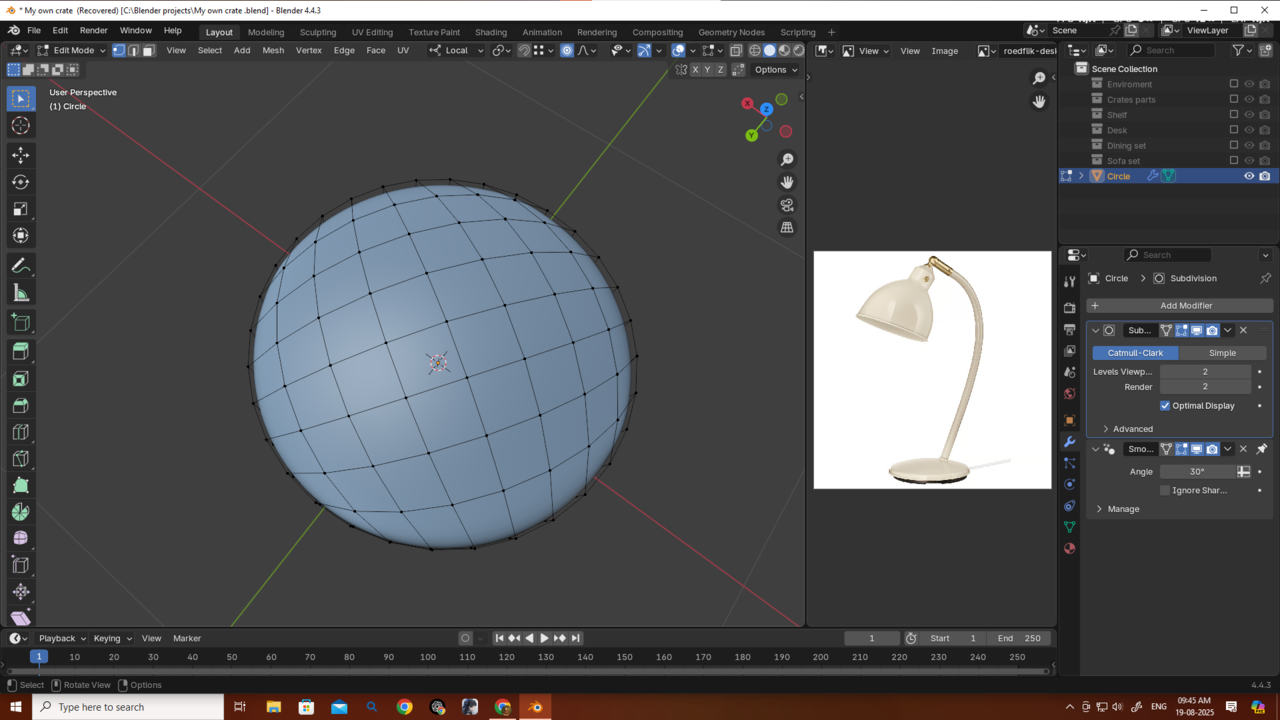

I totally get it....thaks a bunch guys...i will give it a shot tom...if I fail again I will move on as omar said...and try to be better...but let me clear one thing...
I probably have same amount of vertices in the wire and the lamp so if I convert the curve to a mesh and then disable or delete the subdiv and then join them by bridge faces...it will look like a solid obj....am i right? Although i will start from scratch again.
U guys are so good... thanks Omar and martin...
That's the tricky part, to get the shapes to merge seamlessly, even though they are different in their vertex count, now you have to make them similar and get the shape you want out of those vertices. That way make it one solid object that is optimized to get the desired shape out of just enough number f vertices. Because if it's too many vertices then it's so difficult to control.
Thanks Omar....
Now i am feeling 3d is actually very hard thing to master...but it's just beginning for me only 2 months....I won't give up...
Yes, 3D is hard, but there's a bunch of people that know 3D, so hard is no reason to stop, it's not like it's impossible, otherwise no one would know3D. Most things in life are hard, specially the ones that are worth doing. The difference between people that feel good and accomplished is that they didn't stop when everyone else did.
"...so if I convert the curve to a mesh and then disable or delete the subdiv..."
To be clear; you don't need to Convert the Curve to Mesh, it was just used to guide the 'wire' Mesh.
Delete the Subdiv Modifiers (don't disable them).
Converting the Meshes to Mesh, is a trick to Apply all Modifiers at once (that's why the Subdivs had to be Deleted first).
When You Join the Objects with CTRL+J, all Objects get the same Modifiers as the last Selected one, that is why you had to Apply all Modifiers before Joining.
It's a bit confusing when you're just beginning, but if you persevere, 'all the pieces will fall into place'.
Good luck on your 3D journey🍀
Hello Martin and Omar,
Thanks a lot, guys… even saying thank you doesn’t feel enough.
I tried making it again, and here’s the result. I still wanted it to look like a single object, with all the meshes blending smoothly together. So, I connected everything in Edit Mode. I started with a 14-vertex circle and managed to connect them, then added Subdivision afterward. But the vertex/triangle count became massive because of the wire mesh.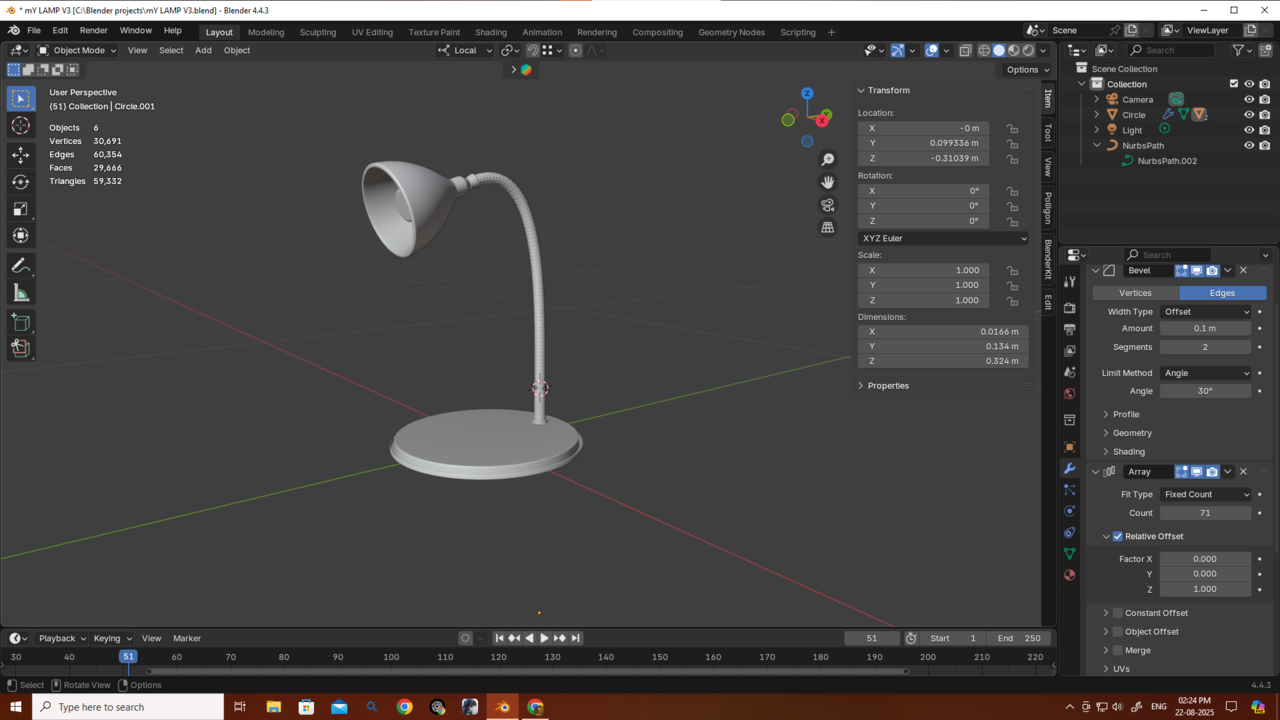
Since I still wanted it to look like one object, I made some changes and optimized the meshes a bit so they’d look like a single obj and blend together better but did not connect them . I also reduced the resolution of the curve object.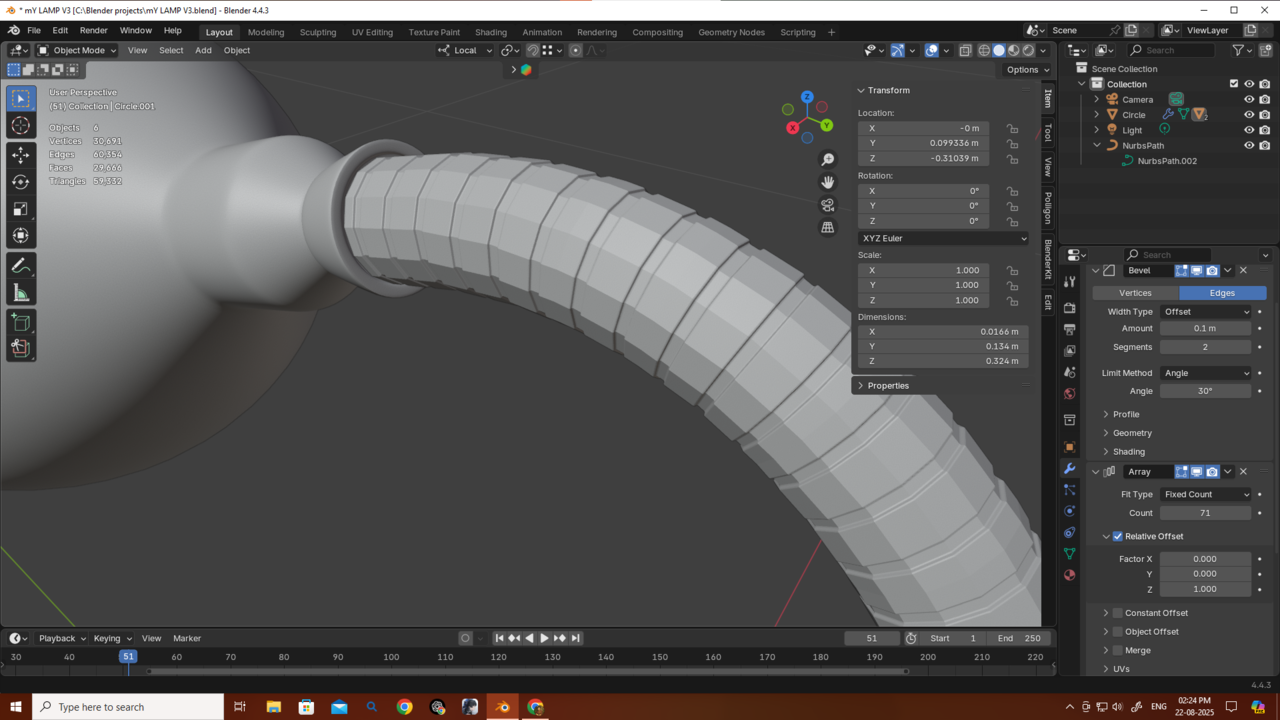
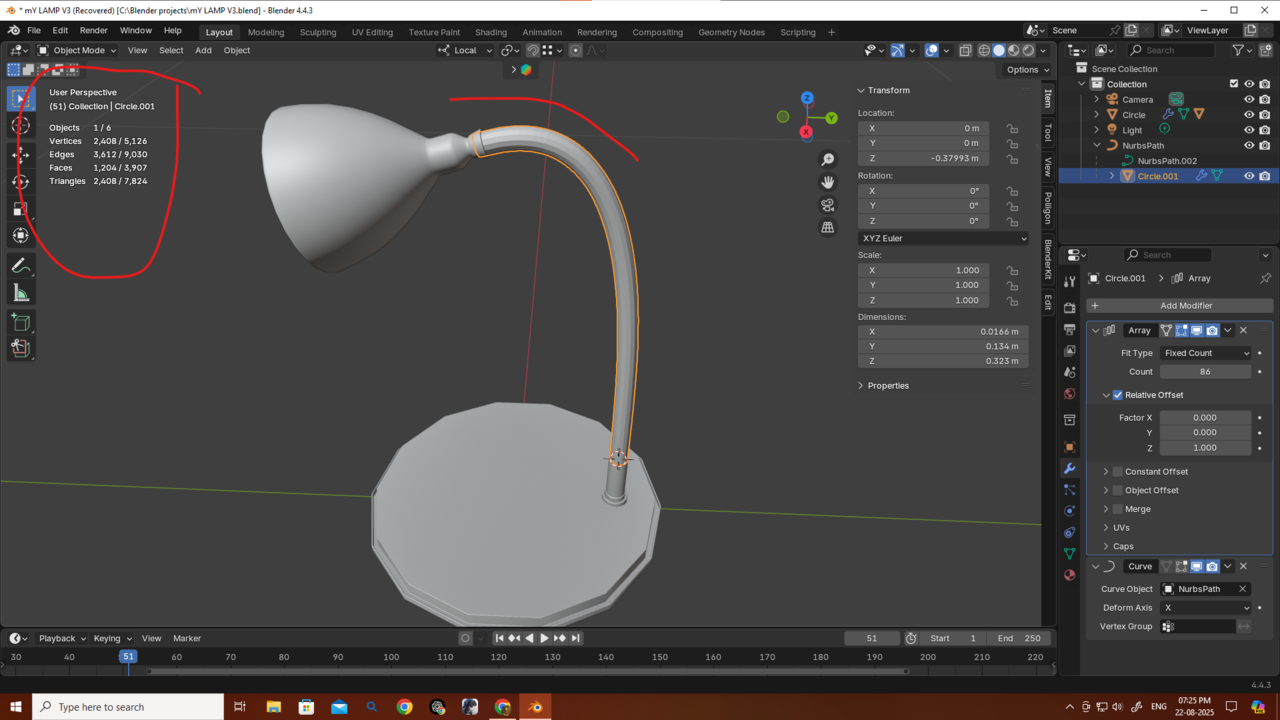
I also experimented with using just bevels (without subdivision), but since I started with only 14 vertices, it didn’t look that good (as you can see in the picture).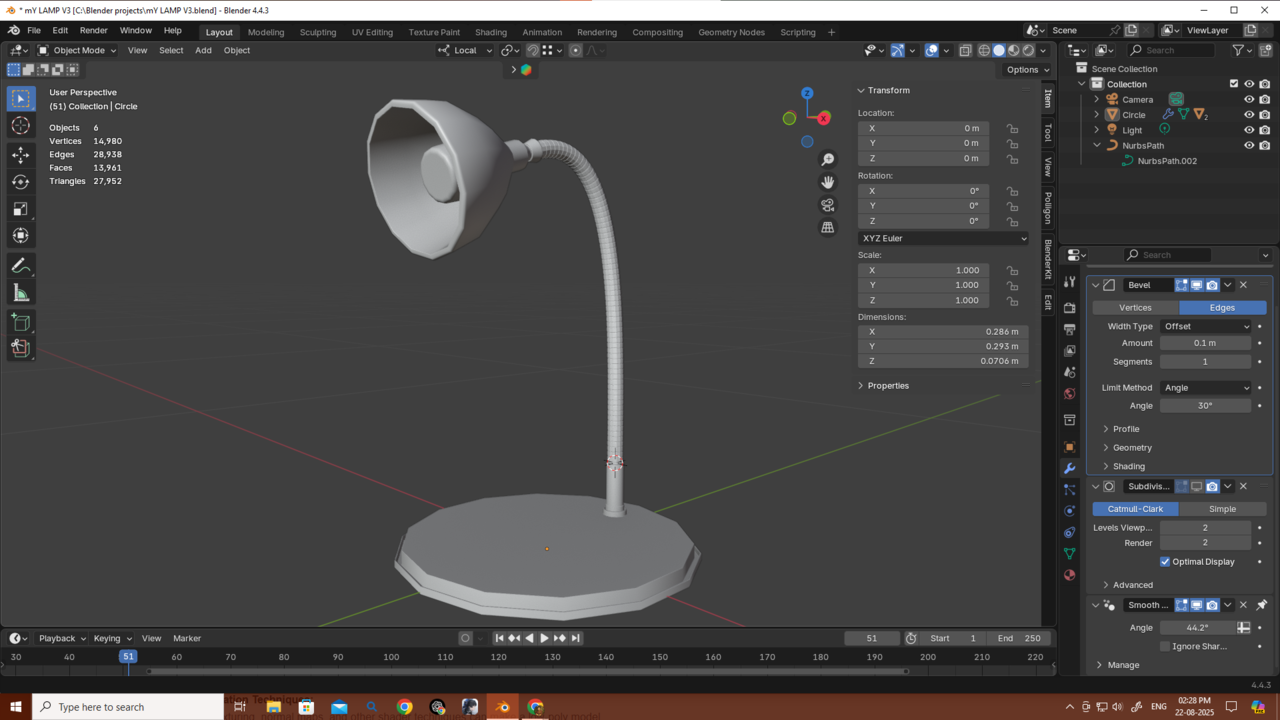 If I started with 32 or more vertices, would it look better? And in that case, would I even need to manually connect the vertices if I just used Bridge Faces?
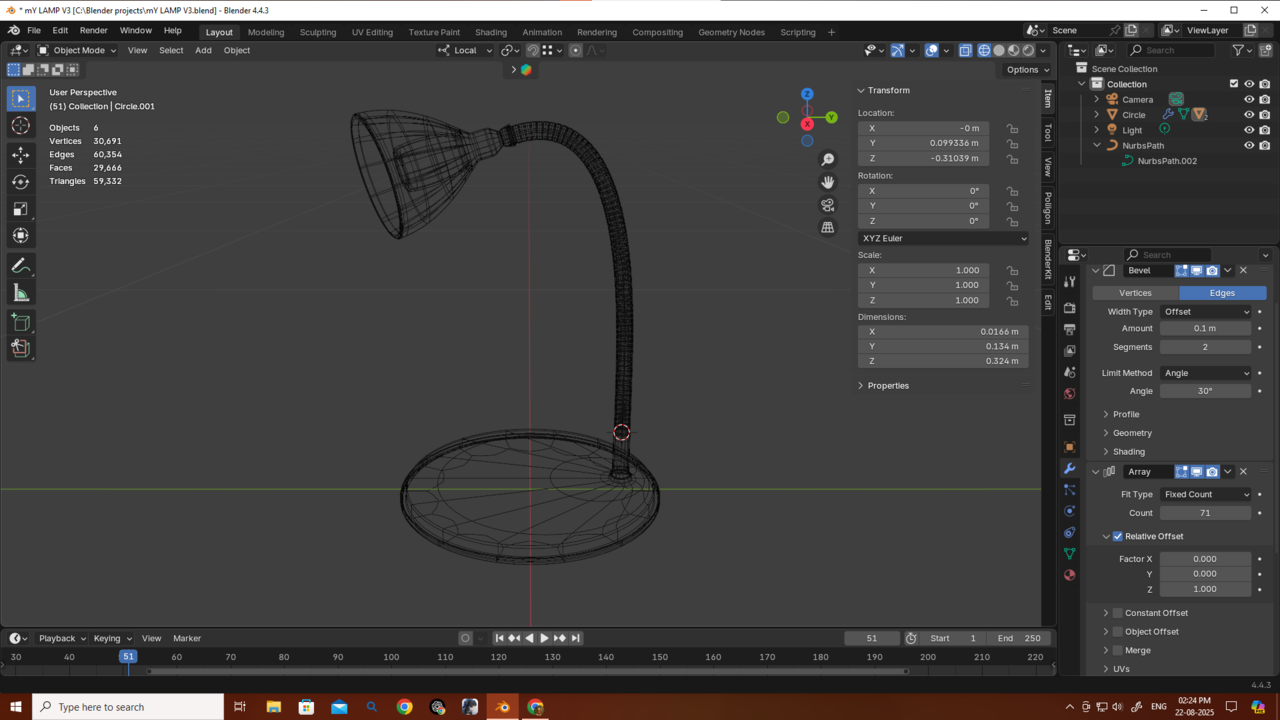
My main focus is game environment design, and I’ve heard that low poly counts are really important for optimization. I also heard about remeshing, but I’m not sure—if my object isn’t one solid mesh, will remesh even work? I don’t know much about those topics yet, but I’m curious.
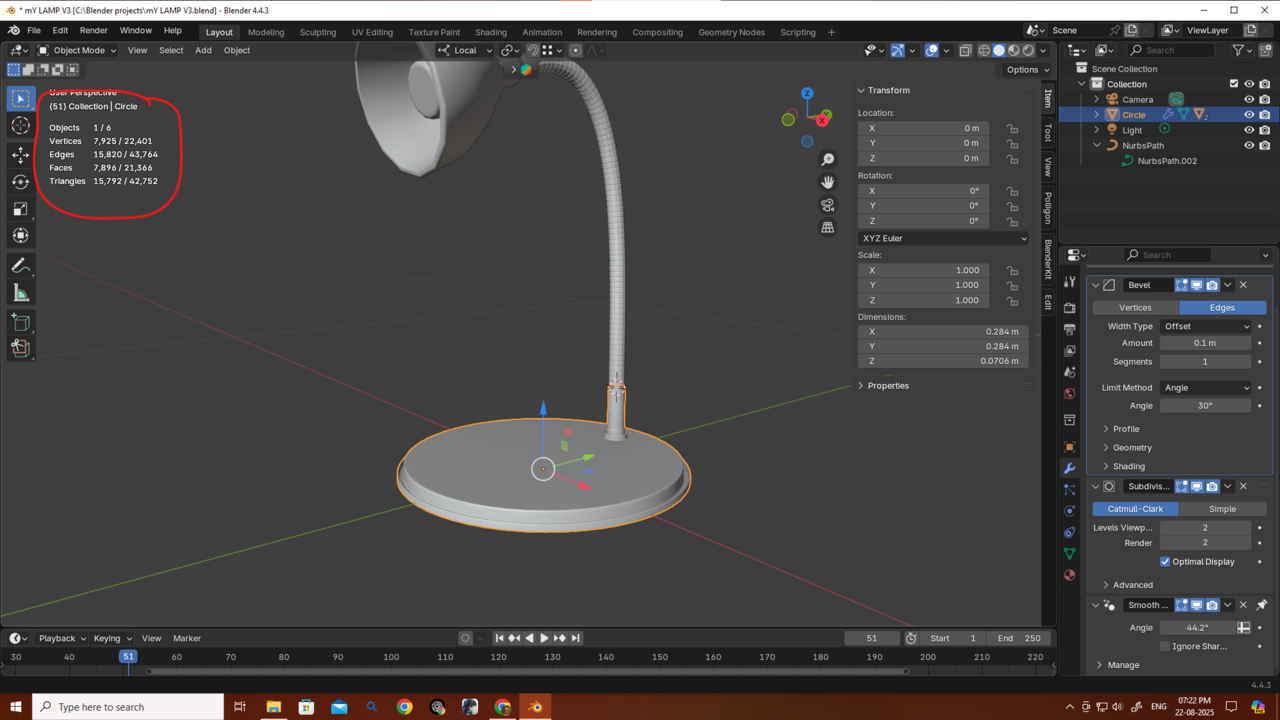
Also, you can see my poly count here—do you think it’s really bad at the moment? It’s just a lamp, and in a game it would probably just sit somewhere in the environment without being interacted with. For that kind of use, I know it could be made with fewer polygons, but right now I don’t really know how to simplify it.
So I’m asking—please reply and help reduce my curiosity! and thanks again.
Looking good Deb!
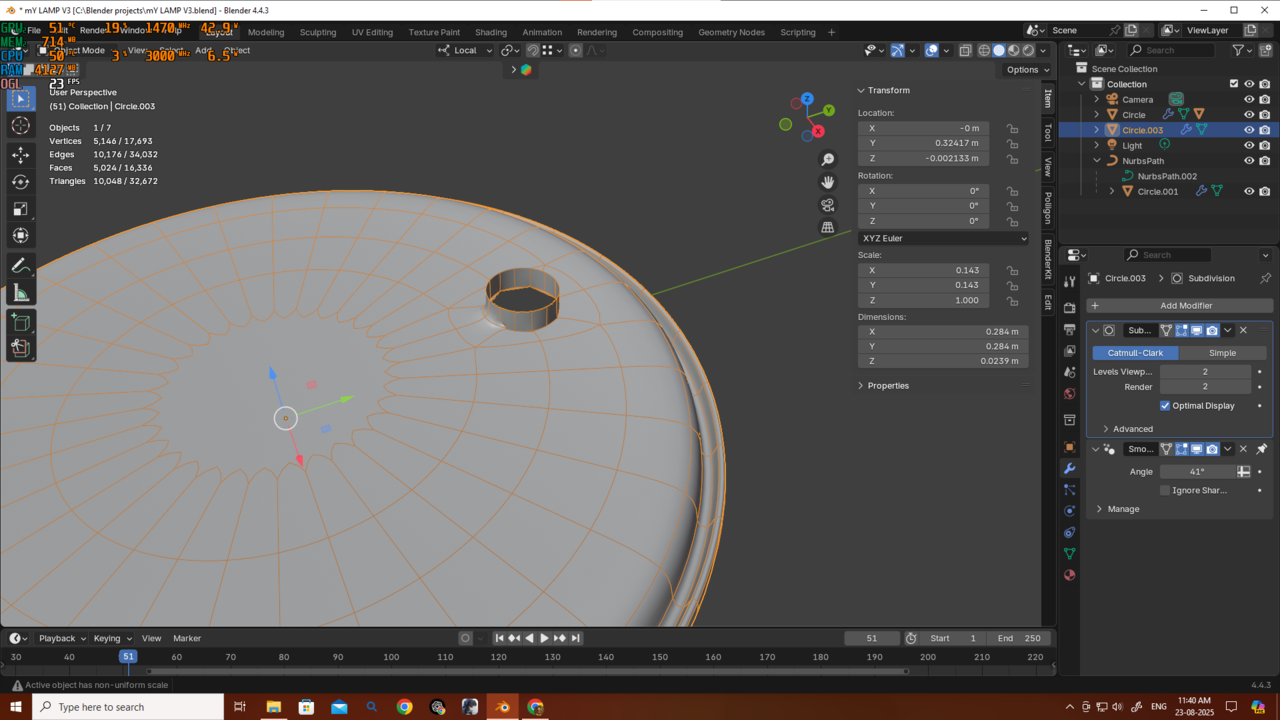
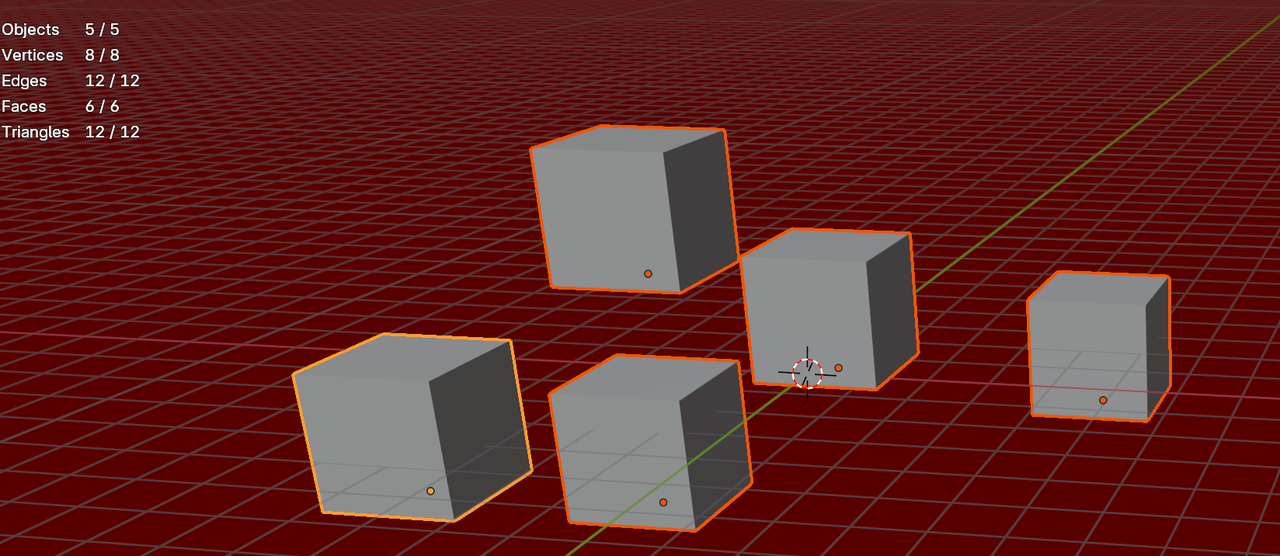
What I would do, though, is to give the base of the lamp more Vertices that the wire and lamp. That way, you still a round profile, and when you use it in a close-up, you can use the Subdiv Modifier and when its further away you can just use the low poly version. Something like this:

The idea is, that smaller circles need less Vertices than larger ones.
I agree, it looks good and low poly enough to me The circle shapes have a lot of stepping, probably can't get more low poly than that. What would get the asset rejected are all the ridges in the neck part, that is a lot of wasted geometry. That would be baked into a small texture to save all those polygons.
Now I get it — thanks a lot, Omar and Martin!
From Martin I learned this:
For big meshes, only use as many vertices as needed to look smooth from a distance.
If you need it to hold up when viewed up close, you can just add one subdivision, since the base geometry already has enough vertices to look smooth. That way you avoid adding a huge number of unnecessary vertices.
For example, just by removing the subdivision from the base of the lamp, I reduced a huge number of vertices.
 The mesh looks jagged right now, but if I had started with 32 vertices it would have looked smooth from a distance. And if it needed to be shown up close, 32 vertices could still work, or I could just use subdivision level 1. That would still be fewer vertices than starting with 14 and subdividing to level 2. So starting with a bit more geometry in the beginning can actually save vertices overall.
From Omar I learned this:
For the wire, the ridges can be done with a normal map instead of adding extra geometry and bevels.
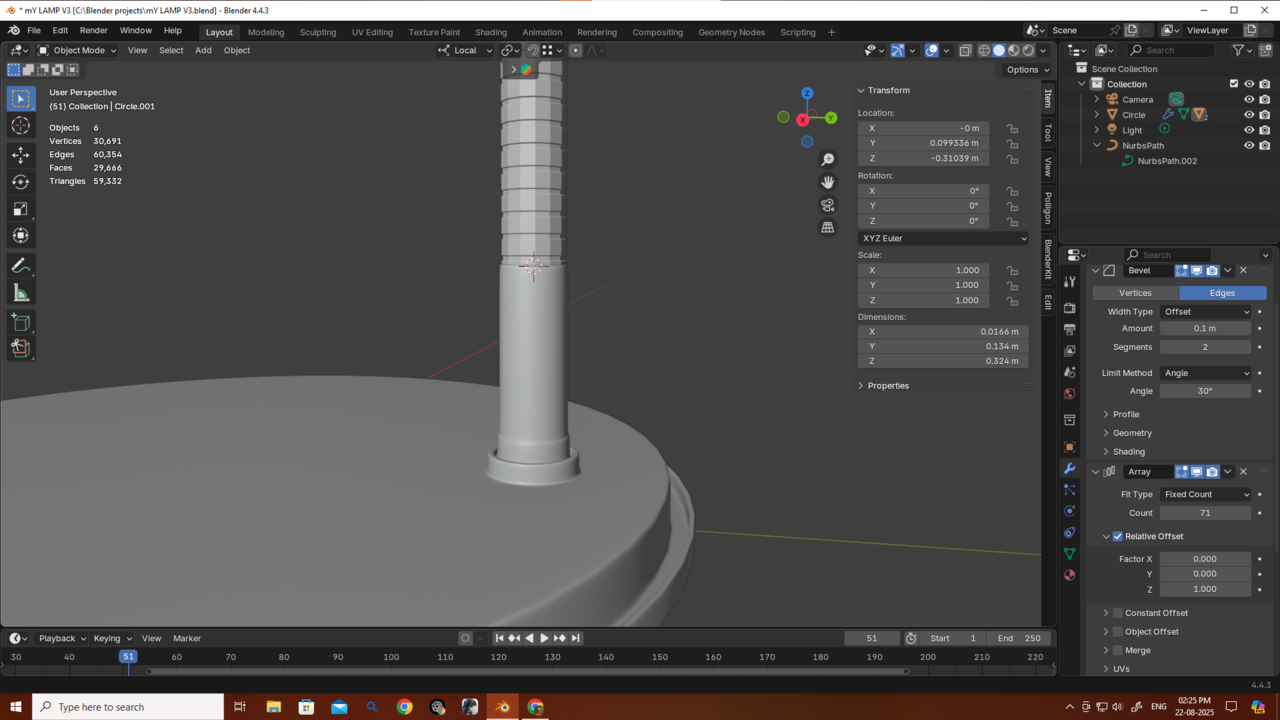
I originally made the wire, added the ridges, and then arrayed it more than 70 times along a curve. But after removing just those ridges, the vertex count dropped massively. Also, I probably didn’t even need 14 vertices for the wire to begin with, so that’s another way to reduce vertices.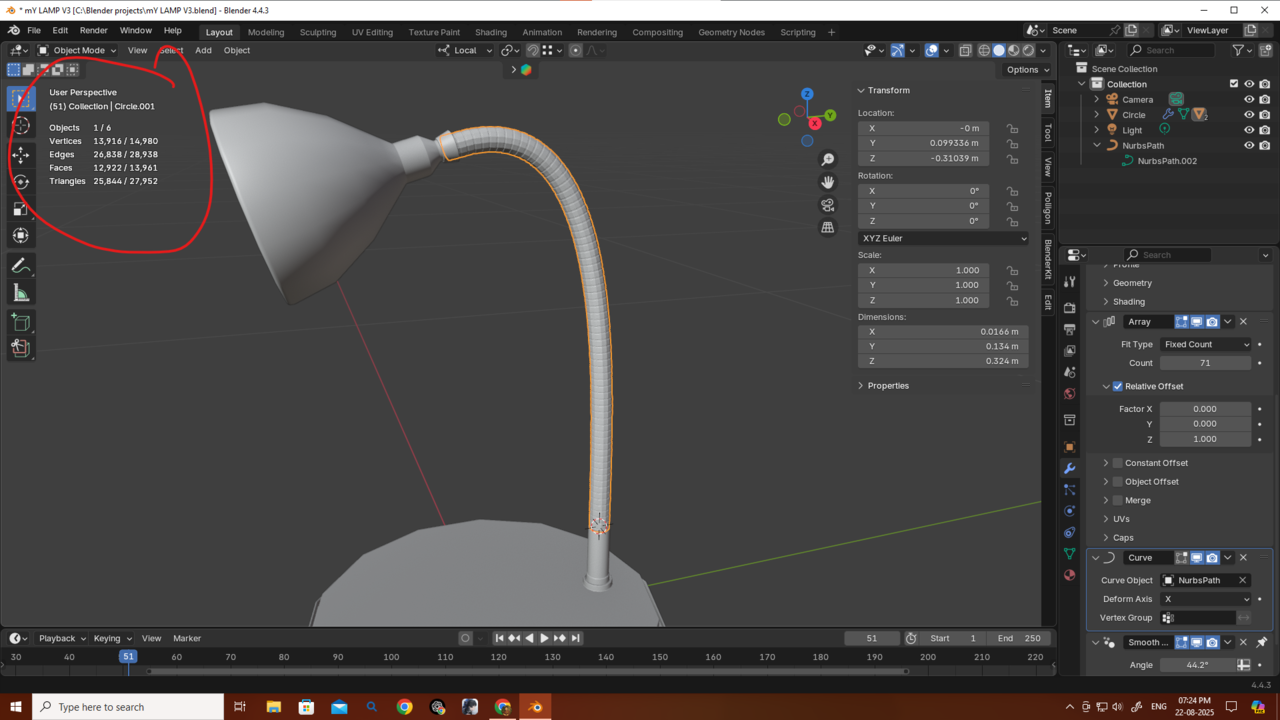
Thanks a bunch, guys, for giving me this much knowledge! If I said anything wrong, please correct me. I’ll try to remake the object using this approach. I still haven’t finished all the Core mesh modeling classes, but this one lamp has been taking all my time — I really want to finish it so I can continue my studies.
If I ever got the chance to meet you guys (though probably not in this lifetime 😅), I’d treat you all—and this awesome community—to a big banquet.
Thanks again! 🙏
Martin, how did you make this part? I’m not able to do it. My method was using LoopTools → Circle then inset and extrude or sometimes deleting some faces, adding a new cylinder/circle with fewer vertices, then joining them together and pressing F to connect. After that, I applied Subdivision,
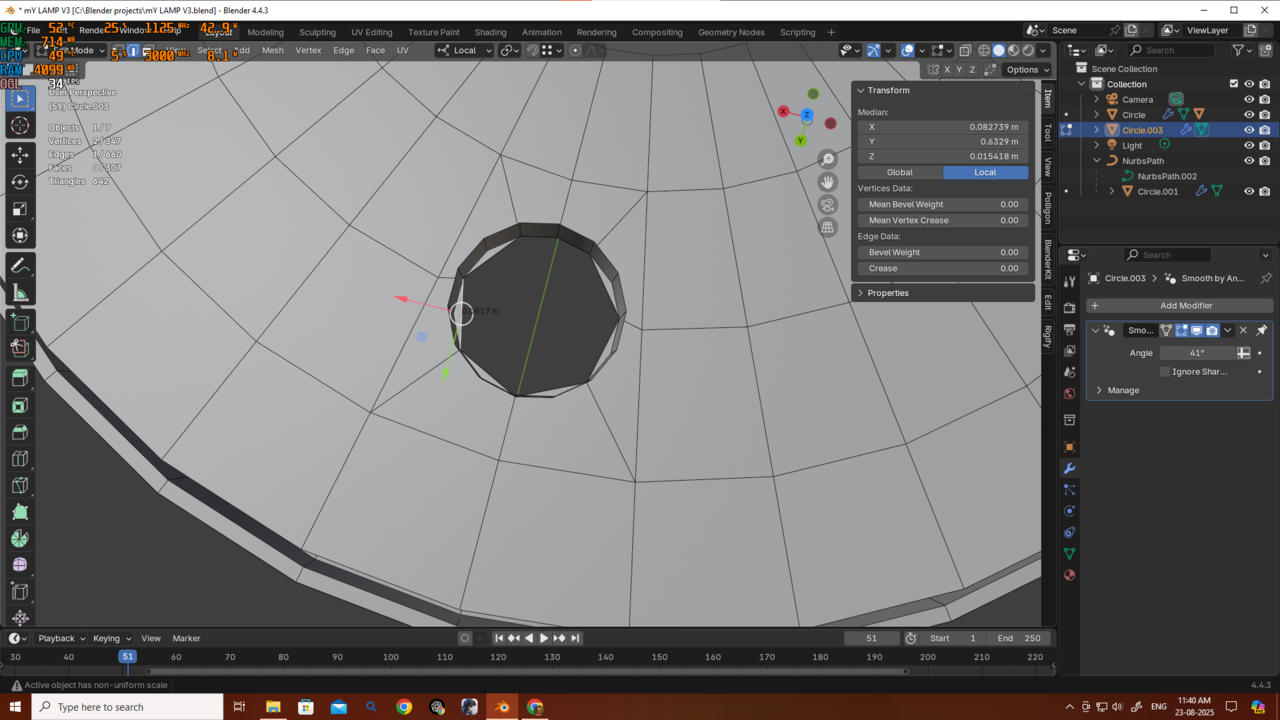
 but the result isn’t as good as yours. Also, I’m trying to use only one Subdivision.
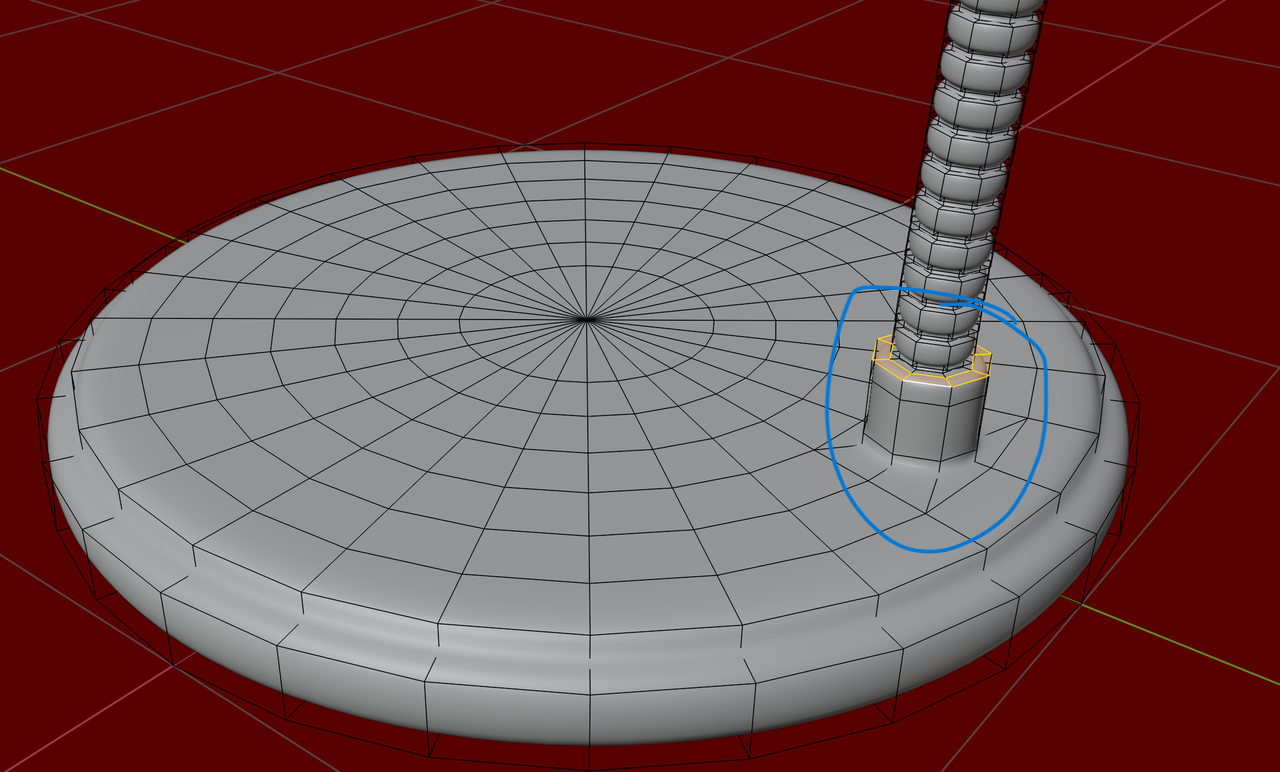
Okay so I just made a separate circle with 8 vertices, joined it with the base of the lamp and yeah it’s working kinda okay now.. I’ll share the result and let’s see how much I can reduce the vertices.
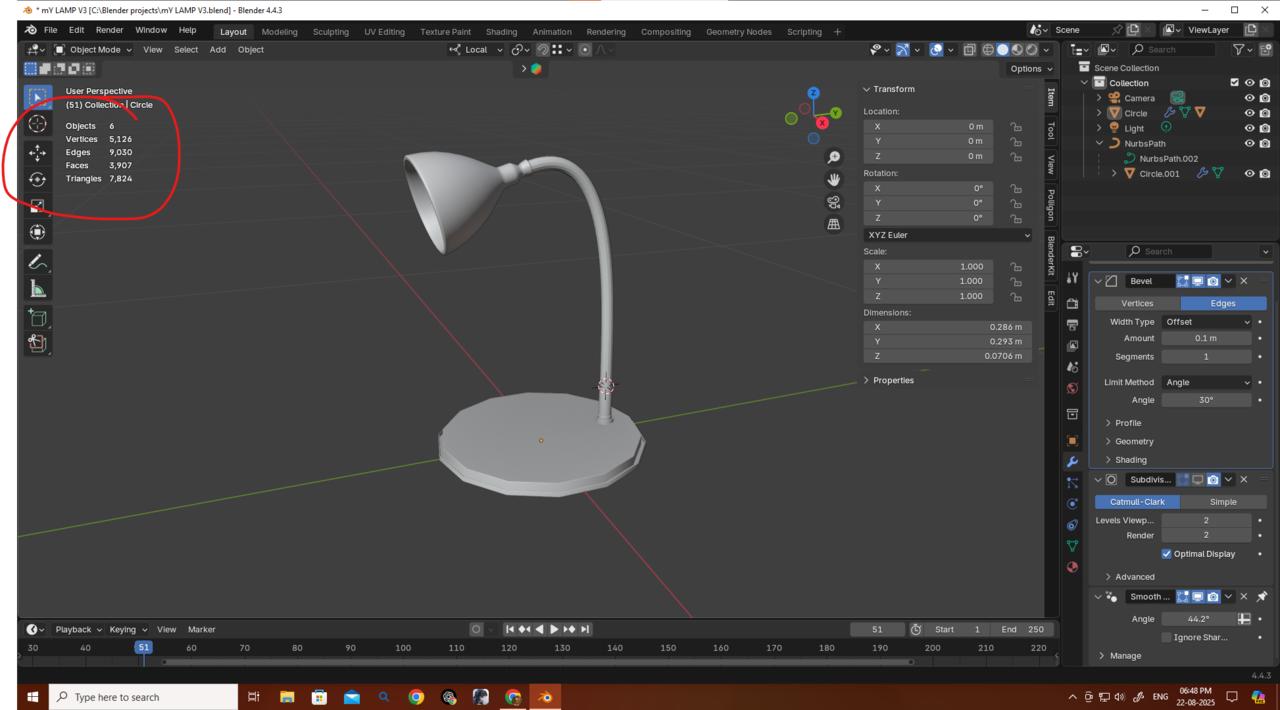
Okay Martin, thanks! I already made this one — please check it. I tried to reduce the vertices as much as possible.
My method for this version was:
I created a separate circle and then joined it.
I used the same method for the switch (8 verts). Both the circle and the switch are getting one level of Subdivision because they’re joined with the base mesh, which already has Subdiv Level 1.
This time I didn’t use a Bevel modifier for the base of the lamp. Instead, I added edge loops for sharpening. The Bevel modifier was only used on the lamp itself.
Wire → 8 verts
Base → 32 verts + 1 Subdiv
Lamp → 16 verts + 1 Subdiv
At first, my mesh had over 50,000 verts.
I know it could still be optimized further with baking, although I don’t know much about that yet. Then I reduced it to 18,000 verts, then 12,000, and now 6,000.
I’m eager to hear your opinions, Martin and Omar.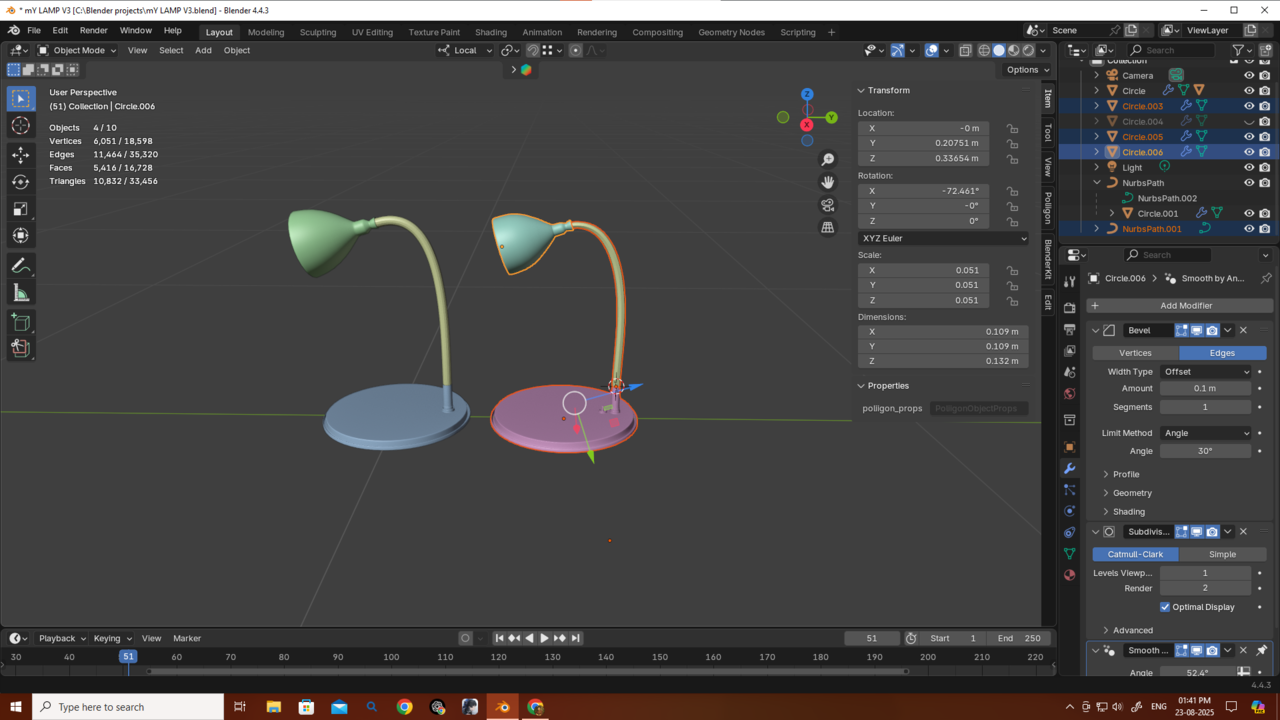 And thanks a bunch for always helping me out this much! 🙏
I think that's an excellent result, Deb!
There is only 1 thing left to do: Apply your Scale!!! (You will probably need to adjust the Bevel Amount after that.)
Now I'd suggest you move on with the CORE: Fundamentals of Modeling and maybe look at this file again in a few months (or years).
Thanks Martin! I haven’t finished the whole Mesh Modeling tutorials yet, but I saw Jonathan gave us the challenge of making an isometric room with at least 30 objects, so I’ve been preparing for that by creating some smaller pieces.
One thing I’m unsure about is poly count. For example, just my dining table setup is already over 2 million polys 😅 (mainly because of details and Subdiv level 3 on the legs), and I’ve only made 6 objects so far.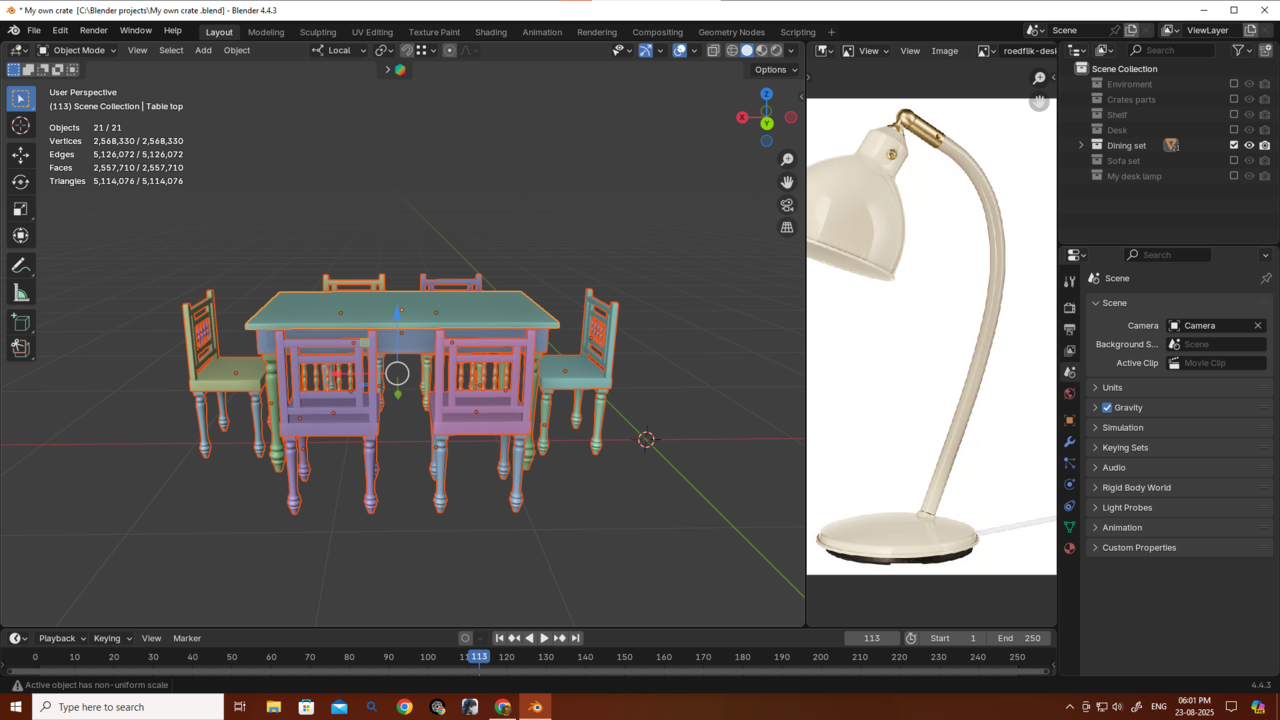 Since I plan to focus on environment design (either for games or hyperrealistic renders), what’s the better practice for me right now: should I aim to keep objects as low-vert as possible, or should I add as much detail as I can? Even for this isometric room, I’d like to do some zoomed-in shots, so I’m not sure which approach to train myself in.
This will be my last question in this section, I promise. Please don’t be annoyed with me—I always ask here because I don’t get such clear answers on Reddit or sometimes even on Other Discords. Also, where I live, nobody cares about this profession, and none of my friends are into 3D or animation, so I always have to seek answers online. Thank you very much.
Hi Deb,
A subdiv Level of 3 is actually a lot. I rarely go above level 2...You can probably save some geometry there.
Also, if you haven't already, use Instances (Linked Duplicates) for the chairs, so ALT+D instead of SHIFT+D:
I wouldn't worry too much about Poly count for now, let that be one less 'stress point'. Just don't go overboard, with so many Triangles, that your computer starts to smoke.
Thanks a lot, Martin! I actually used instances for the chairs already (ALT+D). Really appreciate your advice on the Subdiv levels too — I’ll keep it at 2 max from now on. Thanks again!