Decided to start posting my journey here. I already went through Minimalism but I didn't do enough to make those pieces my own yet, so I'll start with renders as I go through Core I. To be clear, I'm coming to the Core curriculum with a good amount of Blending behind me - for better or worse. I just want to learn as much as I can from as many places as I can so I can improve.
If you want to find me elsewhere, I'm on social media as Shadow64 in most places:
https://www.threads.net/@shadow64
https://www.instagram.com/shadow64/
https://bsky.app/profile/shadow64.bsky.social
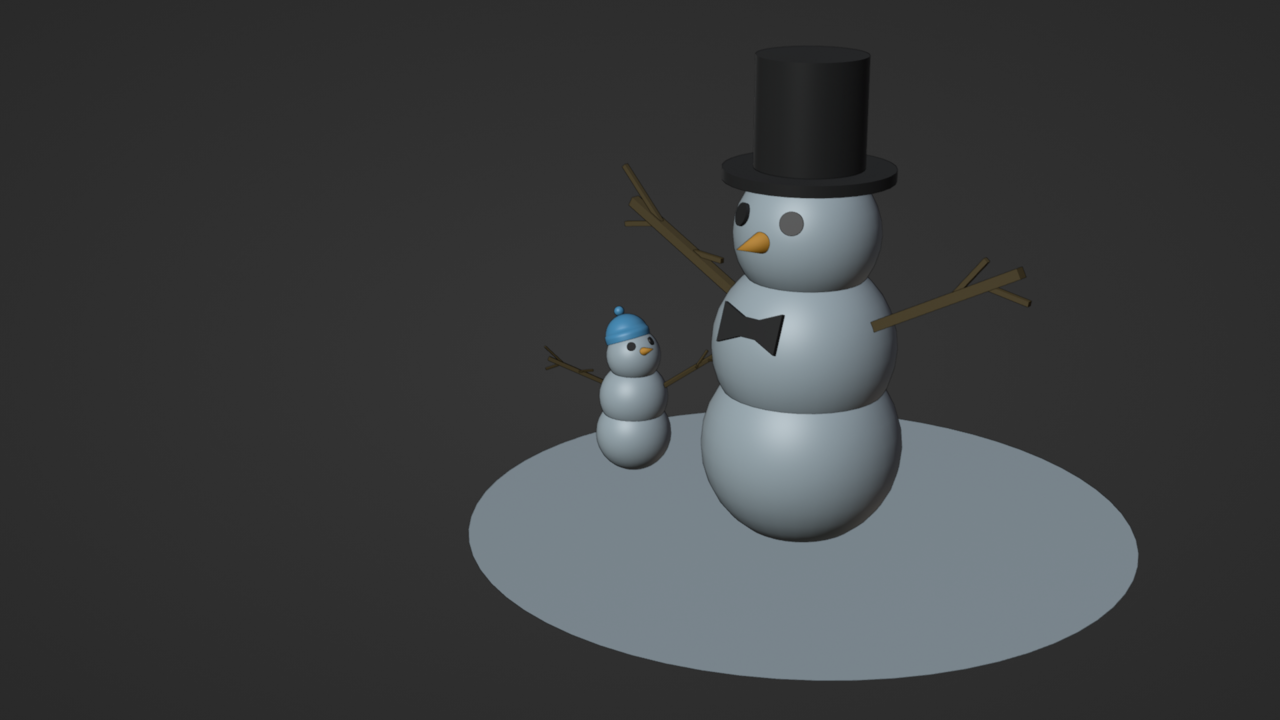
Core I - Mesh Modeling - 1-3 - Snowman
Decided to give him a bow tie and a kid for a little bit of a fun scene.
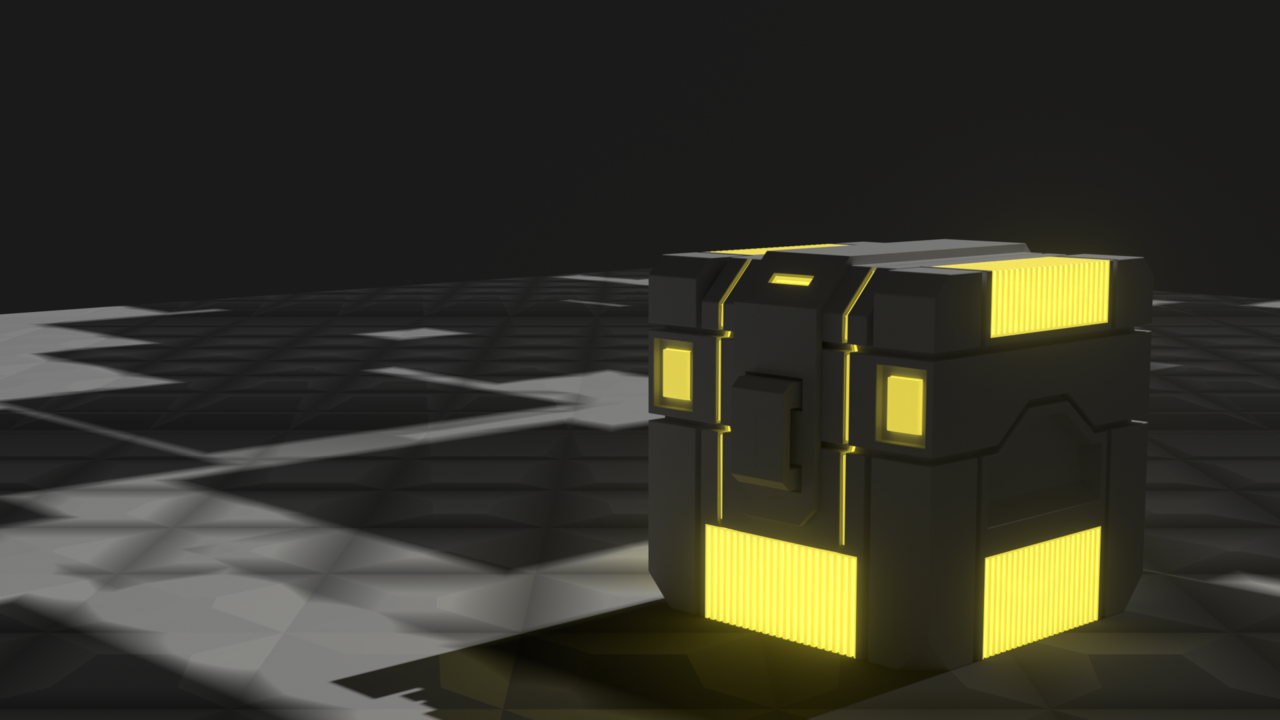
Core I - Mesh Modeling - 1-4 - Sci-fi Crate
Added a few details and did a weird floor using an ill-conceived voronoi pattern (I promise I'll get better at these when I hit the texturing lessons). Wanted to make it glow and I added a little card slow in the top as well. One thing to note is that at least in my case, if I wanted things to look correct then at the end of the process I needed to shift the Bevel modifier so that it was above the Mirror modifier.
Really enjoyed the workflow here. It would be fun to create more props like this.
Thank you both for the comments. I'm glad the scene resonated with you. I'm going to keep moving on things today. Hopefully get through another lesson or two.
Core I - Mesh Modeling - 1-8 - Soccer Ball
I decided to try filling out the scene a bit and playing with some of the camera settings. I think I probably could have done more with the look of the pads on the wall to make them resemble mats a bit more, but I'll wait until I learn more. The same kind of goes for the rolled up gym mats, but I'm happy they look even remotely like I wanted them too. Anyway, more tomorrow!

Thanks! Trying to just keep at it and do like they instruct to take things a little further. Seems like the second section has more workflow exercises regarding the tools and less renders, but we'll see!
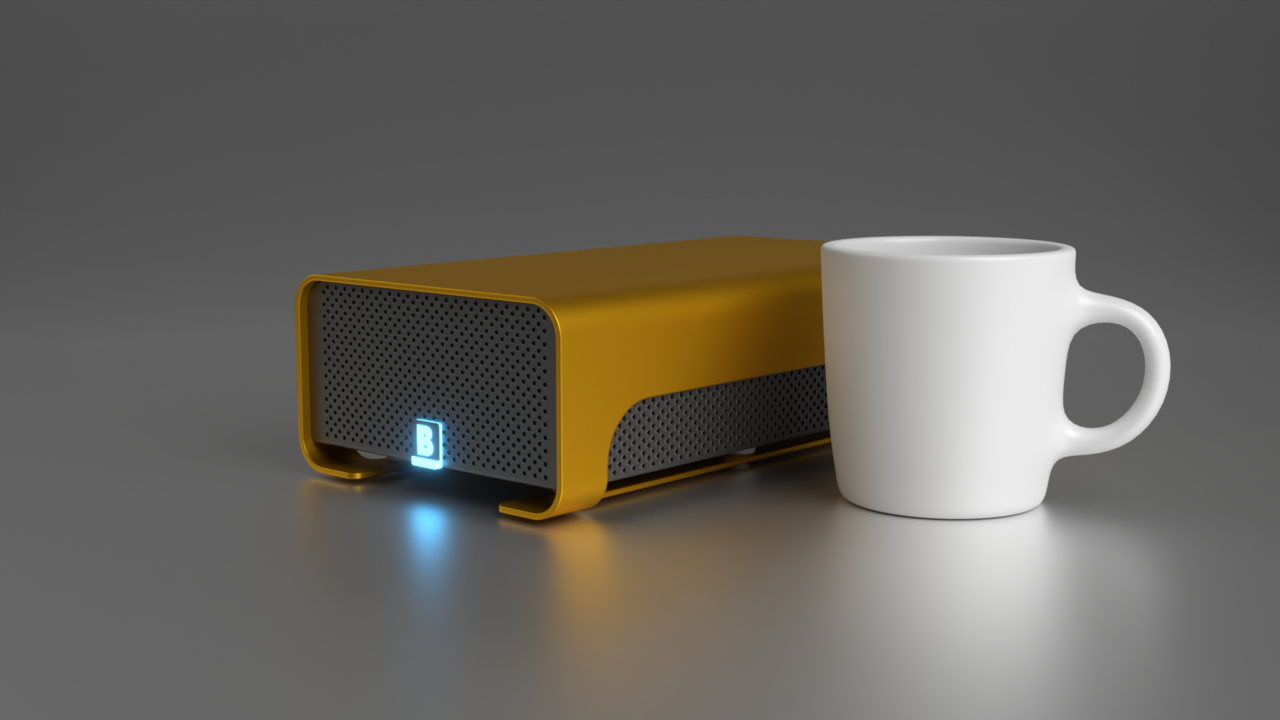
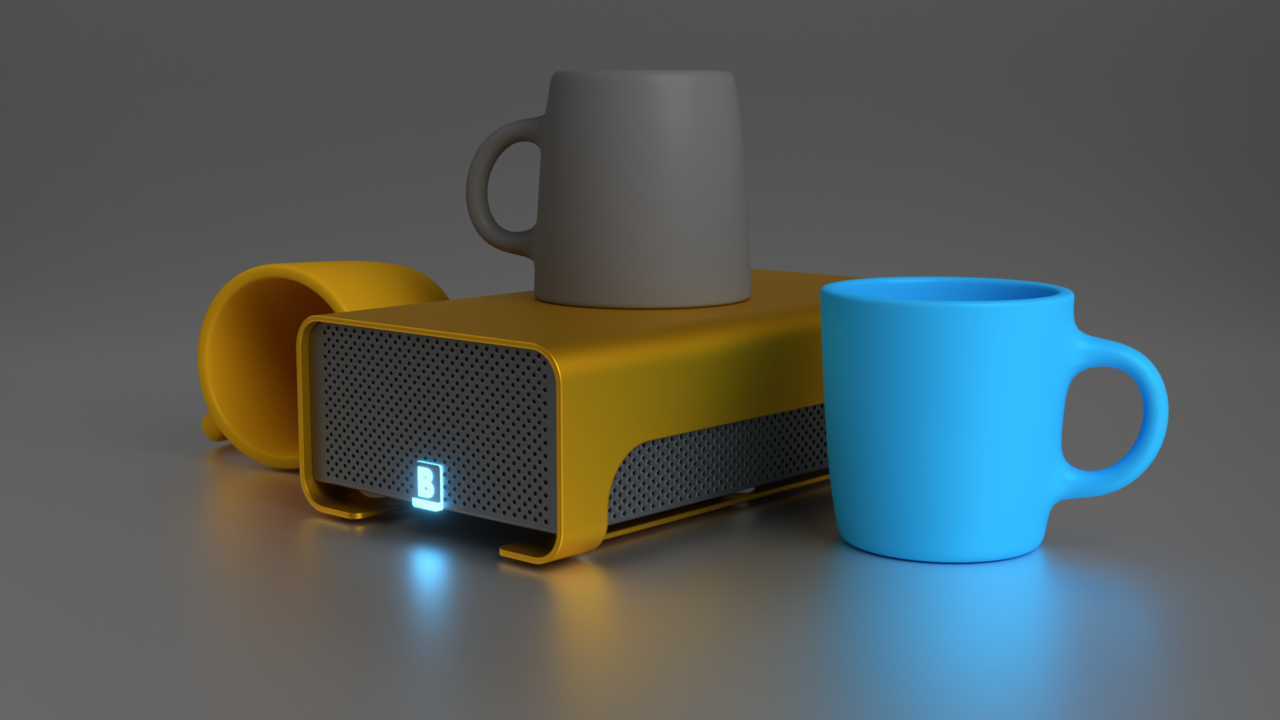
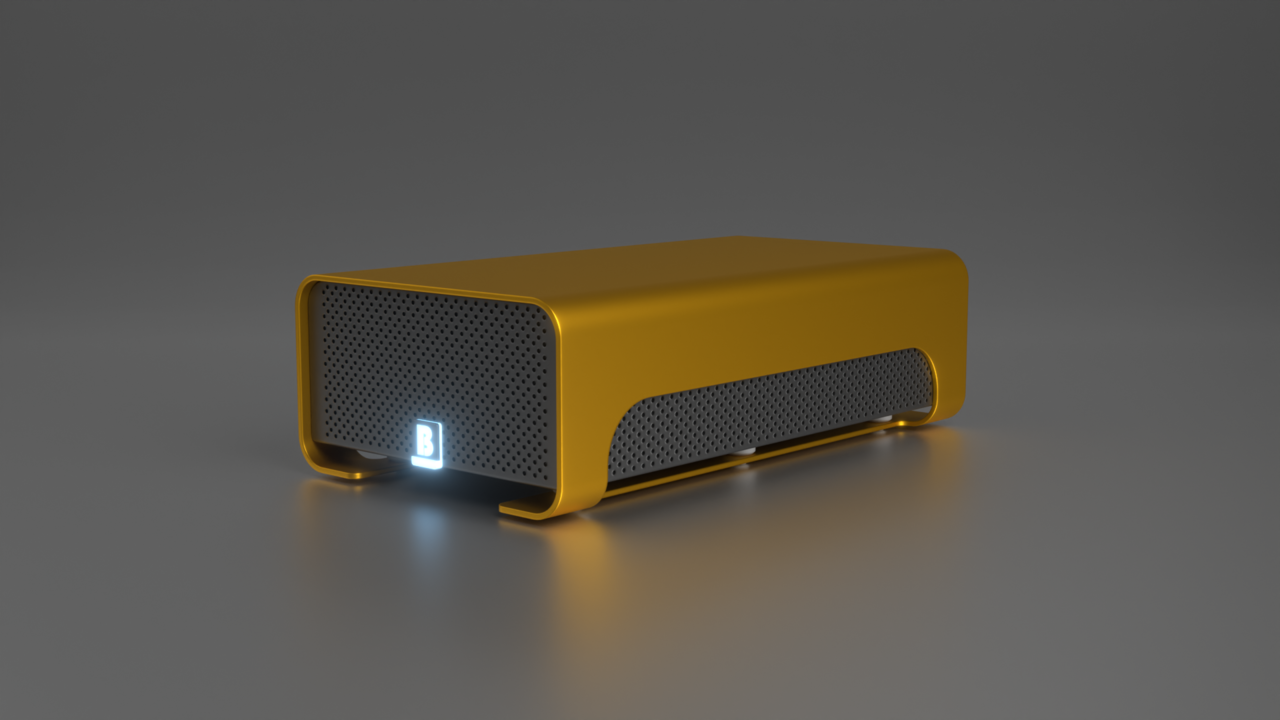
Wrapped up Section 2 of CORE I. Here's my version of the hard drive from the lesson. I decided to give it some extra "Blender" feel with the orange exterior. Made the body a darker grey as well. I learned a lot in this one. I look forward to doing more modeling like this.
Thanks again! I tried to get it close to how it seemed like he did the render that is on the page. Set up some 3-point lighting and a basic cyclorama and added some reflection but also some roughness to the floor. I can't wait to get deeper into CORE - especially looking forward to the Fundamentals of Lighting course. I may hop into that and/or Compositing next, since those two topics are basically cheat codes to make anything you make look even better.
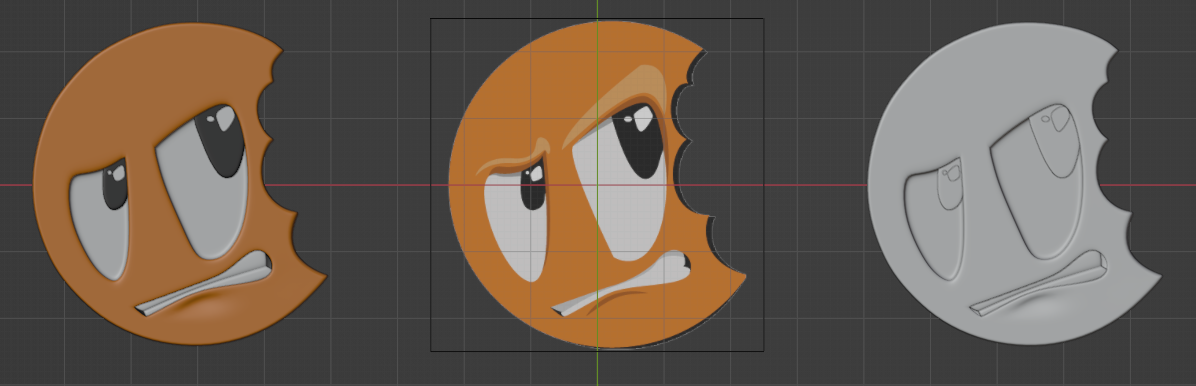
Okay! And here is my result for section 3. Getting that logo done.
Left - 3D Version - Viewport Coloring
Middle - Original Logo Reference
Right - 3D Version - Untextured
Looking forward to doing the final project. I may do it while going through another course though, just to keep moving.
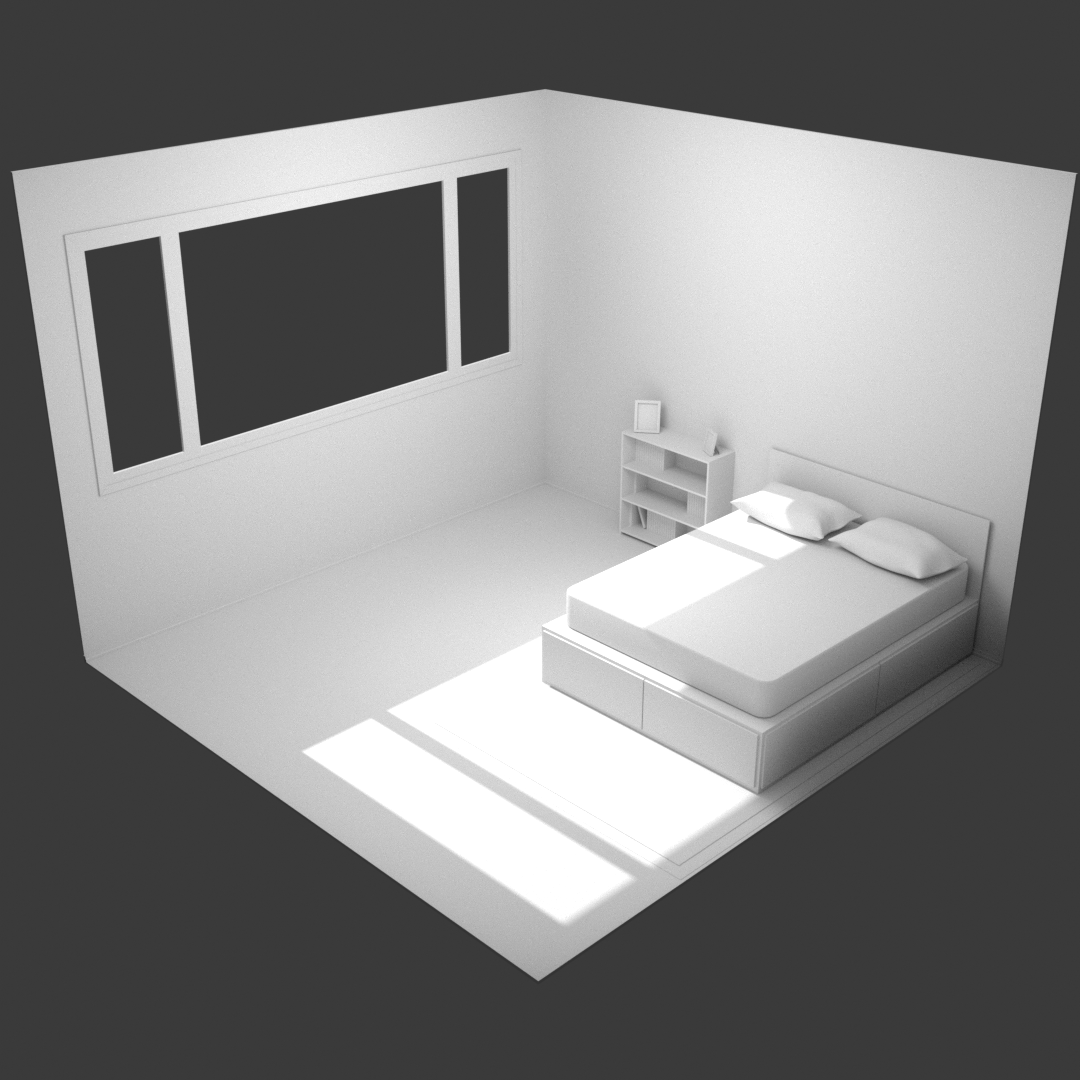
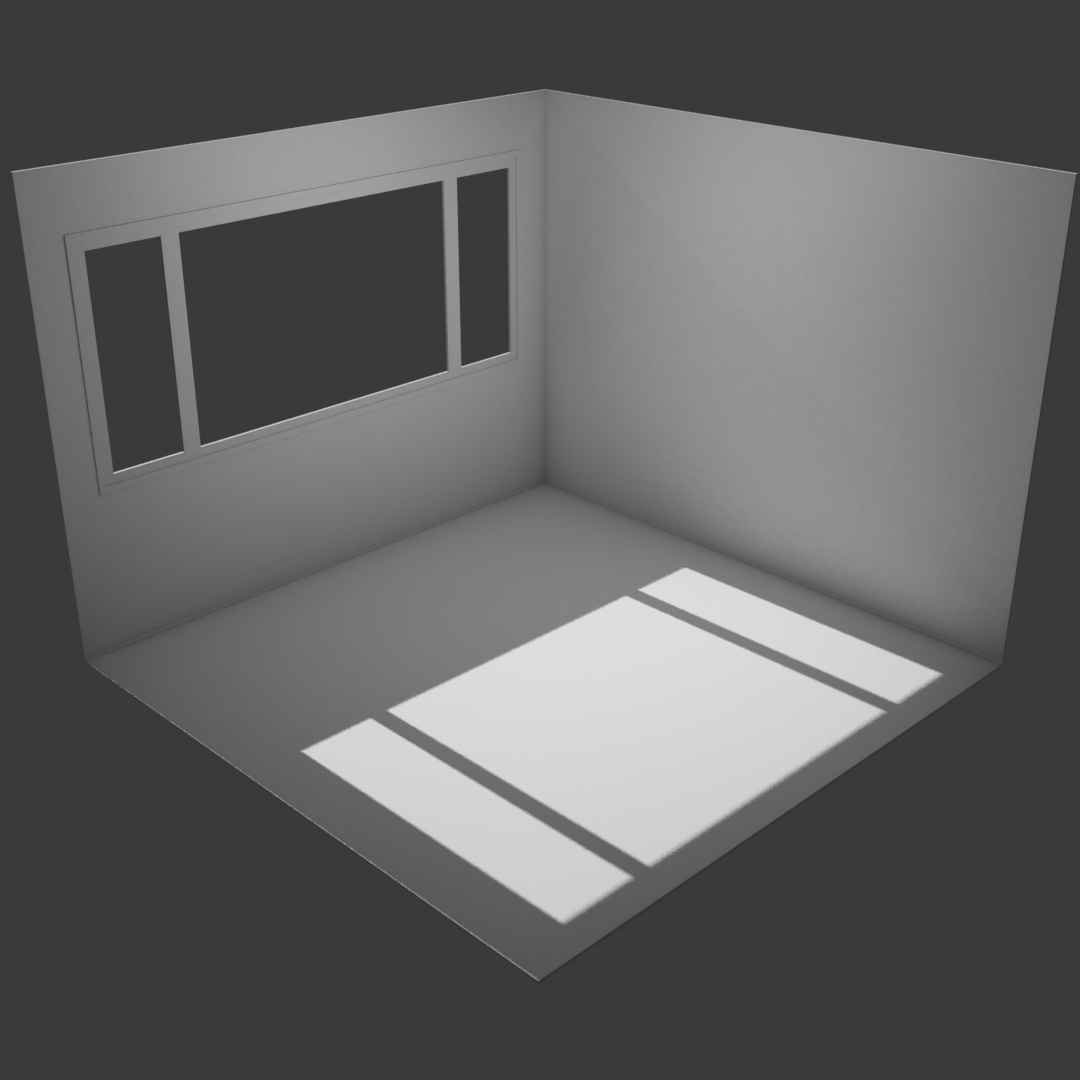
Got a quick start on my final project. Was trying to figure out how to do a proper window trim and realized after trying to model the piece around the window that I could just take the four outer vertices, duplicate them, separate them, and then connect them into a face. Apply scale, scale it out, inset by the width of the trim I wanted and then delete the inner face. SO much faster and it gives me the angles I want and looks good and yessss.
Anyway I feel like the course has really helped me get my brain in the right mindset to make things so I'm just going to keep going and see what I can do. I'll update as I go. Here's the first shot that has the room, the triple window, the trim, and a bit of baseboard.
Oooooooh that is a very cool shortcut. Yes, that would have been even faster. Nice! Thank you!
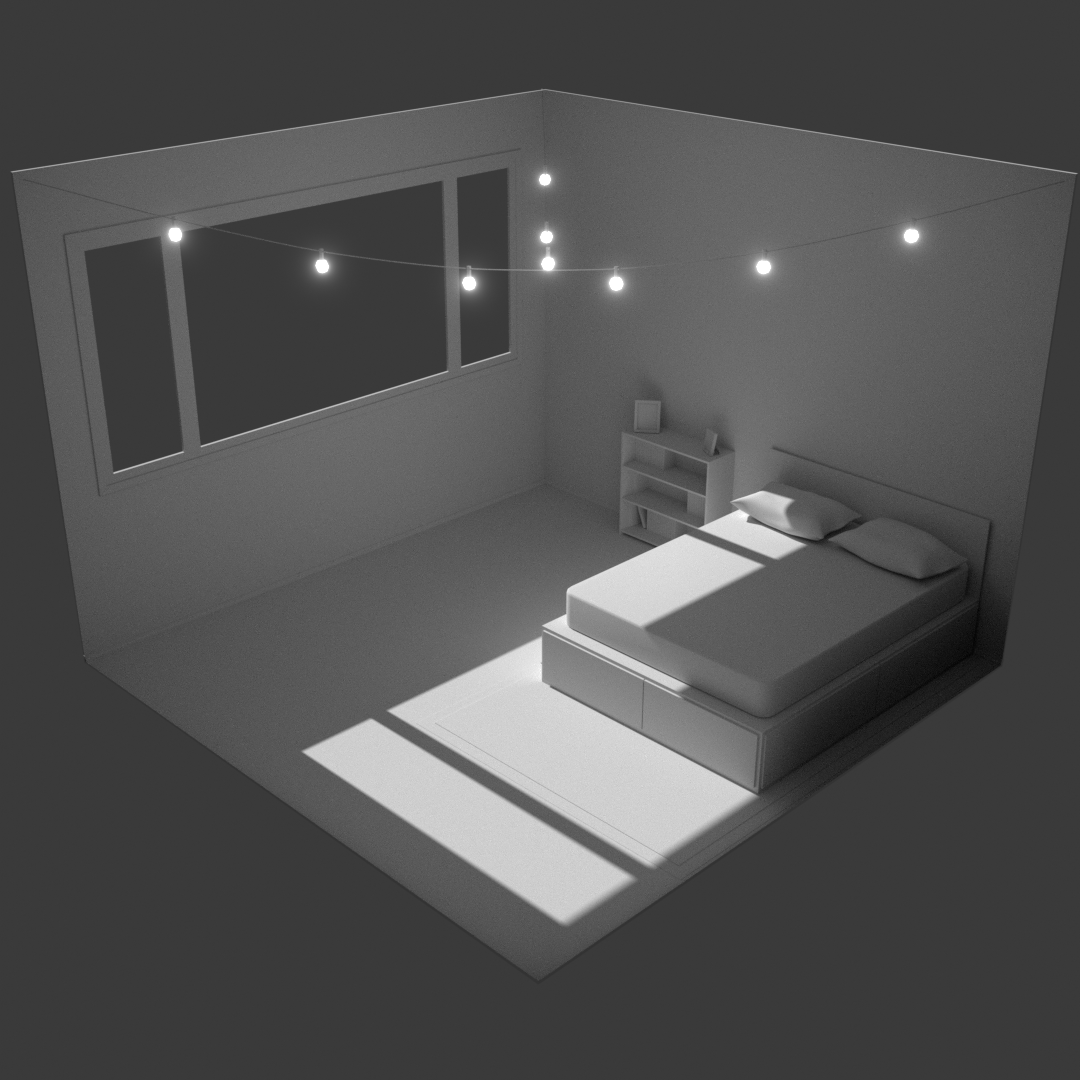
Got a bit further today. I upped the lighting in the room just to give me a little more visibility while I work and then I figure I can go back and do a real lighting pass when I'm getting closer to being finished.
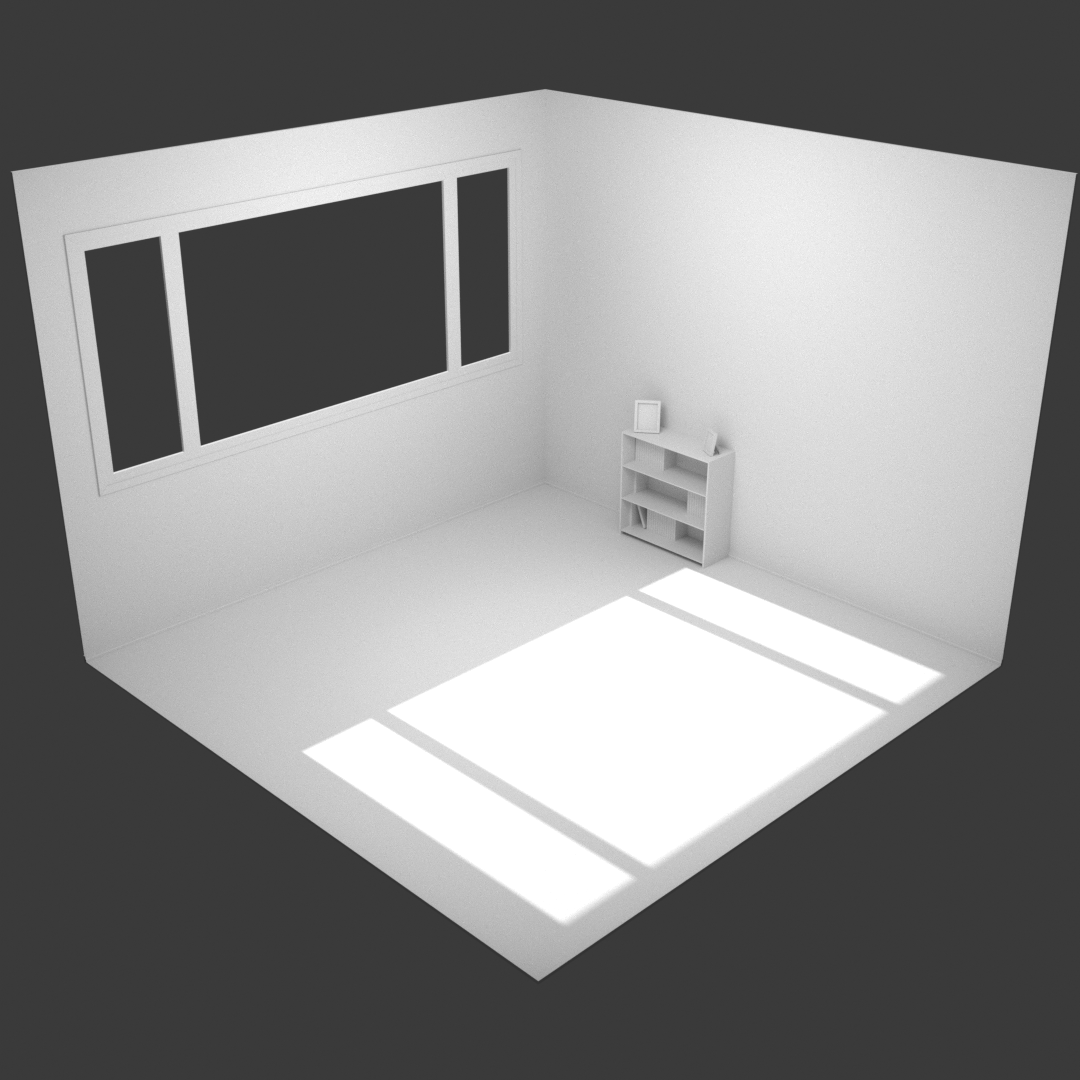
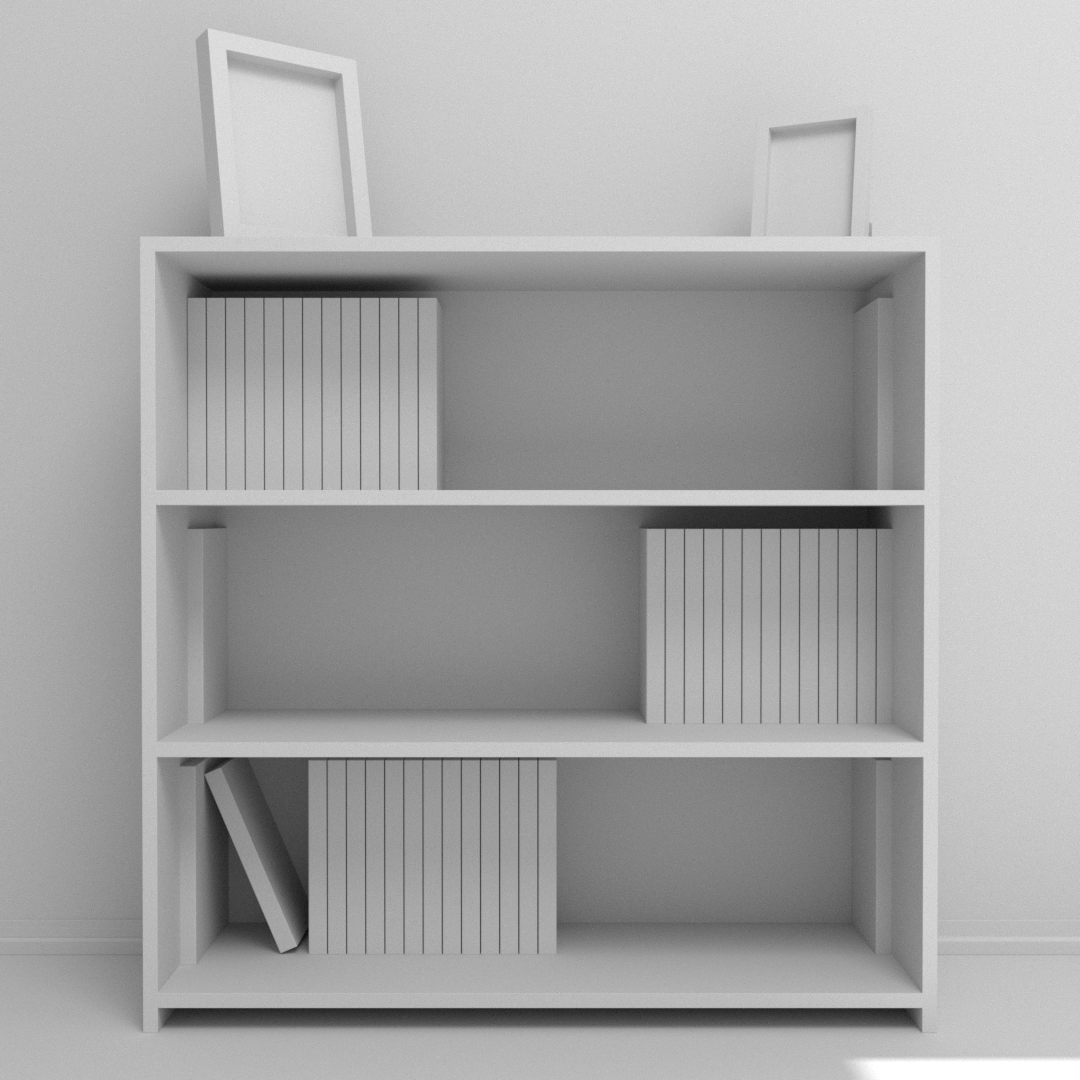
I added some picture frames (with the little kickstands) and then a "Billy bookshelf" from IKEA and a collection of paperbacks and a few individual ones and a tilted one. I'm going to do more with the arrangement and I may try to remember some quick geometry nodes tricks so that they are all slightly different rather than just an array.
I saw some cool room designs in my research that included string lights so I may try to hang some and use them for an interesting practical lighting choice.
I almost forgot about the bookcase trick Jonathan shows in the Solidify Modifier video so I was confused when the initial render had some wonky geometry but then I remembered to turn on Complex instead of Simple and it worked just fine.
Anyway, on I go!
Did a little bit more today but forgot to post it in here until now. Made a rug (which you can't really see with the lighting unless you squint) and a bed frame. Still need to add a mattress and pillows. But slowly but surely it's getting filled in.
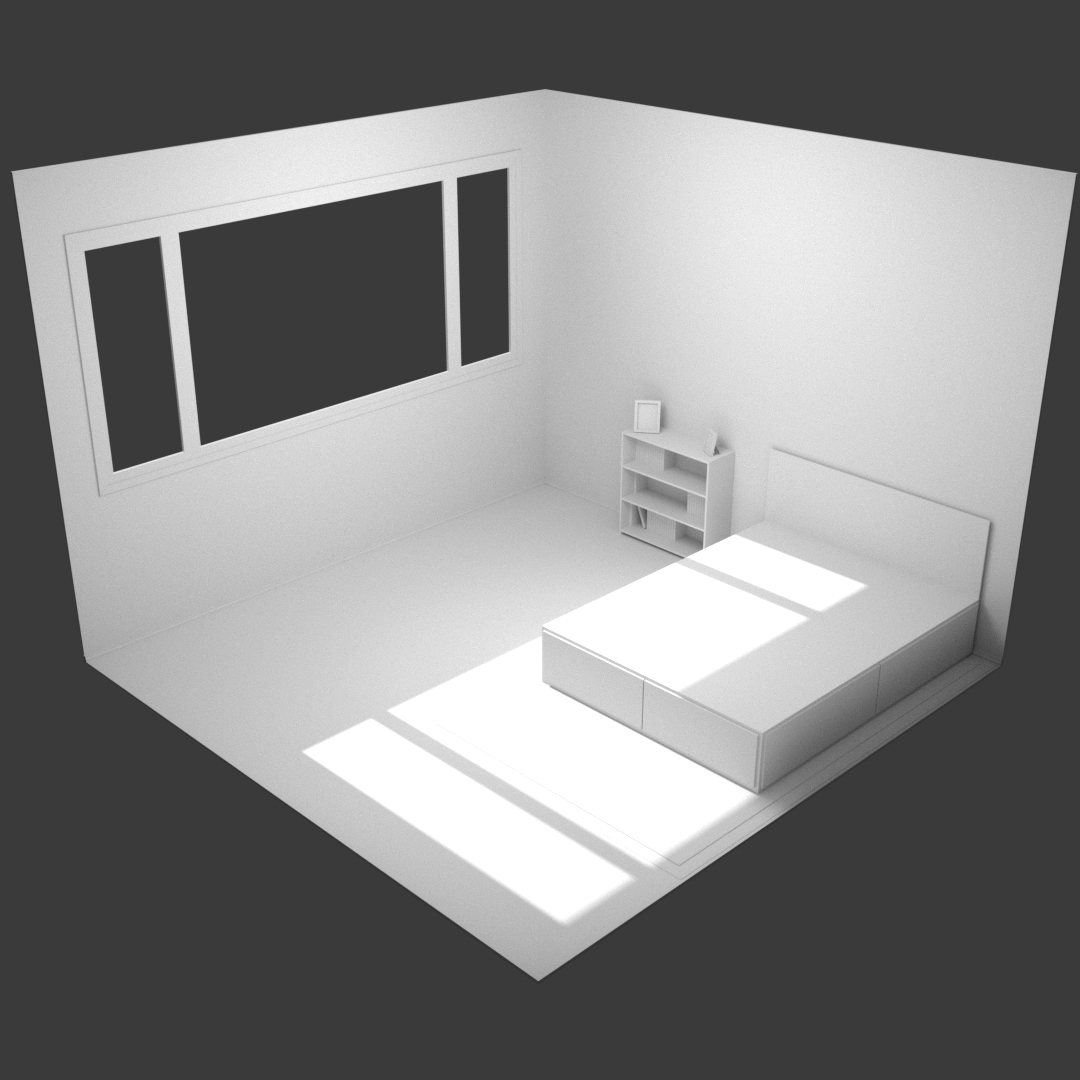
Finally got a mattress on there and added a couple of pillows - forgot to throw a duvet on there, but that shouldn't take long.
Modeled a little lightbulb and then used geometry nodes to distribute them along the curves.
I'm debating whether or not to add individual lights at the positions of the bulbs or if this is already giving enough of an illusion with the glare coming in handy.