Hi, I am trying to test render my model after texturing and even though I have all my lights renderable everything is still being rendered into a black image.
What could this be?
It can be a lot of things. The most usual culprit is that you have an object hidden in the viewport but it comes into effect at render time and it's right in front of your camera, blacking everything. Another one is that you have compositing nodes turned on and it's taking effect after the render. Maybe it's some collection in the outliner that has the renderability off. In any case you can upload your .blend file if you want us to take a look.
This is probably obvious but I do not see a spot where it will let me upload the project file. Is there somewhere I should send it?
Thank you so much!
https://drive.google.com/file/d/1Mb1M51WQ97zY0TYvp3GwRTFxFJy9ygH8/view?usp=share_link
This was so helpful I was able to continue the course after this just as normal. THANK YOU SO MUCH!
I do have another confusion if anyone has time I have linked the project below.
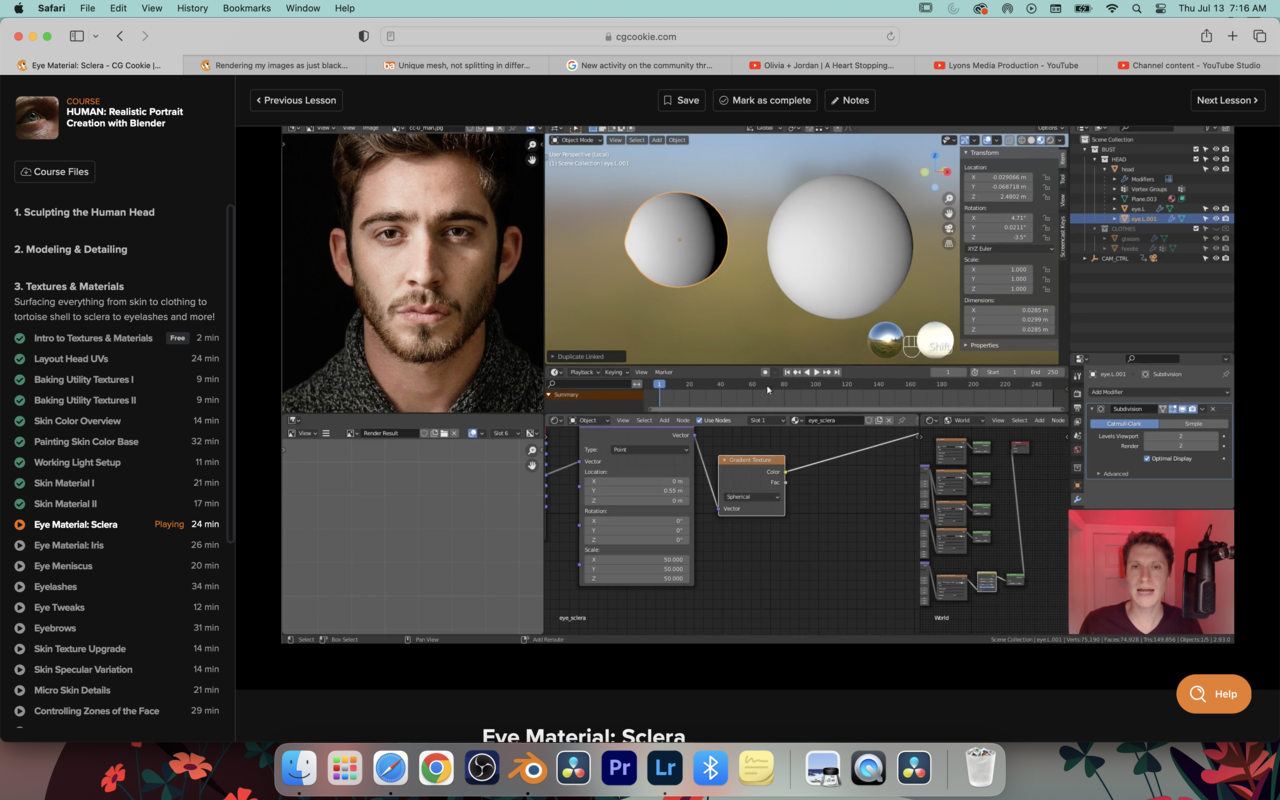
I am at the part in the course where he starts the sclera on the eye ball.
When he applies his gradient and adjusts his maps it looks like this: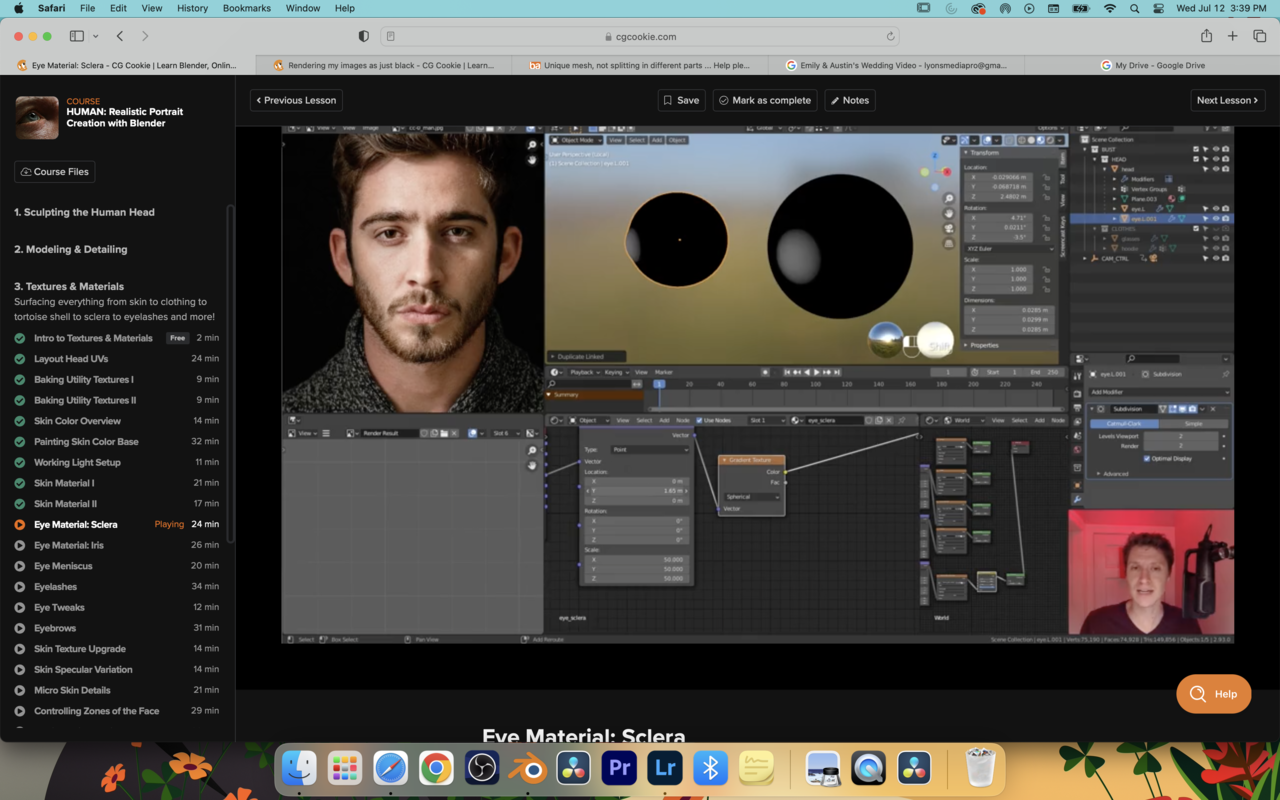
Were mine looks like this:
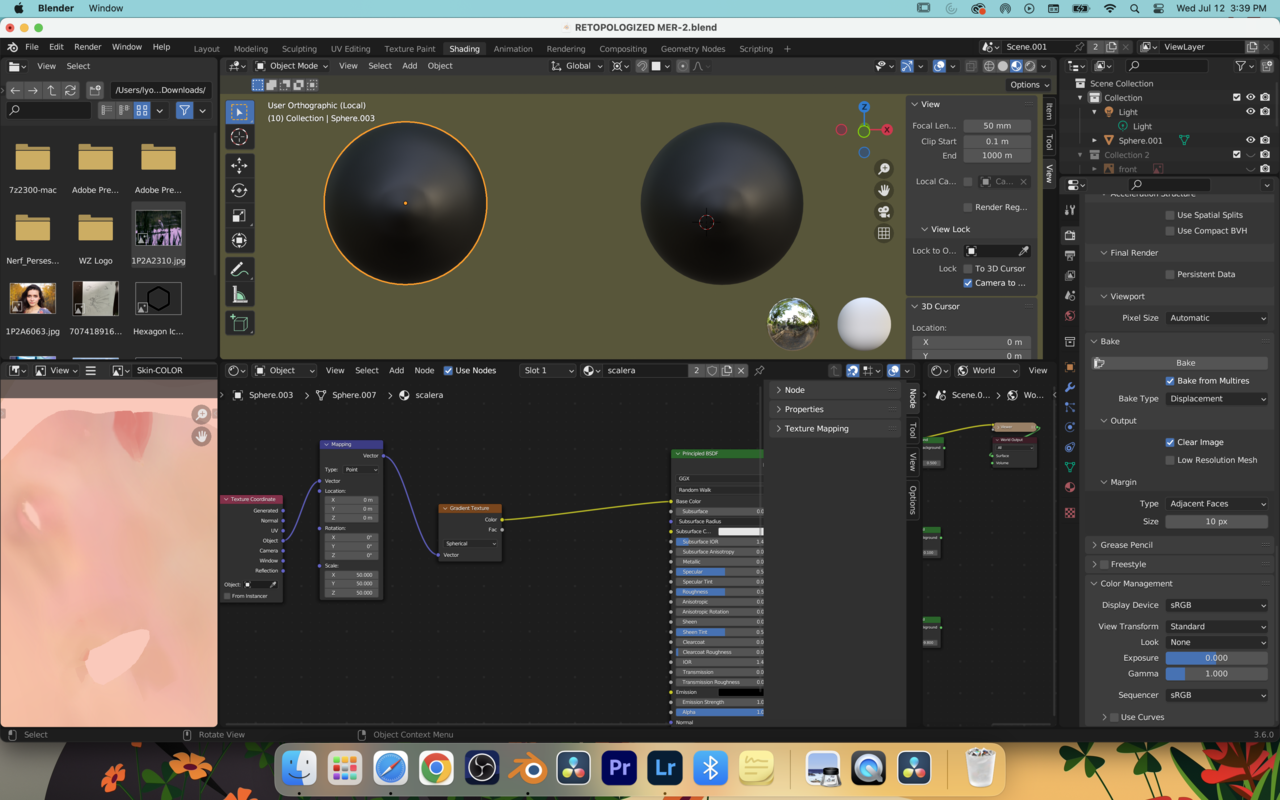
I have changed the scale and mapping coordinates to the same as his as well as set my sclera and iris slot.
any help would be VERY appreciated.
Project:
https://drive.google.com/file/d/1Y18Nr64im9POumRsygk5I92bcRXsNFl5/view?usp=share_link
Hi Emily CCGGorgon ,
The Object Coordinates are in the center of the Eye. You are Scaling in all three Axes equally, thus creating a Spherical Gradient, basically a small white sphere inside the Eye, which you can't see, hence the black eyes. If you set the Scale of one of the Axes (in this case the Z-Axis, because the Eye is rotated) to 0, then that Axis gets 'ignored' and you create a Cylinder:
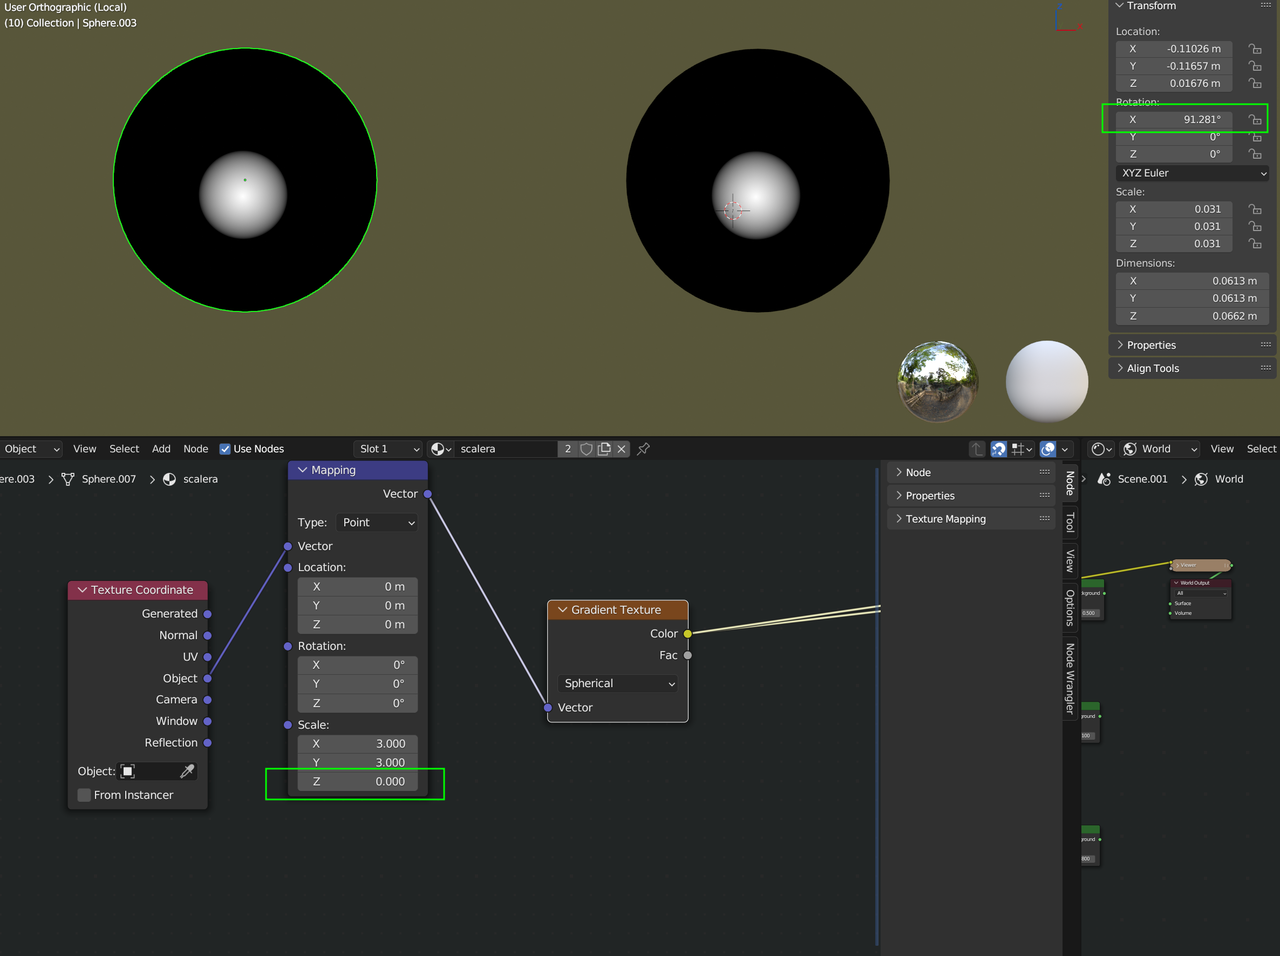
Is that clear enough of shall I try to explain this in more depth?
And a (not completely accurate, but close enough) visual representation could look like this;from left to right, your initial setup, my first suggestion and then two possibilities for the last suggestion (adjusting both Scale and Location, with the 'advantage of controlling the Falloff of the Gradient, if you ever need that):

Hi there, thank you this is quite helpful!
Is there something I did in particular that you can think of that would’ve made me need to scale differently than he did in order to get the same result?
Is it the rotation of my eyes in the transform panel being different that causes this?
Okay, I think I am sort of understanding now.
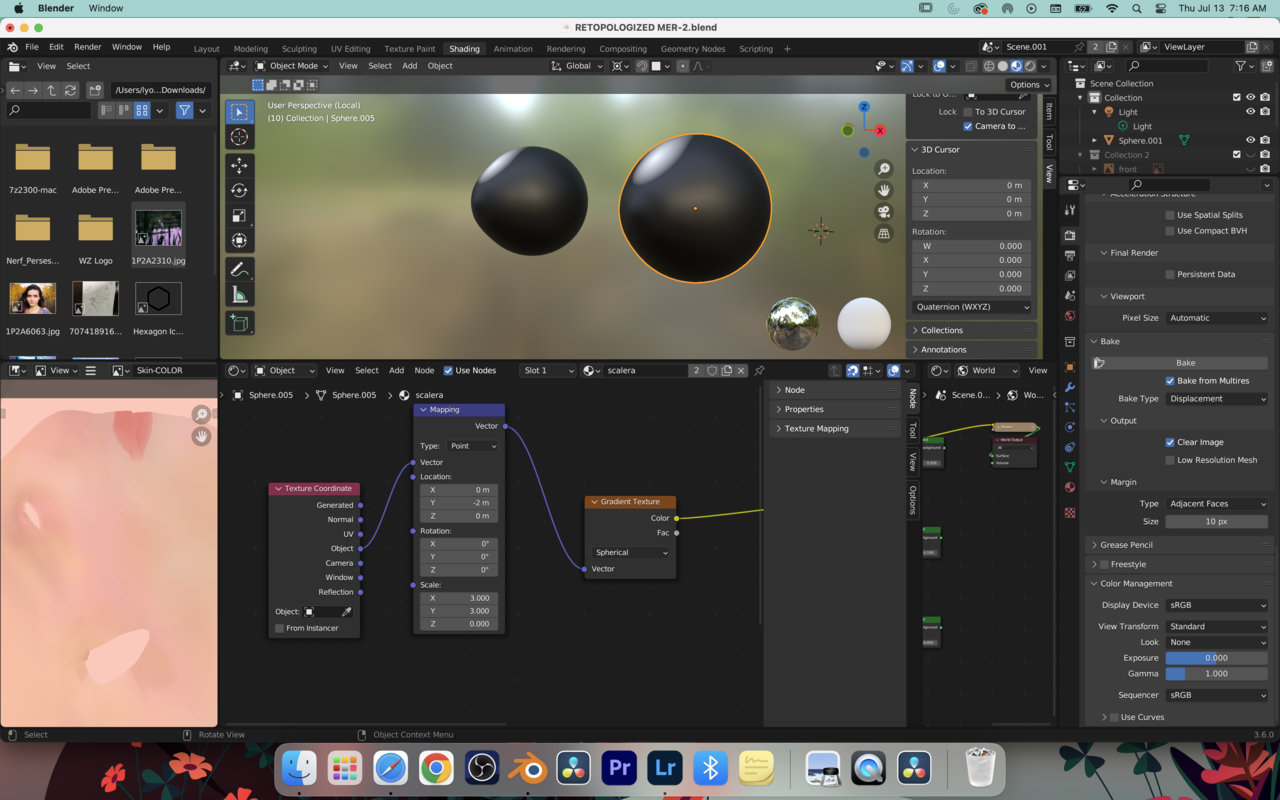
I changed the coordinates to what you said and it worked great, but, then in the next step when he adjusted the Y setting it expanded across the whole shape but mine simply just rotated in a circle around it. Why would this be?
Sorry for all the questions!
Hii Emily,
you seem to have accidentally switched your Rotation to Quaternion. What is more, you set all 4 values to 0...that is an 'illegal' Quaternion Rotation.
For simple Rotations like this, it is not recommended to use Quaternions.
(For more information on Quaternions, see: https://cgcookie.com/posts/what-are-quaternion-rotations-in-blender ,
But you absolutely do not need to know what they are for this Course!)