Announcement #6: Final Presentation Premiere!
Announcement #5: Conceptualizing the Final Animation
Announcement #4: Closing Post
Announcement #3: Blog, Syncing Saga & More
Announcement #2: Updates & Loose Ends!
Announcement #1: Collab2021 has officially begun!
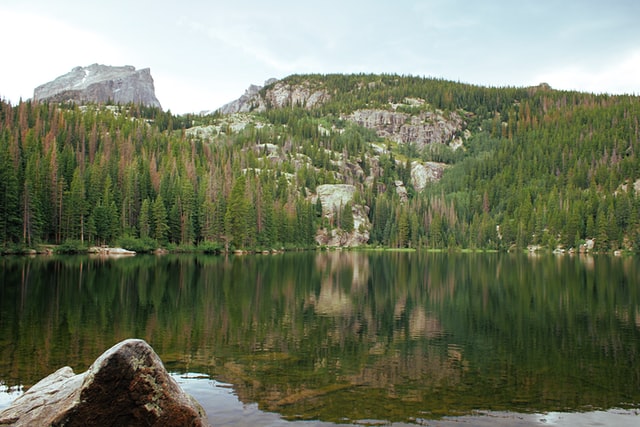
#Collab2021 is focused on stylized, low-poly, fantasy environment creation! Specifically this gorgeous illustration by Vadim Zaitsev:

You can find more from Vadim on artstation.
Through April we will be creating a comprehensive 3D version of this environment and we need a committed team to make it a reality! If you’re not sure what this Collab format is all about, check out the blog article first. If you know what you’re getting into, continue reading about how to register and what the schedule will look like.
Collabs are open to all Citizen members (membership is required to participate). You need to be subscribed by April 5th and remain subscribed through May 4. You're welcome to subscribe earlier so you can access the recommended courses listed below. This option could be helpful for focusing on learning from content before the collab begins at which point you can focus primarily on applying what you've learned.
Collabs don’t have an official web page or system built into our site. Instead it’s facilitated through the Forum, Live Streams, and Google Docs. Fill out this form to register for the Collab. This will give us insight into how many people are interested, the skill levels involved, and some other info that’s helpful before we get underway.
The last day for registration is April 5th. After April 5th the team will be closed! [evil laughs]
As with any production, one can only plan so much before unanticpated things come up. That’s to say we will be at the mercy of the project and the content could change as needed. Schedule should remain the same though.
Goal: Since we’re working within a low-poly, stylized (simplified) genre I think we could finish all the modeling in the first week. For most assets in the scene the modeling is straight forward. For trees and bushes it’s a little different. I highly recommend using the Sapling Addon included with Blender) as taught in the stylized forest course. Similarly clouds will be a unique asset to tackle; something we will need to brainstorm as a team.
Stream 1: April 6th @ 1pm US central time
Helpful Content:
Week 1 Homework Due: April 11th by midnight
Goal: It’s possible that sculpting will be the next step for some assets (ex: rocks) and not for others (ex: trees). If your asset doesn’t need sculpting then your task this week is UV layout and texture painting a color map. If your asset needs sculpted detail, you can do that in addition to the UV layout and texture painting. By the end of the week we all should have our completed model painted with a color map and sculpting done if applicable.
Stream 2: April 13 @ 1pm US central time
Helpful Content:
Week 2 Homework Due: April 18th by midnight
Goal: This should be an easier week than the first two. Since the style is simplistic, the material can also be simplistic. It can also be more complex if one is so inclined. Things like procedural texture accents, procedural water, randomization of the same material across multiple objects, etc. Additionally we will dip our toes into lighting. At the very least we need to implement lighting in a way that informs our material qualities. At the most I want us to light our asset in a standalone presentation, as if you were presenting it to a supervisor for approval.
Stream 3: April 20 @ 1pm US central time
Helpful Content:
Week 3 Homework Due: April 25th by midnight
Goal: As with most productions, the last stretch is the most unpredictable and often results in a lot of problem solving. I expect this week to be a smorgasbord of tasks from catching up / putting final touches on assets, assembling the final environment together, polishing lighting and atmosphere, and who knows what else.
Stream 4: April 27 @ 1pm US central time
Helpful Content:
Week 4 Homework Due: May 2nd by midnight
With the project officially complete, this stream is meant to be a celebratory bookend. We will revel in our hard work and discuss a post-mortem: What worked well, what could be improved next time.
Of course communication is key for effective teamwork. To facilitate this we will utilize a network of forum threads.
Discord: Our resourceful Team Leads have setup a discord server for us! The server features channels for each team including audio + video capability.
Discord is best for LOW LEVEL communication since it’s the easiest, quickest way to communicate. By “low level” I mean casual, small-consequence discussion. The main negative of persistent chat is its brief nature; comments appear and then immediately get buried. This is fine for the majority of our discussions (let’s say 75%) but we want to avoid important info getting buried.
HIGH LEVEL communication is the important stuff that shouldn’t get lost in a persistent chat. Please keep high level discussion like protocols, announcements, lengthy troubleshooting and idea pitches on the forum threads listed below.
HQ Forum Thread: This thread is the foundation of our communication structure as denoted with "HQ" in the title. Discussion here should be broader in context; having to do with the project as a whole. It's the place I will be posting important announcements for everyone involved. It's also ideal for general questions about the project and light-hearted "water-cooler talk" for the team. Things like encouragement, inspirational info / artwork, relevant memes. I love memes.
It's NOT ideal for *specific* things like questions pertaining to a certain part of the environment, WIP of individual parts, or person-to-person discourse.
Team Threads: If more than 30 members register for this project we will divide into sub-teams. Each sub-team will collectively tackle a group of related assets and will be lead by a member (most likely contributors from #collab2020). Each team will have a dedicated forum thread for specific discourse pertaining to their parts. Same guidelines as the Central Thread but with a specified topic.
Individual Homework Threads: Each contributor is required to create a thread for themselves for posting homework confirmation at minimum. This is also where any discourse about your specific part happens. You're encouraged to treat it as a work-in-progress (WIP) thread, posting updates about your work as you go.
Direct Contact: Tagging is ideal for directly contacting me or anyone involved with the project. Tag me (@theluthier) with questions or advice in any of these threads. I guarantee I will be checking my notifications regularly every Monday-Thursday throughout the duration of the project.
Of course the more people that register the less accessible I will become for direct / lengthy conversation. This is where sub-team leaders will be invaluable. If we break into sub-teams please contact your leader first, then me second.
Livestream Chat: The realtime interactivity of streams is another great way to communicate. Taggin works there as well along with an additional tool: Typing "[Q]" in the chat adds a blue "question" label to your post. This makes it easier for me to spot direct questions for me to answer while streaming.
DISCLAIMER: These guidelines are only intended to streamline the challenging task of communicating globally across the internet. They're not meant to create a tense atmosphere of rules! We're a relaxed, reasonable bunch of Blender heads. If you don't know where you're supposed to ask a question, go ahead an ask somewhere and you'll be answered or kindly directed to the right place if applicable.
Everyone working from the same project directory is important for a production like this. From linking models back and forth to sharing texture maps, it's a must for a smooth working experience. Further protocol like file naming conventions and saving files in the right place is necessary to avoid a confusing mess.
The following instructions are depending on you syncing the project's Google Drive folder to your local computer. If you haven't done that yet, please check the Announcement 2 post for instructions.
For this project I want to make the process as simple as possible for participants. To achieve this I've come up with a "plug-n-play" system. Basically I will save a placeholder .blend file in both the WIP and MODELS folder for each participant by including their username in the filename. Once the placeholder is present, each participant saves their work into the MASTER collection within the scene and that's it! I take it from there.
I covered this concept in the Week 2 stream but here's a set up step-by-step instructions as well:
How much time am I expected to commit to this project?
We stress commitment because it's the best to ensure A) the project succeeds and B) lasting skills are learned. We only expect you to commit as much time as you can. DO NOT commit full-time hours to this project (8 hrs a day). As the instructor, I should be the only one doing this.
Everyone else (sub-team leads and contributors) shouldn't need to apply more than 2 hrs per day to the project. It's all relative depending on your availability and skill level. If you can't afford 2 hrs per day you can pick a simpler asset. If you have more time to contribute then perhaps choose a more complex asset. It's up to your discretion.
If you only have 2 weeks available in April, that's OK! Just let me or your sub-team lead know and it's all good.
How do I tag someone?
Like twitter and instagram you simple type "@username" to tag someone. Tagging fires a notification to this person. Everyone's username is either A) in parentheses beside their display name or B) substituted if they don't specify a display name:

What service do we use for syncing files as a team?
We used Google Drive last year and it worked pretty well. Syncing our files to the cloud proved to be a crucial way for everyone to stay up-to-date conveniently. Since we lean heavily on library linking, it's imperative that we all be up-to-date. Google Drive is very accessible too; most people have an account anyway.
If you don't have one, sign up to get 15GB of storage for free. That should be plenty of storage for our project.
I know people are hesitant to sign up with Google but a burner account just for this project isn't too invasive, right? Otherwise Mega drive could be a good alternative since it offers 50 GB for free.
What if I'm not available at the time livestreams are broadcast?
Unfortunately the stream time can't be ideal for everyone. If you're not able to watch the stream live, I will post the recording within 24 hours of broadcast.
When is homework due exactly?
Homework is due every Sunday @ midnight each week. This means whenver your midnight is; relative to your timezone. This gives me each Monday to review homework internally before streaming on Tuesday. Please adhere to this deadline as late submissions can really stunt the flow of the schedule.
Can multiple people volunteer for and build the same part?
Yes! Early volunteers will have the best chance at picking a unique part but eventually parts will be assigned to multiple people. Of course we can't feature multiple of the same part for the final scene so the best execution of each part will end up in the final.
Are we bound to also 1 asset or if there is spare time can we even go for a second or third piece?
You're not limited to 1 asset. I'd love to see contributors challenge themselves with multiple assets, as several did last year. This gives contributors the ability to define their own scope of participation: If someone is newer to Blender they can choose one asset. If someone is more experienced they can choose multiple assets.
Who “owns” the final project?
Technically CG Cookie owns the project but the final project will be released freely as Creative Commons (CC-BY-4.0).
Can I feature my work from Collab2021 in my online portfolio and / or demo reel?
100% yes! Contributors are welcome to use/share visuals from the project to social media accounts, online galleries / portfolios, and featured in demo reels.
That sounds horrible, jewelry girl from Eindhoven; I freak out when my internet connection breaks down for a minute or so ;)
I don't know if @theluthier will let you join for the second week, but I will put in a good word for you.
( You probably don't remember, but we 'met' at the Blender Conference 2018. I asked if you could 3D print metal and you didn't know Captain Disillusion ;))
Oh wow! That was the first Blender conference I attended and I was kinda new to everything. Sorry that I don't remember you personally! What I do remember is meeting so many great people that I came back the next year.
About the block-out, I've been working on the model uploaded in the google-drive and there's one thing bugging me, the wall of the house aren't lined up.
Also, I understand that no wall in reality is perfectly aligned in a grid and we'll need that deformation to give authenticity to our house.
However, here is a proposal. The block-out should be aligned with the grid so we can easily snap details/texture to the house and at the end we can add a lattice deformation (not sure it's called that in blender) to fine tune the angle of the wall so it looks more natural.
@theluthier
2 questions:
A good example of this is the image below. The trees on the left and right feature only the limbs you can actually see from the perspective of the camera. The tree in the middle represents a lot more branching. If we're only concerned with the perspective of the camera, the trees on the left and right are probably more appropriate - a ton less vertexes.
If we need to be able to walk it, then the tree in the middle is likely to get even busier as I find attachment points for the leaves.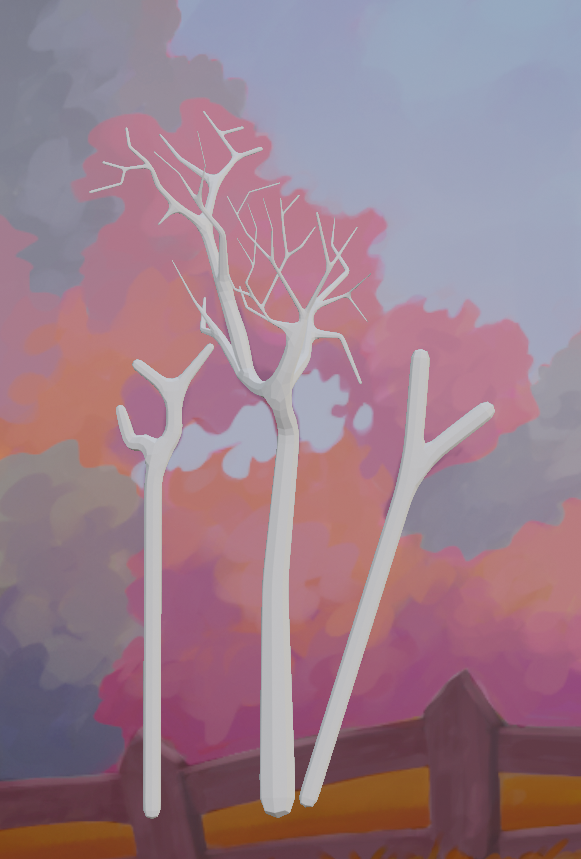
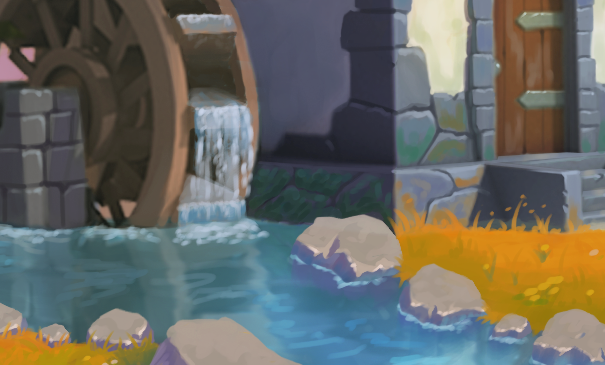
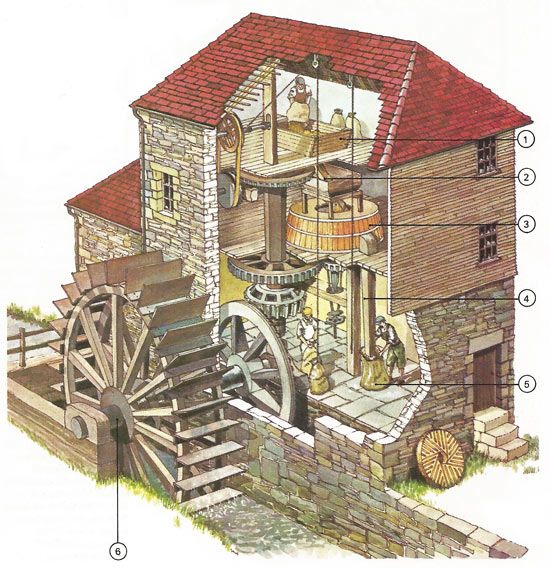
@theluthier I just watched your casual livestream and was thinking of the dam,
Maybe this will help
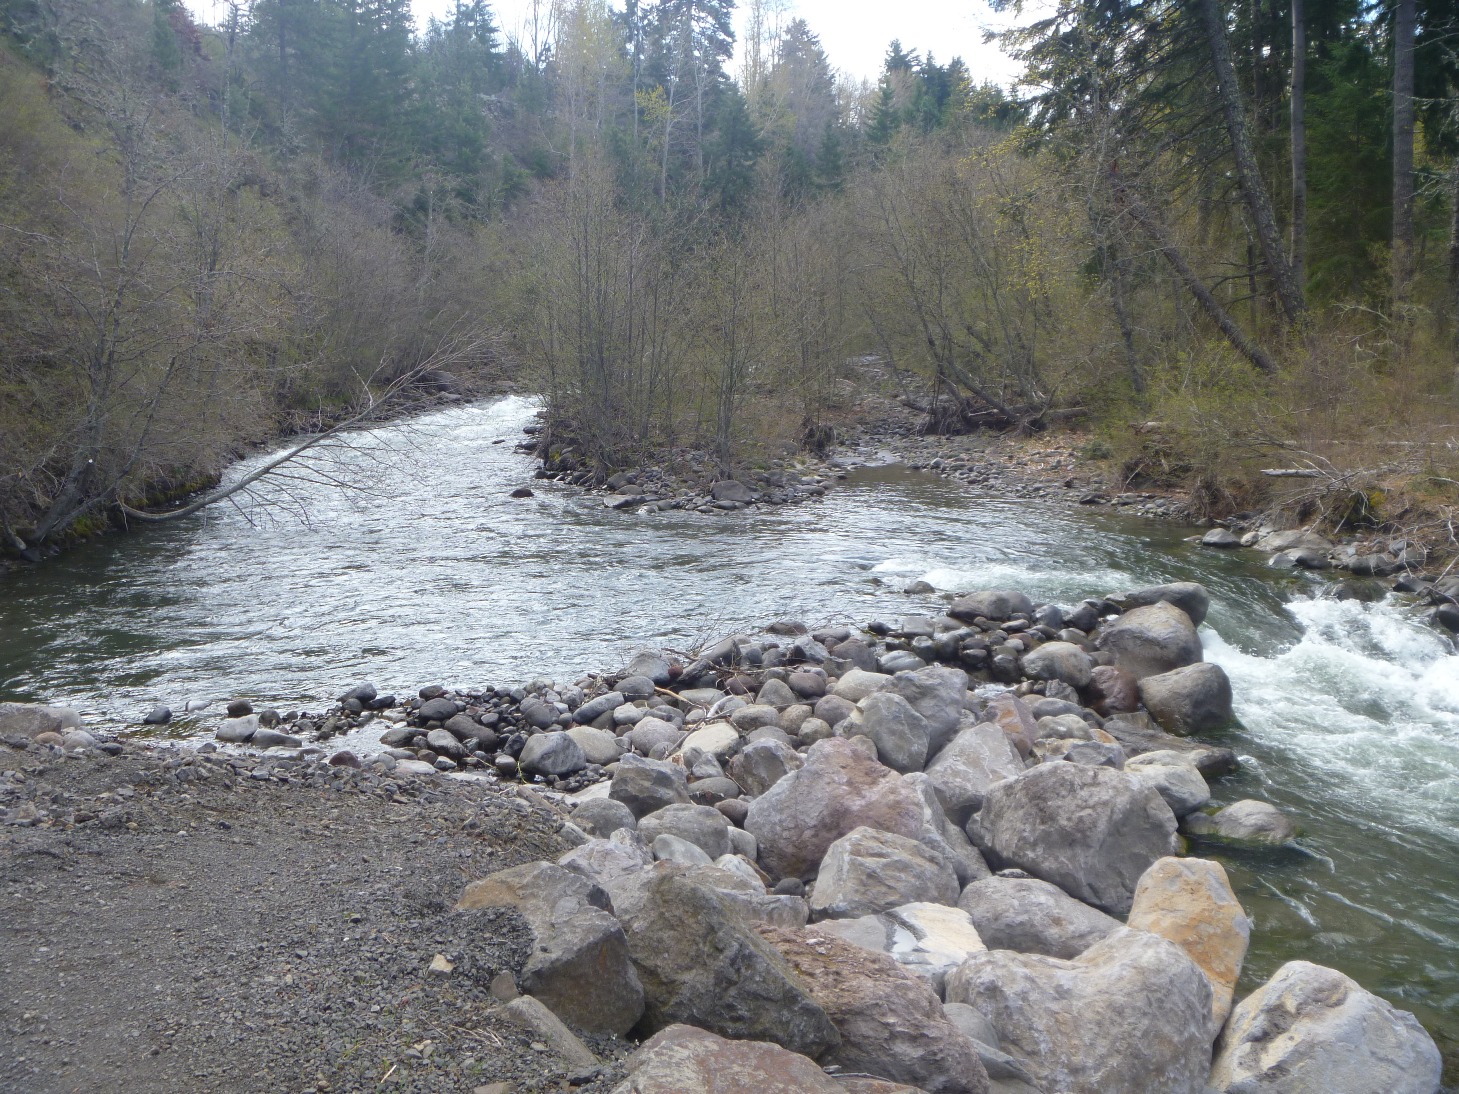
This is the type of dam I thought of, the rocks are used to direct the flow of water into a narrow more powerful flow to turn the waterwheel and could be a feature behind the house. To build it would be to reuse some rocks from the front of the house.
The front I see as a more tranquil and peaceful pool of water
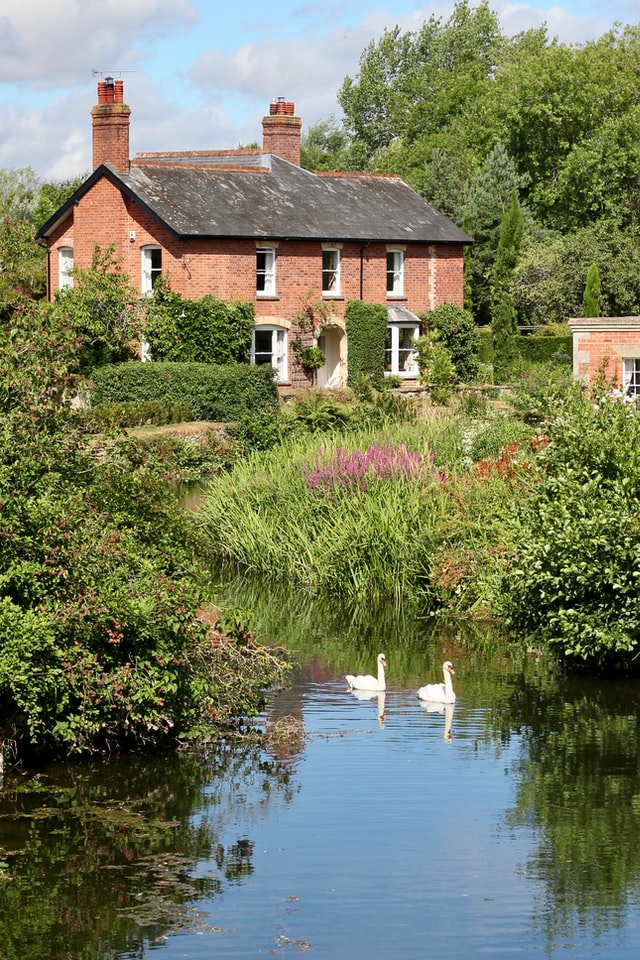
or this
a bridge could be added before opening out into a lake like this.
@adrian2301 I agree. It seems that the vast majority of water wheels have masonry running on their side and below them. This makes sense for both the stability of the support structures, as well as erosion control. I'm no expert on the matter, but I imagine water wheels would increase the rate of erosion for the banks surrounding them. But even just going off the art, I would think that the foundation cobblestone would continue down and over, to at least the support.
@adrian2301 Nice idea about the flow of the water, there should be a more poweful flow to turn the wheel. @lexicolopolis It's indeed custom to build the foundation all the way down into the water to prevent erosion. I'm a structural engineering by day ;) so that's how I would design it :).
Sidetracking here: for bearings that are under water, people tend (or tended, I am not sure if they still do this) to use pockwood, which is a hardwood that has the property, that is becomes 'greasy' when wet. It is self-lubricating!
'Interesting' fact is that there is a tool, used by church organ tuners, that is traditionally also made of pockwood...
![]() spikeyxxx I'm not familiar with pockwood. Do they use it as a foundation or just for cladding?
spikeyxxx I'm not familiar with pockwood. Do they use it as a foundation or just for cladding?
![]() daphne2 Indeed you're on my registration list! Have Week 1's task is so simple, I don't think you will have any issue catching up in week 2.
daphne2 Indeed you're on my registration list! Have Week 1's task is so simple, I don't think you will have any issue catching up in week 2.
I just shared out the asset spreadsheet and google drive folder. Please commend on the asset you'd like to build, get synced up to the folder, create a WIP thread, tag me in your week 1 homework post and I'll grade it 👍
Don't really know where to post this, but the Multiresolution Modifier has some strange and confusing naming convention:
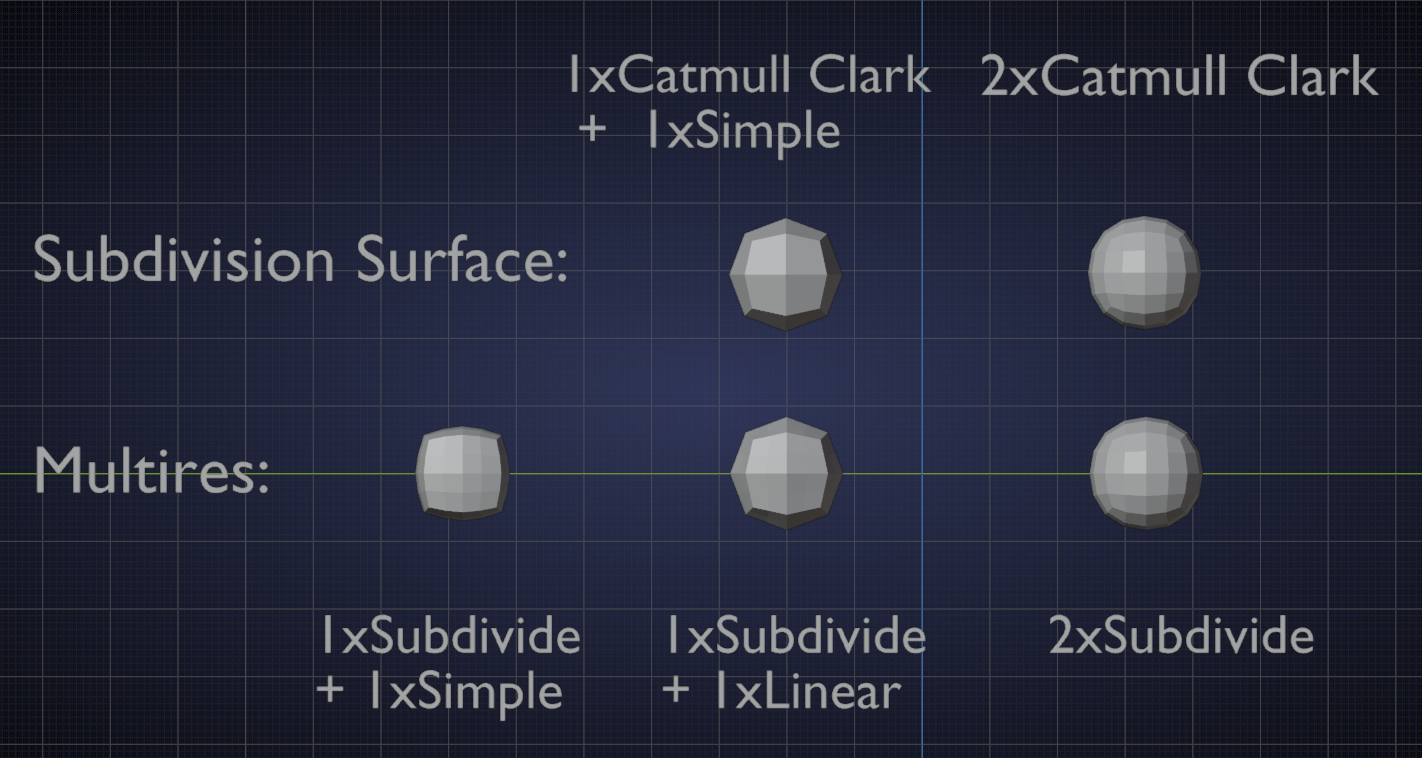
The difference between Simple and Linear only becomes clear on a deformed (by Sculpting for instance, but also like in the example above) Mesh, whereby Linear is like Simple in the Subdivisio Surface Modifier and Simple is something new, smoothing, but smoothing the original Mesh less.....or something like that.
Thanks for digging into this ![]() spikeyxxx! Now that I'm seeing your example, I seem to remember the simple subdiv example used for (kind of) retaining suggested hard edges in a lo-poly base. Which is why it's more cubish than spherical. So I guess it's attempting to preserve suggested hard edges that don't have holding edges like I added yesterday...
spikeyxxx! Now that I'm seeing your example, I seem to remember the simple subdiv example used for (kind of) retaining suggested hard edges in a lo-poly base. Which is why it's more cubish than spherical. So I guess it's attempting to preserve suggested hard edges that don't have holding edges like I added yesterday...
Interesting option but still seems a bit half-baked to me. Holding edges I can trust.
Great question ![]() wardred. I think only the FG trees should feature the small branches you've presented in the screenshot. MG trees can have the thicker branches but thinner branches should be removed (i.e. hidden by the leaves). BG tree clusters will only be the trunks with all branches non existent ( fully hidden by their leaves)
wardred. I think only the FG trees should feature the small branches you've presented in the screenshot. MG trees can have the thicker branches but thinner branches should be removed (i.e. hidden by the leaves). BG tree clusters will only be the trunks with all branches non existent ( fully hidden by their leaves)
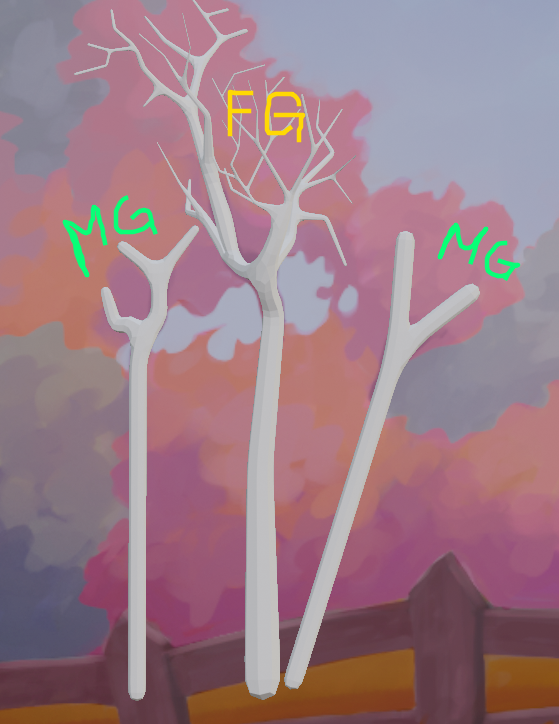
I'm planning to spend some time this week researching foliage methods. Look for a post from me about this and clarifying things like level of detail in the nature team post.
I originally posted this to my team thread, but it might be better to put here:
I have a question about data linking, optimization, and performance.
I understand the benefits of using data linked objects for the sake of mapping numerous UVs to the same map space, and thus cutting down overall texture data. Clearly with that comes reduced time painting, and modeling.
But is data linking reducing the data load based on the vertices themselves? I imagine that you're essentially instancing the object, which I've always believed had huge performance advantages, but I don't know why I think that.
From a rendering standpoint, I could see that you'd probably be getting better performance on memory allocation by having smaller data chunks with the linked object data, but the instanced copies in my example below have faces that aren't being culled on the interior, so the payoff would probably be less. Not sure if I'm assessing this correctly.
If data linking does increase poly-related performance, does this translate to other environments? For example, can you export to Unity in a way that the data-linked geometry is functioning as multiple copies of the same base object? Or would you have to use a different method to have this translate properly?
EXAMPLE:
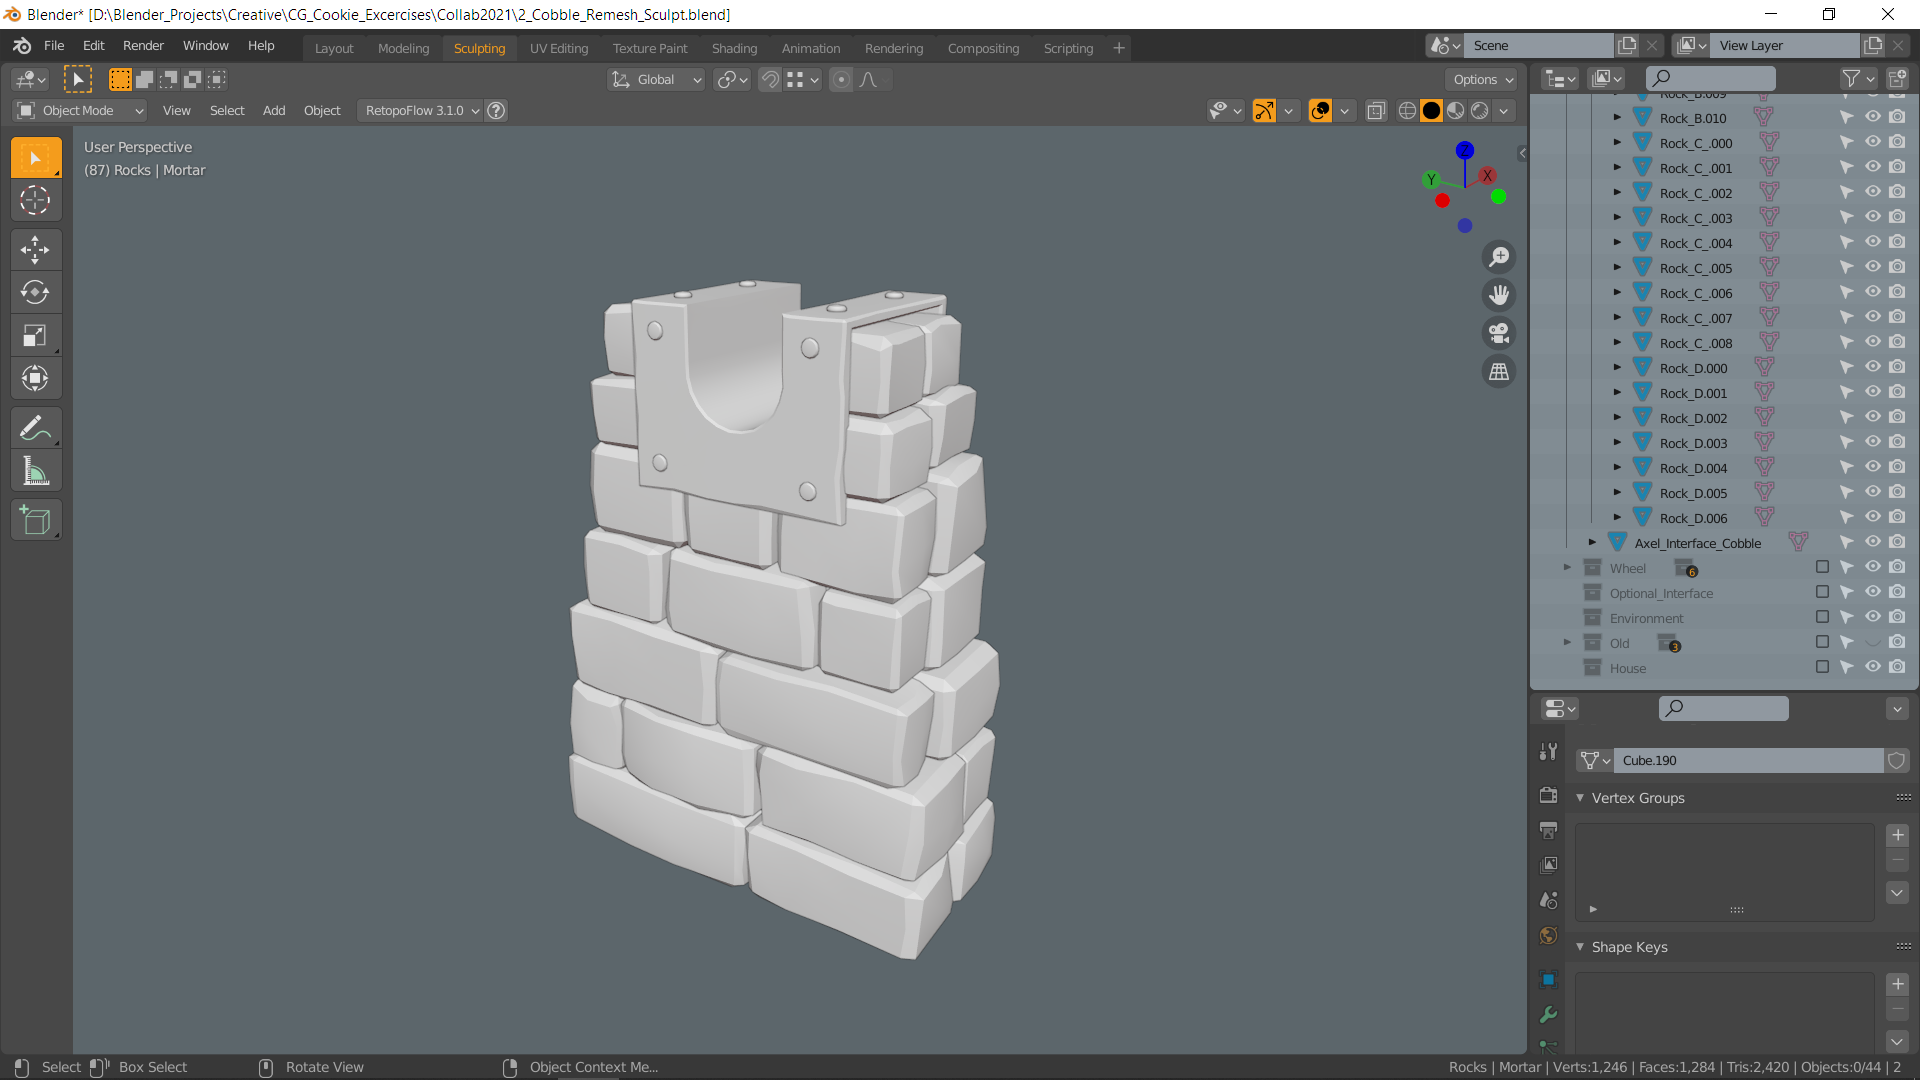
Having these stones setup as 4 stones that have been duplicated and data linked gives me 278 verts. As single users they hop up to 2k.
Alternately by making them single users, booling out their interiors, and then optimizing their geometry the best I could, got me down to 1,483, without data linking.
Retopo looked like it could get MAYBE get me closer to 1000. I started it to see how much labor was going to be involved with what kind of reward, and about 40% through I was already at 500.
So, what approach would be a) most optimal for performance as it relates to this project? and b) most optimal as it relates to exporting assets to game engines or other environments?