A game's performance can make or break the experience. Playing a game that is properly optimized feels smooth and responsive, and it will have a larger audience since it can run on lower-end platforms as well.
Maximizing game performance can be quite relative to the game that you're working on and performance tips that may work for one game may be completely pointless for another. While each game may require a different approach to optimization, these are the key techniques you can implement in most situations.
Getting started in Unity? Watch our FREE tutorial series: Unity Introduction for Beginners
1. Keep It Simple
I'm putting this first since it should be a general rule for any game that you build. Whenever you design a game you need to determine specifically what you need and, more importantly, what you don't need to include.
I always like to approach development from the perspective of what can I get away with to achieve the same effect?
I enjoy going back to old scripts or projects and finding ways to make something more efficient, often by stripping down the excess. However, think with performance in mind as you're designing it the first time. Don't limit yourself too much, but understand that it's easier to build a performant game from the start rather than trying to restructure things to work better later.
2. Use the Profiler
Before you start removing lines of code, refining prefabs, and trying to make everything performant, you need to know what is actually causing performance issues. The Profiler is a great way to get an in-depth look at how your game is performing. You can find the Profiler under Window>Profiler and it will run when you play your game.
You'll need to keep the window visible while playing your game. It will display categories such as CPU usage, GPU usage, Rendering, Physics, Audio and more. You can then narrow down the specifics further within each category.
3. Batch Those Game Objects
Often, the visual aspects of a game are going to be one of the big areas in which you can improve performance. Visual elements will impact draw calls. To put it simply, anything that appears on screen must be "drawn". Imagine having 100 different draw calls for a scene versus optimizing your scene to have less than 5.
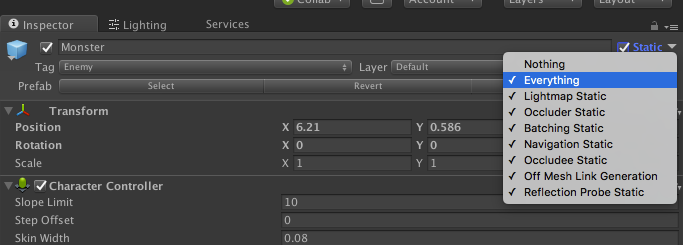
Static Batching is used whenever you set a game object to static. This means that the object will not move, scale, or rotate. Objects that share the same materials will be batched together. You have probably used this when you're trying to add baked lighting or something like a navigational object to your game. Static batching will be the most performant, so set objects to static whenever possible. If it doesn't need to move for any reason then check the static checkbox at the top right of the inspector.
Dynamic Batching is used for objects that will be moving around. Similar to Static batching, it will batch together items of like materials. With dynamic batching there are some unique requirements as per Unity:
- Batching dynamic GameObjects has certain overhead per vertex, so batching is applied only to Meshes containing fewer than 900 vertex attributes in total.
- If your Shader is using Vertex Position, Normal, and single UV, then you can batch up to 300 verts, If your Shader is using Vertex Position, Normal, UV0, UV1, and Tangent, then you can only batch 180 verts.
- Note: attribute count limit might be changed in future.
- GameObjects are not batched if they contain mirroring on the transform (for example GameObject A with +1 scale and GameObject B with –1 scale cannot be batched together).
- Using different Material instances causes GameObjects not to batch together, even if they are essentially the same. The exception is shadow caster rendering.
- GameObjects with lightmaps have additional renderer parameters: lightmap index and offset/scale into the lightmap. Generally, dynamic lightmapped GameObjects should point to exactly the same lightmap location to be batched.
- Multi-pass Shaders break batching.
- Almost all Unity Shaders support several Lights in forward rendering, effectively doing additional passes for them. The draw calls for “additional per-pixel lights” are not batched.
- The Legacy Deferred (light pre-pass) rendering path has dynamic batching disabled because it has to draw GameObjects twice.
Not everything will be batched by Unity. Things like skinned Meshes, Cloth, and other types of rendering components are not batched.
That is batching from the Unity side, but there are ways to improve upon it and even customize batching to your liking. I personally like to combine meshes whenever possible. You can use something likeMesh.CombineMeshes which does exactly what it sound like - it combines meshes.
You could also utilize special assets to do this for you like Simple Mesh Combine from Unluck Software. I've used that asset in a few courses (such as in this lesson for the Tower Defense game) and it's a staple for me when improving the performance of my games.
4. Reduce and Reuse Textures
Since batching works based on like materials, you can combine many objects together if they share one big texture. Multiple high-resolution textures will slow down performance. While you can have these in your game, you need to ensure that you're being selective about how they are being used.
Use a Texture Atlas to combine multiple texture maps into one larger texture map. This is a common technique in AAA games and one you should be utilizing in your games. This not only helps to reduce the number of texture maps used, it also makes everything much easier to organize. This has been done to the extreme at times in games like Rage and Doom with the use of Megatextures and virtual texturing. Here is a video describing this technique if you are curious. Learn about materials and textures and their relationship in our Fundamentals of Materials and Textures course.
5. Use Culling to Limit What is Rendered
This is one of my favorite ways to increase performance, but maybe just because I like the way it looks when testing. To understand how culling works we need to take a look at how objects are rendered in Unity.
By default Frustum Culling is utilized by the camera. To quote Unity:
The near and far clip planes, together with the planes defined by the field of view of the camera, describe what is popularly known as the camera frustum. Unity ensures that when rendering your objects those which are completely outside of this frustum are not displayed. This is called Frustum Culling. Frustum Culling happens irrespective of whether you use Occlusion Culling in your game.
Frustum culling is a great way to improve performance and something Unity does by default. The problem with this alone is that it can render objects that we have no direct line of sight with. Imagine standing in front of a door and still rendering all objects behind that door. This is where Occlusion Culling comes in. To occlude is to block, and in this case a game object is blocking the view of other game objects. We can tell Unity not to render objects that are occluded using specific parameters we designate within the occlusion culling window. That allows us to only render objects that we have a direct line of sight to. There's no reason to render an object at the far end of our camera's view unless we can see it directly.
Like many of Unity's built-in features, there are always great assets that can take it to the next level. One that I'd recommend is SECTR VIS, which gives you better control over what can be rendered when.
6. Optimize Objects that are Visible
Limiting texture sizes and combining meshes are a great way to improve performance, along with culling of all sorts. How can we improve the performance of objects that are not being culled but are too far to see in detail? LODs (Levels Of Detail) are a way to render a lower poly version of a mesh when it's outside of a certain range. A mesh that is quite far away can be made incredibly low poly to improve performance.
MipMaps are like LODs for texture maps. MipMaps allow textures to be reduced in resolution when far away from the camera. They can also be used if a lower end system is struggling to render a texture at the specified resolution. MipMaps are enabled by default on textures that are imported into Unity and should be enabled unless you are using a camera with a fixed distance at all times and/or using your own unique tools to achieve better performance with your textures.
7. Use Proper Compression and Load Types for Audio
Audio is sometimes overlooked when trying to optimize a game, but it can affect performance just as much as anything visual. Unity supports multiple audio types of which you can explore here. By default it'll import the audio clips to use a load type of Decompress On Load along with a compression of Vorbis.
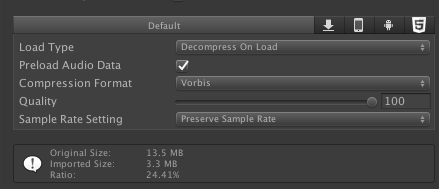
It's important to note the sizes displayed here. For this one looping audio clip, the imported size is 3.3 MB which adds to the memory needed for our game by exactly that much. The original size is the amount of ram it will take to play that one clip.
Sound effects are typically short and thus have small memory requirements. For these, Decompress on Load would work best, but the compression type should be either PCM or ADPCM. PCM provides higher quality but comes with a bigger file size, which is fine for a very short but important sound effect. ADPCM has a compression ratio is 3.5 times smaller than PCM and is best used for audio effects that are used very often such as footsteps, impacts, weapons, etc.
For longer audio clips such as background music or other large files, it's better to use Compressed in Memory, which results in the file being decompressed right before playing. Streaming is another option as well. According to the Unity docs, streaming uses a minimal amount of memory to buffer compressed data that is then incrementally read from the disk and decoded on the fly.
8. Streamline Physics Calculations
Calculations cover a broad spectrum of mechanics in Unity, but I'll focus on a few that are used quite often.
Raycasts Raycasts are often used to detect other objects for various things like checking distance, weapon impacts, direction, clearance etc. Find only what you need when using a Raycast. Don't use multiple rays if one will suffice and don't extend it past the length that you need it to travel.
Raycasts detect objects, so the less it needs to detect the better. With something like Physics.Raycast, you have the option to utilize a Layer Mask which allows you to only detect objects on a specific layer.
Colliders
In Unity, you can utilize a number of different colliders ranging from box colliders, to capsule colliders, mesh colliders, and even 2D based colliders. Use primitive colliders whenever possible. These are your basic shapes for colliders such as box, sphere, or capsule. Mesh Colliders take the shape of whichever mesh that you indicate. An example of this would be a human character that has a collider that conforms to their shape.
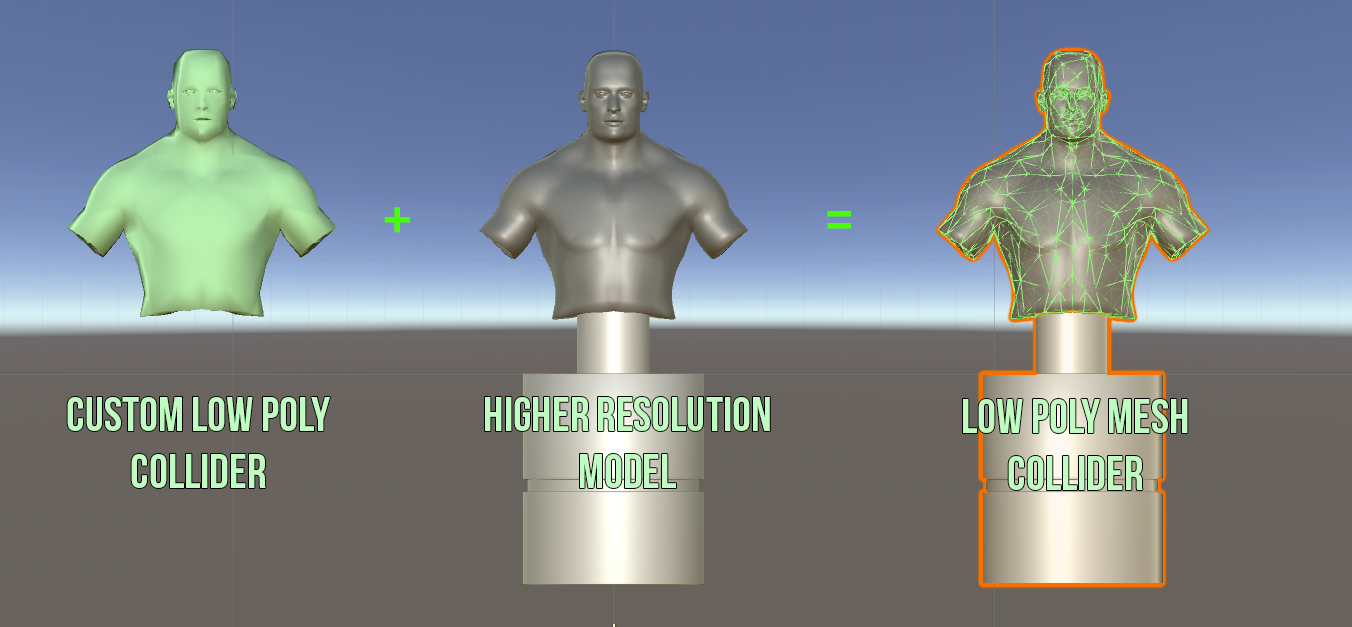
This is incredibly expensive to use and should be avoided if possible. If absolutely needed, create a low poly version of the mesh and designate that as your mesh collider instead. To add onto the Raycast section above, Raycasting against mesh colliders is also quite expensive.
Rigidbodies
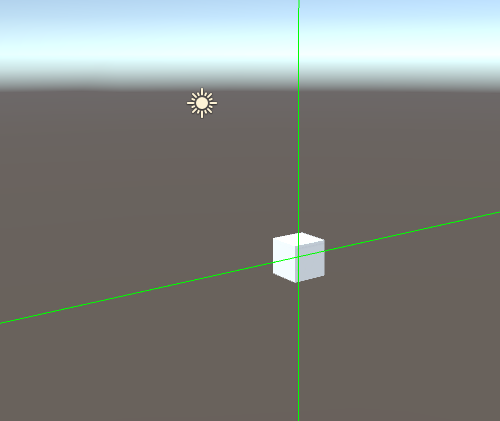
Rigidbodies are typically used to add weight to an object. If an object has a Rigidbody attached, it can then be affected by physics such as gravity other forces. It's important to note that having too many Rigidbody objects within your game will affect performance negatively. For fun, try building a massive wall of Rigidbody cubes that fall to the ground and see how it affects performance in your game. Reducing these to the minimum amount you need is the first step.You can also improve the performance of Rigidbodies you're using by determining when they should sleep.
When sleeping, computation of these objects drops significantly and will stay that way until they are utilized again. It's important to add a Rigidbody component to objects you will be moving around in game, even if they will not be moved using forces. Objects without a Rigidbody are considered static colliders and should not be moved. You can still move them, but it'll come at a drastic performance cost. Set Rigidbody components to "is Kinematic" if you'd like to move them on your own without physics. Learn more about how to use Physics in Unity in our Fundamentals of Physics course.
9. Clean Up Your Code
This area can be quite vast in terms of what you can optimize, so once again I'll just refer to a few areas that commonly need improvements.
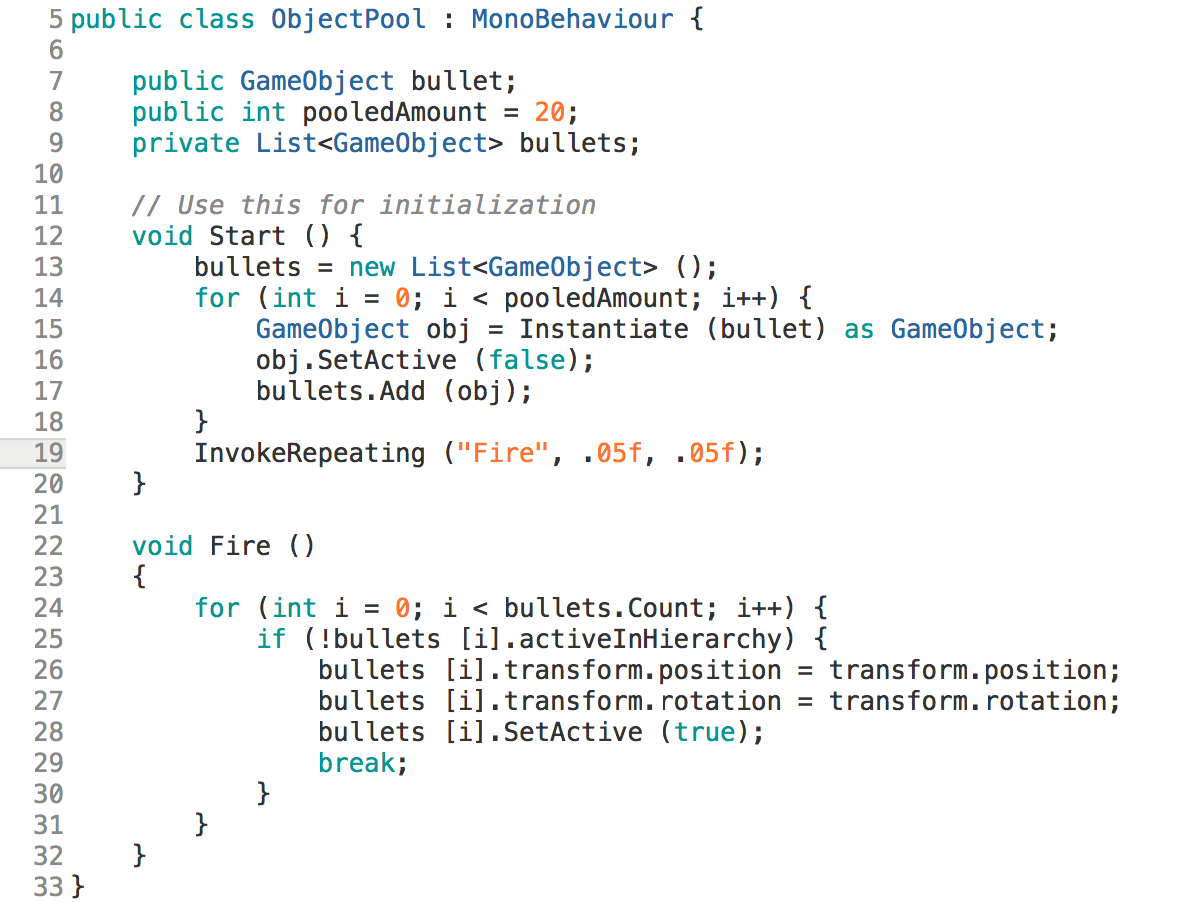
Object Pooling
Pooling commonly used objects allows you to reuse them over and over again without destroying them. An example of this would be in a shooting game where a player may shoot physical bullets at. Each of these bullets can be reused once they've been fired, recycling every time by disabling then enabling themselves when needed. This is useful for objects that are used very frequently.
Coroutines vs Update
An Update method is called multiple times per second and is often used to refresh things like player input or a score. When reviewing code, I sometimes find them used for updating things that don't need to be refreshed so often. For example, I don't need to update a health status multiple times per second. I only need it to refresh when there is a change in health.
Coroutines can act in place of the Update method by updating a value at a specific time that you specify. They have little overhead and can be used in cases where you need to loop through something and then stop. An example of this would be a fading graphic. Fading using the Update method would be a waste since it does not need to refresh so often. There may also be times when you only need to get an update every so often, like a wave system that deploys enemies every 10 seconds or a power up that slowly decreases over the course of 5 seconds.
Think of creative ways to avoid using Update and see how your performance improves.
Caching Components
This is something everyone should be doing, but I have seen some students using this inefficiently. I typically like to cache components in the Awake or Start methods. By caching, I'm referring to using GetComponent. An example would be something like this:
myText = GetComponent<Text>();
where Text is the component I want to get. Don't use GetComponent multiple times in a method when you can cache it once and use that variable throughout the script.
Searching
Avoid using GameObject.Find("MyObjectName"). This is typically done to look for a game object and assign it to some variable. If you need to look for an object in this manner it might be better to use GameObject.FindWithTag("MyTag"), but be aware that since it is looking for a specific tag (which can be applied to many objects) it can be hit or miss unless one object has that tag. The reason to avoid these in regards to performance is because they can be quite slow and, as mentioned before, it's best to add these to the start or awake methods to find them only once.
I personally don't like using either of these because it's quite easy to get stuck with typos. If I am looking for a game object called "Enemy" and I typed GameObject.Find("enemy"), Unity won't find them because I added a lower case letter.
I prefer to manually assign these objects. Not only does that give more freedom, it also makes it easier to make changes to names and hierarchies if needed.
Custom Performance Scripts
When testing a game, one of the first things I'll look at is the Frames Per Second. The FPS is typically a general indicator of how well your game is running. This number can vary greatly depending on the platform that you're running the game on, but you need to have a definite way of checking this regardless. The stats window can be misleading in regards to FPS, so it's best to use either the profiler or a custom FPS script to display on screen when playing the game. You can find some examples of FPS scripts here.
Turn off Unused Scripts
As with a lot of things in your game, if you're not using something, turn it off. Is there a reason to constantly update the waypoints of an enemy that you can't even see? Probably not. Leave only what is necessary on while the rest are disabled and/or turned off.
New to C# in Unity? Get Started With Coding Quickly: Unity C# Bootcamp
10. Bake Your Lights
Lighting can be quite a complex topic, but in general you should use the minimum amount of lights necessary to achieve your desired style. Lights can be one of the most expensive aspects of a game, so lower end platforms often struggle with dynamic lighting.
In Unity 5.6 there are there three light modes: Realtime, Mixed, and Baked. Realtime is the best, but it comes at a performance cost. This also allows dynamic shadows, which are also expensive to use. Baked lighting can and should be used whenever possible. This allows you to add lighting to your world while giving you the performance benefits of not having to calculate dynamic light at all times.
Keep in mind that you can "fake" lighting by using emissive maps, which cause parts of the texture to appear to emit light. An example of this would be the dashboard of a plane that has many small lights. Creating a point light for each of these would be incredibly expensive, but using a series of emissive areas on one big texture map not only serves the same purpose but is also much more performant. Baked lighting and other lighting techniques are taught in our Fundamentals of Lighting course.
Looking to learn how to bake lighting for HDRP? Check out this course: https://cgcookie.com/course/real-time-rendering-in-hdrp-with-unity-2019 or read this article on lighting game environments: https://cgcookie.com/articles/art-of-lighting-game-environments
11. Use Efficient Shaders
I can't get into the complexities of optimizing shader code here, but we all utilize shaders regardless of whether we create them ourselves or use the built-in shaders. Shaders control all the visual elements in your game so having optimized shaders can greatly improve performance because they require a ton of calculations. While you could go in and start tinkering with the code itself, I would like to point out some general considerations for shader use in regards to performance.
are typically camera based effects which apply to the entirety of what the camera sees, which is usually the whole screen. Things like Global Fog and Fisheye are common image effects that you may have used before. These are almost always going to come at a performance cost and, if used, should be optimized as much as possible. I tend to use image effects as a little extra something to make the visuals a bit more appealing or fun, but stacking too many on top of each other is a sure way to slow things down.
Another way to improve performance is to use mobile friendly shaders, even on higher end platforms. This goes along with the idea of what can I get away with. If you're working on a mobile game you should definitely be using mobile shaders because they require less computation.

Enable Instancing
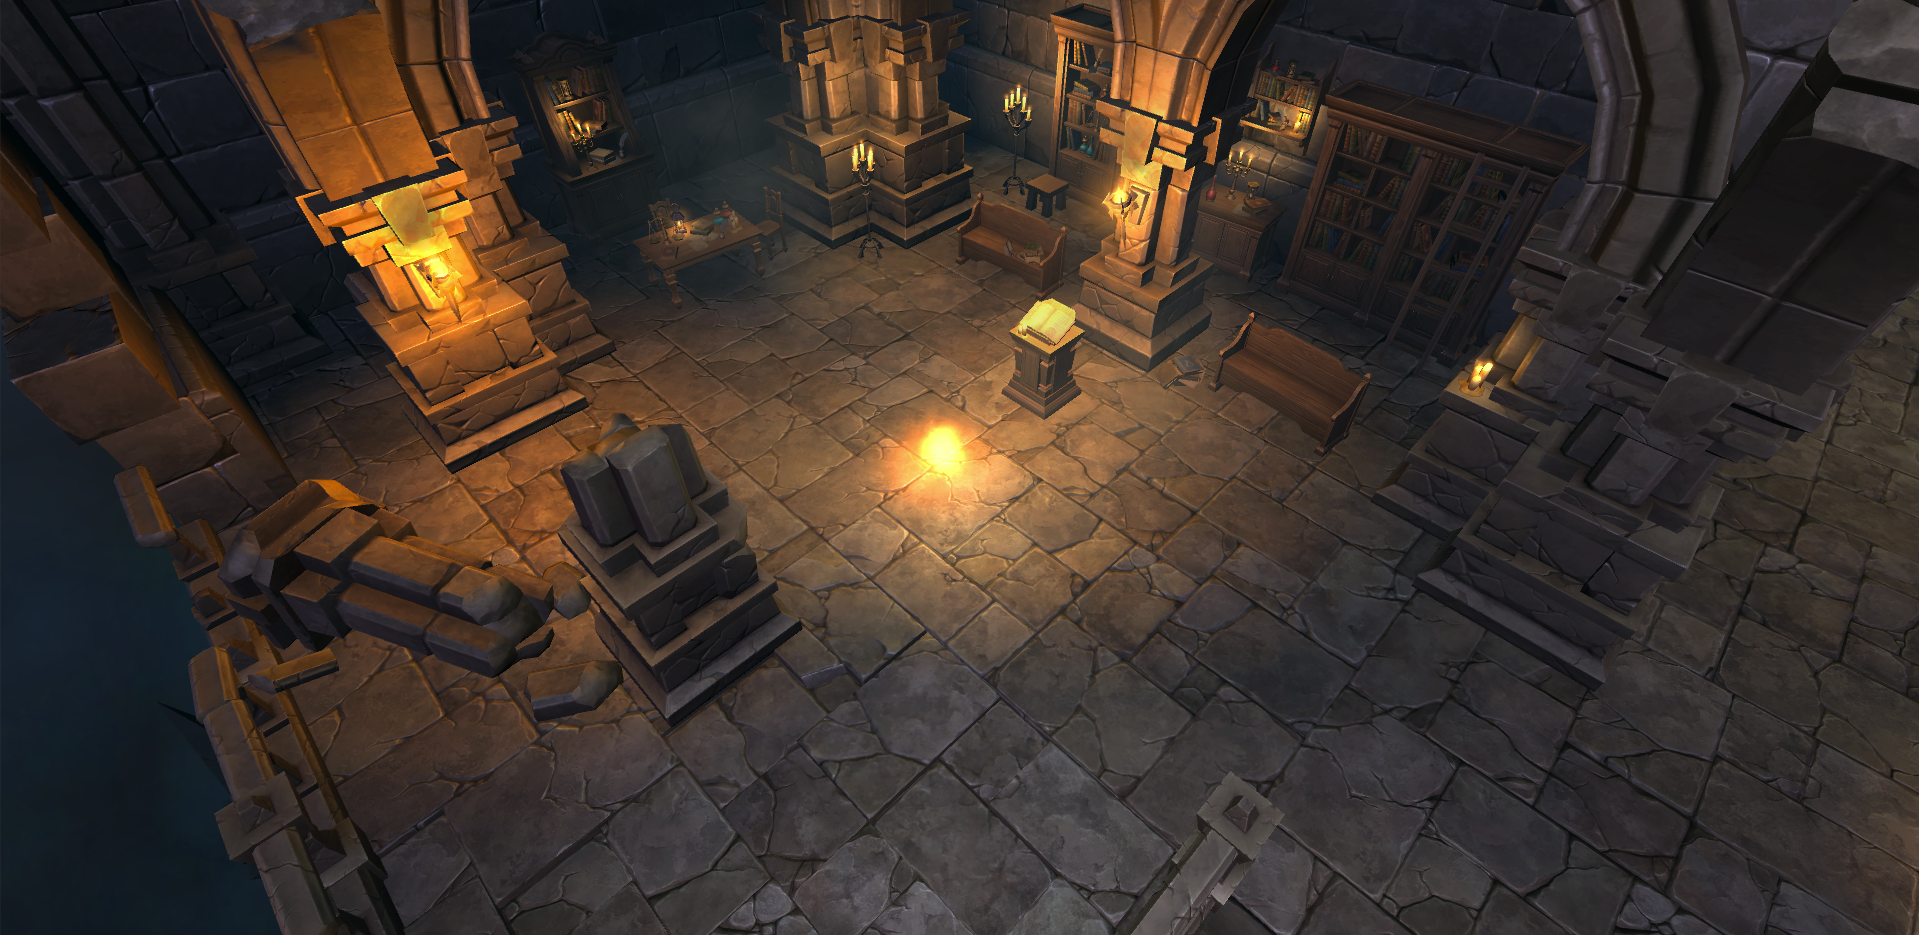
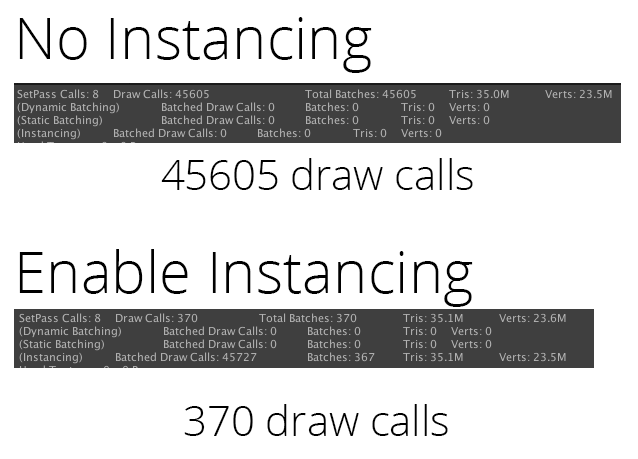
I left this one for last as it is a relatively new performance upgrade that Unity 5.6 utilizes, but it's one of the best tricks I've seen and it's quite easy to use. On the Standard material (and a few others like Mobile and Nature Shaders) you'll see a checkbox at the very bottom under Advanced Options that says Enable Instancing, check that on and you'll see your draw calls drop drastically for all objects that utilize that same material. You'll see bigger performance increases if you have a lot of game objects in your scene that utilize the same material such as an asteroid field, bullet hole impacts, trees, etc.
12. Utilize LODs
We've discussed this a bit up above but Level of Detail or LODs as they're most often referred to allow us to display 3d meshes at different polygon counts depending on the distance. Up close I may see a model at "full resolution" but if I'm standing too far away to make out any details on that mesh it makes no sense to continue rendering the higher poly version of that model.
Unity has a built in LOD system, but it's a bit of a manual process and can be a bit tedious. Automatic LODs are something that is being experimented with and if you'd like to try it you can utilize this Github page to try out what is currently available.
Imposters are an extreme form of LODs and have been used for quite some time. If you've ever played an older game you may have noticed crowds rendered using animated billboard meshes. Trees that just appeared as images. Imposters utilize the same concept. Why render out a low poly mesh when you can render out a flat plane?
 Amplify Impostors
Creating imposter LODs can be a bit more time consuming as you have to take into account multiple angles. I'd recommend getting an LOD system like InstaLOD or Amplify Impostors to make this process not only easier, but more efficient.Remember the less you need to render the better and having LODs help reduce the load of rendering only what is needed.
13. Utilize Efficient Particle FX
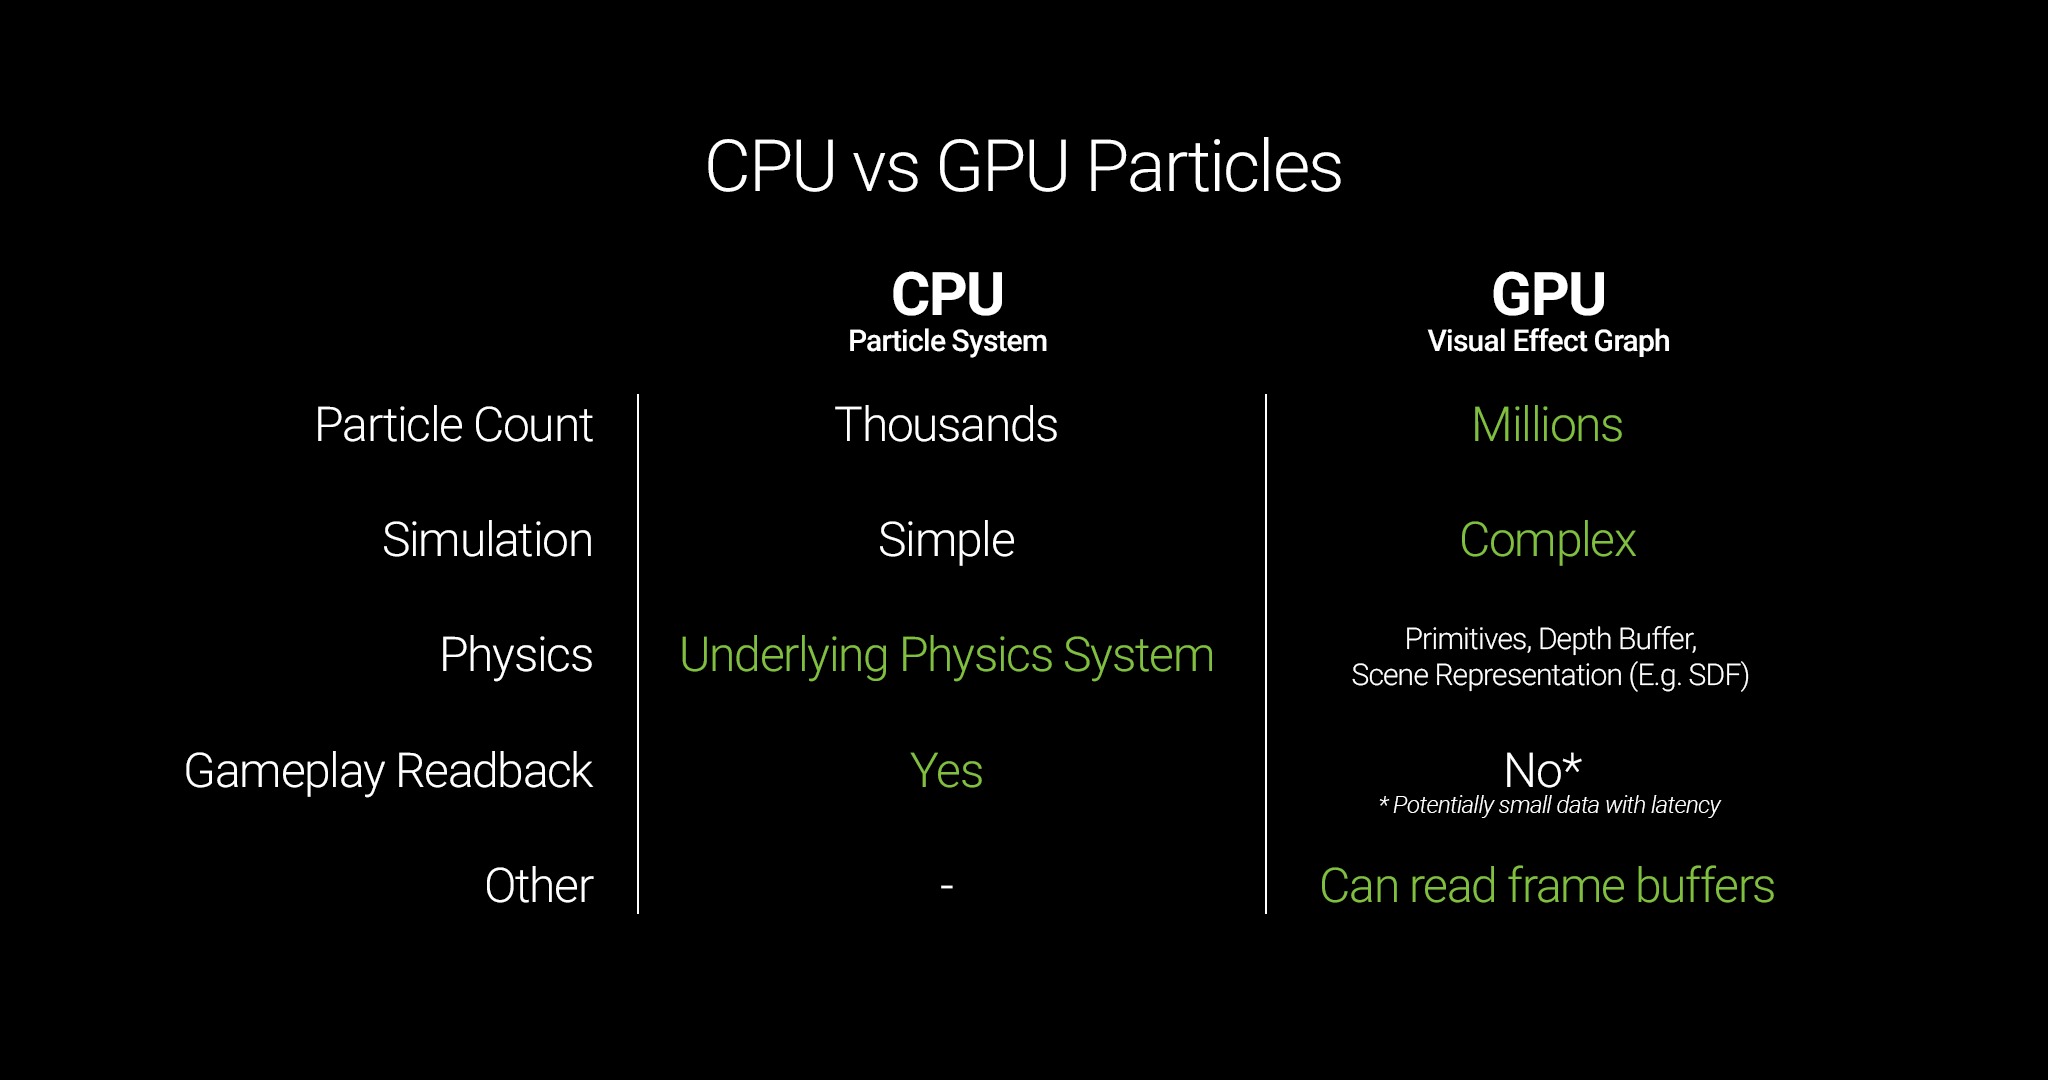
Unity currently has the VFX Graph in preview as of writing this and can be utilized while using the HDRP template. Particle effects can sometimes be some of the most expensive things to render in general. Creating a fancy fluid simulation, smoke or fire to look realistic takes plenty of processing power. Thankfully the VFX graph can help solve some of these issues while still looking amazing. Here is a quick comparison between the built in Shuriken Particle System and the VFX Graph:
 VFX Graph Comparison
The shuriken particle system works off the CPU as do many parts of your game while the VFX Graph can work off the GPU and as such can have millions of particles.
The VFX Graph will not replace everything within the Shuriken Particle Systems. I'd utilize the VFX Graph for larger "visual only" types of effects like smoke, fire, or any other effect that requires large amounts of particles and won't interact much with the environment if at all.The shuriken particle effects should be used for small quick effects like projectiles, impacts and debris.
14. Animation Instancing
Having many animated characters and objects within your game can reduce performance quite a bit and that's due to how the skinned mesh renderer is processed.
 Make your zombies performant!
Here is quote from a great article on Animation Instancing
We often implement outdoors scenes with GPU Instancing, such as grasses and trees. But for SkinnedMeshRenderer (for example characters), we can’t use instancing, because the skinning is calculated on the CPU, and submitted to the GPU one by one. In general, we can’t draw all characters through one submission. When there are lots of SkinnedMeshRenderers in the scene, this results in lots of draw calls and animation calculations.
Animation instancing is especially important when working with large amounts of characters. Think about an open world environment that contains many people or Crowd simulations. Check out the Github page from the article linked above here: https://github.com/Unity-Technologies/Animation-Instancing
Wrapping Up
There are many ways to improve the performance of a game that are specific to only one genre or style, but I hope this general overview of common performance tweaks will help you regardless of the type of game you are creating.
Check out our free tutorial series "Unity Introduction for Beginners"
If you're feeling ambitious, take it to the next level by learning about Unity Interface, how to create Materials and Textures for your game, and make your game shine with this tutorial series about the perfect game lighting.
Thanks for the great tips. I am only a beginner at this stage and not understand most of these concepts. Definitely, I will need these knowledge sooner or later. I have bookmark this article for future read.
Ah thanks. I updated it.
Lovely, there is a missing image for Default Audio Import Settings (tip #7)
Amazing info. Thanks a lot!
Awesome man, will be saving this for future reference!
Great! Hopefully these tips improve the performance of your games.
This is great! I look forward to tinkering with these optimization settings,