
Let's talk about what vectors are, why they’re so crucial to understanding 3D applications, and how to use the most important vector math operations in a visual and intuitive way that I don’t think you’ll forget.
A vector is just a set of numbers. In the context of Blender and 3D graphics, we’re usually talking about a set of three numbers - one for each dimension. If you chart these three numbers on a 3D graph, you'll get a point in space.

You can also think about a vector as an arrow which points from the origin to that point in space. Both the point and the arrow are valid ways of visualizing the vector, but the arrow is going to be much more intuitive to think about.

A lot of people shy away from using math operations in Blender. I did too for a long time, because I just assumed that it was for people who were smarter or more technically inclined. If you feel the same, I don’t want you to think about this in terms of numbers and equations.
I’m sure you had to learn what a bevel and an extrusion was at some point while you were new to 3d modeling, but of course you didn’t have to know the algorithms behind the tools in order to use them - that would be ridiculous. In the same way, I want you to think about these operations in terms of learning a new tool. If you can just connect the name of the math operation to the effect that it has on the arrow that represents the vector, you’ll be able to start intuitively using it right away.
Adding Vectors
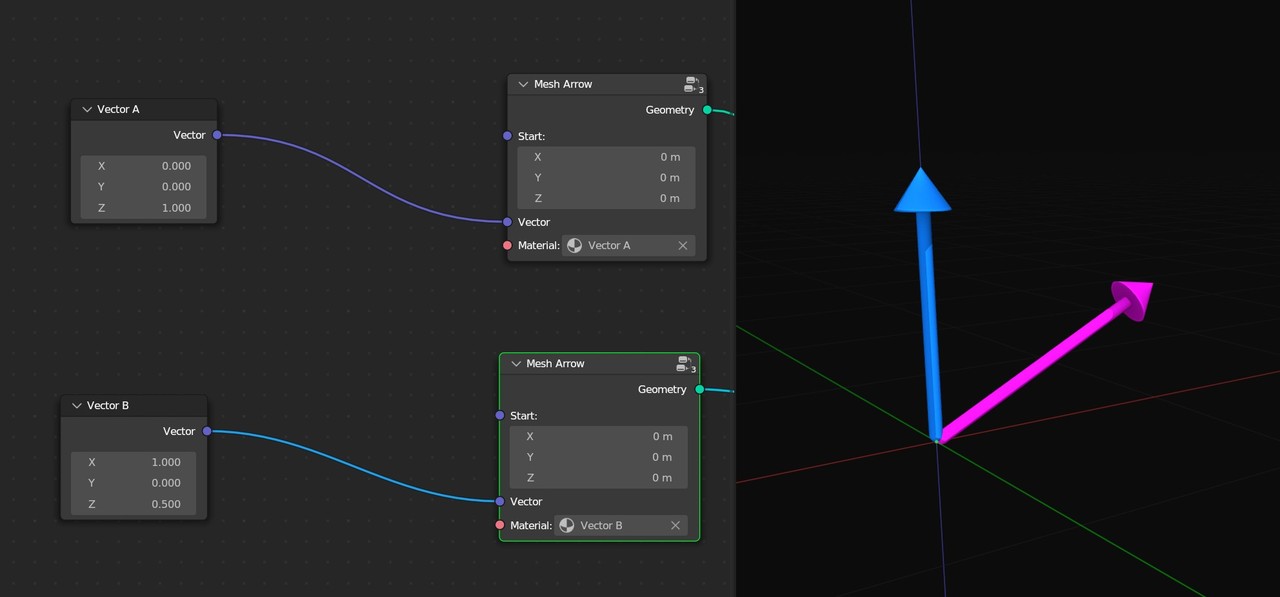
Here I’ve used Blender’s geometry nodes to create a mesh arrow that starts at some point and shows us the direction and length of any vector. I’ll create an arrow for vector A, another arrow for vector B, and then join them together. What do you think the resulting arrow will look like when we add the two vectors?
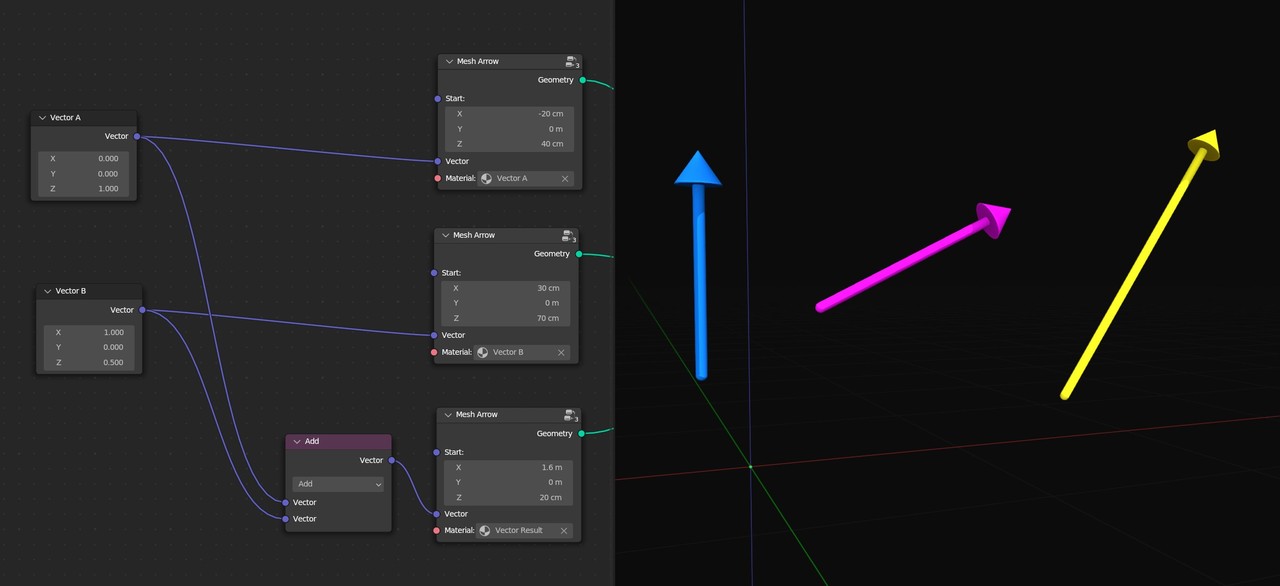
Now, I’ll use a vector math node to add the two vectors together and visualize that as vector C. The result lies somewhere in between the first two, and I don’t find it immediately intuitive until we do a little trick.

In math class, you might have learned that a vector has just a size and a direction. To visualize it, we have to give it some point in space to start from. In my mesh arrow nodes, all of the start points are currently [0,0,0], but we can change that to whatever we’d like and that does not affect the vector itself. Even if I move the start points around, vector A plus vector B still equals vector C. The sizes and the directions of the arrows are the same regardless of where they are. So, if we can place these wherever we want, we may as well move them into whatever configuration is most helpful for understanding the result.
Look what happens if I start vectors A and C at the origin but start Vector B at the end of vector A. Check out how the resulting vector C points to the end of vector B. I can change either vector to any set of three numbers and that will always be the case.

You can add as many vectors as you’d like, and the result will always point from the start to the end if you stack them together.

If you want to do the math, you can just add all the X values together, the Y values together, and all the Z values together.

But visually, addition is just stacking vectors on top of each other and taking a shortcut from the beginning to the end.
Subtracting Vectors
Subtraction is just adding the opposite of a vector.

If we were to flip vector B around, our triangle would be completed. Whether we do it with one number or a set of three, subtraction is always just addition but with the opposite of a number. A - B is the same as A + (-B).
Starting Points
At this point, you might be wondering how on earth a vector can be moved arbitrarily when we can also visualize it as a point in space. How can a point in space be moved to wherever we want? Well, that’s actually the foundation of how everything works in computer graphics: everything is relative!
The vector itself, the set of three numbers, doesn't tell you anything about the starting point that it's in relation to. The starting point, a.k.a. origin, and the vector are two separate things. We always need both pieces of information in order to visualize a vector.
The starting point of a vertex is going to be the object origin, the starting point of a child object is going to be the parent object, and the starting point of any object without a parent is going to be the world origin. Blender knows where to draw the vertex in the viewport by adding all of those vectors together!

Moving by Adding or Subtracting
In geometry nodes, we can offset things by adding or subtracting from their current position. In the example below, I can have Melvin drive to the left or right of the curve by adding or subtracting the curve's normal to his position.
In the same way, we can move any texture around in the shader editor by adding or subtracting from its vector coordinates.

Anywhere you see vectors in Blender, adding and subtracting is going to be how you move the point in space where the vector is pointing to.
Scaling Vectors
Multiplication is where things get interesting. If you ask a math student to multiply a vector, they might come back to you with several different answers because multiplication can mean a few different things when talking about sets of numbers.
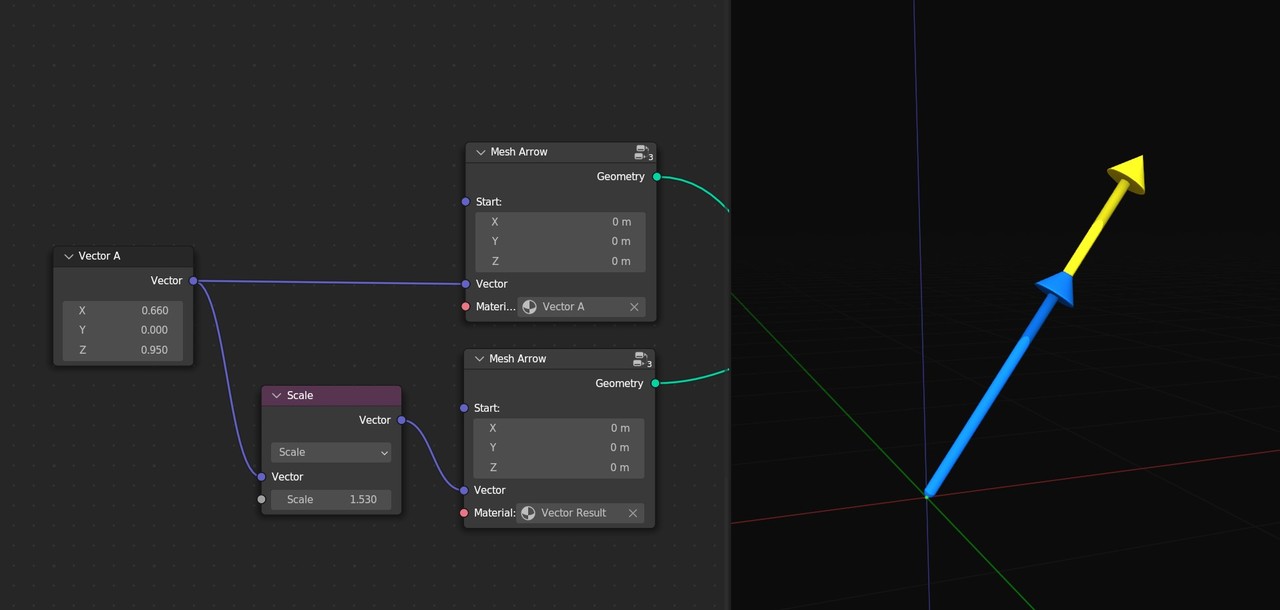
The first one we'll talk about is scaling a vector. When you scale a vector, it points in the same direction but gets longer or shorter. The scale function on the vector math node is the exact same thing as multiplying the vector by a single number, so we could just as well use a vector math node set to multiply and then input the same value for the X, Y, and Z axes. The scale function is just for convenience.
Blender also lets you scale each axis independently if you’d like by using this multiply function. Here we can input a second vector to scale vector A along the X axis, the Y axis, or the Z axis.

This is called element-wise multiplication, and below is what that equation looks like if you’re curious.

You can see that scaling objects in the 3D view works exactly the same way. If we point our vector at a vertex on a cube, then scale our cube, we just need to multiply our vector by the exact same amount we scaled the cube by, and we’ll always be able to point right to that vertex. Scaling things in 3D is just multiplying their vectors.

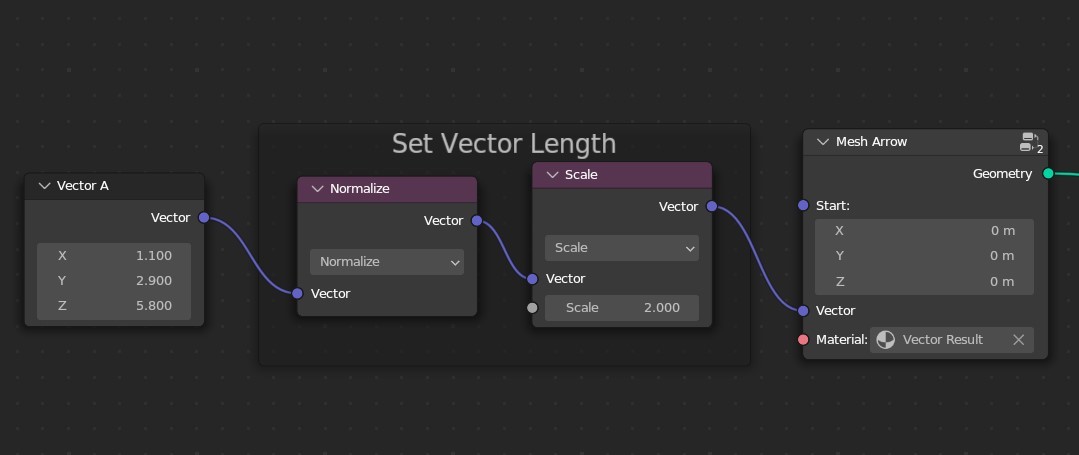
One helpful operation related to scaling is Normalize. That will take any vector and set its length equal to one. If we need to set a vector to any specific length, we can first normalize it and then scale it.
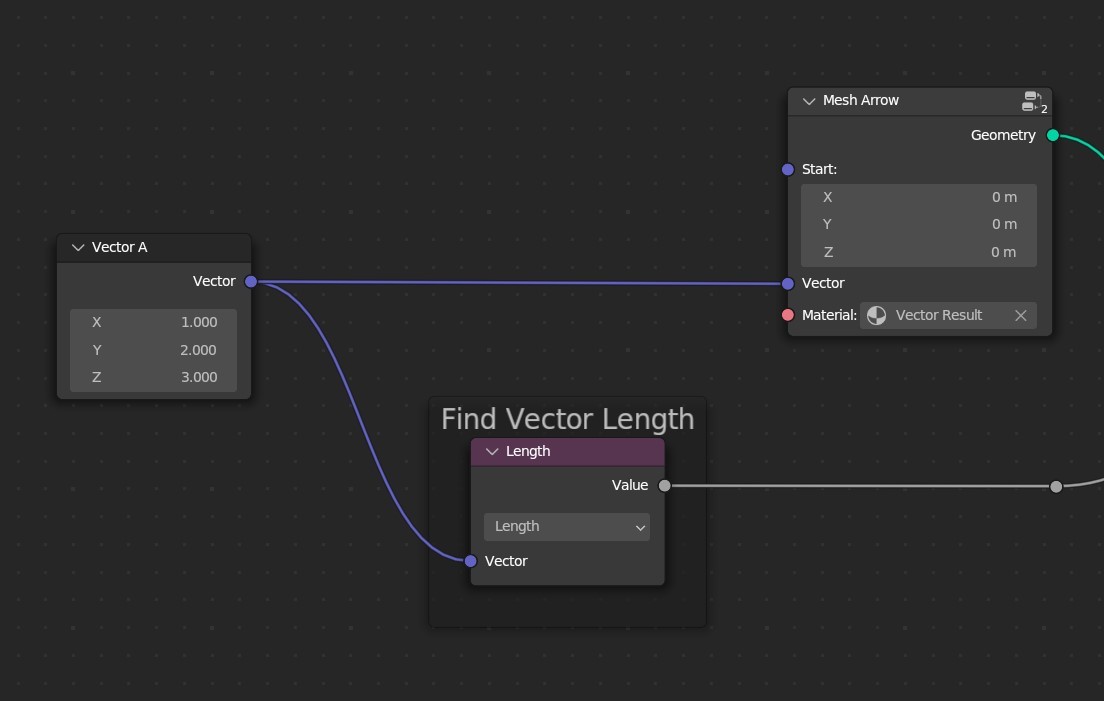
To find the length of a vector, we can use the length operation.
Division, in this case, is just the opposite of our element-wise multiplication. With division, the smaller the value, the larger the result will be. As you approach zero, the scale will approach infinity, so just be careful with small numbers. Luckily Blender won’t allow you to explode your computer by dividing by zero.
Similarly, in the shader editor, multiplication and division is how you can scale a texture's coordinates.

In short, anywhere you see vectors in Blender, multiplication and division is how you scale them.
Rotating Vectors
Now that we’ve looked at moving and scaling, let’s look at rotation. Rotating a vector is a bit more complicated mathematically, and could be a topic for another day, but we can easily do it in Blender with the Vector Rotate node.
We can use it to rotate a vector around the Global X axis, the Global Y axis, the Global Z axis, an Euler combination of all three, or, if we set it to Axis Angle, we can rotate a vector around any other vector.

To learn more about how Euler rotations work, check out my previous video on the Align Euler to Vector node.
The Dot Product
I mentioned earlier that there are more ways of multiplying vectors than just multiplying each axis separately. The two other most useful types of vector multiplication are the dot product and the cross product. These are the two that are often mentioned as confusing, but they really don’t have to be.
The Dot Product returns a single value that’s useful for comparing how similar two vectors are. If two normalized vectors are pointing in the same direction, a.k.a. parallel, the dot product is 1. If they are pointing in opposite directions, the dot product is -1. If they’re perpendicular, the dot product is 0. If the vectors are not normalized and do not have a length of 1, then the result can be less than -1 or more than +1, so I generally normalize them first.

This is extremely useful for finding if two things are pointing at or away from each other. In the example below, I’m using the LibSM64 add-on to drop a playable Mario into my Blender scene. I’ve used a dot product to control a Boo character that chases Mario around when his back is turned (the dot product is greater than 0) but hides whenever they’re facing each other (the dot product is less than 0).
Comparing two vectors can be helpful in the shader editor as well. In the example below, I'm comparing the regular normals of a mesh with the beveled normals to mask out the parts that are being beveled.
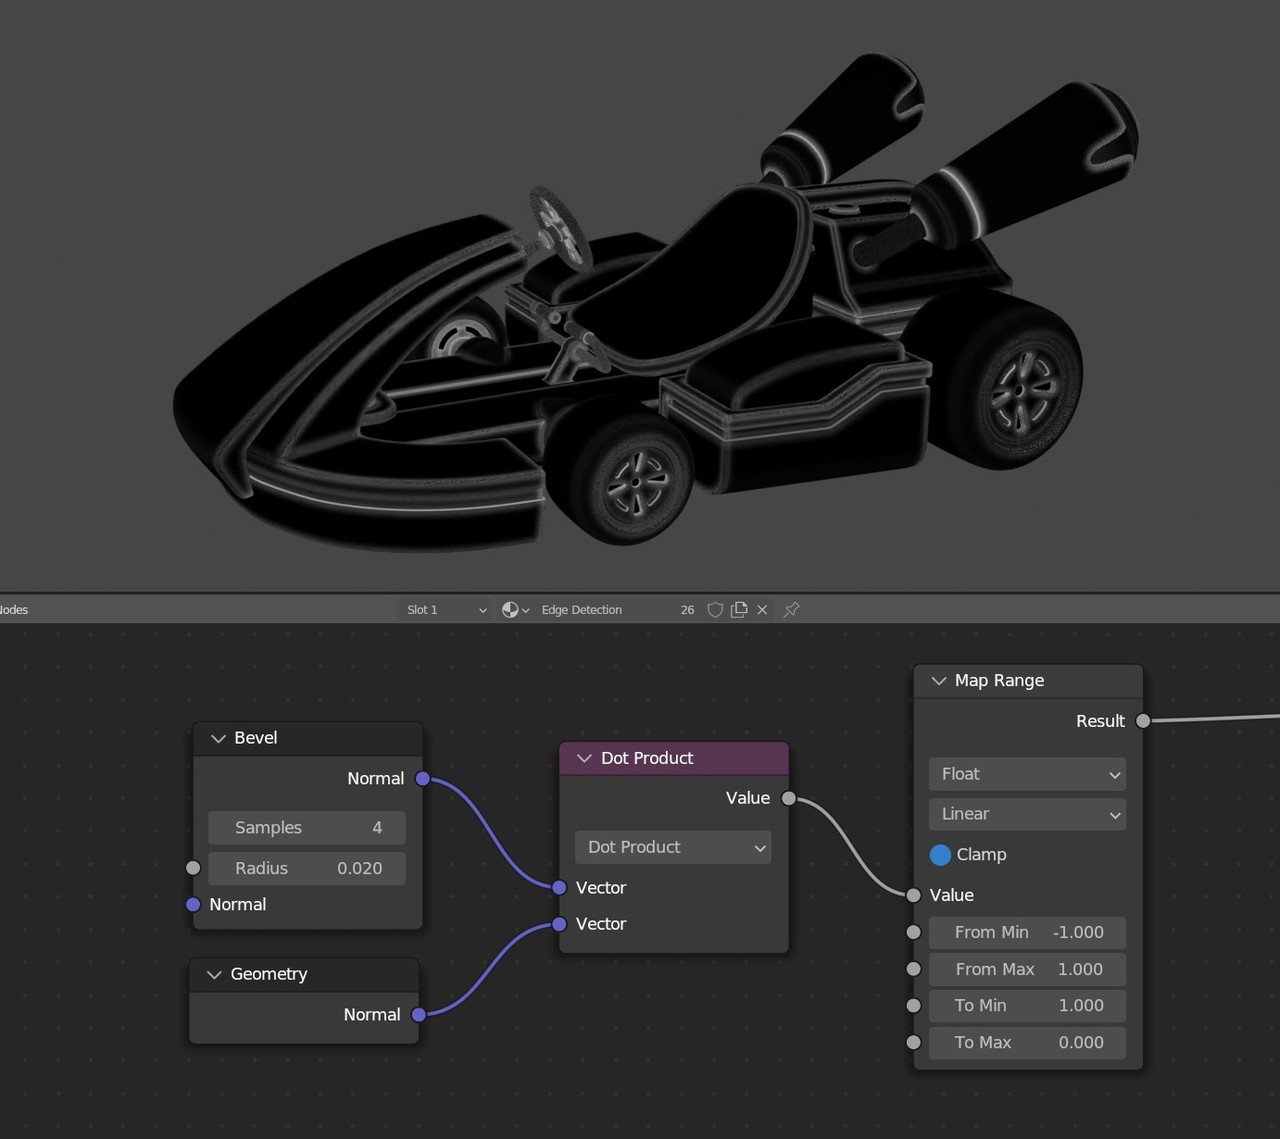
The actual equation is just multiplying the X, Y, and Z values together and then adding the result.
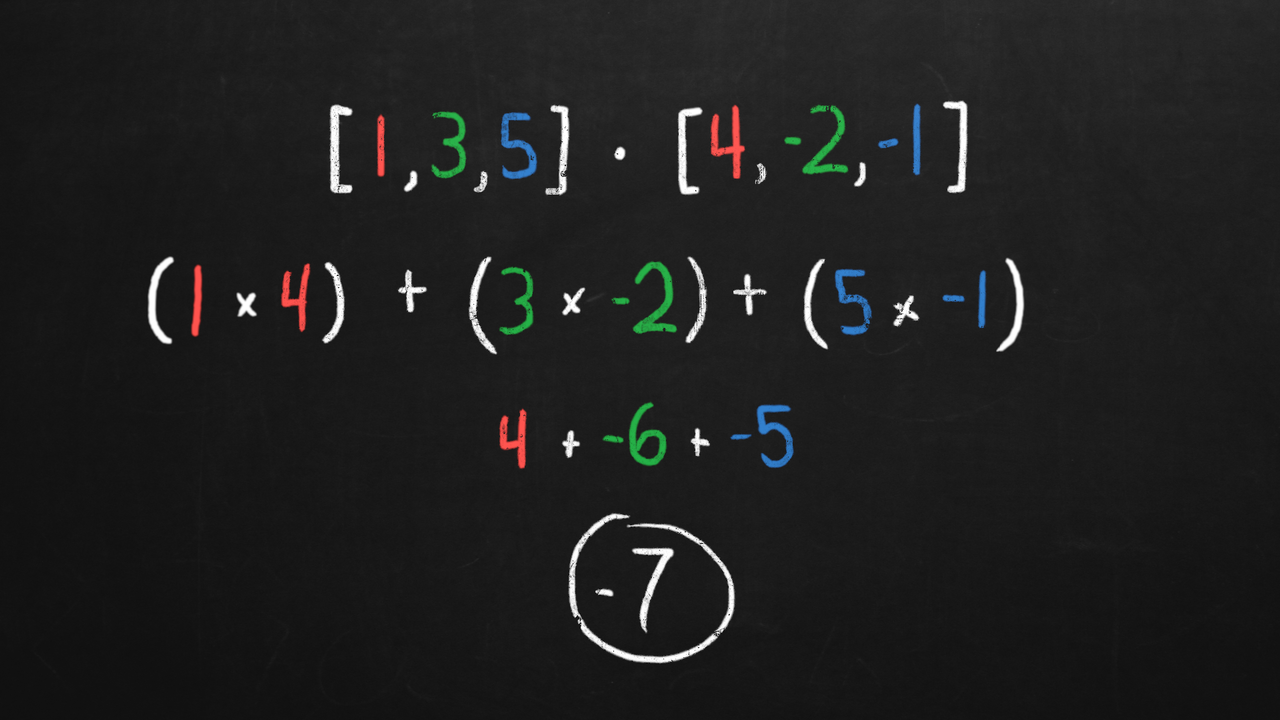
But all you really need to know to use it is that a Dot Product compares how similar two vectors are, and, if you normalize the vectors first, the result will always be between -1 and +1.
The Cross Product
The cross product, on the other hand, is also a form of multiplication, but it returns a new vector instead of a single number. All you really need to know is that the new vector is perpendicular to the two inputs. If vector A is along the X axis and vector B is along the Y axis, the result will always equal the Z axis. Or, if you think of vector A and vector B as creating a surface, the cross product will be the normal of that surface. The cross product gives you the third dimensional direction to work with when you only have two.

This is especially useful when working with curves. We have the normal and the tangent to work with, but what if we need to move something in that third dimension? Well, we just take the cross product of the normal and the tangent to get that third axis. If you want it to point the other way, just switch the inputs.
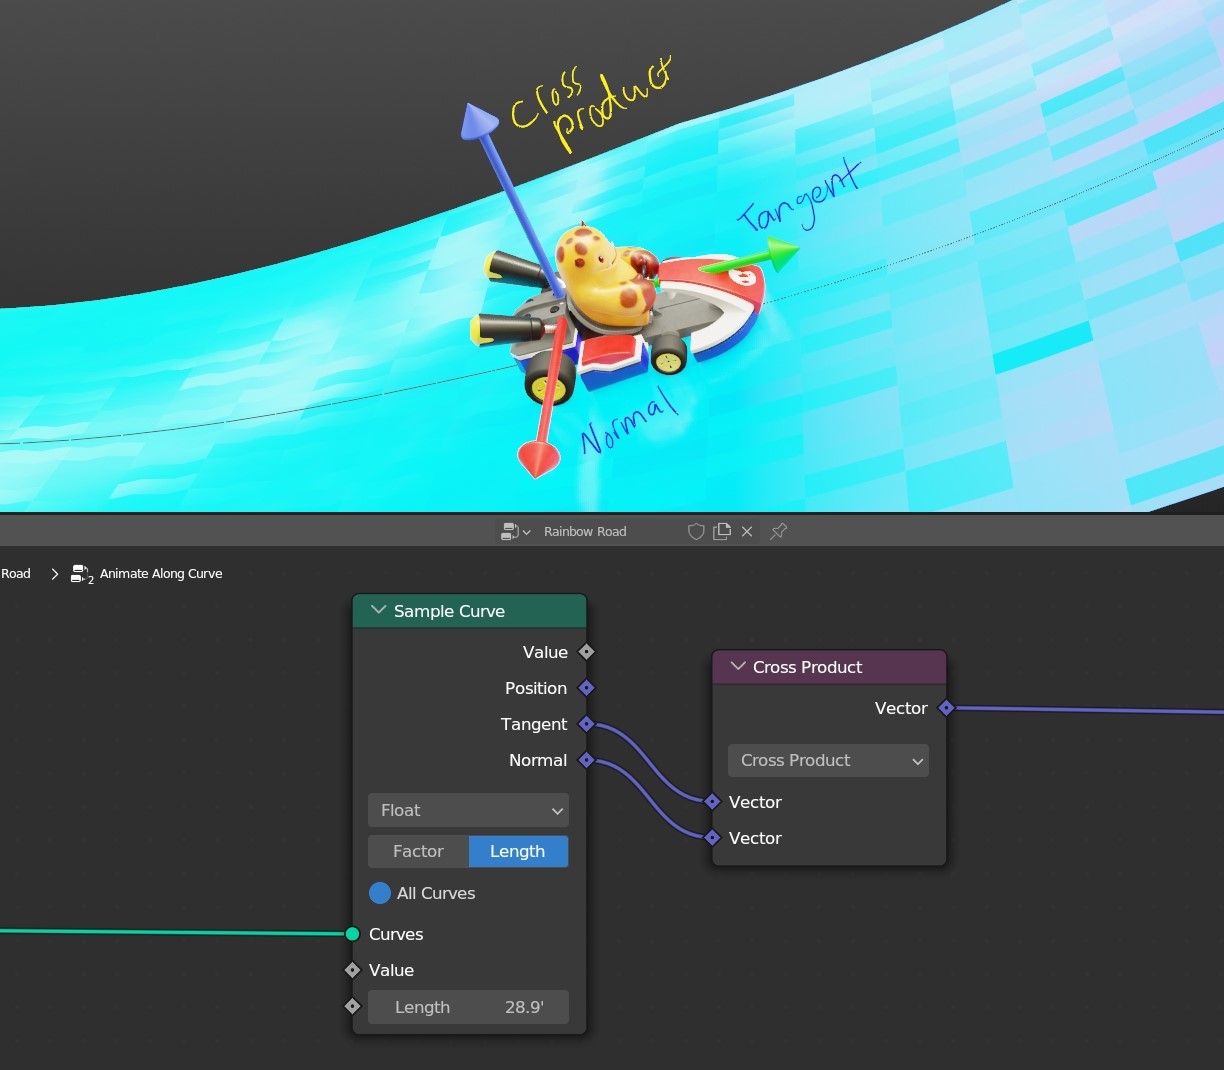
You can always remember the cross product because the result points across the two inputs.
Misc. Operations
There are a couple other operations that are helpful to know about as well.
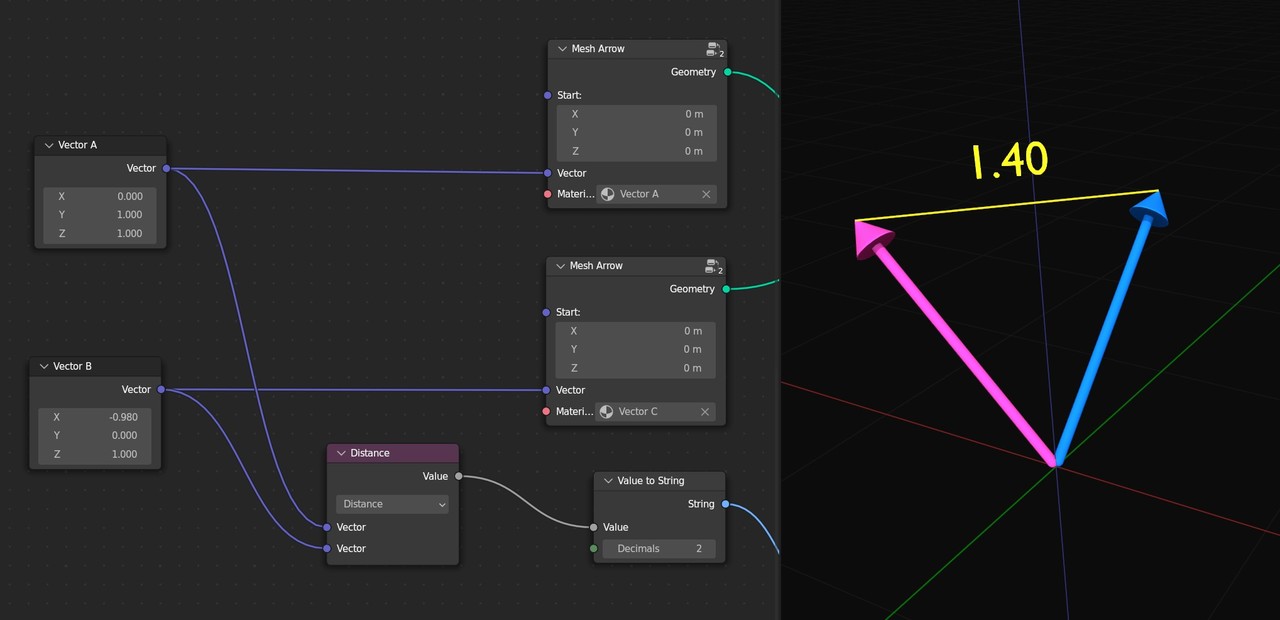
Distance calculates the length of a straight line between the points of two vectors. Just remember that vectors are always in relation to some starting point, and these operations will calculate them as starting from the same spot. You can move the visualization of the vectors wherever you’d like, but the resulting distance won’t change because the vectors themselves, the set of three numbers, do not have a starting point.
Project takes the tip of vector A and finds where along vector B it lies perpendicular to vector B. It doesn’t matter how long vector B is or which way it’s facing. If you think of vector B as the ground and imagine shining a light directly on it, the result of Project will be the shadow that's cast by vector A.

For Reflect, you can think of vector A as the ray of light heading from the tip of the vector towards the origin and vector B as the surface. The new vector will be how it bounces off, and the angle coming in will always equal the angle coming out.

Like the name implies, you can use this for all sorts of mirroring effects. Just reflect the positions of your vertices around whichever axis you want.

Faceforward is a bit of a weird one, and frankly I’ve never used it in a real project, but it can be helpful for flipping something around. It works based on the dot product, which, if you remember from before, just compares two vectors to see if they’re pointing the same way or not. On the faceforward node, the two vectors being compared are called the incident and the reference. All you need to know is that if those two are pointing in similar directions, faceforward will return the opposite of vector A. If they’re pointing in different directions, then faceforward will just return A. It’s just one or the other and there’s no blend between the two.

It’s also helpful to know that the Mix Vector node can smoothly blend between two vectors. However, you can also switch it over to Color to use any of the blend modes. I’ve talked about all of these blend modes in detail in the Fundamentals of Texturing course. The Mix Color node will work the same on XYZ information as it does for RGB information since they’re both just sets of three numbers.
My favorite one to use that’s only in the Mix Color node is Linear Light. This one will add if the second value is above 0.5 and subtract if it’s below 0.5. I haven’t used this in geometry nodes yet since we can do something similar with the Offset in the Set Position node, but I use it pretty often in the shader editor to smoothly warp or distort one texture based on another texture. Remember that adding and subtracting is just moving, and so the texture will move in the positive direction where the second texture is bright but move in the other direction where the second texture is dark.
Things to Remember
Ok, that should be plenty to get you started. I know I got into the weeds a little too much near the end, but to summarize the important parts:
- A vector in Blender is just a set of three numbers.
- You can think of vectors as arrows that start at an origin and point to their XYZ coordinate.
- Adding is just stacking the vectors on top of each other and pointing to the result.
- Adding and subtracting is how you move where the arrow is pointing.
- Multiplication and division is how you scale the arrow.
- The dot product checks how similar two vectors are.
- The cross product is the third direction that points across the first two.
If you can remember those few things, you’ll be well on your way.
Hopefully that’s helpful! Of course, you can still use geometry nodes to some degree without knowing much about vector math, but having a basic understanding of it is what will unlock its full power for you.
If that was still a bit overwhelming though and you want to ease into geometry nodes starting from scratch, check out my full procedural modeling course called Assemble, which will walk you through all of the basics and all the way up to how to make some pretty cool parametric structures.
You can also check out the video version of this article for a more visual explanation of each of the points.
Thanks for reading!
It would be nice if you made this "vector visualizer" node group available for download.