Modeling a cute Robin Hood 3D character in Blender 2.81
Dec 23rd 2019
This is Part I of the Robin Hood Blender tutorial series. To learn how to texture and render the 3D character, check out part 2!
Skill level: This is a beginner to intermediate tutorial. If you're just getting started, check out Your First Week in Blender Playlist to learn Blender fast.
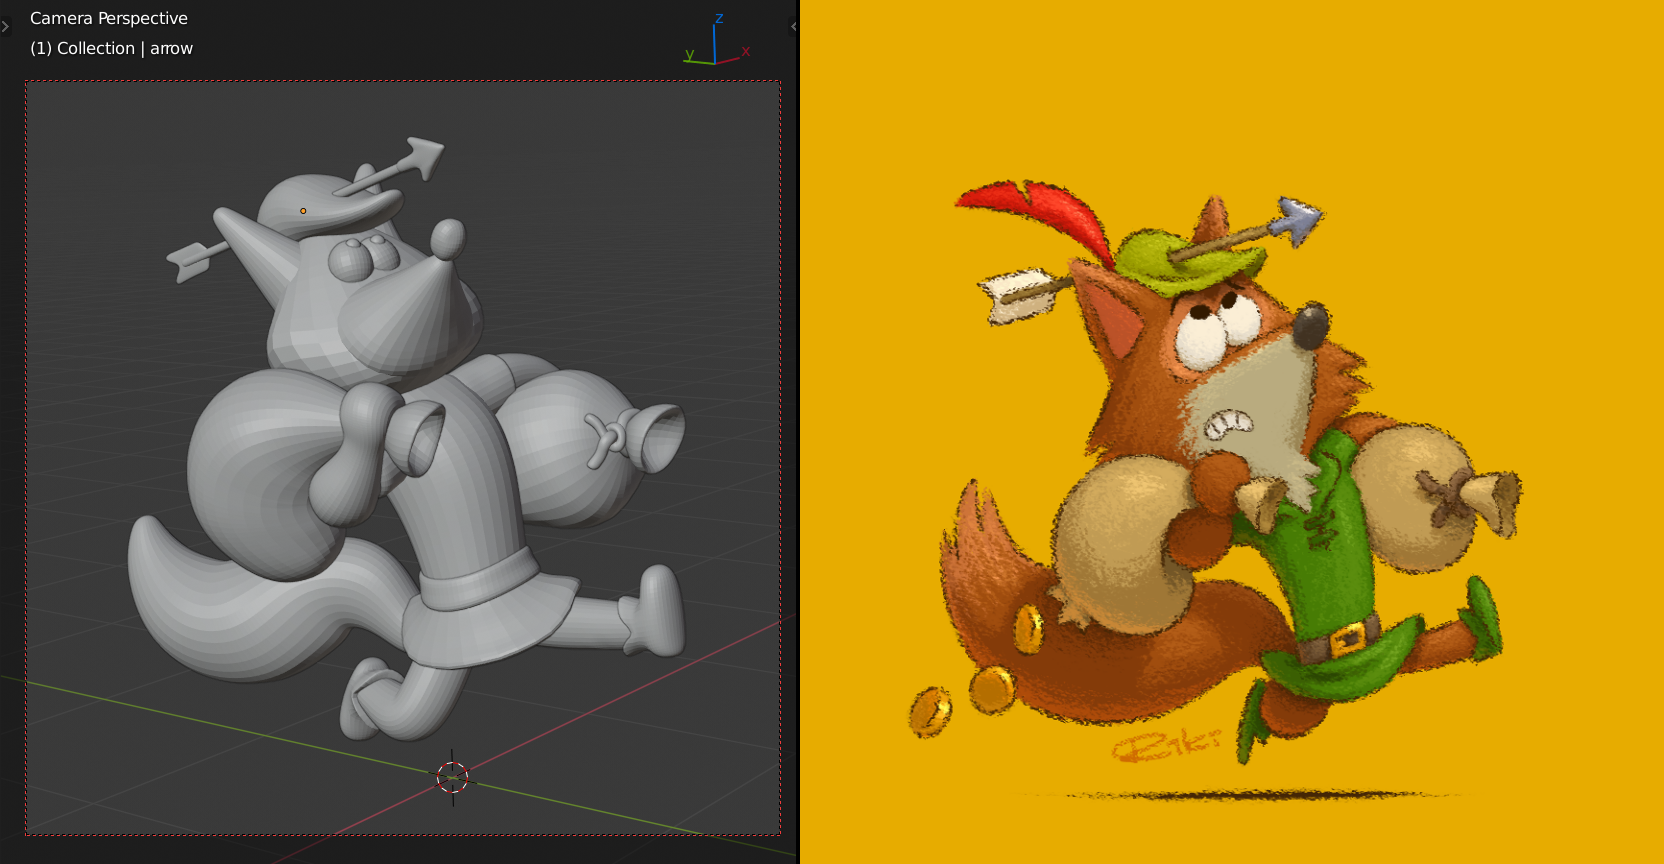
The Japanese art director Riki Fuhrmann reimagined Disney’s classic Robin Hood fox character in a cute, contemporary style. I decided to translate this concept to a 3D model using Blender 2.81.

Riki Fuhrmann’s ‘kawaii’ version of Disney’s famous Robin Hood fox character
1: Preparation
The first preparation stage usually involves gathering reference images. In this case I figured it’d be good to have an image of the original fox as well, for extra reference of Robin Hood’s shapes.
After starting Blender 2.81 I expand the bottom frame and change it from the Timeline to the Image Editor. Then I split that into two Image Editors, and dragged and dropped the reference images in there.

The first stage of preparation is having reference at hand
2: Blocking out
A lot of beginning 3D enthusiasts start sculpting in Sculpt Mode right away, pulling and pushing all shapes from one mesh. Although this is an alternative way of approaching it, it is advisable to block out major shapes using separate objects first, for a flexible, easily adjustable setup.
I always delete the camera and light, for minimal distraction during the modeling phase. Then I select the default cube, enter Edit Mode and press Alt + M ➔ At Center to leave only one vertex at the world center.

Then I press E to extrude that vertex and form an edge, and add a Skin modifier.
I’m a big fan of the Skin modifier. It brought the modeling ease of ZBrush ZSpheres to Blender, making the Skin modifier a great way to quickly block out shapes.
Add a Subdivision modifier to the modifier stack, and set the subdivisions to 3.

The result of a Skin and Subdivision modifier on an edge.
💡 Tip: I’m using the free Modifier List add-on for an enhanced modifier workflow.
Now it’s a matter of extruding, moving and scaling vertices. Think of it as manipulating metaballs, where every vertex is a metaball, and the edges connect the metaballs. Scaling is performed by pressing Control + A to adjust the radius of the Skin result around a vertex.
To get a better view of the vertices you’re extruding, moving and scaling, press Alt + Z to activate X-Ray view mode (which can also be found in the Shading menu at the top right of the 3D viewport).
Also, switch the selection mode to Tweak by pressing W a few times. Tweak mode allows you to select and move a vertex in one movement.
Skinning without branching
Although Skin is usually used for the creation of seamlessly branching meshes, like arms coming out of a torso, I don’t use branching in my skin-based models. Instead, I keep the elements — arms, legs, etcetera — flexibly separated by copying and moving them while in Edit Mode. This means you’ve got multiple separate body parts in Edit Mode, consisting of edges, each with its own marked root vertex for the Skin modifier.
If your model is symmetrical, add a Mirror modifier before the Skin modifier, and synchronize the mirror axes of the Mirror modifier and Skin modifier.
To make the Skin modifier’s mesh result a bit smoother, add another Subdivision modifier before the Skin modifier, to subdivide the edges before they’re ‘Skinned’.

Work in progress of blocking out the fox base shapes using the Skin and Subdivision modifiers. A Subdivision modifier has been added before the Skin modifier as well.
If an ‘island’ of edges doesn’t show up as a mesh part generated by the Skin modifier, that part will probably lack a marked root vertex. You can assign this in the Skin modifier settings. It’s good practice to assign the root to a vertex at an outer end.
To select connected edges, press the L key while the pointer is placed on the part, or select a vertex and press Control + L to select all linked vertices. You can then easily copy the selected part using Shift + D. If necessary, press Alt + A to deselect all before selecting the desired part.
You can also non-uniformly scale a vertex influence on the Skin modifier result by pressing X or Y after Control + A. This is useful for things like making hand shapes flatter than the arm they’re extruded from. To reset the non-uniform scaling, select vertices and press the Equalize Radii button in the Skin modifier settings.
Press Alt + Z every now and then, to see the solid mesh result without X-Ray mode.
Keep it global
Be sure to keep all shapes global in the block-out stage, or you’ll lose the momentum that is gained by swiftly copying, moving and scaling parts. Fine-tuning will be performed in a later stage.
Personally, I like to create as much base shapes as possible within the same Skin modifier mesh, to keep the process of blocking out very editable. You’ll be surprised how many shape variations you can make in this way, especially when all shapes are of a similar kind, like the rounded shapes of this cute fox character.

A global block-out of the fox, executed almost entirely using edges meshed with a Skin modifier. The only element that isn’t part of the Skinned mesh is the belt.
Also very important to keep in mind: if you’re sure you’re only going to create a one-view image, then leave out the parts that are not visible. The left hand of the fox disappears behind one of the money bags, so it’s no use to spend unnecessary time on that hand.
If some (or many, or all) parts are more suitable to be created by primitives instead of the Skin modifier method, then use primitives to complete the block-out. In the fox block-out I’ve used primitives for the belt and the eyes.
Last but not least, don’t be afraid of improvising. For example, if you think the character’s pose looks a bit better if you deviate from accurately copying the concept, then by all means add your own touch to the end result.
3: Tuning, not fine-tuning
When the global block-out is finished, it’s time to enter Sculpt Mode for some initial shape tuning. Before entering Sculpt Mode you need to make sure all meshes are ready for sculpting:
- First, make sure you keep everything you have in its current flexible setup. You can either save incrementally to keep old setups, or make a copy and move it to a hidden Collection.
- Then apply all modifiers (make sure you’ve got enough subdivisions, but not too much, to keep it adjustable).
- Make sure the scale is applied to all parts using Control + A in Object Mode and apply the scale, or weird deformations will occur in Sculpt Mode.
- Join or separate parts in a logical way. For example, in this case the head, snout and ears can be joined. Don’t yet Boolean or Voxel Remesh the parts, that will follow when it’s time.
- Now it’s time to add (or unhide) a camera, assign a section of the UI to the camera view, and modify the camera view and settings to match the concept art, so from now on you can keep an eye on the camera view while adjusting and sculpting.
Select an object and go to Sculpt Mode. Then activate the new Elastic Deform tool, which is very effective for smooth mesh deformations, and start tuning the major shapes of your block-out. The smaller the brush size is, the smaller the area of influence will be.

Tuning the shapes using the Elastic Deform brush
Be careful not to already start detailing, no matter how tempting that may be. We’re still tuning, not fine-tuning. Smaller details such as the coins, stitches, cap feather and belt buckle will also be added later. They’re the icing on the cake.
Next to the Elastic Deform brush, use other brushes if applicable, for example the Inflate and/or Clay brush to add volume.
The tuned result, opening the door to fine-tuning
4: Merging parts and fine-tuning
The time has arrived to merge parts together and then fine tune the result in Sculpt Mode.
Merging parts is possible using Blender 2.81’s new Voxel Remesher, a new version of the old Remesh modifier / ZBrush Dynamesh principle: generating a voxel-based mesh across the source mesh and conforming to it.
But I personally prefer good old Boolean union, because it keeps the mesh structure of the merged parts completely intact.
First I add one more subdivision level to all parts, because I had left the detail low to keep everything very adjustable.

One more subdivision added for smoother shapes
Then I select the parts I want to Boolean and press Control + Shift + numpad plus to Boolean using BoolTool, an add-on that comes with Blender. It can be activated in the Addons section of the Preferences.
If parts you want to Boolean are part of the same mesh, enter Edit Mode, select the parts under your pointer using the L key and press P ➔ Selection to separate the parts to a new object.
For the fox I’ve merged the shirt and its sleeves, and merged the head with snout. I’ve left the ears separated for the moment, to keep them more editable.
Select one of the merged meshes, then activate Dyntopo sculpting mode by pressing Control + D (dismiss the vertex data warning if it appears).
Switch the Dyntopo detailing method to Constant Detail, and set the Resolution to a value that matches the rest of the mesh. Then use a brush like the Clay brush to weld the seams between the shirt and sleeves, and between the head and snout.
💡 Tip: when using the Clay brush, set the Autosmooth value to something like 0.1 for a smoother result.
5: Detailing
Let’s move on to the last sculpting stage: adding the final details. First stop: adding a subtle rim along the outline of the ears. I’m still in Dyntopo mode, because it allows for total sculpting freedom without having to keep track of polygon stretching and having to frequently remesh, resulting in a subtle overall smoothing that I don’t want. So, Dyntopo is my friend, although it’s running a different, slower engine inside Sculpt Mode, but that’s okay, because we’re not working on a scene with millions of polygons.

Added a subtle rim to the ear outlines, after blending the head and snout, and the shirt and its sleeves.
Then it’s time for the other details, such as the edge of the hat, the folds in his outfit, fur tufts on the tail, and some cut-outs, such as the V-shape in his shirt. For this I go to Object Mode, place the 3D cursor on the depth I like the cut-out to have, then press Control + Shift + X to activate the Carver add-on that comes with Blender. Carver has a number of on-screen options, including pressing Spacebar to change the Cut Type from Rectangle to Line, and pressing D to make the cut stop at the cursor depth.

A V-shape cut out of the shirt. A piece of an arm appeared, but that’s no problem, because we’re going to create a neck in the V-shape.
After making the cut, I return to Sculpt Mode and perform a Voxel Remesh (Control + R, don’t forget to set the Voxel Size to a sufficient detail first), so I can smooth the harsh edge of the V-shape a bit.
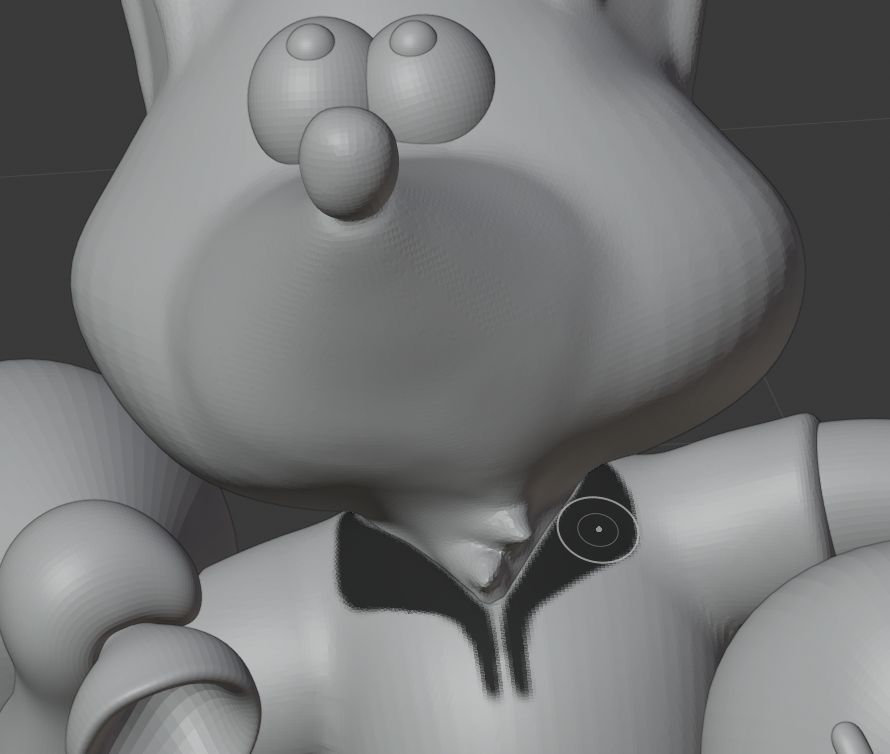
Then, mask a circular area underneath the head, activate Dyntopo (if necessary) and use the Snakehook brush to pull out a neck.

Pulling out a neck using the Snakehook brush in Dyntopo mode. As you can see, there’s no hidden hand behind the money bag. 🙂
Use the Snakehook brush to pull out some fur tufts from the neck. Then select the shirt, mask an area to pull out as the collar of the shirt, after inverting the mask and activating the Move tool.
The mouth cavity can also be formed using a mask, inverting it and tucking in the unmasked area with the Move tool.
Continue refining the model using the available brushes, until what’s left is adding some remaining details: feather, eyebrows, teeth, stitches, belt buckle and coins.
💡 Tip: Change your viewport shading to different Matcaps for better discovery of surface irregularities.
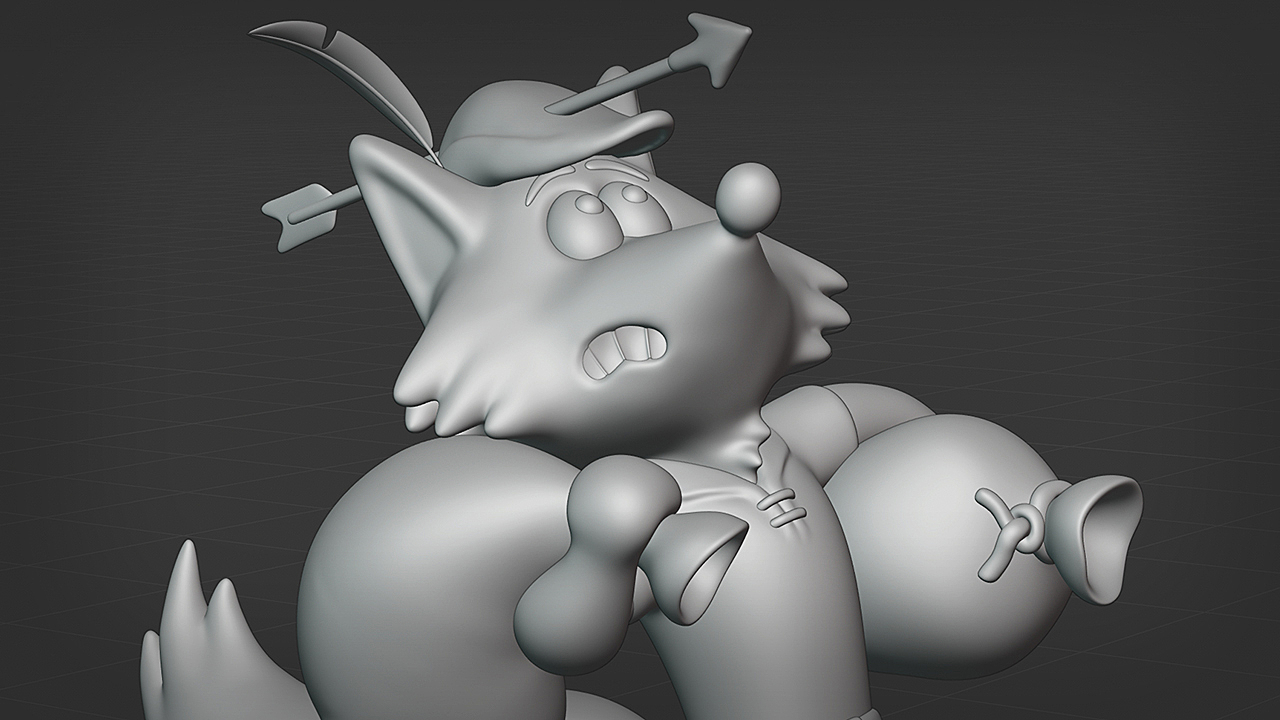
The almost-finished cartoony Robin Hood model. Viewport shading has been changed to a Matcap, making it easier to spot surface irregularities.
6: Finalizing
I modeled the remaining details using manipulated primitives and simple polygon subdivision modeling. For example, the stem of the feather is simply a very elongated sphere, the teeth are a subdivided box with extruded faces, and the coins are cylinders with face extrusions on the sides.
Finally, all elements are present
All elements have been modeled now. The only option that’s left is retopology for cleaner meshes. I call this an option, because you might like the slightly roughish, Sculpey-like look of the elements as they are now. And as long as no animation or other purposes than a single-image rendering are needed, you can get away with not-very-neat topology.
I chose to go the retopology route. You can do this manually. There are lots of tutorials and a number of add-ons for that. You could also make use of the new Quadriflow remeshing tool in Blender 2.81. It can be found in the Properties panel ➔ Object Data Properties tab ➔ Remesh rollout ➔ Quad button. Or simply press Control + Alt + R in either Sculpt Mode or Object Mode. If you’ve got some budget, I can recommend the Quad Remesher auto-retopology add-on.

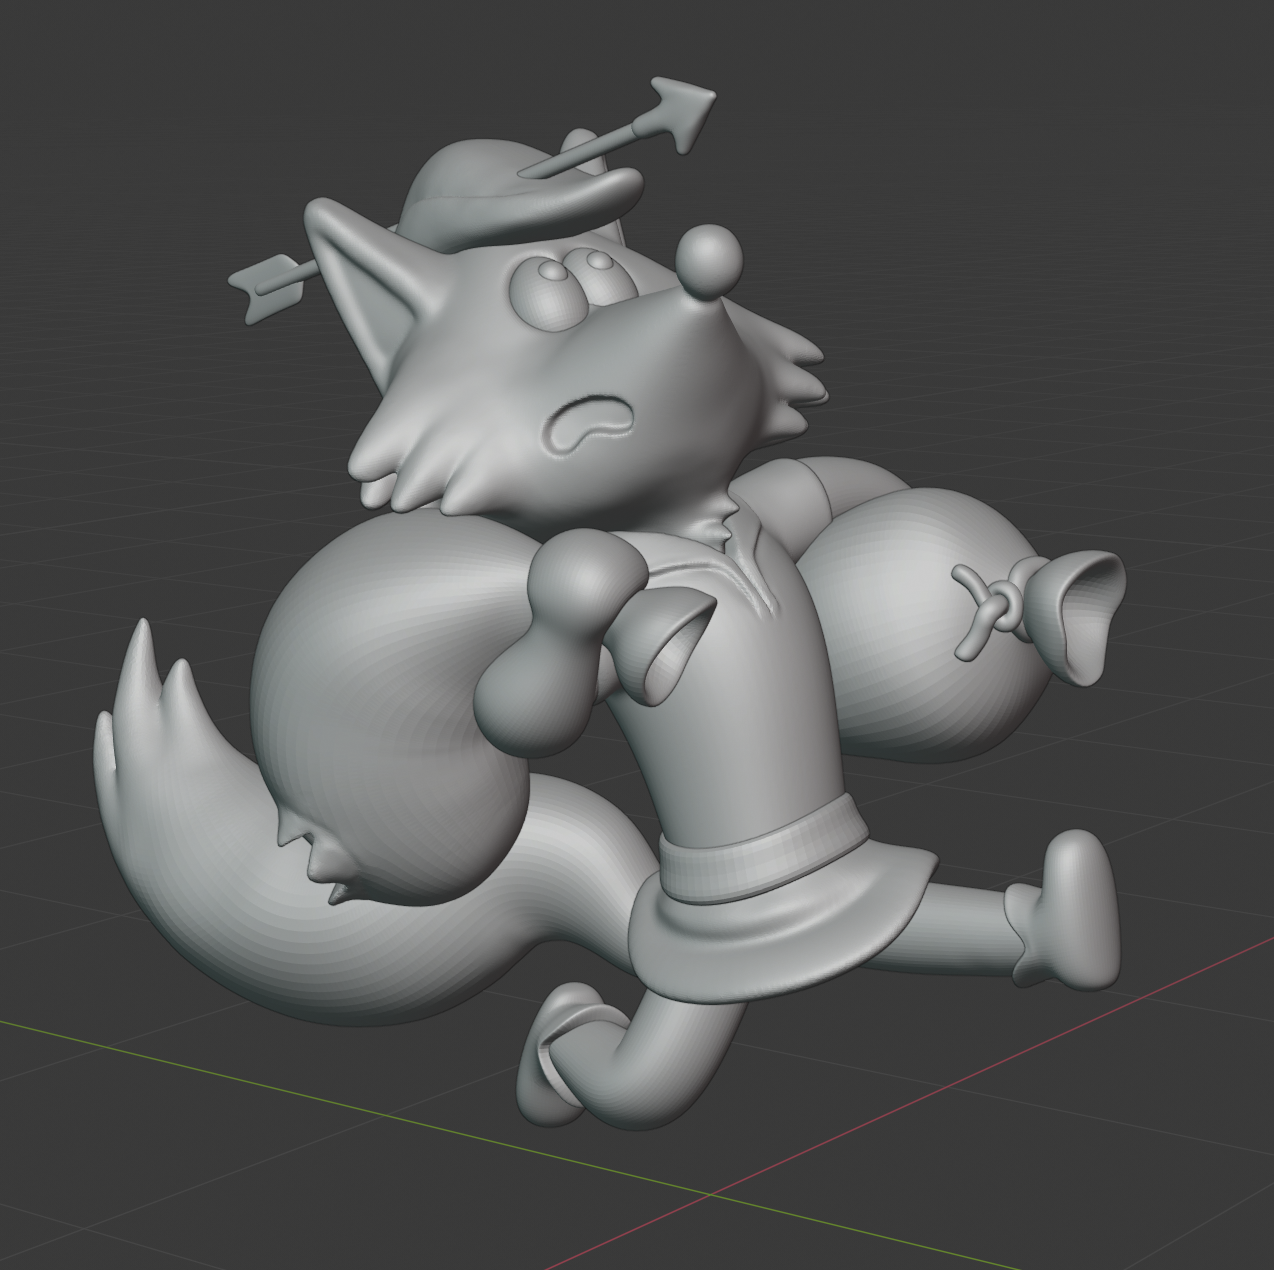
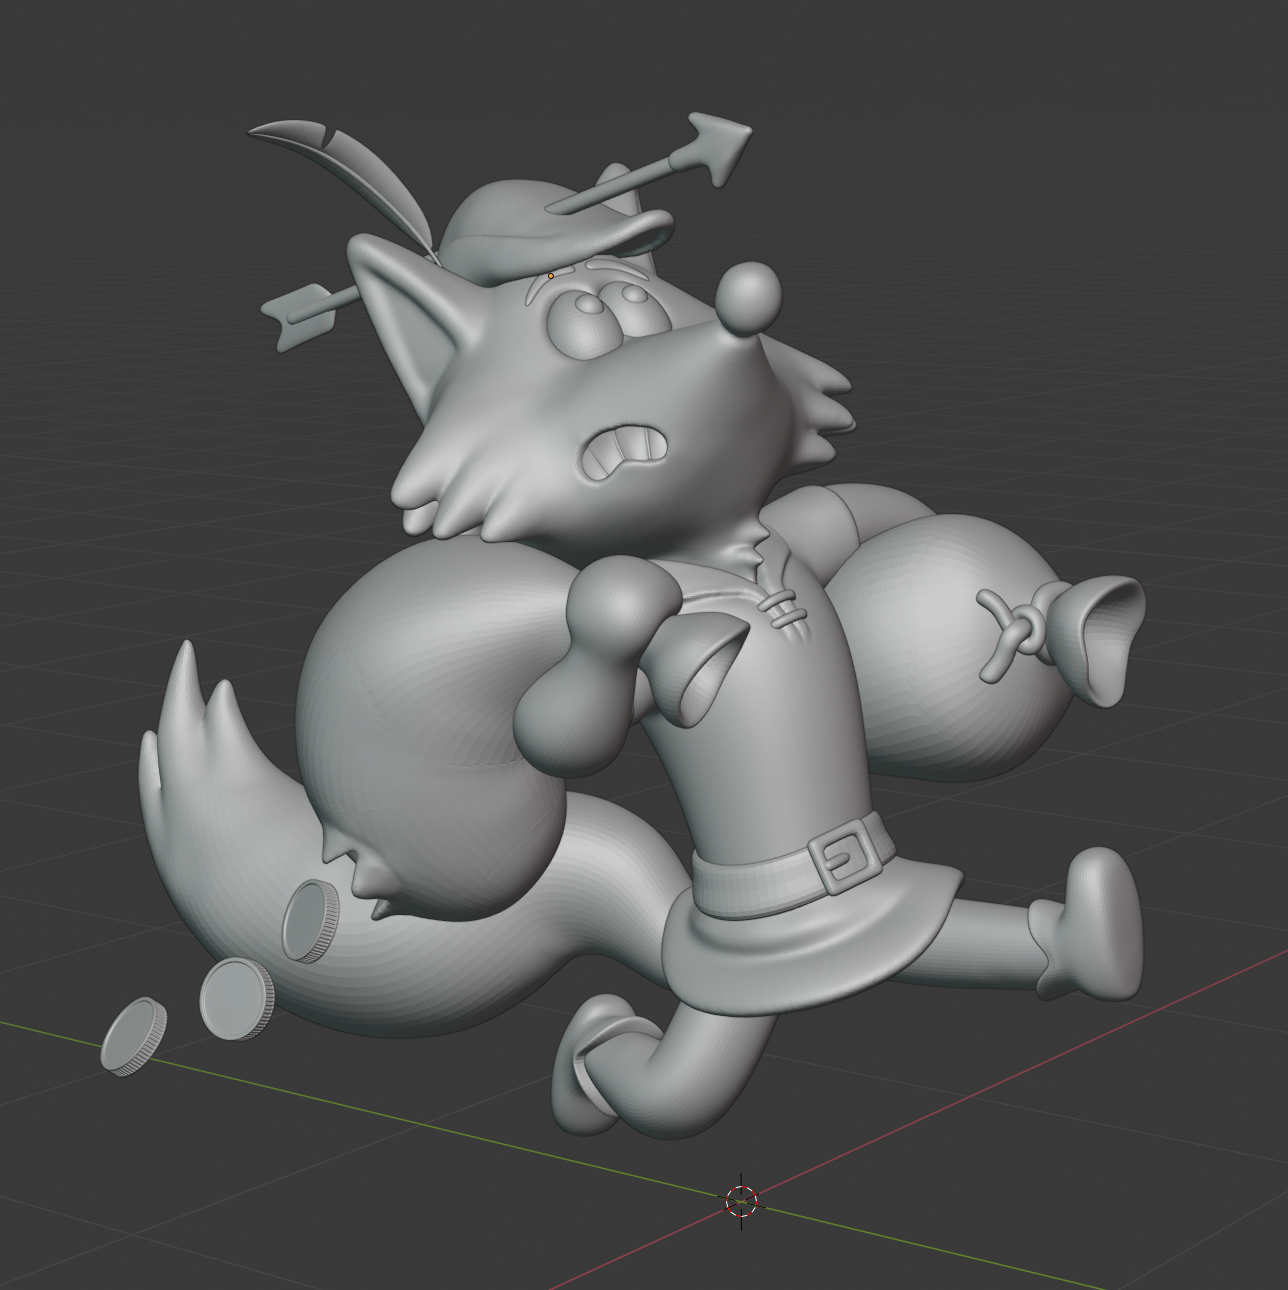
The final sculpture!
This wraps up the modeling of a kawaii interpretation of Disney’s Robin Hood fox character. I hope you learned some useful Blender techniques.
Happy Blending!
Metin Seven, metinseven.nl
Is there a video course for this? or just this post available?
the process looks really interesting and fun to try. One doubt or problem I think we can find is how to deal with clothes
I only used the skin modifier once, but that was about a year ago. The idea of using a different root for the separate parts(legs) seems easier than doing it all as one mesh. I will try that for my next character.