Have you ever wondered how realistic 3D portraits are created from scratch?
No scan data, no Metahuman, no photo textures - just an artist, a Wacom tablet, and a FREE 3D creation application called Blender.
Mankind has always been obsessed with the human face and obsessed with capturing it in various mediums. From ancient statues and hieroglyphs to greco-roman funerary mosaics to renaissance paintings and sculptures, photography and film, and into the modern era: hand-crafted computer-generated portraits.
But…wait… how can computer-generated art qualify as “handmade”? Doesn’t the computer do most of the work for you?
Well..some tools are designed to do most of the work but that’s not really creating a portrait any more than assembling an Ikea table is considered carpentry. In fact, most computer-generated art, including portraits, is custom and in a very real sense, built from scratch.
So I want to pull back the curtain on my scratch-made 3D portraiture workflow. If you want to learn how to sculpt in Blender, you're in the right place.
I use Blender 3D to model human portraits.
Add a ball of digital clay to begin digitally sculpting. Which is really not that different from sculpting in reality.
We have tools to simulate real-world techniques, it’s up to us to form proper shapes, our hands even get a little sticky… except we do get symmetry for free and can undo our mistakes.
Now, let’s get back to the human face which is quite a complex shape to achieve and, as with anything complex it helps to start with a simplified version that we can gradually refine.
In the case of portraits, this geometric simplification is commonly referred to as “planes of the face.” This stage can even adhere to a step-by-step formula of sorts, similar to Andrew Loomis’ method for drawing the human head.
Once our head is blocked out and resembles an Oscar statue, we can smooth out the geometric shapes and begin refining facial features like the mouth, the nose, the eyes, the ears, etc. All of which are exhaustively based on photographic reference.
Another goal of the simplified blockout is to establish correct general proportions so the refinement of each facial feature fits this solid proportional foundation. I think it’s wise to focus on each feature individually because the face as a whole can be overwhelming. But each feature by itself is much more digestible.
Retopology
At this point we’ve got a head sculpt that’s about 75% complete. All major features are refined and believable but it’s still lacking fine details like wrinkles and pores. But our sculpture is quite inefficient and we need to perform a technical task to regain efficiency.
Essentially this will capture the shape of our sculpture within an optimal model by tracing a tailored wireframe over the surface. It’s important to work efficiently when trying to achieve high-fidelity Blender 3D art because we don’t have infinite RAM, GPU or processing power - at least I don’t. And if we neglect to work efficiently, our project will increasingly slow down to the point of being unworkable.
With our retopologized model completed, it’s like we’ve reset our project’s resources which enables us to sculpt high-frequency details like pores, wrinkles, and blemishes.
To achieve such detail we need to subdivide our model into tens of millions of polygons. 😳
Think of it like increasing the resolution of an image; more pixels for more detail. In this case, more polygons for more details. Only when we have a significantly higher model “resolution” can we stamp various pore and wrinkle details to achieve a high-fidelity skin surface.
Modeling Accessories
And, after what feels like a million hand-placed stamps, voila! We have a realistic, fully-detailed bust - completing the modeling phase of the project.

That is if we want a naked portrait. If we’re not going for naked, then we need to switch gears and model things like eyes (which we need anyway), but also accessories, and clothing.
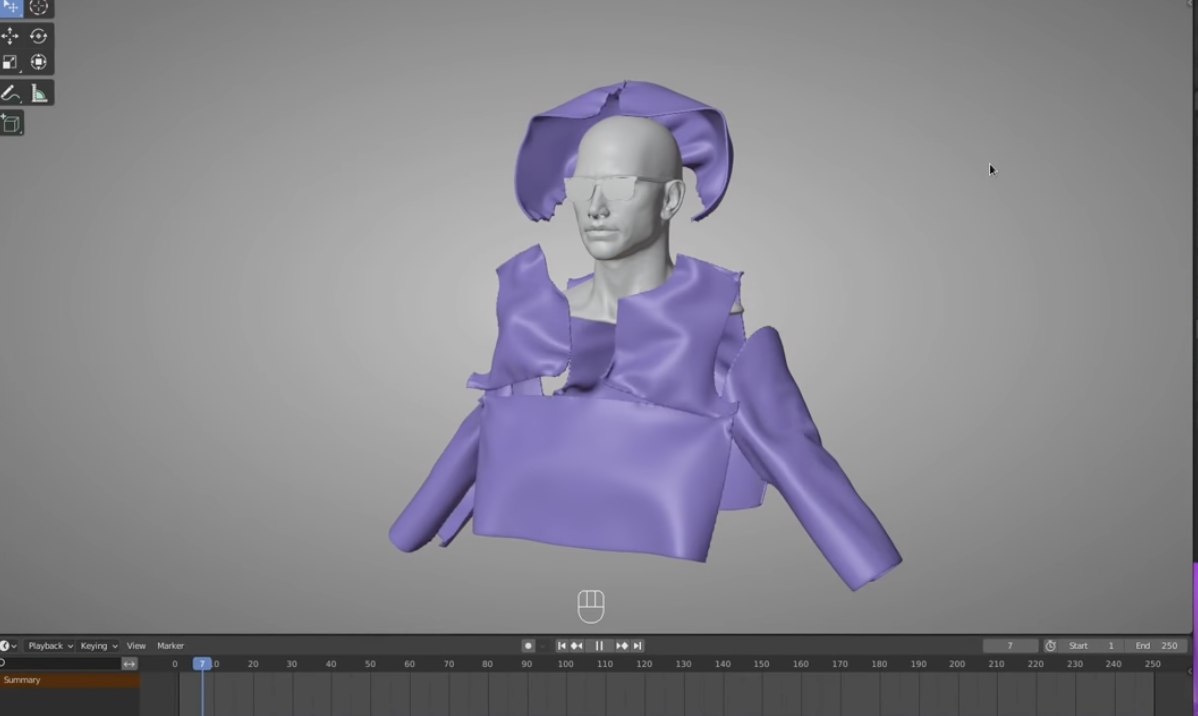
While the face is certainly the main quest in a portrait project, we cannot neglect the side quests. They deserve the same level of attention and craftsmanship. Nothing against naked portraits but clothing and accessories usually make these things more interesting by injecting elements of personality and narrative.
Texturing our human in Blender
At this point, we have a 100% complete portrait model! However… gray is boring and kinda strange for anyone that isn’t an avid 3D modeler. And, well, I want to show my mother this render when we’re done.
So let’s move on to texturing. Which is essentially to paint our models with color along with introducing material properties like reflection and translucence.
I like to start this stage by extracting geometric information from the sculpture itself - this is called texture baking. Various baking algorithms will capture all of our fine details as images in a variety of ways for layering on top of a simple color foundation – which can easily be painted by hand.
All of these cg textures can then be modified to control those material parameters of reflectivity and translucence. Color and material properties must work together like a carefully-choreographed boy band number if we want to achieve a believable level of realism.
And there we have it: a finished skin material. Perhaps it’s an acquired taste but a good skin material is like a fine wine….mmmm..like you could just touch it…or pinch it
Blender 3D Hair
Once again we can’t neglect our side quests! Eyes, accessories, and clothing need their textures and materials as well.
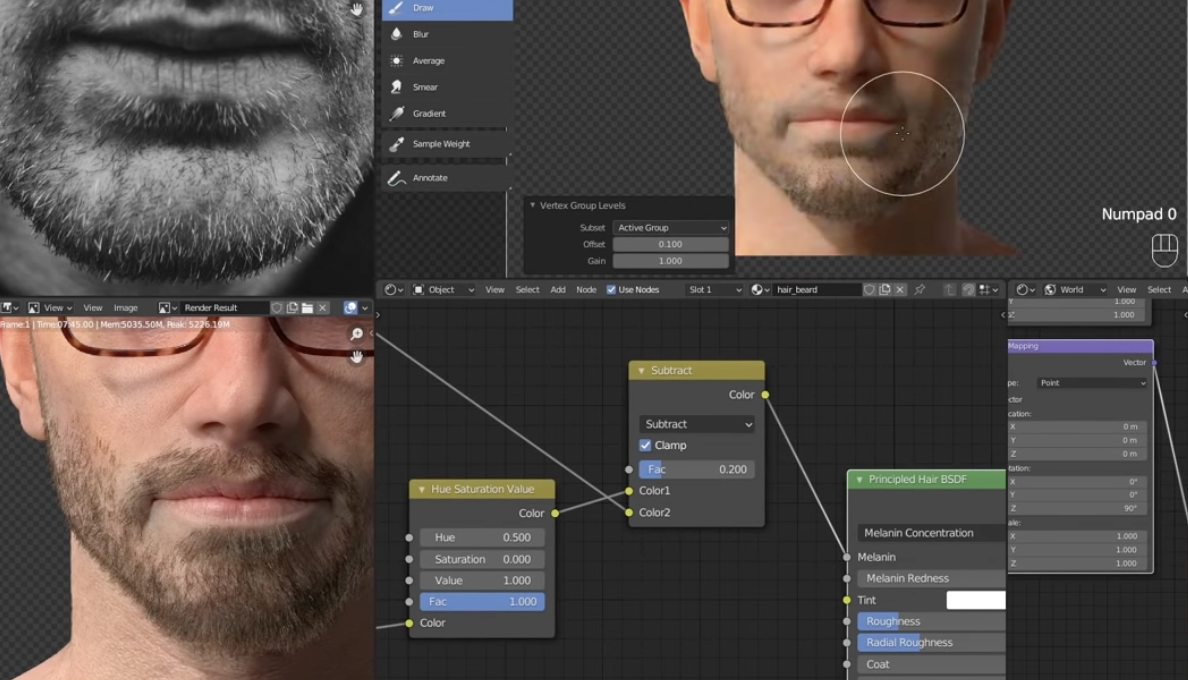
This is also where we need to implement another crucial component of portraiture: hair. Similar to a chia pet, we can grow, comb, and manipulate hundreds of thousands of digital hair follicles to achieve believable beards, eyebrows, eyelashes, and scalp hair.
Thankfully we don’t have to address each hair follicle individually but rather we’re controlling a smaller number of parent hairs which propagate their properties to their many children hairs. And after a delicate dance of styling, dialing in parameters, and finessing materials, we arrive at believable digital hair.
We can also use this hair system to achieve a layer of fuzz on clothing. Neat!
Lighting our Character
Right now we just have a completed 3D asset that exists inside Blender but it’s not really something finished that can be shared online to impress our social media friends following.
For that, we really need to showcase our portrait in the best light which we call rendering. This is where we can add light objects to mimic portrait photography.
There are also these nifty things called HDRI environment textures which serve to capture a full 3D world or room as an image that can even cast light due to their high dynamic range.
With our portrait lit to perfection, the only thing left to do is let it render into glorious images and/or videos of our masterpiece.
Just prepare to be… you know… patient.
Creating CG portraits from scratch is quite an involved, artistic, technical, and deeply rewarding process that is beyond the scope of this article. Though I hope it's given a sense of the workflow to do so. We have a full Blender course and even a Youtube video to help fill in the gaps
While there are definitely bonuses to working digitally, there’s also no shortage of hand-made craftsmanship.
Try modeling your human in Blender!
If you want to try your hand at 3D portraiture or creating characters in Blender, you can download the software today for free, with no strings attached, and begin your creative journey. Also, we are here to help you learn Blender with 100+ Blender courses.
All the footage in this video comes from an extremely comprehensive Blender tutorial course if you’re interested in taking a deeper dive - it’s called
HUMAN and it’s available to CG cookie members or as a standalone purchase from the
Blender Market.


