Building a Simple Game in Unity
Jan 15th 2019

Making games is hard. Contrary to what Udemy ads say, they are not "easier to build than you think". As with just about any project - it's a process.
At CG Cookie, we've completed a variety of game projects and know how much work they entail. Tank Ball has just been released, both as a fun game and also as a course. But the process started a few months prior to even recording the course itself.

Coming up with the Game Idea
Originally the idea for Tank Ball started as a note. When I'm out and about I'll usually have an idea for a game. "Better write that down!" I think. Since I don't carry a notebook, I use Evernote to keep track of random thoughts or game ideas. Tank Ball started out like that, until I decided to turn it into reality with CG Cookie, with the goal to make it a game that anyone can play, as well as build over just one weekend.

The game mechanics are quite simple: shoot the other tank and destroy it before it destroys you. What's the catch? The tanks in the game are essentially stationary and cannot move unless they fire. The recoil force of firing a projectile pushes the tank in the opposite direction. Rotate the turret to fire and move in a new direction.
Projectiles are not a line of sight hit, but instead ricochet which means you can be hit by your own miscalculation when firing. It's a simple idea to grasp since most games that involve tanks have similar mechanics, we've just added a bit of a twist to it.
Limitations for Gameplay Can Be Freeing
Developers like to add all sorts of bells and whistles to games to try and entice players. This usually results in a lot of half baked mechanics that are kind of cool but not really all that useful. With Tank Ball I wanted to keep things very simple, both in terms of development but also from a gameplay perspective. If someone can instantly pick up your game and understand how to play it instinctively, that's a win!
By keeping the mechanics and general gameplay simplistic I'm able to dedicate more time to making sure it works, refining it, and polishing it. Oddly enough this also tends to spring new ideas on how to use those mechanics in a unique way which actually extends the replayability of the game without increasing its complexity.
My favorite thing about Tank Ball is that general idea be used in a variety of settings. Move the tank using force and have the projectiles ricochet. If you're a game developer you probably just thought of a few ways to use those mechanics yourself. Imagine playing "dodgeball" with tanks, or flying through the air avoiding obstacles by shooting in the opposite direction, or how about playing a Tank Ball version of soccer?
Next Step: Prototyping your game
It's easy to envision a great game in your head. The tough part comes when you're actually building it, to see whether the idea holds water. Prototyping is usually the first "hands on" portion of game development. Sure, Game Design Documents, storyboards and concept art are hugely important, but none of that really lets you try the game out.
Prototypes usually start off rough, with basic stand-in art, little to no audio and scripts that are patched together to get something working quickly. It's quick and dirty, but invaluable in giving you feedback on whether your game is worth pursuing.
Thankfully, the simplicity of Tank Ball meant it was relatively easy to prototype.
 Early Prototype with stand in visuals
The initial first steps on building the game were to determine the following:
- The size of the maps
- Basic tank models that included a rotating turret and an adjustable barrel
- How projectiles should ricochet and how long they should last
- What happens when a Tank is destroyed
- How enemy tanks will operate
There were many more things to uncover along the way, but those were the main "meat and potatoes" of what I needed to first figure out.
So first we had the size of the maps. Initially, I envisioned this game to be something similar to a Mario Party style game. Small maps, easy to navigate and understand. I started off using some generic assets I created in Blender. The process of creating the environment went through a few iterations.
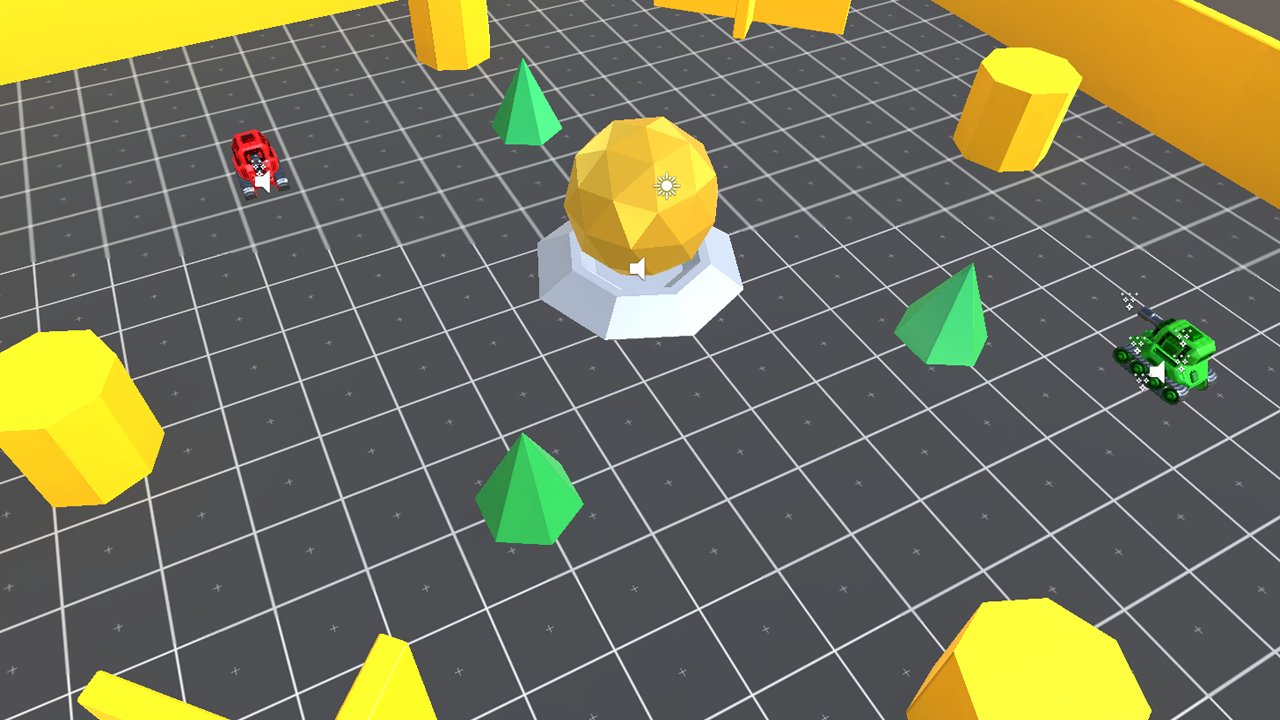 Original Level with Basic Shapes
It started off with simplistic, flat looking models then evolved into a full on military base. Eventually I landed on what we have now in the game which was just to include basic props for a shipping container and concrete barriers with some cones added in for a little flair. The containers acted as cover and also objects that projectiles could ricochet off of. They were angled to ensure projectiles didn't bounce back straight into the tank that fired them.
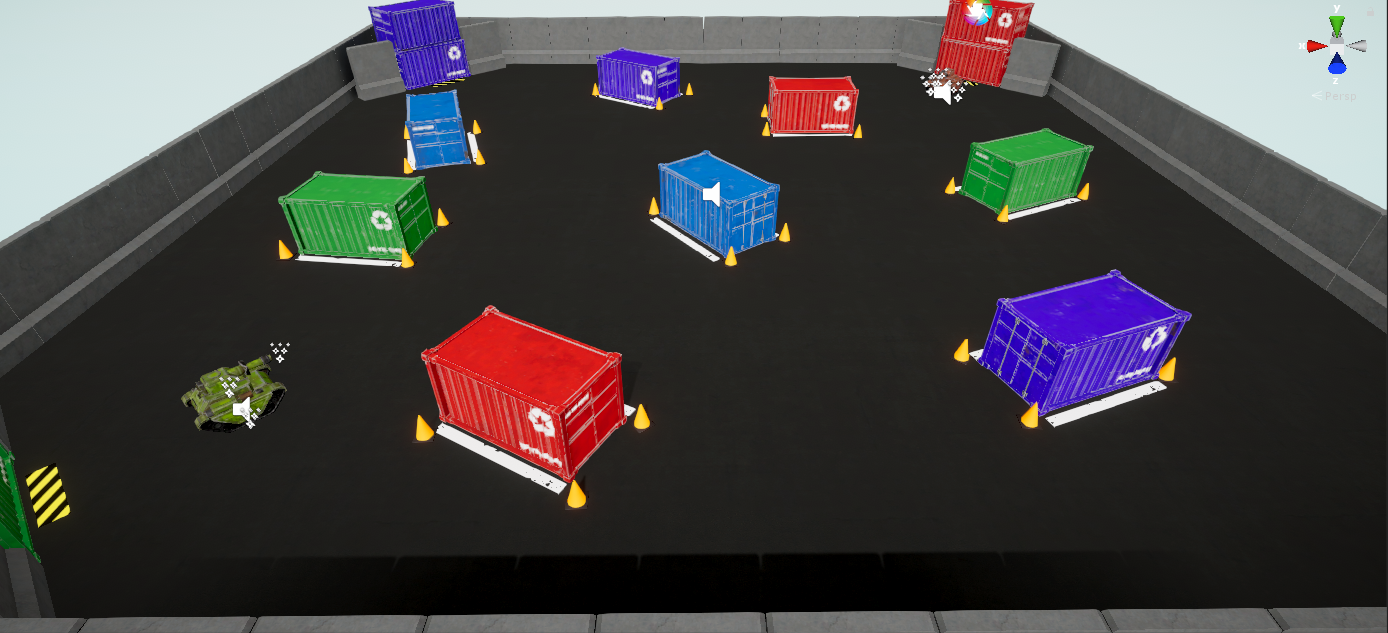 Updated Level with Final Game Assets
The goal was to have multiple tanks in the game, so each corner had a unique color scheme to it. In the game itself only two tanks face off, but the potential to have four playing simultaneously is there.
Next up were the main "actors" in the game: the tanks. I didn't want to use realistic looking tanks because this game was supposed to have a slapstick/cartoonish feel to it. Features were to be exaggerated and feel fun. So I looked around on Sketchfab for something that would fit the bill and I stumbled upon this awesome tank.
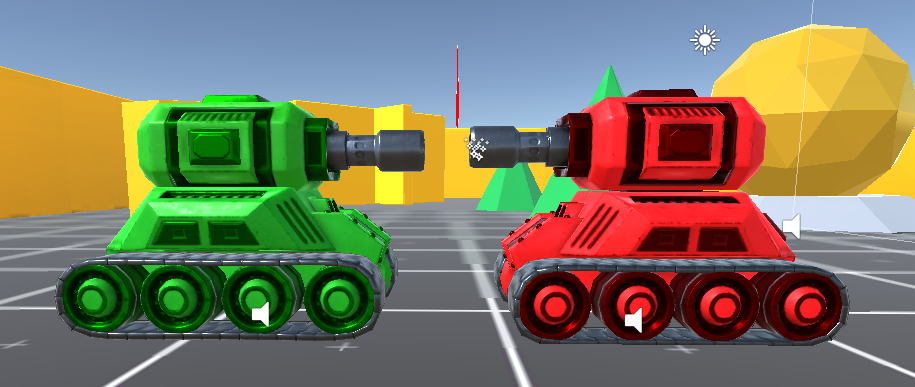 Player and Enemy Tanks
This model had everything I needed. It wasn't realistic, the top portion of the turret could freely rotate 360 degrees around and the barrel itself could also be modified separately. Once I had those in the game, I started scripting the turret to rotate based on mouse movement. I wanted the barrel to be a separate piece as I wanted it to move in and out very quickly when fired. This is a small detail but looks great when used. I did this through script as well as by using a Lerp mechanic to move the barrel back and forward over time.
This was added into the shooting mechanic as they were essentially tied together. Shoot out a projectile while simultaneously moving the barrel back and forward. Shooting a projectile was easy enough but it also had it's own unique mechanics since it would ricochet.
The projectile would be fired out, then ricochet and continue moving in the opposite direction of the object it last hit. I had experimented with this in another project so it was fairly easy to implement. Essentially, you apply a force using the normals of the object hit for direction. This allowed me to continue using physics instead of having to dive deep into scripting of a fake physics system.
To make it look better, I added a trail using a trail renderer and some particle effects for both the impact and final death of the projectile. I set the projectile to ricochet twice before exploding, unless it hit the tank in which case it exploded on impact.
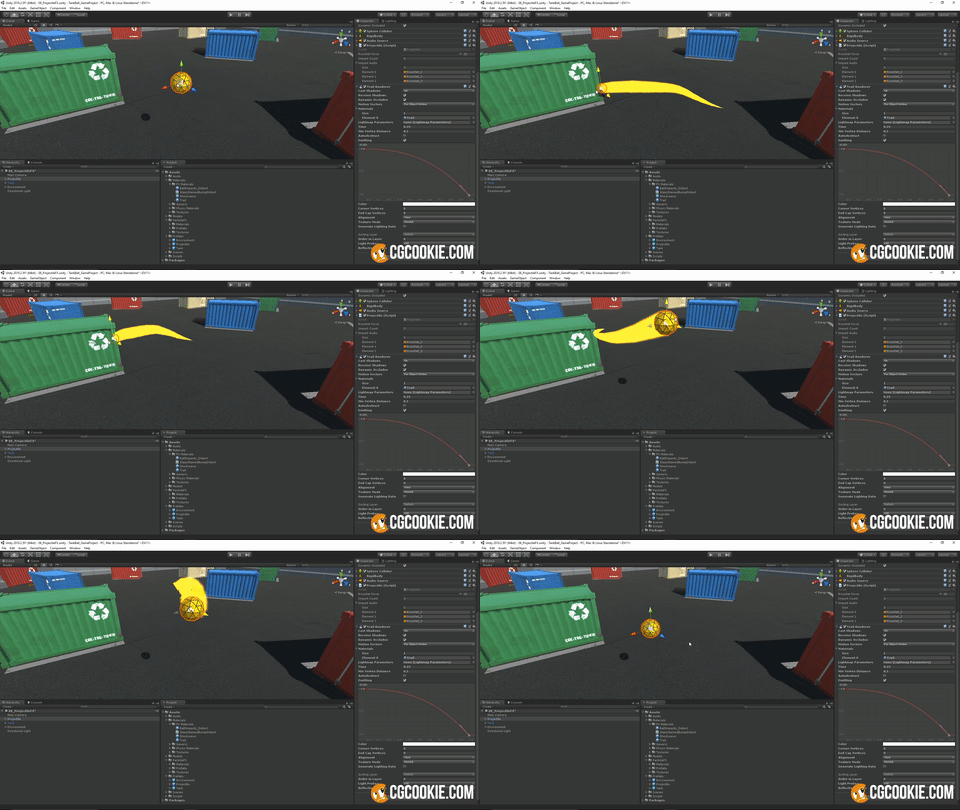 Trail Effect Added to Projectile
That leads me into the next section, the tank death. How will projectiles affect the tank and should the tank explode when it's hit enough times?
This is where a tank health mechanic needed to be implemented. It's quite simple, every time we detect the project hitting the tank, we apply damage.
If enough damage is applied, eventually the tank health will reach zero and the tank should die. If the tank had just broken down upon "death" it probably wouldn't have been that fun to see, so I decided to make it more interesting.
At the time I had been playing Mad Max fairly often and in that game you get chased down by enemy vehicles that you can destroy. Shoot them, ram them, whatever it takes, but when the enemy vehicles finally "die" they explode in a glorious mix of fire and car parts that fly off the vehicle.
That's impressive enough on it's own, but they also added in a slow motion effect to really emphasize the effect even more. So I decided to try and replicate that. The trick with this was to get the time to slow down just enough when the tank exploded, then return back to normal time soon after. Make it too long and it feels like it takes forever, too short and you lose out on seeing the effect.
I added in some tank explosion effects that included mesh particles of gears and bolts which looked great when slowed down, plopping down onto the ground.
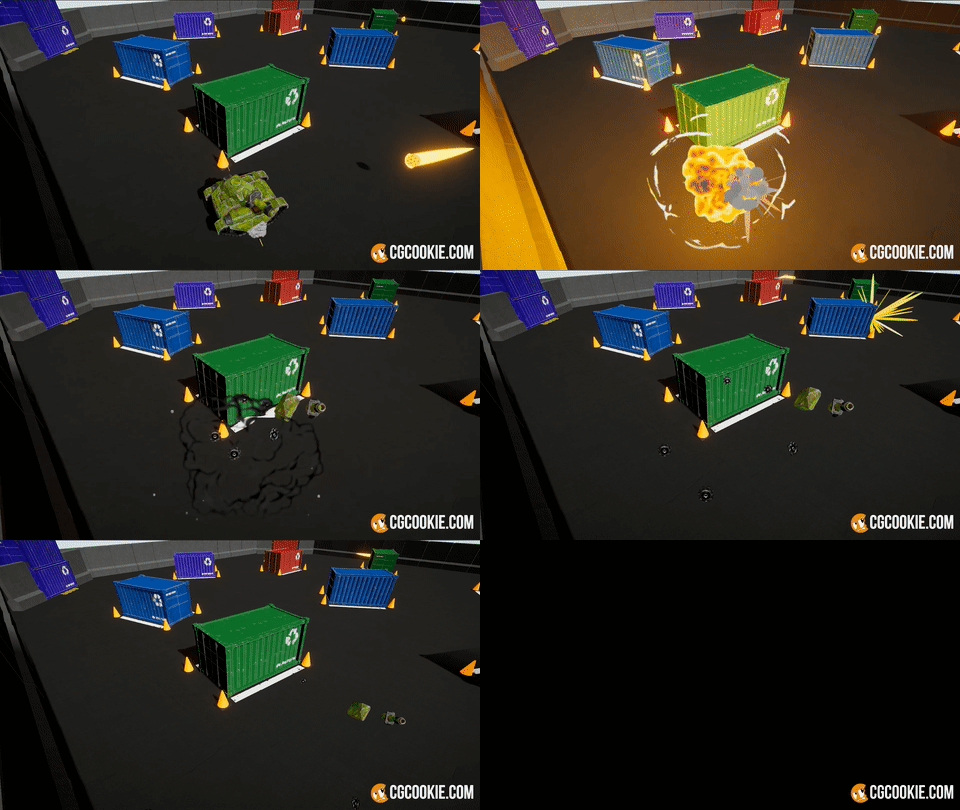 Explosion with Subtle Slow Motion Effect
I also needed to have an enemy. This game is essentially built with multiplayer in mind, but in single player mode enemies needed to be included. This one was a bit more challenging as there really was no reference of what I could use for the AI of the enemy.
Unlike traditional "player vs computer" games where you face off against cars racing, or enemy bots in a first person shooter, this was a completely new way of playing so I needed to build something different.
I kept it simple. "What does the enemy need to do?" I asked. Well, it needed to look like it was moving around just like a player and shooting in different directions to seem as if they were trying to navigate around the map. Occasionally this would also mean shooting in the direction of the player.
The easiest solution? Use invisible targets that the tank would randomly choose and shoot at. Place them behind the enemy so that the enemy would turn the turret to fire in the opposite direction, pushing them closer to the center of the map.
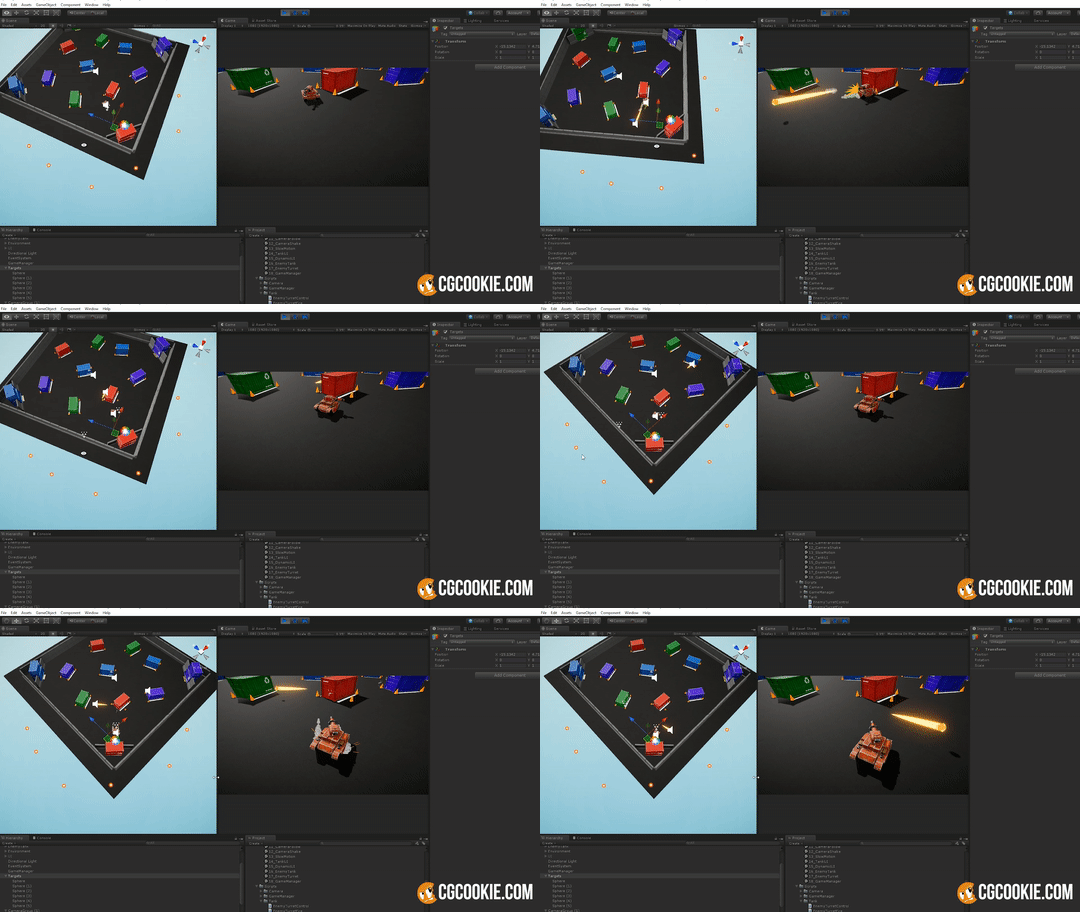
The AI was simplistic but it worked. It was actually quite difficult to take out the enemy at times even with this basic AI in place. So now I had everything in place for a basic prototype. It was rough around the edges, but got the general gameplay mechanics to work as expected.
Play Testing
Prototypes don't mean much unless you get them in front of people.
Often, you'll find out things you didn't even think about before. This also gives you a great idea of where to focus your efforts and find out what players find most enjoyable about your game.
Some things that were reworked/added after play testing:
- Keyboard controls were requested to rotate and fire the turret. The original prototype just included mouse controls but some players preferred to rotate the turret with the arrow keys and fire with the spacebar.
- Camera was reworked. Originally it was perspective, then it went orthographic, then back to perspective. While the end result of this was not the most ideal, I found a happy middle ground in how the camera worked.
- Constant tweaks to forces at play. This involved tweaking the ricochet force of the projectiles, the sliding force of the tanks, along with the turret rotation speed and launch timer.
- UI was added to give players an idea of what their health was and when they could shoot again.
Had this been a more complex game, the prototyping and play testing phase would have been much longer. The time between prototyping and play testing was roughly 2 months (including some down time).
Game Asset Iterations
Once you've go through the prototyping and play testing stages, it's time to start working on the visual aspects of the game. This process also went through a few iterations as I wanted the level to feel appropriate for the type of gameplay expected. Initially, the level started off with basic game assets.
It looked fine, but too generic. So I started to create a military base like environment. While the military base looked better, it just didn't really fit the fast paced feel of the game I was going for and it looked a bit strange to bank shots off military buildings and vehicles. I wanted something that felt like a map built specifically for the game and eventually I went with what is shown here:
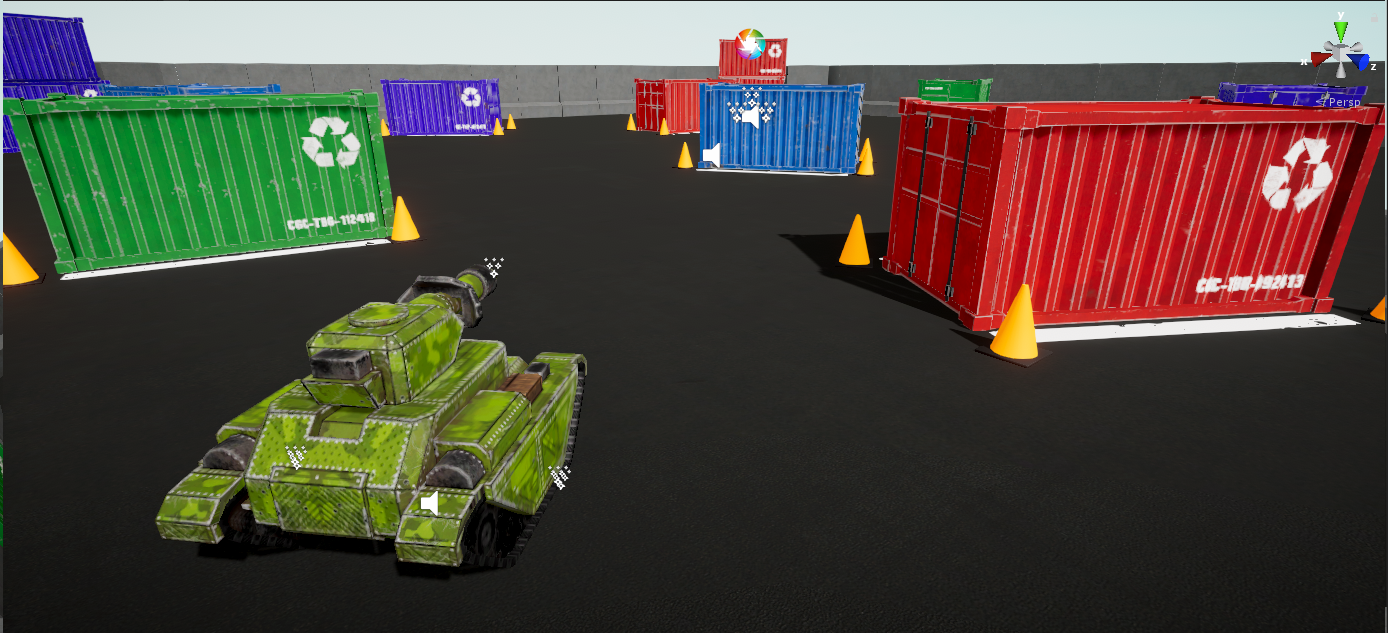
It was simple, just some shipping containers that can be used to hide behind or shoot projectiles at with concrete barriers around the edges of the map to keep everything contained. Each corner could contain a unique tank player.
The tank started off with a stand in model, but was soon replaced with a much better looking custom tank built by CG Cookie's Jonathan Lampel. You can model and texture this same tank in his course Creating Mini Tanks for a Mobile Game. It looks great and includs everything needed. Thanks to prior prototyping it was easy to swap out the old tank model with the new one.
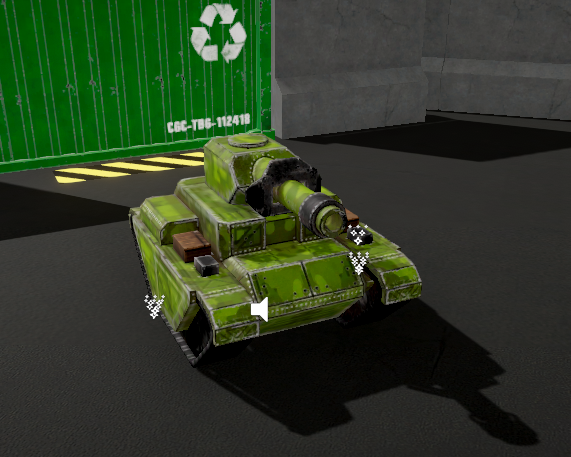 Updated tank looks much better
Lastly, the UI was modified. It originally started off with a basic red cross and ammo icon across the bottom of the screen, but I decided to make it more visually appealing by adding the icons of all the players in the game.
 Old UI across the bottom of the screen
 Updated UI icons across the side for each tank
I kept the icons off to the side and had it display both the health (green ring) and the ball icon when the players could shoot again. This gave you an idea of when you (and the enemy) could fire again. It was also made to include up to 4 players easily so if this was made into a multiplayer game you'd just need to add in new icons.
Final Polish for the Game
You could spend ages polishing your game making it feel better and look better. You eventually need to stop and say "OK, this is ready!"
I spent a few weeks on this stage. This involved steps like adding a small delay in the particle effects for the explosions, adding different audio effects with proper 3D settings and tweaking force values. I also added the following things.
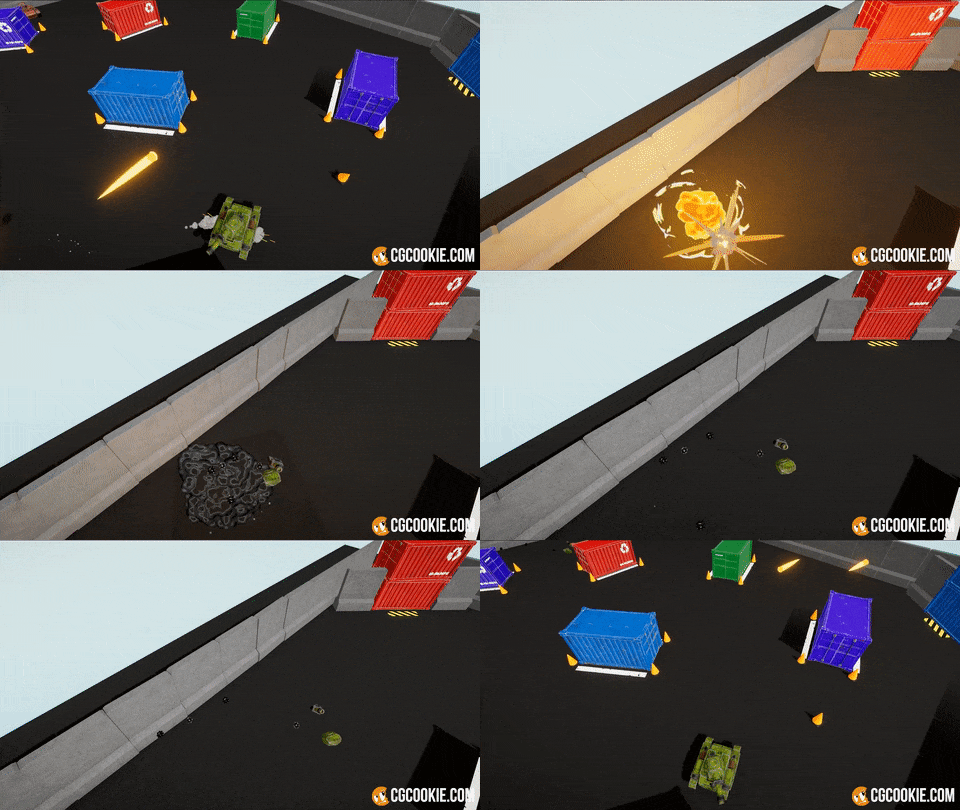
Camera switching effect on death which allows the camera to quickly move to the position of the enemy for about 3 seconds, then return back to the player:
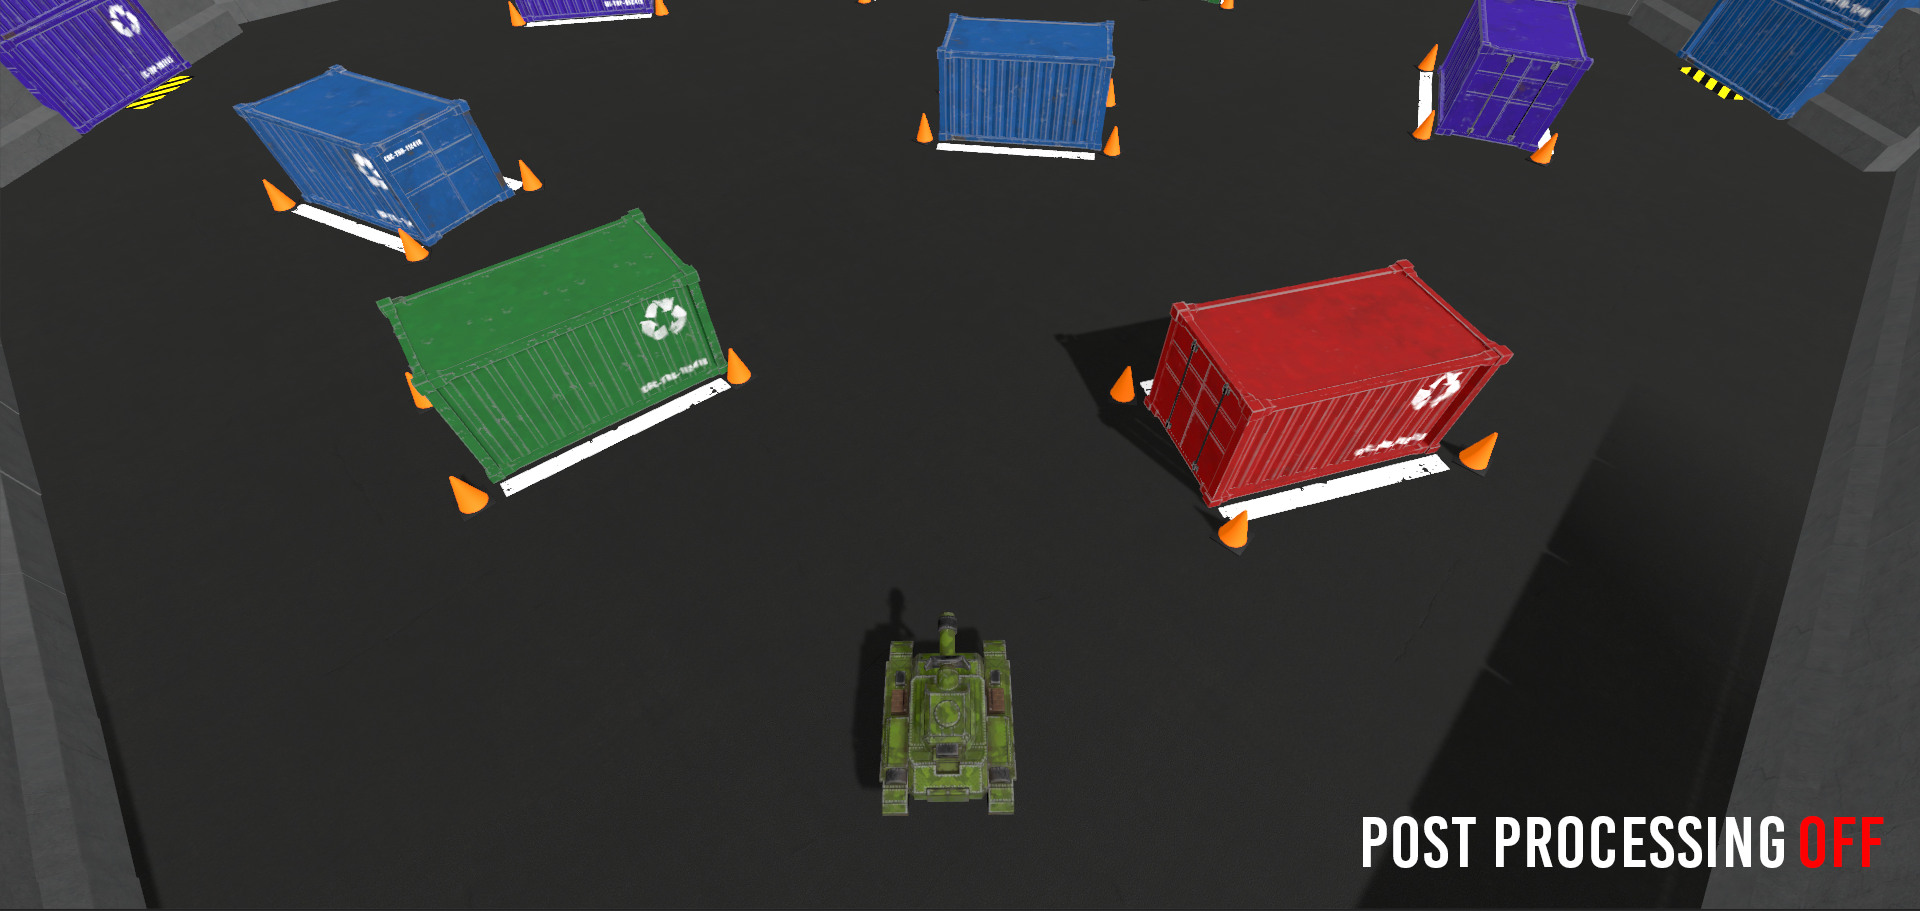
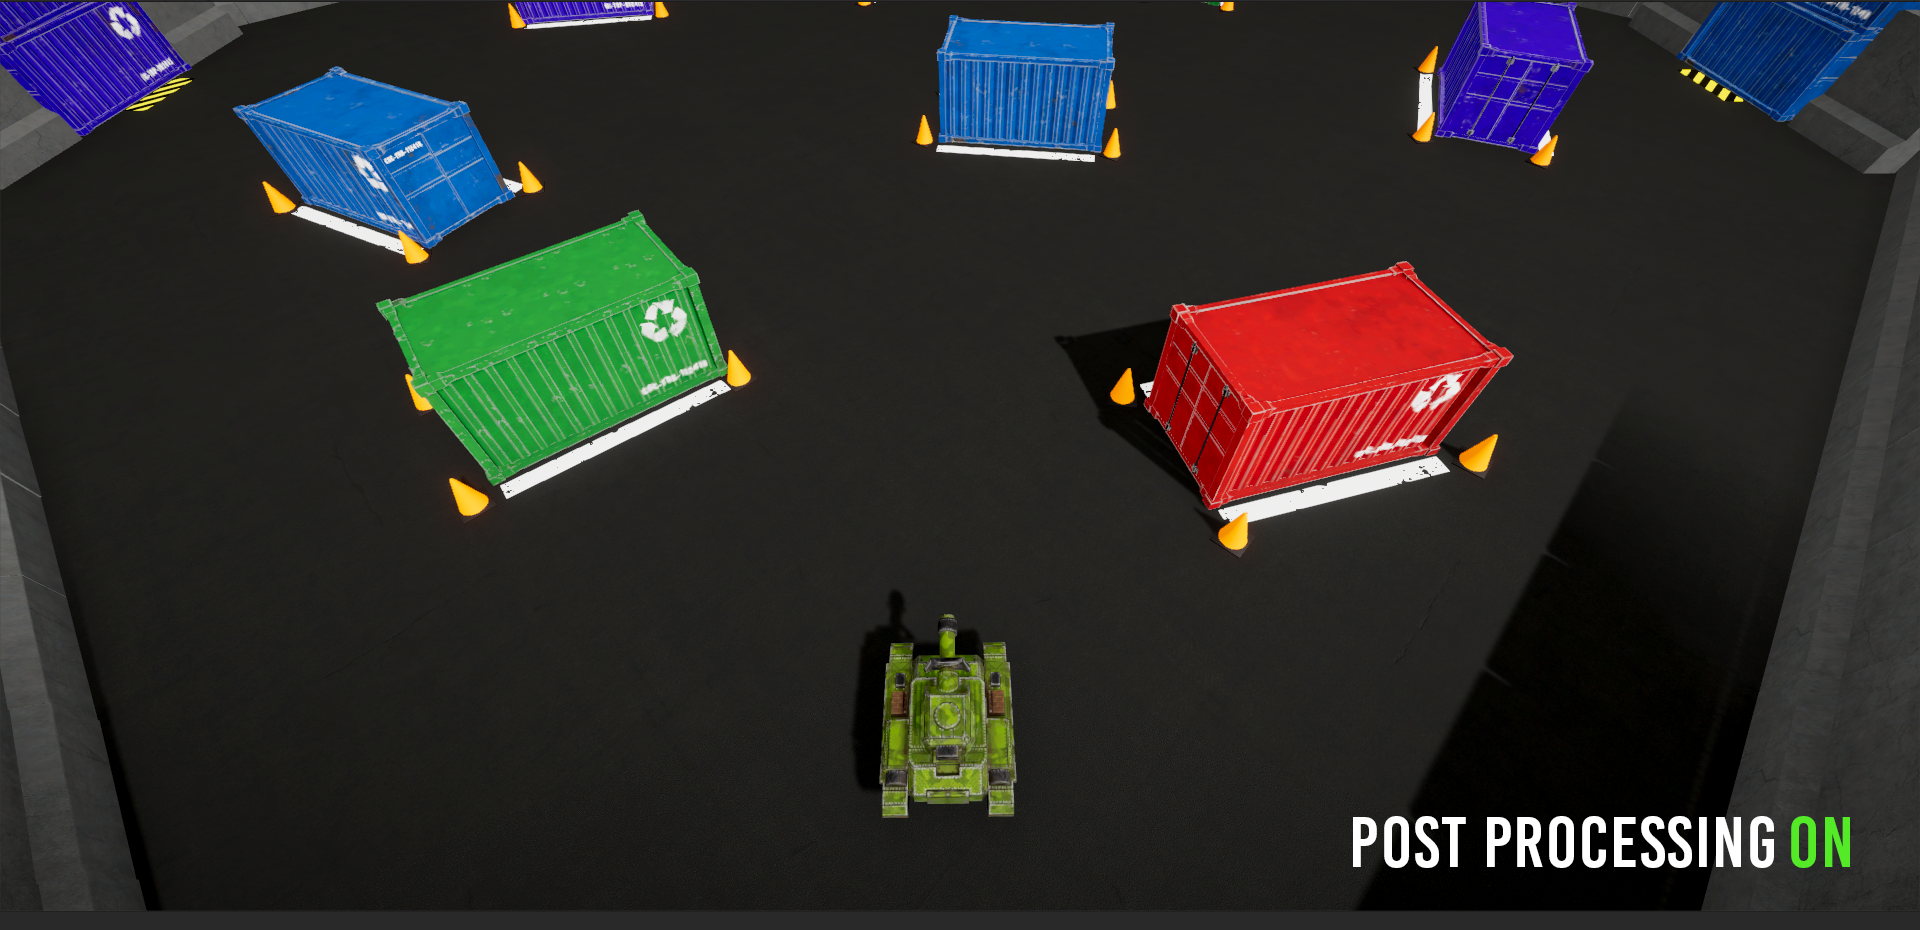
Post Processing which included Color grading, Bloom and even a subtle Vignette effect greatly affect how this game looks:
Main Menu with Custom Logo Intro was something I wanted to add in as an homage to games that have had unique logo intros. I even found the old logo in the prototyping stage I was testing out:
 Old Logo
  New Logo
There's a lot more I wanted to add, including new levels and tank abilities, but eventually this needed to be released and shown to everyone. This game was incredibly fun to make and I'm glad I was able to get it published on itch.io. You can play it here:
I've shared my full process for creating the Tank Ball game in a comprehensive course. It can be done in 1 weekend! Better yet, you can add to this by creating new levels or tank abilities.

This course no longer exists?
https://cgcookie.com/courses/creating-a-tank-ball-video-game-within-unity
Yeah, could be also done via raidbots with that link https://bedoper.com/raidbots-review/
Cool I'll have to try it out.
Very cool! The nice thing about going thru iterations is that you can pinpoint areas that can be included in new levels - like superpowers or new enemies for example.
Nice and insightful to read the thought process and iterations of the project. ill have to get caught up at some point. cheers Jonathan for sharing.
(lol yea that Udemy Ad does get about Youtube alot heh)
Excellent!. I really enjoyed the look and feel of the game. I played it for a minute or two on my lunch break. Definitely an idea that has awesome potential. Thanks for sharing. I learned a lot from this post.
Awesome article! very interesting to read about the process of making a game, learned some new things about how to tackle such a project :)