Blender 5.1 includes awesome new features, with most of the focus being on quality-of-life enhancements, stability, and polish after the devs finished another Winter of Quality push. During those two months of focus on quality, they solved 350 important issues in addition to cleaning up the code to make future improvements easier.
Let's dig into what all is new, so you know what to expect when you make the jump.
Modeling
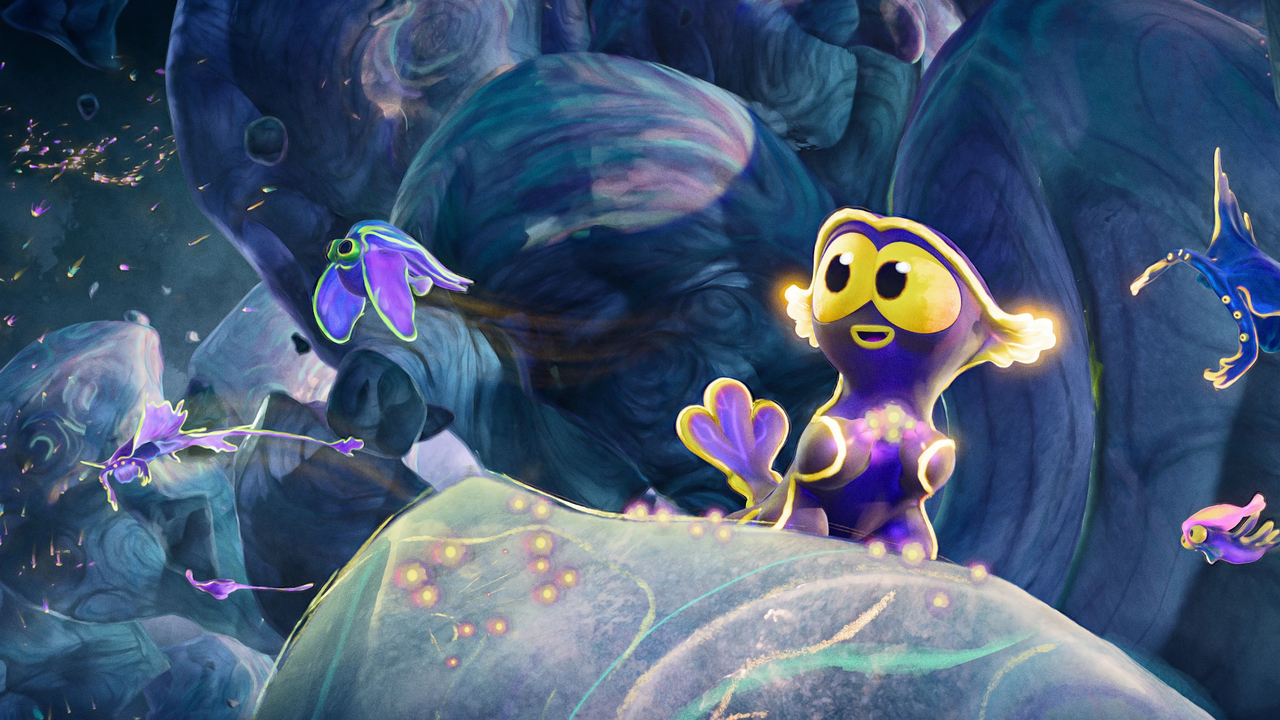
Text objects have a new default filling option that is a huge improvement over the previous method. If you've ever loaded a font into Blender only to see it be completely unusable in 3D, you'll appreciate this change a lot.
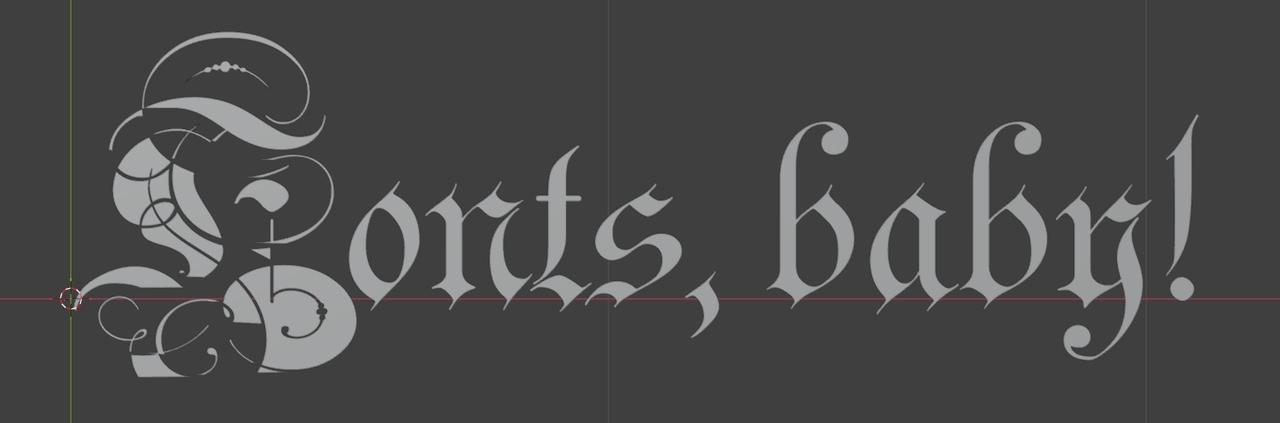
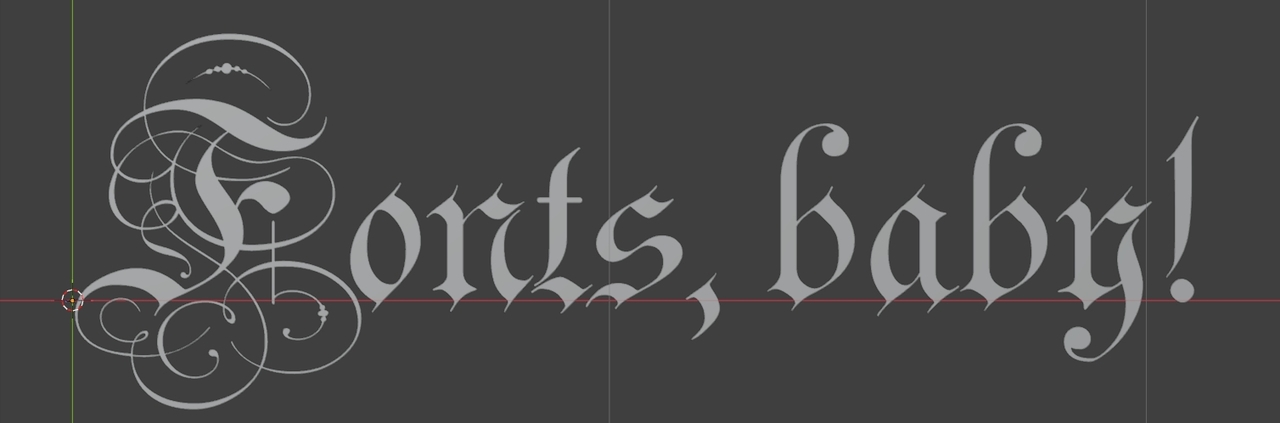
Filling in general while modeling is now up to 5x faster, especially for n-gons with many sides.
There's a new snapping option to snap to the center of faces.
You can now choose to correct the normals for flipped faces when applying an object’s scale.
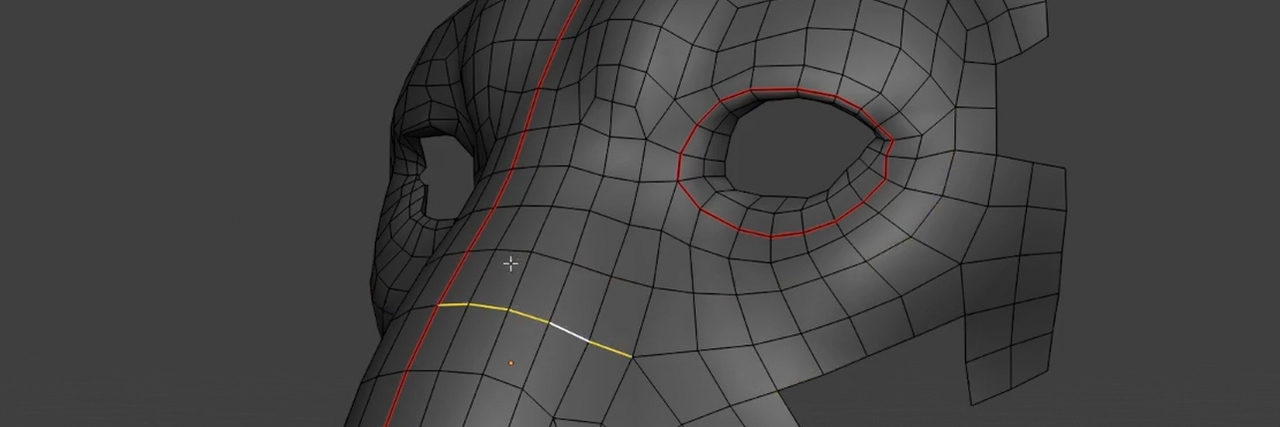
When selecting edge loops, there is now a redo panel where you can choose where the loop ends, such as at seams or sharp edges. When the loop is a boundary loop, you can control whether it passes through inner corners, outer corners, or n-gons. When the loop is a face loop or edge ring, you can even stop at material boundaries.
While beveling, you can now hold down Ctrl to snap to increments and use Shift for more precision.
Undo in Edit Mode is now 20-30% faster.
The Exact Boolean solver can be up to 35% faster for meshes with lots of attributes, and the Manifold solver is slightly faster as well.
The Lasso, Box, and Circle selection tools were added to the Sculpt Curves mode.
In the UV Editor, you can now select everything inside of any given UDIM tile, and there’s a new edge opacity slider to match the face opacity slider.
Sculpting & Painting
A Blur brush for colors was added to Sculpt Mode.

In mesh sculpting mode, you can now toggle to the Mask brush by Alt LMB Drag or toggle to mask erasing with Ctrl Alt LMB Drag.
Strips of faces without thickness are better handled when masking and smoothing.
You can now cancel a stroke while painting by hitting Escape.
The Asset Shelf icons can now go as small as 24 pixels.

You can now add sampled colors to the palette while sculpting with Shift X and LMB.
Sampling colors in Vertex Paint mode now reads the attribute color directly rather than the viewport color that might have a view transform or shading, and color sampling in any mode now supports dragging to get an average of the colors you draw over for easy blending.
Changing things like selection and which texture is active in Texture Paint mode can now be undone with Ctrl Z.
When modifying face sets or masks, the overlay for it will be turned on if it isn’t already so that you can always see what you’re doing.
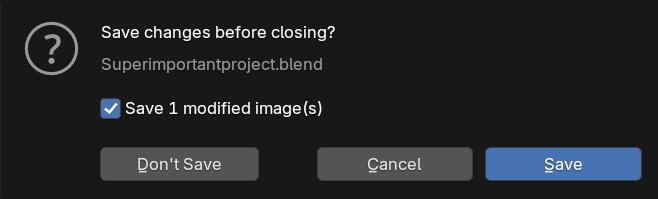
The Save Modified Images checkbox when closing files with unsaved texture changes is now always on by default.
Rigging & Animation
In Weight Paint mode, you can now select loops when using vertex selection.
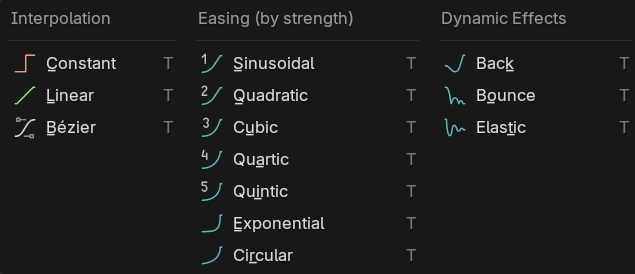
In the Dope Sheet, interpolation line colors now indicate the interpolation type. This is also true in menus.
The Timeline now looks much nicer when you have subframes enabled and the marker region is a little thinner.
A new Replace Action operator swaps out an action for all objects that share the same action.
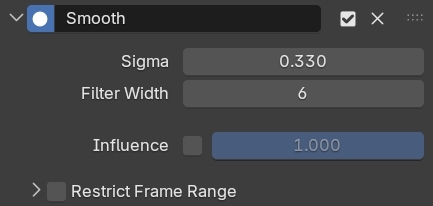
The Graph Editor now has a nice Smooth modifier, though it needs to be first in the stack.
A new Apply to Basis operator for shape keys can apply the deformations of a selected key and then remove it all in one step.
And last but certainly not least, the performance of actions and shape keys is significantly faster. Depending on the file, you can get anywhere from a 4% to 304% improvement in frames per second.
Grease Pencil
Blender’s 2D animation tool got a pretty big upgrade in that it can now support holes in shapes. This means you can import SVGs and PDFs without any weirdness, the fill tool just works, and you don’t have to use holdout materials as a workaround.
As a part of this overhaul, whether lines are fills or strokes is now an attribute of the line itself rather than a material property.
You can choose between fills and strokes while drawing new lines, choose which to remove when deleting, set the type with an operator, join multiple strokes into the same fill or separate them out, and select everything that makes up the fill.
Oh, and performance while drawing very long strokes has improved and the ability to make a lattice object a parent during a lattice deform was added back in.
Geometry Nodes
A new Bone Info node allows you to get the transform data of any bone in an armature. Combine this with the Attribute Constraint from the last release and you can now both rig your nodes and node your rigs.
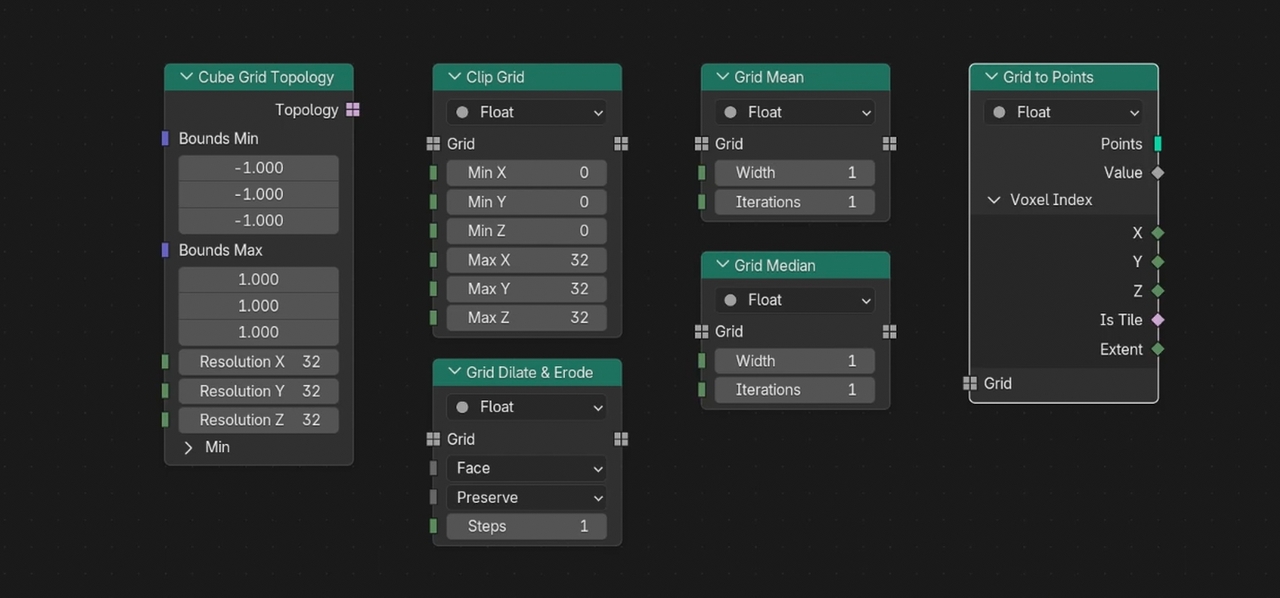
There are six new grid nodes for creating and manipulating volumes. You can use them to create volume grids from scratch, expand or contract the number of cells, find averages, and convert the cells into points.
The Font and various menu inputs for the String to Curves node are now sockets and can be used as group inputs. There’s also a nice new output for the word index.
There are new Get and Store Bundle Item nodes for extracting just one socket from a bundle so you don’t have to separate and combine the entire bundle to use one property. You can even use slashes to access properties in nested bundles.
The UV Unwrap node now supports Minimum Stretch unwrapping and the No Flip option. The Pack UV Islands node can now pack to a custom region.
Ctrl F can now be used to search for node warnings.
A new Matrix SVD node can be used for Singular Value Decomposition of 3x3 matrices. One of the main use cases for this is finding the minimum bounding box and its orientation for any set of components, which is going to be extremely helpful for all sorts of things.
If you’re making node tools, each one now has its own registered operator, which makes it easy to call with Python or assign hotkeys to.
Rendering
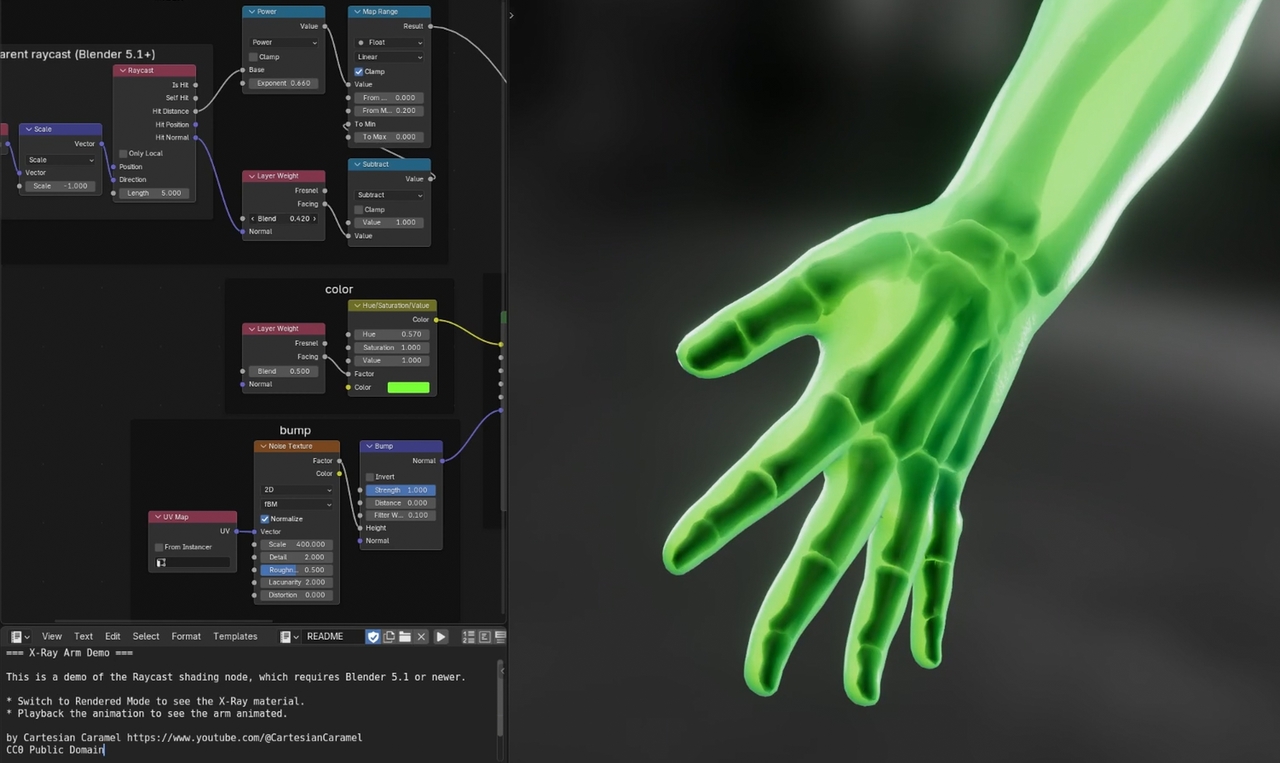
There’s a new shader node in Blender 5.1 for raycasting. This one is pretty incredible because it allows for so many effects from faking custom subsurface scattering, creating NPR outlines, creating fake shadows, and blending objects together. Just know that when you’re using EEVEE, the ray is in screen space while in Cycles it is in world space.
Normal Map nodes can now be switched to reading the Direct X format.
The maximum number of AOVs, the arbitrary output variables for compositing, was bumped to 128. Also, the AOV list in the Properties Editor now shows the socket color it has in the compositor.
EEVEE has new sliders for adjusting the intensity of direct and indirect light.
EEVEE Reflection Planes now support glossy materials again, the Shader to RGB node now works with transparency again, and the material preview HDRI rotation can be locked to the view again. We got the old features that were removed during EEVEE Next!

The Light Path node in EEVEE now works in the world shader.
Initial material compilation with EEVEE is now significantly faster thanks to preprocessing and some parallelization, and in some cases, cutting the wait time in half.
EEVEE also uses texture pooling now, which really really helps to reduce the amount of VRAM needed for a scene. So, you can render bigger scenes now on your same graphics card.
For Cycles, GPU performance has improved 5-10% for a lot of scenes, and HIP-RT ray tracing is now enabled by default on AMD GPUs. When previewing in Cycles, viewport navigation now syncs up a bit better with the overlays.
And lastly, the Use Nodes option was removed for light objects and they just always use nodes now.
Video Editing
In the Video Sequence Editor, you can click and drag with the Blade tool to quickly ripple cut sections. You can also hold shift to keep the gaps and not ripple.
The Speed Control strip can now use negative multiply values to reverse footage.
A new clock icon is shown on strips that have been retimed, and you can now hide the retiming keys. The time property panel was also cleaned up and the property names now make a lot more sense.
Shift S, which snaps the selection to the playhead, now keeps the strips offset by default when you have multiple strips selected.
Holding Ctrl when scaling or rotating in the preview area now snaps to even increments.
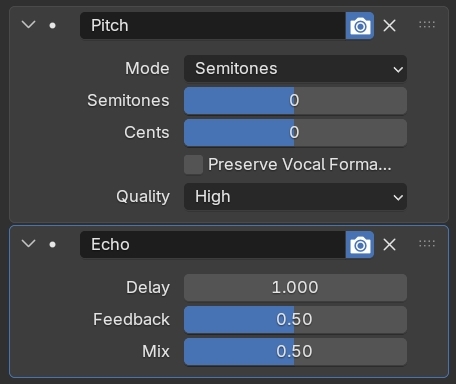
Sound strips have new modifiers for nondestructively editing the pitch and echo.
Meta strips, the strips that contain other strips, now have a master volume setting.
Soloing strips using the right click select keymap is now Shift Left Click, so scrubbing with Left Mouse Drag is easier. For Left Click Select users like me, soloing is still Shift Right Click.
A new Sequencer Strip Info node in the compositor allows you to make some great procedural effects that work on any strip out of the box. Having information about the strip's frame numbers is a huge power unlock!
You can also create new sequencer modifier node trees directly from the compositor now.
Compositing
Speaking of compositing, the default workspace now uses an image editor at the top and has the node backdrop disabled.
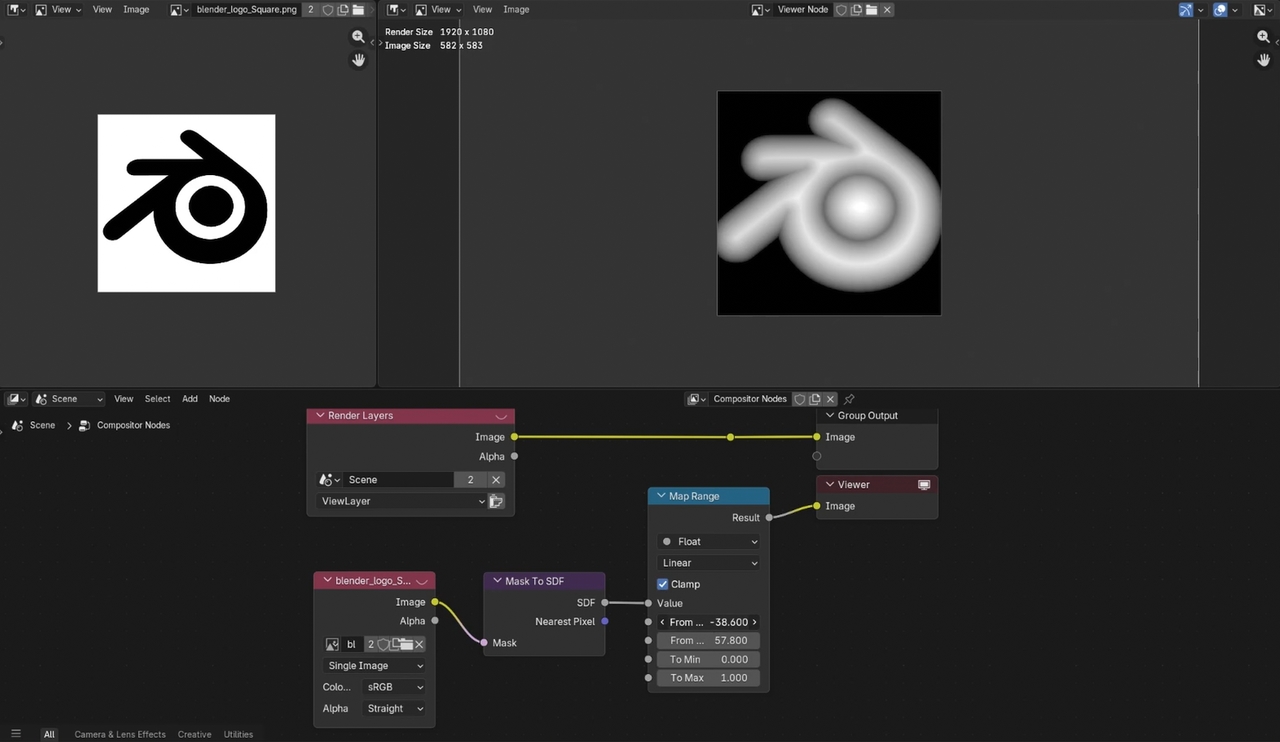
A new Mask to SDF node was introduced, which lets you turn black and white masks into gradients and find the nearest pixel inside the mask, both of which are extremely powerful.
The Mix node now mixes the alpha channel when mixing the colors, and this is also true in all the other node editors as well.
The Relative to Pixel node now works with image and mask inputs and not just single values, which makes it easy to do variable blur effects.
The Movie Distortion node, which adds or cancels out lens distortion based on the lens set in the Movie Clip Editor, has modes which now better cancel each other out and make the effect more reversible. Plus, the Nuke lens distortion model now supports anamorphic lenses.
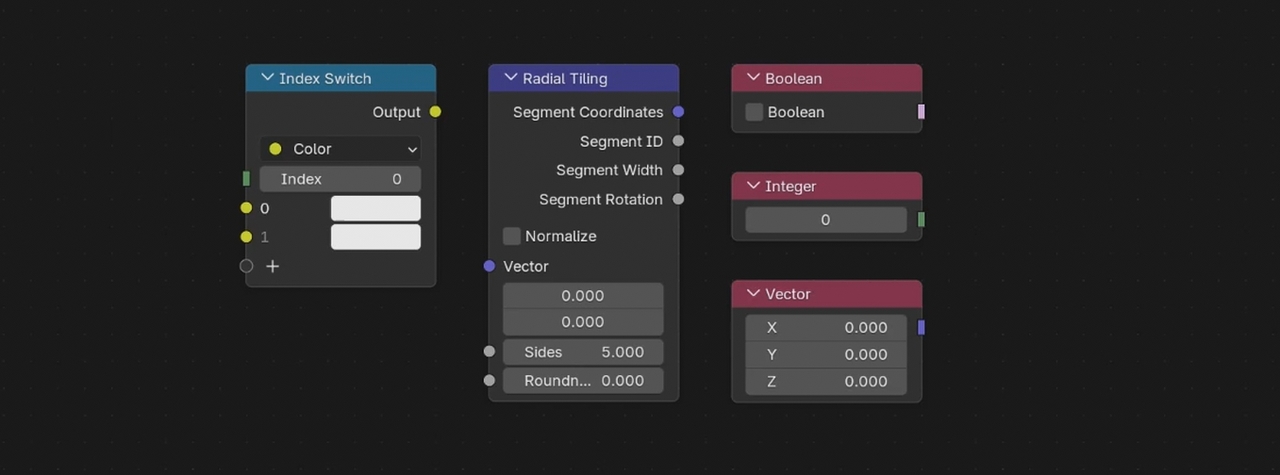
The Index Switch, Radial Tiling, Boolean Input, Integer Input, and Vector Input nodes were all added to match the shader editor.
The Image and File Output nodes can now write custom metadata. The File Output node regained the ability to use slashes in file names to write to subfolders.
The humble Group Input node was optimized, and can sometimes improve the animation performance of an effect by about 30%.
The Glare, Directional Blur, Lens Distortion, Anti-Alias, Blur, and Vector Blur nodes were all sped up too, between 20% and 100% faster depending on the effect.
Assets & Pipeline
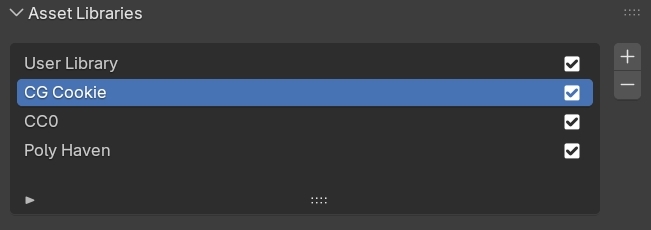
Asset Libraries can now be individually disabled in Preferences.
The Asset Browser now uses fuzzy searching, so you can misspell things and still find what you’re looking for.
Deleting linked data now supports redo and not just undo.
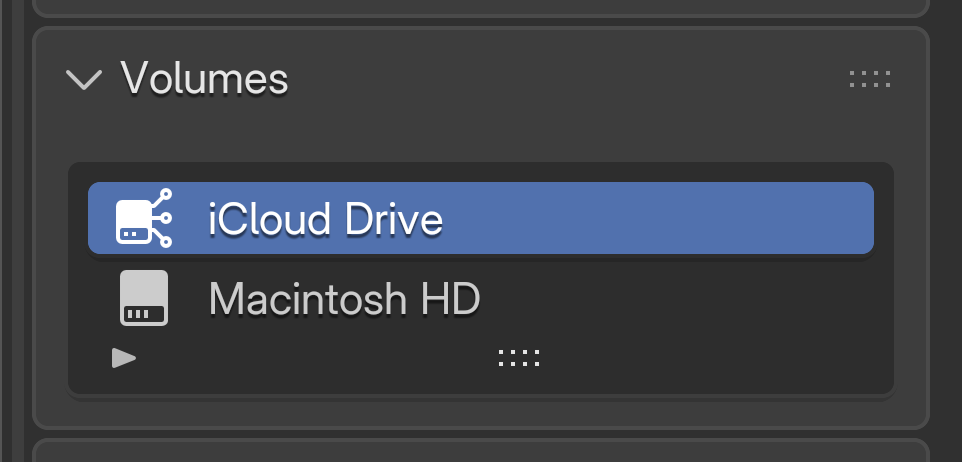
On Mac, the file browser now supports iCloud Drive. On Windows, user fonts are now shown alongside the system fonts and drives can now use different icons.
A new image file format, AVIF, is now supported. It fully handles HDR data, has better compression than a PNG, and is already widely supported by most web browsers and image apps.
OpenEXR can use a new lossless encoding option called HTJ2K, high throughput jpeg 200. It’s great compression but not yet widely supported by other software.
Saving JPEG 2000s themselves is now multithreaded.
Video encoding can now use a custom quality level, and the audio bitrate can now be set up to 2048 kb/s depending on the codec, whereas it used to be limited to 384.
USD importing and exporting now supports the USD UI Accessibility API and transparency and translucency for the USD Preview Surface. The exporter now writes indexed UVs that don’t separate each face into different islands when imported into certain apps, and there’s a new get_prim_map API option for mapping between Blender objects and USD prims.
The FBX exporter now exports shapekey normals, which is great for importing objects with shapekeys into Unity.
User Interface
The 3D View infinite grid got a cleanup. It now draws 85% faster, z-fighting with other overlays has been solved, low alpha values look better, and you can now separately theme the major grid lines.
There are new performance stats available in the text overlays that tell you how long it takes to update the viewport.
The status numbers in the header during operations no longer jump around as much and show more numbers when you’re holding shift for precision mode.

Quad View can now be resized by dragging the center point, and it no longer shows duplicate overlays and widgets.
You can now search in the Add Workspace menu.
Editor size snapping while holding ctrl is now a bit nicer, as is resizing editors overall.
The number of items is now shown when dragging and dropping objects from the Outliner.
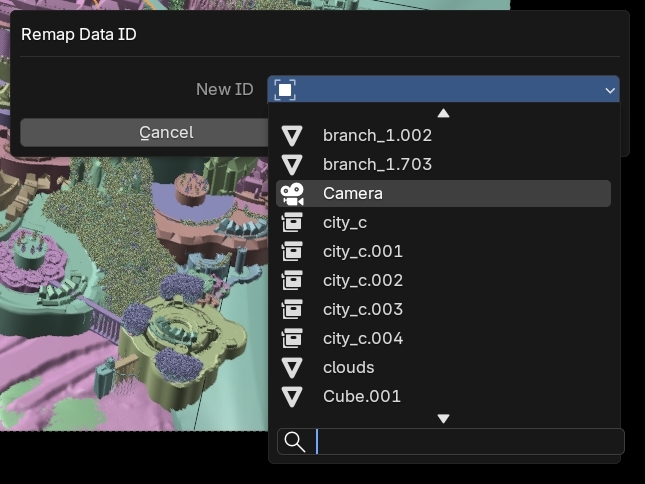
The Remap Users command in the outliner now has a nice search menu. And, these object data block menus now show the object type icon.
The hex code input in the color picker now supports autocomplete, so you can just type in a couple characters and it will fill out the rest for you.
You can now use hover copy and paste to rename things in nested lists.
The Preferences editor now has a search box, so you can quickly find settings. It even works for keymap items!
3D Mouse navigation has a new Drone mode that won’t change altitude at the same time as moving forward or backward.
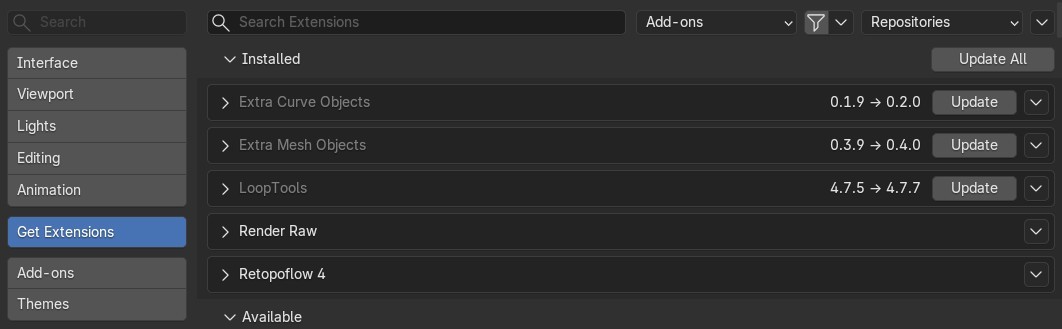
You can now update all your extensions with one button, and extensions that have updates now show the current and pending version number.
You can now copy and paste nodes between different instances of Blender. And, when possible, this also works between different node editor types. So if you have math nodes or textures in geometry nodes, you can easily copy them into shaders or the compositor or vice versa.
The Swap Node command, Shift S, allows swapping between similar zones while keeping the sockets, does the same for the bundle nodes, and it can now maintain object references.
Node headers can be made semi-transparent, if you want.
The node group interface list now supports selecting multiple items for dragging and dropping or deleting.
Float sockets can now have the mass subtype.
The node panel was cleaned up a bit and you can now use it to toggle muting and hiding options.
Node groups with a period before their name are now hidden in search results by default, but you can turn this off in Preferences if you need to.
On Linux, you can open Blender without window decorations now using –no-window-frame.
Will you update?
And that, along with hundreds of bug fixes, is what’s new in Blender 5.1. Download it today from blender.org and don’t forget to support the development fund while you’re there, to help make future updates even better!
The best thing about Drive Mad https://drivemadgame.cc/ is the balance between fun and challenge. It feels accessible for new players while still offering enough difficulty to stay engaging.
The cross instance node copy paste sounds like the most useful change for me, especially when moving setups between geometry nodes and shaders. I’d probably update after checking that my main add ons are compatible first. https://5letter-words.io/
filling n-gons is faster is actually pretty nice for CAD imports and ugly topology. https://tagunblocked.com/
">tag unblocked
A well-crafted and insightful post! Your explanation was clear, accurate, and engaging, making the topic easy to understand. Looking forward to your future posts! https://in.ojolit.com/call-girls/delhi/