What's new in Blender 2.92? All the new Features (UI, Modeling, Sculpting, Grease Pencil and more)
Feb 25th 2021

Blender 2.92 is the first Blender release in 2021.
It improves on existing features and sets up the framework for exciting major updates down the road. So, without further ado, here’s what’s new in Blender 2.92!
First of all, here are the Top 5 Changes in Blender 2.92
Read more about them below - or browse our full list with an overview of all the new features.
All the new Blender 2.92 features covered in this article:
User Interface
The Outliner got a few notable improvements in 2.91, and that work has not slowed down. In Blender 2.92, clicking on a data icon in the outliner will jump you to that section of the Properties Editor. To keep things from getting confusing when multiple Properties Editors are open, this syncing only works when the two editors share a border like in the default layout.
The Outliner also has a new filter for selectable objects, a new invert button for any filter, and a new way to display library overrides.
Quite a few minor layout and theme changes have been made to help clean up the interface and clarify settings, but none that would change your workflow. My favorites would have to be the Group Node sidebar getting more breathing room and the drag-and-drop modifiers being locked horizontally.
A new Viewport Studio Light was added that’s designed to be really close to white with a little darkening around the edges so that colors can be seen more clearly while texture, weight, or vertex painting.

I didn’t even know this feature existed, but Camera Parent Lock has been moved from the User Preferences to the Relations section of the Object Properties. I’m not sure why it’s available for all object types, but here’s how you can use it with your camera: Turn it on, view from the active camera, lock the camera to view, and parent the camera to an object in the scene. Now when you navigate the scene, the object appears stuck to the camera! In most cases though, you can just parent the object to the camera instead to get the same effect.
On MacOS, the scroll direction is now determined by the system settings and the Blender preference has been removed.
Modeling
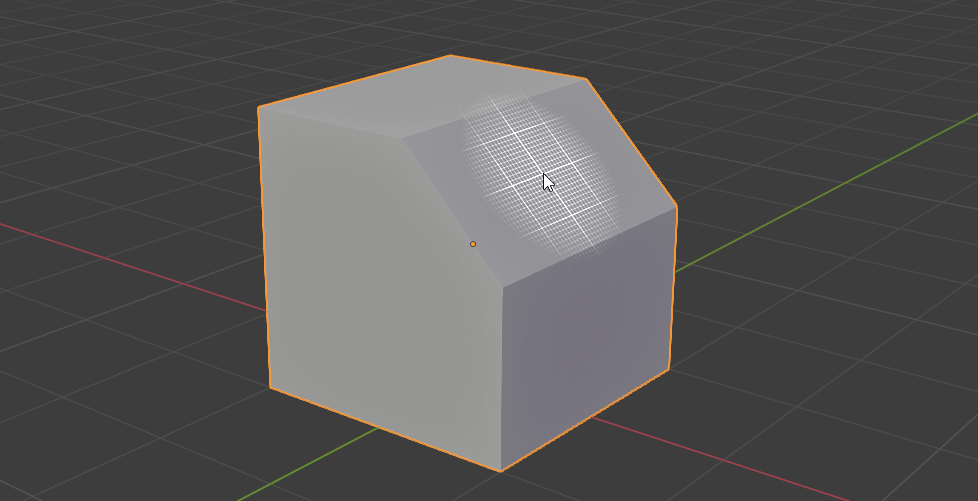
New Add Primitive tools were added to Blender 2.92 which enable you to interactively create cubes, cones, cylinders, spheres, and icospheres on the surface of other geometry. Similar to other software, you can hold Shift to constrain to even proportions and/or hold Alt to transform the shape from its center.
The Bevel modifier now uses Angle as its default limit instead of Weight since the former is generally used more often and requires no additional setup.
All modifiers have a new Copy to Selected option in their header dropdowns. Previously it was only possible to copy the entire modifier stack via the Ctrl+L / Make Links / Modifiers command and not individual modifiers.
Geometry Nodes
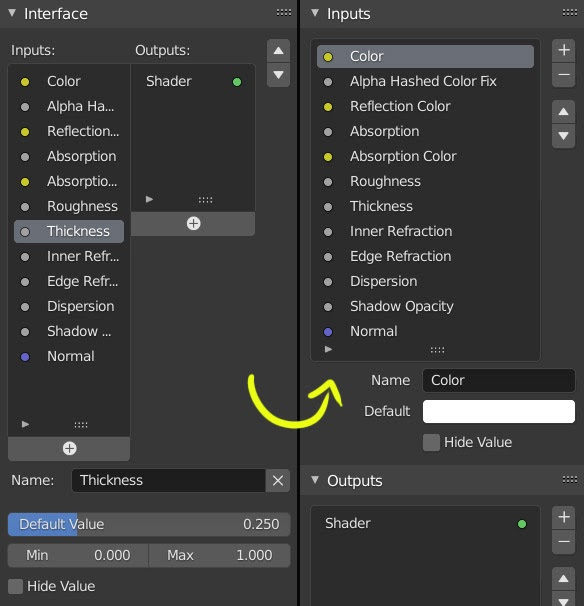
The most exciting development, at least in my opinion, is the initial implementation of node-based modifiers! To use, add a Geometry Nodes modifier, make sure it is the active modifier by clicking on it, and then open up the Geometry Nodes Editor.
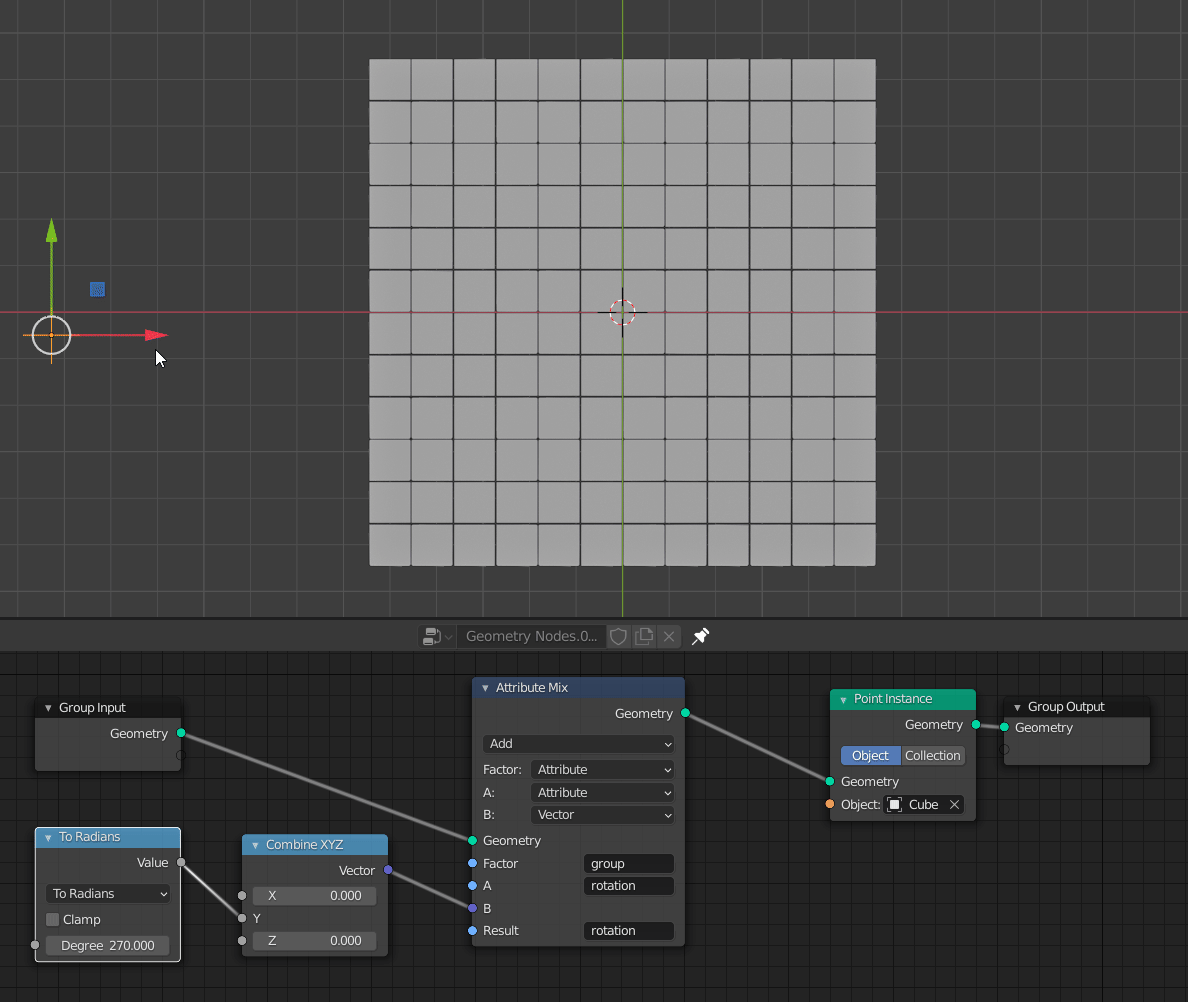
It’s just the first steps so only the Subdivision Surface, Triangulate, and Bevel modifiers are available as nodes, but with its built in point instancing system and attribute support, a lot of new possibilities are already available. The attribute system is not particularly intuitive to use as it expects you to memorize all available attributes such as vertex group names, but I expect that to be improved over time as well.
To create something like this example above, this video by Sketches for Humanity is a good introduction.
Sculpting
We’ve seen so many massive improvements to sculpting recently that the list of updates for 2.92 looks small in comparison, but it still includes some helpful changes!
The Snake Hook brush has a new Elastic deform type, and it’s incredibly fun to use.

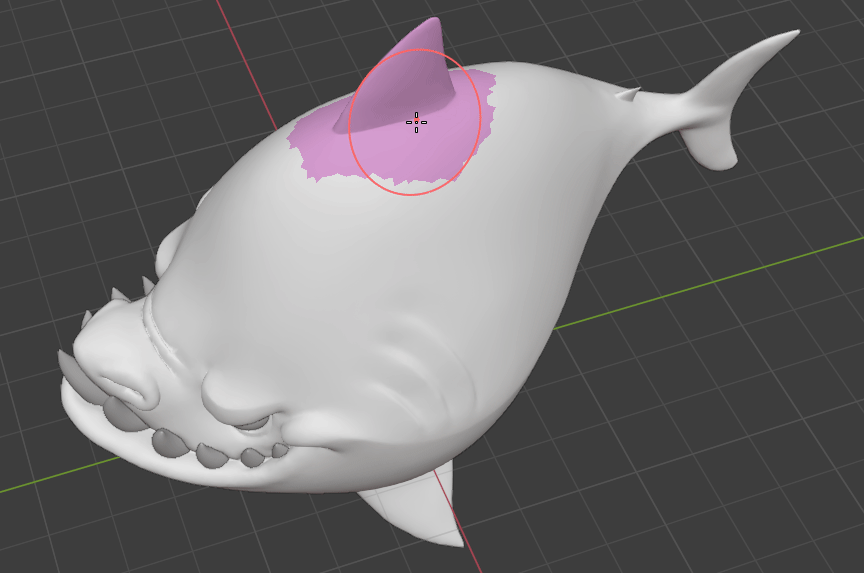
The Face Set Edit tool has a new Delete Geometry mode that is pretty self-explanatory as well as a Fair Tangency mode which smooths the face set as much as possible, resulting in a good sharp detail remover.
Additionally, the trusty Grab brush can now optionally grab an object’s silhouette, the Cloth brush grab deformation can now use planar falloff, the Scene Statistics now show more detailed information about the current sculpting session, the Erase Displacement mesh filter got a new invert option, and a new tool called Multires Displacement Smear allows you to slide details around the base model.
Grease Pencil
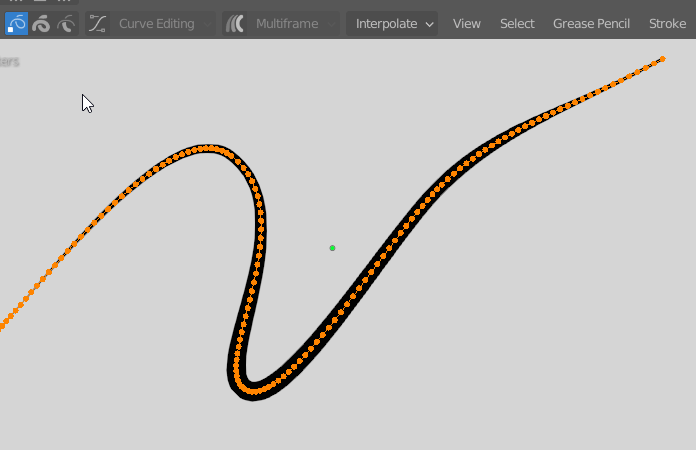
The biggest change to the Grease Pencil in Blender 2.92 is the addition of Curve Editing mode inside of Edit mode.
Just turn it on in the header and manipulate the stroke with Bezier handles!
Some Edit mode operators are not supported in this mode but the developers say they will be soon.
A new Automerge option, which can be found in the header next to the Additive Drawing icon, fuses the beginnings and ends of strokes so that you can draw continuous lines with multiple strokes.
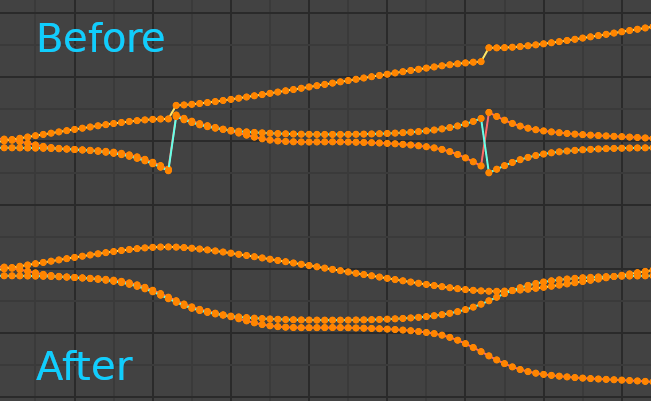
The Interpolate popover, which helps animators create new keyframes between existing ones, is now available in Draw mode as well as Edit mode. The interpolation algorithm itself has also been improved so that it can better handle transforming between strokes of varying lengths.
The Cutter tool has a new Flat Caps option which will remove the rounded caps of the stroke where it cuts.
Onion skinning is now enabled by default for new layers.
The Join operator for combining strokes in Edit mode was dramatically improved and now gives much cleaner results.
A new Reset Vertex Color operator was added to Vertex Paint mode.
The Bake Mesh to Grease Pencil operator has a new option to bake only the keyframes that are selected in the Dope Sheet and the Trace Image to Grease Pencil operator has a new mode for tracing image sequences so that you can easily import simple hand drawn animations.
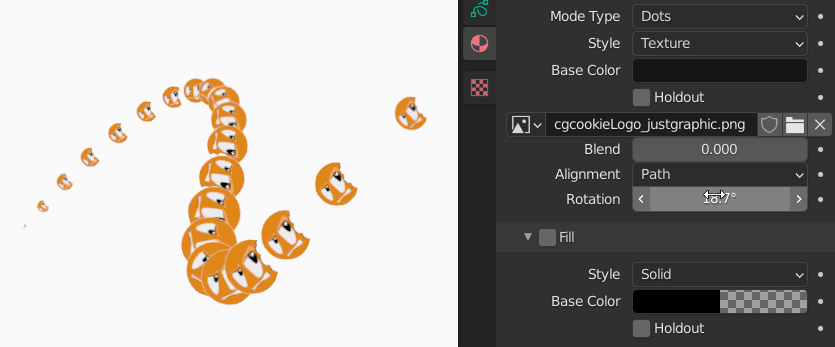
Textures for dots and strokes can now be rotated in the material properties and in the Texture modifier.
The Grease Pencil Subdivision modifier now works with cyclic strokes and the start and end points are not moved.
Effects can be copied from object to object now using the Ctrl+L Links menu or using the dropdown menu on the effect’s header.
The Array modifier Randomize Scale has a new option for keeping the seed the same across all axes. As a side note, I really wish that the regular Array modifier for meshes had control over randomness!
Rigging
Constraints have a new evaluation space option called Custom Space which allows you to pick any object or bone and use its local space. This should allow for some complex rigs to be simplified quite a bit.
Weight Painting has been improved a bit as well. The Sample Weight tool now displays the result in the Tool Settings and painting with Auto Normalize enabled now paints exactly zero when it needs to instead of extremely small numbers.
Bendy Bones no longer cause much unwanted mesh distortion when using the Preserve Volume deformation method.
Animation
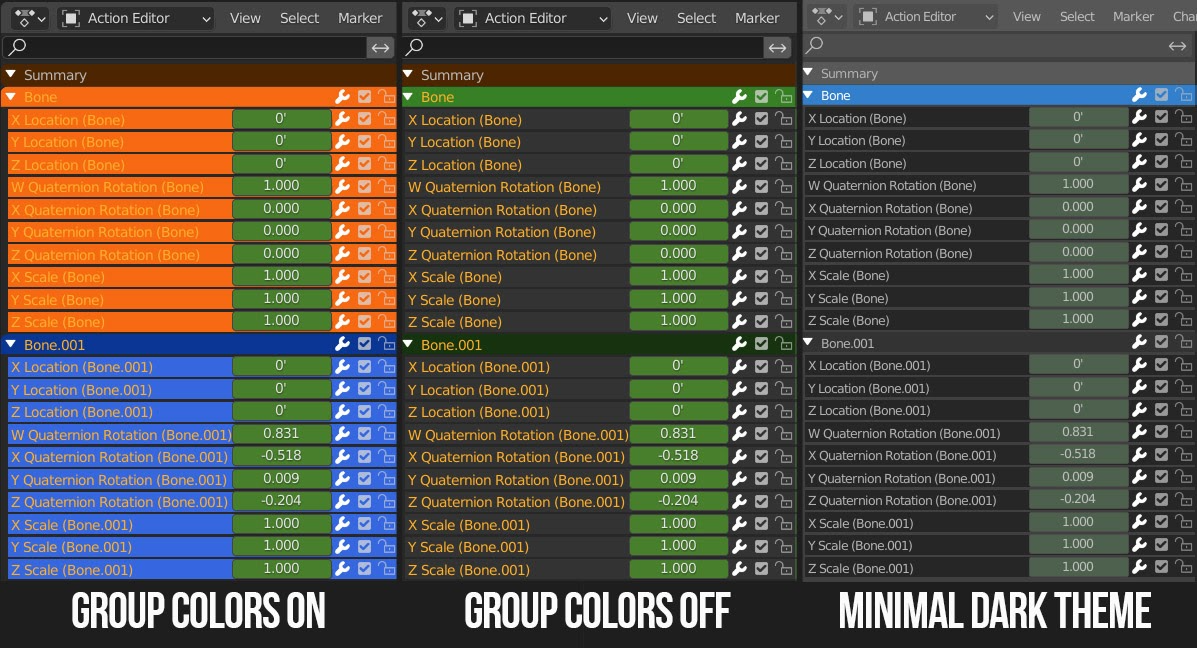
The Group Colors option that used to be in each animation editor has been moved to one single option in the User Preferences under Animation. It’s nice to be able to turn off once and for all, because bright bone group colors make the text impossible to read. For anyone who still thinks the colors are a bit too much, try using my Minimal Dark theme that’s included as a default as well.
Deleting keyframes no longer brings up a confirmation dialog if using the Delete or Backspace keys instead of the X key, similar to deleting things in the 3D Viewport.
The Euler Discontinuity Filter, which cleans up jumps in the graph editor caused by gimbal lock, has been improved so that it can solve a lot more cases.
The Bake Action function (which we used rigorously at the end of the First Person Animation course) now uses the Euler Discontinuity Filter behind the scenes and the Clean Curves option is now disabled by default.
New NLA strips now have Sync Length enabled by default so that it will update whenever the first or last keyframes are moved. For my workflow, this is extremely helpful! Strips with modifiers are also now drawn correctly in some edge cases.
Physics
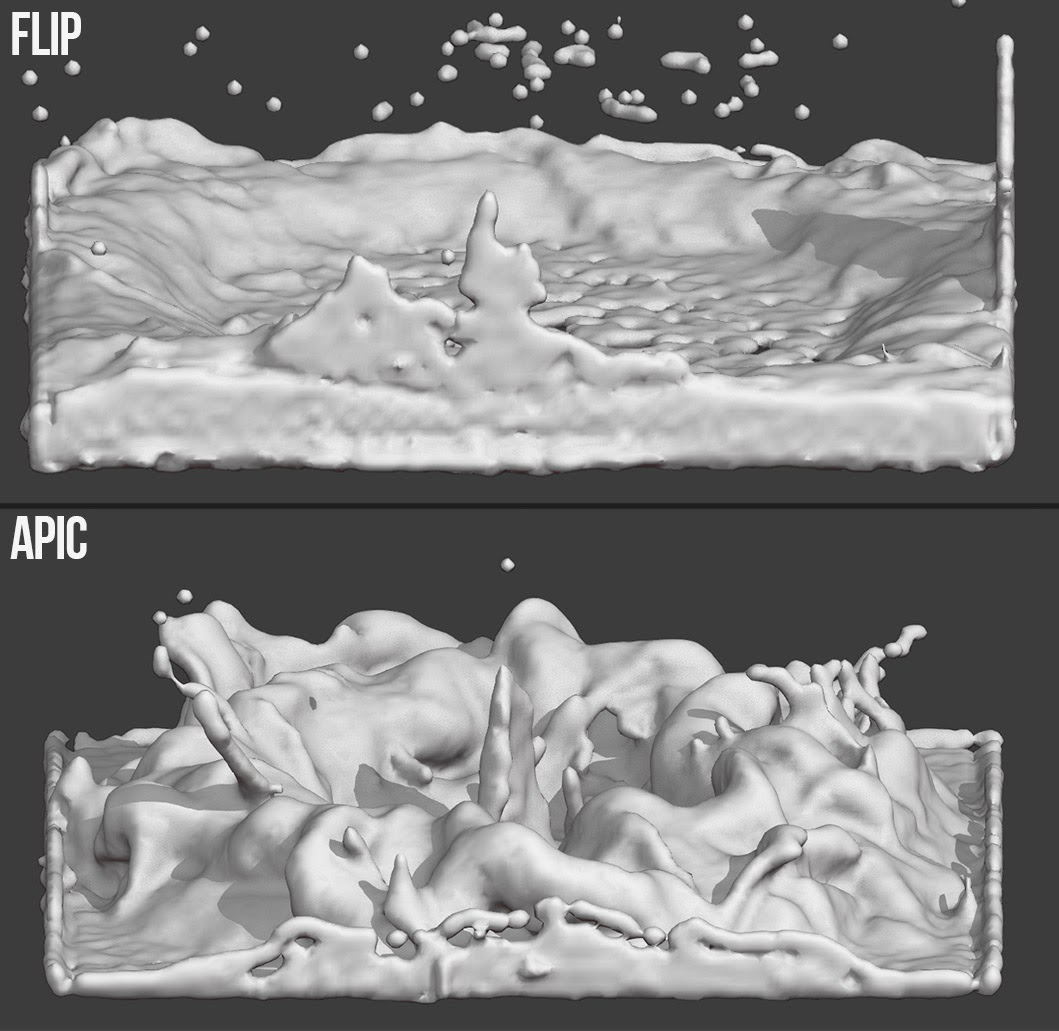
A new fluid simulation method for liquid, called APIC, has been added as an alternative to the FLIP solver. FLIP works great for medium size scenes, but APIC outshines it when it comes to small scale scenes because of its less noisy nature. In the example below, both images are on the same keyframe and were baked using the same settings with the only difference being the simulation method.
Fluid particle sampling is now stable and predictable, so that baking with the same settings will result in the same outcomes every time.
A new Viscosity solver is available for liquid simulations, which is perfect for simulating thicker fluids like honey, ice cream, or chocolate drizzle. Hungry yet?
Smoke simulations now have a smaller cache size and will playback faster in the viewport.
A new cloth simulation vertex group setting for collision allows for specifying which parts of the mesh should ignore obstacles and therefore simulate faster.
Collision objects have also been improved with a new animatable toggle to disable them.
Cycles
Before you render anything with Cycles, the geometry needs to be synced with the render engine. In Blender 2.92 this process has been multithreaded which makes it up to about 5x faster for scenes with many objects. That’s a big boost! For scenes with few objects, though, this makes very little difference.
Rendering on both the GPU and CPU at the same time has been improved. Now, the GPU can steal tiles from the CPU if there are no others left to render, so that the last remaining tiles will no longer take far longer than necessary.
Rendering with OptiX optimizations, for NVIDIA cards that support it, is now able to use GPU/CPU hybrid rendering, AO shaders, and Bevel shaders.
Volume rendering is now much more memory efficient but at the cost of a slight render time increase. However, less memory usage means that volumetric scenes can more likely be rendered using a GPU, so it seems like a fair deal overall.
In Blender 2.92, you can now use Cycles to bake to vertex colors instead of to a texture, which was a previous feature that had disappeared with the Blender Internal render engine.
The Attribute node for both Cycles and Eevee has a new Alpha value output and can now use custom object or mesh data properties so that the shader can be customized per-object in any way that you can think of.
Eevee
The Cryptomatte and AOV passes that were recently added to Cycles can now both be used in Eevee! These generate masks for compositors based on objects, materials, similar parents, or any shader parameter so that compositors can tweak the render to their hearts content after rendering.
Library Overrides
NLA Strip properties can now be edited on Library Overrides, which is helpful because it allows you to change the order of animations coming from a linked file. Overridden objects can now have simulations applied and they also no longer take much disk space in a file because the large data such as geometry are now stored only in their original local files.
VFX
The Clip editor menus have been reorganized and now include the commands that had previously only been in the sidebar.
Camera tracking has been significantly sped up. In one example from the developer Sergey, a scene with 443 trackers running for 250 frames used to take about six minutes while now it takes about 15 seconds. Wow! An elusive bug causing crashes during tracking in some edge cases has also been fixed.
Video Editing
Interestingly, the Video Sequence editor has been getting some love! In Blender 2.92, importing images and videos is more intuitive as they are now transformed appropriately and placed at the playhead as one would expect.
The Text strip has a new Box option that surrounds the text with a rectangle.
Compositing
The Keying node now premultiplies the result, so you no longer need to use an Alpha Convert node directly after it.
A new Exposure node was added, and the only strange thing about it is that it was missing before!
The Save as Render option, which enables or disables color management for a saved image, was added to each input socket of the File Output node.