Designing for Augmented Reality
Jun 26th 2018

Augmented Reality is a hot new field, and like it's not so distant cousin, Virtual Reality, it also has it's own unique set of guidelines we should try to follow when building AR experiences. AR presents a whole new way of looking at things, literally and figuratively.
I see AR as a window into a completely new environment. One that is not bound by the size of our screen, but rather using that screen as a way to view a much bigger experience.
With AR we have to think about the user experience and how a user will feel when interacting with our AR environment. Will they be frustrated? Amused? Bored? I think we can all agree we want an AR experience that will maker users say "Wow that was great".
There are pitfalls when designing any kind of interactive experience for the public. We can't control how they will ultimately use what we create, but we can make it easier by designing AR experiences that make the process smooth and enjoyable.
Lets discuss the three main areas I believe you should really hone in on for a smooth AR experience: Scale, Interaction, Purpose.
Working with Scale
Working in XR (AR and VR) scale is incredibly important. In traditional games that use a flat screen scale is important, but since we can completely control what is seen within that screen it's much easier to give arbitrary scales to objects to fit that screen. Within AR, we are essentially placing 3d or even 2D objects within the real world so these objects should represent a realistic scale. Now we're not talking about creative design here, obviously we could create an AR app that has humans the size of your hand. Instead we're talking about how we use scale properly based on how we expect the app to be used.
Life Size Scale
When building AR objects such as a vehicle or realistic human character, you want to ensure scale is realistic using real world measurements. An example of this would be creating a car demo that someone may use to determine if they want to buy the actual car. They may take a look at the engine, the interior, even use the actual size of the car to determine if it's too big or too small.
Another example is IKEA Place, which allows users to place realistic furniture from their catalog into their living space to essentially "window shop" for furniture using realistically scaled 3d models of furniture. Things like this are a must when it comes to realistic expectations. If you've never had to work with precise real world measurements this may be a bit of a new way of looking at things. In our latest Augmented Reality course, Augmented Reality Dev Kit we used measurements in Unity to determine precise scale.
Lets take a look at an example of how this would work. Say I want our Baker character to be 6 feet tall. In Unity they use meters, so we can use a game object to act as our "ruler". Since we're only interested in the height of this character, I'll use the Y axis to determine the measurement. Placing our character into the scene directly at 0,0,0 for the X, Y and Z axis which puts him directly in the center of the world. Do the same for the rotation. Here is what he looks like with the defaults in the Transform component:
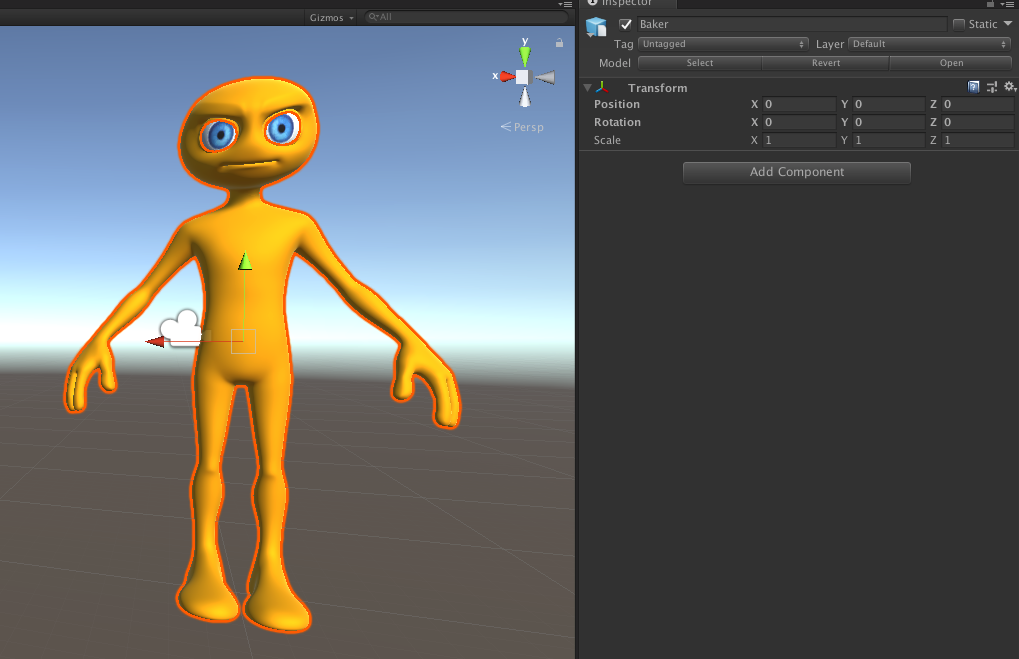
The scale of this object says 1x1x1, which means he's 1 meter tall based off the defaults. Now lets see how tall he really is by default. Create a cube game object, this game object is a good representation of units in Unity as it's exactly 1x1x1, other game objects may differ in default sizes so use a cube to be safe. Placing the cube directly at the same spot as his feet, we can see the baker character is actually much taller than 1 meter in height.
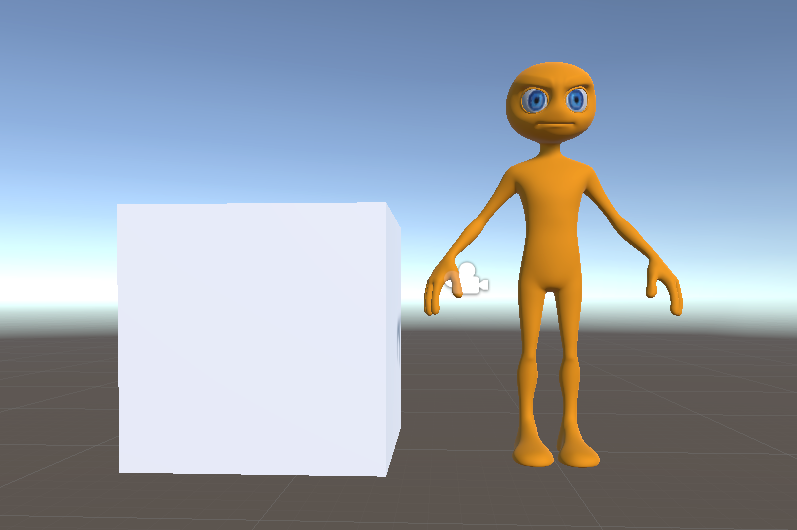
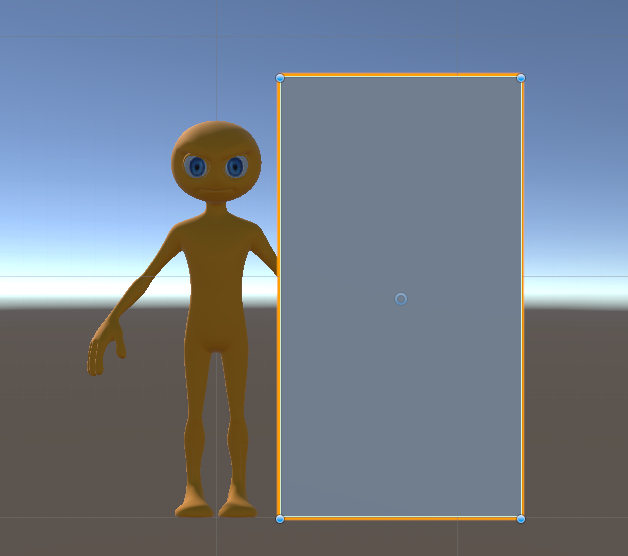
This is due to the differences in scale units used when this object was created in Blender. It's a non-issue since we will be using the cube as a reference of the height but something to be aware of. So we wanted to scale this character to be 6ft tall, since Unity uses meters we need to ensure we convert these measurements. A quick Google conversion shows 6ft is 1.8288 meters

I increased the scale of the cube up to 1.8288 in the Y axis since we're just tracking height. Here we can see the Baker character is nearly 6ft tall by default, we just need to scale him up a bit more to better match:
To scale him up I want to ensure I scale uniformly along each axis. While I do want to adjust his height, his width needs to match as well to avoid an elongated character model:
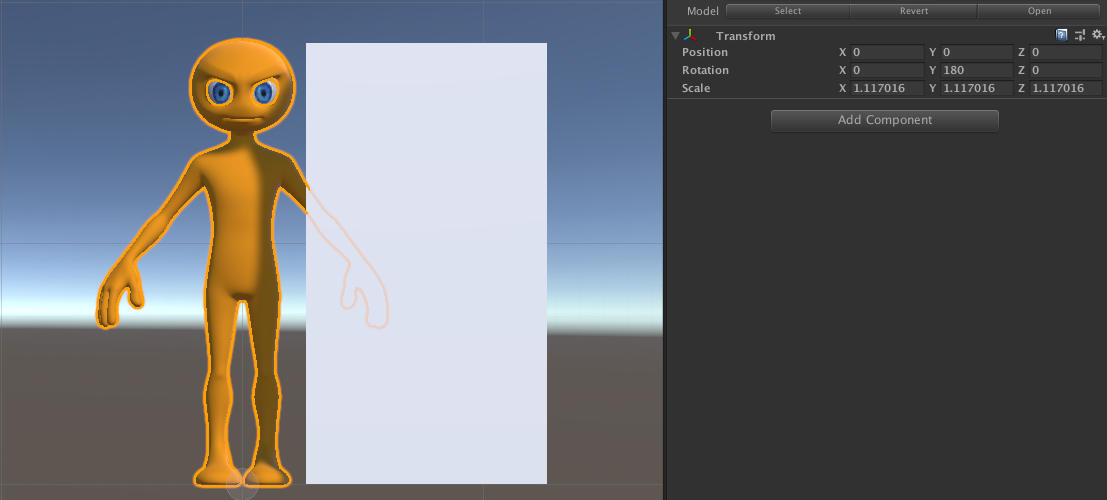
There we go, bumping the scale up to 1.117016 we can see he's now the same height as our cube. Ideally models of this kind would be created in a 3d program with precise real world measurements, but if you're using assets you've acquired elsewhere or want to reuse older assets this is a simple work around.
Camera Scale
Unity has a great article on Dealing with Scale in AR in which they talk about using scale in relation to the view of the camera and also scaling object down to the tracked surfaces detected. This could be incredibly useful for improving the overall experience by ensuring that scale doesn't become an issue. Lets take a look at an example given from that article, cameras.
Instead of scaling an object, you can scale the camera. This in effect will determine how big something looks without actually changing the scale of the objects. The scale of the camera can also determine how quickly you can "walk up to" an object.
Below you'll see an example of how adjusting the camera's scale can mimic the effect of resizing an object when in reality we're just adjusting the scale of the camera to make it seem so.
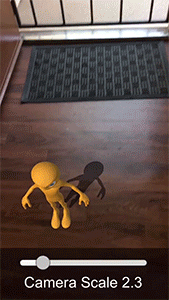
The larger the camera scale the smaller the objects will appear. The smaller the camera scale, the larger the objects will appear. Use this when scaling the objects directly is not feasible. It may also make sense when you want to scale multiple objects at once using a "uniform scale" versus manually adjusting the size of each object.
Interaction


"Lean Touch is an input library that makes handling gestures (e.g. Pinch, Twist) incredibly easy across all devices and resolutions." - Lean Touch
- Find a vertical or horizontal surface that has recognizable detail such as bumps or unique design
- Tap the button of the decal you want to use as your art piece
- Tap anywhere within the highlighted surface detected to place your select decal
- Use Pinch to scale the decal, swipe left and right to rotate it and tap the screen again to reposition it
- Press the "submit" button to keep the settings