Okay but wait.. what are Textures?
Textures in 3D art are essentially 2D images that are applied to a 3D surface to add visual detail. They can be anything from a simple color to highly complex maps that define things like roughness, reflectivity, and even the bumpiness of a surface or just creating an effect that the surface is bumpy.
Here are the key types of textures you’ll encounter:
- Albedo / Color / Diffuse: The first two are the base color of your model without any lighting or shading information. It’s essentially the "paint job" of your object. The last one has some information about light on your object. But very often, they are named alternate, so don't get confused. If you see any light information instead of just a color of the texture, that will be a diffuse texture.
- Normal Map: This adds surface details like bumps and grooves without altering the model's geometry. It uses RGB data to simulate how light interacts with a surface. It's usually in shades of blue and is a frequent subject of memes on the internet.
- Roughness Map: This defines how smooth or rough a surface appears, controlling how light reflects off it. Lower values create shiny, reflective surfaces, while higher values give matte finishes. Instead of just applying one value, we can add some lower values for shiny metal and higher values for rust and imperfections.
- Metallic Map: Used to define which parts of a surface should behave like metal. If you're working with metallic objects, it should be white; for nonmetallic objects, it should be dark. There are some controversies about how the metallic texture should look - many artists go with black-white texture only, but to be honest, for me, it's an artistic choice rather than being perfectly real-world-accurate. As long as you're not making plastic looking metallic you're good to go with some greys in your metallic map.
These are just the basic textures that are a must in every project. You can also create subsurface scattering textures (for strength and color), bump, displacement, translucency, and many, many more. Another useful one is Ambient occlusion map and you can incorporate it to your shader using a mix node with Color/Base map.
Textures are essential for adding realism or stylization to your models. Even a default cube can feel special when you give it a wood texture, complete with grain and a little wear on the edges (only if you haven't deleted it already).
UV Unwrapping: The Ultimate Test of Patience
Before you can apply textures to your 3D models, you need to unwrap them. This is where UV unwrapping comes into play, and it’s one of the most crucial steps in texturing. Basically, unwrapping is the process of flattening a 3D object into a 2D space so you can map textures onto it accurately.
Think of it like you want to peel the orange - the skin would be uv islands that you can texture and wrap around the orange again.
Here’s a breakdown of how to go through unwrapping without a headache (well, almost).
Remember that this process applies mostly to the handpainting or texturing in other software. If youre using procedural textures you can probably just use generated or object coordinates, but if you'd want to export your model with procedural textures to other programs or engines it won't work!
1. Marking Seams: In Blender, you’ll first need to mark the seams of your model. Seams are like the cuts that help the model "unfold." You want to place seams in less noticeable areas, such as edges or hidden parts of the object. Blender will use these seams to split the mesh into different UV islands. If your topology is good, you'll be able to mark seams on loops or use Ctrl-left click to select the shortest path and add a seam there too.
Tip: If you're working with hard-surface models (with many hard edges), seams along the edges are usually a safe bet. Don't forget to mark these edges sharp, too! In Blender, it is okay to leave the hard edge without a seam, but if you use Substance Painter, it will create weird artifacts on the edges, so you'd need to mark seams there, too.
For organic models, like a face or character, you’ll want to be more careful, placing seams where they’re less likely to be seen, like the back of the head or under the arms.

2. Unwrapping: Once you’ve marked your seams, it's time to unwrap. Select your model, hit U, and choose Unwrap. If you’ve placed your seams correctly, Blender will create a neat UV map that represents your model’s surface in 2D. There are different methods of unwrapping—angle-based or conformal—that can be used for different types of models. Conformal usually works with hard surface objects, and angle-based is better for more organic shapes.
3. Tweaks: I often find myself tweaking and adjusting the UV layout to make sure the textures apply evenly. You’ll want to avoid distortion, which can stretch or warp your textures in weird ways. You can use the relax/pinch brushes in your uv editor as well as more advanced methods, e.g. addons like Zen UV or UV Packmaster.
4. Patience and more tweaks: Getting good at UV unwrapping requires practice, patience, and attention to detail. I’ve learned over time that the cleaner and more efficient your UV layout, the better your textures will look. Even though I like unwrapping and the process is mostly easy for me, I'm also going back to fix some areas I don't like, sometimes way more than just once.
5. Packing UVs: After unwrapping, it’s important to make sure all your UV islands are efficiently packed into the 0-1 UV space (the square in the UV editor). This ensures you’re using your texture space efficiently, reducing wasted space and potential artifacts. Why it is important to keep as much space occupied with uv islands as possible? Because we want to squeeze everything from the texture resolution we have. Remember, that the islands can't be placed too close together and usually 0.007 works best (result of dividing the recommended amount of pixels between UV islands by the texture size - 32px for 4096, 16px for 2048 etc).

6. Scalling and another Round of Tweaking: I usually spend some extra time packing UVs by hand. Automatic packing tools can work, but sometimes you might want to resize some islands to add more details to the places are visible or make the islands smaller if the area is not visible that much.
Depending on the complexity of your object you can go with just one uv, add more uv maps, add another materials (and apply them to different part of your model) or use UDIMs (which are a little bit more complicated).

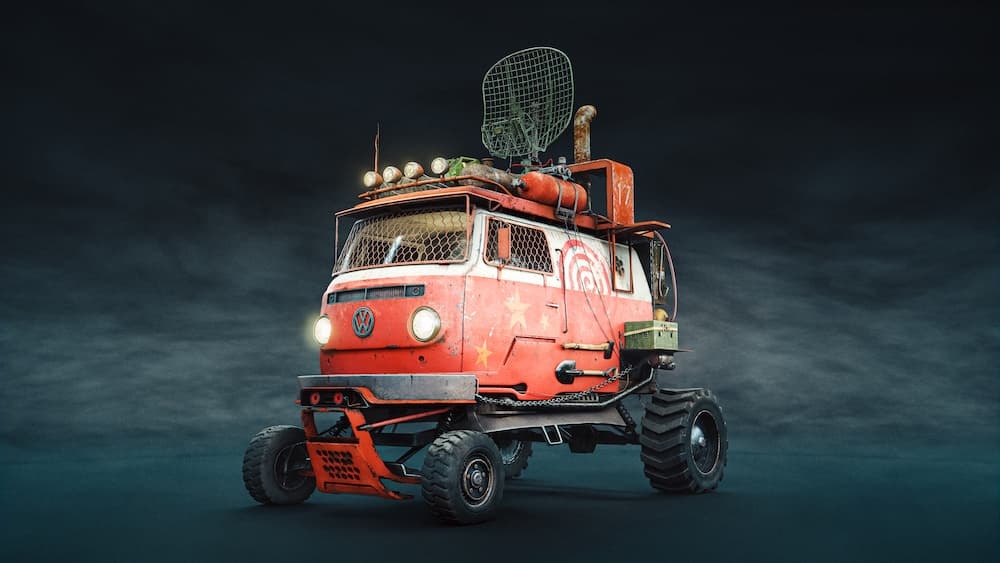
For this car model and all the assets I used 11 sets of textures (there is 10 visible, the last didn't make it to the screenshot). It was crazy at the beggining, but way easier to manage in the texturing program.

Painting Textures
After Unwrapping, you can relax and paint textures directly onto your models using the Texture Paint mode.
This is great for hand-painting details like scratches, dirt, or stylized patterns. Just make sure your model is unwrapped and you’ve set up a texture to paint on. Blender’s brush tools allow you to control things like strength, size, and texture, giving you flexibility when creating unique surface details. We won't go into details here because the process itself is pretty easy after learning basics of the texture paint mode. Create a texture slot, grab a brush, different colors and start painting.
And don't forget to save your textures, preferably with proper names (texture_normal.png, texture_basecolor.png etc -you will know what you created and importing them will be way easier)!

For more advanced texturing, programs like Substance Painter allow you to paint directly onto 3D models while using powerful procedural tools to add effects like wear and tear. Once you're done, you can easily export your textures and apply them back in Blender for final rendering. This combination can elevate your work, especially for more detailed projects!
Applying Textures in Blender
Once your UVs are ready, you can start applying textures to your model. Here’s a step-by-step guide to get you going:
1. Shader Editor: Open the Shader Editor and use the existing material or create a new one (you'll have one if you painter the textures in Blender or export the model to external program but you can still create another one). This is where the fun begins!
2. Add Image Textures: For each texture map (diffuse, roughness, normal, etc.), add an Image Texture node and load your texture image. Connect these to the appropriate inputs of your Principled BSDF shader. You can use Node Wrangler built-in addon to press Ctrl-Shift-T to open the window where you can import all the textures you created or want to use. That's why it's crucial to name them properly. In the Node Wrangler addon options in the Properties you'll find a list of acceptable suffixes for all the textures. You can add yours too!

3. Tweak and Refine: You’ll want to adjust the settings in the Principled BSDF shader to fine-tune how your textures appear. Add a color ramp and place it between the texture and the Principled shader input and play with values. Keep in mind, that it won't be exported to any other program so it's better to use proper texture rather than add some adjustments with color ramp or other nodes, but if you will use it in Blender only then you're good to go.
If you're mixing in the procedural textures, remember about tweaking their size to match the object size.
Texturing Tips for Better Results
Here are a few texturing tips that I’ve found invaluable over time (and after hours of painting and creating textures):
High-Quality Textures: Always aim to use high-enough-resolution textures. Low-res images can look blurry and unprofessional, especially on close-up renders. Don't go crazy though, for most of the game assets 1024x1024 - 4096x4096 textures are the best, adjust the size depending on how close you're planning to zoom in or if the object is in the foreground or in the bacground. This is where good uv packing is important - with whole uv space occupied with islands you'll be able to use the most of the texture and maybe you won't need 4k and just 2k will be enough. Your GPU and CPU will be grateful!
Experiment with Procedural Textures: Blender has powerful procedural textures that can be used alone or blended with image textures. Nodes like Noise, Voronoi, and Musgrave can add incredible surface variation. Don’t be afraid to experiment and mix different shaders and textures together. Just adjust the size of the procedural textures to make it look more believable.

Lighting Matters (again): Even the most detailed textures can fall flat without good lighting in Blender. It was important for creating just a simple shaded materials and it's crucial for detailed textures too. Adjust your lighting to emphasize the details you created and build a desired mood with various colors and light intensities.
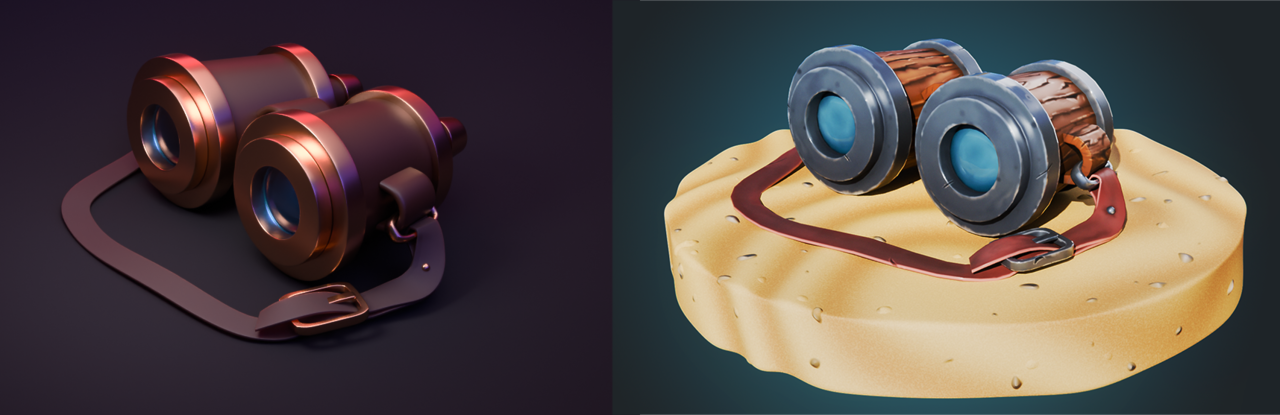
Patience and practice: I wouldn't be myself if didn't say that you just need to practice. Watching real life examples of different materials is the best way to create good looking textures. Take your time to take the material "apart" and understand what a roughness or base color map would look like.

(Un)wrapping Up - In Conclusion
Texturing is an art form in itself, and mastering it takes time and practice. But once you understand how to properly unwrap your models and apply textures in Blender, you’ll see a huge improvement in the quality of your 3D work.
Remember, the key to great texturing is efficient UV unwrapping, smart use of texture maps, and always experimenting with different approaches. Don’t be afraid to try new things and push your creativity. If you ever stumble upon some problems - ask another artist how would they overcome them, ask for feedback.
If you want to learn more about texturing, check out Fundamentals of Texturing from the CORE course.

Happy texturing, and don’t forget to give your UVs some love!
I may not be a beginner anynmore. But no matter what time and how experienced I am, UV unwrapping will always bring me to tears of breaking down.
And, welcome to https://geometrydash-lite.io