
Whether you’re working on a very simple model or a crazy detailed one, understanding materials and shading is key to making your 3D creations look cool.
In this Blender guide, we’ll break down the basics in a fun and easy-to-understand way. Ready to dive into the world of Blender materials?
Let’s go!
Why materials and shading are a big deal
When you’re new to Blender, it’s easy to think that modeling is all that matters. After all, that’s where you create your 3D objects, right? But here’s the thing. If you want your models to look fabulous, you’ve got to pay attention to materials and proper shading.
Consider materials as the details that give something its texture (I mean, more like specific properties - we will talk about textures in the next article!) and feel whether it’s rough like concrete or smooth like glass.

Shading, on the other hand, is about how light interacts with that surface, creating depth, shadows, and highlights, bouncing off the surface or going inside the object etc.
Together, they make your models look like they belong in the real or stylized world you’re building. When it comes to choosing between realistic or stylized art, there’s no right or wrong - it’s all about what feels best for you. The principles are the same no matter which style you go for. Personally, I chose to focus on realistic 3D models because I enjoy the challenge of making things look lifelike.
But if you’re drawn to something more stylized, go for it! The key is finding your own unique style that makes you excited to create.
The ABCs of Materials and Shaders: the basics you need to know
Okay, before we get into the fun tips and tricks stuff, let’s talk about the basics.
What are Materials: These give your model its look - its color, texture, shininess, and so on.
In Blender, you create materials using something called nodes. At a first glance they seem difficult to understand but they’re really just like building blocks that you connect in different ways to get the effects you want. Imagine having a few LEGO bricks connected together creating an awesome building.
Those bricks are nodes - shaders and other tools that help you to connect them and make a material. When I first saw shader nodes in Blender, I felt totally lost — they looked so complicated! It took some time, but I eventually got the hang of it, and things started to make sense.
Those bricks are nodes - shaders and other tools that help you to connect them and make a material. When I first saw shader nodes in Blender, I felt totally lost — they looked so complicated! It took some time, but I eventually got the hang of it, and things started to make sense.
What is Shading: This is all about how light interacts with your materials.
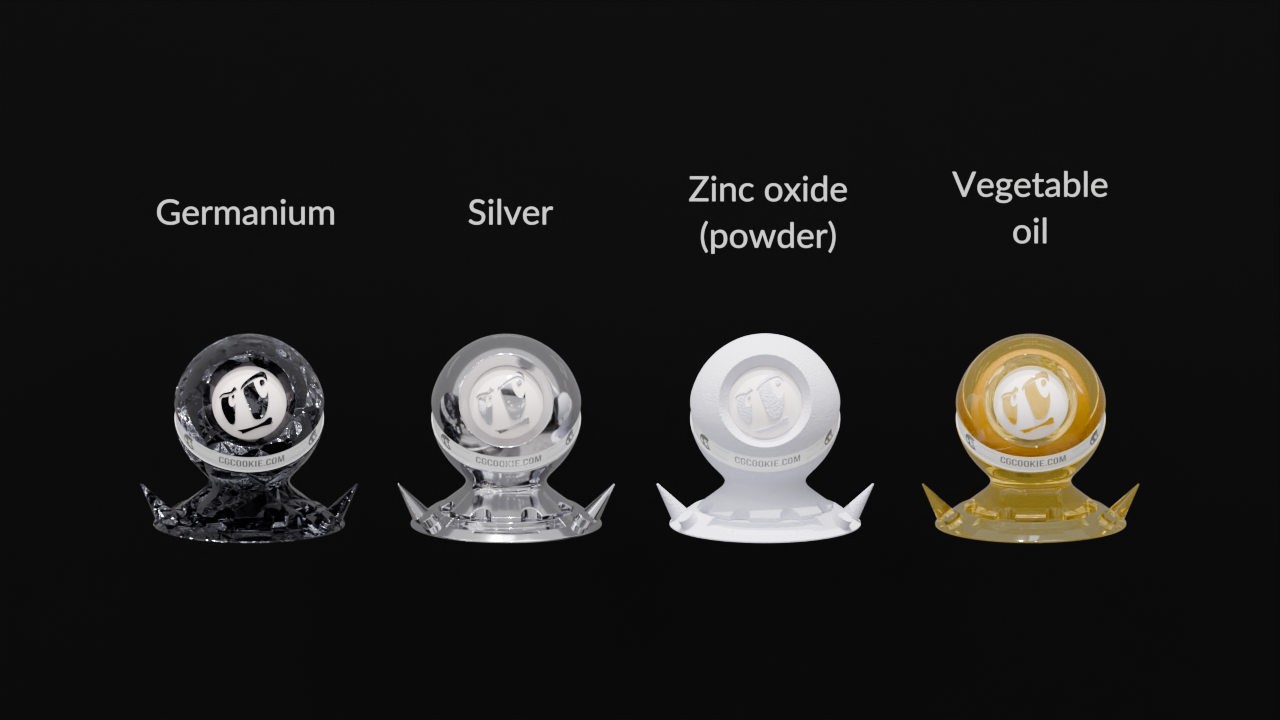
Want your object to reflect light like polished metal? Or maybe you want it to absorb light like soft velvet? That’s shading. By tweaking how light reflects, absorbs, or passes through a material, shading helps you add depth and realism to your models.
In Blender, you can play around with different shaders we mentioned earlier, like diffuse for matte surfaces or glossy for shiny ones to get the right look. Of course, there are many different shaders, and it’s great to know them all, but the one you’ll probably be using the most is a Principled BSDF. With every new Blender update, the nodes got easier to use, and when they added the Principled BSDF shader, it was like all my problems were solved. Now, I can’t imagine working without it! With proper settings and all the parameters set to accurate values, your materials will really make your models pop.
Tips and tricks: How to make good-looking materials
Here are some tips to help you create amazing materials and shaders in Blender, even if you’re just starting out.
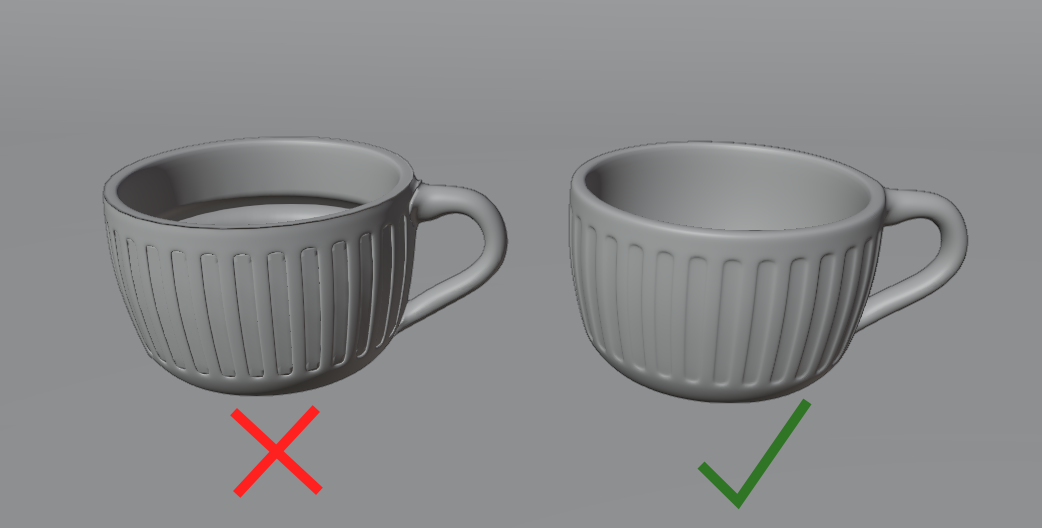
Remember that the look of your materials also depends on the geometry, so to keep a good workflow, try to practice efficient modeling first to avoid problems with shading.
Keep it simple!
Start with the one principled BSDF shader. It’s like the all-in-one tool for shaders - super versatile and covers most of your needs. Want a shiny surface? Just crank up the metallic slider and set the roughness value to something low. Need a velvety material? Use sheen. Glass? Bring translucency all the way to 1 and you’re good to go. No need to connect a few of them to achieve even more complex results.
Use reference images:
Don’t try to guess what something looks like - use a reference image! If you’re trying to create realistic material, it’s always a good idea to have a photo or two to look at from time to time.
Whether it’s metal or any other material, having a reference helps you get those details just right and saves you from randomly putting some values in the shader and from the confusion of why something looks wrong. I started using references pretty late, and before that, my renders never looked as good as I wanted them to. Changing the habit of just guessing material properties and actually studying references made a huge difference in my work.
Experiment with nodes:
Whenever I talk to someone who has started to use Blender’s node system, they say it is a bit intimidating. Once you get the hang of it, it’s pretty fun.
As we’re focusing on the materials and shaders only here, it’s difficult (or maybe even impossible) to achieve super realistic wood material without using a texture, but you can use Light Path node to make your material look different in the camera and in the reflections or blend different shaders with a Layer Weight node and experiment before using or painting the textures.
Light it up:
Even the best materials can look flat without the right lighting. After you’ve applied your materials, play around with your lighting setup in Blender. Change the angle, intensity, and color of your lights to see how they affect your materials. Sometimes, just a small tweak can make a huge difference.

Preview and talk about your masterpieces:
Of course, don’t forget that Blender has a rendered preview so you can inspect the results of your work all the time. And with that, you can also ask for other people's opinion.
I’ve found that asking for help and getting constructive criticism from friends is super valuable. I’m often sending them WIPs (work in progress) to get their feedback, and it really helps me see my work with a fresh eye. Sometimes, they point out things I totally missed, and it pushes me to improve and try new things. It’s amazing how much better my projects turn out with a little outside perspective!
Example projects to try out
Now that you’ve got some tips to start with, why not put them to the test? Here are a couple of beginner-friendly ideas to help you practice:

Simple shapes:
Model a cup, metal utensils, a key, and simulate a simple cloth. Use different values for metallic, roughness, and other parameters to get the desired look. In my huge library of projects (not all of them are finished) I have a lot of these simple models and they really helped me to learn the basics.
Multimaterial objects:
A lamp, pencil, light bulb or a rubber ducky. Thanks to the increased difficulty of these objects, you not only improve your modeling and sculpting skills but also see how different materials interact with each other.
If you’re looking for more challenges, check out this awesome resource where you can find weekly challenges to push both of your modeling and shading skills even further.
If you like a little competition, check out the Weekend challenges on Blender Artists. https://blenderartists.org/c/contests/weekend-challenge.
If you like a little competition, check out the Weekend challenges on Blender Artists. https://blenderartists.org/c/contests/weekend-challenge.
Keep learning!
Blender’s materials and shading can seem like a big topic, but the good news is there are plenty of resources to help you keep learning:
CG Cookie’s Fundamentals of Materials and Shading contains everything you need to start your journey with materials and shading and also to get started with Eevee.
Blender’s official documentation: A great go-to when you need to dive into the nitty-gritty details. Mostly everything is explained there, so be sure to check it out.
Ready to take the next step?
You’ve got the basics down so now it’s time to get creative! Open Blender, start a new project (or finish the old one, as I trying to do 😉), and put what you’ve learned into practice.
Remember, the key is to keep experimenting, and don’t be afraid to make mistakes. Every project is a step closer to becoming a better artist.
And if you want to dive deeper, consider joining our CORE Fundamentals course. It’s packed with detailed lessons, expert tips, and hands-on projects that will help you master your skills in materials and shading and many, many more. Plus, it’s a fantastic way to connect with other Blender enthusiasts who are on the same journey. And believe me - Blender has the best community, so... let's do this!

Happy shading!