Hi,
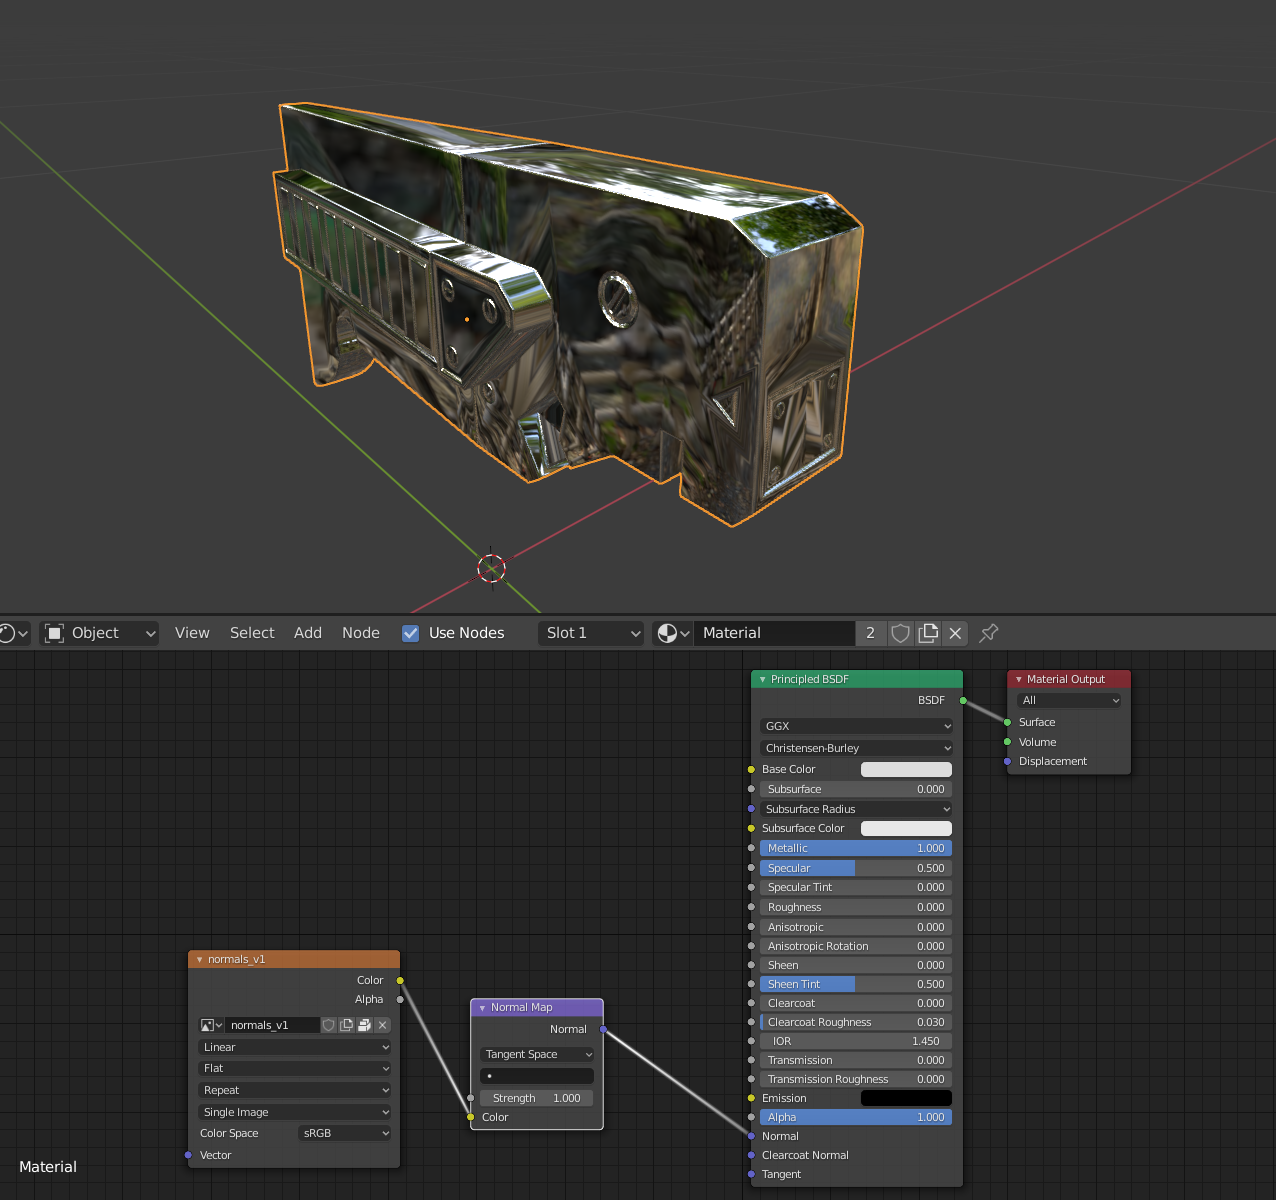
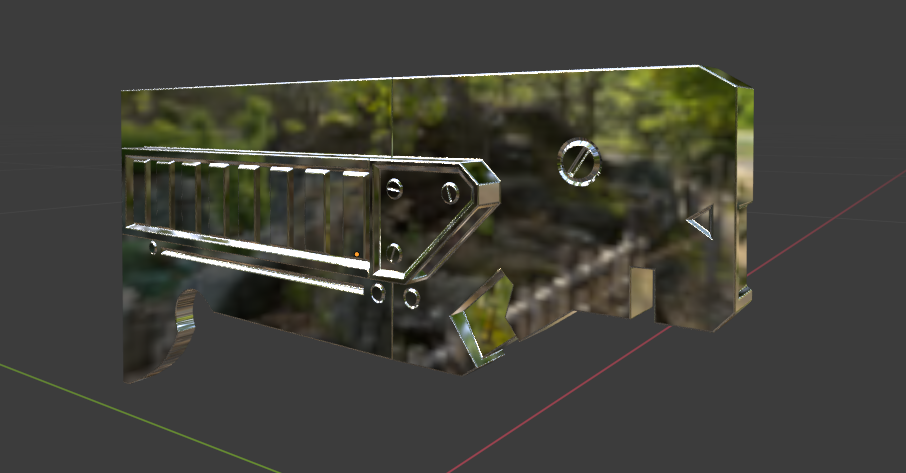
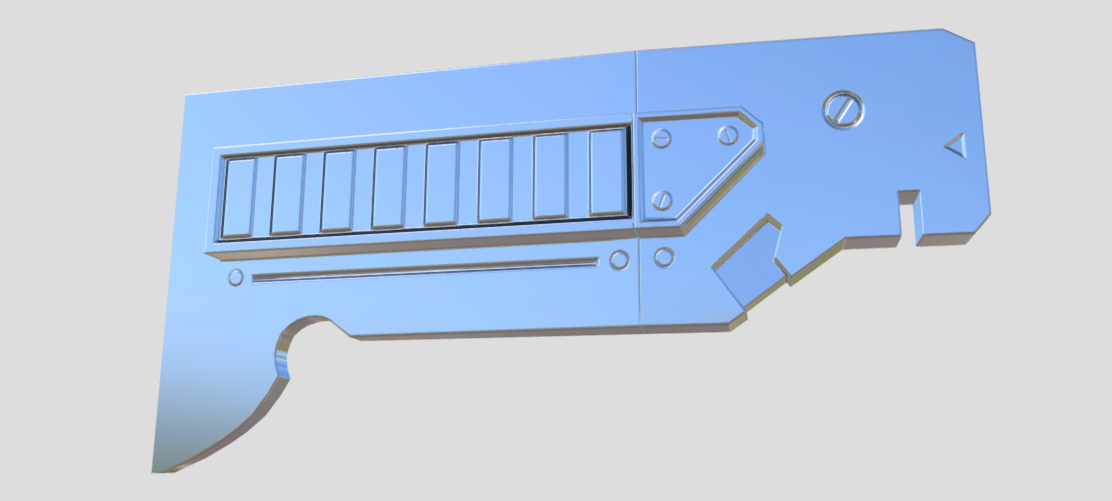
I've been struggling quite a bit, reuploading and trying to get the normal map correctly displayed in Sketchfab. It works in Blender, material mode and render mode. Just not on sketchfab, it seems to use an entirely wrong UV mapping.
This is my model upload: https://sketchfab.com/3d-models/exercise-baking-a-hard-surface-normal-map-ab41156ecb074628b3200e00f389f570
Any idea what causes this or how to fix it? :/
Thanks in advance,
Great tutorial btw, was very well structured and insightful, love the theory and the workarounds for all kinds of different issues of stretching etc. :)
-Tom
Hi Jonathan,
Thanks for the reply, I actually had that problem some time before, but it was already showing up in Blender itself. After finding the issue and solving it I made sure that any uploads/save files had the correct and only one UVMap in there. So, the uploaded model only has one UV map. I have no idea where it is getting the other coordinates from.
I'll try doing the exercise again starting from the base model. Perhaps something went wrong anyway.
Cheers,
Tom
Could it be the wrong texture then? I've certainly done that before too. If not, you can upload the file to pasteall.org or something and I'll check it out.
Hm, that could be it perhaps. I tried deleting all the resources that weren't used but then for some reason ended up with a file of 50 MB for this exercise. I don't have the original save file anymore which was giving those specific issues.
But I did just start from scratch again - and uploaded that to sketchfab and that seems to have worked correctly. Though I don't really like the shading there. It seems like there's some artefacts, however, renders in cycles or evee don't show any issues. I've submitted it as exercise for the course.
Thanks for the help though Jonathan. :)
The new upload is linked to the exercise here: https://cgcookie.com/exercise_submissions/23696
Hope that one seems correct.
Hey! That one looks like you've got the ideas right when it comes to beveling and hard edges but it still has issues, especially on the bottom faces. Can you post a link to the .blend file? It may just be a simple fix, but I'm not sure what that would be without messing with it.
Hey Jonathan. You are right, the bottom faces look a bit off, I hadn't noticed before. Seems like I need to do some more quality assurance on the models I make... I'm not sure what causes it. It doesn't really appear in blender itself. Thanks for wanting to look into it.
I've shared a google folder with two blend files: https://drive.google.com/drive/folders/1y9Id2C19S4yqS26BYAGR5TPB-1DVvZOx?usp=sharing
file: "finished_2": this blender file contains only the low-poly model with the normal map and is the file that I uploaded to sketchfab.
file: "finished_1": this blender file contains all the models. It has the original high-poly model, and the self-created low-poly that I use, as well as the cage object in there (and of course the normal map).
I just checked the low-poly model in finished_1 again and it does not seem to exhibit any odd shading behaviours.
Cheers,
Tom
Hey Tom, thanks for the files! It does look like something is up with the baked normal map, but it's just more exaggerated in Sketchfab. You can see this if you make the shader super reflective:

It looks like the Harden Normals option (which is relatively new) in the Bevel Modifier on the high poly is pretty close to a magic fix:

You'll also want to enable the mirror modifier for all the high poly objects because it will change the bevel modifier and cause the geometry to jump around a bit on the seams.
Now comes the weird part - Sketchfab doesn't like how Blender saves the 32 bit bake out as a 16 bit PNG and doesn't accept EXR files, so you'll need to set your Color Management View Transform to Raw in the Render properties, and then when you save out your image, choose Save As Render to apply the color management to it.
Then, load it up in Sketchfab and be sure Flip Green is unchecked in the Normal Map settings under Materials.

That should do it! There may be a couple compression artifacts but I wouldn't worry about those. You did everything right according to the tutorial, so nice work👍 Looks like I'll need to update it at some point when I've finished the fundamentals.
Hey Jonathan,
Thanks a lot for the time you put into this! I just wanted to quickly post an update that I'll be looking at and reuploading the exercise as soon as I've got a moment to work through it. I'm just fighting some work-deadlines right now (and losing), so I haven't had time yet to look at it.
Enjoy your weekend!
Tom
Hey Jonathan,
So I finally got some time in to finish this. Weirdly enough though, the exercise was 'not accepted' but the course still marks as completed, so.. that's odd. In any case, the new submission is here: https://cgcookie.com/exercise_submissions/23843
I've used the harden normals as you said and the different process of saving the texture, and all shading issues seem to have been resolved. I read some more about the harden normals flag because I like to appreciate the magic a bit better. :P In any case, it seems to have been added exactly for the case that I was experiencing.
Even more so, I saw these kinds of shading issues before and thought that it was a biproduct of the 'Shade Smooth' > 'Auto Smooth' where you select the angle, I thought that was odd, but by tweaking the angle a bit I managed to find a good compromise between 'too smooth' and 'no weird shading', or so I thought. Apparently my material was just not reflective enough to highlight the issues. But, harden normals was invented specifically for those issues it seems. It's an interaction between 'shade smooth' and the bevel modifier' where flush surfaces experience shading issues using 'autho smooth'. So, now I know how to recognize that issue and what the fix is.
Thanks a lot for your time going back and forth on this. It has been very interesting, I feel like I've got the gist now of normal map baking now.
Thanks,
Tom
On a side not, the shading lessons are looking good, quite interesting so far. Can't wait to play around with the shaders a bit. :)