Any hints or clues on how to make the coiled wie and trefoil wires you demo at the end would be appreciated. Thanks.
You'll be able to create pretty much any kind of spline-based asset using the same structure shown in this video, however setting up the initial geometry will be a little different. Here is another CG Cookie tutorial covering the creation of the coiled wire.
To create the other wire, that is simply setting up a curve (Bezier, Poly or NURBs) and using a separate object as the profile of the curve geometry itself. You will be able to find some options under the Geometry tab in the curve's settings. :)
Hey Chunk, The cord tutorial es a bit different. The main difference I found is that you first extend the cord to the desire lenght and then add a curve, and also extend it. So both objects match in length. I didn't like that approach so I combined both tutorials and I think this is a more procedural method.
However, if you move one vertex of the curve to make it longer, as said, I get gaps, unless I keep incrementing the Screw iterations.
Even when in the array modifier I've set up fit curve and selected the NurbsPath curve.
Is there a way so when I move a point of the NurbsPath to make it longer I don't get those gaps? (Increasing the number of iterations automatically?)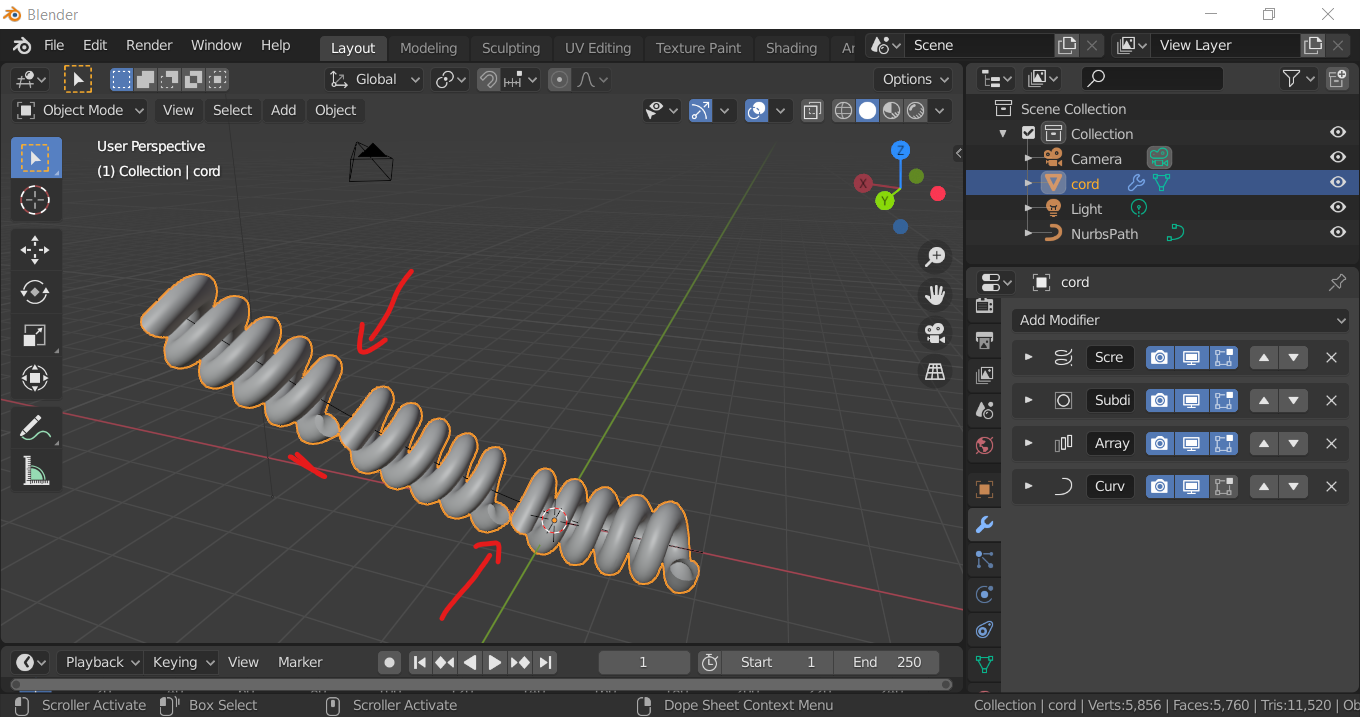
Also, in the Cord tutorial on youtube, I see you sudvide the Curve, using the Curves tool? Where is it located in Blender 2.83 or how do I activate it?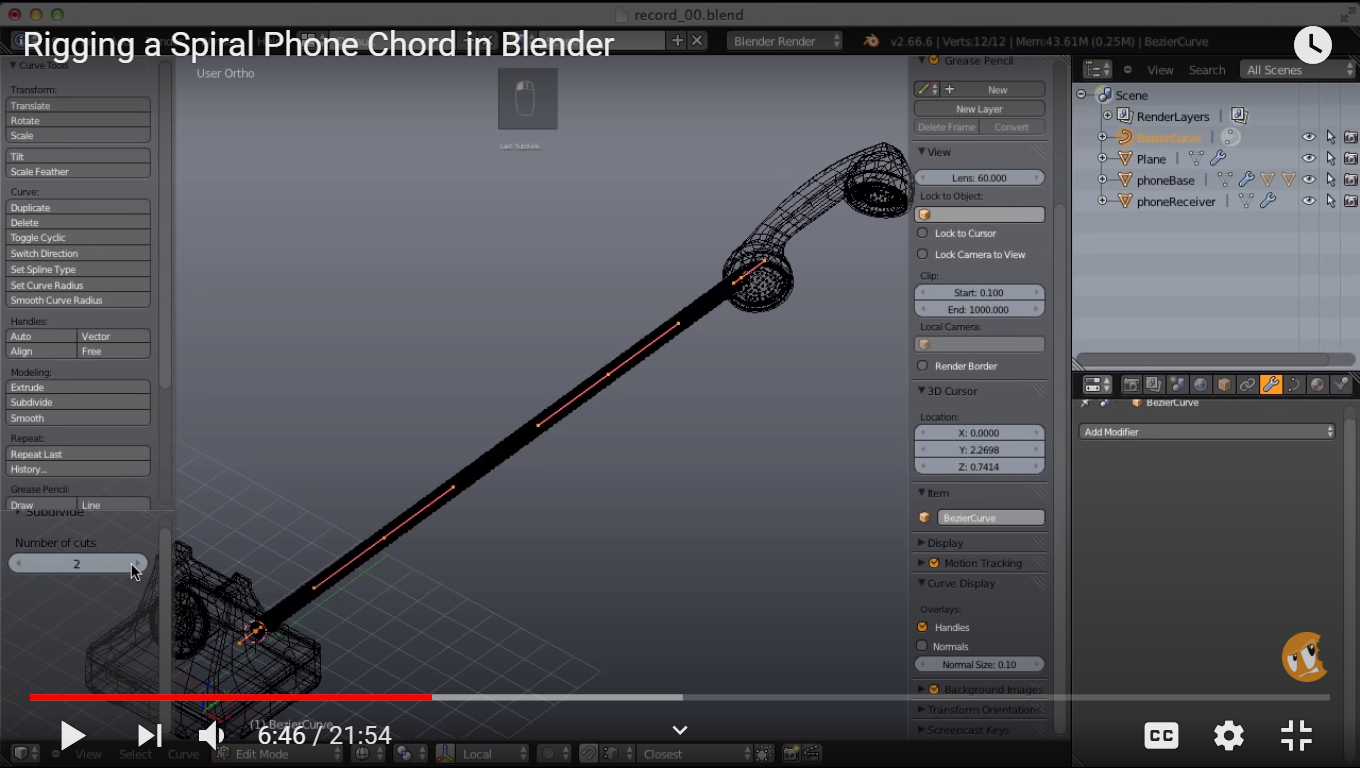
Thank you.
That's a great question! And one I think may have a fairly simple solution, thankfully. Before I propose my fix, I'll let you know a method that I use to troubleshoot these types of issues, as it definitely gets hard to pinpoint these problems when we are using a lot of modifiers!
What I normally do when I run into an issue is I start hiding my most recent modifiers to see if the problem still persists or not, and if it doesn't, I know that it was an issue with that specific mod. Where I think you are running into this issue may be in your Array modifier. I think you may need to play around with the offset you are giving to each of your instanced cords, because that is what is giving you the gap. As well, there is a "merge" option within the Array modifier, I would take a look at that as well, as it will merge vertices that are close enough so that your cord is all one continuous mesh.
As for the second question, when you use an operator (basically any action in Blender that does something), you will have that little black box appear in the bottom left of your viewport. That is the "Recent Operator" window, and it will allow you to tweak the last thing you've done. So if you manually subdivide your curve (select the edge you want to subdivide, hit W and select "Subdivide"), that window will pop up and allow you to do more or less cuts.
I hope that gives you a solid starting base, and please let me know if you have anymore questions! :)
Yes, Chunck, it was the Relative Offset in the Array modifier that was causing that. I turned Merge on, but don't see this having any effect? 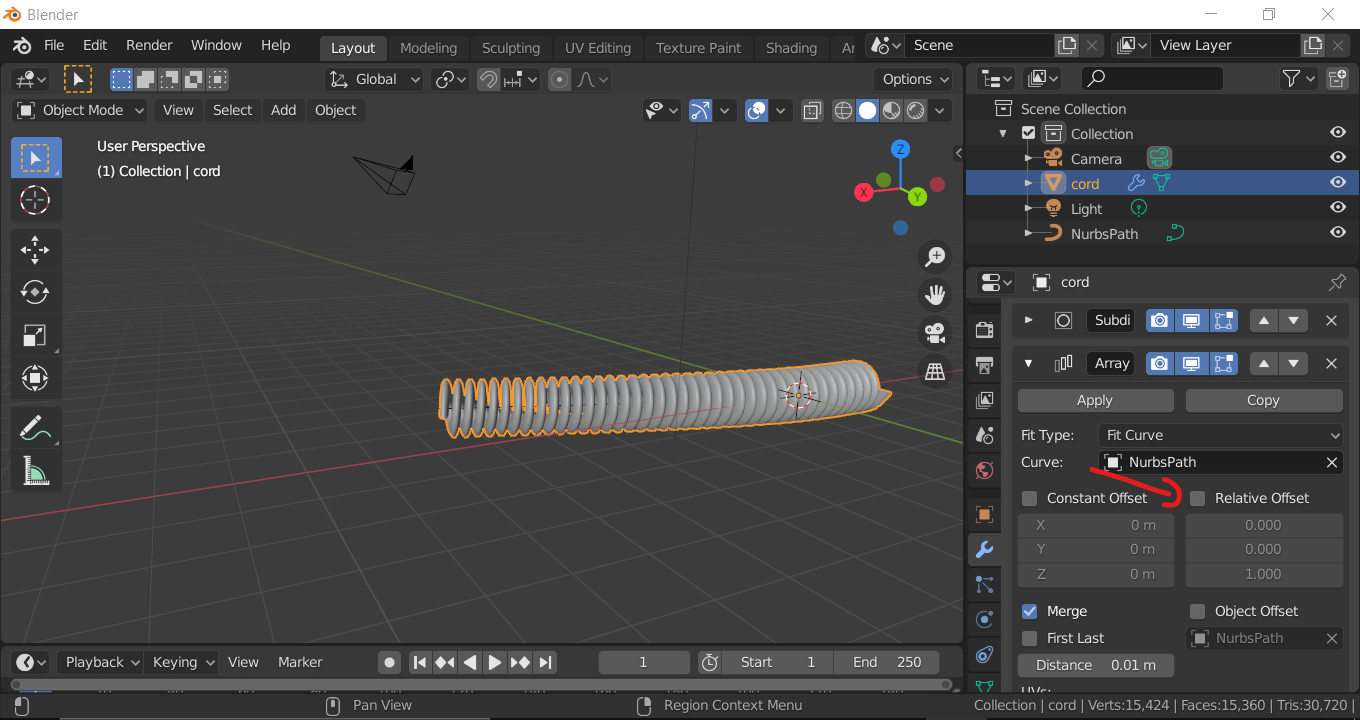
This solves part of the issue. The other one is that when stretching the NurbsPath the width of the rings of the cord get flat, as would happen when in real life you pull out the cord of the phone. This is nice, but, the question remains, how to keep adding "iterations" (from Screw modifier) to match the desired length.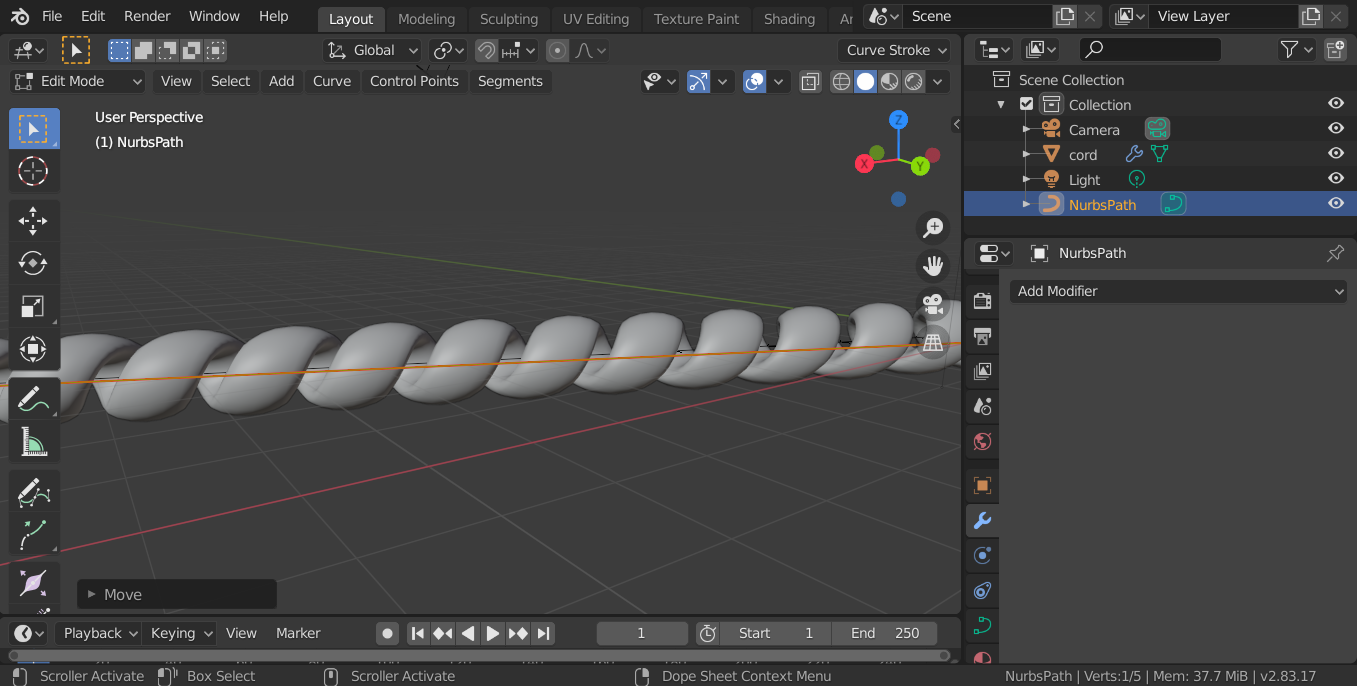
As for the second question, I see what yo mean with the "Recent operator" box. And it shows info related to the last operation. In this screenshot it shows info about extrude and move, but how about the subdivide we see in the tutorial Video.
Selecting a point of the curve and pressing "W" in edit mode, gives me the Box Select o Circle Select. I'm using Blender 2.83. Ty.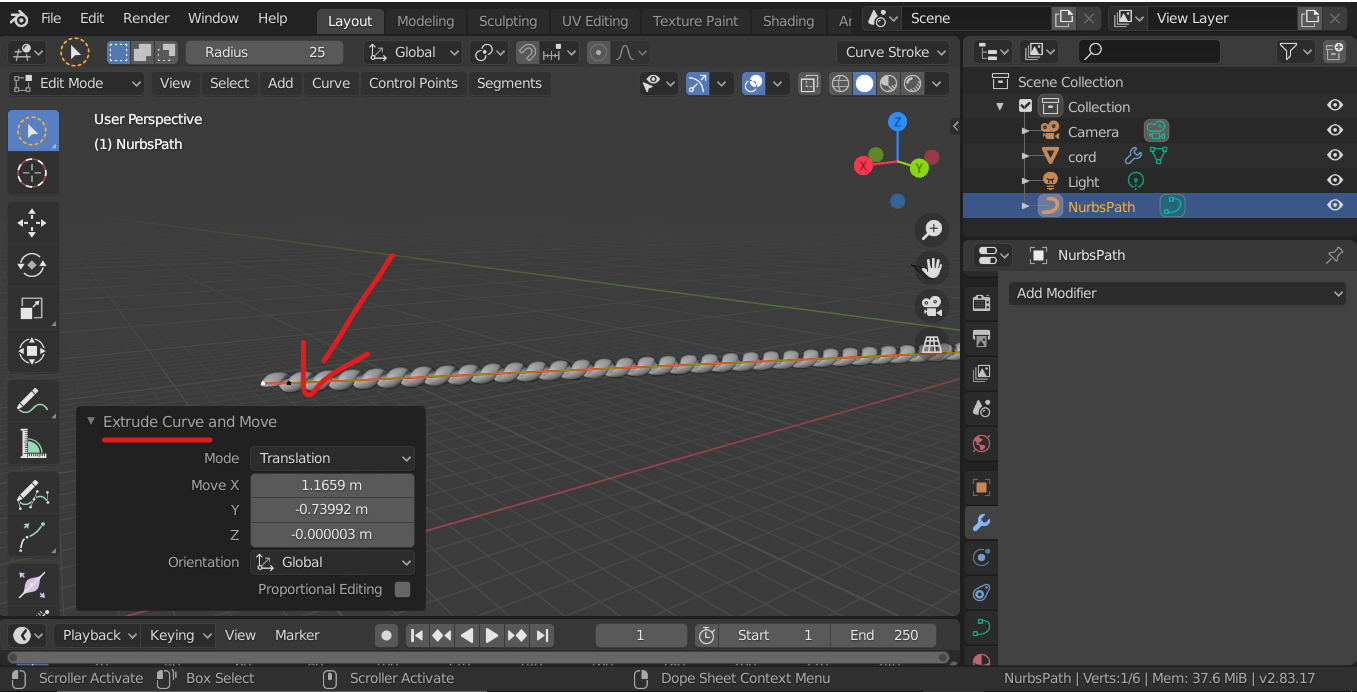
It sounds like you may need to apply the scale of the cord object. If you have tried to scale it up or down without applying the transformation, you would get a result similar to what you have shown above. With the mesh selected in Object mode, hit Ctrl + A, and select "Scale". That should hopefully fix the stretching and squashing error.
As for the addition of new iterations, I'd suspect that if your Array modifier was set to "Fit to Curve", anytime you'd extend or move it that the mesh would generate to fit? I'm not quite sure I have an answer to satisfy that aspect, sadly. Perhaps make your initial mesh only one loop around, if you have it more than one, as that would allow the modifier to more frequently update when you move the curve points. If you want to add or remove iterations at your command, rather than to fit the length of your curve I would recommend switching Fit To Curve to any of the other two options, so that you will be able to add or remove the amount of coil to whatever you would prefer.
Lastly, the Recent Operator is Extrude and Move because that would've likely been the last operation you had conducted on the object. It sounds like you are using Left Click Select, so I realize the W key is not the hotkey for the subdivide operation. Instead, with the curve selected in edit mode, you should be able to right click and Subdivide should be an option. At this point, the Recent Operator panel should reflect as such. :)
I hope those do a better job at getting you to where you want to be!