![]() blanchsb as promised (and everyone else that's interested, of course) a 'small' video going through the principle of the Drivers and Custom Property and how I set it up. I started from scratch and didn't make the exact one from my entry, because I thought that it would be nice to see the whole process. It's a uncut realtime recording and I am not very good at doing more than one thing at the time (like talking and modelling), so it's not perfect (lots of "ehhh's" and pauses), but real;)
blanchsb as promised (and everyone else that's interested, of course) a 'small' video going through the principle of the Drivers and Custom Property and how I set it up. I started from scratch and didn't make the exact one from my entry, because I thought that it would be nice to see the whole process. It's a uncut realtime recording and I am not very good at doing more than one thing at the time (like talking and modelling), so it's not perfect (lots of "ehhh's" and pauses), but real;)
Have fun!
As I explained you that same process worked for the other tyre tread. But not for the CAT tyre.
Here is the blend file.
https://drive.google.com/open?id=1UBat4Ntyyru_g7xLEylqBwOTHxQ_oZDd
I have 360° circle. And there was no need to add the segment numbers as I have used the fit curve in Array modifier with offset of 0,52.
Can you please take a look?
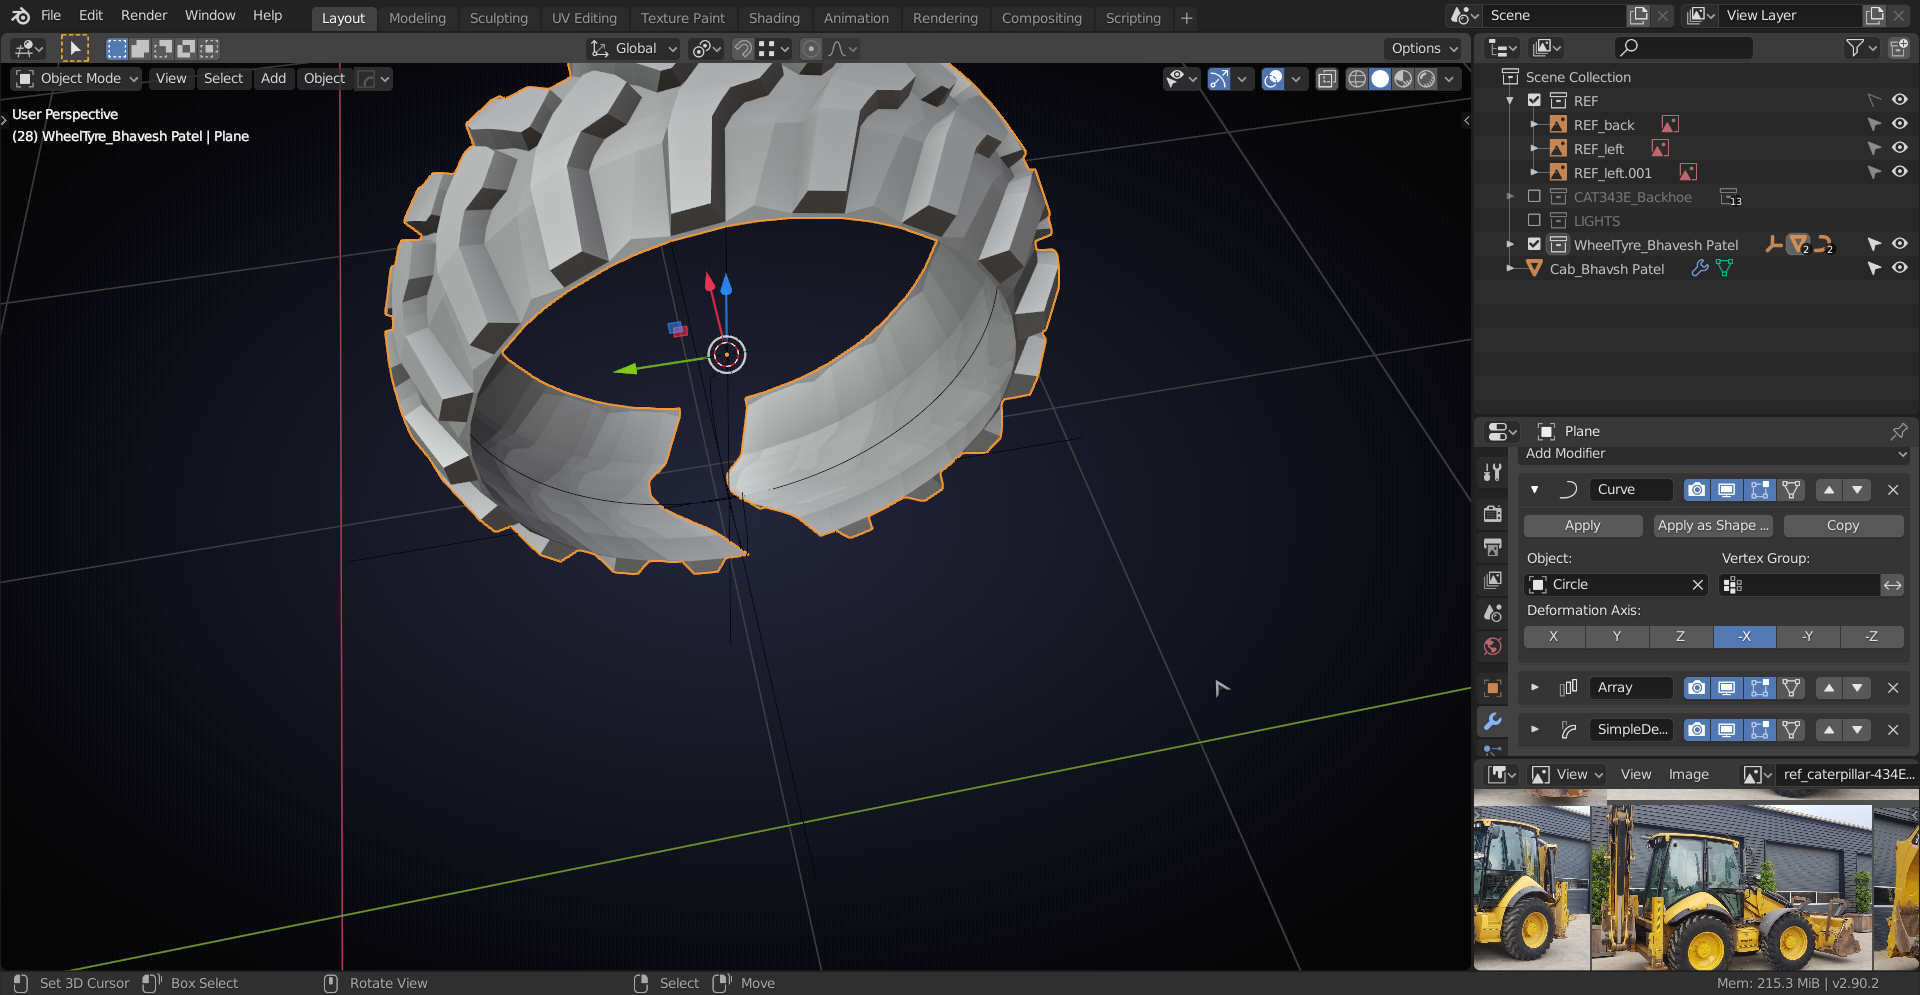
|Make sure that your segment is straight at the connecting edges
which they aren't!
That's why I used the Knife Tool to cut straight edges....
And you are using a Curve Modifier, even before the Array Modifier! What is that supposed to do???
Thanks for the quick look.
The curve modifier I have used to move the profile to follow the tyre shape.
Yesterday late night, I figure out that my segments are not straight, I made it straight then also it did not work for me.
Sorry, I missed that the curve was working it that direction, that's okay then;)
|Yesterday late night
Sometimes things don't work late at night, try them next morning:
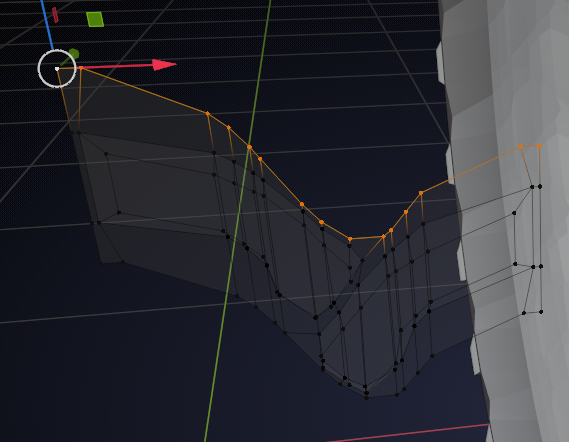
Pivot Point is set to Active Element and the straighten them out with S, Z, 0.
Same with the bottom edge: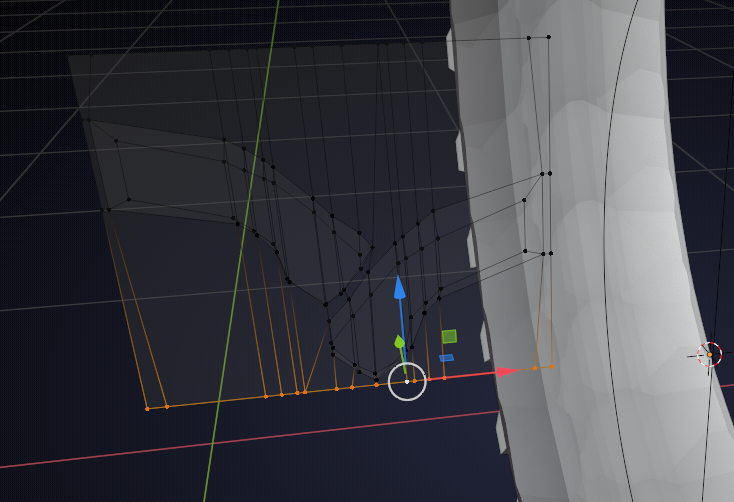
Gap is gone!
Move the top edge down a bit:
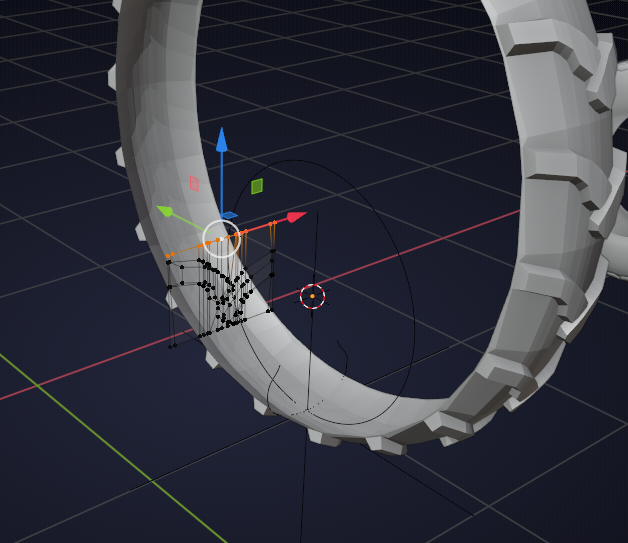
Now maybe you can see why I made a few segments first an then cut on out, instead of just making one segment an getting in all sorts of trouble...
Hi Sudeep, this was not meant as a tutorial; Shawn had asked me during the stream to show how I made the number of treads changeable, so I just showed my workflow here.
Don't worry about not understanding the Driver part, that is completely unnecessary in tire making, that was just me, seeing if I could pull it off;)
Drivers are not something I can explain in a few words, unfortunately.
Maybe have a look at the Manual: https://docs.blender.org/manual/en/dev/animation/drivers/introduction.html?highlight=drivers
Thanks a lot! ![]() spikeyxxx
spikeyxxx
I see the mistake now. Actually I did the specific shape, so that the treads are not so far away from each other. But it seems that it does not work for that shape. Your suggestion works.
Thanks again for helping me out.
Hi ![]() spikeyxxx,
spikeyxxx,
Actually I missed that I made the straight edges for the other tyre. After you showed it to me. I checkey why the hell it worked for the other tyre and not for the CAT tyre.
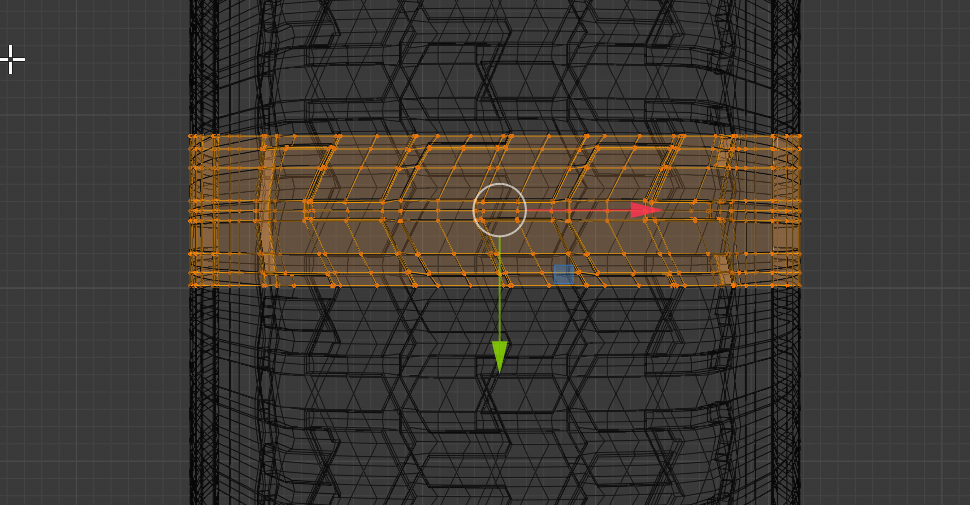
Here is the complete fix: select the two edges and delete them.
Duplicate the treads and move the duplicates up. Shift R to repeat that (so the moving distance will be the same as the first time).
Connect those pieces like so:
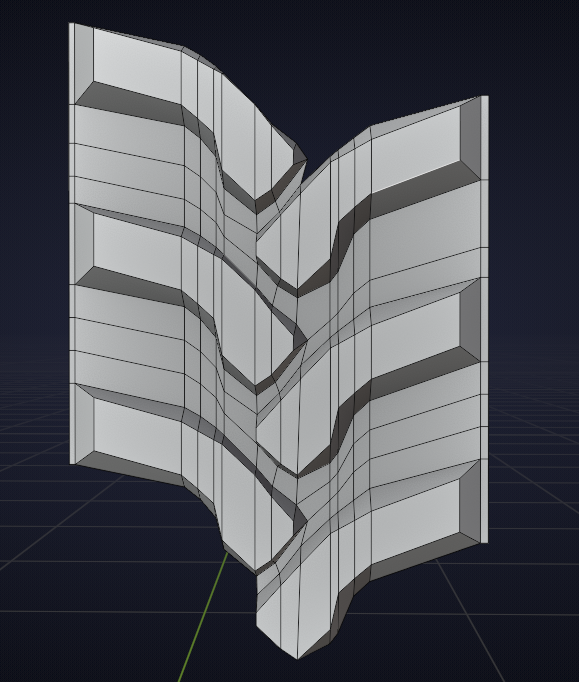
Make two straight cuts to make one segment and remove the unnecessary vertices:
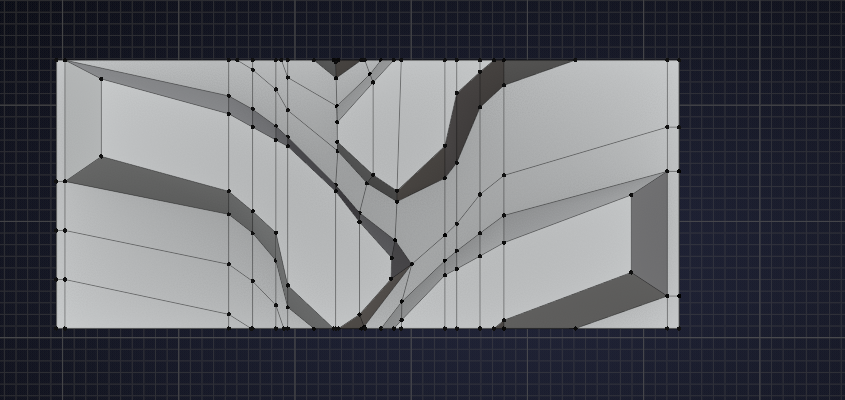
Don't forget to set the Relative Offset back to 1:

Still needs some topology cleanup, but it's a gap-less tyre at least;)
Alright I finally got some free time to try my hand at this bad boy! I decided to make a Sand Dune Tire with scoop treadz.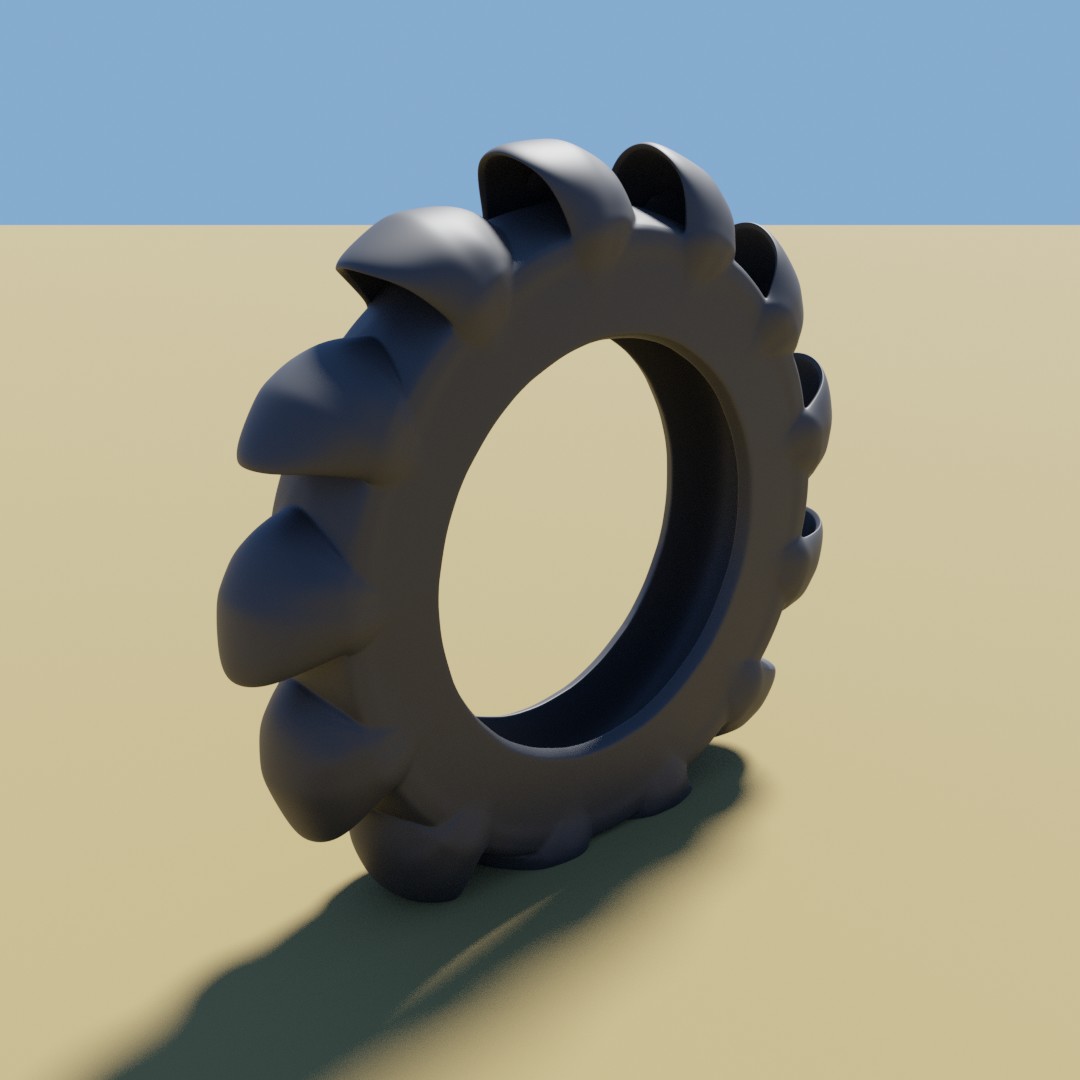
![]() spikeyxxx
spikeyxxx
Here is the cross section: I used the cube and preserved the length. Then I used the Box Cutter addon to do an easy knife cut exactly 1 cube wide to make a tile-able tread.
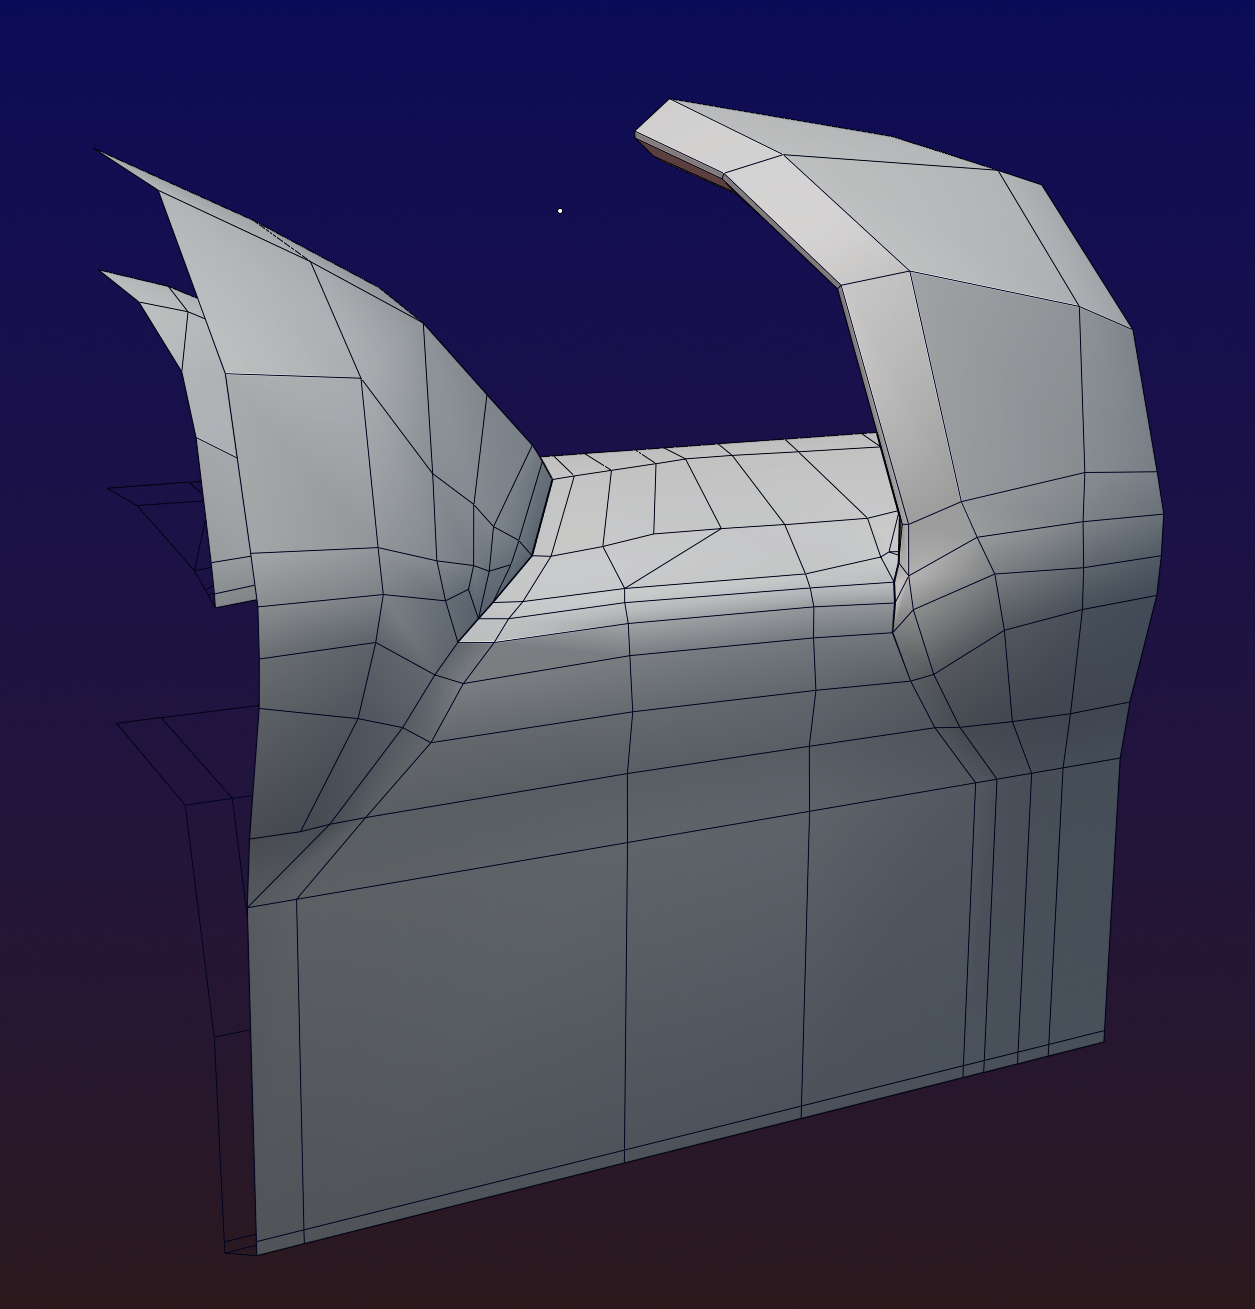
I also made a short animation showcasing the adjust-ability of the treads and uploaded to YouTube Here showing the treads changing. So cool spikey. Thanks again!
HI shanr, I do not know why this isn't working for you...
The Individual Origins Pivot Point work for rotating and scaling.
It depends on what you have selected.
It's a bit confusing; think of two Objects, lets say two Cubes. Then each Cube has its own Origin, so it is sort of clear what Individual Origins does in this case; each Cube 'blows up', when scaled up.
When you have one Object, consisting of two Cubes, then in Edit Mode and using Individual Origins, with everything selected, scaling up has the same effect, although there is technically only one Origin...
This is probably not very helpful, so please tell me a bit more about what is not working.