You guys really should update how to make all these nodes in the new version, it would really help a lot
That's thousands of tutorials that would need to be 'updated' (read re-made) and 2.80 is different from 2.81 is different from 2.82 is different from 2.83....
This specific tutorial is mostly a bunch of Voronoi Textures, so maybe it helps if you compare this:
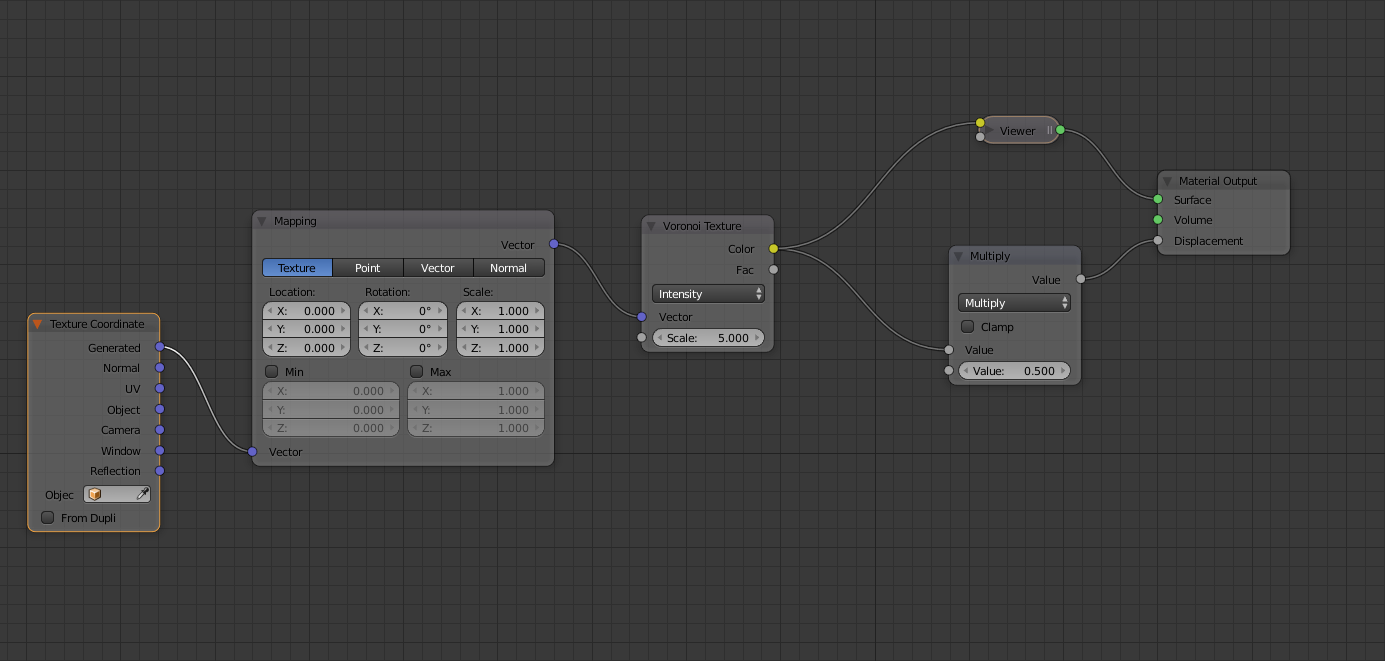
to this:
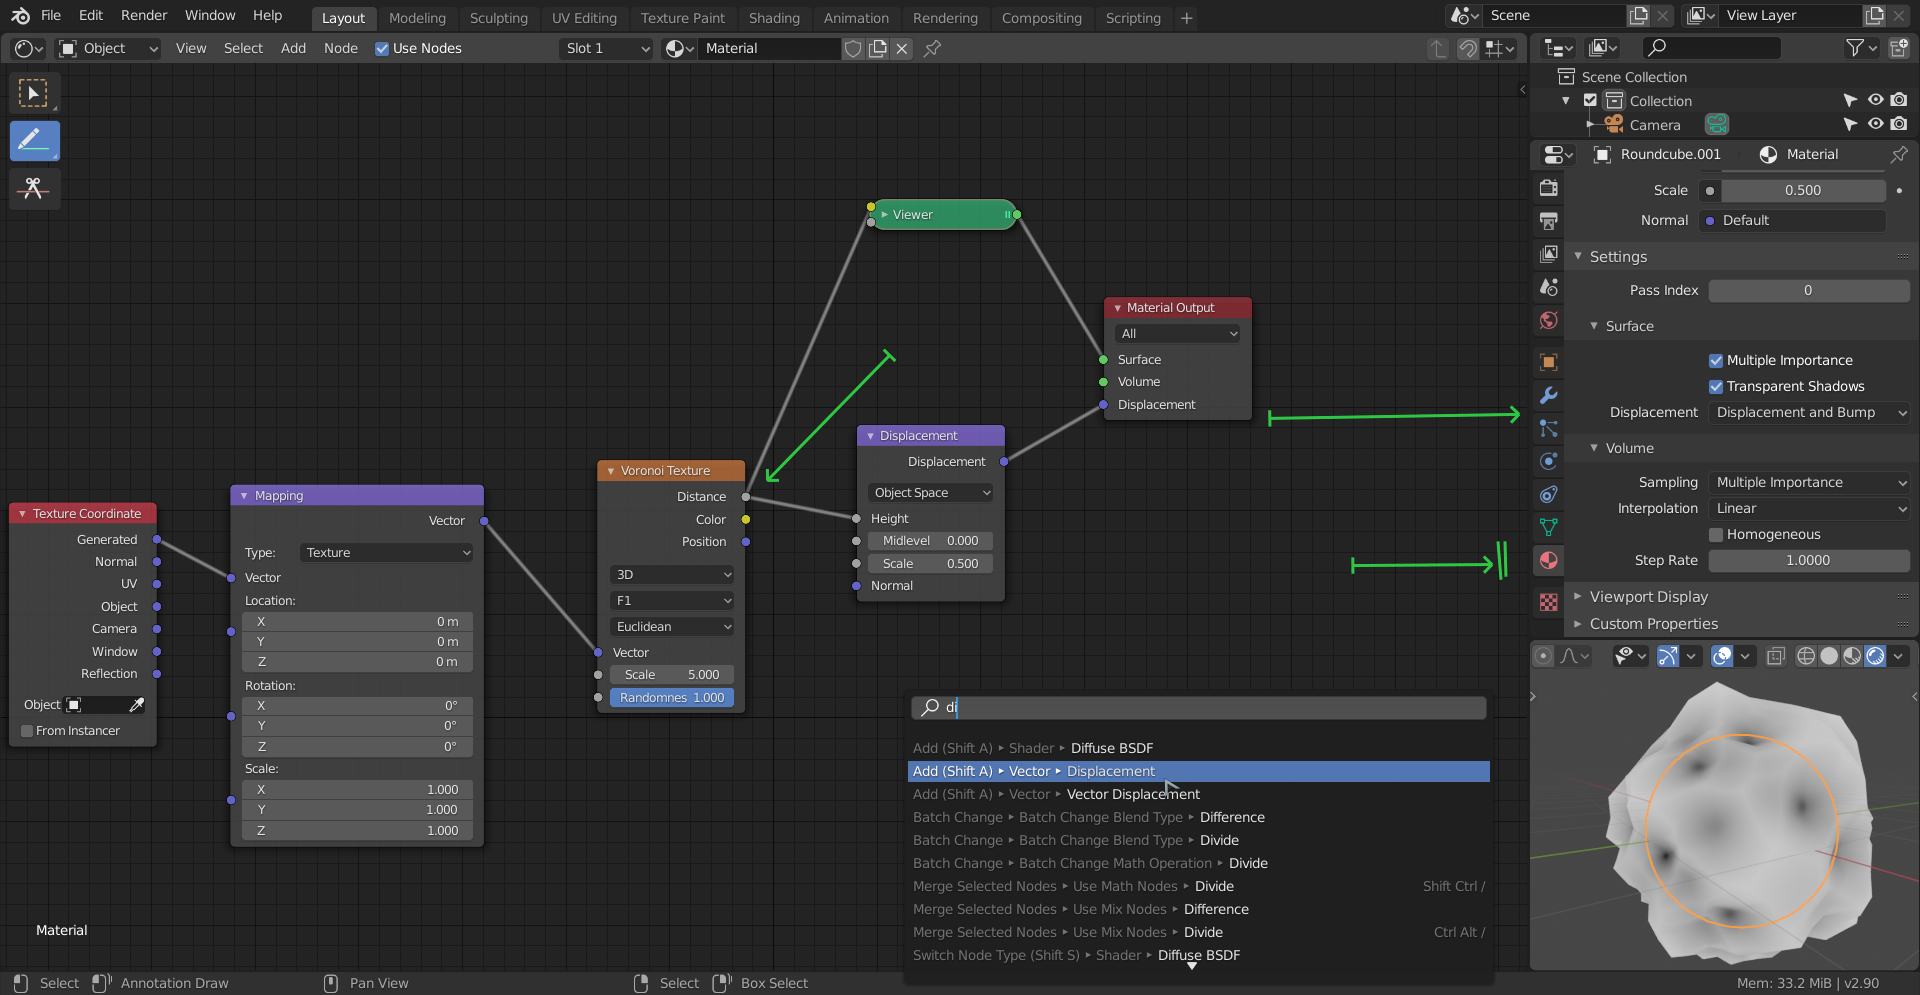
Use the Distance output from the Voronoi. Use a Vector > Displacement Node instead of a Math Node. What used to be called True is now in the Material Settings under Displacement and is now called 'Displacement' (what used to be called 'Both' is now 'Displacement and Bump').
The principles in all these Shader Forge lessons haven't changed.
I think that covers most of the differences, but if you get stuck just ask;)
Nice, thanks ![]() spikeyxxx
spikeyxxx
i have the same problem, because looks like when using math nodes, the parameter is not the same as shown in the video.
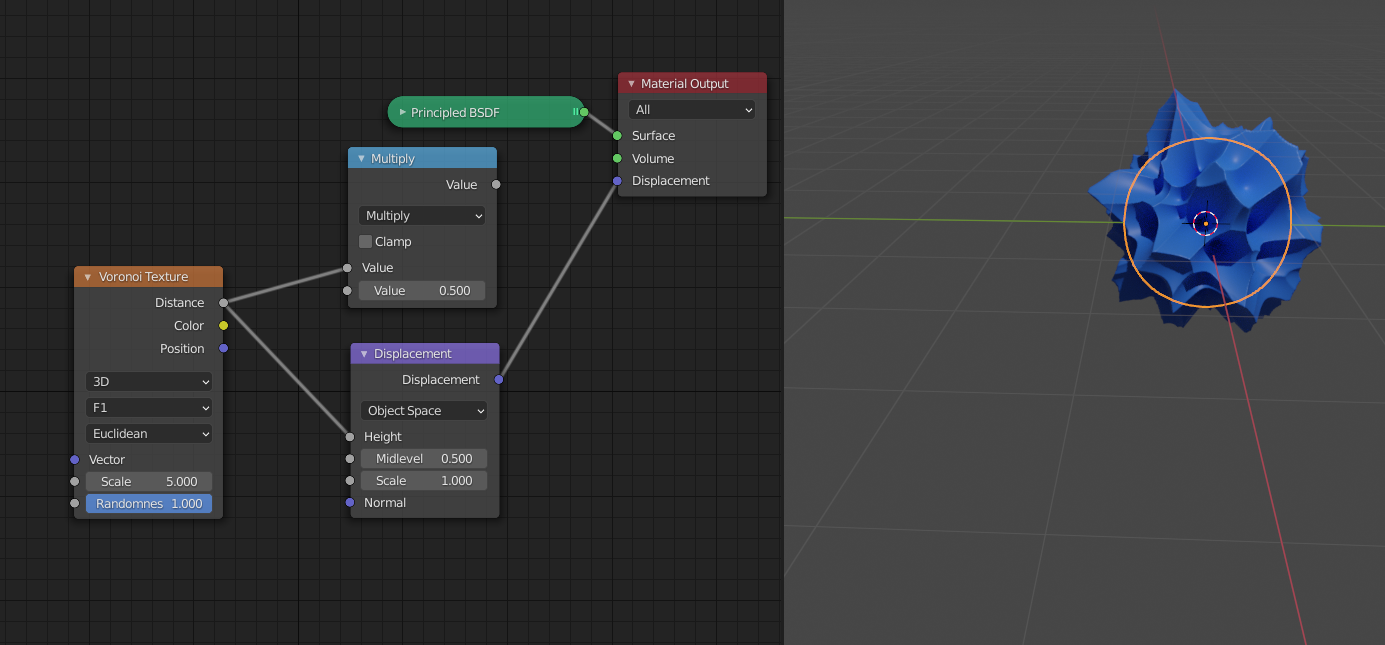
vvpanggabean1980 when you are using the Math Node, you are plugging a grey (single value) socket in to a purple (3 values for X, Y and Z) one. What happens then is that Blender fills in this one value into all three values of the Vector (sometimes called "broadcasting" in programming). This means that the displacement will happen in all three axes in the same amount:
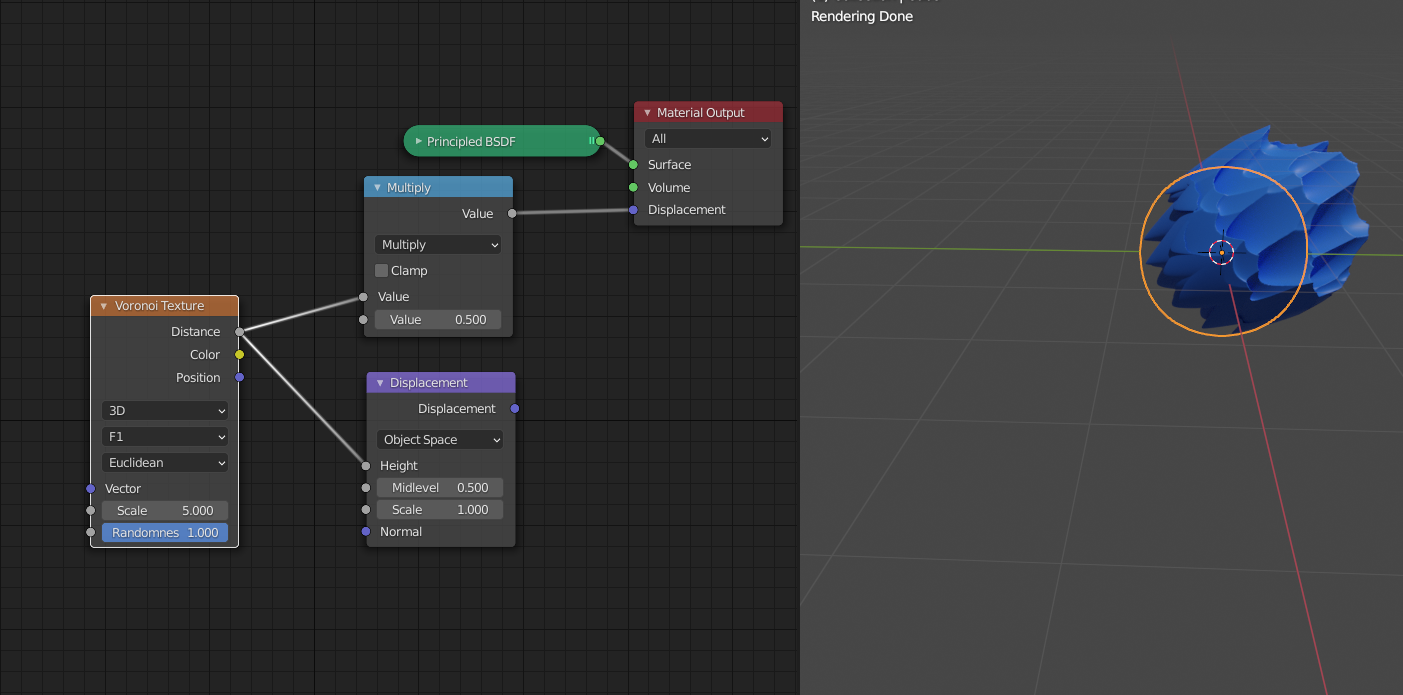
Making the 3 dimensional Voronoi texture effectively into a 1 dimensional texture.
While you actually want (or at least this is how it is meant to be):
Thanks for the explanations ![]() spikeyxxx
spikeyxxx
ok, so the displacement node translate the grey (single value) into purple (x,y,z value)
Anyway i have problems on the final result of the video, it looks like this. Any thought on how to fix it?

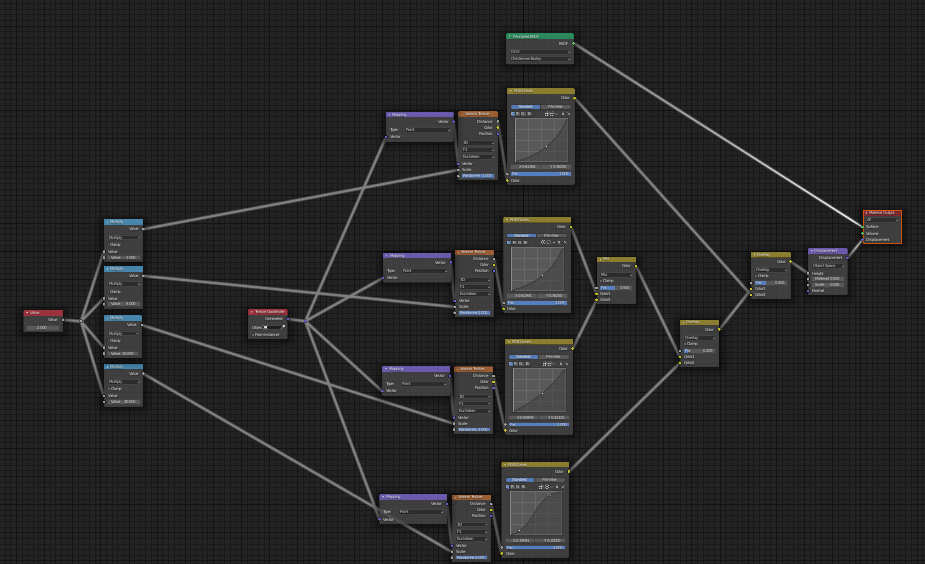
I have absolutely no idea why your result looks like that...
I tried to reproduce your node setup from your screenshot, which is not exactly the same, but should give a similar result, but I get this:
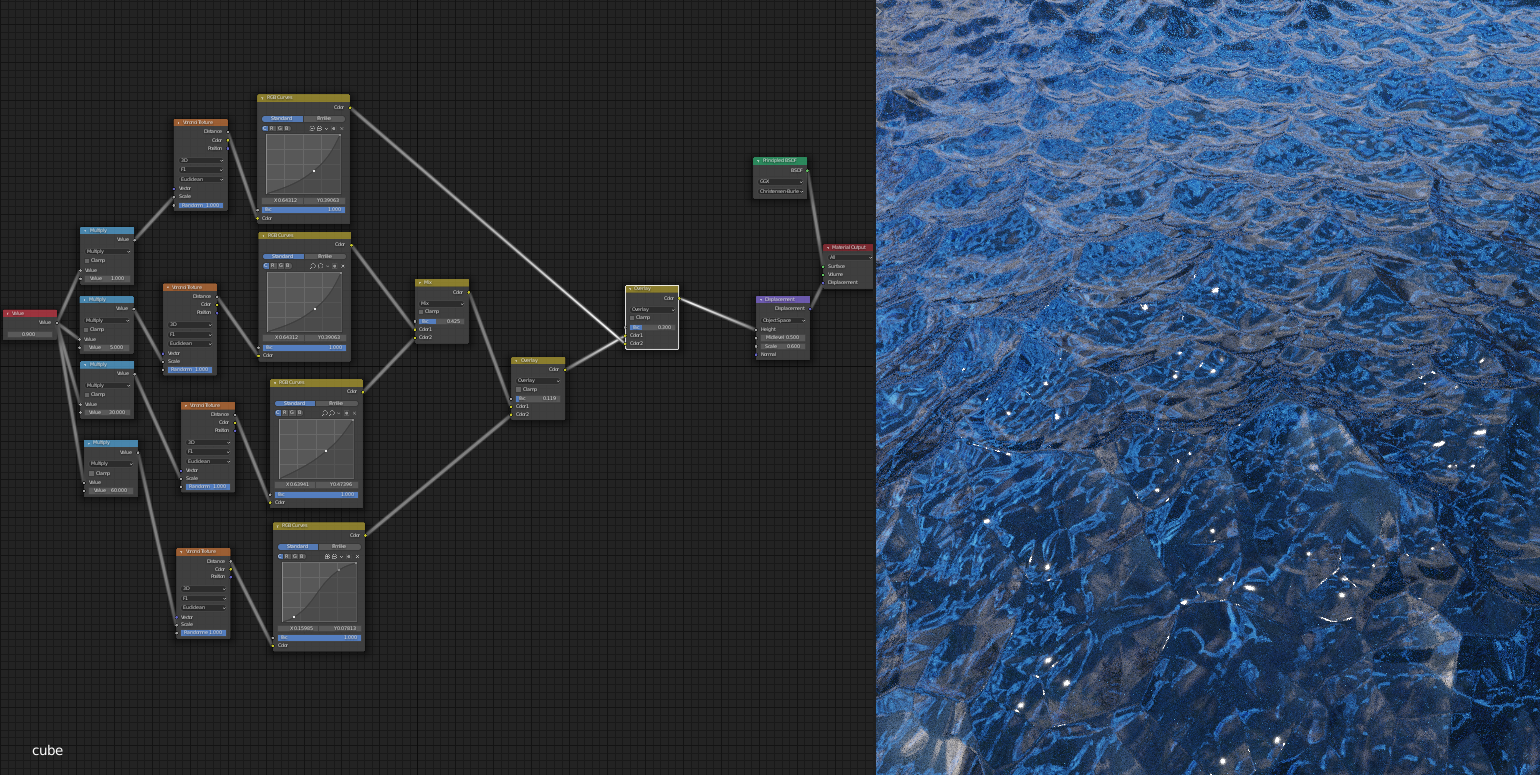
Maybe you messed up the Vector > Mapping Nodes? (Rotated around a wrong axis?)
If that is not the case, please post a link to your .blend file here (upload it to Dropbox or something like that...) and I, or someone else will have a look at what is going on.
I try to recreate it again, is this the right result?
Here's the file ![]() spikeyxxx , thank you
spikeyxxx , thank you
https://drive.google.com/file/d/1f-Ic9Zwds1gA4CPHa247pyh9t6C8YlYz/view?usp=sharing
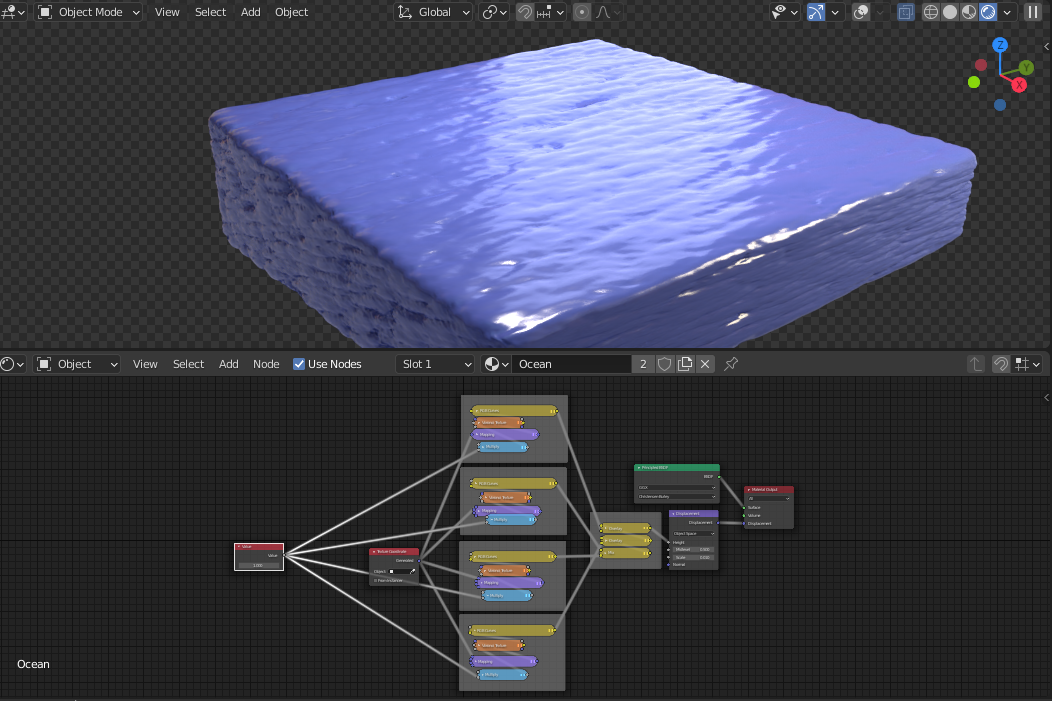
You have made your water body from a Plane (delete the default cube...add a plane.. in edit mode extrude on the Z-axis...something like that ;) ), which is not wrong per se, but has the risk of getting the Normals flipped! This is exactly what happened in your file.:
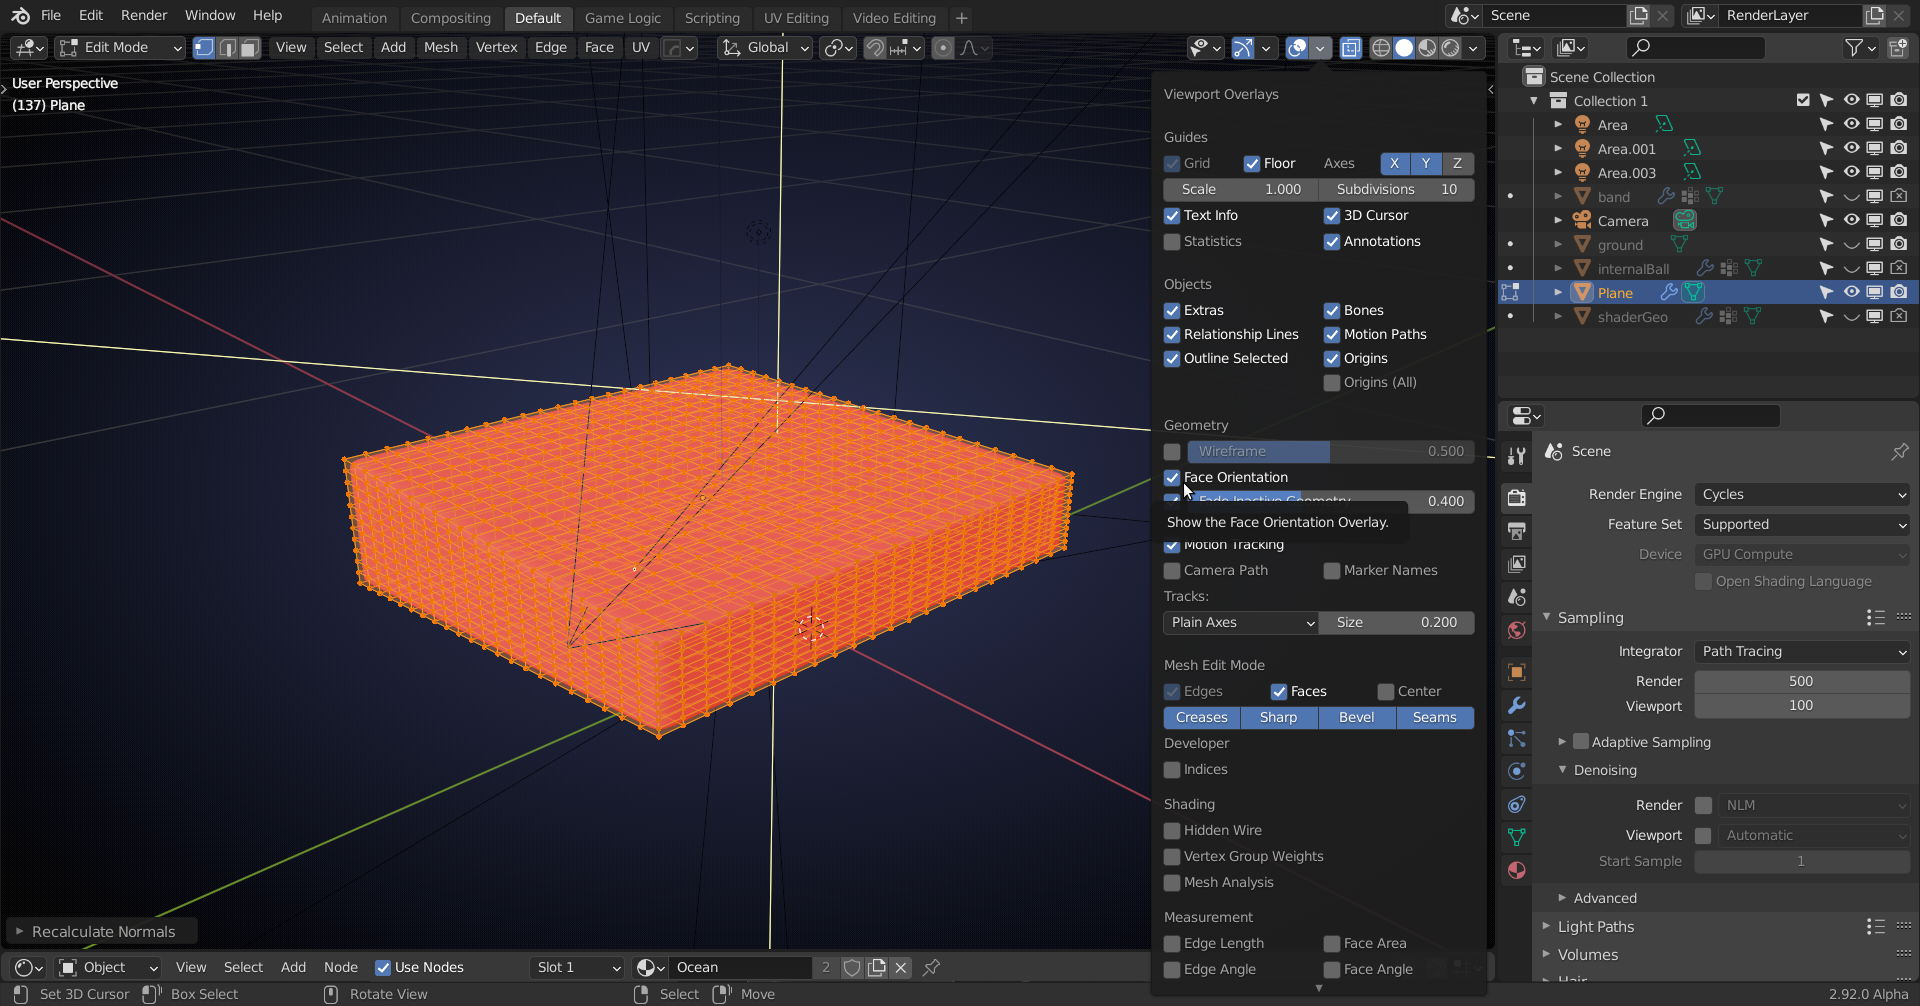
In edit mode, select all and then press SHIFT+N to re-calculate the Normals. The reult will be a lot better out of the box and then you can still tweak some values or curves.
Aha.. ok, it turned out the problem is very simple but i didn't thought of that.. thank you