I was planning on focusing on vehicles for the month of July for my own personal modeling challenge and it just so happens that the next CGC Challenge is also based on vehicles. That said I plan on participating. The vehicle I plan on creating is based off this: https://cgcookie.com/course/modeling-a-post-apocalyptic-vehicle
I'll be using the vehicle in that course as the base and add my own unique features to it. Ideally this would be game ready and include real time "renders" of this vehicle running in Unity. More high def still shots will be made in Blender.
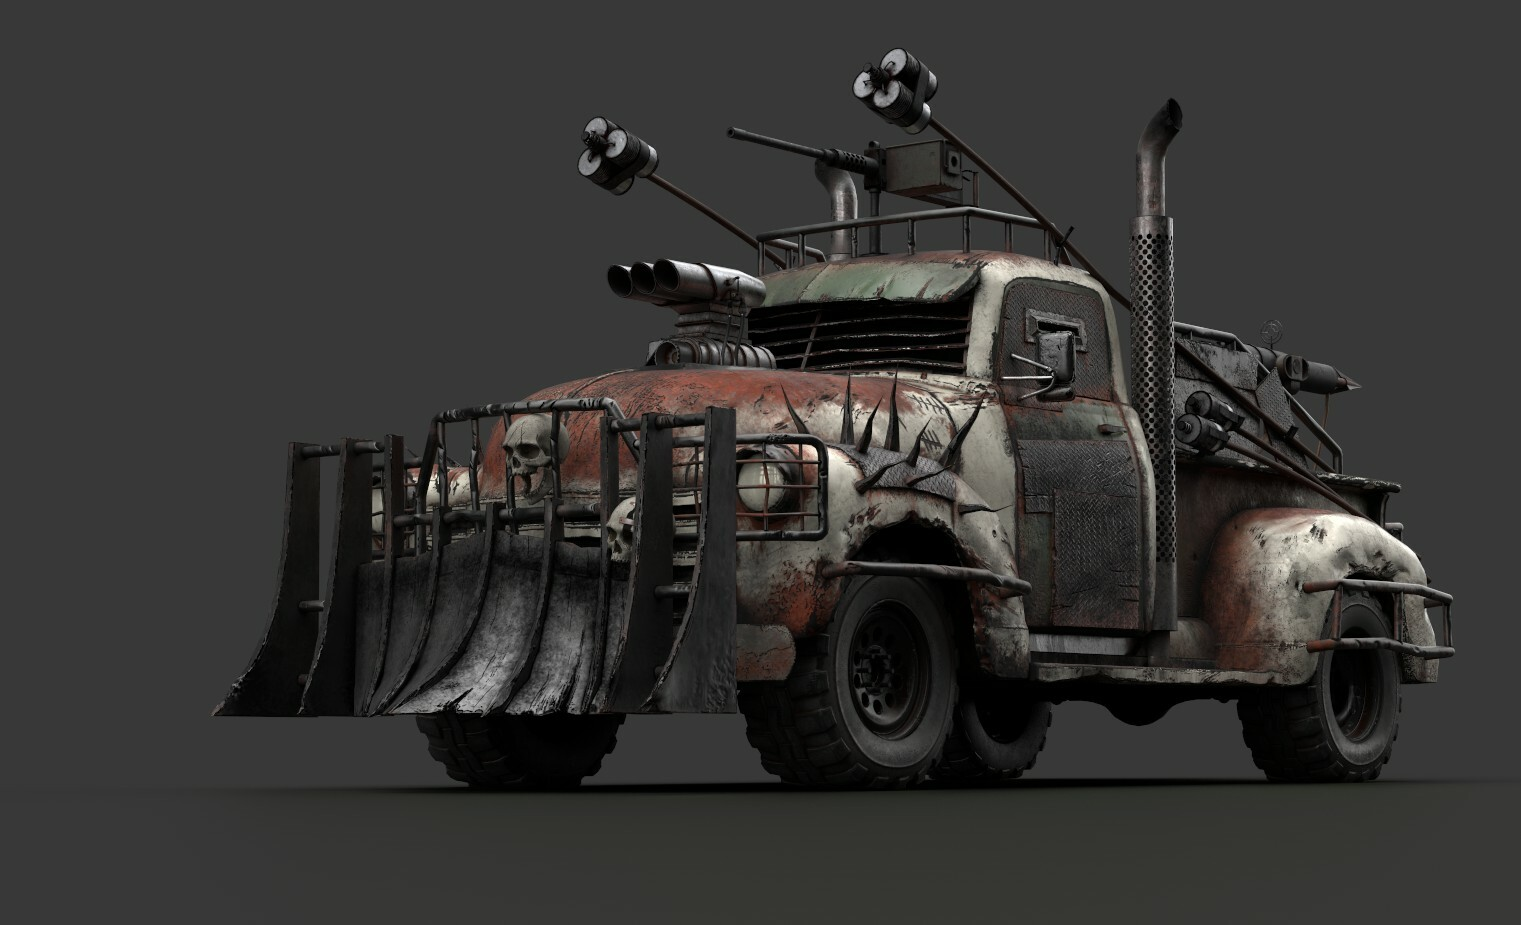
The main theme of the vehicle will be a combat/apocalyptic vehicle. Something that you might find in Mad Max or Twisted Metal. Below are some references for the vehicles or vehicle modifications I'd like to incorporate.
https://www.artstation.com/artwork/KRkW9
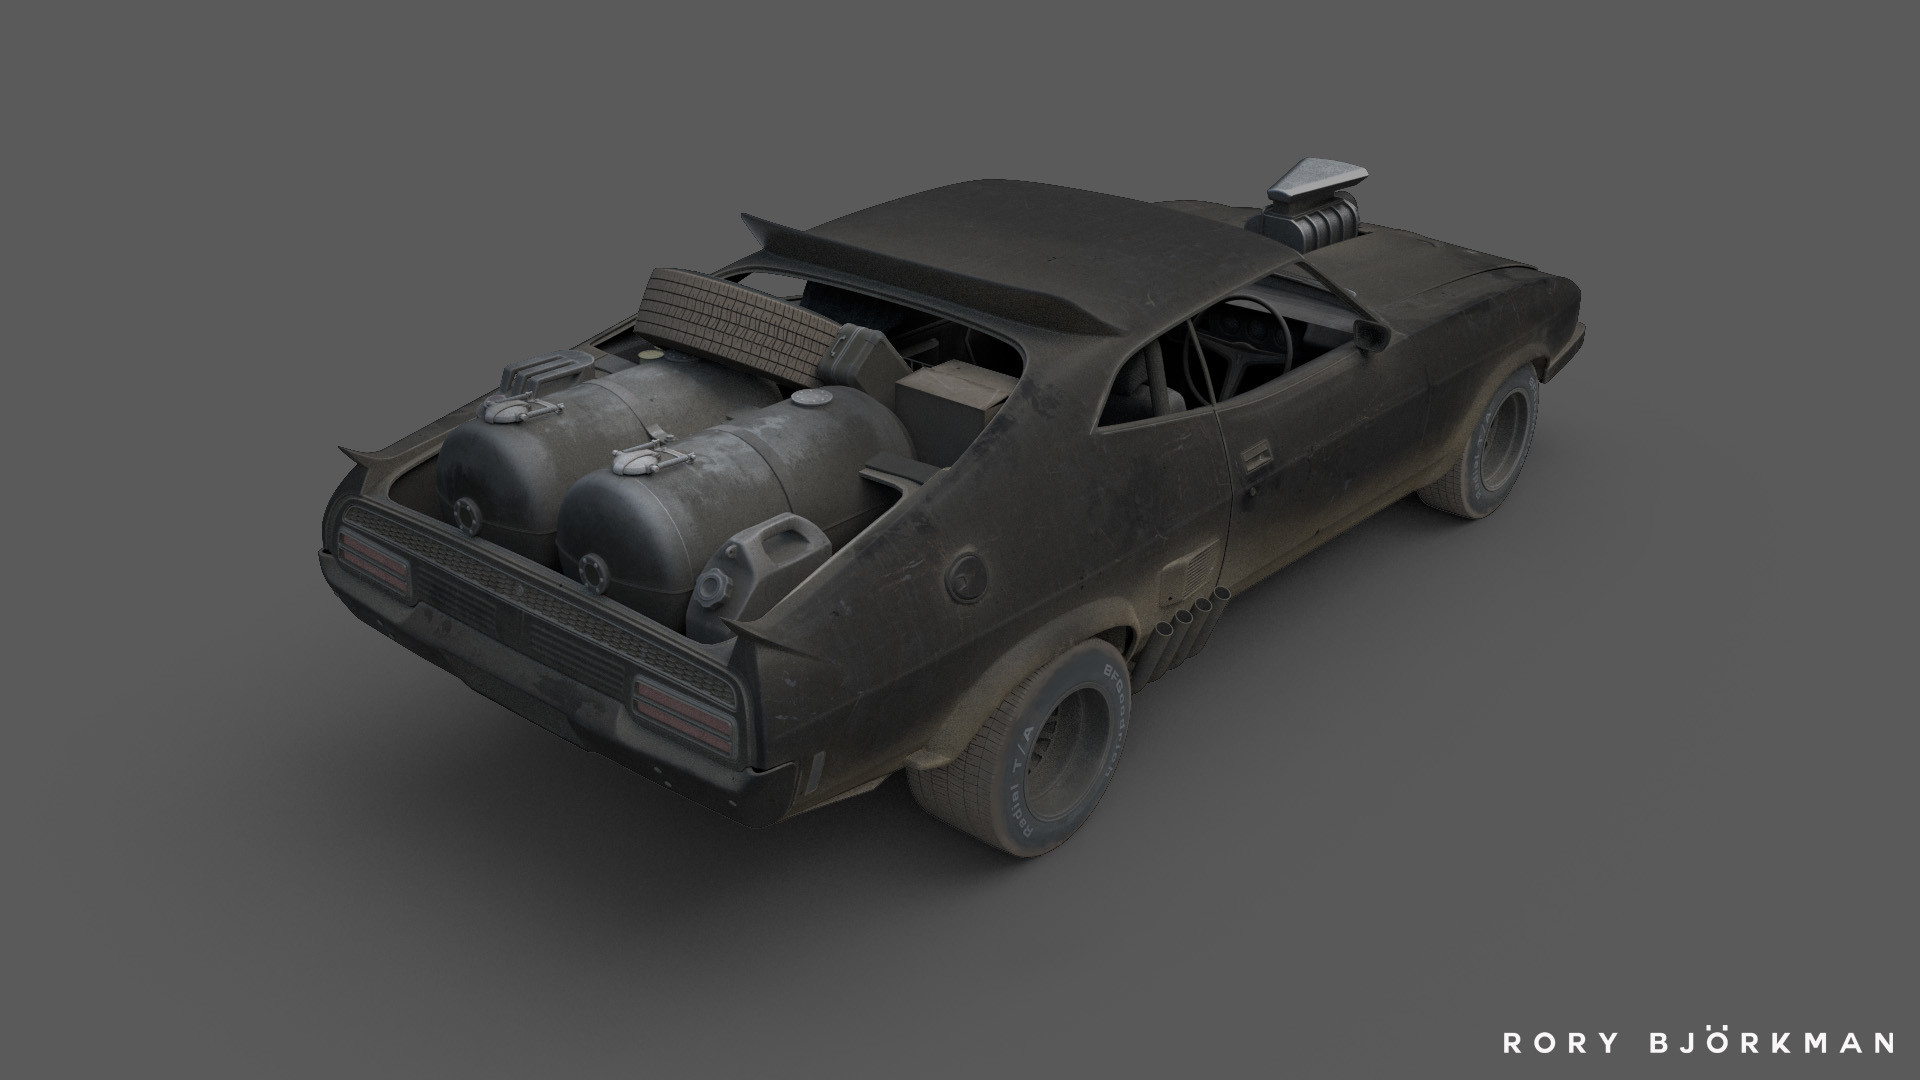
https://www.artstation.com/artwork/4bEvzl
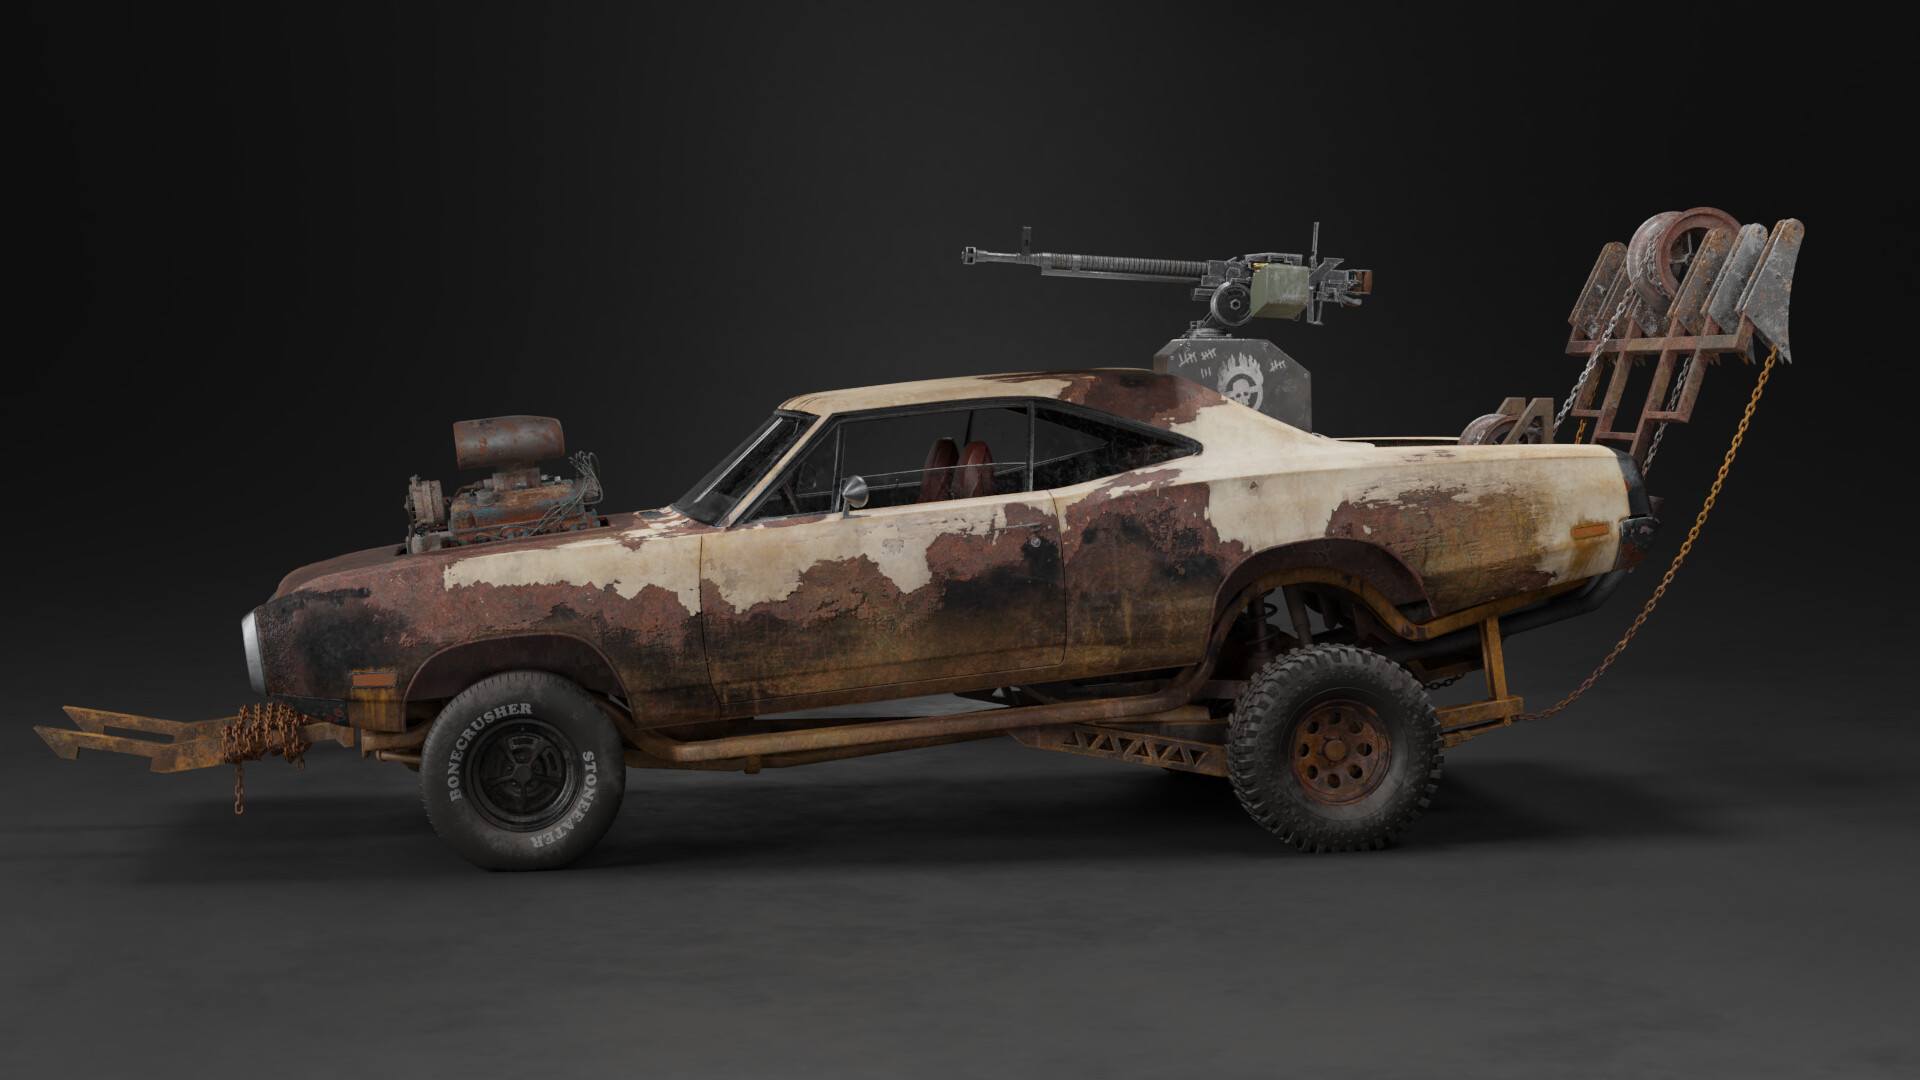
https://www.artstation.com/artwork/RYDODO
I will be breaking this down into 3 week chunks, each week covering a specific part of the vehicle.
Week 1 - Vehicle Modeling
With this being my first big vehicle model, I'm mostly focused on getting the base truck created from this course: https://cgcookie.com/course/modeling-a-post-apocalyptic-vehicle . After that if time permits I'd like to make the following modifications:
Week 2 - Vehicle Texturing
With the vehicle being apocalyptic I'm aiming for a grungy look. Rust and peeling paint, maybe even some bullet holes and metal that is being eaten away by the elements. Along with that I'd like to have some unique visual elements like painted decals. This will all be done within Substance Painter 2019.
Week 3 - Rendering
I would like to make this a game ready model and as such would like to experimental with real time rendering of this vehicle. Using Unity 2019 and HDRP to really enhance the looks. Using volumetric lighting along with some custom shaders for the tires to look slightly deflated. If time permits I'd like to create a vehicle controller to drive the truck around a desolate desert environment complete with usable .50 cal machine gun that can fire and aim in the direction of the mouse.
I like this idea! Pretty challenging concept. Good luck Gonzo and enjoy the ride 😊
I'm posting what I plan to accomplish every week this month for this project. Since it's based off 21 days I'm breaking it down to three weeks to complete this. I've never created a vehicle as complex as the one I'm aiming to model so we'll see how well it goes. The good thing is I'm learning through a course so a large part of the modeling process will be covered through that. I would like to model the bottom portion of the truck as well. Ideally this would be usable in game so having a missing under body wouldn't look weird.
In order to keep momentum up I plan on updating this daily showing off the small changes I make. I think it's great to see the small pieces come together to create something bigger in the end. Today I just setup the images for the truck. I'm using Blender 2.8 for this even though the original course was made with an older version.
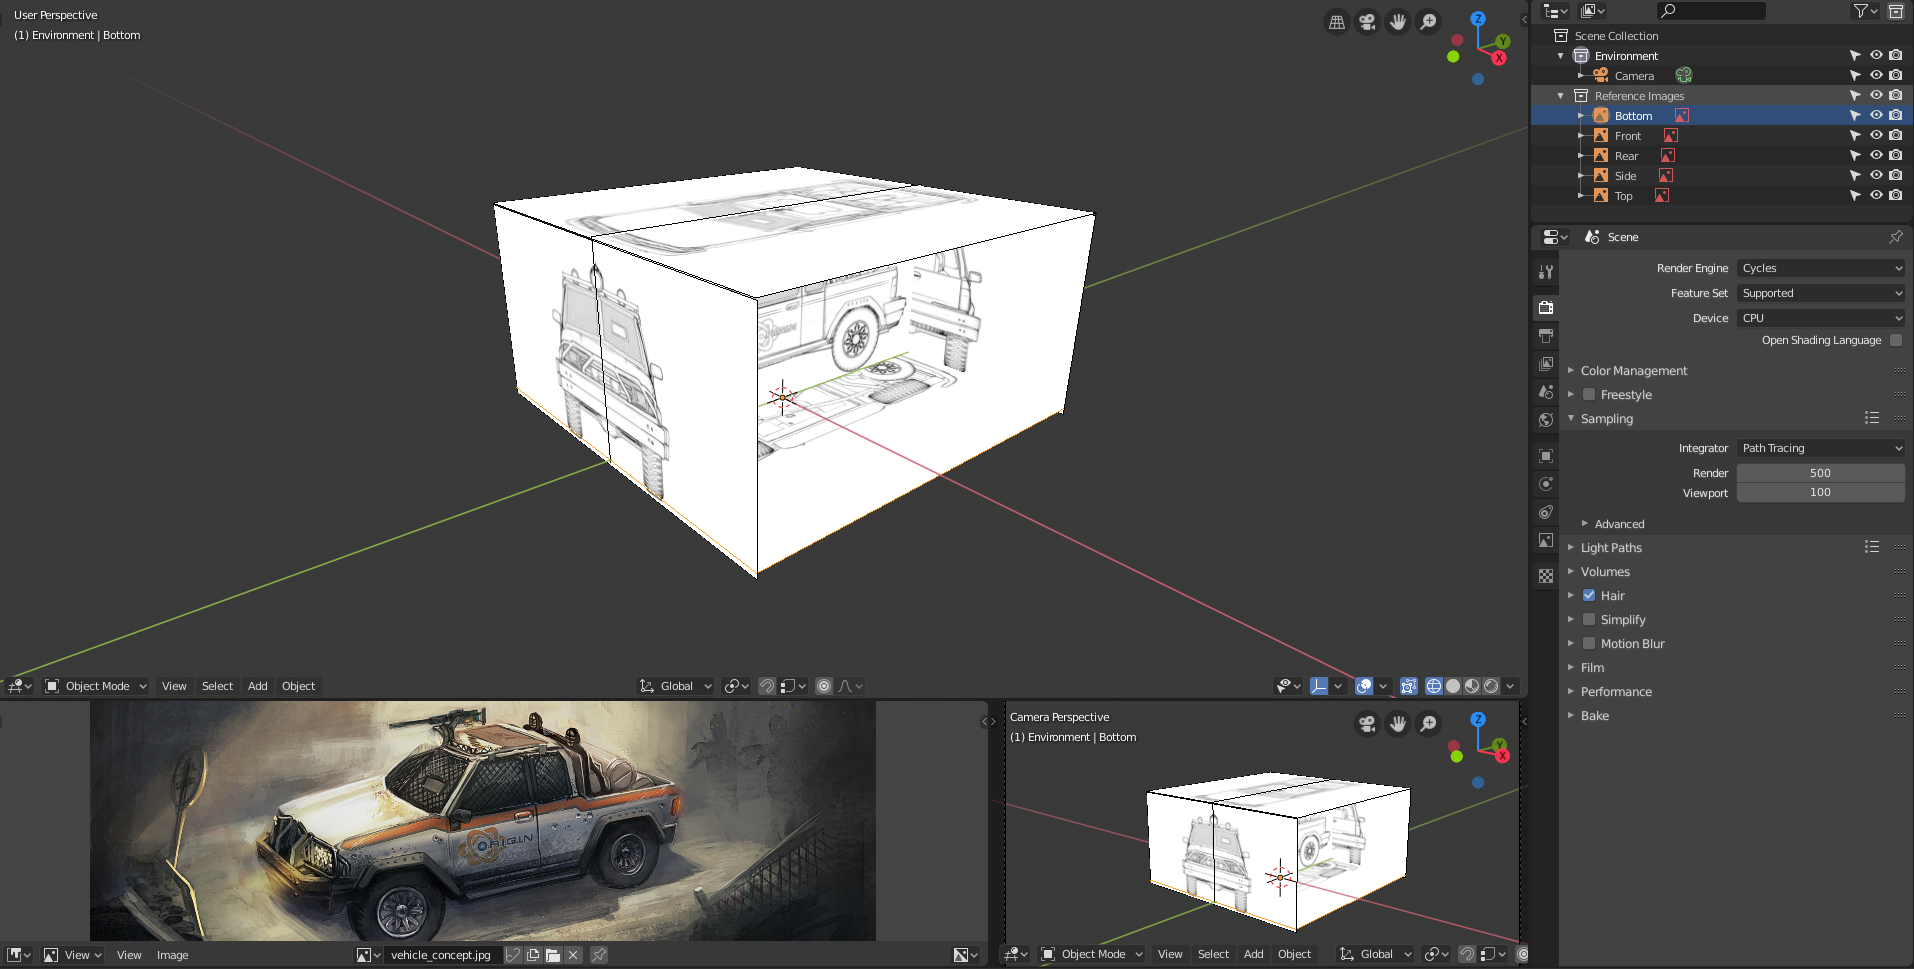
Got the major portions of the truck blocked out: 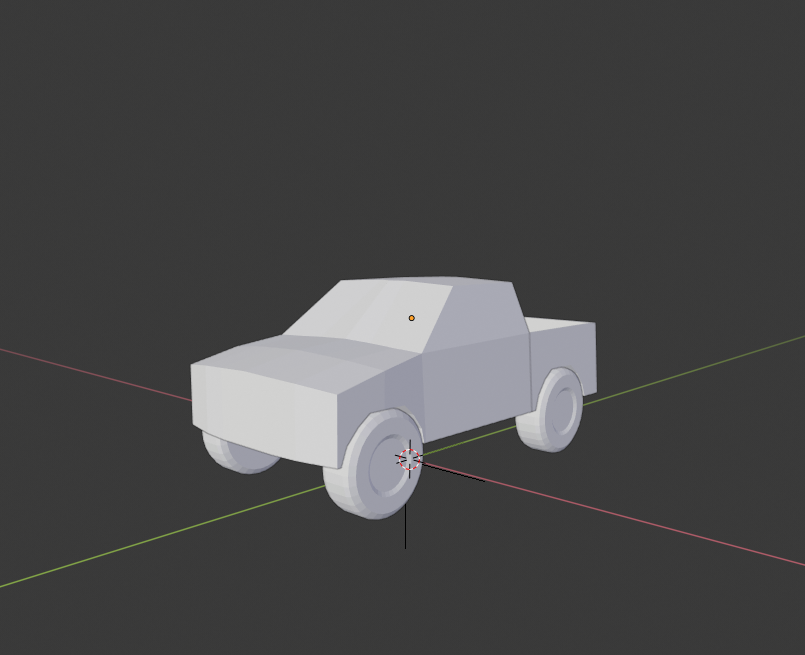
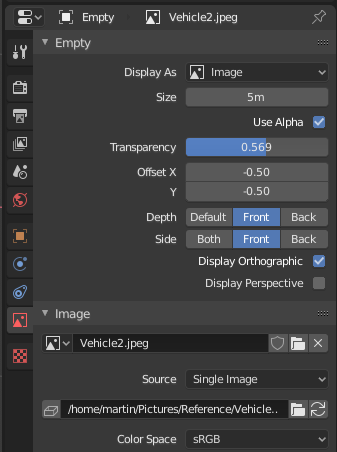
Looks a bit small but the truck doesn't have a large truck bed so I suppose it's accurate. I'm not sure if Blender 2.8 has background images like older versions of Blender have as I found it a bit annoying to move around physical images in my view port. I added an image as a background (Shift A > Image > Background Image) but it seemed identical to the reference image type so I'm not sure what the difference is.
On a side note this truck has me thinking this would make for a fun RC Combat game in AR. One of the big inspirations for this vehicle was the Twisted Metal series, it somewhat reminds me of Outlaw: https://www.youtube.com/watch?v=g92VTM5CXVM
![]() jgonzalez the old background images are gone... you can move your ‘empty’ (‘cause that’s what it is, and empty with image type) wayyy in the distance on a specific axis. Then it won’t be in the way when in perspective mode, but when you go to a specific orthographic view (front, side, top, etc.) then you can still see it as normal.
jgonzalez the old background images are gone... you can move your ‘empty’ (‘cause that’s what it is, and empty with image type) wayyy in the distance on a specific axis. Then it won’t be in the way when in perspective mode, but when you go to a specific orthographic view (front, side, top, etc.) then you can still see it as normal.
![]() spikeyxxx WHOA, does this mean you can now completely hide it in perspective view with the tick boxes???!
spikeyxxx WHOA, does this mean you can now completely hide it in perspective view with the tick boxes???!
![]() jgonzalez I’ll be curious to see if you will reach all your weekly goals (without making extremely long nights), because I think your time schedule is pretty ambitious for a first car. Especially since you plan on doing all this extra / new stuff... (optimizing for games, playing with HDRP, vehicle controller and gun)
jgonzalez I’ll be curious to see if you will reach all your weekly goals (without making extremely long nights), because I think your time schedule is pretty ambitious for a first car. Especially since you plan on doing all this extra / new stuff... (optimizing for games, playing with HDRP, vehicle controller and gun)
Btw, you could add a 4th week to your schedule, since the challenge runs till July 28th (28 days) 😉
ssmurfmier1985 Good to know. All the game stuff is relatively easy for me as I've already done it before. The hardest part of this is the modeling/texturing. Everything outside of that will be quicker. I feel confident about getting this done, now whether it's as high quality as I'd want is the only issue.
I look forward to seeing this project come together. It's great to see a CGC staff member particpate in a challenge :) Good luck!
![]() frikkr Hah thanks. I was planning on working on vehicles this month so this was a nice surprise. Been wanting to create this vehicle as a game asset for a while so all the more reason to join in. I'm also one of the few CGC crew that isn't amazing at Blender so I'm not cheating. Hah.
frikkr Hah thanks. I was planning on working on vehicles this month so this was a nice surprise. Been wanting to create this vehicle as a game asset for a while so all the more reason to join in. I'm also one of the few CGC crew that isn't amazing at Blender so I'm not cheating. Hah.
Truck is coming along. Learned quite a bit with the past few lessons in the course:
I'm not aiming for an exact match as I will be changing a few things myself but I'm quite happy with what I have so far. Also found out today I have quite a few credits for Substance Source which will come in quite handy next week with texturing. Might even be able to save me some time with specific modeling as I found a few high quality textures that can mimic specific parts of the vehicle.
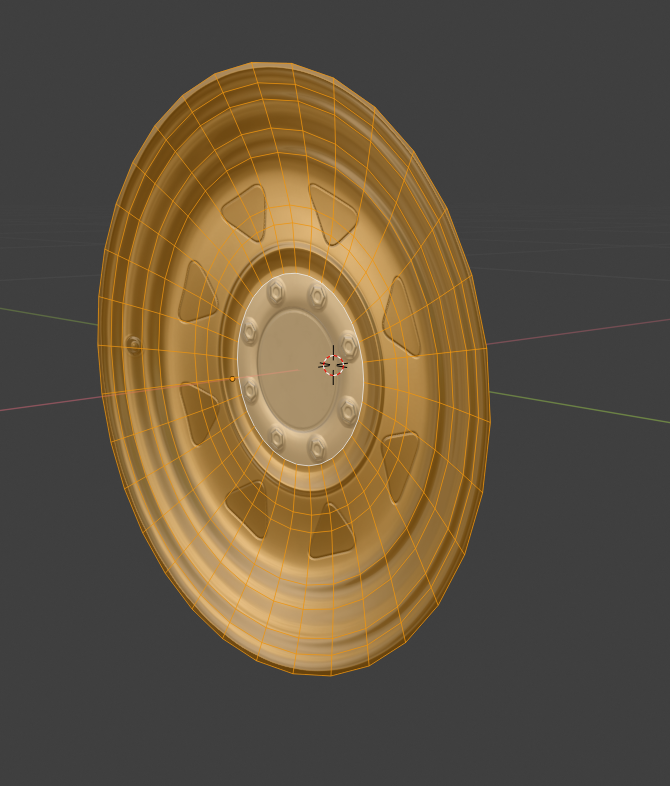
Ok so last night I was playing around quite a bit in Substance Painter. After realizing I had quite a few credits for Substance Source I decided to download a number of SBSAR files for use in Substance Painter to make things much easier. Since I primarily plan on using this as a game asset I'm finding ways to cut down on topology and utilize more low poly ways of achieving a similar look. I'm quite happy that I've been able to achieve this with the rims:
Here is what it looks like in Unity:
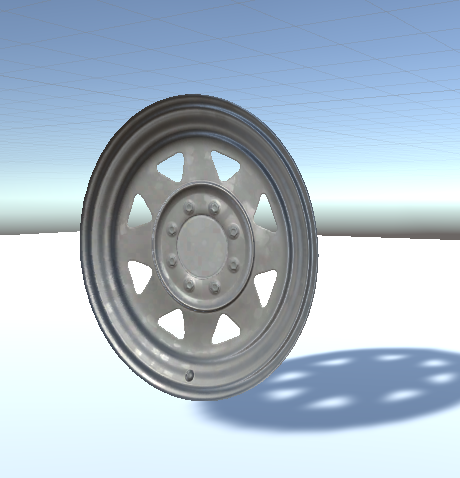
I did make it a concave object so it doesn't just look like a flat mesh object which I think helps the realism of this. Here is another angle in Substance Painter:

The truck model also has a few parts that include a mesh grille and window grates, so I plan on using textures for the grille portions in conjunction with physically modeled edges. Think it would make for some nice low poly details that still look great.
![]() jgonzalez that is nice way of doing it. i'm thinkin similar approach, creating trim sheets for the details to get more texture detail on them. other would be doing decals and make the main body of mass with weighted normals.. decisions decisions. :)
jgonzalez that is nice way of doing it. i'm thinkin similar approach, creating trim sheets for the details to get more texture detail on them. other would be doing decals and make the main body of mass with weighted normals.. decisions decisions. :)
Spent way more time on this than I thought I would, but I have some decent looking off road tires now
Probably way more high poly than necessary for a game asset, but I can probably bake it down from a high poly to a low poly tire in Susbtance Painter. I wanted to model the treads manually to get some nice depth and also more control over how it looks. I followed most of this tutorial: https://cgcookie.com/lesson/modeling-the-tires
And used these tire treads for reference: https://rfclipart.com/shabby-tyre-treads-traces-of-three-different-off-road-tyres-28487-vector-clipart.html
Added in the rim textures just to see how they would look. Initially my rims were too small so I increased their scale without making it seem impractical for a offroad vehicle. A lot of the tread details and tire details in general will be covered up by grime/dust/damage so any imperfections in it now will be fine.
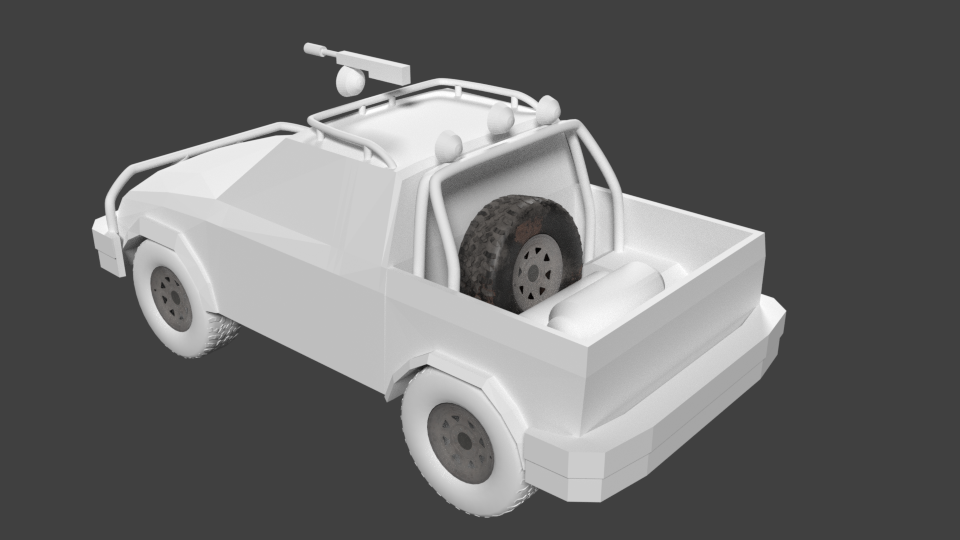
Also added a spare tire in the back. Added some quick textures in Substance Painter.
The tires are a bit too shiny in Blender, but the texture maps I'm using are intended for Unity so it'll look different there.
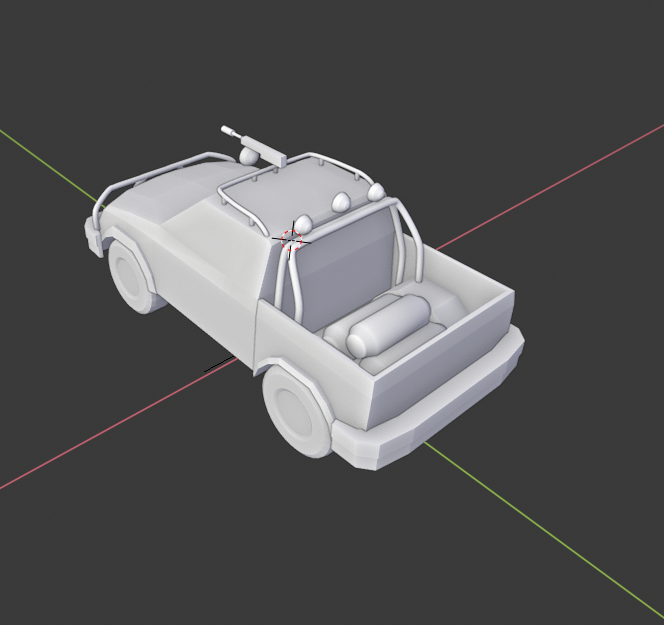
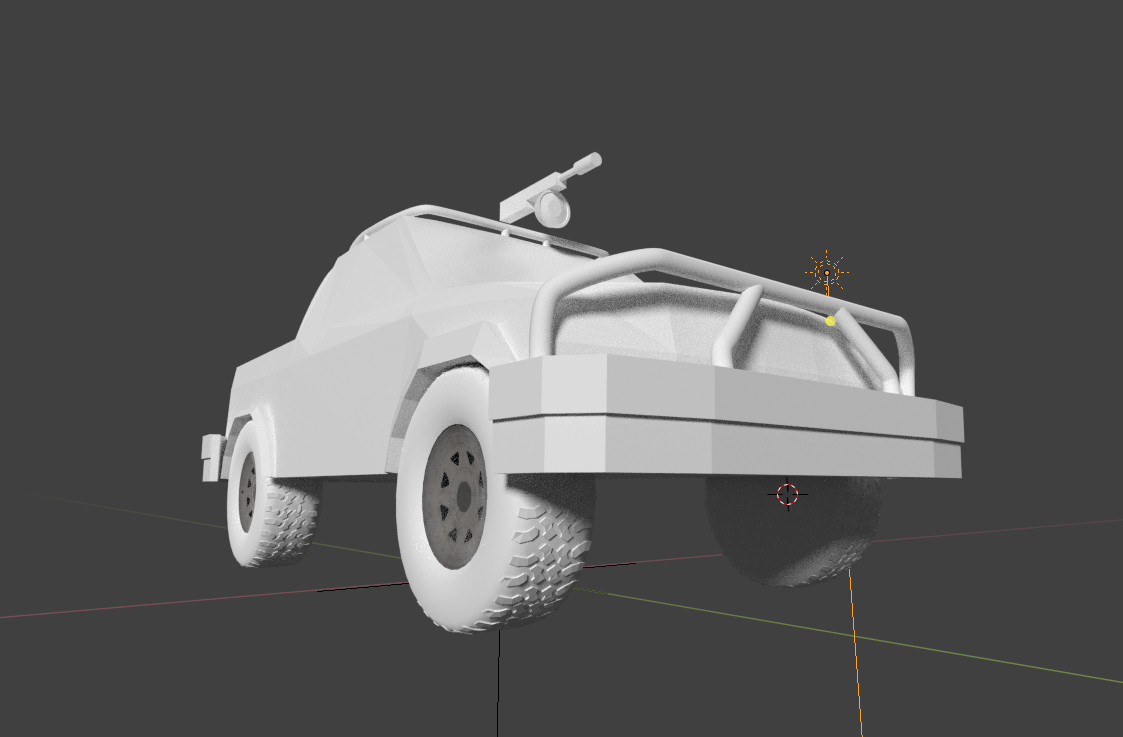
Started smoothing out the various parts of the truck and adding distinct sections.
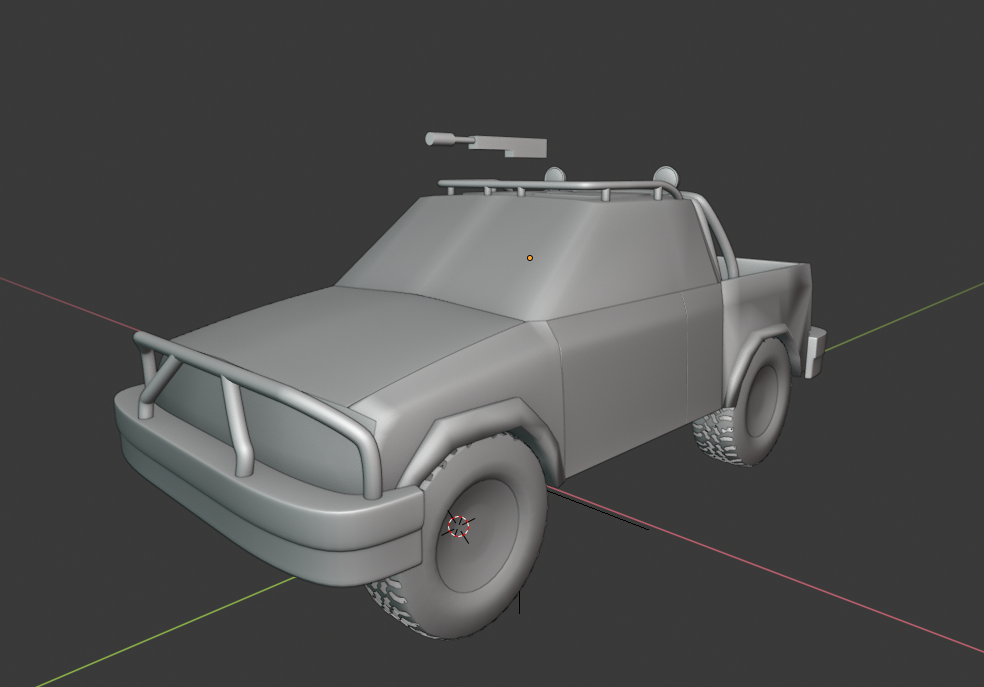
Looking back I probably would have opted to keep the fender flares as separate pieces as it would be easier to keep clean topology but I'm keeping them together for now. I plan on creating the window grates low poly with a custom texture. Maybe even mix it up a bit with some unique window "armor" that can be swapped out.
![]() jgonzalez looking good. actually one thing that i noticed with the rim now is that you could add one edgeloop on the edge and the pull outmost edge back to give actualy geometry to enhance the normal information for the edge, now it feels bit flat on the edge.
jgonzalez looking good. actually one thing that i noticed with the rim now is that you could add one edgeloop on the edge and the pull outmost edge back to give actualy geometry to enhance the normal information for the edge, now it feels bit flat on the edge.
![]() louhikarme Yeah I plan on remaking them, sort of. The rims right now just looks like shallow bowls, but I can reshape them to look very similar to the actual rims while keeping the same geometry. I'll then use project from view from the UVs again and get the best of both worlds. In reality the main reason I went the texture route with the rim was because I had trouble getting clean topology with the holes and I figure it wasn't really that important to have high poly rims.
louhikarme Yeah I plan on remaking them, sort of. The rims right now just looks like shallow bowls, but I can reshape them to look very similar to the actual rims while keeping the same geometry. I'll then use project from view from the UVs again and get the best of both worlds. In reality the main reason I went the texture route with the rim was because I had trouble getting clean topology with the holes and I figure it wasn't really that important to have high poly rims.
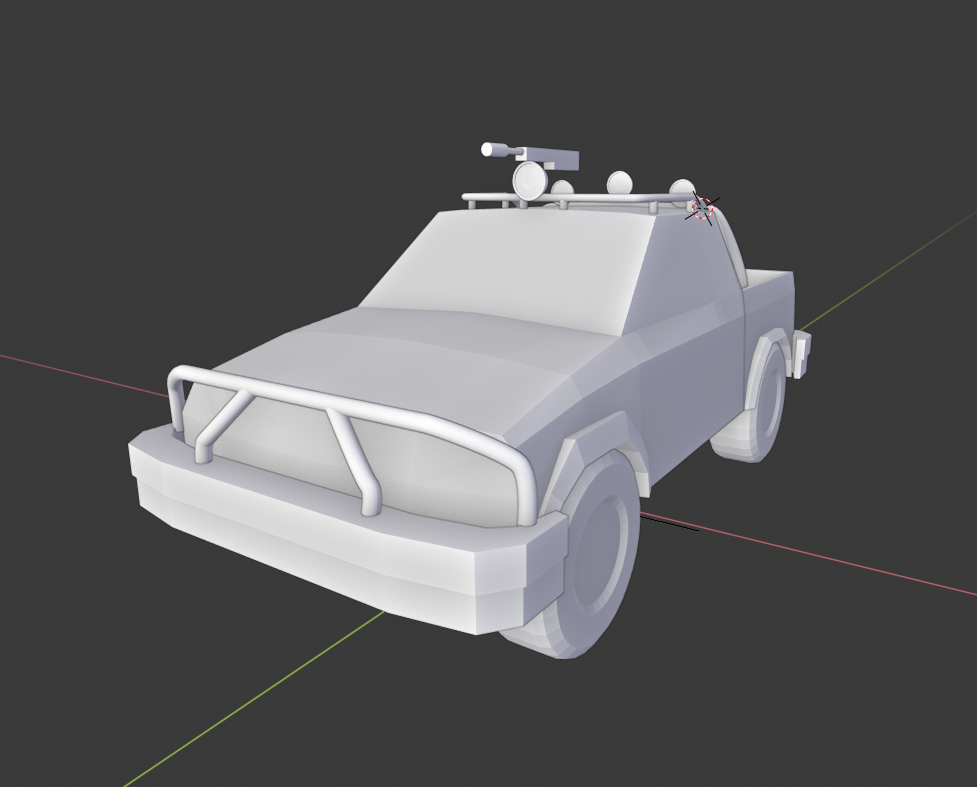
Ok today I worked on getting the windows in. Spent more time on this than I thought I would but I got them in. Ended up cleaning up a lot of topology. One thing I'm doing more lately is separating out pieces and giving them unique topology so that the body isn't super dense because of a smaller piece added in.
Also fixed up the rims. Added a bit of a lip to the rim and gave it a bit more depth than a concave dish. They look much better now.
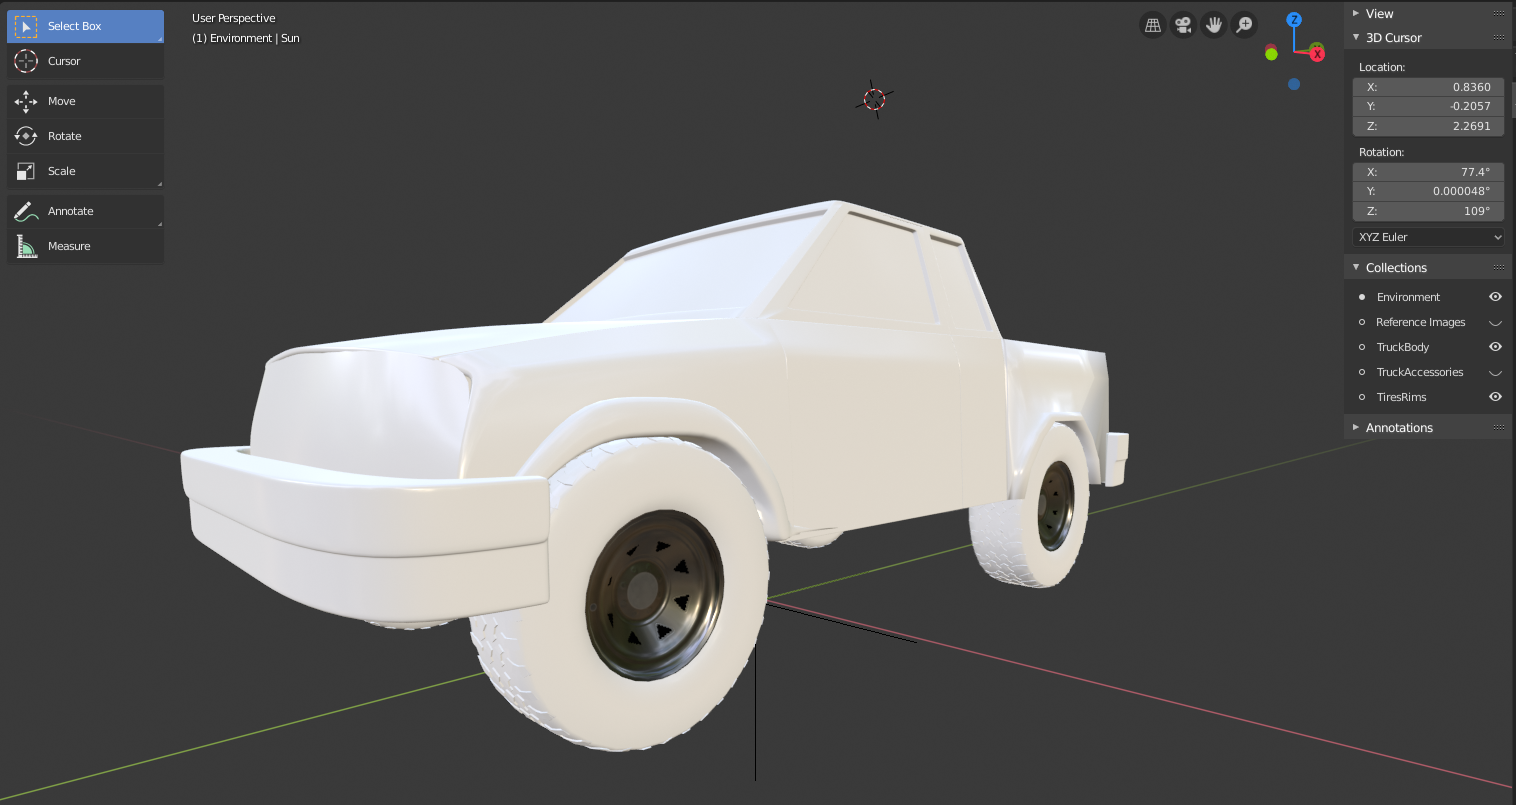
I'll probably add in some physical pieces for the center cap and possibly some low poly lug nuts but I think they look great for now. I had scheduled the first week for modeling alone, but I'm taking my time with this one. Texturing and rendering will only improve with a higher quality model. Tomorrow I'll add in the headlights and possibly the grates over the windows. Since the windows will mostly be covered by other objects I'm not adding more details to them for now.