My homework thread for the October 2018 Class.
Week 1:
Week 2:
Week 3:
Week 4:
![]() thecabbagedetective Thank you, Aaron - and you are correct, there are noise textures involved :-) Both on the backdrop and on the crane, which also has some scratches-meant-to-look-like-crumpled-paper. It didn't quite work, but I kept them in all the same. And the left side is darker indeed. I had to add vignette in compositor, because the lights were too bright in Eevee no matter how low I set them. I fiddled with the vignette for ages, but this is the best I could do. I'm looking forward to soaking up more lighting tips during the next stream. :-)
thecabbagedetective Thank you, Aaron - and you are correct, there are noise textures involved :-) Both on the backdrop and on the crane, which also has some scratches-meant-to-look-like-crumpled-paper. It didn't quite work, but I kept them in all the same. And the left side is darker indeed. I had to add vignette in compositor, because the lights were too bright in Eevee no matter how low I set them. I fiddled with the vignette for ages, but this is the best I could do. I'm looking forward to soaking up more lighting tips during the next stream. :-)
![]() shiennar it looks great Kate, I like the texture and the lighting comes very close to the original! 😊
shiennar it looks great Kate, I like the texture and the lighting comes very close to the original! 😊
Week 2 - Act 1
I had already shaded my car in the previous class, so I thought I would focus more on lighting and compositing, putting to good use all the tips that have been flowing through the forum. I think I'm starting to understand how reflections work in Eevee (big thanks to ![]() nekronavt for putting together those handy mini-tutorials). So, there are the new things I incorporated into my scene:
nekronavt for putting together those handy mini-tutorials). So, there are the new things I incorporated into my scene:
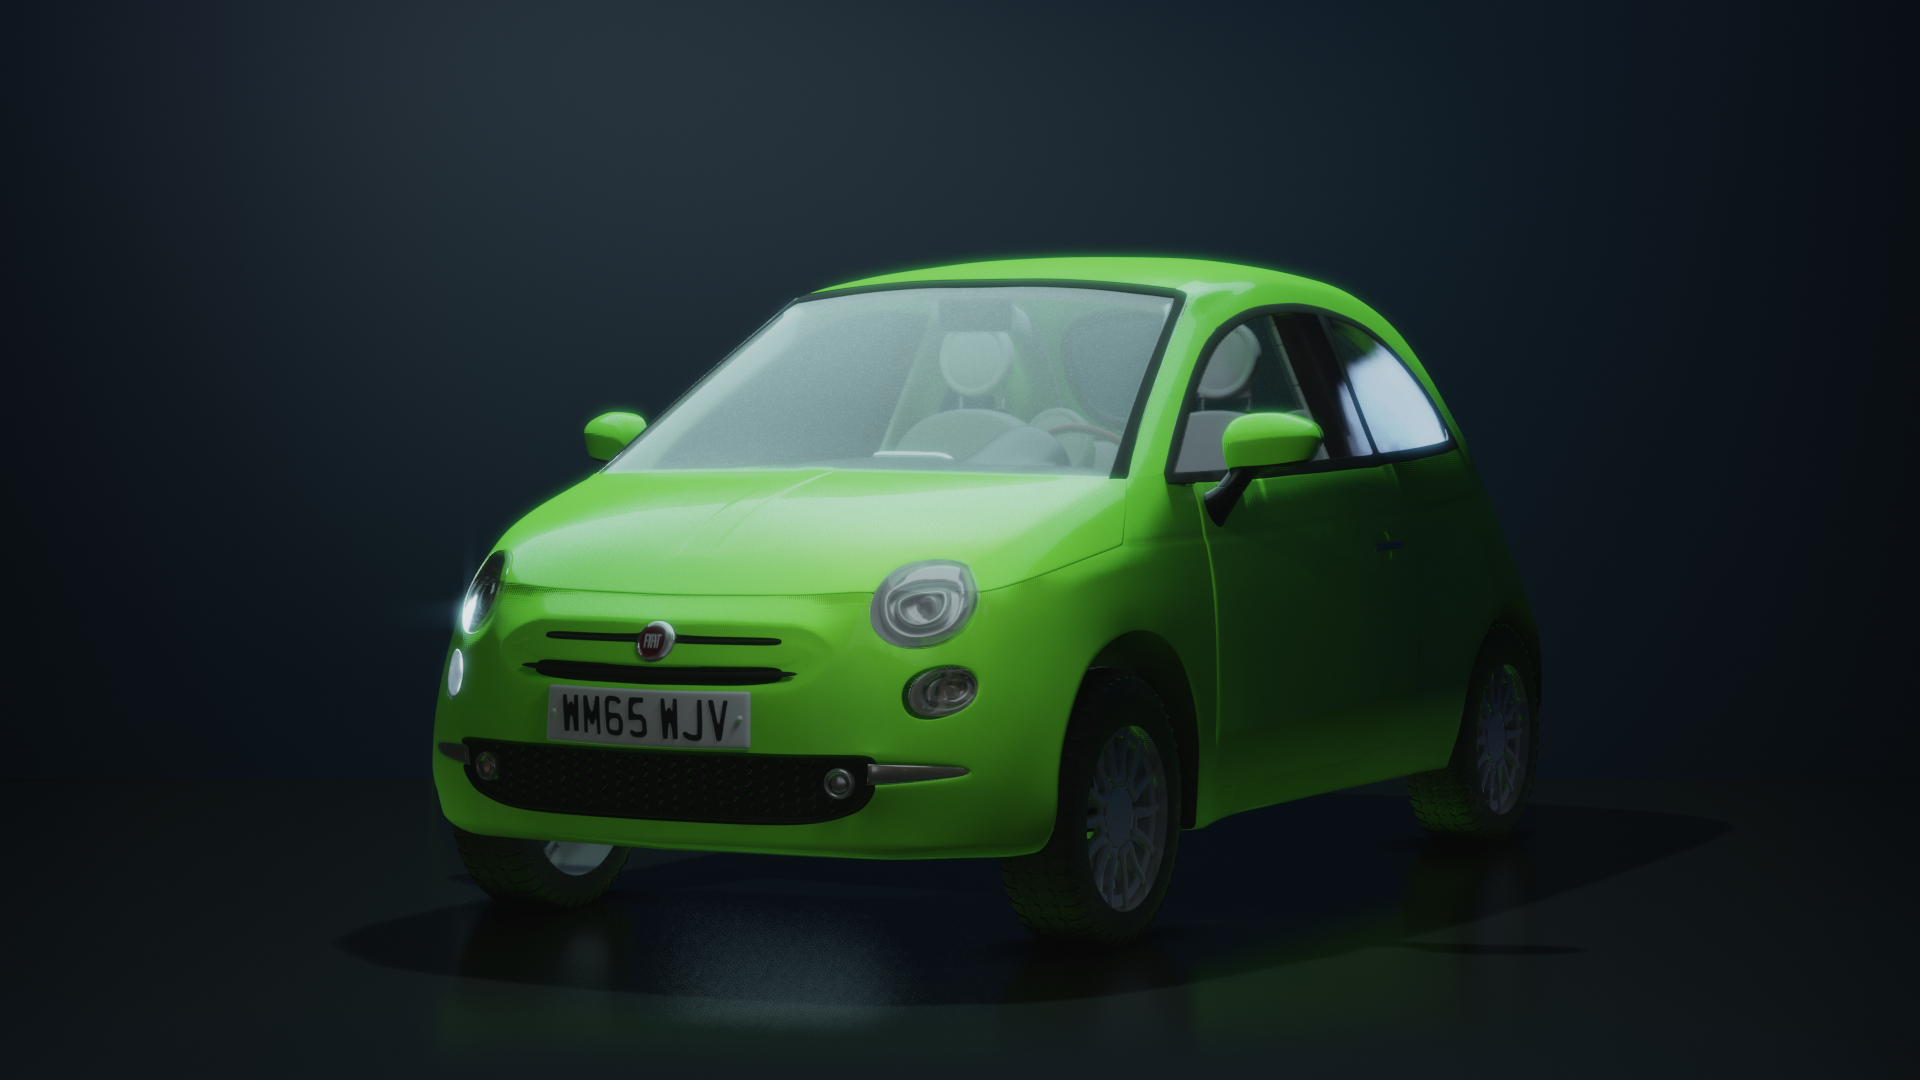
ssmurfmier1985 Thank you very much! I also made a red version, but ended up liking this more...
![]() shiennar nice presentation! I spotted a small artifact on the left side of the image. Probably some SSR glitch.
shiennar nice presentation! I spotted a small artifact on the left side of the image. Probably some SSR glitch.
![]() nekronavt Wow. They call me Eagle Eyes at work, but I've got nothing on you! Well spotted indeed, I'll try to fix it tomorrow (need to sleep away this nasty cold somehow...)
nekronavt Wow. They call me Eagle Eyes at work, but I've got nothing on you! Well spotted indeed, I'll try to fix it tomorrow (need to sleep away this nasty cold somehow...)
![]() bun-bun Thank you. :-) I've been watching your thread and you are progressing with your render nicely. I especially enjoy the warm yellow light on the car, it really suits it.
bun-bun Thank you. :-) I've been watching your thread and you are progressing with your render nicely. I especially enjoy the warm yellow light on the car, it really suits it.
And as a side note, I have updated my car render to get rid of that pesky lighting artefact. The solution was to slightly increase the size of the reflection probe. But, as I was trying different things, I ended up baking the indirect light multiple times and I noticed that even when I don't change anything in the scene, I get slightly different results in lighting. I guess the calculation still has its quirks...
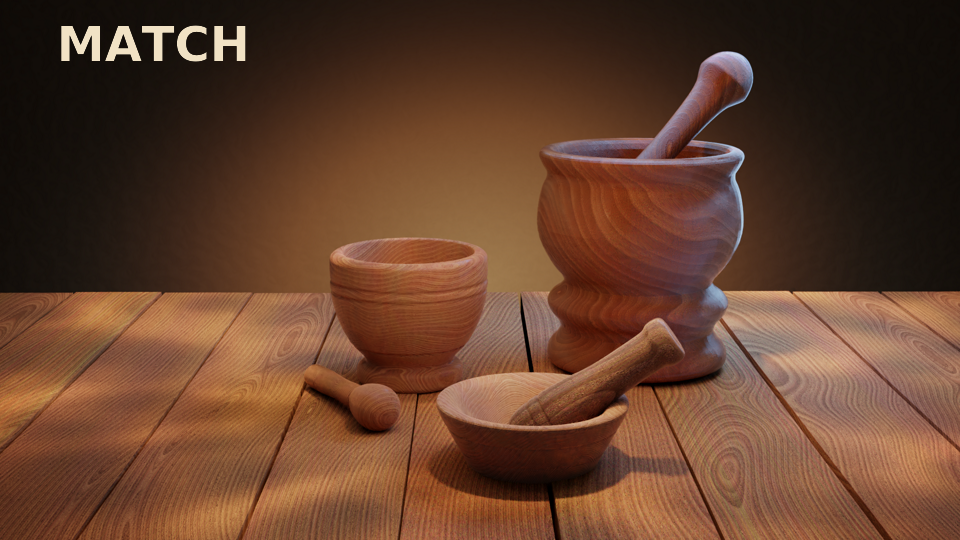
Week 2 - Act 2 (Lighting match)
I like to try several new things in every project, so this time I decided to have a look at procedural wood material (in the Shader forge) and lighting with textured lamps. I went for the shader course thinking that I had a decent understanding of the node editor and node wrangler. But holy cow, that course is packed with useful information! Three minutes in and my jaw was locked in a permanent gaping position. Changing coordinates by colour mixing? What kind of black magic is that? Can't say I understood, or remembered, everything, but I can surely recommend the course.
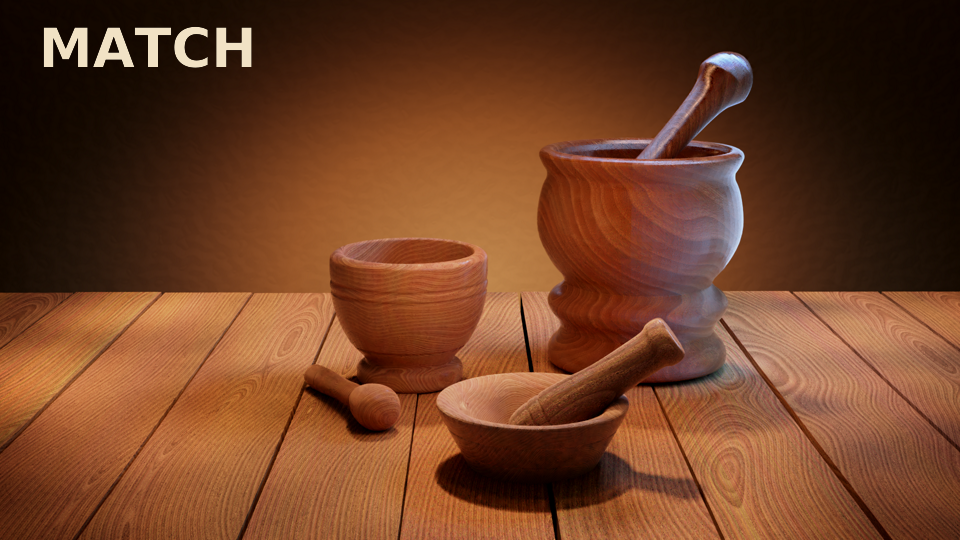
One sad downside of using the wood material was that I couldn't use Eevee for lighting. All I got was brown shiny... thing of a material. I still used 2.8 Cycles, though. I didn't get as close to the target as I thought I could, partly because my mortars aren't as visually interesting as the grinder, and partly because I ran out of ideas for what to try. So, here is what I've got.
The mortars I modelled myself, the goal image is from Pixabay.
EDIT: edited too many times...
 |
 |
![]() shiennar Lol, yeah that is kinda like black magic 😆
shiennar Lol, yeah that is kinda like black magic 😆
I think they look very much alike, looks great! Good modeling too 😊
![]() shiennar Good job! The shader looks fantastic! As do the models. Two notes on the lighting. The rim light doesn't reach quite as far in yours, notice the cool highlights on the beans, and the shadows in the goal image are barey distinguishable. There isn't anything nearly so harsh as your foreground object's shadow.
shiennar Good job! The shader looks fantastic! As do the models. Two notes on the lighting. The rim light doesn't reach quite as far in yours, notice the cool highlights on the beans, and the shadows in the goal image are barey distinguishable. There isn't anything nearly so harsh as your foreground object's shadow.
Nice color on the car, Katerina. On the color match exercise, I think I agree with John.
Thank you, pprocyonlotor and ![]() gradyp for your notes. I have played with the lights a bit more - the rim light now extends further, the shadows are slightly less harsh, and as a bonus, I was able to better show the procedural shadows on the table. I have updated the original post, but here is the comparison of both versions.
gradyp for your notes. I have played with the lights a bit more - the rim light now extends further, the shadows are slightly less harsh, and as a bonus, I was able to better show the procedural shadows on the table. I have updated the original post, but here is the comparison of both versions.
 |
 |
![]() shiennar oh wow much better! So cool that a couple of little tweaks of the lights can improve the look of a render so much. Awesome work this week Kate 😄
shiennar oh wow much better! So cool that a couple of little tweaks of the lights can improve the look of a render so much. Awesome work this week Kate 😄
Matching both? heheh :D I think this one is better, but the rim does seem a bit stronger in this one than in the original. and maybe just a bit more forward?
Still, it looks great!
![]() gradyp Yes, they are both matches. :-) The rim light is tricky here. If I want to extend it further, I either have to increase the intensity or make the lamp smaller. This will show up as stronger rim light on the areas that were already lit. I think the light you see on the beans is not actually the rim light, but an extra light thrown in for a good measure. But since my objects and materials are not directly comparable to the original, I don't think I'll be able to get a perfect match. (It's difficult to say, but the top of the grinder might be metallic, in which case it will behave differently than wood when lit.)
gradyp Yes, they are both matches. :-) The rim light is tricky here. If I want to extend it further, I either have to increase the intensity or make the lamp smaller. This will show up as stronger rim light on the areas that were already lit. I think the light you see on the beans is not actually the rim light, but an extra light thrown in for a good measure. But since my objects and materials are not directly comparable to the original, I don't think I'll be able to get a perfect match. (It's difficult to say, but the top of the grinder might be metallic, in which case it will behave differently than wood when lit.)
![]() shiennar Nice update!! I had a similar experience with the exercise, wondering whether certain effects were achieved with one light or multiple lights, and also having dissimilar geometry which made it tricky to know whether I had imitated the lighting accurately or not. Either way, you came away with a beautiful render that has the same feel to it. Good work! Edit: Also, upon closer inspection, the drawer and drawer handle in the source image are casting a pretty harsh shadow so I was wrong on that point.
shiennar Nice update!! I had a similar experience with the exercise, wondering whether certain effects were achieved with one light or multiple lights, and also having dissimilar geometry which made it tricky to know whether I had imitated the lighting accurately or not. Either way, you came away with a beautiful render that has the same feel to it. Good work! Edit: Also, upon closer inspection, the drawer and drawer handle in the source image are casting a pretty harsh shadow so I was wrong on that point.
I distinctly remember that this was supposed to be a quick project since I need to work on other things as well. So, naturally, I made another version of this. The rim light was bothering me (mainly the fact that it was showing on both sides of the mortar). I'm going to update the original post once more, and as a bonus for your patience, I'm going to create a gif that shows the individual lights being added. I'll put it in the gallery project once I finish writing this week's blog post.