Watched the video and very interesting to start learning blender 2.8, I have a bit of experience in modeling with blender already but using this chance to start exploring and learning how to work with blender 2.8
WEEK 4 - Learning more - Dragon head sculpt
Well was a busy week so only had today to work on the homework, since sculpting is what I have less experience when modeling decided to go and try sculpting a mosnter from scratch, originally I planned to do the whole body but was jsut no going to happend, so limited myself to the head, and tried playing around with

a few things.The model is mostly sculpting, but used poly modeling for the tetch the tongue and the little membrane.
I also planned on using particles to make like a feathery mane on the back or put some scales with curves and array but was not happy how it looked, still was nice to try may use them in the future.

The quills/feathers done with particles
I do need more time to get used to sculpting, specially from scratch
Stuff like theeths and spikes, are a lot easier to do on poly modeling, and maybe use multirez to sculpt detail on them later on
WEEK3-SCULPTING MELVING EXCERCISE
Tried my hand at thesculpting homework, sadly there was a ton to do this week and had some problems with my hardware but things working now, sadly there was no time to try the extra, but will try have it done before the stream if I find the time.

For Melvin I decided to sculpt the body but I made the fangs and honrs with poly modeling and positioned them, used blender 2.79 for the sculpt and render
WEEK2-SPIRAL STAIRCASE
I went for a victorian spiral staircase, working a lot with modifiers to try get things done with them as much as possible, I started doing the volumes with more basic shapes to get the overall look and proportions and after that I sketch up the details looking at references, and started putting them in.
Ended up cleaning things a bit, and adding some end cap meshes to close things up, so I can adjust the number of steps and blender will do the work, also adjusted the spiral vertical bars to not use so many polygons.
One thing I made use of was vertex groups, this way I could put objects I had separated before inot a single entity, and add a modifier that only affected a part of these, sadly this does not seems to be working very wellwith the solidify modifier at the moment.
Also went a bit overboard playing with lights and animation to get a nice scene for it.
Here is a Turnaround animation for the spiral staircase, I should have used less frams so its a bit heavy: Spiral Staircase Turnaround
Blender file: Spiral Staircase blender File
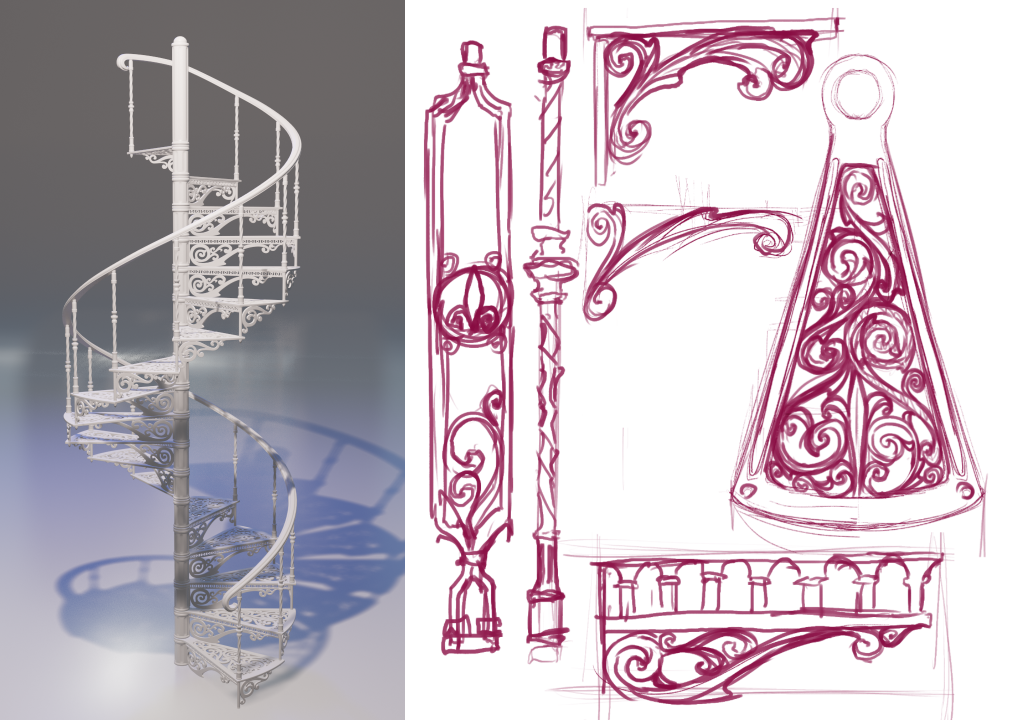
Final render of the stairs with the sketchs I used for making the patterns based on references I was looking at.
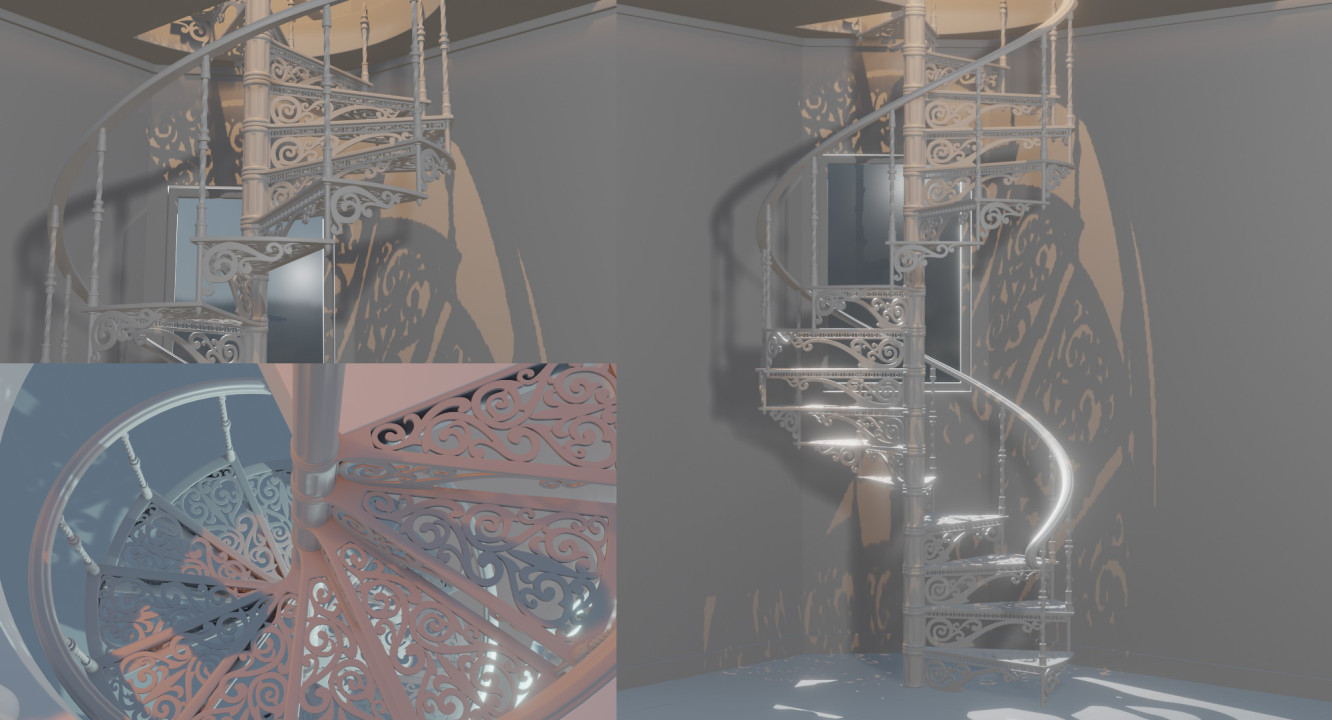
Different views on a little scene I made to test out EEvEE rendering and the different options, and to get a good look at the ful ldetails on the stairs
Observations:
-The lack of being bale to see the effect of modifiers on edit mode made this much harder thna I expected
-For wirefrime view apartently you can turn on hidden wires on the views menu.
-Wonder if the developers may add the option to use a modifier on a collection, that could be very interesting and save time on several items sharing modifiers, but not all of them, maybe just add a "collection modifier" modifier on each object on the colection and you can change its order on particular objects.
-The end and start cap on the array modifier are a bit weird, I had to put the start cap on the end of the section and the end cap on the start, thats not very intuitive.
-Open GL render to get the turnaround on the viewport worked very quickly and with nice results, also no crashes, but since I have subdivision surface do a extra subdivision on rendering, I did a full render of the turnaround and crashes 3 times in the process, lucky I was rendering the image frames so was not a hugel oss, but its still very unstable atm.
-Added a glass material, and the default option is for it to cast shadow and blocks all the light, had to change the option from opaque to alpha blend in options to get he light trough.
WEEK 1-MORNINGSTAR
So I went wiht somehting simple, a morningstar with primitives, the spikes where done quite simple with cones and cilinders, first selected the sphere and used the cursor to selected to create a cone at the center ofthe spere, then grab it in z to take it to the top, selected this and set the transformation to the 3D cursor, that way I could rotate the spikes around the sphere surface easilly.
I planned to do the chain links with a torus by adjusting the segments but sadly the torus is not working in the current release of 2.8, so I used a cube and a bolean to punch a hole trough it with a smaller cube, after that is only a matter of positioning the links.
things I learn
-The outline option on the shading is quite nice, too bad you can not set the line width
-on evee you have to turn on screen space reflection for glossy materials to reflect things, otherwise it shows no reflection
-the viewport render is now under the view menu -> open gl render
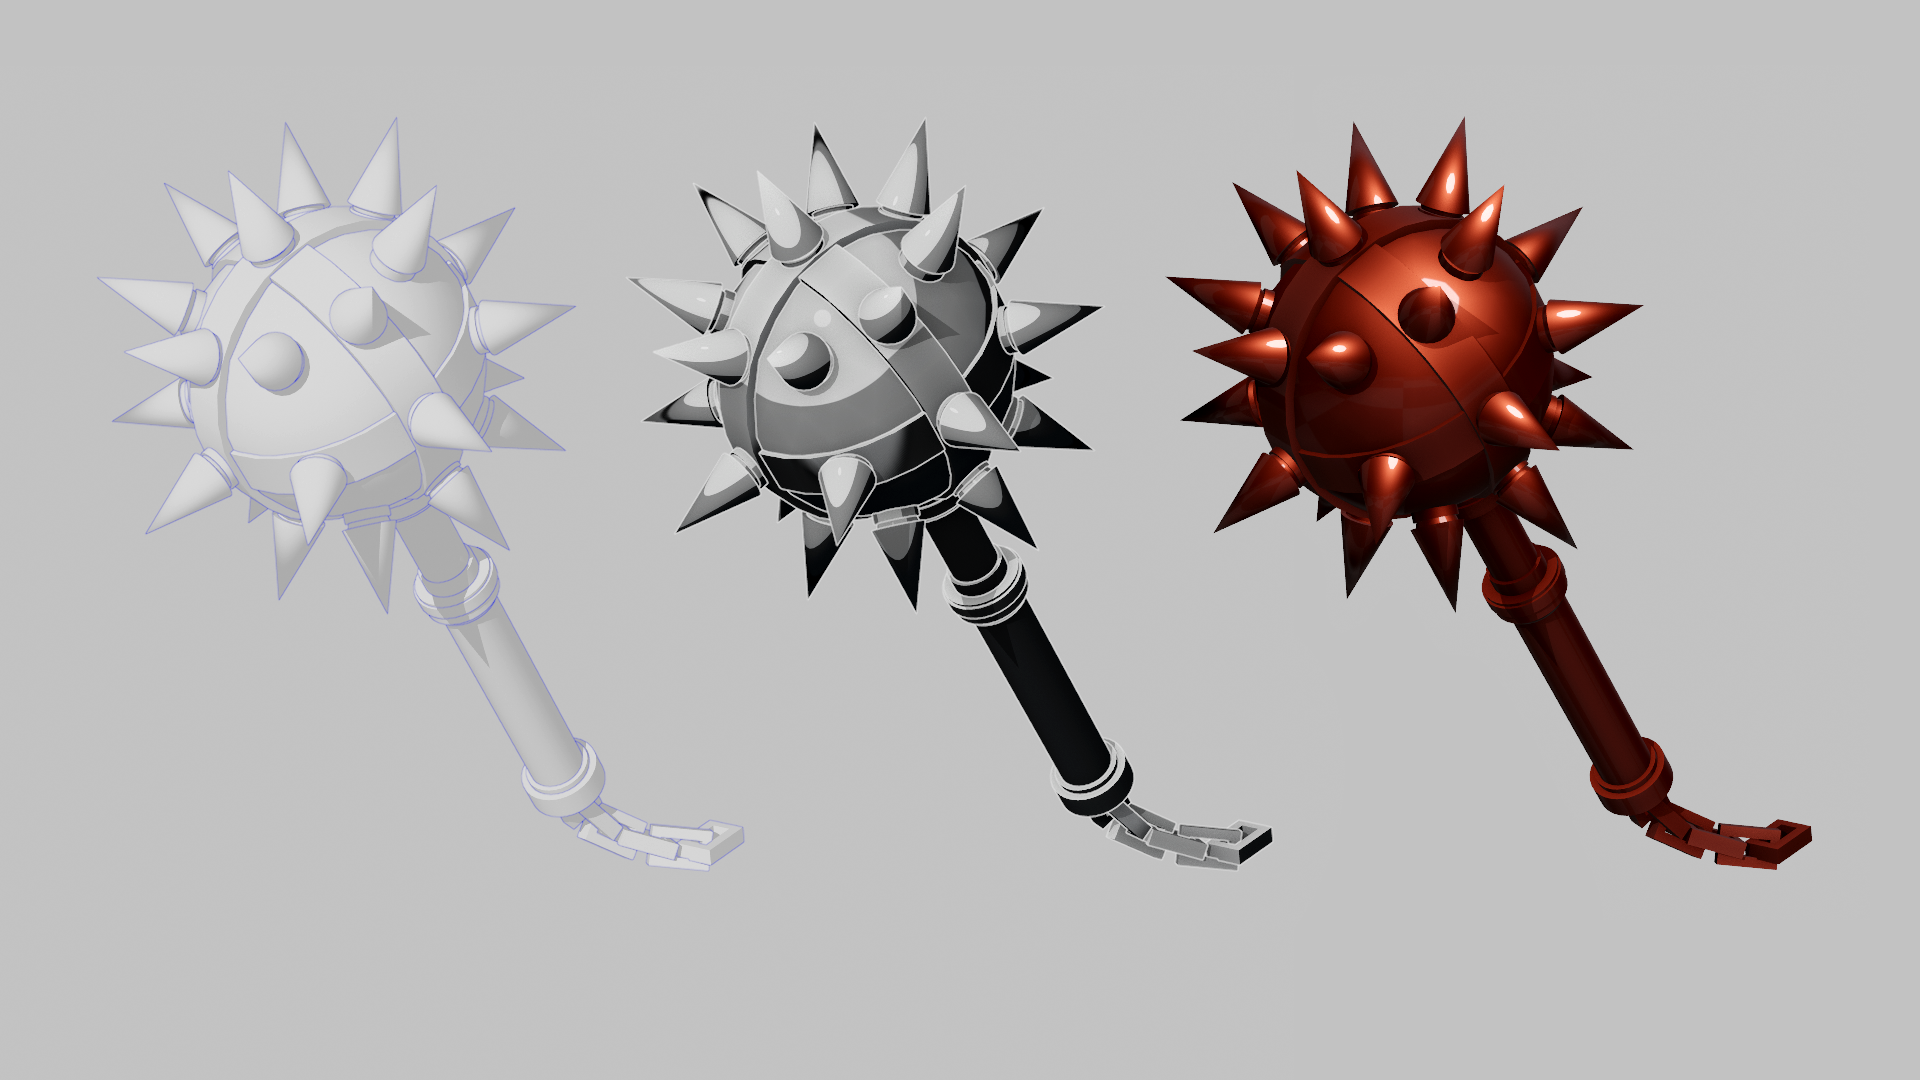
I did open gl render of 3 different matcap settings, flat with blue oulines, comic style matcap with white outlines, and the red metalic matcap (I edited them togheter in clipstudio)
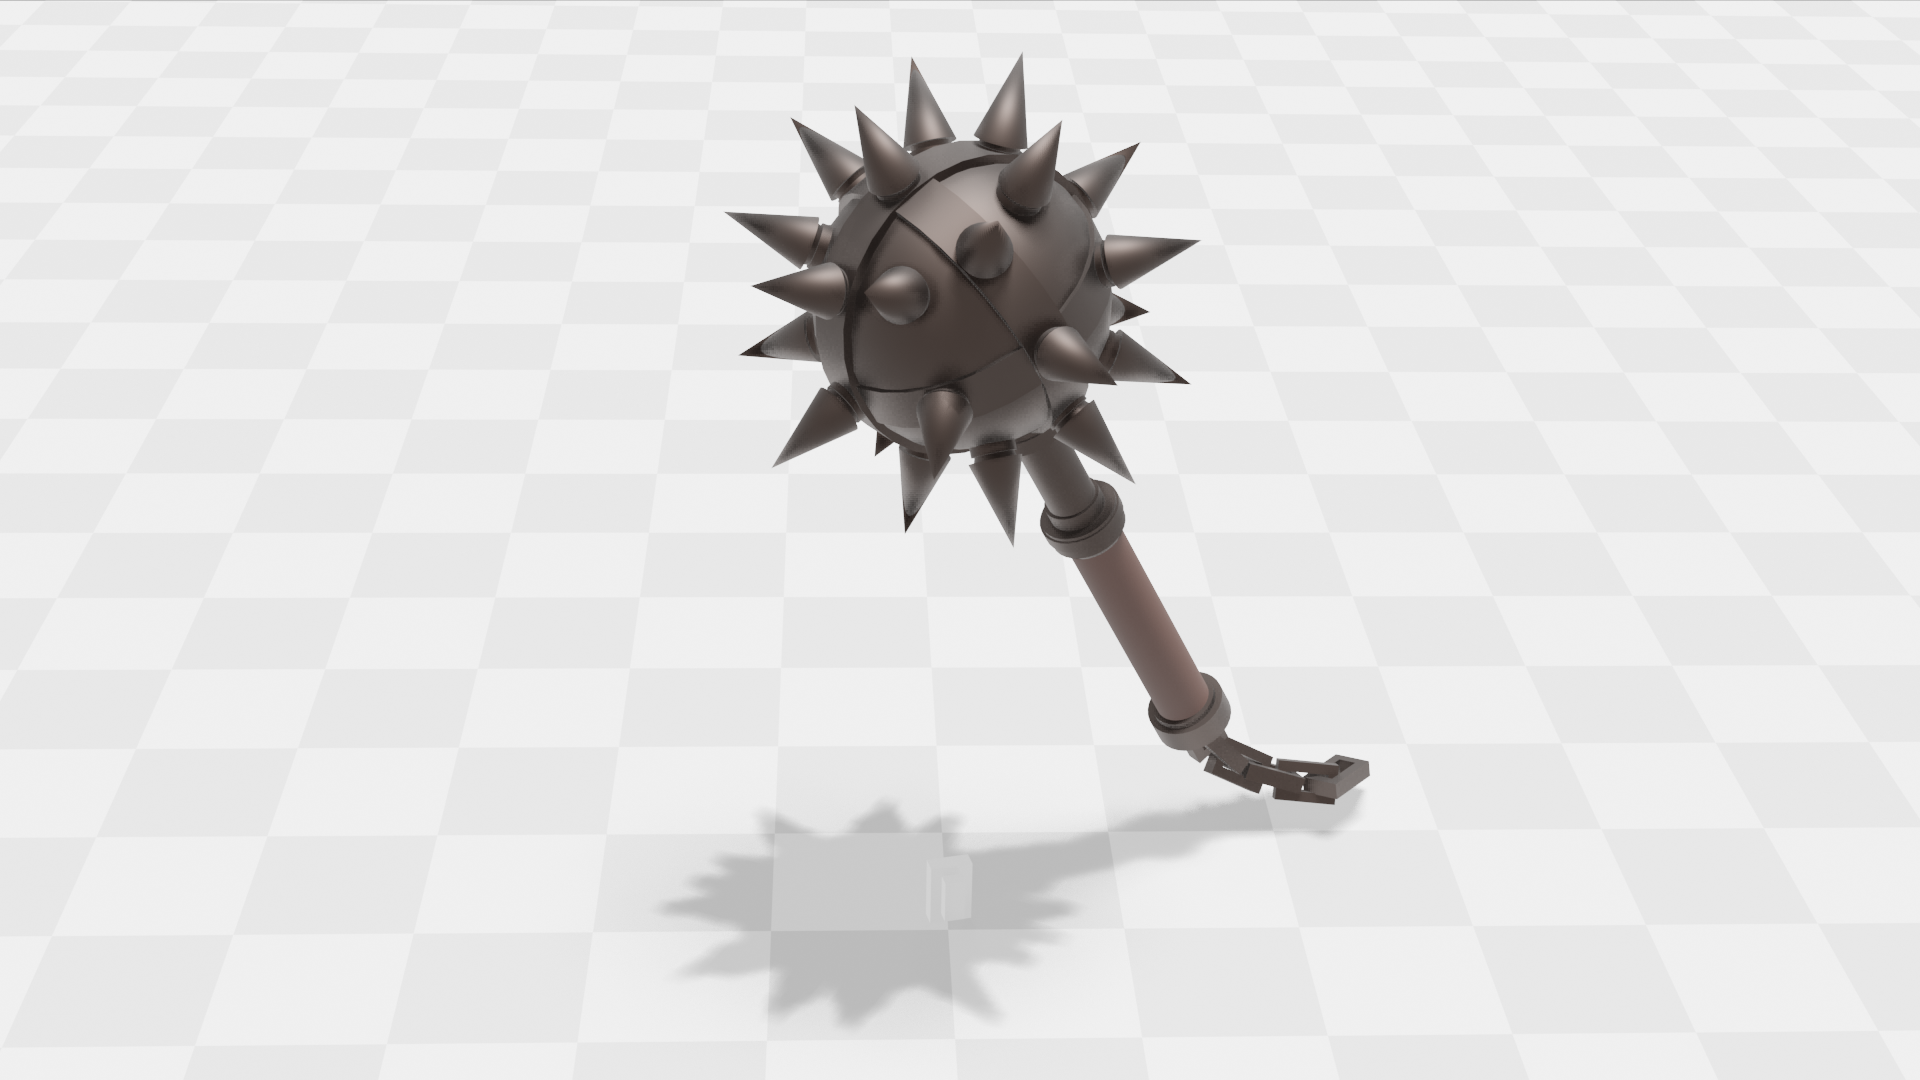
Also did a render on evee using a simple metalic material and a second material non metalic for the handle, for the floor I used a plane and on texture just set checkered and adjusted scale
Wow, this looks super cool! Amazing showcase of what you can do with simple primitives and the power of eevee. Well done 😄
Okay I know that you only used basic materials but that looks really bloody nice, it's quite impressive.
I'm kinda where William is on this... Doesn't look primitive at all. Amazing model.
You guys keep saying Eevee, Eevee. You're going to pressure me into downloading 2.8, aren't you? lol
![]() silentheart00 ... Must. Resist. Download. Too. Many. Bugs yet. Resist.
silentheart00 ... Must. Resist. Download. Too. Many. Bugs yet. Resist.
Thanks, I m very glad it was to your liking, it really does not compare to some of the more complex entries I have seen, this one looks good because is a basic shape so was easy to make with primitives, one thing I forgot to note was the use of the autosmoth to let some parts look sharp or flat, that really helped.
Wonder if they will have the matcap as materials set ups too, that comic like matcap one looks like it has potential for osme nice stuff combined with the outlines option.
As for 2.8 it still too unstable the program crashed on me 2 times by doing very simple stuff, and was not even able to add a torus, is good to start getting used ot the new one, it has some very nice tools, but I would not do any serius work on it yet.
![]() pffsfs Take the 2.8 plunge, Scott! The 2.79 pool will still be open if you don't like the water 😀
pffsfs Take the 2.8 plunge, Scott! The 2.79 pool will still be open if you don't like the water 😀
![]() n647 Wonderful job! And welcome to the class. I really like you primitives model and also the angle of exploring Blender 2.8's fancy new viewport options. Thanks for sharing tips as well! A+ in the ol' grade book.
n647 Wonderful job! And welcome to the class. I really like you primitives model and also the angle of exploring Blender 2.8's fancy new viewport options. Thanks for sharing tips as well! A+ in the ol' grade book.
@theluthier Thanks, this is a great chance to start getting used to 2.8 and be ready for the switch when it releases, also to refresh some stuff, hope the tips I post are of some help to some.
![]() n647 It sure does! Learned some things by reading your detailed description of how you made this 😊 especially about the reflections that you have to turn on screen space reflection.
n647 It sure does! Learned some things by reading your detailed description of how you made this 😊 especially about the reflections that you have to turn on screen space reflection.
Ok starting homework for week 2, tryng to build mostly using mods, I decided for a spiral staircase so I can test using different mods to do the heavy lifting.
My first goal is getting the basi shape of the stair right, after that to start adding detail to the steps and then build a simple scene around it.
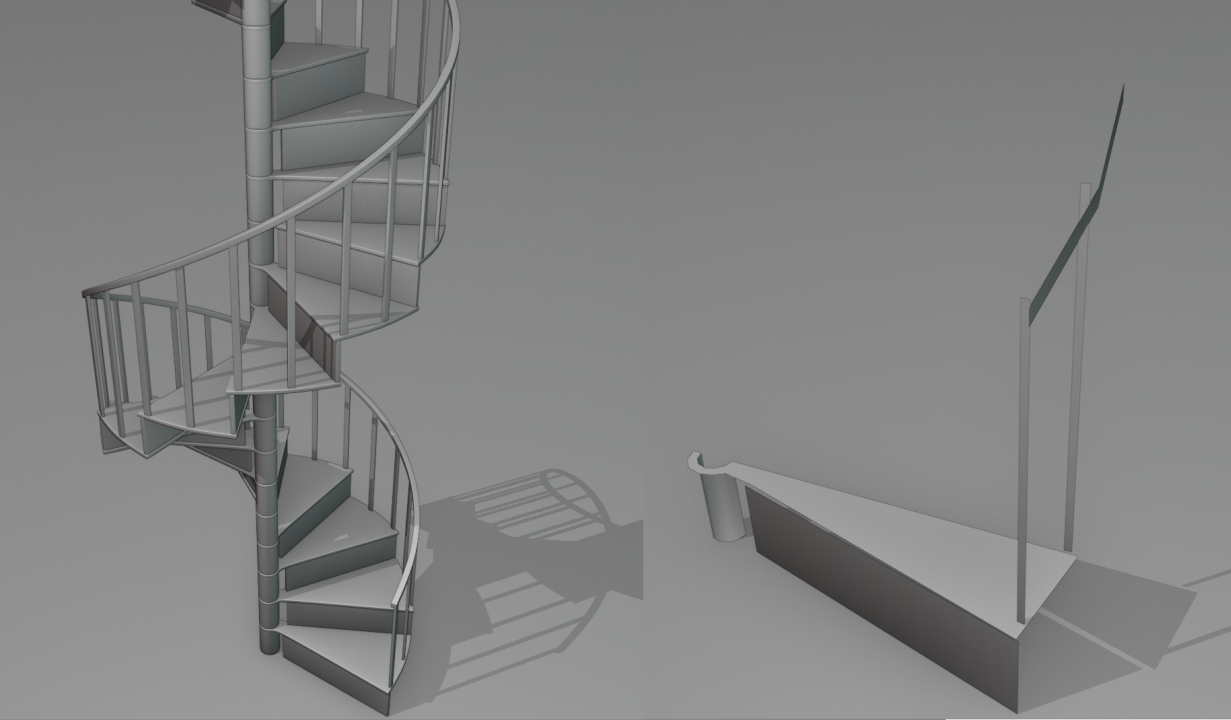 Here is a viewport render using matcaps of the stair with modifier ON, and on the left with the modifiers turned OFF
Here is the blender file for this version: spiral Staircase V00
The modifiers used where, mirror, solidify, bevel, subdivision surface, array
For the handrail I has no mirror modifier and had to change the order a bit so the array could merge the segments properly, turning on the merge option in the modifier.
for the array I used a empty as a target object, this empty was raised in the Z axis the height of the step, and rotated 30degrees in z to rotate the steps accordingly.
By putting the bevel modifier before the subdivision surface and setting it to angle, I could procedurally create holding edges, is not ift for every situation but can help sometimes
May need to use a curve for the handrail to improve the shape, since it has no vertexs before startings to guide it is does not follow the curve that well
Being unable to see the effect of the modifier on edit mode made htings quite difficult to work with, as did the lack of a proper wireframe mode.
![]() n647 Good work! I feel you on the no modifier preview and wireframe fronts. Hopefully that'll get ironed out soon, but it's kind of a fun challenge to predict what'll happen to your mesh before you tab out. Looking forward to the end result.
n647 Good work! I feel you on the no modifier preview and wireframe fronts. Hopefully that'll get ironed out soon, but it's kind of a fun challenge to predict what'll happen to your mesh before you tab out. Looking forward to the end result.
![]() n647 Thank you for explaining your process with the modifiers! It's so helpful to learn more about how they work, most of them are still a mystery to me. Gonna dig through your blend file throughout the week to see for myself. Last but not least, looks very good so far! Very curious to see how this will evolve 😄
n647 Thank you for explaining your process with the modifiers! It's so helpful to learn more about how they work, most of them are still a mystery to me. Gonna dig through your blend file throughout the week to see for myself. Last but not least, looks very good so far! Very curious to see how this will evolve 😄
![]() n647 Fantastic example of modifier-based modeling! I had to open your file and snoop around. Awesome job. I find modifier wizards to be particularly clever modelers 🤘
n647 Fantastic example of modifier-based modeling! I had to open your file and snoop around. Awesome job. I find modifier wizards to be particularly clever modelers 🤘