Jonathan said jump so I'mma jump!
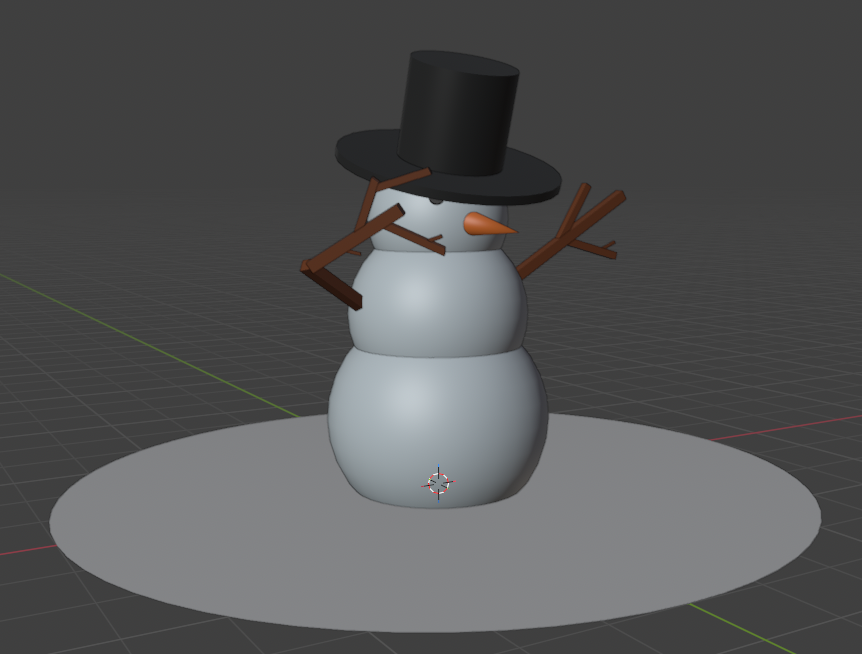
06/05/2026 - Snowman
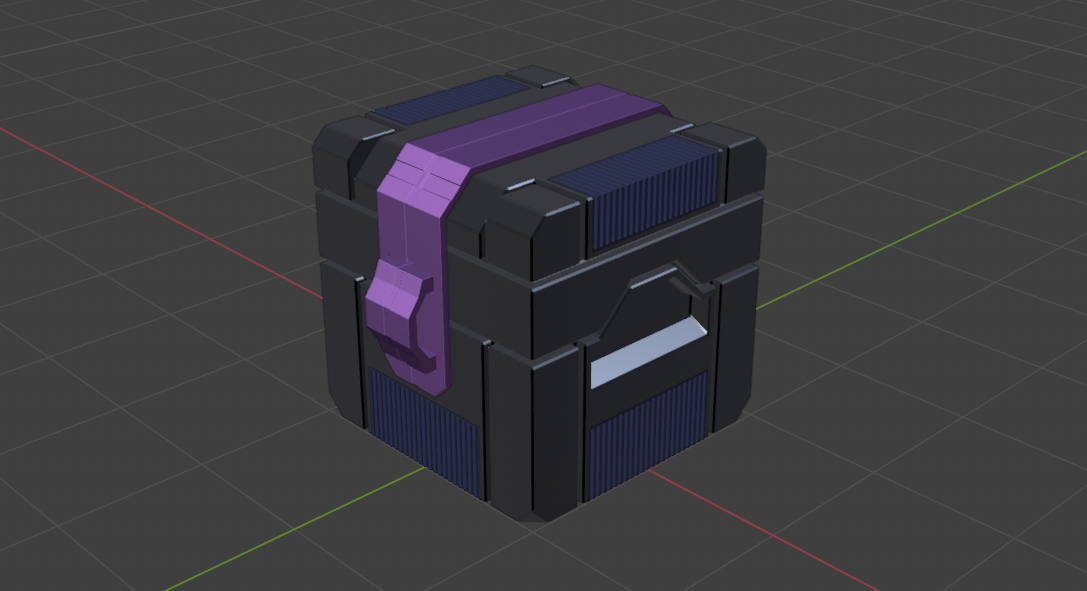
06/06/2026 - Sci-fi Crate
As a side question, should we keep updating the original post, or is it fine to keep replying to the original post when we have new models?
Looking good.
You can just keep replying to your post and keep track that way.
06/07/2026 - Soccer Ball
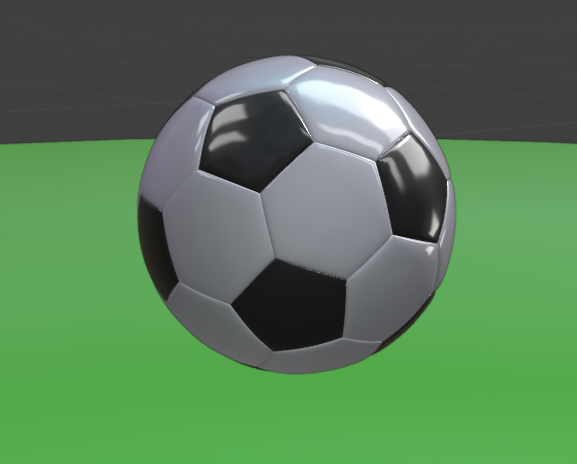
I experimented with some of the viewport shading options. Never realized just how many choices we had! Also tweaked the roughness a bit to get that "new ball" sheen. Looking forward to the next one!
06/07/2026 - Basketball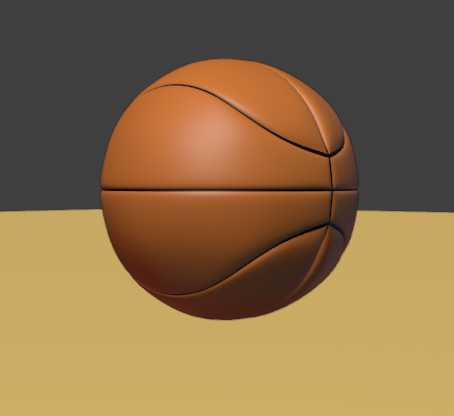
I tried a bunch of stuff to model this one. First I tried an ico sphere like we did for the soccer ball. That... didn't quite work mostly due to the inability to cut out symmetry/mirror.
Then I tried a UV sphere rotated on its side. I got closer with that, but I ran into problems once I tried to bevel it.
I decided to take a look and see how others approached it. Turns out everyone just tries it with a subdivided cube, so I gave that a shot, and we made some progress! I was able to combine that bit of knowledge with the lesson on the soccer ball to get this result. I used the "make spherical" option to try to round it out, and I got further, but ultimately I still had to manipulate some vertices directly to get closer to a rounded basketball.
Something else that weirded me out was when I was using my bevel modifier, it affected the shading/materials if I went too high despite the geometry looking fine. Weird, but I'll just take that as a lesson learned.
Onto the next!
Cool!
This one's a lot harder than the soccer ball, especially without the guidance, but you did well.
Not sure what happened with the Bevel specifically, but if you change the Topology (which the Bevel does) and or position of the Vertices, that will often affect the Shading.
Hah it wasn't as bad as you'd think! It was mostly the mirror modifier doing all of the work for that one.
06/08/2026 - Golf ball
I decided to finally round out (hah!) the rest of chapter 1 before going too much further by modeling a golf ball. I thought it would be easy. Boy was I wrong.
I spent roughly two hours looking at golf balls, noticing that okay sure it's not just hexagons, there's pentagons mixed in there, and trying to figure out how to get the geometry to work. I wasn't really able to just grab all of the hexagons because, well, the same reason we couldn't in the soccer ball video, so I tried following that technique multiple times. I tried varying the hexagon size, tried doing slightly different patterns to see if I could fudge it to no avail.
Then I figured: "Okay let me just look this up".
To solve it you had to start with an icosphere, (I had that part), subdivide it a few times, (I also had that down), and then break the geometry by applying a subdivision surface so you could just select all of the newly created hexagonal faces. :|
So, I did that. Once that was done it was pretty easy. Dissolve the center vertices for all hexagons and pentagons, scale the faces inwards a smidge to create that divot, and add a bevel modifier to create those flat-ish faces between the shapes.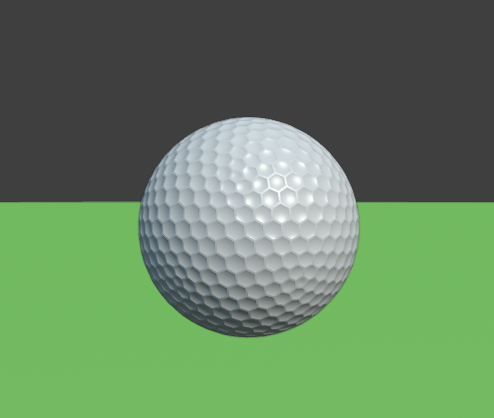
All-in-all I'm happy with the result, just annoyed at the trick I had to learn to do it. But hey! New tool in the toolkit! If you're having trouble selecting a ton of faces that you feel like you should totally be able to select, give a subsurf apply a shot!
Though that leads to a question - I tried multiple levels of subdivision and was unable to create the hexagonal structure I needed. I always had too few/too many faces. What does the subsurf modifier do differently from a standard subdivision that makes this possible even though it should be technically at the same level?
Hi Chris,
Good question!
As an Icosphere is made of Triangles, we can just look at 1 Triangle. The Subsurf Algorithm take the Center of a Face (in this case the Triangle) and connects that to the Centers of the Edges that make up that Face. The 'normal' Subdivision, 'cuts' the Edges in half and connects those:
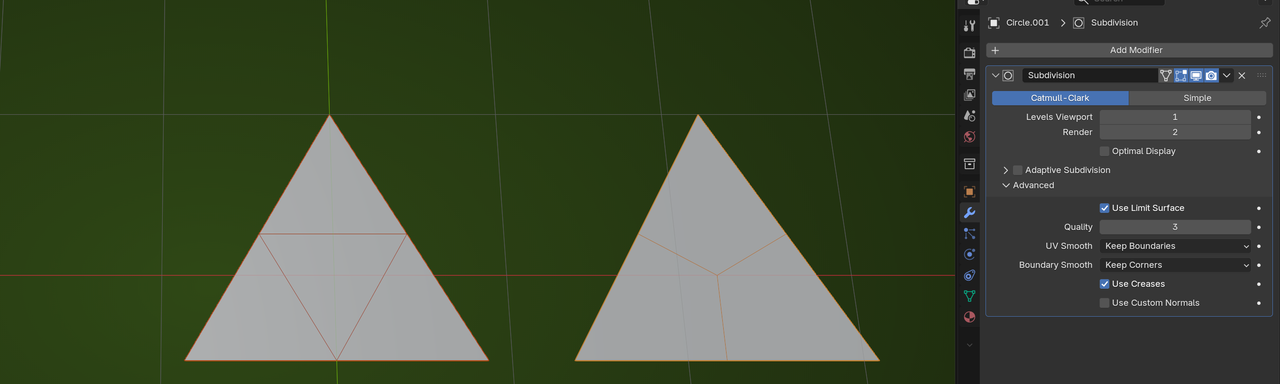
(The Catmull-Clark Algorithm also moves the original Vertices towards the Center of the Face, to 'smooth' the Mesh, but in above example I deliberately left that out; Advanced > Boundary Smooth > Keep Corners. Hope that doesn't create extra confusion.)
If you take a Quad, both methods will yield the same result.
Thanks Martin! That clears a ton up. Would also pretty directly explain those hexagons. I guess more via coincidence then huh?
Makes me wonder how golf balls got that sort of surface in the first place... I guess I have a rabbit hole to dig into later.
But at any rate, let's keep going!
06/08/2026 - Hard Drive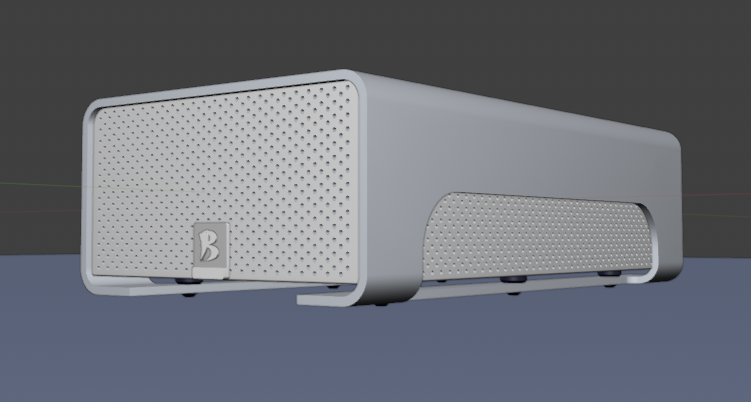
Ho. Lee. Crap. This was a tough one.
I actually tried it myself at first. Twice. I managed to get the shell and the inner body as their own separate parts. I started figuring out the solidify modifier as a way to solve for the shell and I was trying to use some booleans for the annoying edge, and the edge underneath. (And it was working! Sorta!)
The problem came in once I tried the numerous hole booleans.
I think my issue was because I had set up the inner body based on the outer shell, I created some ngons since I extruded that outer face. I wanted to avoid having to precisely match them up for some reason so I paid for it later. Turns out it was significantly easier to just... model them separately and just match it up. Who woulda thunk! The tl;dr is that the booleans wouldn't boolean. Though even in the actual lesson he wasn't kidding when he said it was expensive. My poor laptop was struggling a bit.
I also wish I'd considered beveling the internal edge before seeing it like Jonathan did. But that's also in the mental vault now!
At any rate, after doing that, the brain is fried. I have some smaller ideas I want to tackle here and there since this one was pretty huge, but otherwise we're going to keep on moving!
Great progress! You're making big strides and kudos for trying stuff on your own first. 👍
06/09/2026
I tried modeling a CD + case!
I wanted to try pushing some of the skills I've been getting on a non-tutorial novel thing. So I looked up some CD dimensions and tried modeling that.
After nailing that down, I realized it was kinda easy... so I pushed a bit to try making a case for said CD. After all, you wouldn't just leave your various disks just lying out in the open... right?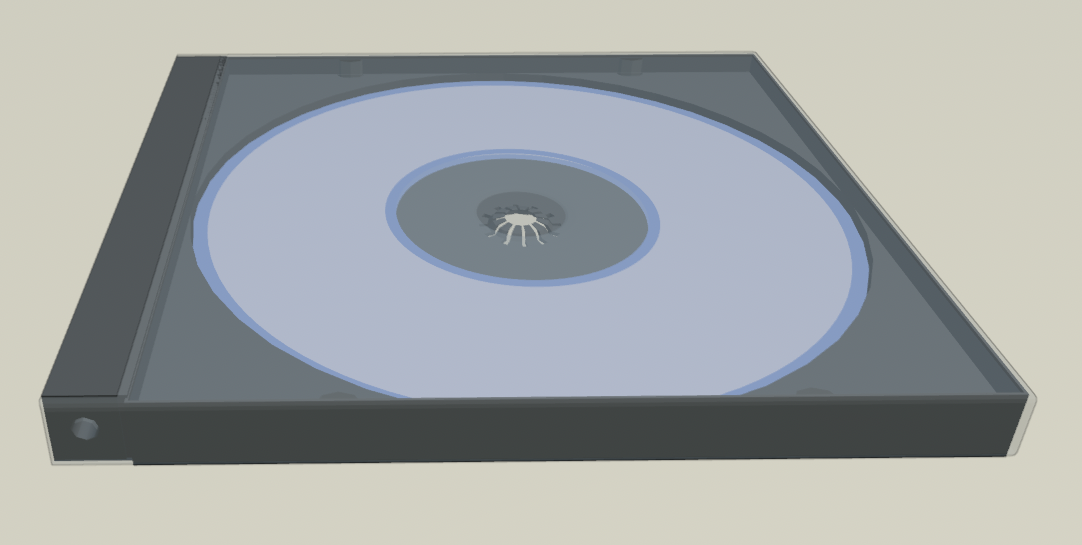
Turns out the case was a good challenge! There was a lot going on that was worth breaking down. The internals are a little odd as well since it, yknow, has to hold the CD. I also ended up modeling a clear cover to go over the case, and placed the CD in.
It was a good learning experience, modeling multiple pieces with some surprising complexity, and a lot more problem solving than expected. (those notches were something alright), and I'm pretty happy with how it turned out. I ended up mostly using bevels to create some of the geometry with a bevel at the end to soften those edges. I had to use mirror modifiers multiple times and then attach everything at the end, which was also neat.
I think I actually wouldn't mind trying this one again a few months down the line to see how I progress, but I digress. Onwards to the next challenge!
06/10/2026
Two things this time around! I've been continuing through the fundamentals of mesh modeling course.

Finally made it to the subsurf modeling section! Followed along and made this coffee cup. It wasn't too bad actually! I want to go back and experiment with different cups. I'll be doing that in the next few days.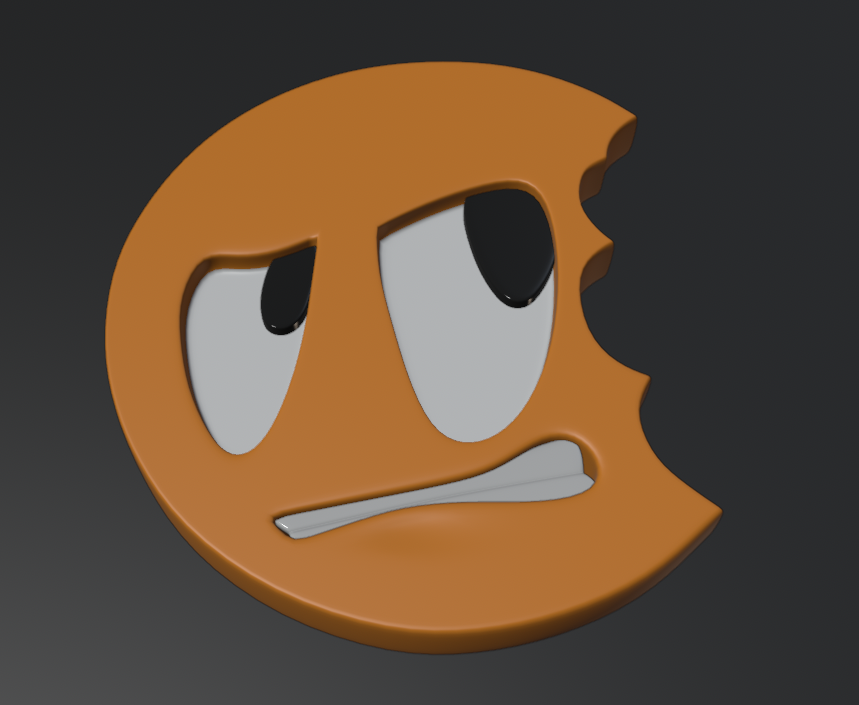
I also followed along and made the cgc logo! There was a TON of good learning in this one. It was great to see the edge control techniques in action. I'm also going to try this one without assistance before hitting up the final project as well!
All in all some solid learning. We picked up some subsurf modeling and edge control techniques that were honestly outright fascinating. My brain is absolutely fried though!
Those are excellent results Chris!
Keep practicing! That 'brain-fry' is totally normal; it's part of 'the 4 stages of learning'.
1. You're totally ovewhelmed.
2. You think you get it.
3. You realise that you still don't get it. (This is where a lot(?) of people give up. Don't give in to that.)
4. You really get it.
There is probably going to be some ever-decreasing bouncing between 3 and 4 (you'll never know everything), but that's it in a nutshell😉
Nice progress Chris! Only comment I have is on the basketball, the curve that crosses the mid line is a bit too pointed rather than being a curve. It's sligh, but just enough to not quite look right.
MMartin - Got it! Power through the brain frying. No big!
@Grady - Noted! I'll have to revisit it for sure after I learn a bit more. I think I'm starting to get the idea for how to resolve that. Thank you!
06/11/2026
As a warmup before revisiting the logo from scratch, I decided to try first modeling the coffee cup without assistance, and to complete it I also added a coffee plate. I didn't want to get too fancy with the plate, but I think it turned out well enough.
I'm starting to put a little more energy into my topology instead of "just trying to make it look like the thing". For the models the edge flow seems about right, though for the plate I feel the model got a little dense near the center. Though it does match the edges that I wanted, so maybe I'm just overthinking it?
REALLY glad I learned about grid fill in the course. Made working with those ngons on the cylinders much less of a headache!

I see plates like that where I work all the time... 2 things.. they don't really rise up before sinking down.. they just drop down. There might be some that do that though, so that's not too big of a deal. What would be more of a problem is that the cup should fit within that space. So the space should be wide enough to fit the cup. Every cup/saucer I've ever seen, the cup fits inside the ring.
Alright! Round 2 of the cg cookie logo! This time I did it without any guidance whatsoever. (Besides the reference I guess)
06/11/2026


So this was mostly an exercise in figuring out the topology, and boy was that an adventure!
Some lessons learned:
- I initially set up the mouth to have the shape of the final mouth object. Big mistake. I realized after the fact that I could have simplified the geometry significantly had I avoided that. I also would have been able to reduce the number of edge loops going between the eyes from 2 to 1. I also could have completely avoided that edge munging at the bottom left of the mouth. Thankfully it doesn't show in the actual geometry, but it's definitely going to live rent free in my head.
- The right side of the cookie, the topology ended up flowing in an interesting way. I wasn't sure how Jonathan managed to force the loop cuts to stop along each sharp point of the cookie and mine ended up actually flowing through the entire geometry! (Check the top-right of the cookie) I was able to work around the unexpected smoothness by doing some sharpening along the points, but I need to revisit that.
- I ended up having an ngon initially once I finished the forehead. I initially tried to work around it by moving the ngon in an area away from the rest of the geometry. (And that worked!) Then after counting vertices for ten minutes I realized: "Wait, if I just cut out one of these cuts from the edge entirely it just flows through the current face cleanly! And so I did.
- I created more 5-sided poles than I would have liked, but I went out of my way to try to avoid making a 6-sided pole. Easier said than done!
All in all one heck of a challenge. Following it in the course was exhausting, but doing it solo is a completely different beast!
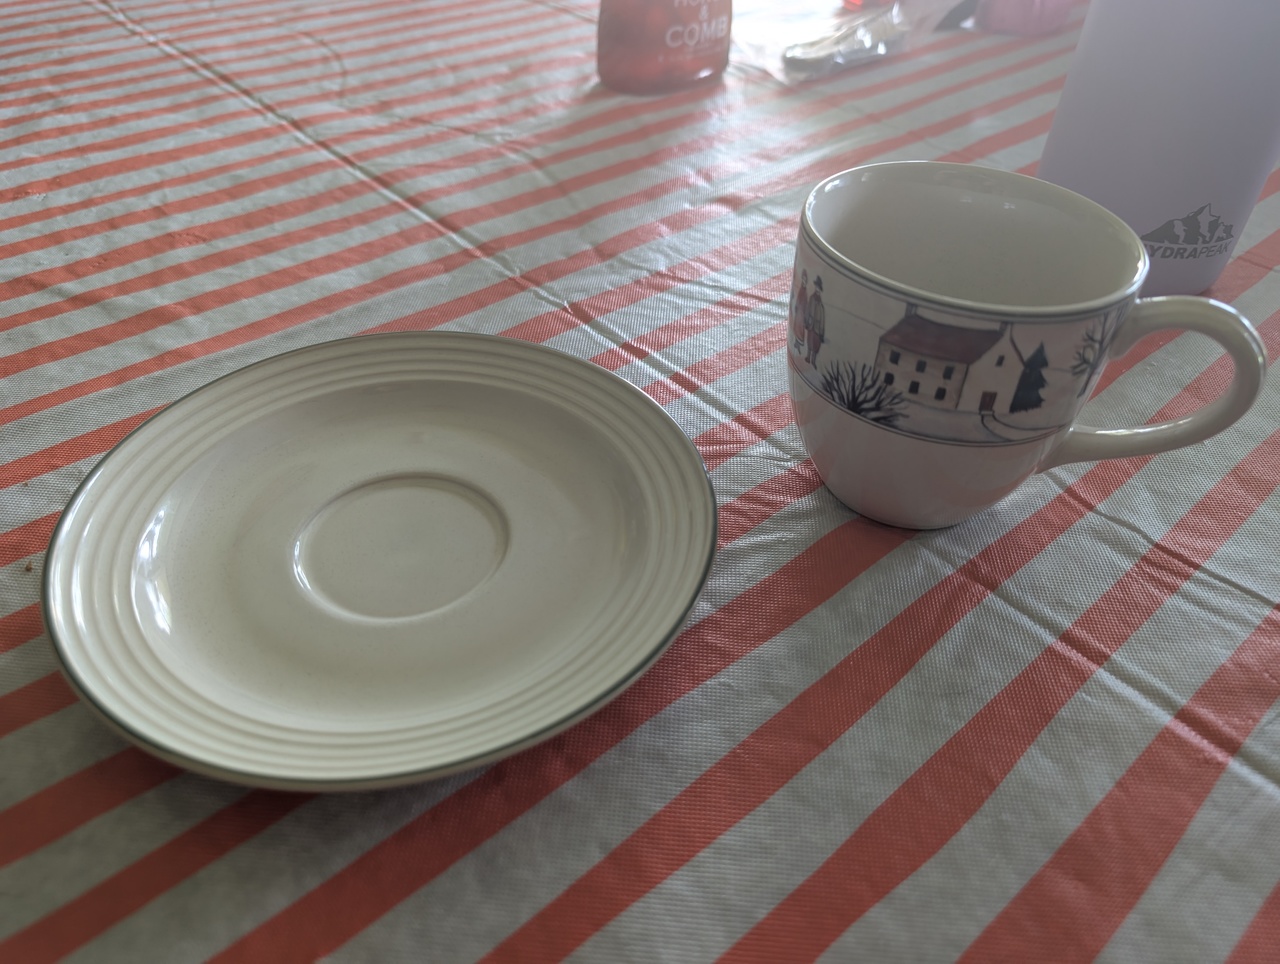
Here is one from my kitchen at home showing what I was talking about.
![]() gradyp ack! I realize now the ones I was looking at were glass and it created an optical illusion that made it look raised in the middle. Whoops!
gradyp ack! I realize now the ones I was looking at were glass and it created an optical illusion that made it look raised in the middle. Whoops!
Lesson learned. I'll make sure to not make that same one next time!