Hello, I am on Blender 4.4.3 and I have done my best to follow your instructions up to this point.
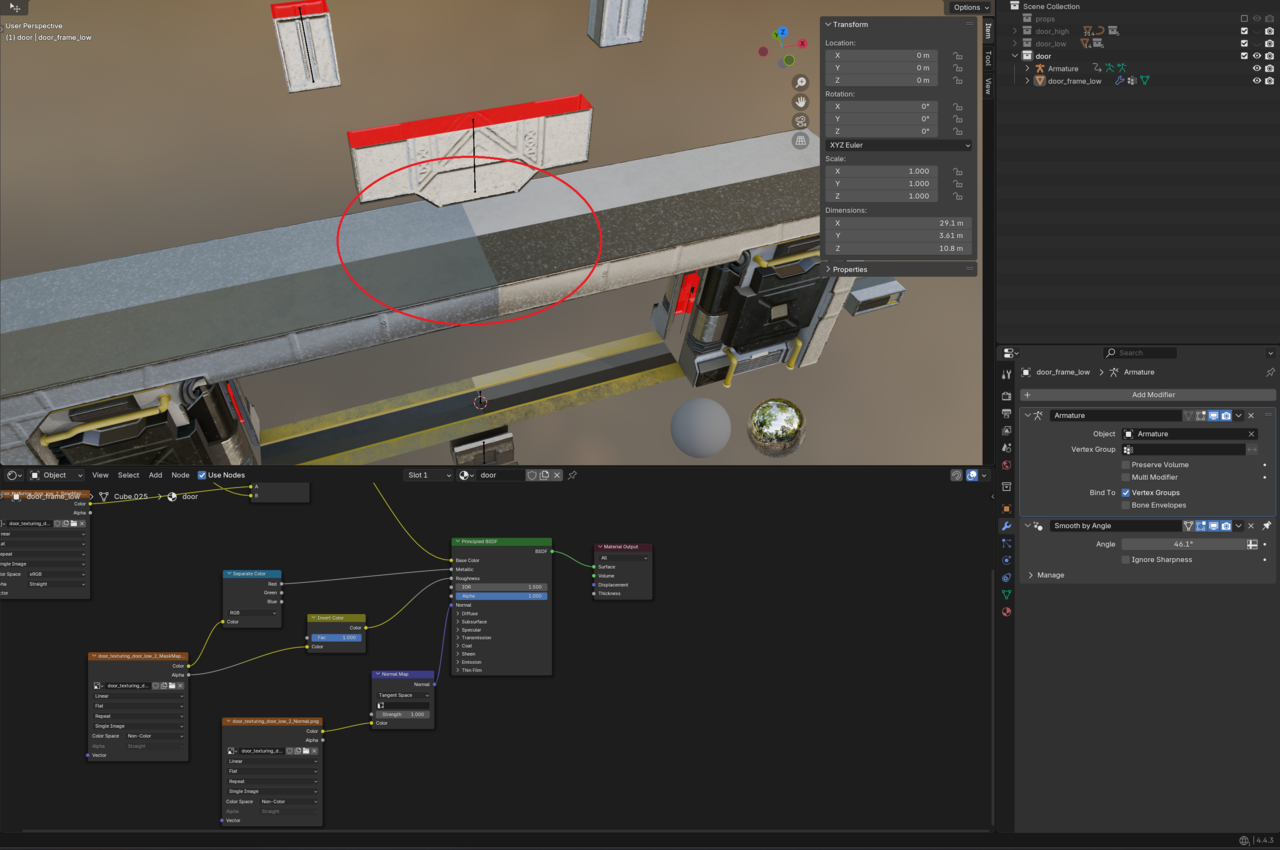
For some reason I am seeing weird shading on the mirrored parts of my object after I applied the mirror modifier.
It appears to be an issue with the tangent space as the normal texture wraps around the object fone until I put it through the normal map node set to tangent space. When I set it to object space the issue seems to go away.
The only way I was able to resolve this issue on part of hte mesh was by manually going to the uv islands for the red circle rectangular planes and flipping their uvs by negative x and y.
I understand that blender does a negative transformation for mirrored objects and uvs and it seems like once I applied the mirror mod it caused this strange issue. It also persisted in substance painter. I am also going to attach screenshot of what the tangent map shows when applied as a texture.
Thank you for the tutorial up to this point and thank you for your help as well!
Hi hhodain ,
That sounds really weird and I don't know what's happening.
Did you try Mirroring U and V in the Modifier?

What was the order of the Modifiers, before you Applied the Mirror?
You may need to post a link to your .blend file (via Dropbox, Googledrive, or so). Make sure to (File > External Data >) Pack Resources, Save the file and then upload.
Yeah this is one of those where uploading the file is a must. Lots of tinkering will be needed to get to the bottom of the mystery. But issues like this are super usual, Chunck has a course that deals with the usual suspects when it comes to baking and normals maps and stuff.
Thank you both very much for the help!
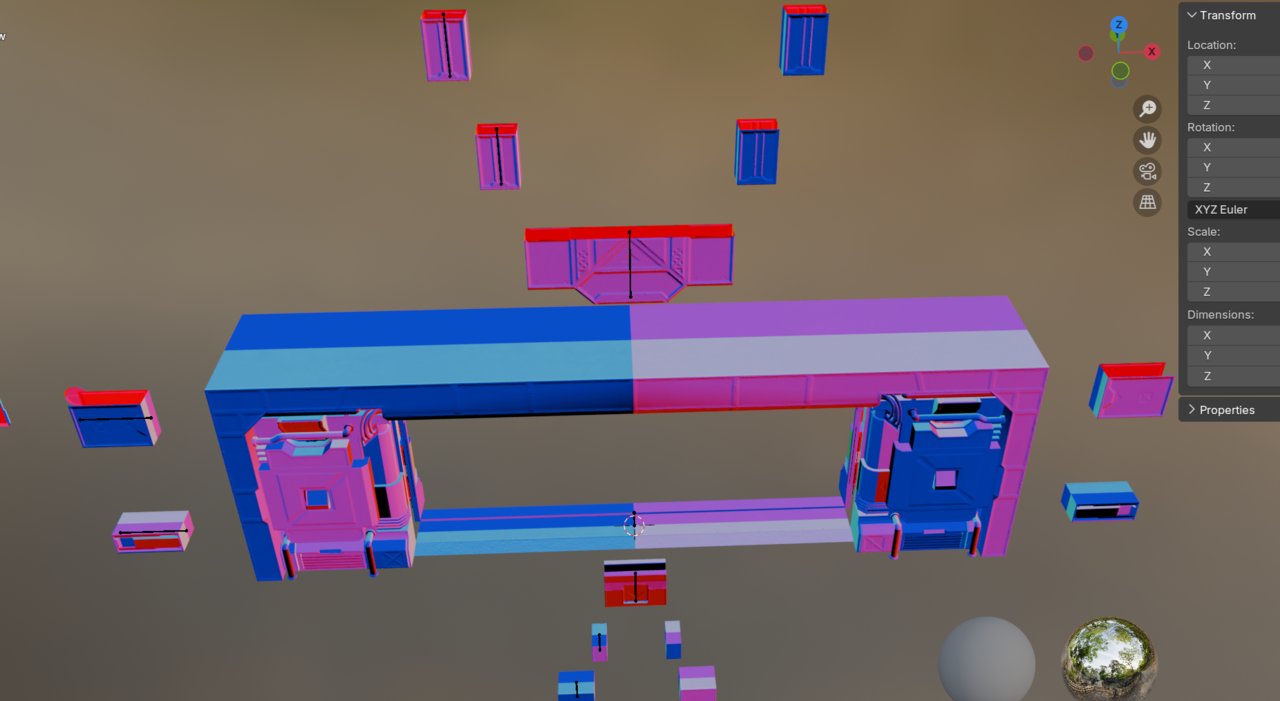
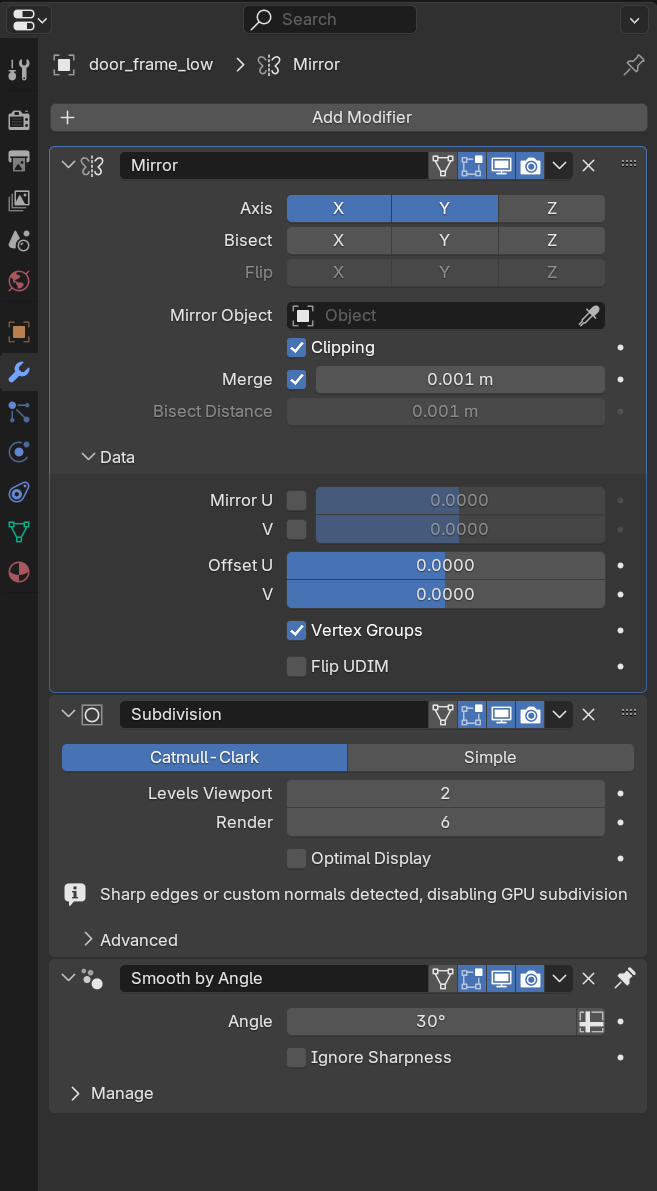
Here is a screencap of my low and high poly modifiers that I had set when I did the bake.
Low Poly:
High Poly: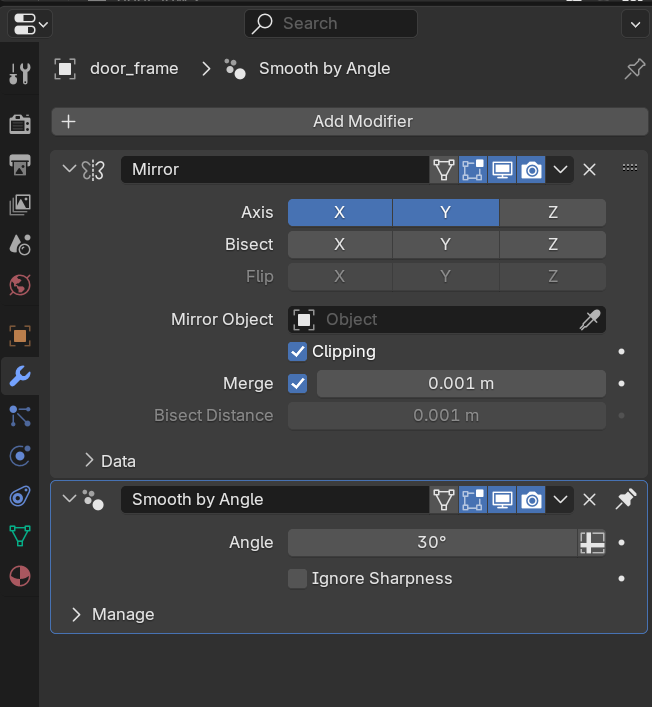
After doing the bake I selected the mesh and then did convert to mesh as the video instructed to apply the mirror modifier to the low poly model we export to substance painter. This is when things broke. After applying the mirror modifier post bake.
I do agree that setting a uv mirror here would resolve the issue but then it would require more texture space for the bake as the mirrored objects are no longer sharing the same uv island (no longer overlapping). It was my goal here though to try and follow the video and have overlapping uvs as in this tutorial Jonathon's baked normal also appears to have overlapping uvs. I'm wondering if something was changed outside the video as Jonathon's modifiers and steps the steps I performed were identical. The only difference I can think of so far is that this series is using blender 2.x and I'm on 4.x
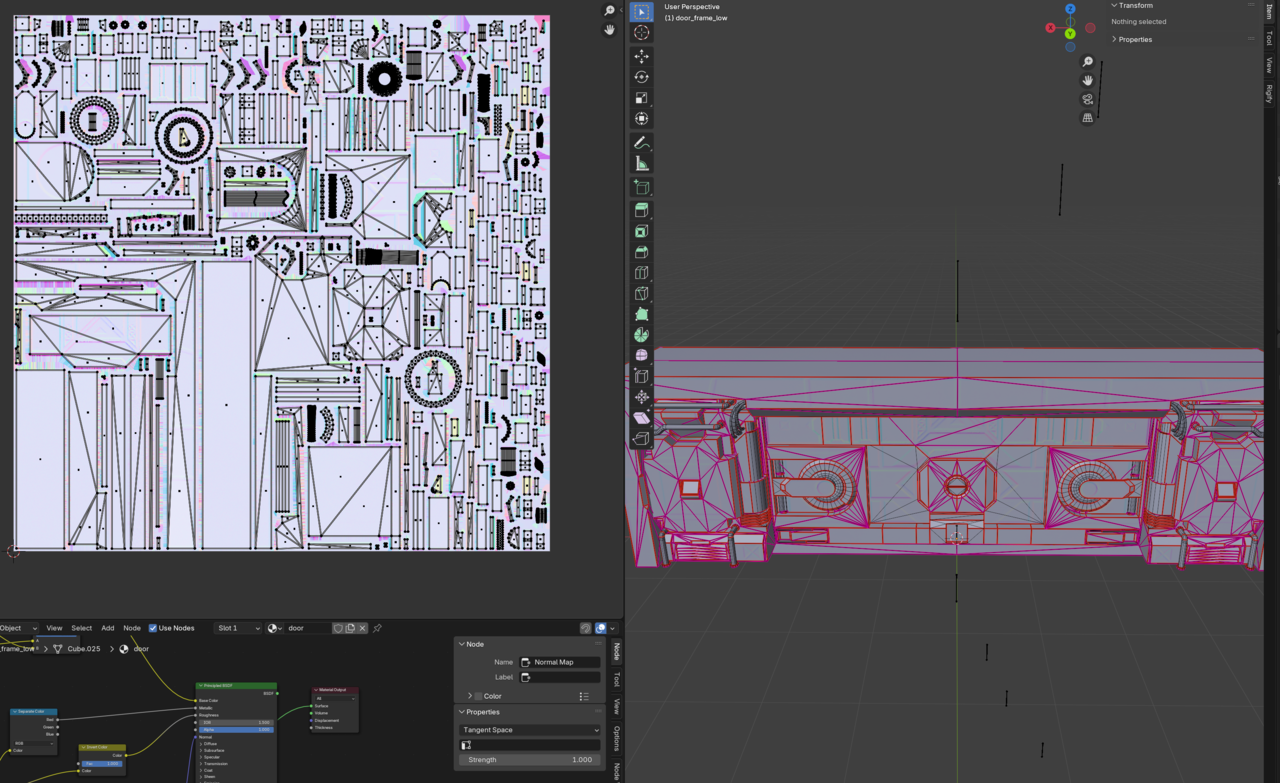
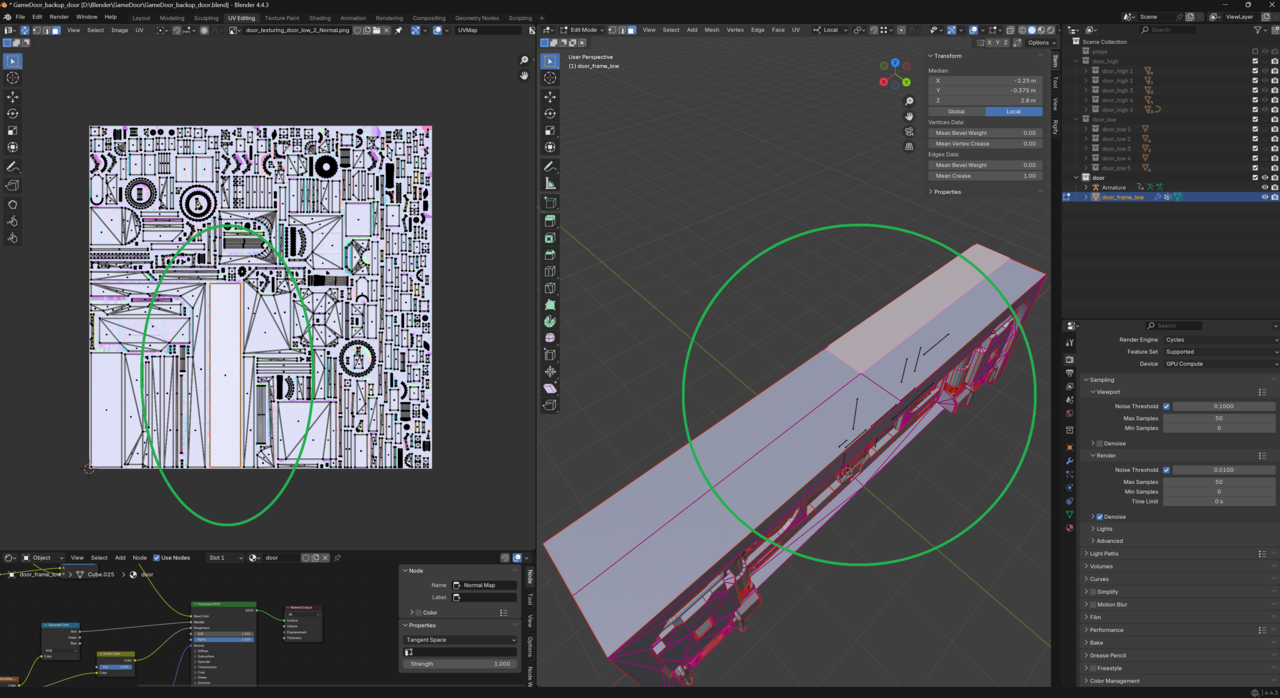
Here is a screencap of my overlapping uvs. I imagine that as long as the mirrored uvs are not directly next to each other this issue would not be noticeable but I would like to see if maybe I'm missing something here
Lastly, here is a google drive link to 3 blend files, the current one, and two for pre/post bake. Thank you both again for your help, it goes a long way!
https://drive.google.com/drive/folders/15ZNj1XxpVSjc-wWyywu4n9Y62BsbtZZW?usp=sharing
https://drive.google.com/drive/folders/15ZNj1XxpVSjc-wWyywu4n9Y62BsbtZZW?usp=sharing
Thanks a lot hhodain !
I'll check those out tomorrow and see if I can find what's causing it (I am pretty sure it's not because of a difference in Blender Version though.
HI hhodain ,
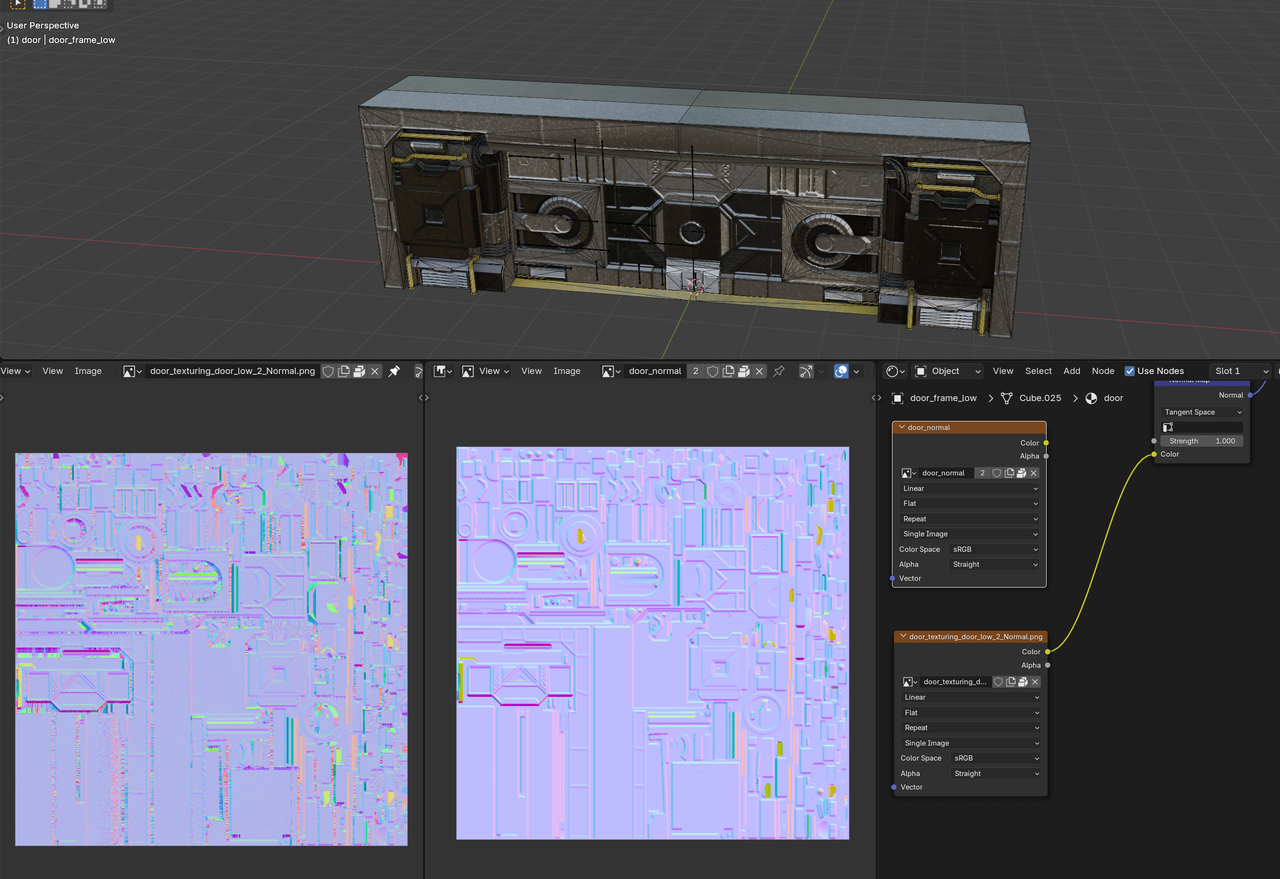
I don't know exactly what's happening, but it seems to me, that it's not simply the Mirror Modifier, that's causing it, but the compression from 32 bit EXR to 8 bit PNG.
Also the change from sRGB, to Non-Color makes a difference.
door_normal, sRGB:
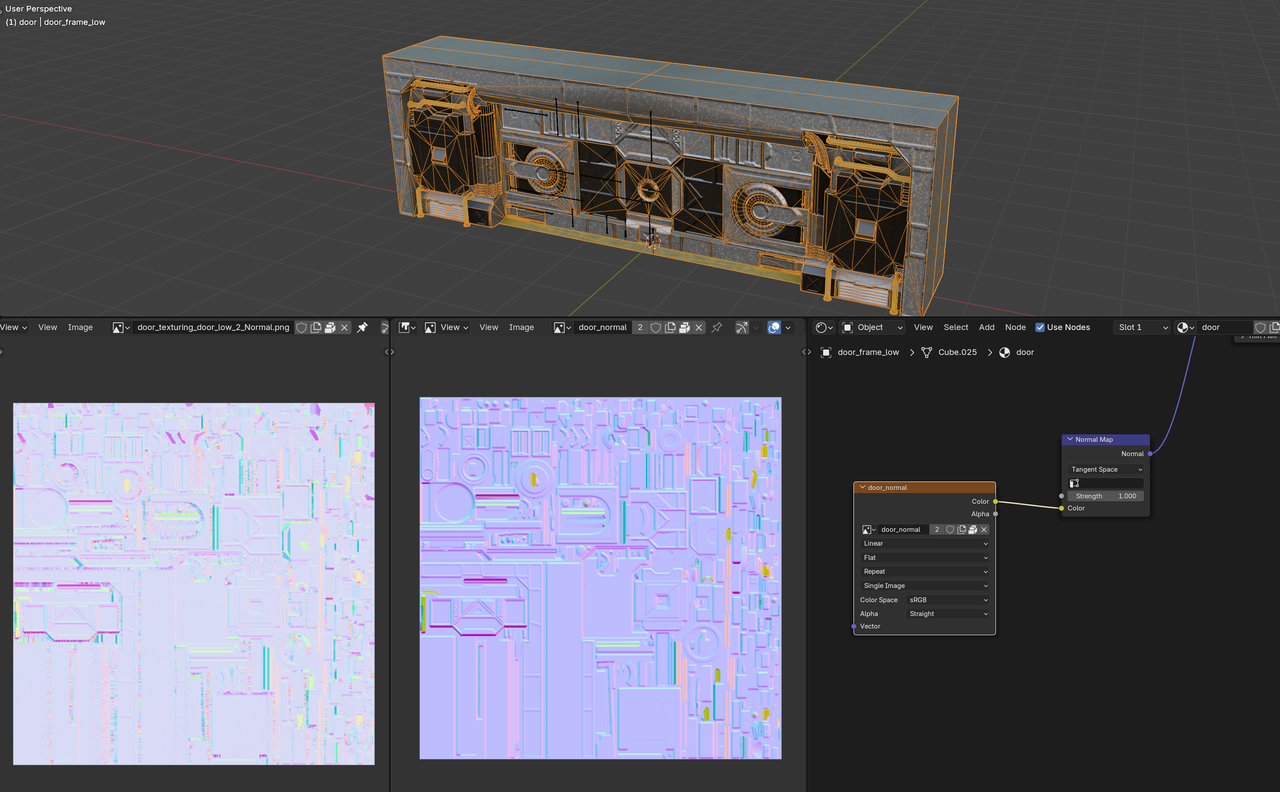
door_normal, Non-Color:
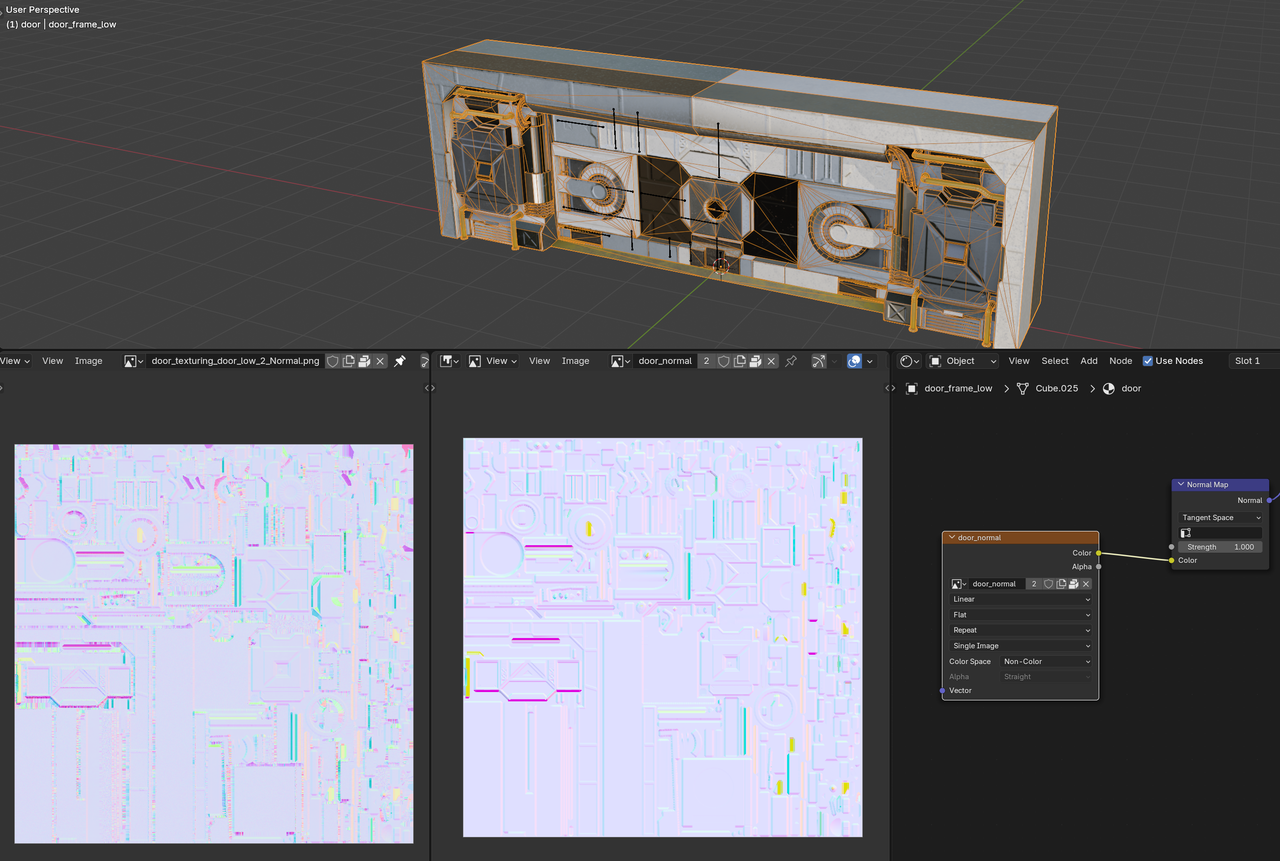
door_texturing..., sRGB. Doesn't fix it:
I don't have access to Substance Painter and I haven't watched all of these Lessons, but it seems to me, that the problem occured somewhere after Importing to SP.
After Baking in Blender and Applying the Mirror Modifer, everything was still okay, as far as I can tell.
The way I see it, is that Normal Maps assign a Color to the direction of the Shading Normal for each Pixel.
Something like this:
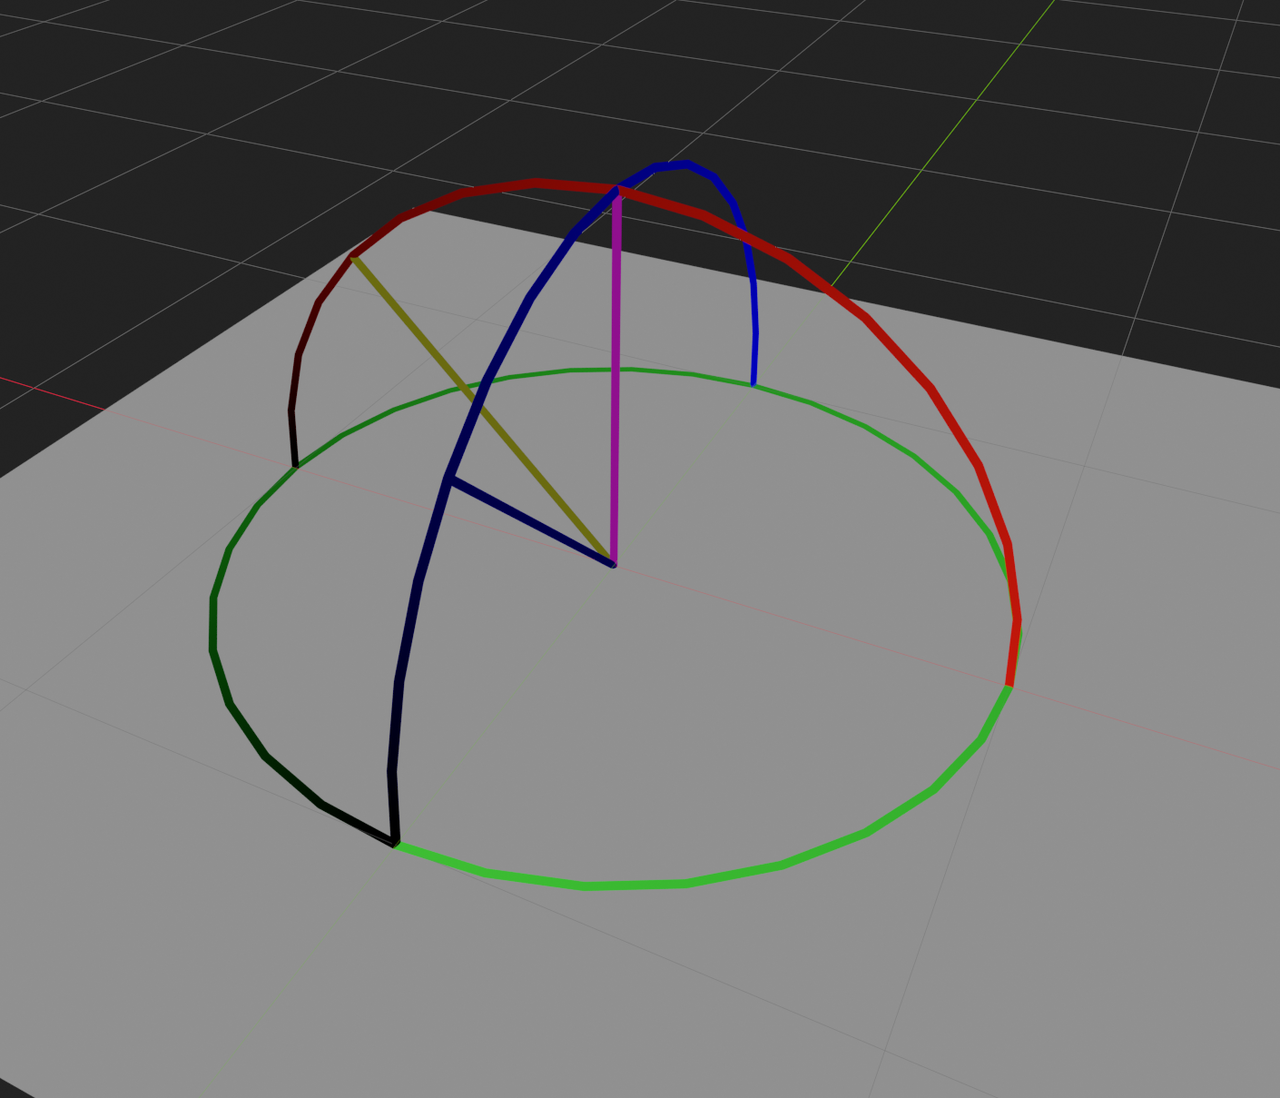
So straight up is that purple-ish Color that covers most of the Map.
Now if you change that Color (or the Color Transform), the Shading normal is no longer pointing straight up and when you Mirror that.point, the Shading Normal will be pointing differently than the original. If it were straight up, the mirrored version would still be pointing straight up.
Does that make some sense?
Still don't know where exactly things went wrong for you; I don't really have the ability to check.
Hello, ![]() spikeyxxx thank you very much for your response!
spikeyxxx thank you very much for your response!
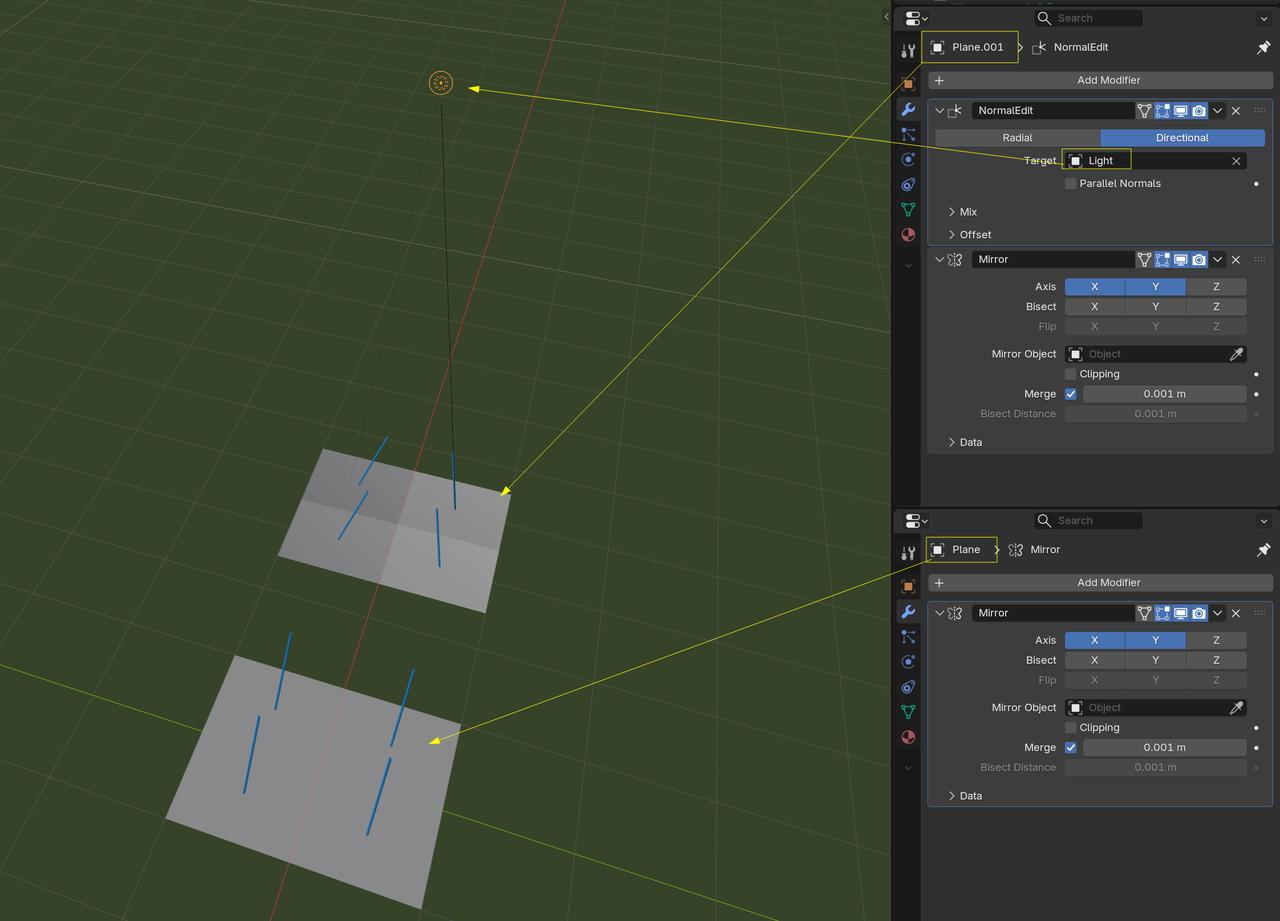
I do believe that I understand what you are saying. It appears that due to compression artefacts my normals are not perfectly straight and then because the uvs are getting mirrored it becomes very apparent as the two angles are fighting each other and are not pointing directly up. I have attached a visual guide below which may assist anyone else if they experience the same issue. Thank you again for your help, it goes a long way and I really appreciate it!
>>If I find out anything else regarding this as I continue working with Blender I will make sure to do another post in this thread. I will be marking it as solved for now though. Thank you again! :)
Good normal map:
↑ ↑ ↑ ↑
Mirror (with seam):
↑ ↑ | ↑ ↑
**********
Bad normal map:
↗ ↑ ↖ ↑
Mirror (with seam):
↗ ↑ | ↗ ↑