Hey guys so I'm working in 5.0 and tbh its killing me that they changed cycles from material based bloom to scene based cause I want to apply bloom to only some emissions and not some parts being hit by sunlight.. anyone know how to do it?

I want to apply the bloom to just the objects that have emissive and maybe the shell that is hidden but not the legs since they're being caught by bloom from the sun light 
If you want to target emission specifically, you can use an emission pass (activate in render passes) for this. It'll give you an extra output on your render layer node, which you can then use to add bloom. For the rest you can use a separate glare node with a threshold adjusted to only show what you want effected.
Then add them together for the final image.
If that doesn't work you can always do separate render layers for the different objects and composite them back together.
I may consider some kind of fight end scene where there’s an ant walking away from a wrecked one with like broken plastic!
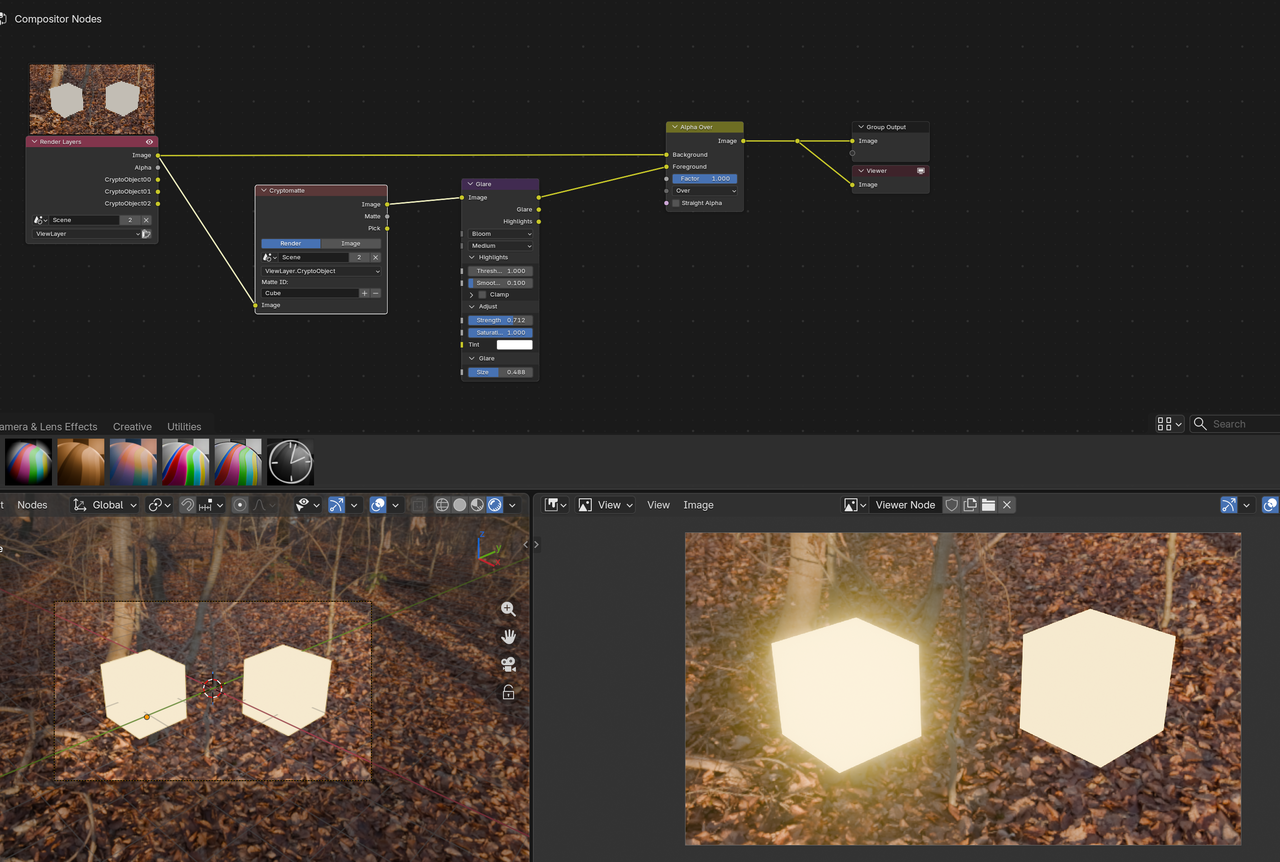
went with the cryptomatte way in the end twas simpler
Sure, it would look somewhat like this:
After activating the Emission pass on the right, you'll get the output in the render layers node in the compositor, which you can then bloom independently. The thresholds of course depend a lot on your individual scene.
Depending on how the strengths are on the various surfaces, the threshold might not get you there. In that case the cryptomatte method might be better, or render layers, which is a more extensive topic. Lots of info on that though in the CORE Compositing, which is excellent.
![]() SFE-Viz I've discovered a problem though which is that you cant see in the viewport in cycles I deffo need to do that compositing course but the only way I can see to mask it this way in cycles is rendering out the view first and compositing the EXR layer which I dont know how to make from the image
SFE-Viz I've discovered a problem though which is that you cant see in the viewport in cycles I deffo need to do that compositing course but the only way I can see to mask it this way in cycles is rendering out the view first and compositing the EXR layer which I dont know how to make from the image
Yes, this is definitely something that's done after rendering, especially with cycles.