The goal:
I feel like I should be able to use the compositor to hide the back of the tyre you can see through the rim.
I set-up 2 view layers of the tyre and the rim with alphas which is fine but I can't work out how to convert the rim alpha here
To this where I'm only left with the inner black mask
this is the alpha I need to use on the composite to remove the tyre showing behind the rim
Hi Charles,
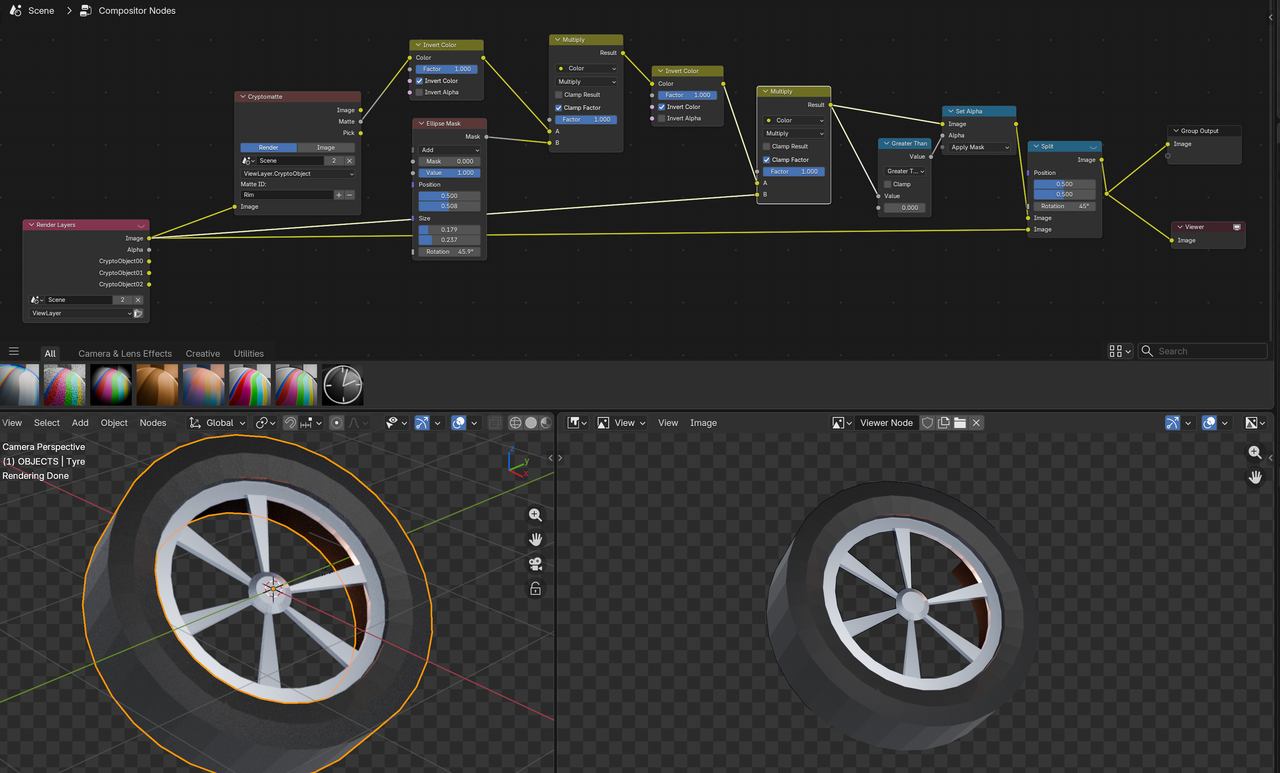
Take your first Mask (white Rim) and Multiply it with a Tyre Mask (Tyre black), then Invert it.
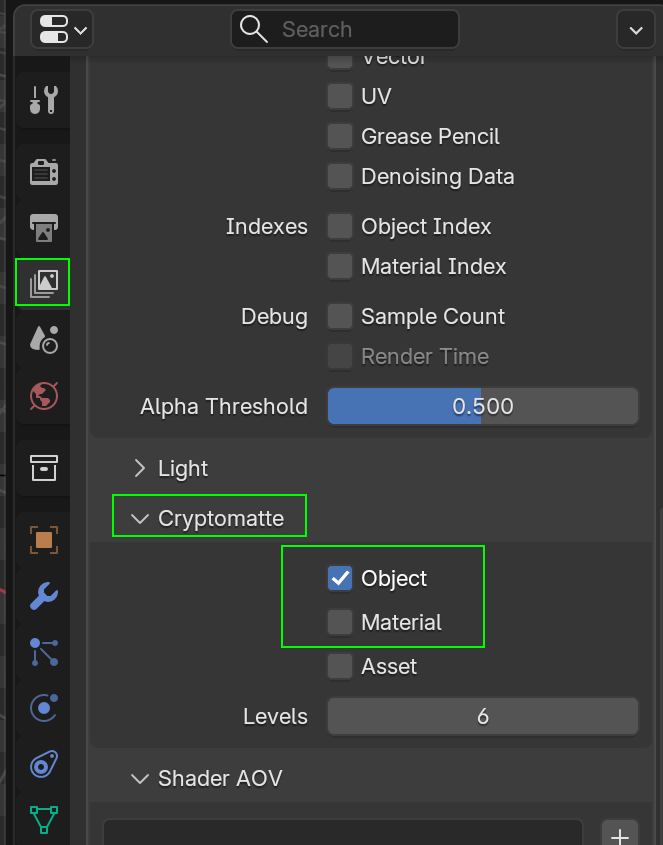
You can also, instead of, or in combination with View Layers, use Cryptomatte to make your life a bit easier (to get that Tyre Mask, for instance):
It's always just a matter of Multiplying (sometimes Inverted) Masks, remembering that multiplying by 0 (black) returns Black and multiplying by 1 (white) doesn't change anything.
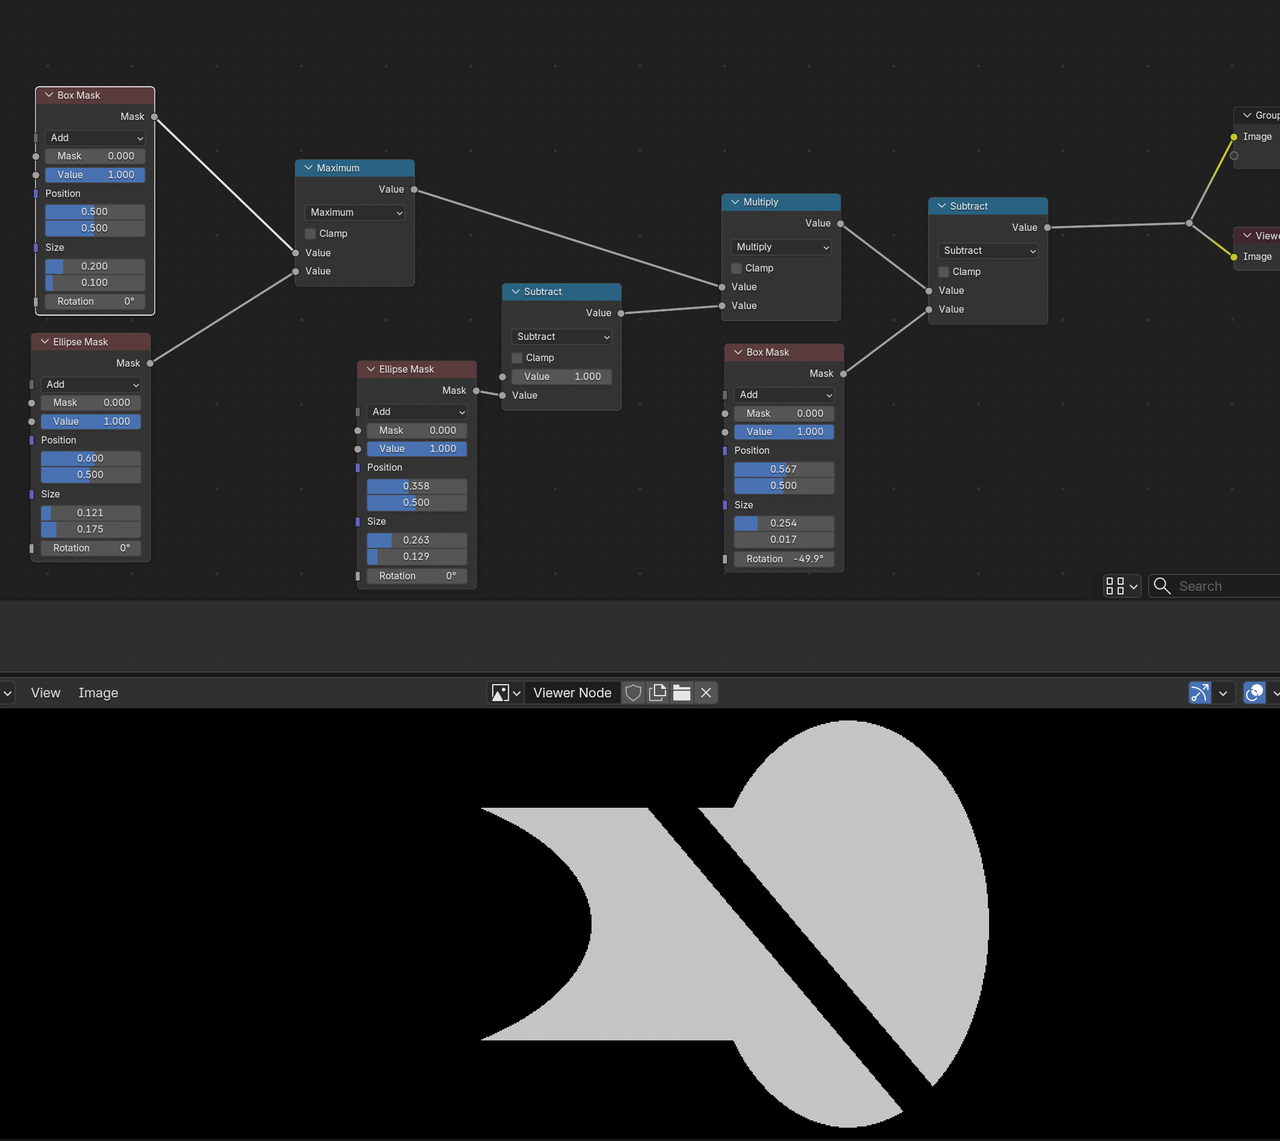
For instance (and I'm sure this can be done a lot easier):
Setting aside the Crypomatte for the moment I'm struggling with the alpha multiply approach. This is the closest I can get but this excludes the bolt holes as the tyre alpha masks those. This is the issue. I want to turn all the black outside the rim white but not affect the inner alpha
OK slowly inching forward using the ellipse mask.
However the issue with this is that if I move the position of the object the ellipse mask position stays in the original position so this doesn't work dynamically.

I expected to be able to set this up so I can render in multiple positions and the mask is dynamically updated based on the position so I don't have to keep adjusting the ellipse mask. So... I suspect this does mean a cryptomatte or the dreaded maths nodes.
If we could stick to discussion the alpha approach for the moment so I know the limitations of what's actually possible. I did suspect a cryptomatte might be the answer and went looking for the explanation in Core Compositing last night but couldn't find it quickly and it had again become a very late night. I can't really remember anything about Cryptomattes now.
This was initially intended as a quick project just to have something original to use to get to grips with Substance. When I did the tyre and brought it back to Blender I thought it was worth doing a rim and then saw the issue I'd have with the final render before even doing the rim texturing. So as it seems ALWAYS happens this has unravelled into a brand new rabbithole of confusion and complexity but this struggle is where the learning lies.
I am so grateful for your help. I spent all last night trying to ChatGPT a solution but all that came out of it was me swearing
I don't really understand what you are trying to do. You want a solid background(white) with transparency(black) in the rim and you want it dynamic? Just render out with a background. Then add a mesh circle using a holdout shader node instead of the principle shader. Position it directly behind the rim from the camera's viewpoint and then parents it to the rim.
Yes, like Dwayne says.
You can make a dynamic Mask, but for something like this, that would be overkill. A disc with a Holdout BSDF, just behind and Parented to the rim would be the easiest way.
If it's going to be a 360° rotaion around the wheel, you'd probably have to change the psition of the Holdout disc halfway through, but that still beats a dynamic Mask.
All I want to do is hide the part of the tyre showing through the wheel rim (highlighted in red) from rendering regardless of my viewpoint.

I have no idea about a holdout shader node. I think it sounds like another approach I'd considered (render the gaps as a solid object so I could use that as an alpha) but then didn't know how to make this mask object not show in the final composite.
Holdout shader is used to create a masking object. I use to have a crappy computer and I had to render out in different layers. There was this animation where a guy goes in front and behind a wall. I used a plane to represent the walls silhouette with a holdout shader material. Then in the background file we have the fancy high detailed wall. This way when the character is in front of the plane you see them and when they are behind or partially behind the wall they get masked out.
I haven't read through all of that, so forgive me if it's been discussed, but there's used to be Material ID's, where you set a material as a given number and then in compositing you can grab that ID and change it to something else. So you assign those faces the material with the ID and then you can make it see through in compositing.
Oh wow.... thanks Dwayne... this was so simple in the end. I had NO IDEA you could do this. Amazing! I can go to bed on time tonight :) Obviously I now have to model and texture the correct rim