Hi Deb,
Hope you are well.
Acceptable? Yes. Good? No.
I would start with the inset and make sure to have a continuous Face Loop around it, something like this:
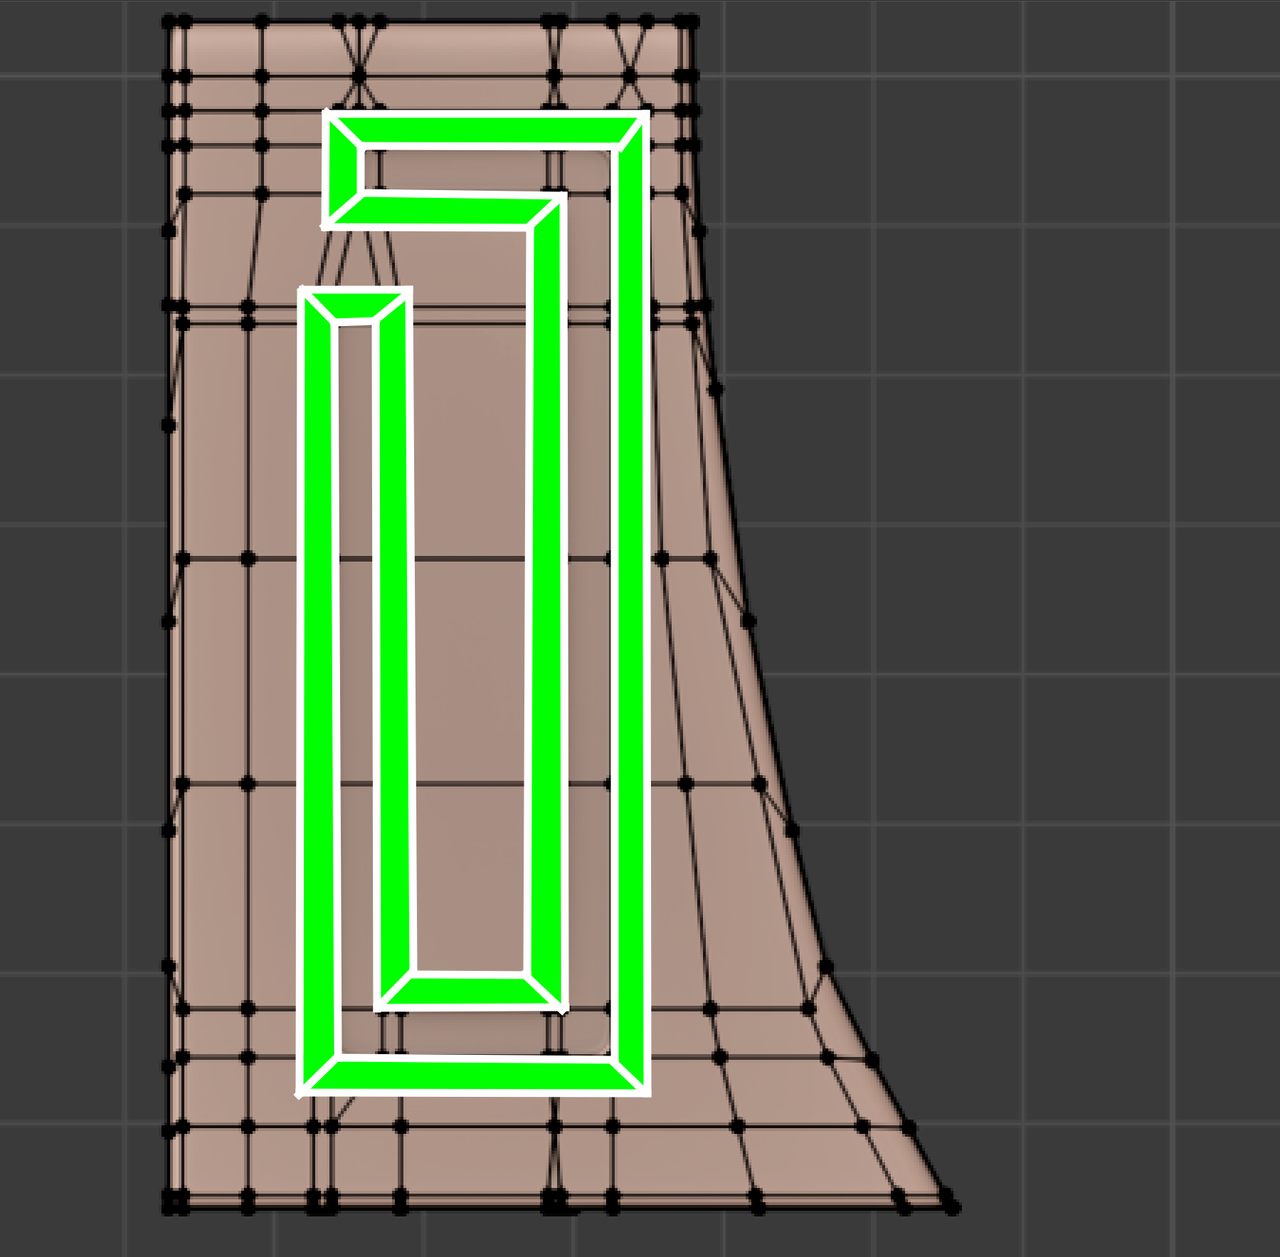
Then you'll have to add some holding Edges at the corner of this green Face Loop.
After that you can work your way 'outwards' and add Edge Loops wherever you need them, without any problems.
Thank you very much martin as always..
I am doing okay for now actually....my condition is not the worst doctor say haha...
Anyway thank u again..and i was doing your method....but had this kinda silly topology idea so asked here to confirm haha...
Adding the edge loop like Martin says will help you to control the detail inside the loop... so if you need an extra edge loop as a holding edge, etc, you can easily add without affecting the entirity of everything else.
Thank you ![]() gradyp for the clarification...
gradyp for the clarification...
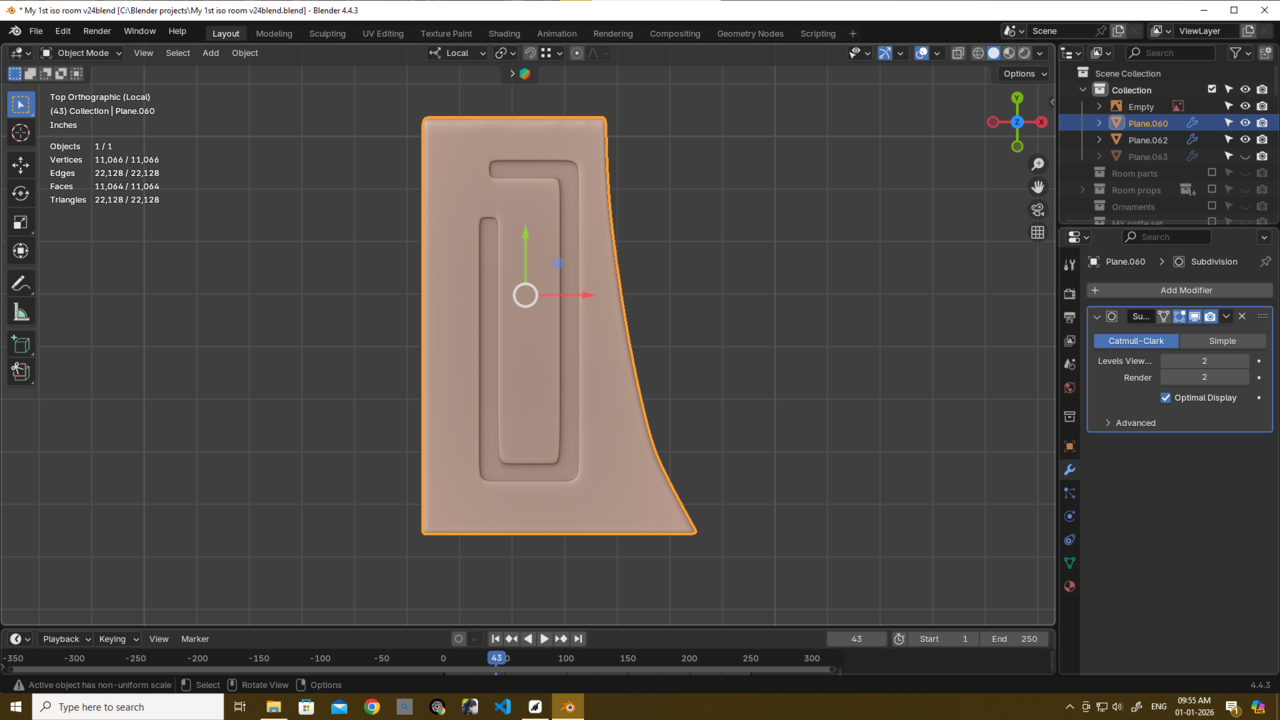
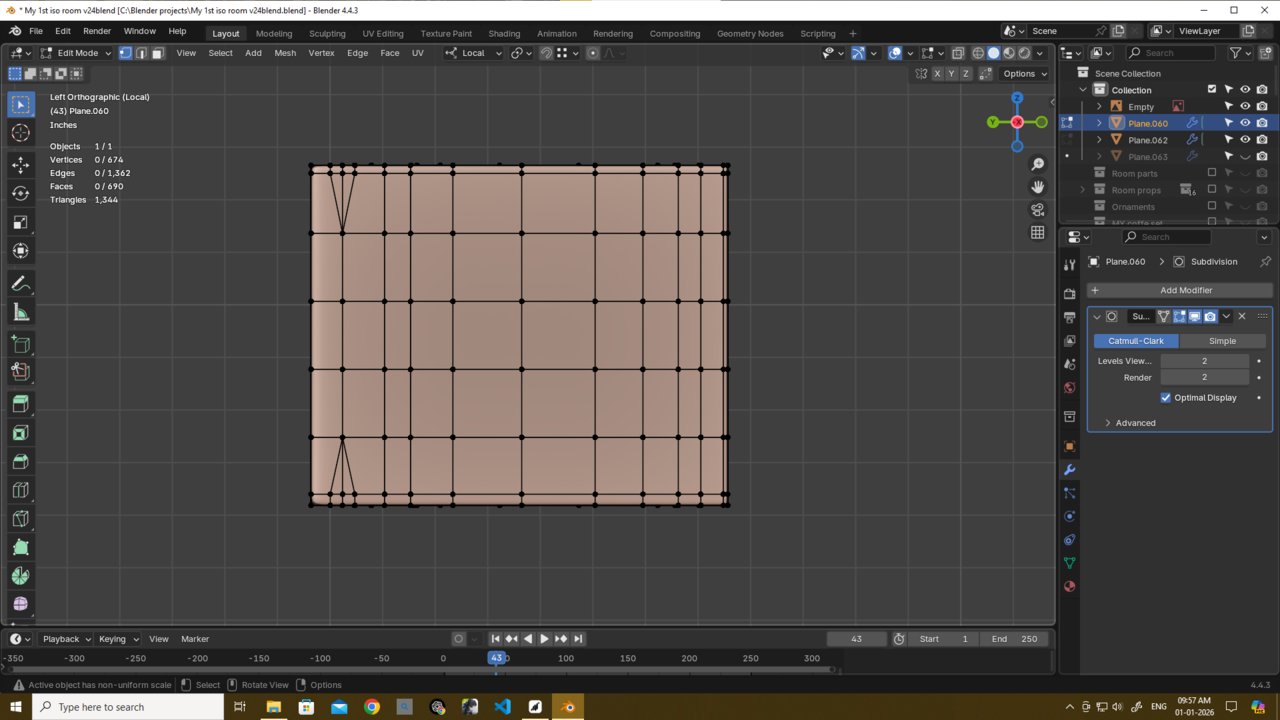
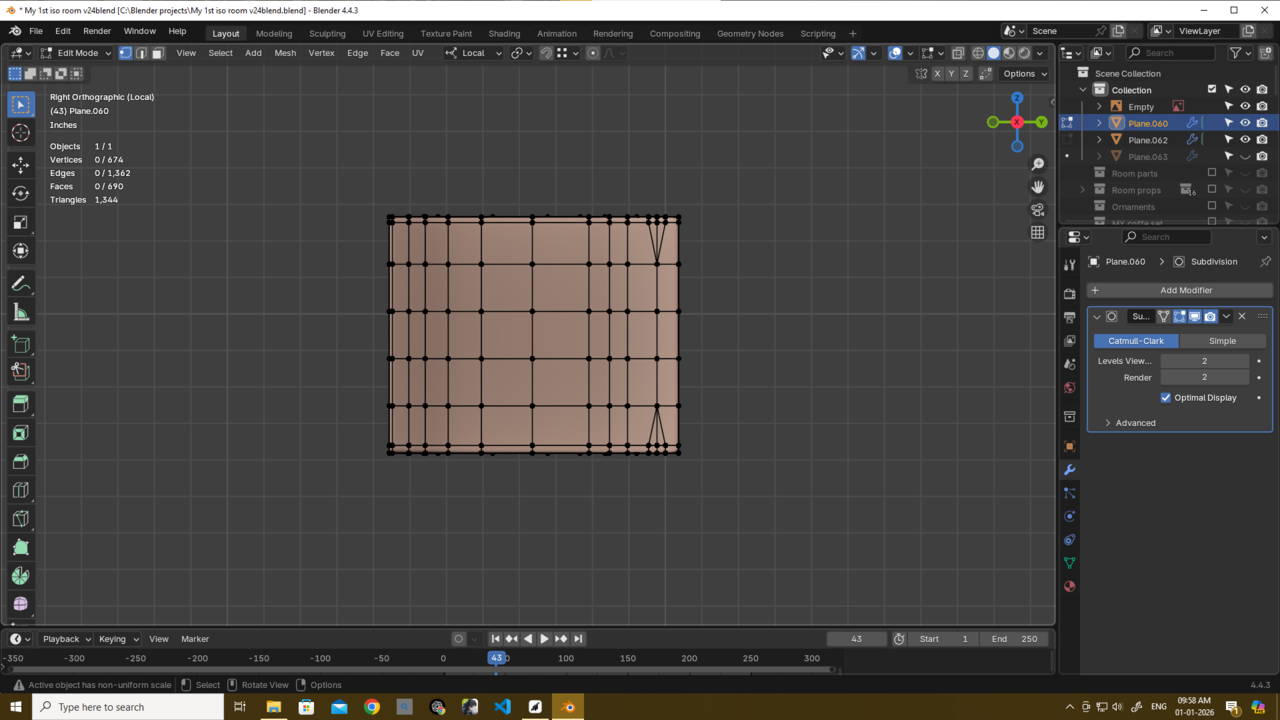
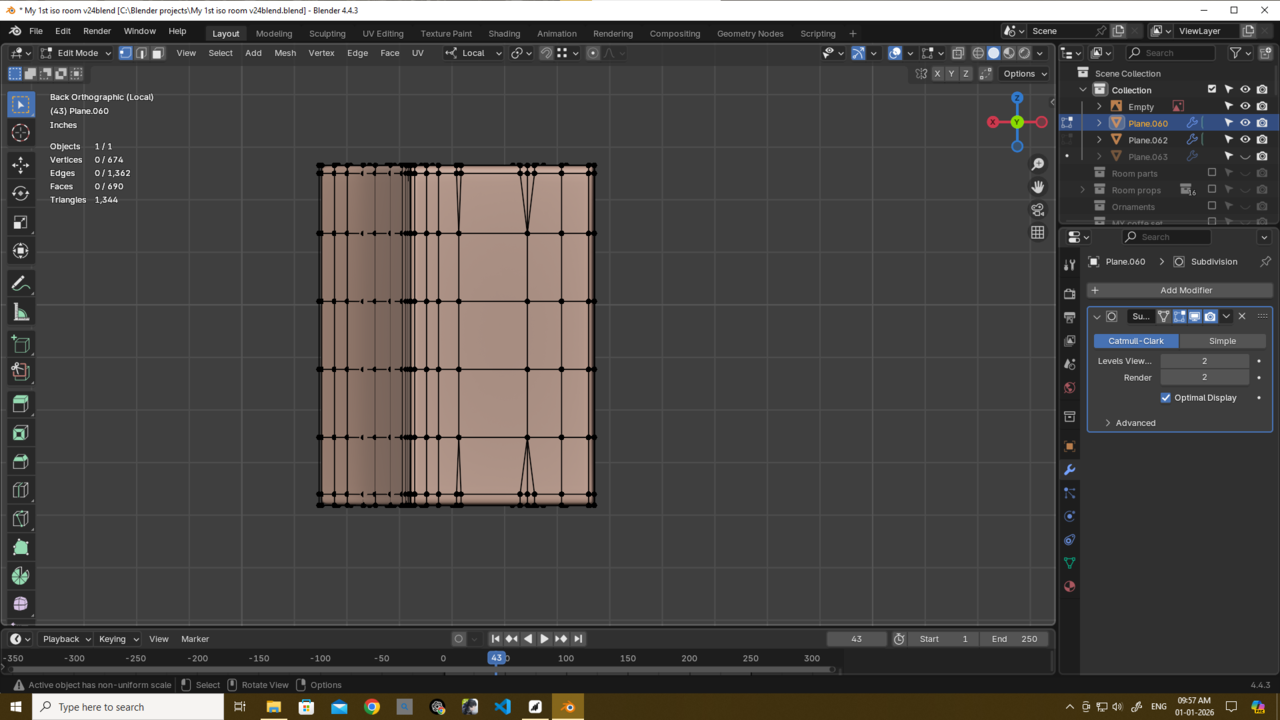
Also martin plz see this and tell me is this better version? also with ur method i reduced geometry significantly...though i am ushing subd so its still relatively high anyway..
something i cant explain properly but with this model i am facing some edge loop issues idk why its that way but thats why its looks well like this way i made but i definately use ur method u can definately see that...thank u martin again and thank u too ![]() gradyp
gradyp
also i will evenly distribute some loops....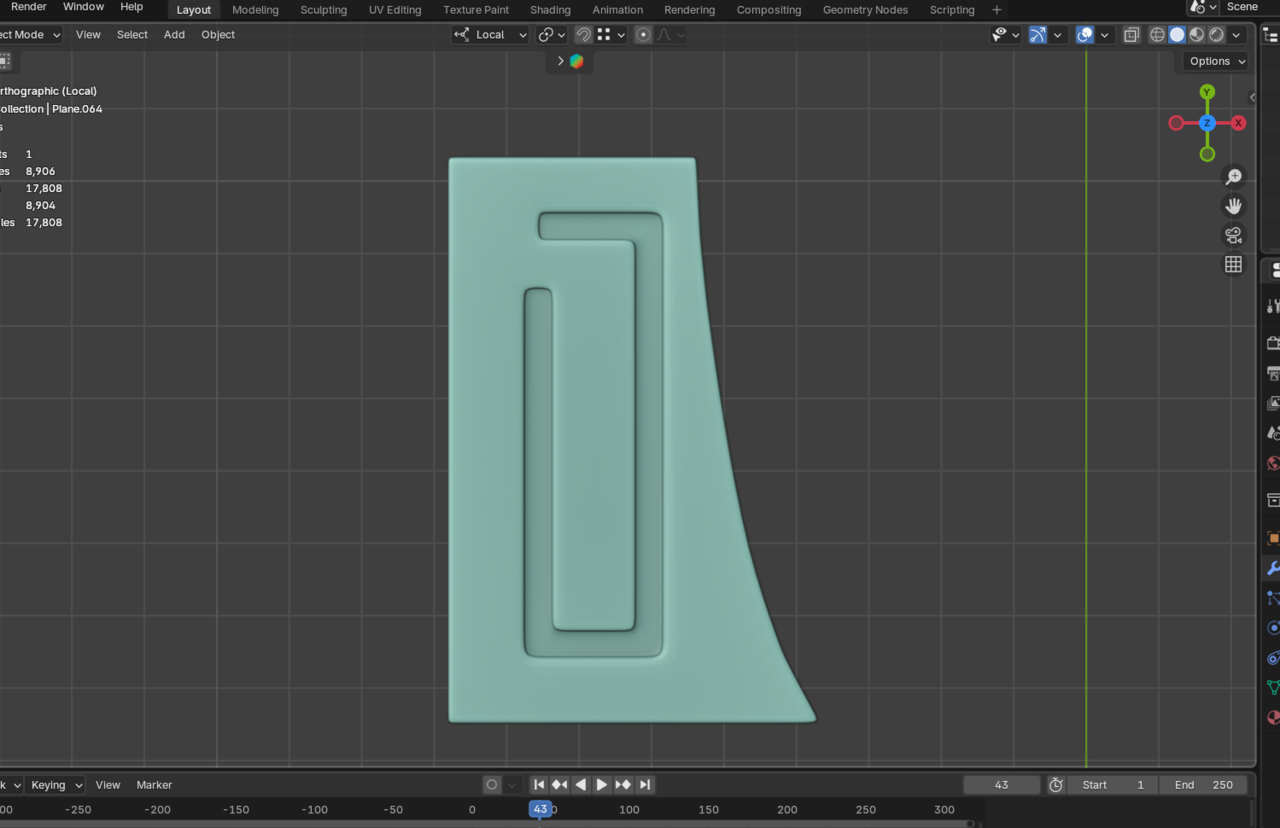
Hi Deb,
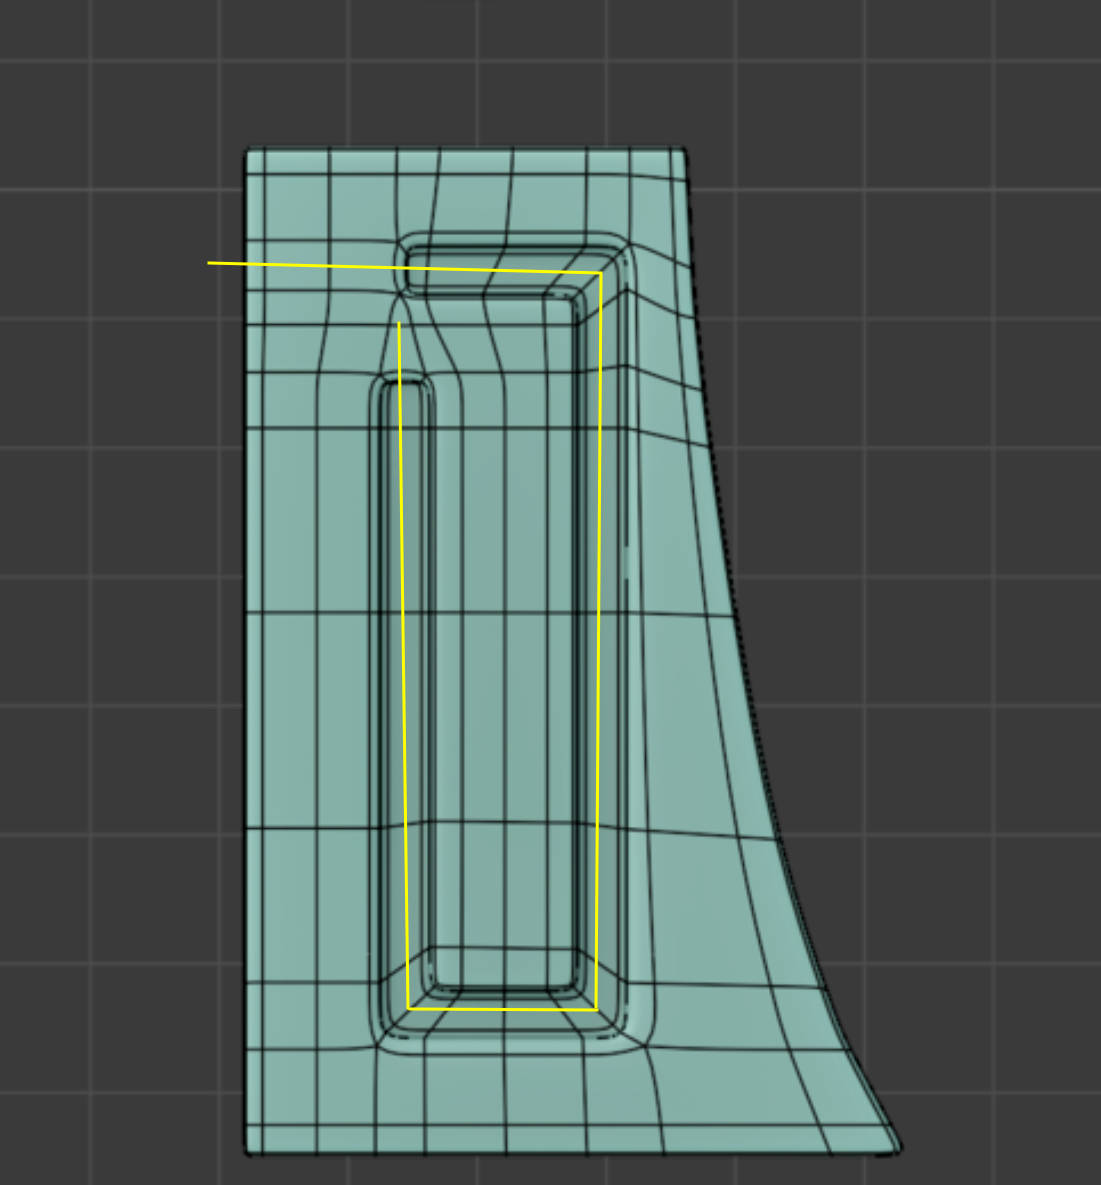
That looks much better!
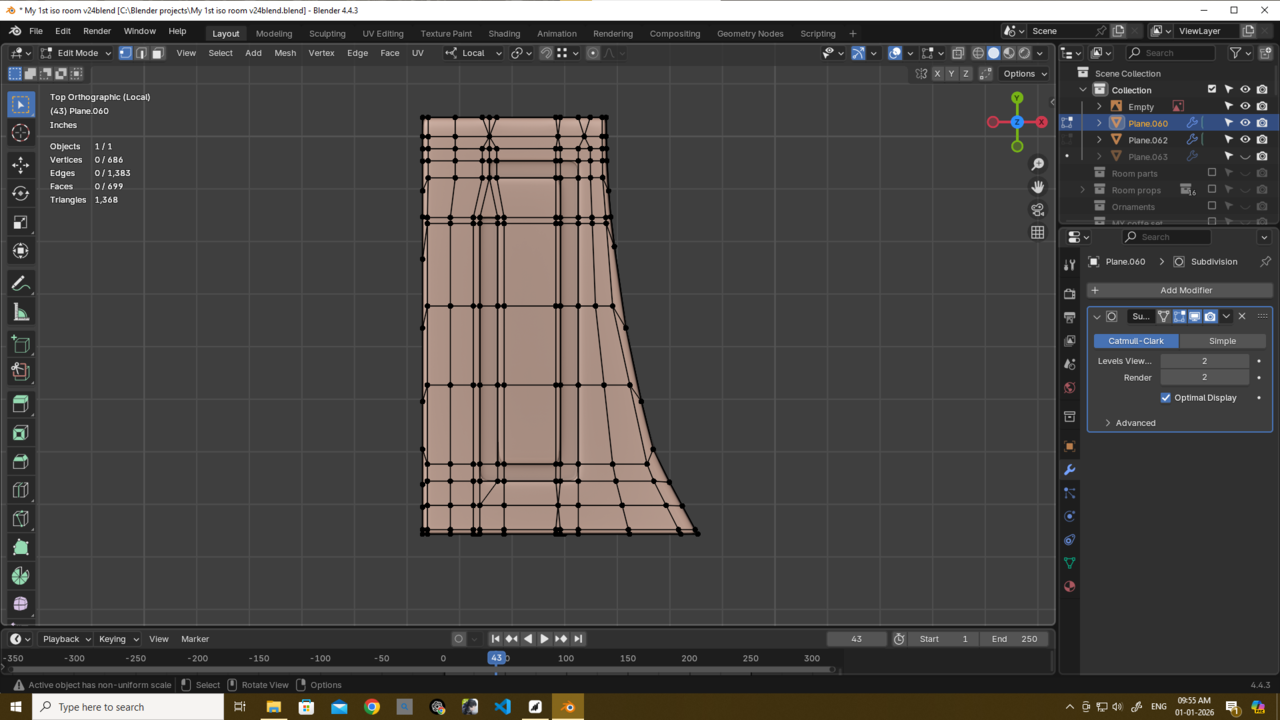
Maybe you can have a look at these 4 (yellow) corners; it would be good to have a holding Edge on each side of those, that will improve the bending. Also, while you're at it, I don't particularly like that these 2 white Edges on the left turn into 1 on the right:
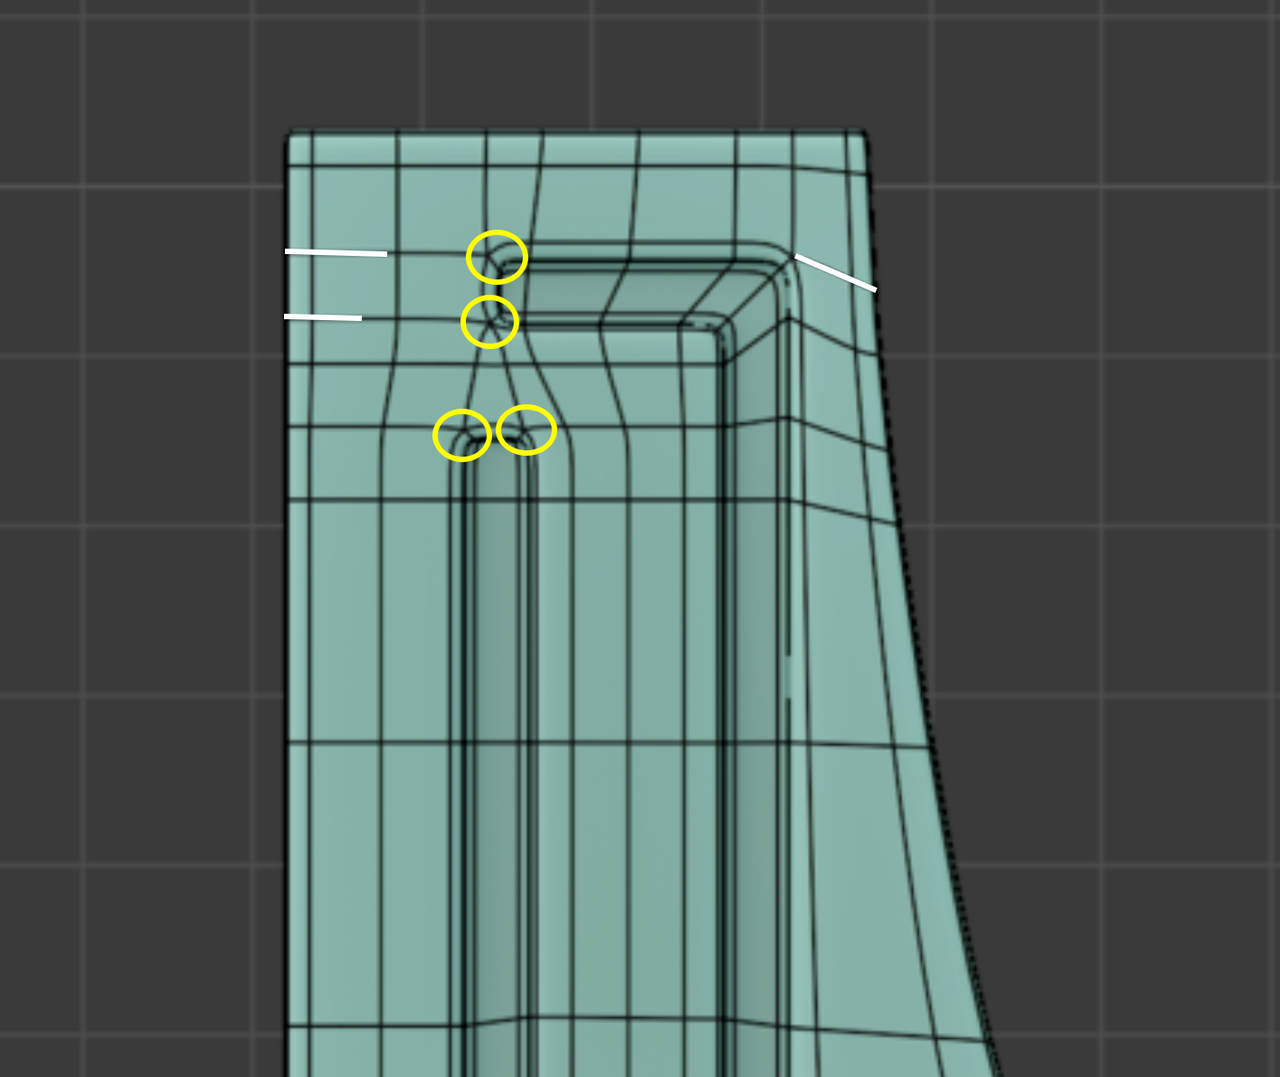
But overall a huge improvement already!
here what i did with the extra edge..i merge it in the back and no shading or any issue and also because its back no one gonna notice a thing at all...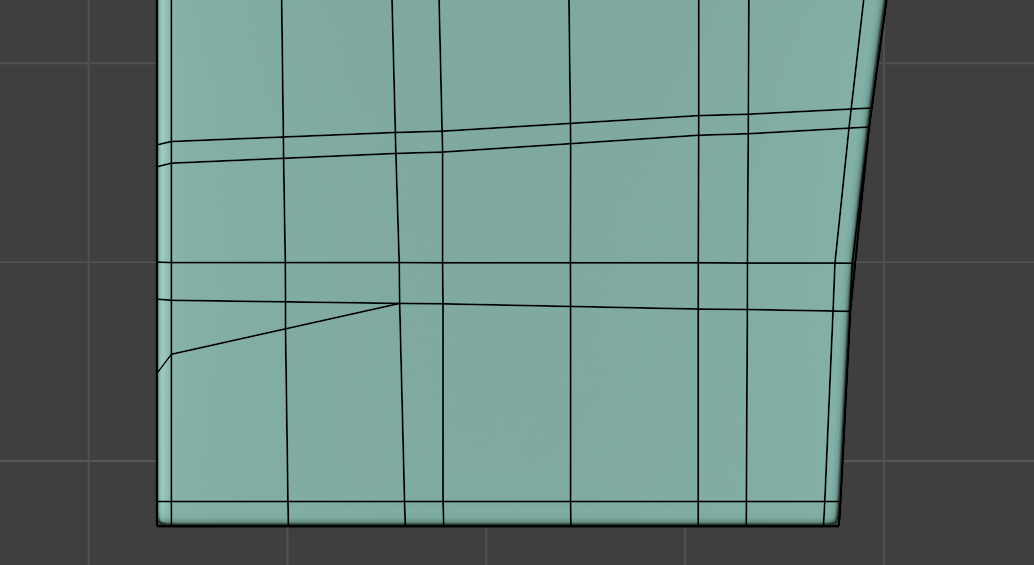
also martin if u can explain what this person did here...i asked him but he yet to be reply and i really want to know ur oppinion too
my confusions - (i am pasting what i asked)
sir i m really confused how did u achive this?
did u 1st subd and then extrude that area??
also because after i create my initial shape for sub d ready and add the subd modifeir then the edges became roundy so i need to add some edges there to make the edges non roundy..but becase there is a traingle i canadd the edge properly.
also if u add the subd modifer 1st did u not use catmull-clark? thats why u did not have to engage with the roundy edges or corner issue? so i tried to use the subd simple method but then the proper curve shape is gone with the simple method then i have to add edges manually and make the curve i am really confused as hell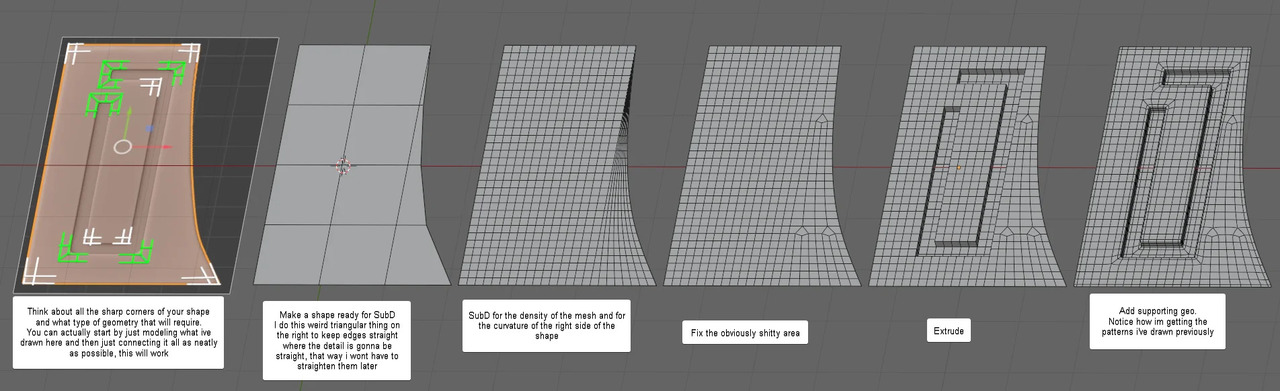
Hi Deb,
There are indeed some confusing things happening.
First: the image on the left is a different method than the others (and one I would use).
Also, this is all done on a Planethe thickness of the model comes later. This is actually a great workflow.
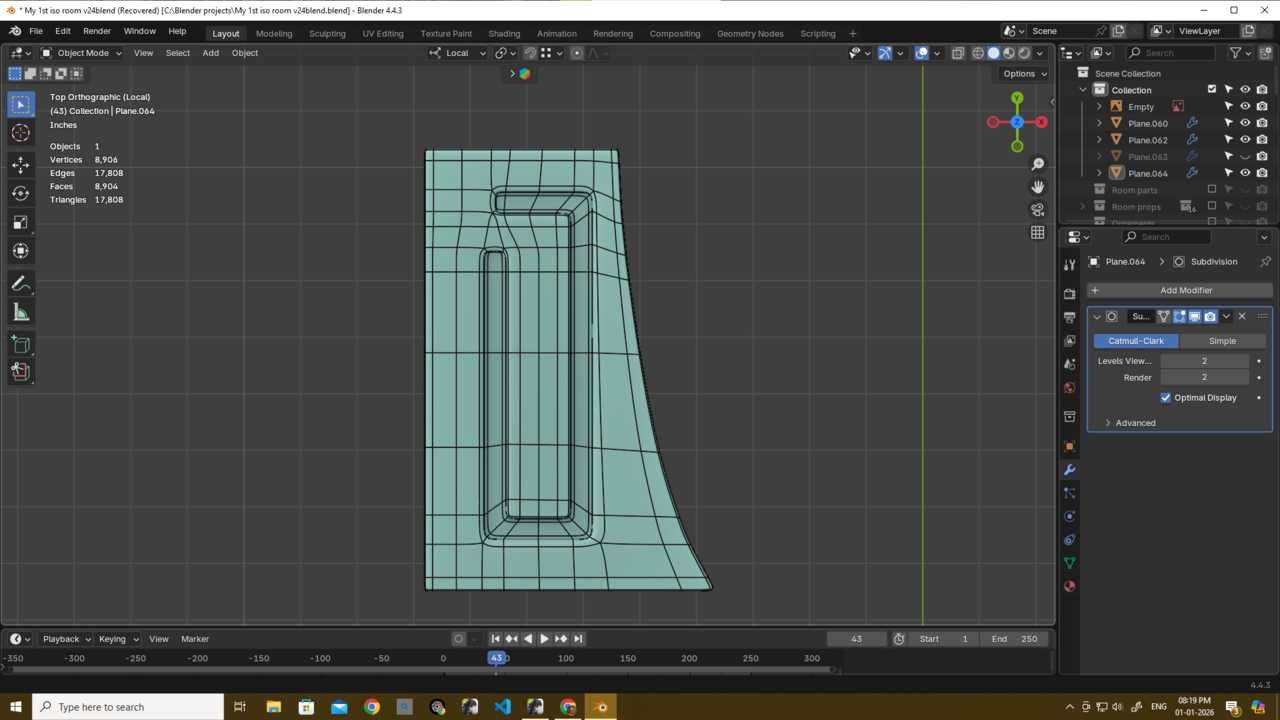
From the 2nd to the 3rd it is not clear how that is done. The left part seems to be using Simple Subdivision and the right (curved) part Cattmull-Clark. The only way I managed to acchieve that (but that might be my lacking Modeling skills), is by using 2 Objects, Subdividing them in the 2 different ways and then Applying the Modifiers and Joining the 2 Objects and then Merging the Vertices. Something like this:
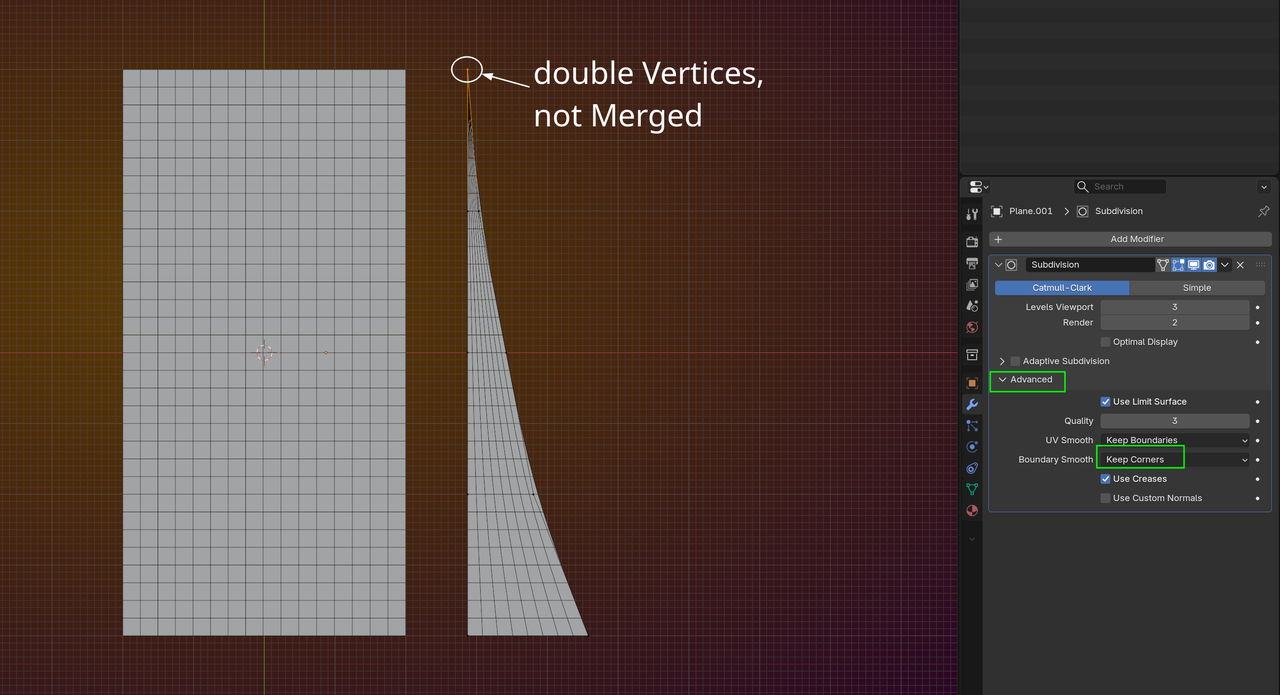
If I just would have used a Subdiv on 1 Object, it would result in this (sorry for the green line, ignore that please):
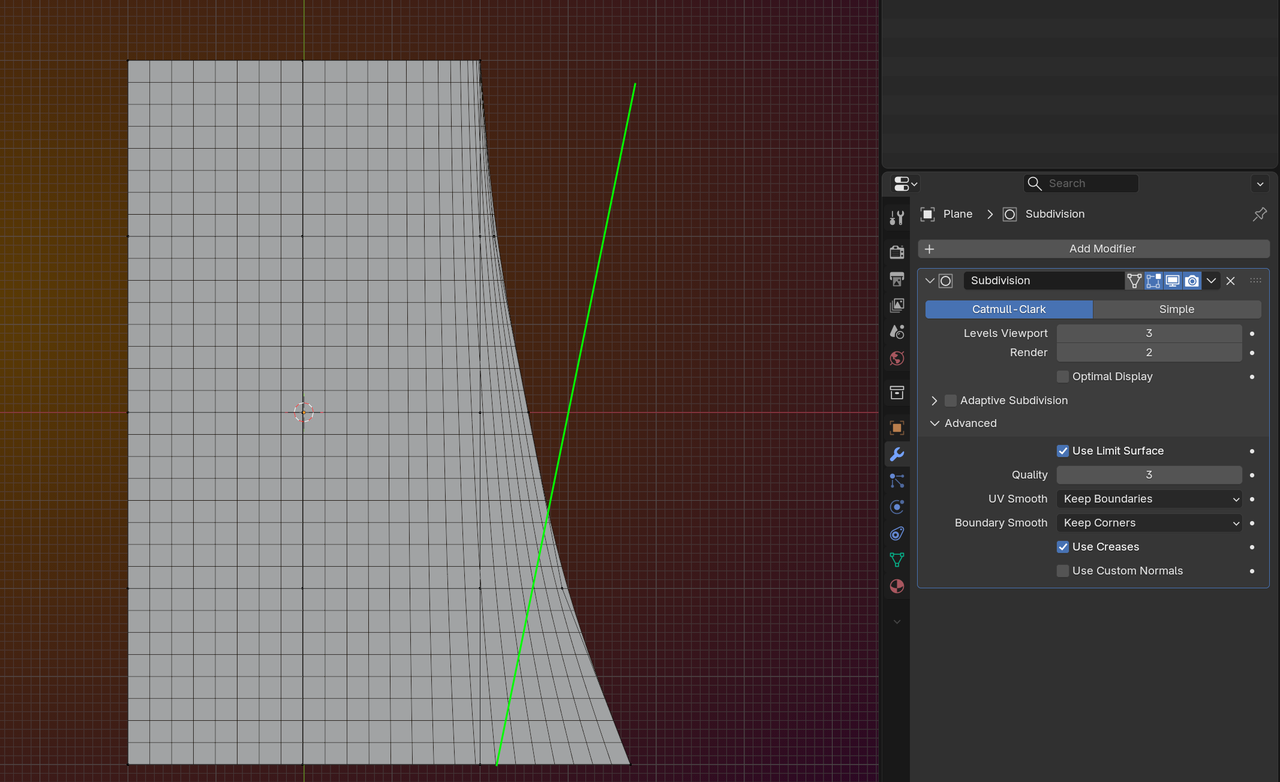
(Again with Boundary Smooth set to Keep Corners.)
Then from the 3rd to the 4rth image, the fix this area, is a bit of work, Delete most of the inner Verts of the right side of the Mesh and r-create it as shown (or similar).
The Extrude part is clear and then you can CTRL + twice, to grow the Seletion to something like this:

And then simply Inset.
Hope this helps.
Thank u martin really 😄 really thank u again..i will try to fix that..
And that person replied martin and wow i cant even begin to think like him..i need more time.. his process is actually very good and smooth like u said..
because i cant upload the video here i am sharring a link of the video (My g drive) u can see it in ur spare time and plz reply i want to hear ur Thoughts
Link - https://drive.google.com/file/d/1roq1igFkxr6SnAQgiB-uKI1lSRjE6joj/view?usp=drive_link
also if u watch the video plz look into 0.12-0.17 - extrusion on x axis what he did?? and 1.12 what happend to the traingle and how did he manage to put the edge like that..
i am hoping u will reply first before that person so i am also asking u haha....
Btw is omar okay? i am not seeing him around though i am not also very active haha...
Oh,
I didn't think about Creasing those Edges before the Subdiv. That's clever.
Overall, this is an excellent workflow! Very elegant.
The Extrusion on X is okay, you could also Scale a Plane (in Edit Mode) time 3 on the X-Axis and times 4 on the Y and then CTRL+R, to get the 12 squares.
At 1:12, they use the Loop Tools Addon > Space. Very nice! Alternatively, you could Delete the vertical Edge Loop and CTRL+R to Add a new one, that would give the same result, only then you could simply Scroll up to get the correct amount.
And Omar is good, as far as I know.
Thank u martin again really...he also made a 20 min plus video (can u imagine what a nice guy he is, like u haha) for me and explain his thought process becasue i asked him what is the specific reason he choose to make the model like that i mean he applied the subd 1st...and he explained very clearly and his process is super smooth and elegant as u said....Thank u martin again for always helping us out..
and good to hear omar is okay...he is a chill guy good to have around haha...see u soon martin